vsmStudio - Timers

Introduction
In vsmStudio, the main purpose of a timer is to count a set time to zero, possibly with a post-roll time. There are multiple ways to activate a timer.
This chapter covers the configuration of timers.
New Timer
To access the Timer function, select the clock symbol in the main menu bar.
The Timer view opens: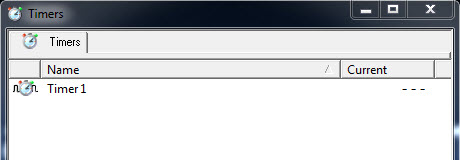
Existing timers will be shown in the Timers view. The column Current shows whether they are currently active or not.
To set up a new timer, right-click into the Timers view and select the option Create Timer.
Creating new timer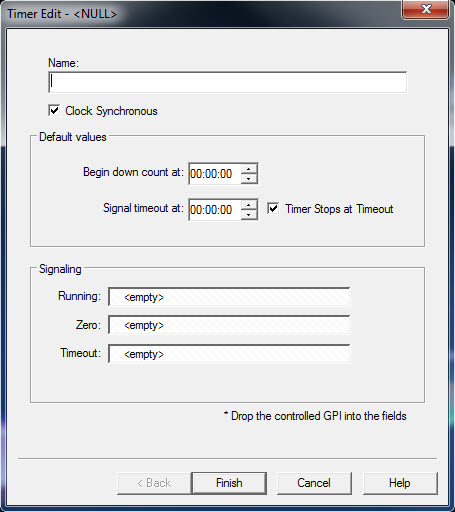
First, enter a name for the new timer in the input mask. The name should not be too long as it will be displayed on control panels. By checking attribute Clock Synchronous, the timer will run synchronously to the server time. If it is not checked, the timer will start running as soon as it is activated.
After Begin down count at, the starting value for the countdown is defined in hours, minutes and seconds. The time after Signal timeout at: represents the postroll time.
The attribute Timer Stops at Timeout is checked by default. If the checkmark is removed, all three GPOs remain active and the time continues to run until the timer is reset manually. Under Signaling, GPOs are assigned using drag and drop (see Time Activation using GPO). The GPOs are accordingly activated or deactivated once the time markers are reached.
Timer Activation using GPO
A timer can be activated using GPO (see GPIOs). To do so, an active timer has to be set. When the GPO reaches the zero mark, another GPO can be set, and another one once the postroll time has been reached.
GPOs to activate a timer
Follow this predefined procedure or the set-up: set the Run GPO when the timer is active. As soon as zero (without postroll time) is reached, the Run GPO becomes inactive while the Zero GPO becomes active. If a postroll time has been set-up, the Run GPO stays active while the Zero GPO becomes active. As soon as the end of the postroll time is reached, the Run GPO becomes inactive and the Timeout GPO becomes active. The Zero GPO becomes inactive and the Timeout GPO becomes active. The Zero GPO will stay active until the timer is reset.
Timer set-up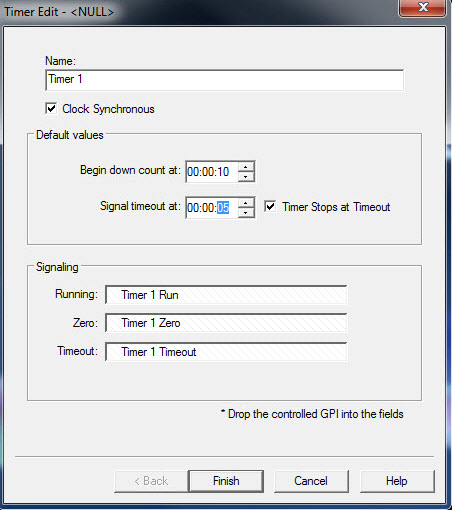
A timer can be locked or changed at any time via a control panel (see Timer on Control Panels).
Timer in the Gadget Tree
Each timer is shown as an active gadget in the gadget tree (see Gadget Tree). 
Timer on Control Panels
Using drag and drop to place a timer on a free control button, the timer value can also be changed from a control panel. 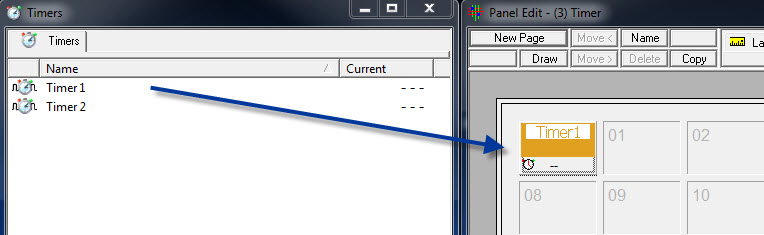
This button is a display button by default. To open the Property-window in which button mode can be changed, select this button in the Panel Edit.
Changing time button properties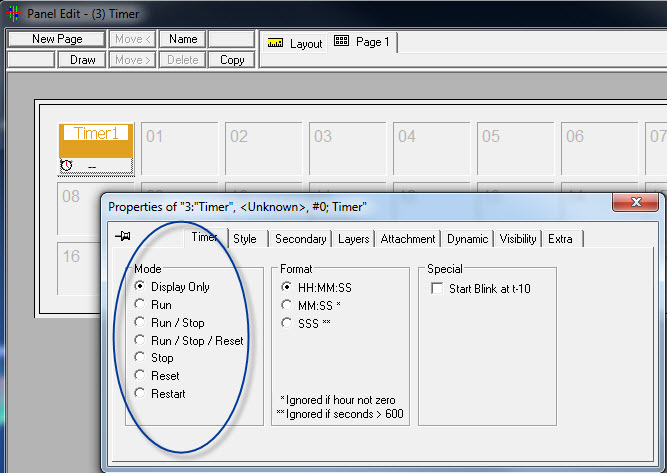
The timer can be displayed as button or as clock.
vsmPanel with timer
To do so, change the button style from Flat to Normal.
Changing time button properties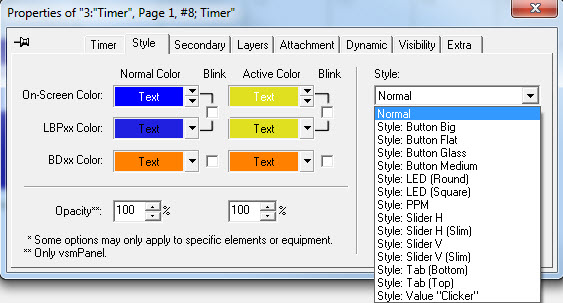
Using gadgets (see Gadgets), pre-defined values can be accessed. Plus or minus rules can be set-up through secondary commands.
Timer on UMDs
Each timer can be displayed on UMDs (see UMDs). To access an existing UMD, double-click on its ID in the Monitor Displays view:
Editing UMD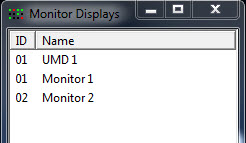
By right-clicking, a new segment can be created in the UMD. Use drag and drop to move a timer into the new segment.
Creating a new segment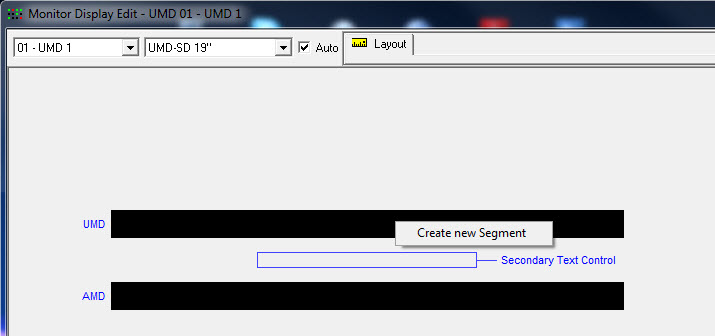
Placing a timer on a UMD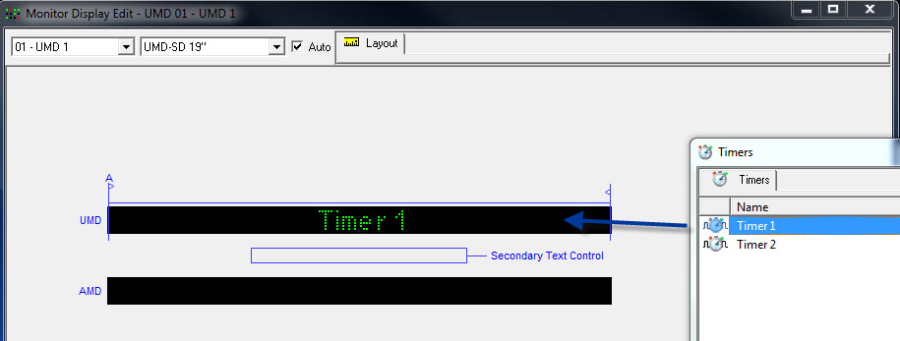
Timer as Secondary Command of GPIOs
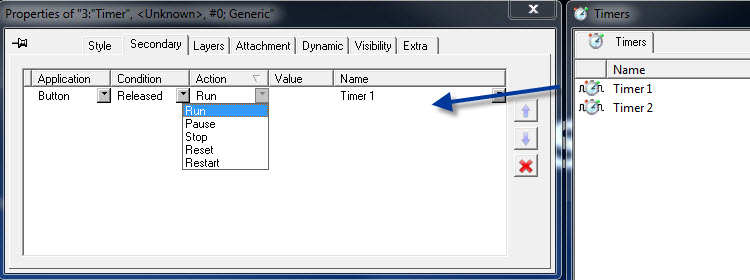
As secondary command, a timer can be started, stopped, reset, or put on hold. To do so, move the timer into the properties window of a GPIO (see GPIOs) using drag and drop.
Timer as secondary command of a GPIO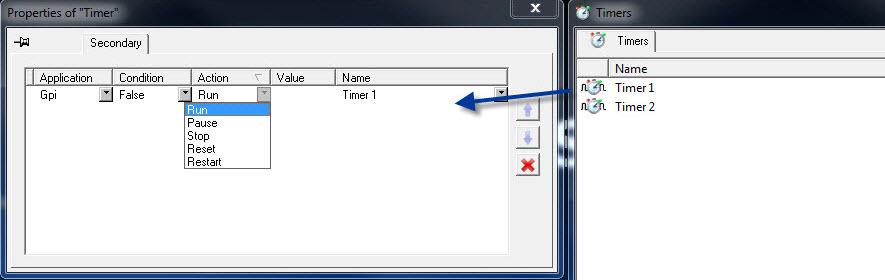
Alternatively, the timer can also be assigned to a control button in the tab Secondary property window.
Timer as secondary command on a button