Introduction
Views in vsmStudio are effectively custom matrices that can contain a subset of existing Signalpaths. Views in general have the same properties as the master matrix just for a limited number of Signalpaths.
Create a View
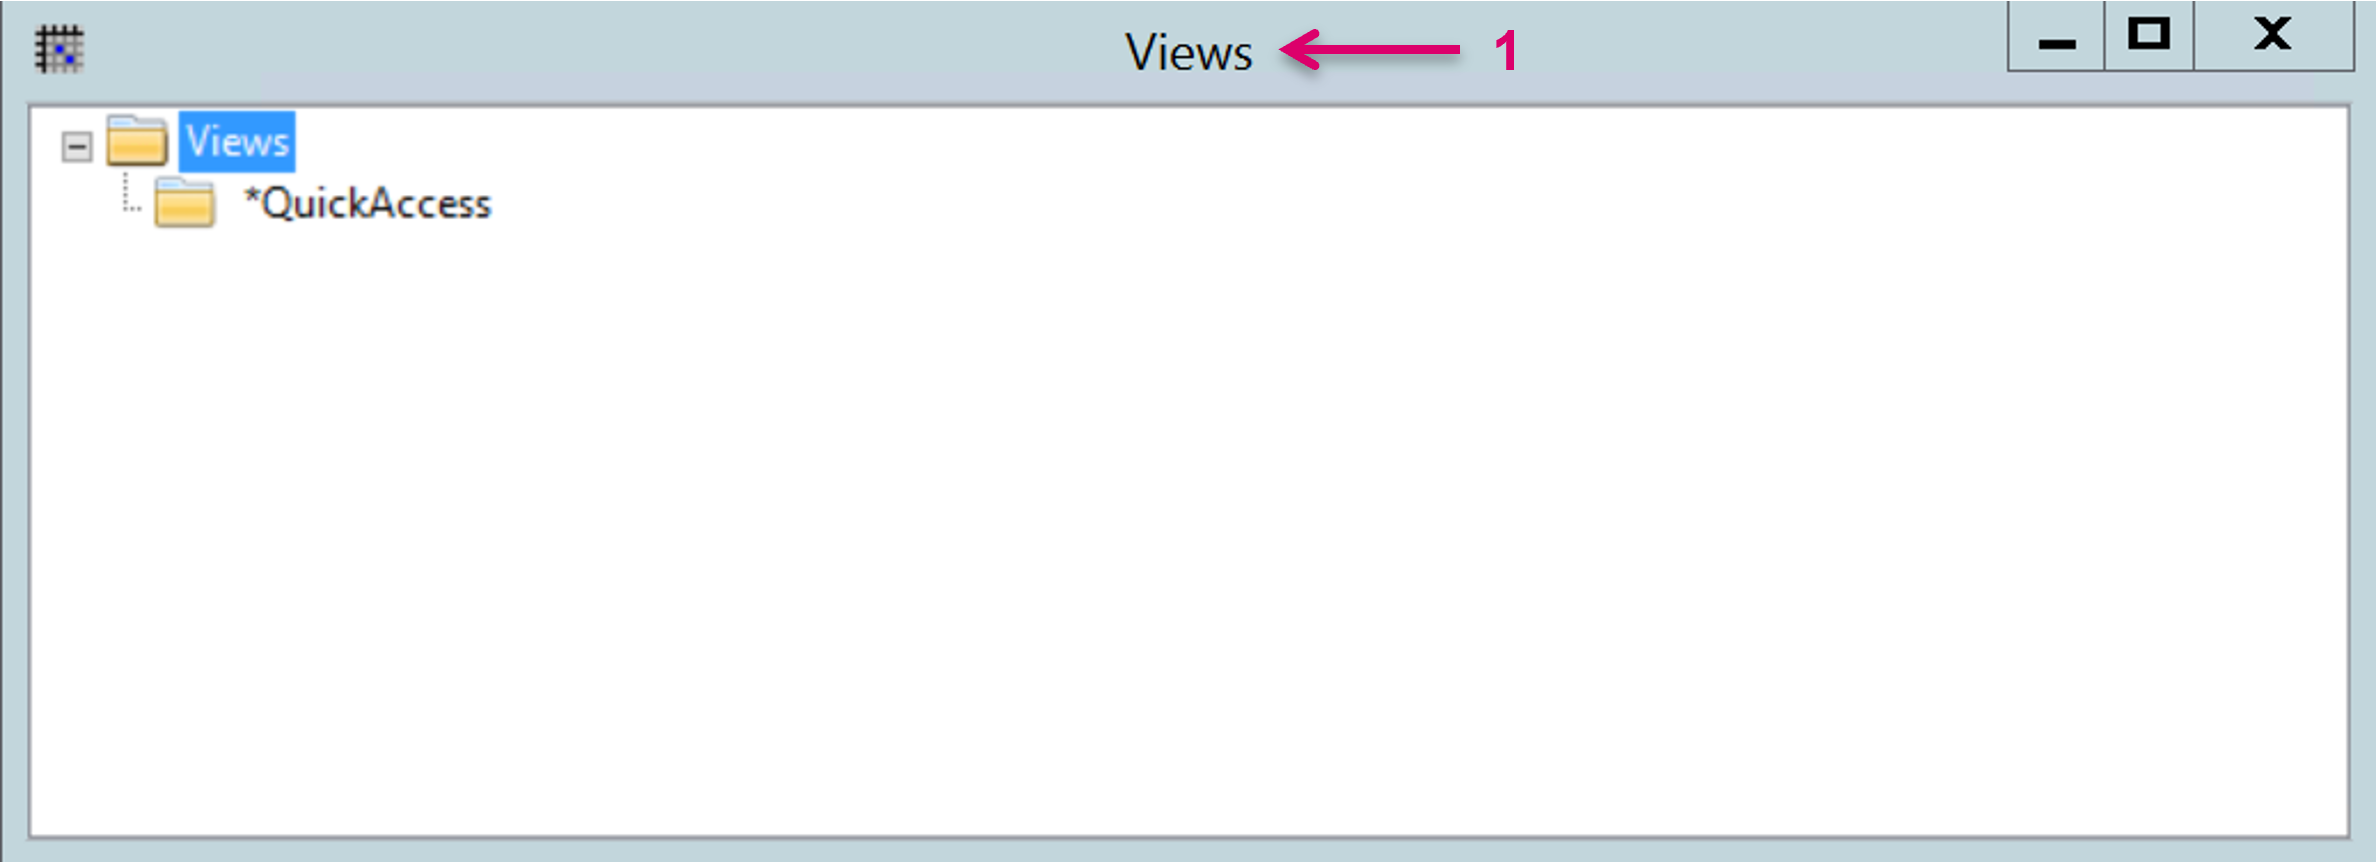
Open the Views window (1) via the respective icon on the vsmStudio top menu bar.
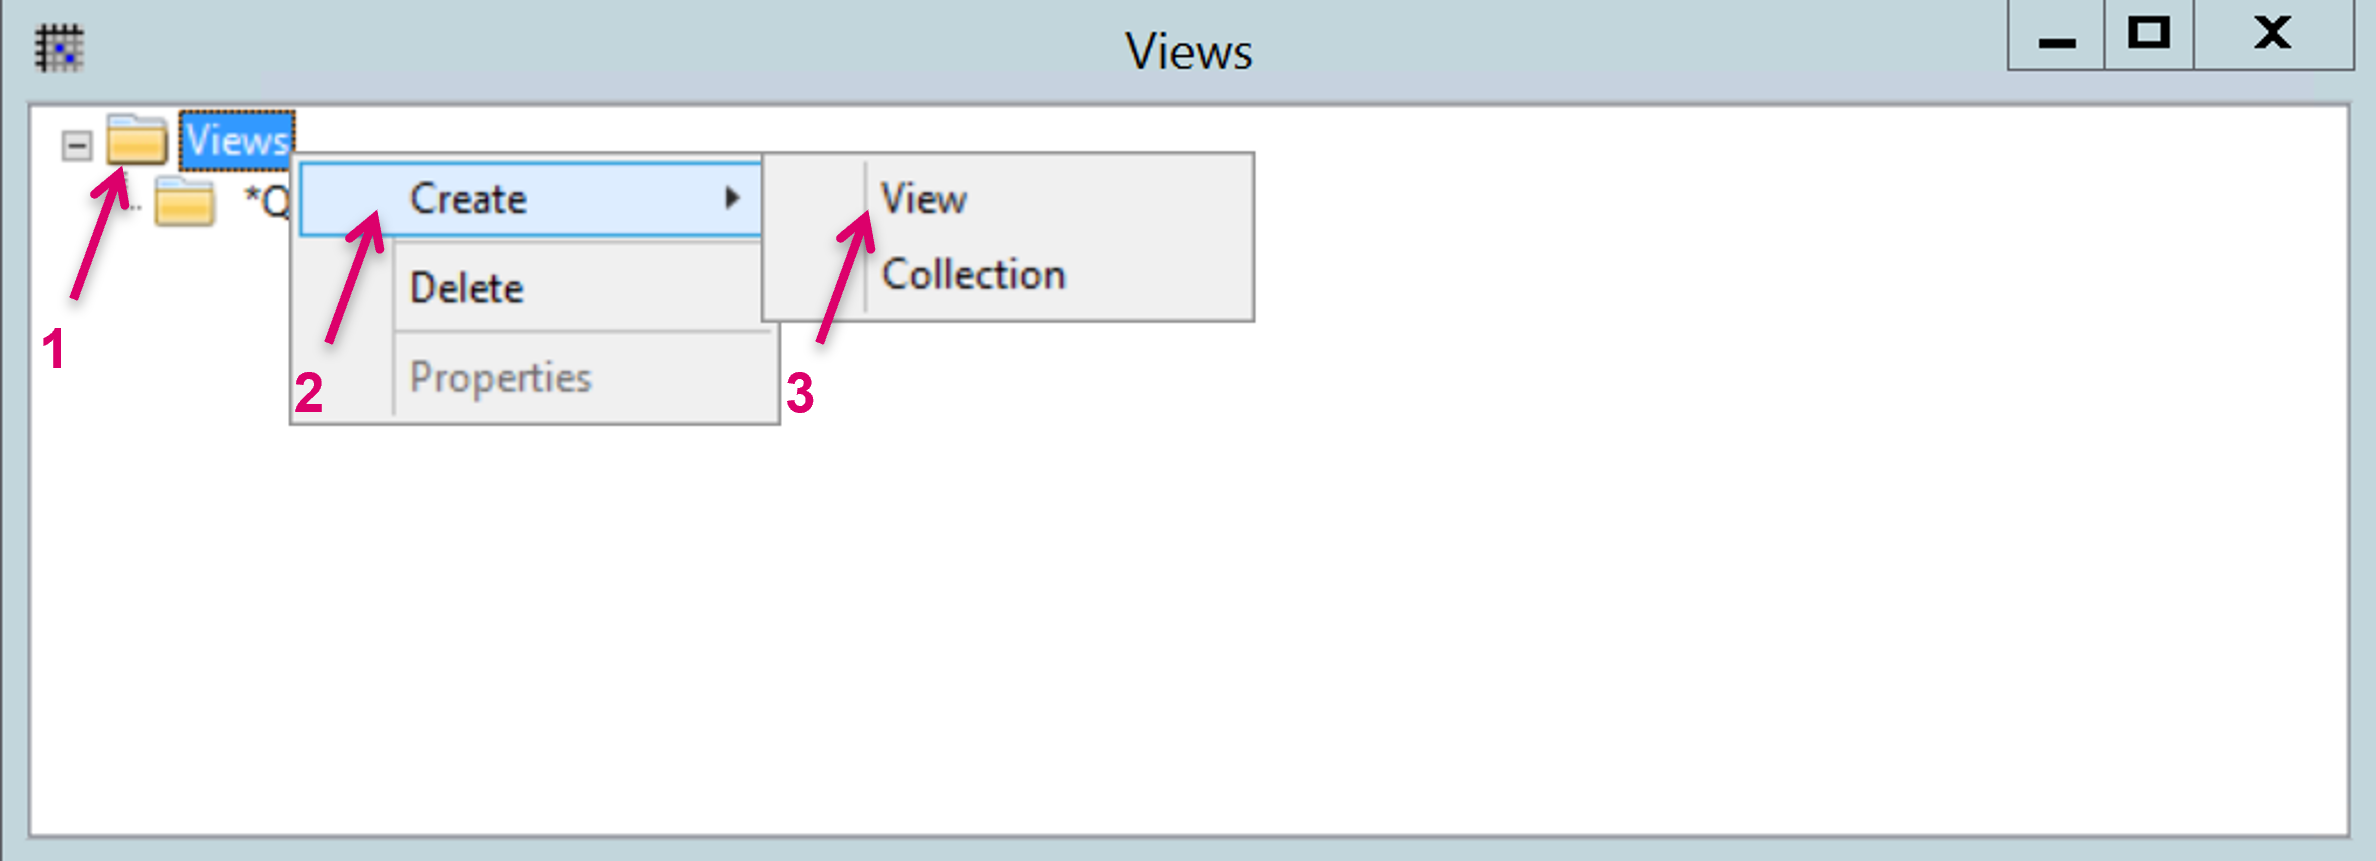
Right mouse-click on folder Views (1), select Create (2) and View (3) from the opening sub-menu.
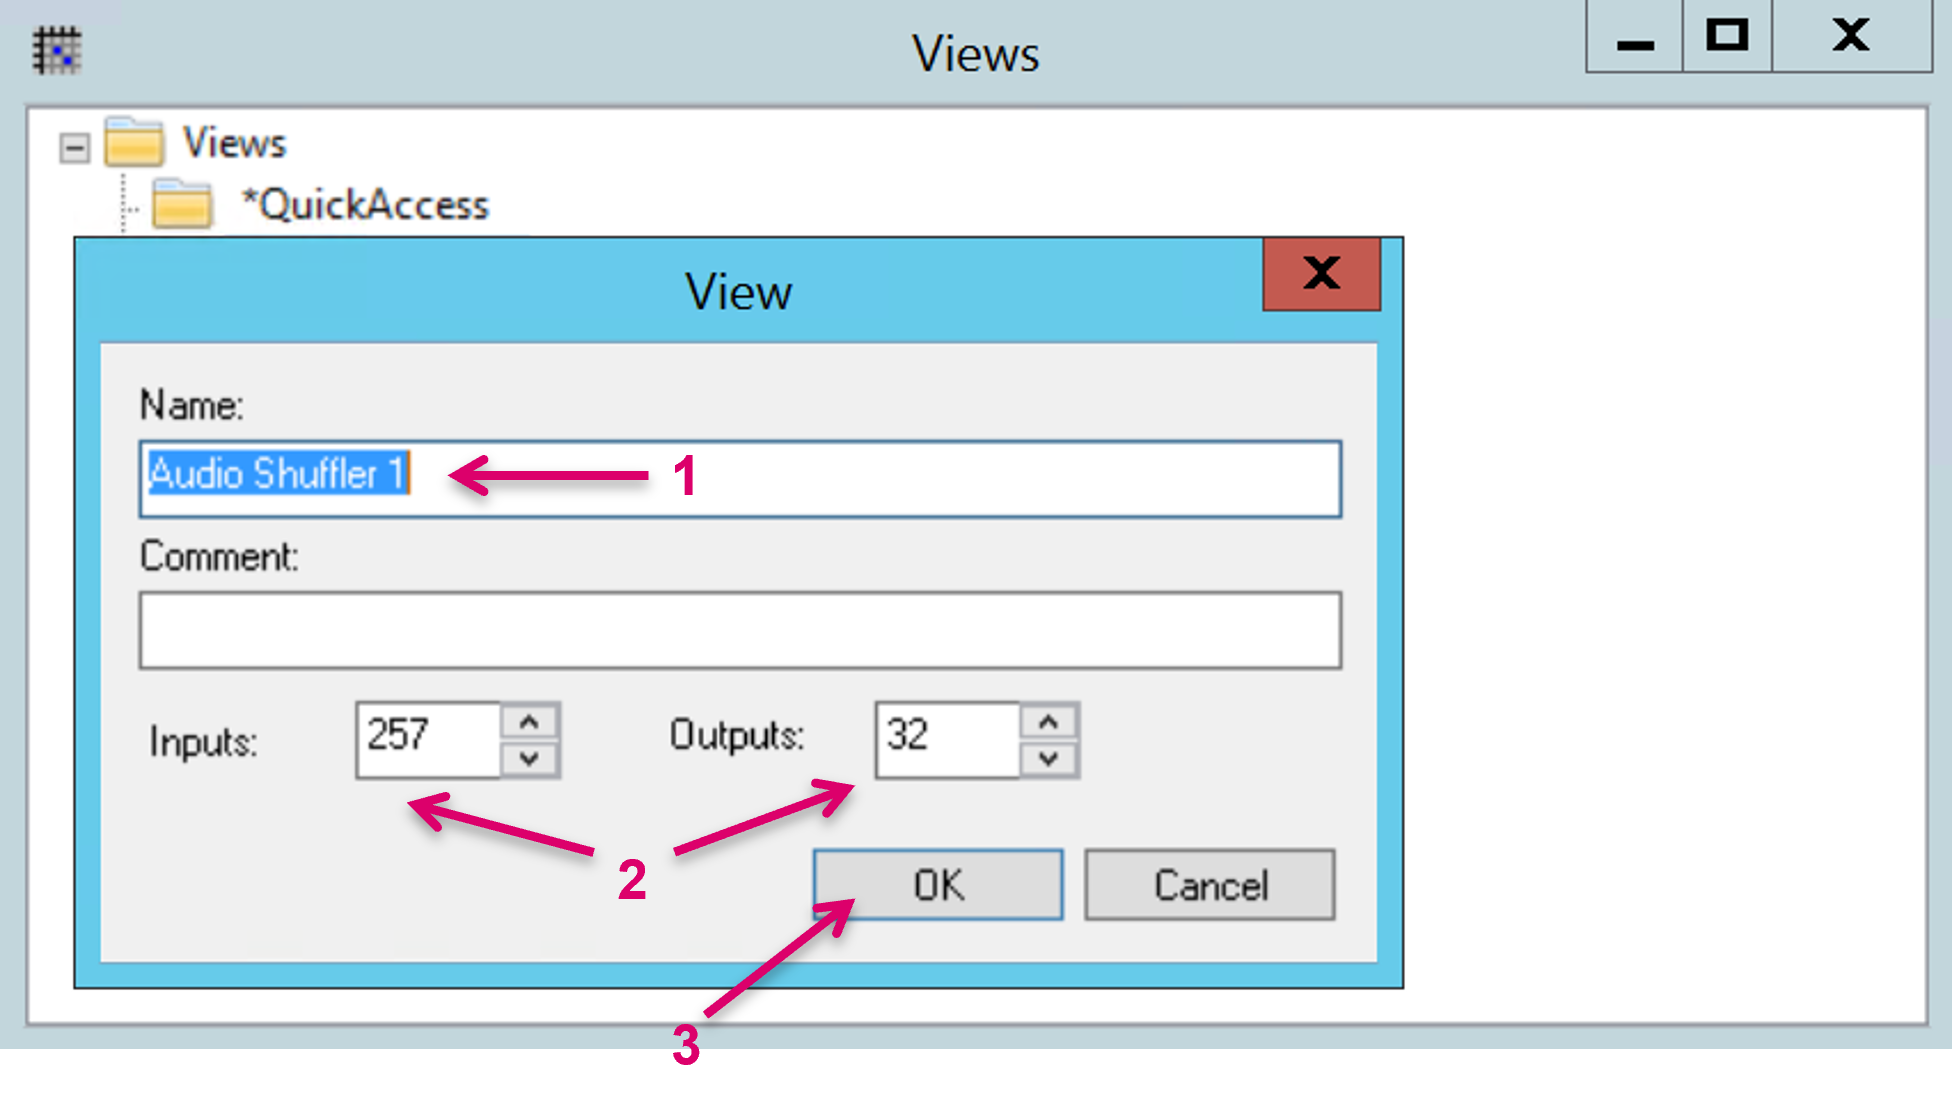
Assign a Name (1) and define the matrix size by entering the number for Inputs and Outputs (2). These settings can be modified at a later stage if required. Confirm with OK (3).
Assign Signalpaths to View
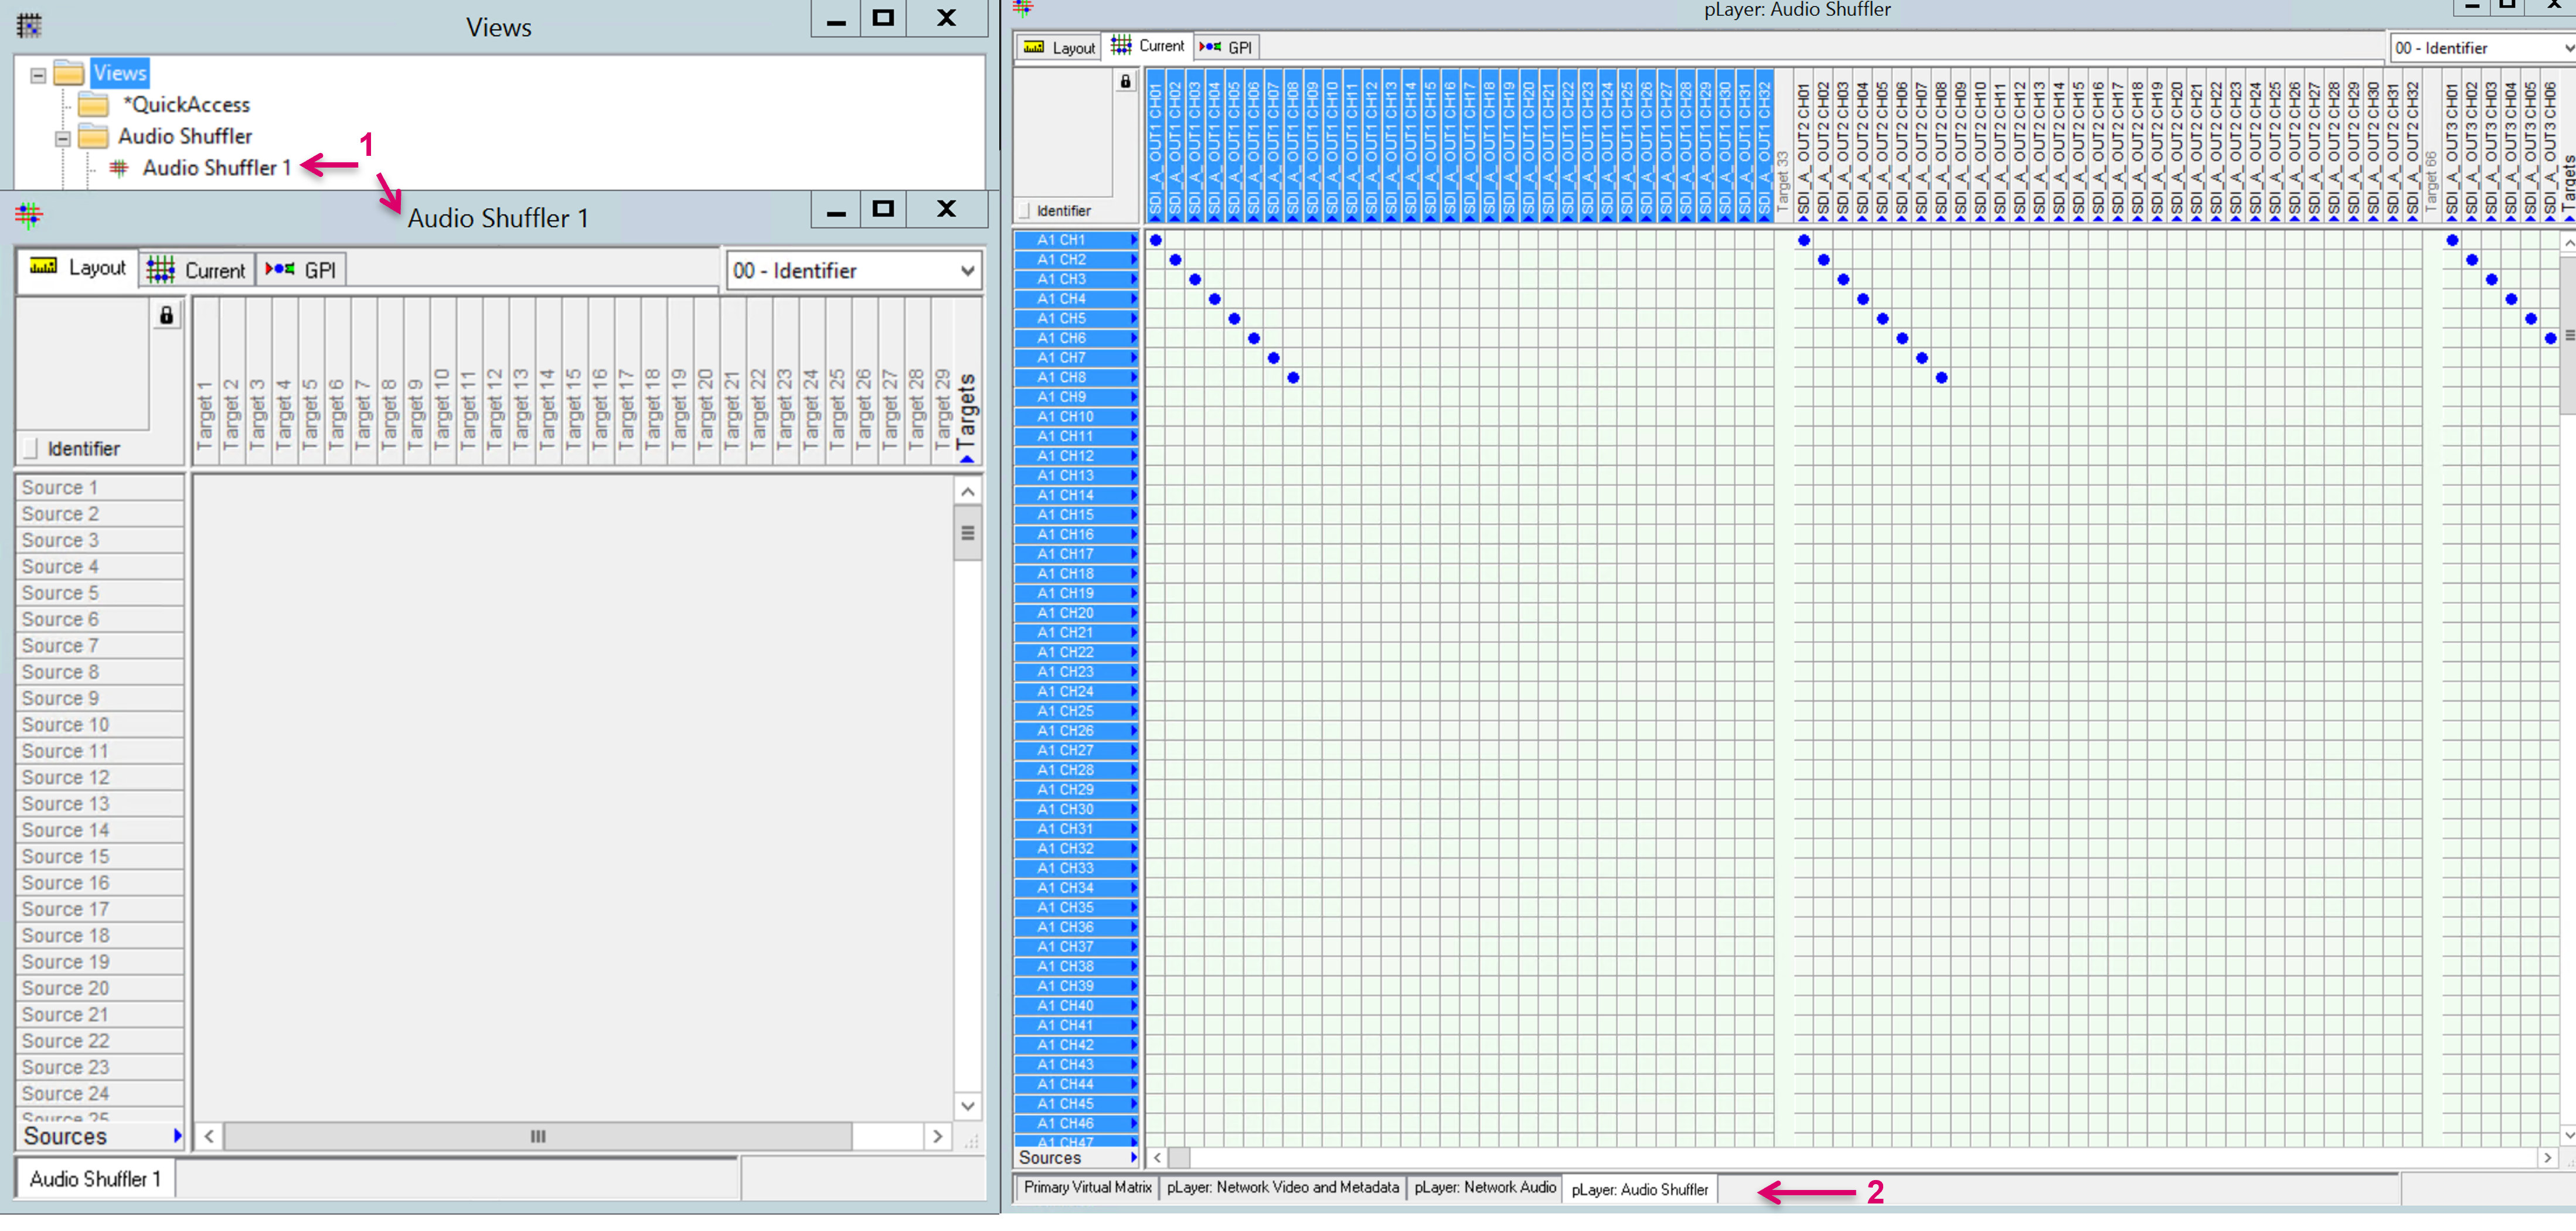
Select and open the respective View from the Views list (1). Open the Primary Virtual Matrix or any other Matrix view (2) containing the desired Signalpaths.
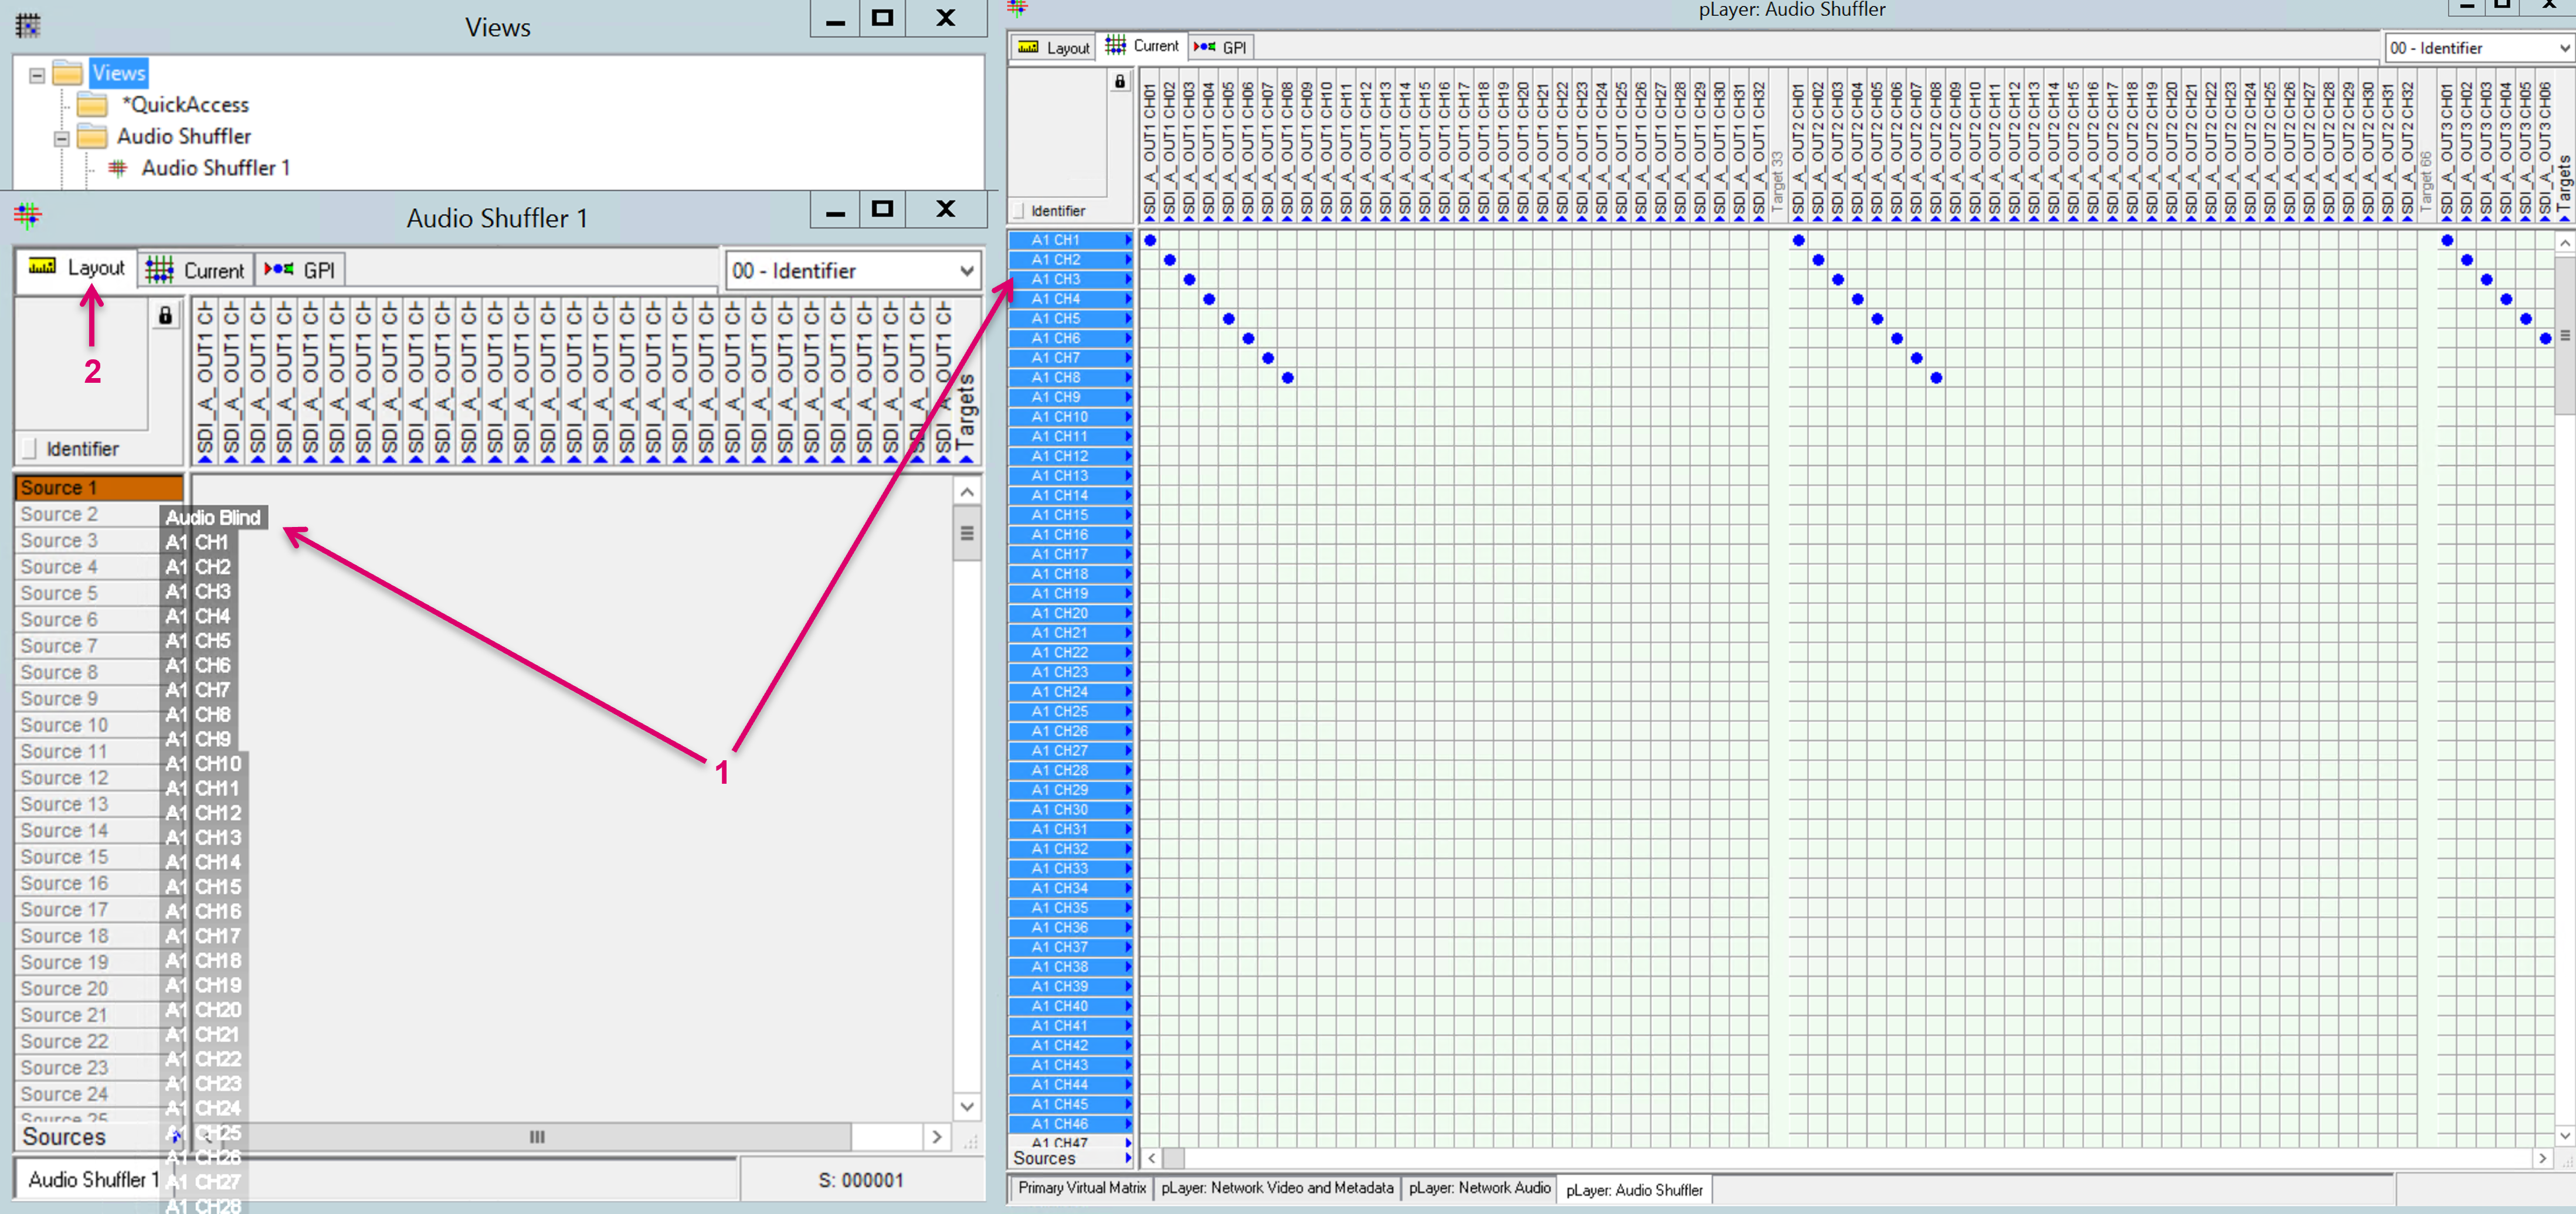
Select the desired Source and Target Signalpaths from the Matrix view and assign them to the View via drag and drop (1). Make sure the Layout tab is selected on the View (2).
Create a View Collection and assign Views
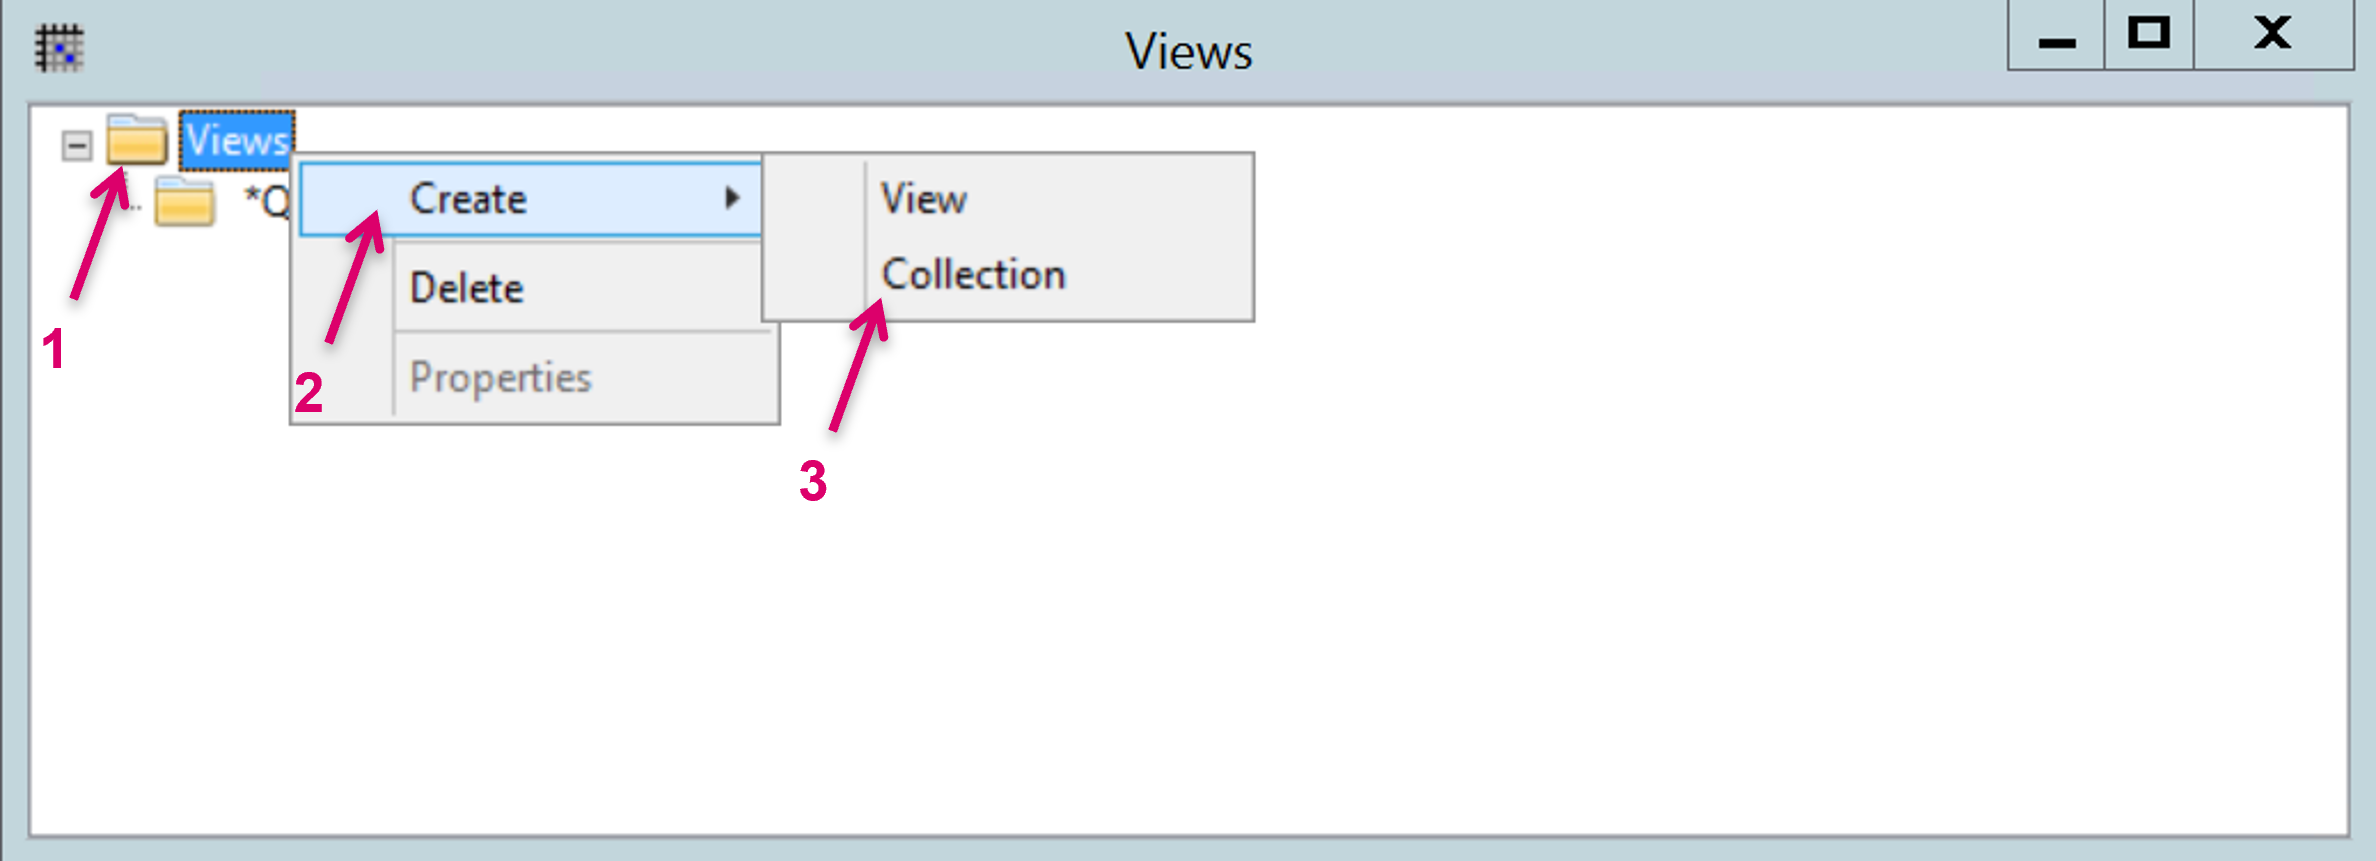
To keep Views better organized, especially if many Views are in use, it is possible to group and organize them in Collections. To create a new Collection, right mouse-click on folder Views (1), select Create (2) and Collection (3) from the opening sub-menu.
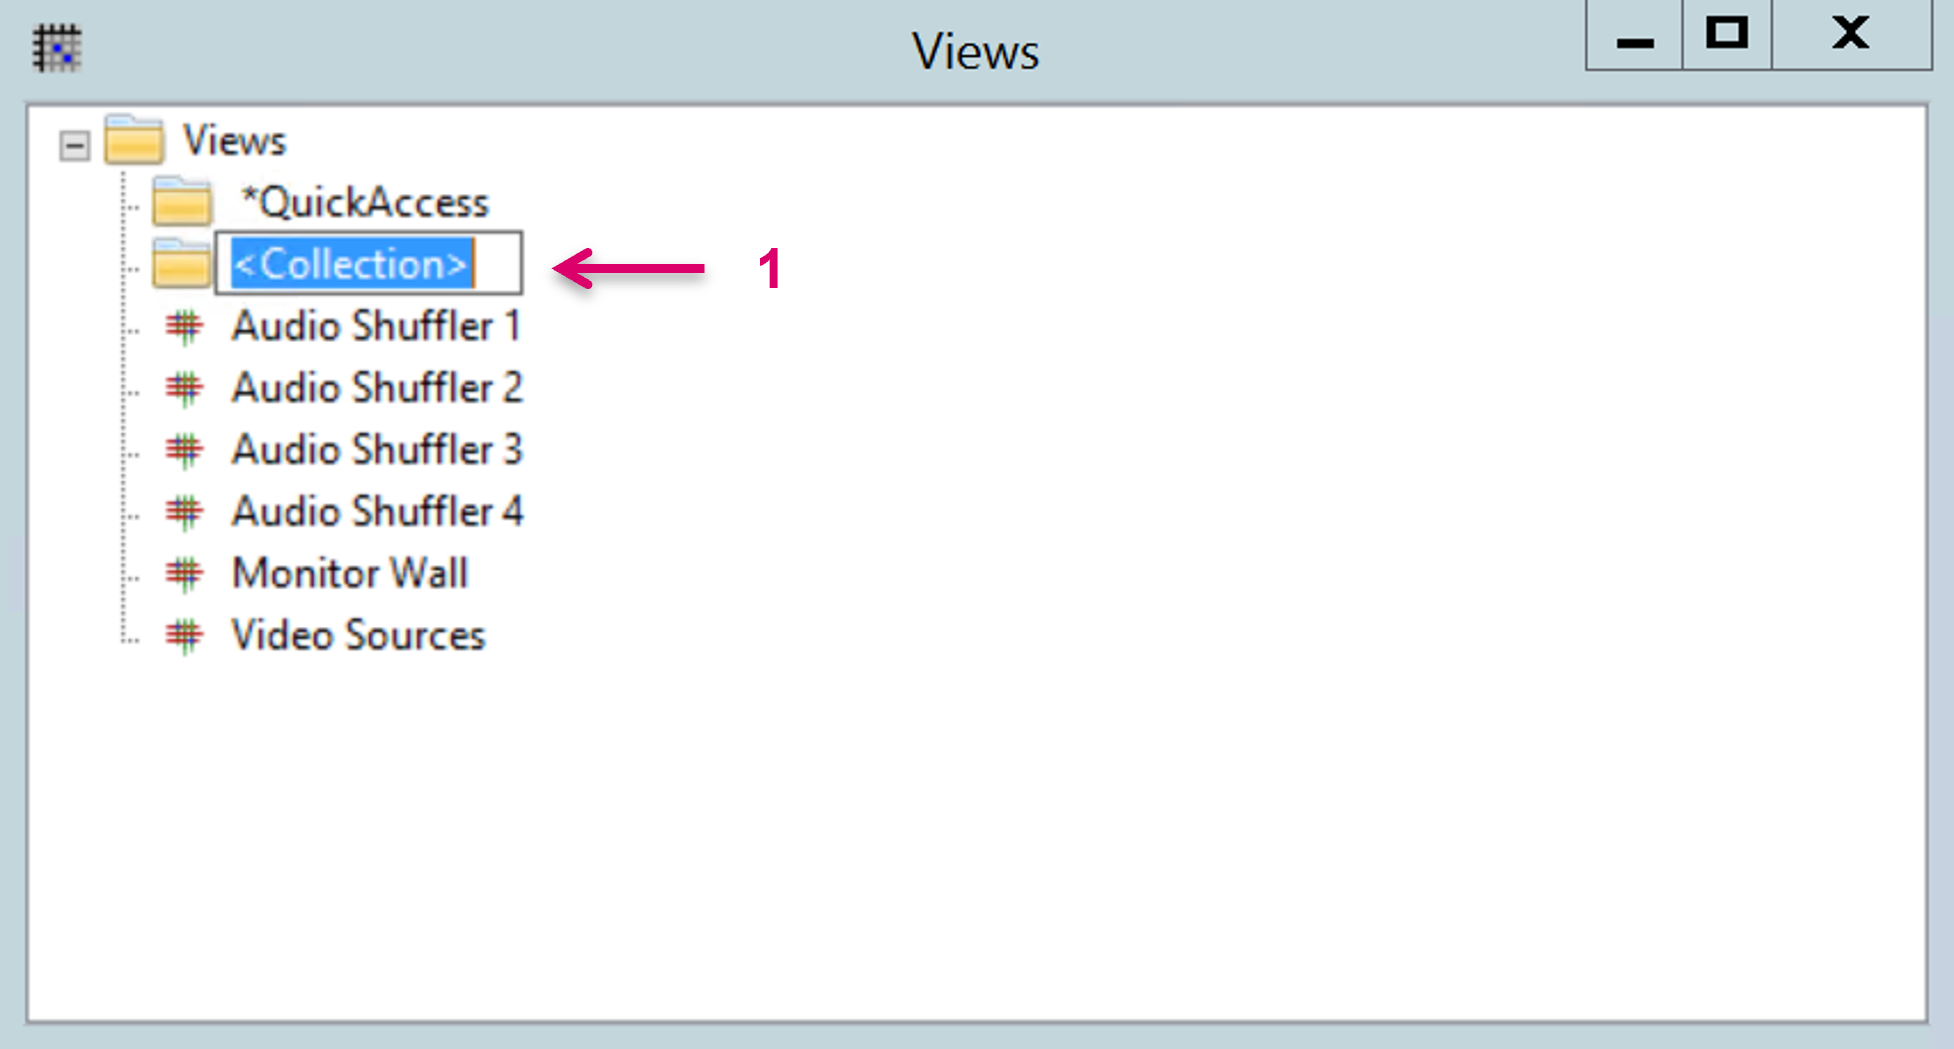
Set a descriptive Name to the Collection (1).
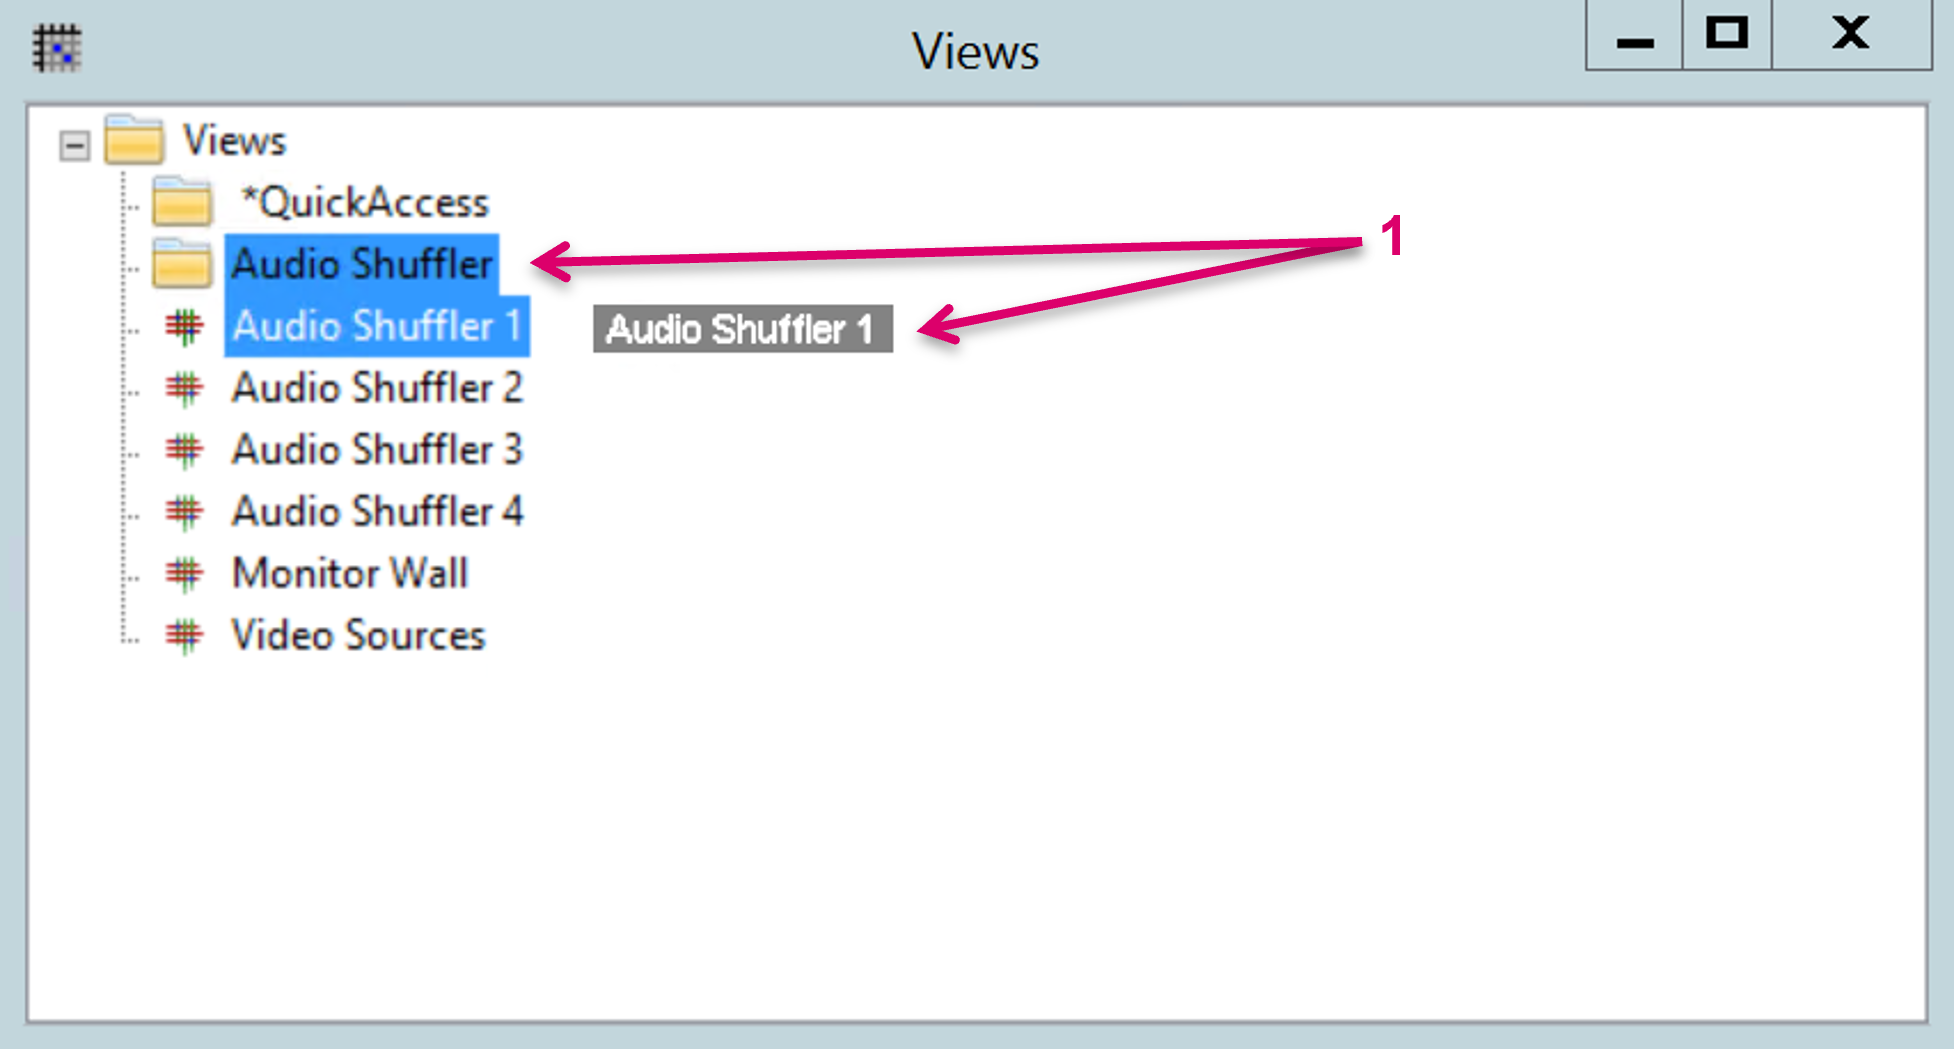
Assign Views to Collections by select and drag the respective View and drop it on a Collection while holding down the Shift key (1).
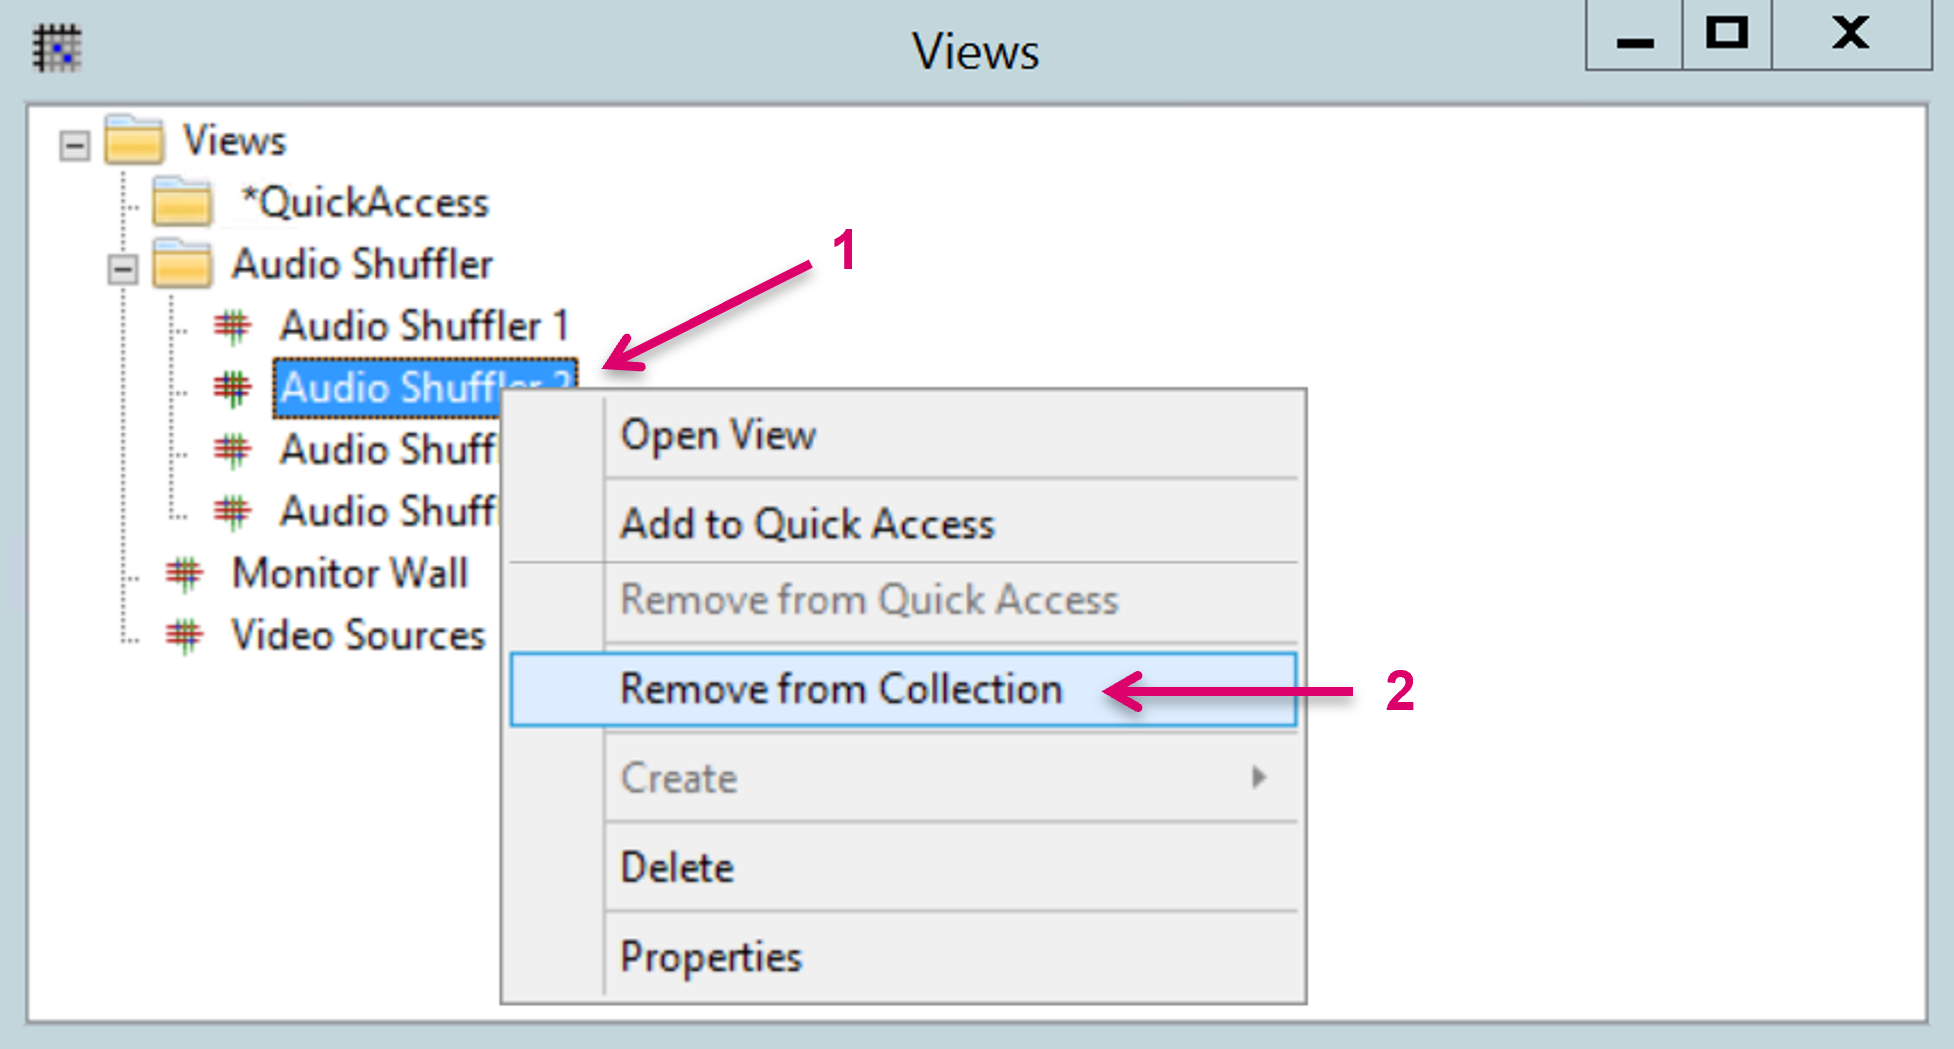
To remove a View from a Collection, right-click on the respective View (1) and select Remove from Collection (2).
Quick Access
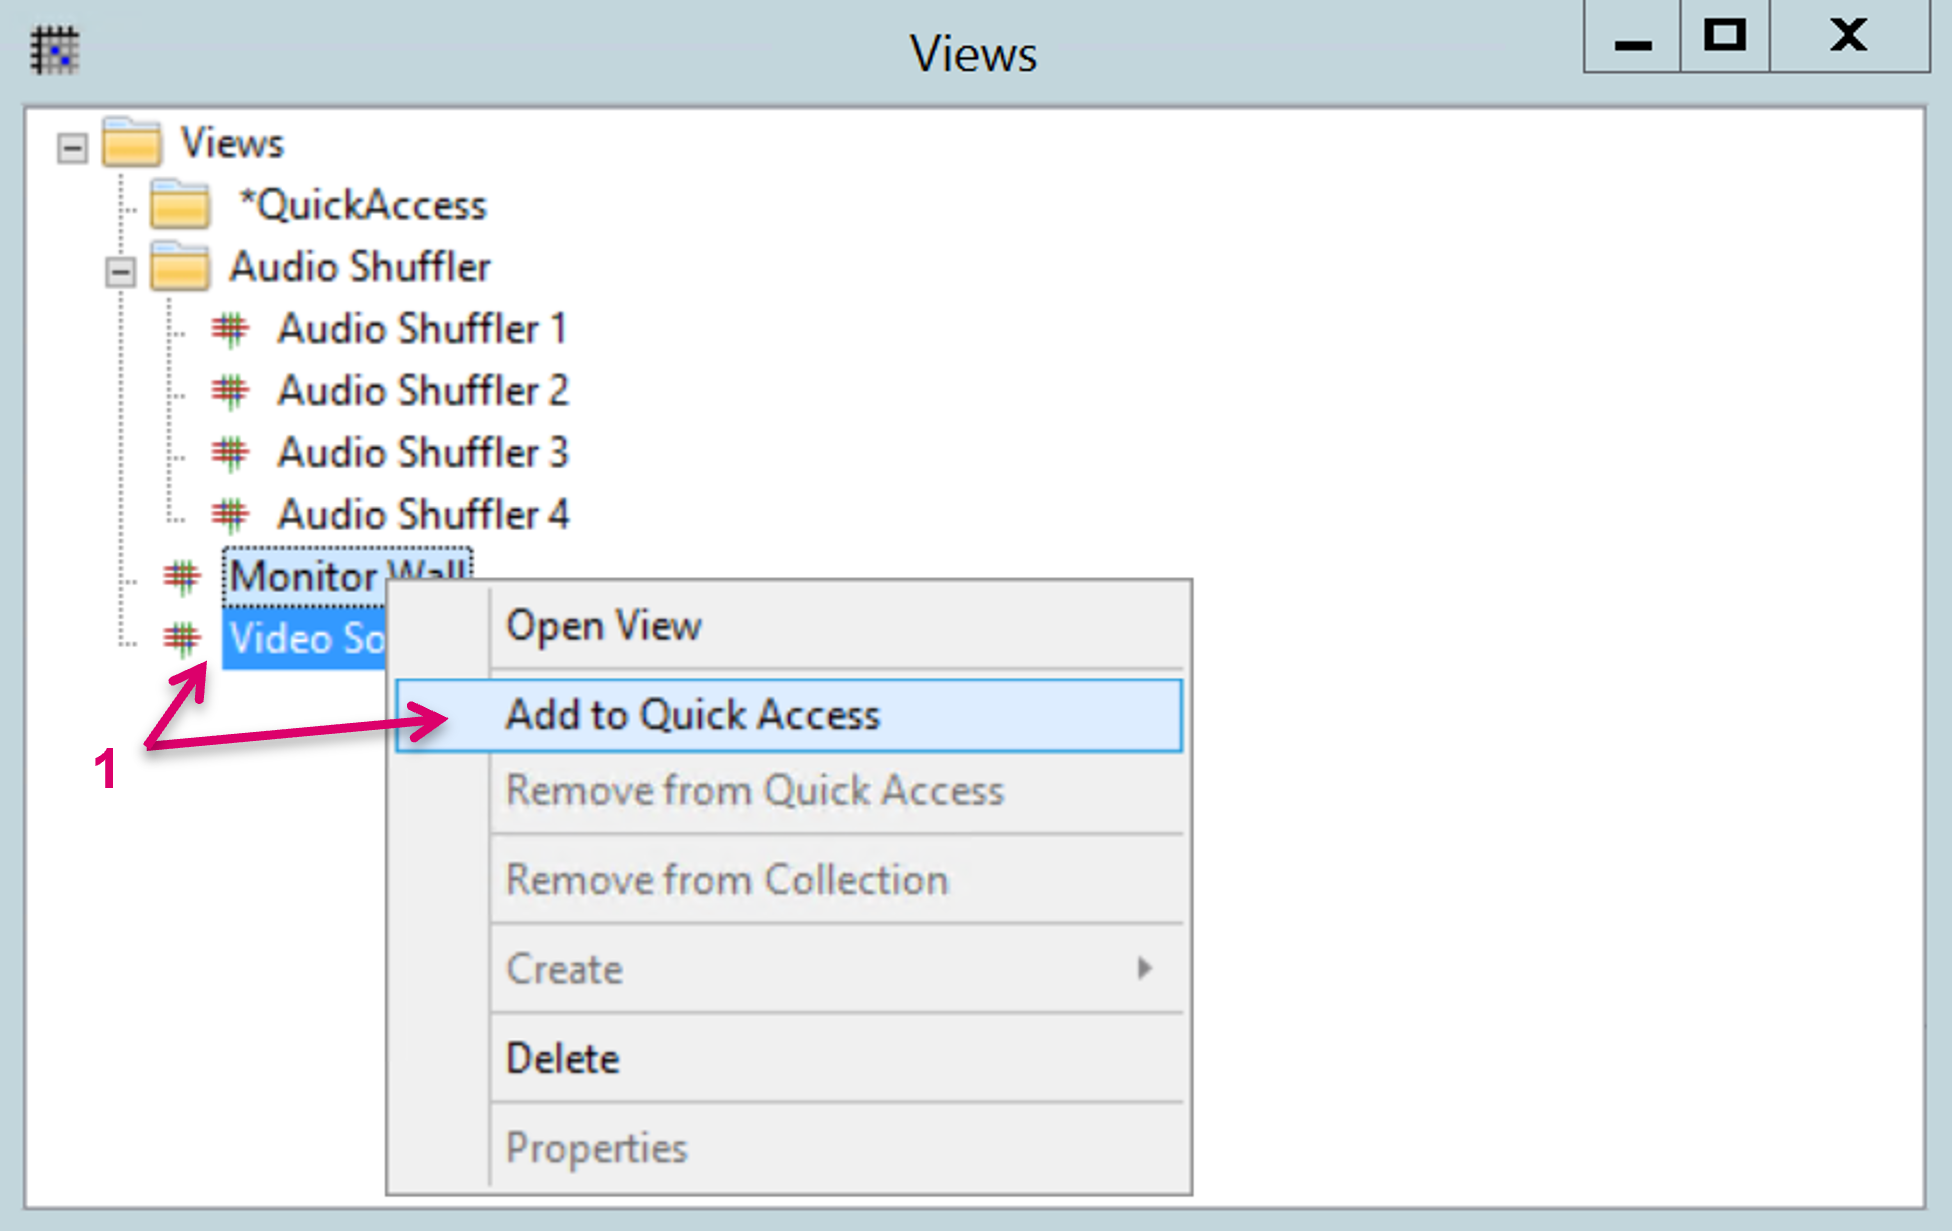
It is possible to add selected View to a Quick Access section. To assign Views to this section, right-click on the respective View and select Add to Quick Access (1). Alternatively, Views can be assigned just by drag and drop operation.
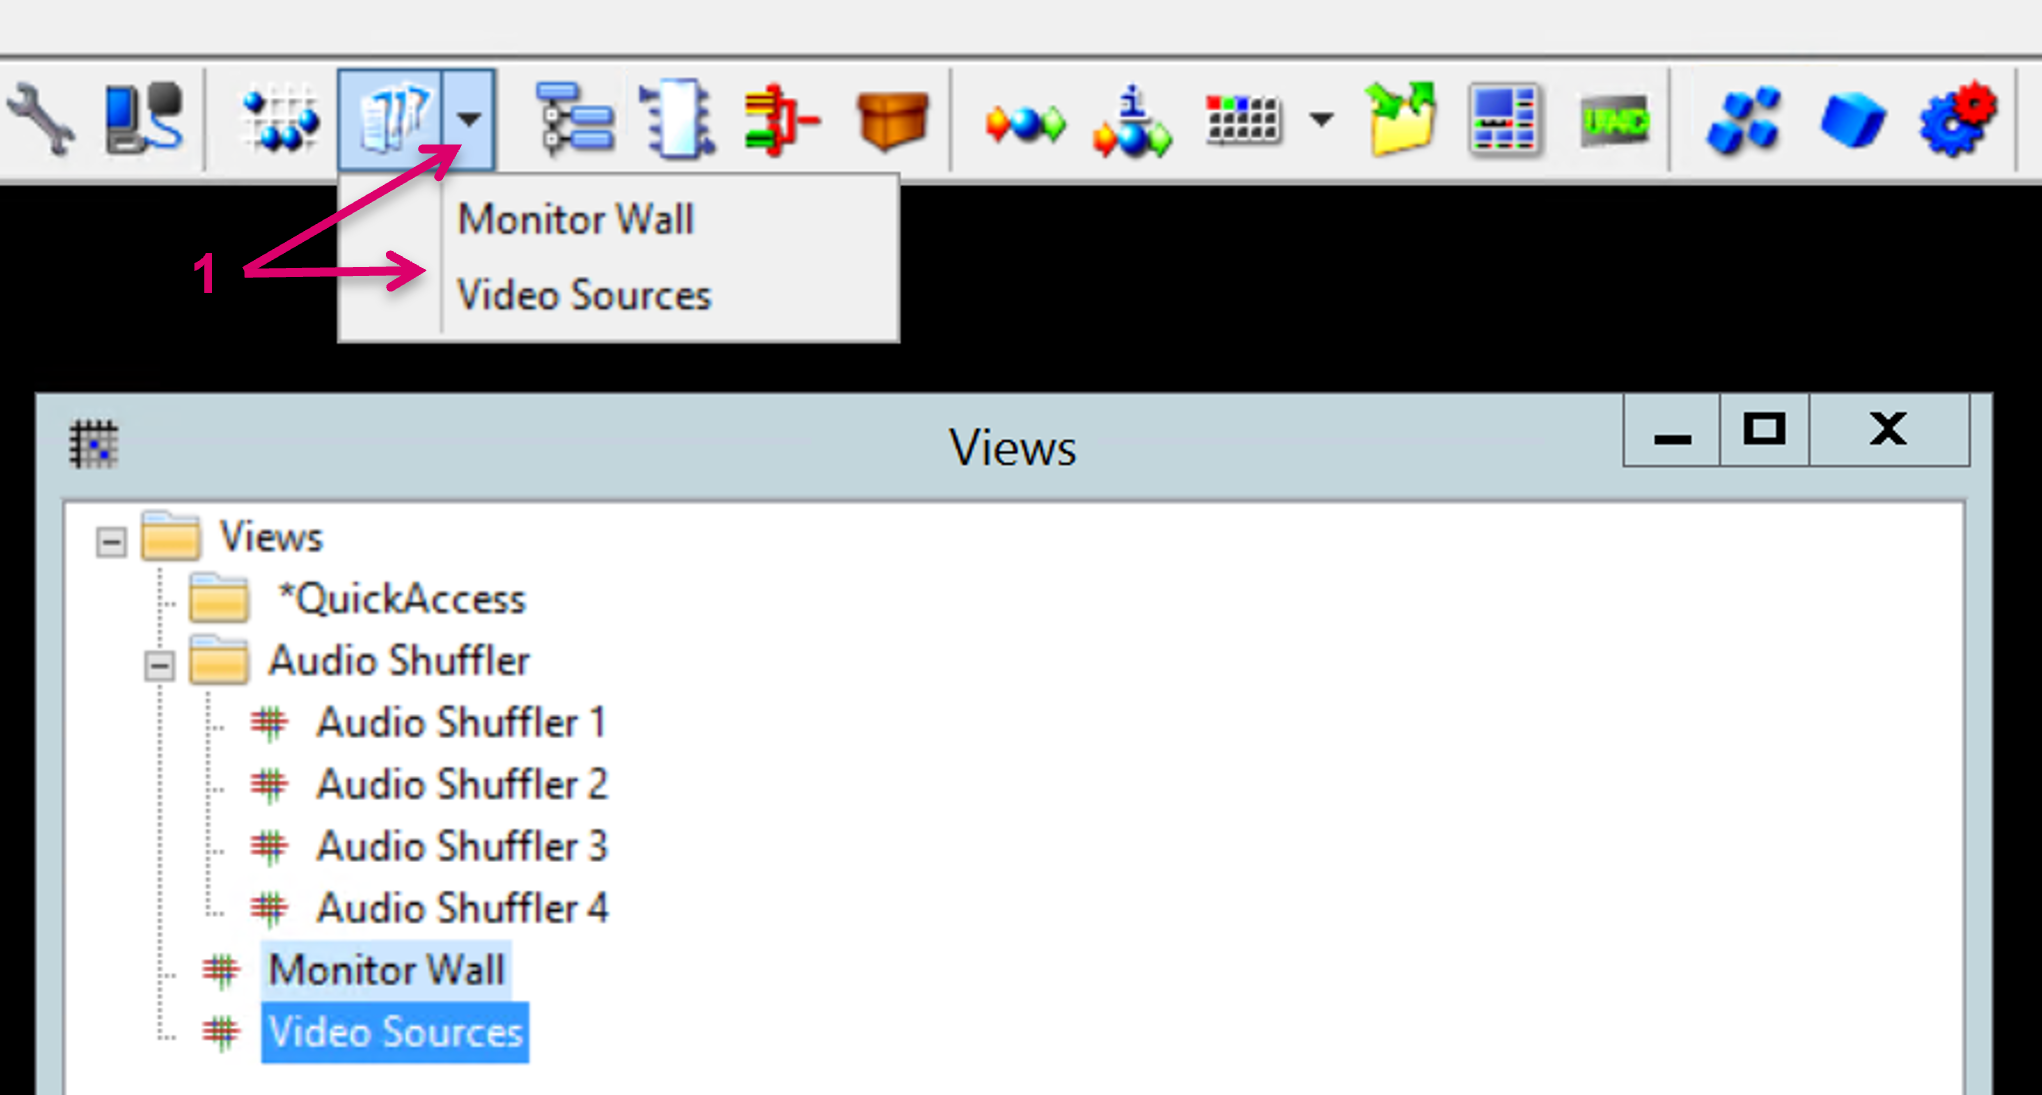
Once a View is assigned to Quick Access, it can be easily selected and opened via the little arrow symbol next to the Views icon on the top menu bar (1).
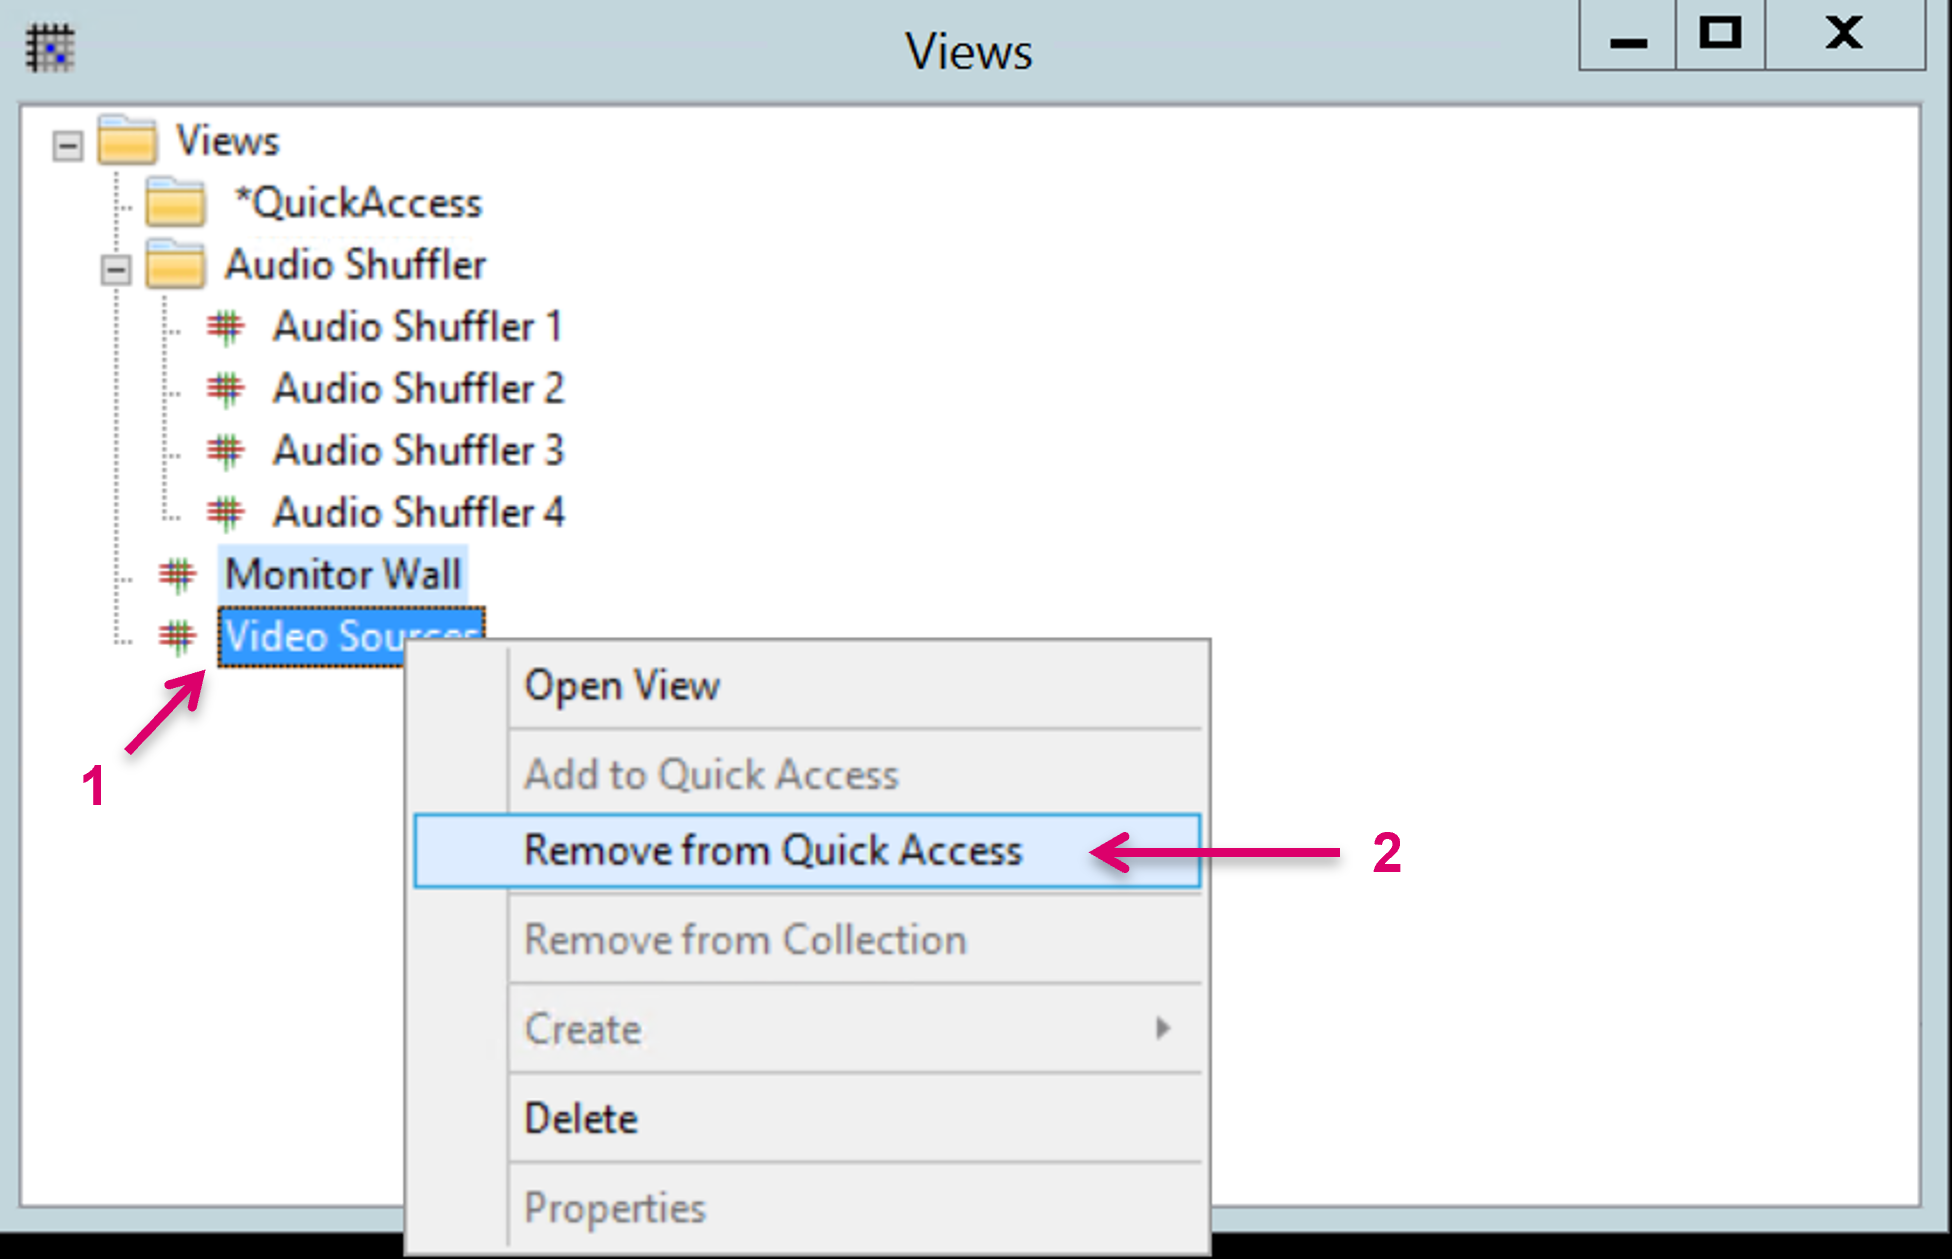
To remove a View from Quick Access, right-click on the respective View (1) and select Remove from Quick Access (2).