Lawo VSC - Audio Device Quick Setup
To stream audio to and from the media network, you will need to add an audio device.
This topic describes how to add a simple stereo audio device (to get up and running quickly). To learn more about the parameter options, please see Lawo VSC - Audio Device Configuration.
Overview
The audio device(s) in Lawo VSC convert the local audio on your computer into IP senders and receivers.
Firstly, each audio device appears as a Sound device in the macOS system. This allows it be used by a local audio application such as a playout system or digital audio workstation.
- The number of inputs and outputs of the device defines how many channels can be handled. i.e. the I/O capacity of the audio driver.
- By configuring more than one audio device in Lawo VSC, you can create multiple audio drivers to support multiple applications.
Secondly, each audio device has IP senders and receivers (to stream the local audio to and from the media network). These are created for you, based on the configuration of the device, as follows:
- First, define the total number of inputs and outputs that the device can handle. e.g. 8 inputs and 8 outputs.
- Then, define the number of channels per stream and the number of channels per receiver. e.g. 8 or 2.
- The resultant senders and receivers are calculated by Lawo VSC. e.g. 1 x 8-channel sender + 1 x 8-channel receiver OR 4 x 2-channel senders + 4 x 2-channel receivers.
The resultant stream size is defined by the number of channels, codec type and frame size. This is important if network bandwidth is an issue. Thus, the network topology should be considered before defining the number of channels per stream.
Please note:
- To stream audio to/from multiple applications on your computer, you must configure an audio device for each application.
- The free version of Lawo VSC supports a single stereo audio device for playback and recording. If you wish to create more than one audio device, or a device that can handle more than 2-channels, then you must upgrade to the licensed version (as described earlier).
- The licensed version of Lawo VSC supports up to 128 audio devices, with up to 128 audio channels per device.
Add a New Audio Device
1. Click on the + button (at the bottom of the 'Audio Devices' list).
The 'New Audio Device' dialog opens.
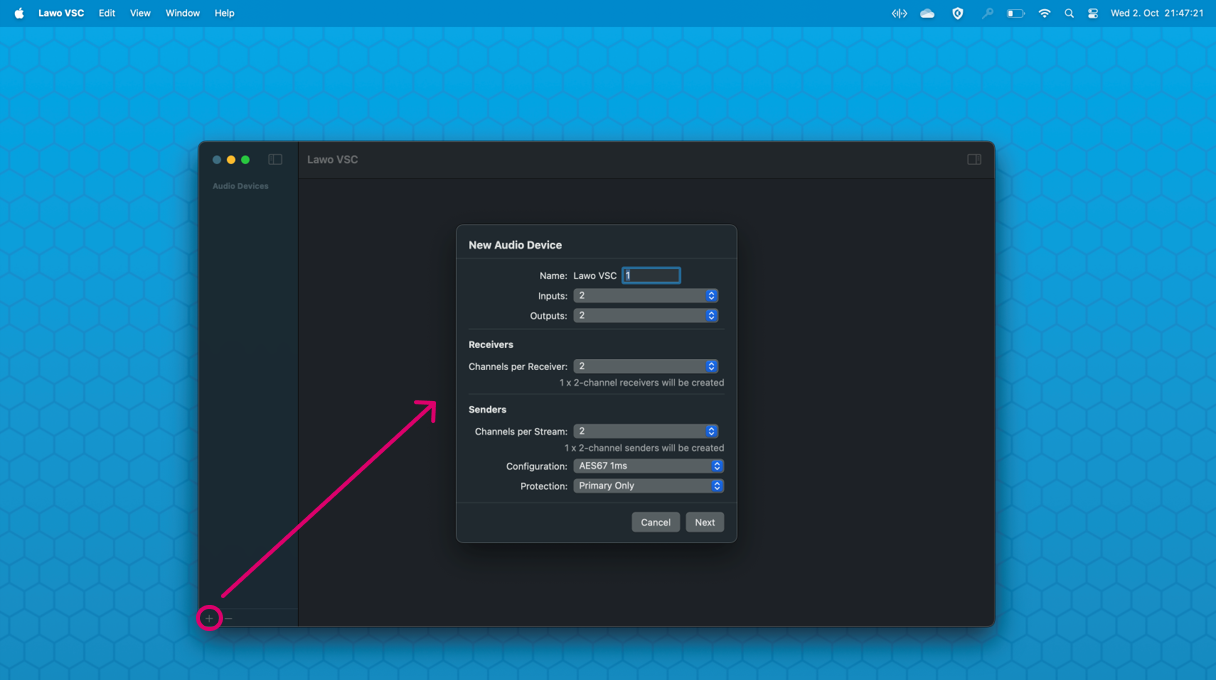
2. Check and, if necessary, edit the fields to define the audio device.
By default, the fields are completed to create a stereo playback and recording device that supports non-redundant streams that are AES67-compliant. For our example, the default values are fine.
If you wish to edit the fields, then this can be done as follows. For more information about the parameter options, please see Lawo VSC - Audio Device Configuration.
- Name - identifies the audio device in Lawo VSC and in the macOS.
The name always starts with "Lawo VSC"; this cannot be changed. The second part of the name can be edited. - Inputs and Outputs - defines how many inputs and outputs the device can handle.
Please enter a value that meets the requirements of the local audio application/driver. - Channels per Receiver and Channels per Stream - defines the number of IP receiver(s) and sender(s) according to the number of channels per receiver/stream.
Once a value is selected, Lawo VSC calculates the number of senders (or receivers) and displays this below the corresponding field. - Configuration - defines the advanced parameters for the outgoing stream(s).
By default, an AES67 preset is selected and the advanced parameters are hidden from view.
In most cases, it is recommended to accept the default preset (as this ensures that the streaming configuration is permitted, and that the streams are AES67-compliant).
If Custom is selected, then it is possible to edit the individual parameters. This is explained in more detail later. - Protection - defines the network interface(s) used to transmit the stream(s).
By default, Primary Only is selected (to be compatible with the free version of Lawo VSC).
To create redundant streams, compatible with SMPTE ST2022-7, you must change this option to Dual Redundant.
Please note: To support the Dual Redundant protection mode, you must upgrade to the licensed version of Lawo VSC. Then, assign a secondary streaming interface using the NIC 2 field in the 'Settings → Streaming' dialog.
3. Once you are happy with the configuration, click on Next to continue to the next screen.
Here you can check and, if necessary, edit the labels for the receiver(s) and sender(s), and define the multicast IP address(es) for the outgoing stream(s).
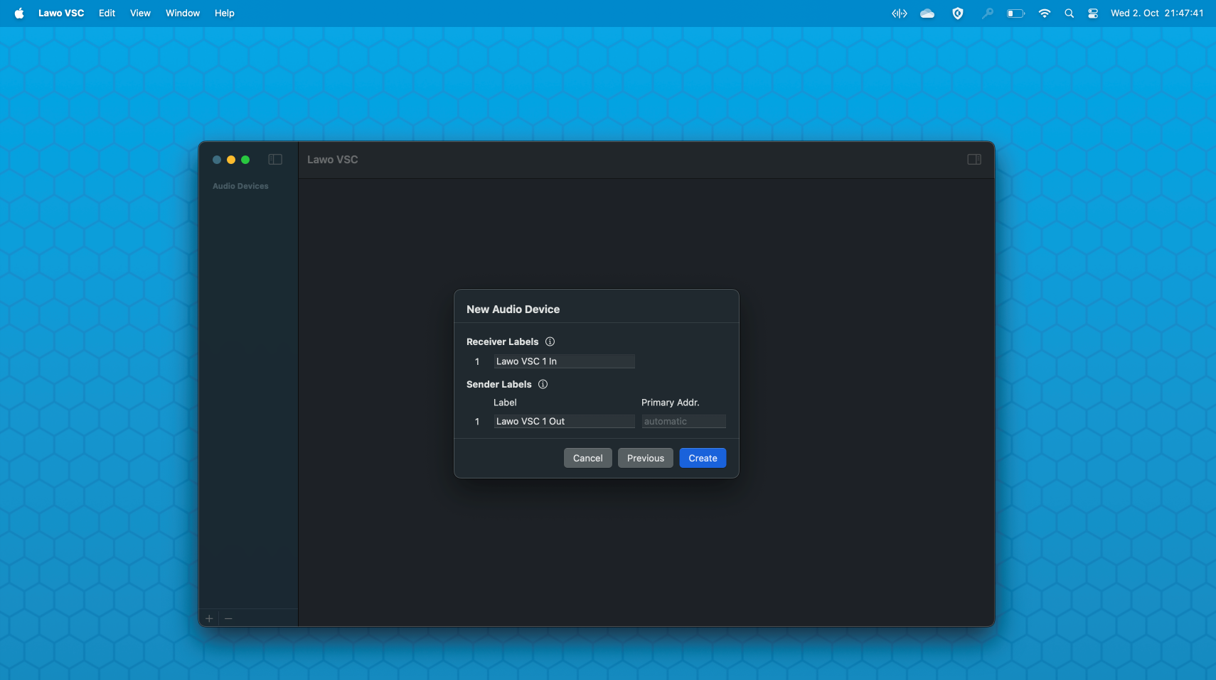
To save time, it is recommended to use the default labels. These start with the device name (entered earlier).
If there is more than one receiver or sender, then the labels end in a number that increments automatically. Thus, the default labels are:
- <device name> In n - for receivers.
- <device name> Out n - for senders.
The default labels can be overwritten by typing into the fields.
Each label must not exceed 28 characters.
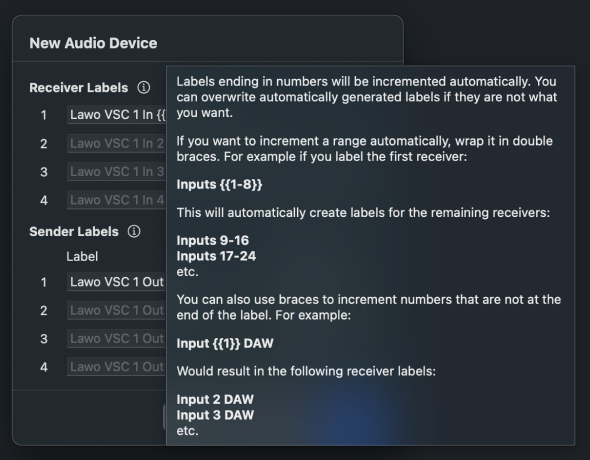
To speed up the labelling for multiple receivers or senders, double braces can be used to automatically increment a number or range. Click on the i icon to open an "information" dialog that explains how to use this shortcut.
Beside the sender labels, the Primary Addr. field determines how the multicast IP addresses are created. There are two possibilities: either automatic or manual.
For our example, the default (automatic) mode is fine.
If you wish to edit the multicast addresses manually, or use a different UDP port number, then please see Sender Multicast IP Addresses & UDP Port Number.
4. Once you are happy with the labels and multicast addresses, click on Create (to create the audio device).
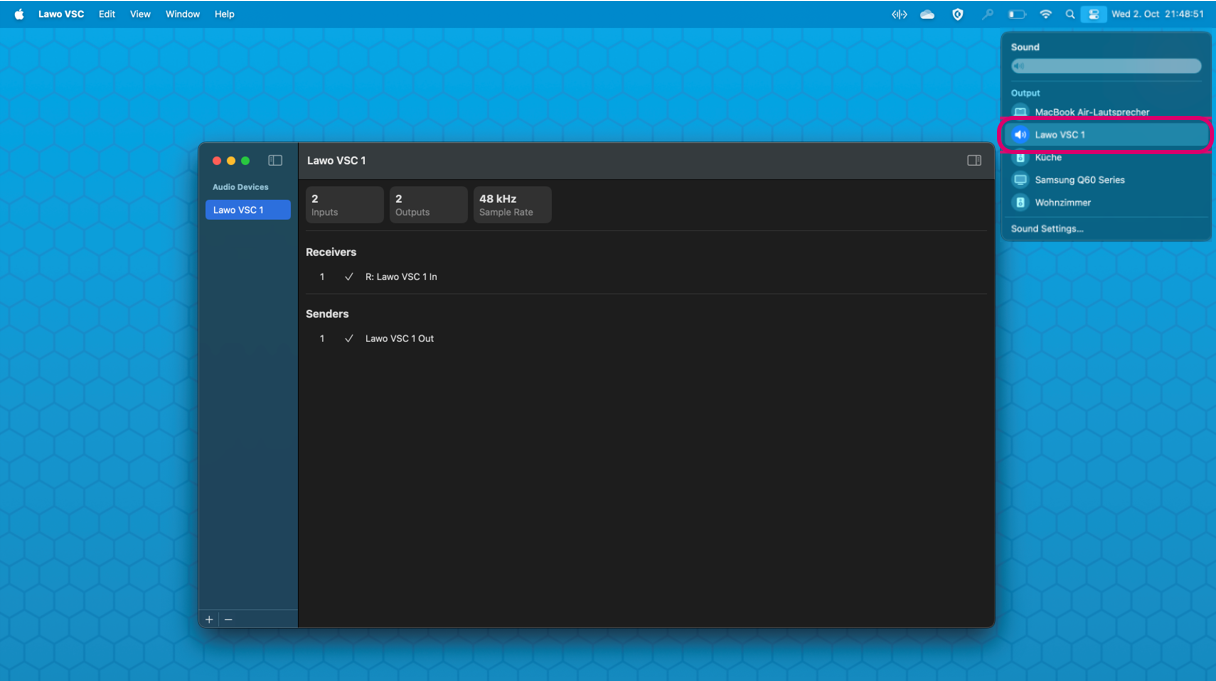
The new device is added to the list of 'Audio Devices' and a summary of its configuration is shown in the main working area.
- On the network side, the receiver(s) and sender(s) are now active, and so their status is ticked.
- The setup of the audio device in Lawo VSC is now complete, and you are ready to connect your audio application.
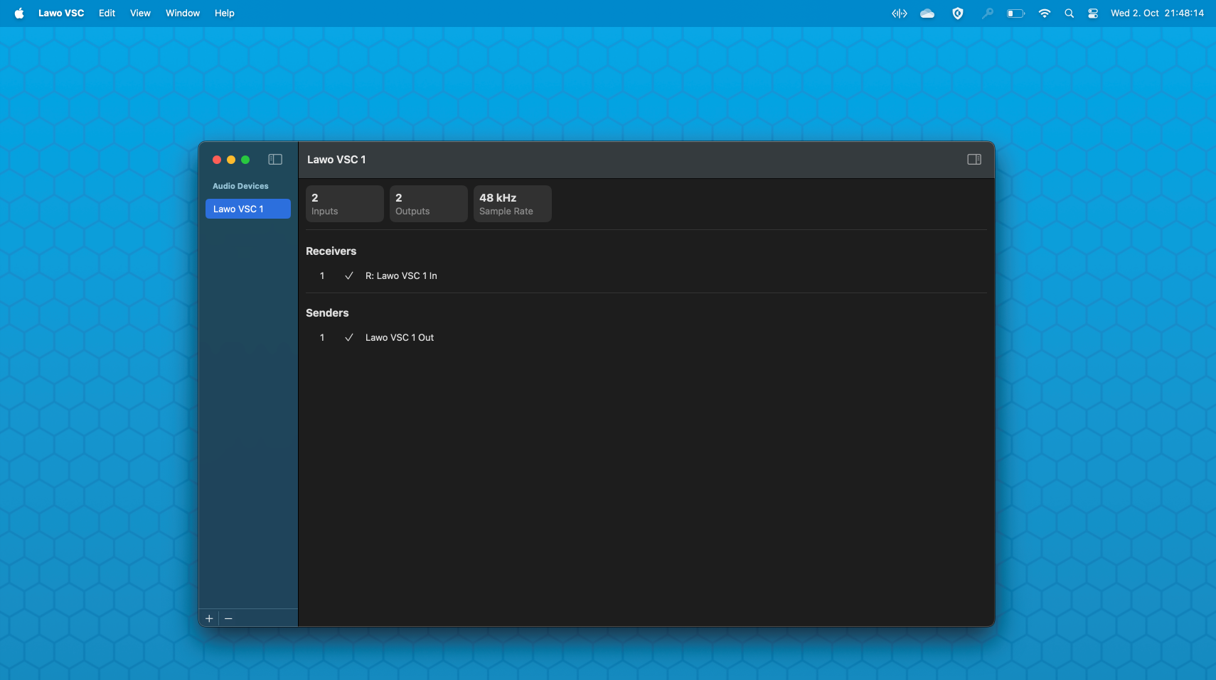
Notice that the device called "Lawo VSC 1" appears in the list of Sound devices (in the macOS status menu). This confirms that the device is ready for use outside of Lawo VSC.
Connect an Audio Application
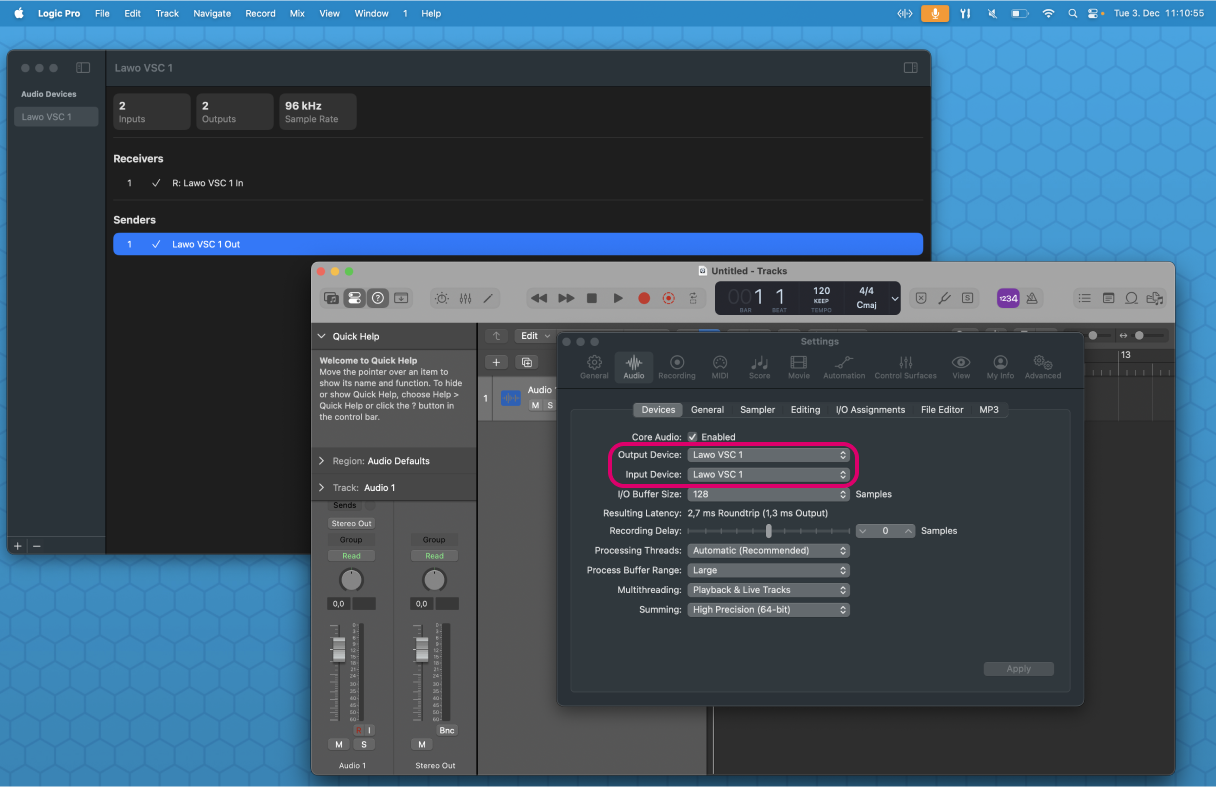
Once an audio device is created in Lawo VSC, it can be used by an application on your computer. This will allow you to use the audio received from the network (via the Receivers) and stream audio to the network (via the Senders).
This part of the setup is done in the audio application and so the method may vary.
In the example below, the audio device named "Lawo VSC 1" is assigned to the input and output device fields (in the settings for the digital audio workstation).
Please note:
- To stream audio to/from multiple applications, you must configure an audio device for each application. An audio device cannot be assigned to more than one application simultaneously.
- Sample rate conversion (SRC) is applied automatically to the audio (as required). For example, if a 48kHz stream is connected to a 96kHz application, then audio from the stream is decoded and up sampled.
- While Lawo VSC supports 96kHz and up to 128 audio devices, whether your configuration will work in practice is dependent on the overall usage of the macOS system.
Once the Lawo VSC audio device is assigned to its audio application, the setup is complete.
For the outgoing streams, you can use the Lawo VSC GUI to check the audio carried by the streams or edit, disable or remove the streams (as described in Lawo VSC - Sending Audio to the Network).
To receive audio from the network, you must setup a streaming connection to the device's receiver(s) This can be done either manually (by editing the receiver's SDP data) or dynamically (using Select Stream in Lawo VSC or the Stream Routing page in HOME). For more information, see Lawo VSC - Receiving Audio from the Network.
Remove an Audio Device
The steps below describe how to remove an audio device from Lawo VSC.
Important: If you remove an audio device, then this will delete all of its outgoing streams.
1. Select the device you wish to remove from the 'Audio Devices' list.
The selection highlights.
2. Click on the - button (at the bottom of the 'Audio Devices' list).
3. Select Confirm to continue (or Cancel to abort the operation).