Lawo VSC - Sending Audio to the Network
To publish audio to the network, you must configure an audio device in Lawo VSC. Then assign the device to your local audio application.
The outgoing streams are available as soon as the audio device is configured. This means that they can be used by other receivers before a local application is connected. In this instance, the sender's audio channels are muted until the driver assignment is made.
I/O Routing
There is no user-defined I/O routing in Lawo VSC and so the local audio application connects to the sender's audio channels on a 1:1 basis. If you wish to shuffle the audio channels, then this must be done in the external application.
Please note: Sample rate conversion (SRC) is applied automatically to the audio (as required). For example, if the sample rate of Lawo VSC is set to 48kHz and a 96kHz application is connected, then the audio from the application is down sampled and then encoded.
Checking the Audio Outputs
The Lawo VSC GUI can be used to check the audio carried by the outgoing streams on a channel-by-channel basis. This is done as follows.
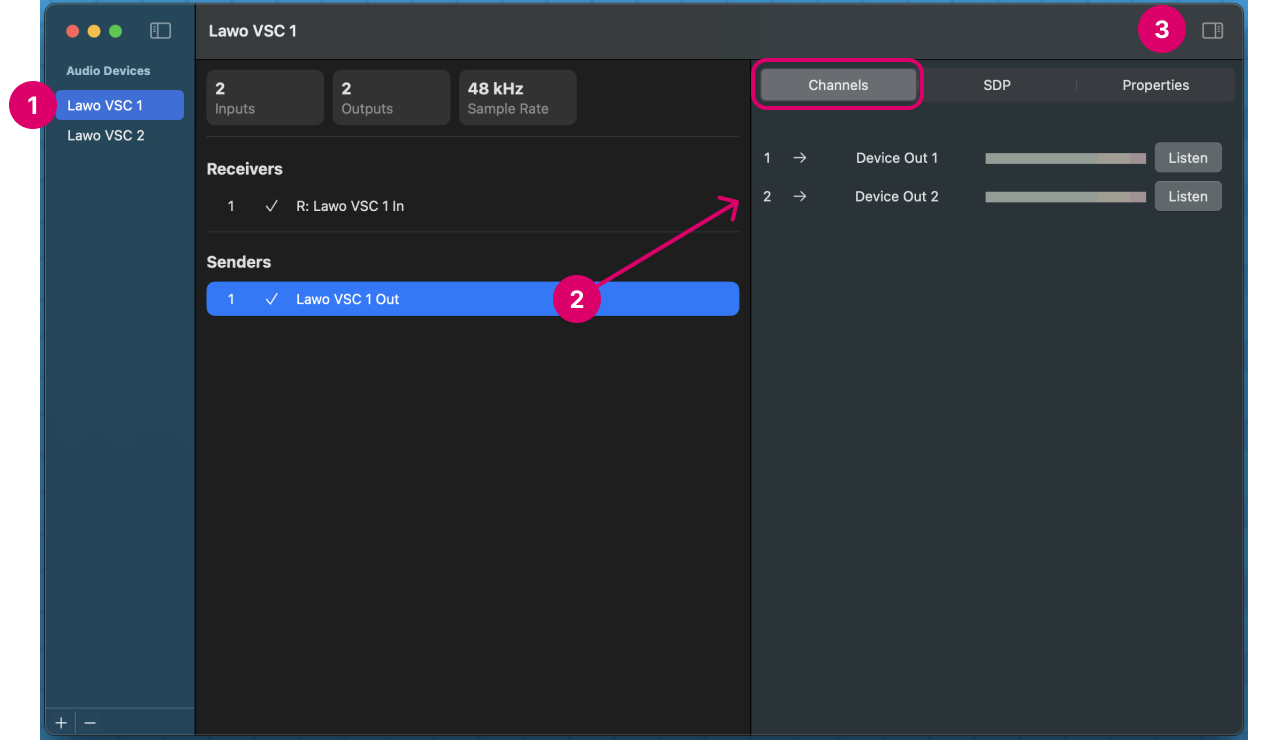
- Select the audio device in Lawo VSC (to reveal its Receivers and Senders).
- The sender status should be ticked (to confirm that the stream setup is ok).
- Select a sender (e.g. Lawo VSC 1 Out).
- Click on the show side panel icon (to view the right-hand side panel) and select the Channels page.
- If audio is present, then you will see the level on the meters.
- Click on Listen to monitor a channel on the local playback device (defined in the ' Settings → General' dialog).
If the audio device has multiple senders, then the number of the sender can be used to identify the channels. For example, if a 64 output device has 8 x 8-channel senders and you wish to check outputs 17-24, you will need to select sender 3.
Listen Function
First, you must configure a local playback device using the Play local audio through and Channels options in the 'Settings → General' dialog. You can choose any Sound device that is configured in your macOS system.
Then click on one of the Listen buttons (available for each channel). The audio is played out through the selected channels of the playback device.
SDP Functions
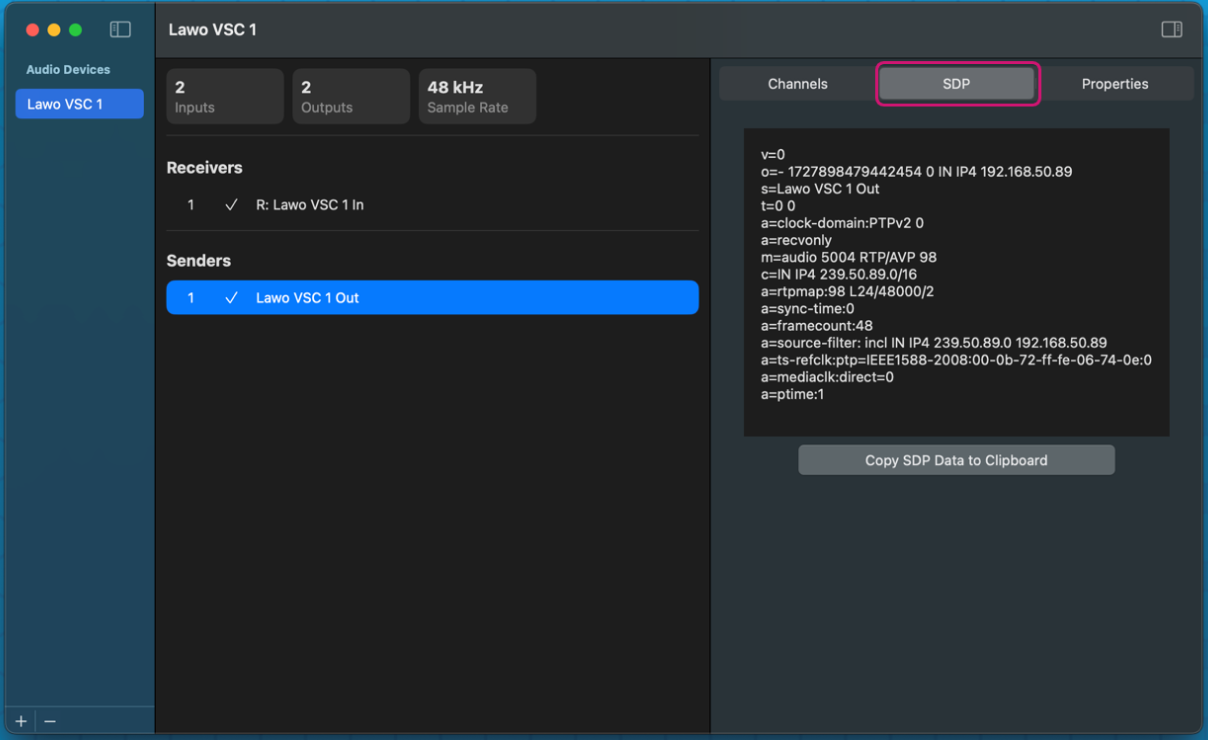
The SDP page shows the SDP data for the outgoing stream. This can be used to check the contents of the SDP data or copy the SDP to the clipboard (so that it can be used by another device/receiver).
Copy SDP Data to Clipboard
Click on this button to copy the SDP data to the clipboard.
Once in the clipboard, the SDP can be saved as a text file (for backup purposes or transfer to another device). Or, pasted directly into a receiver (to setup a new streaming connection as described earlier).
Sender Properties
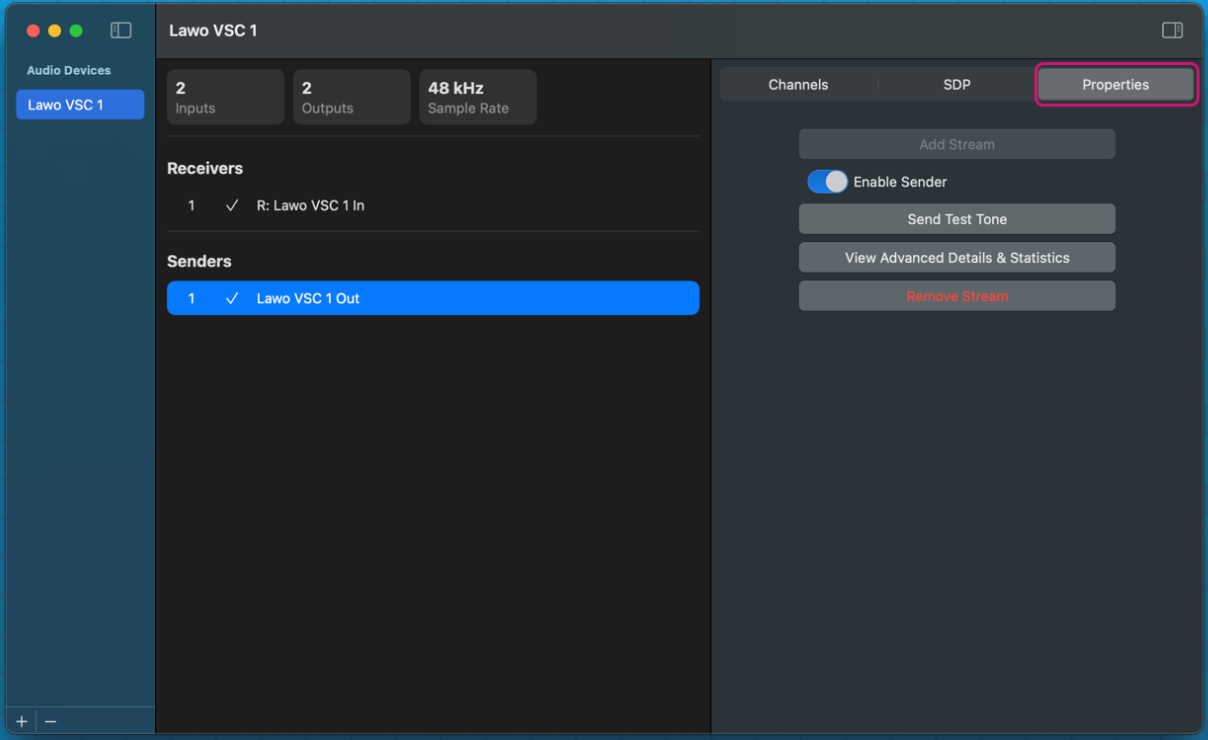
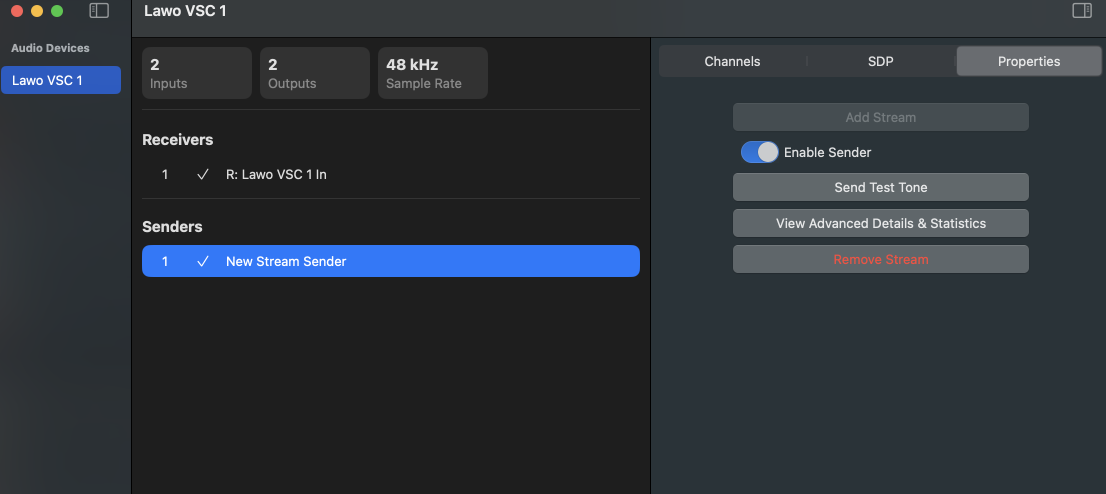
The Properties page can be used to access the sender properties. If an option is not supported, then it is greyed out.
Add and Remove Stream
The Remove Stream option can be used to delete the selected sender. This can be useful if, for example, you want to change the configuration of the outgoing stream(s).
In this instance, click on Remove Stream to delete the existing sender. Once the sender is removed, it is possible to select the Add Stream option.
Click on Add Stream to open the 'New Stream Sender' dialog. Use the Label, Configuration and Protection fields to define the new sender. These options work in the same way as for a new audio device (as described in Lawo VSC - Audio Device Configuration).
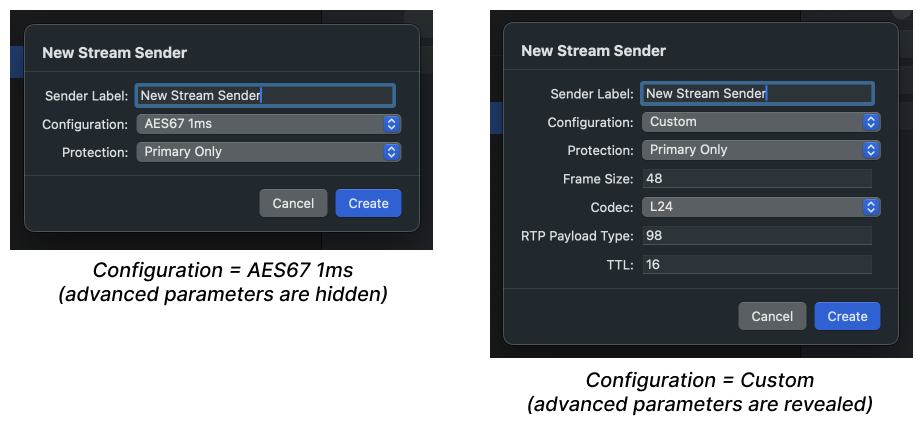
Once you are happy with the configuration, click on Create (to create the new sender). The stream is created and the list of Senders updates.
Enable Sender
Click on this option to enable or disable the outgoing stream. This can be used to remove the stream from the network on a temporary basis.
If you wish to remove the sender completely, then use Remove Stream.
Send Test Tone
The audio test tone generator can be used to line-check the audio path from a sender.
When enabled, the test tone is assigned to each channel of the stream in a cyclical manner - so tone appears on channel 1 for a few seconds, then on channel 2 and so on.
The generator produces a 1kHz sine wave test tone signal. The frequency is fixed and cannot be adjusted. The level is variable and can be adjusted in 1dB steps (from the 'Settings → General' dialog). By default, the level is set to -18dBFS.
To use this function:
- First, set the level of the test tone, using the Test signal level slider in the 'Settings → General' dialog.
- Select the audio device in Lawo VSC (to reveal its Receivers and Senders).
- Select a sender (e.g. Lawo VSC 1 Out).
- Click on the show side panel icon (to view the right-hand side panel) and select the Properties page
- Click on the Send Test Tone button. The test tone is assigned to each channel of the selected sender in sequence. So, tone appears on channel 1 for a few seconds, then on channel 2 and so on until all channels are tested.
- Remember to turn off the Send Test Tone button when the line check is complete.
View Advanced Details & Statistics
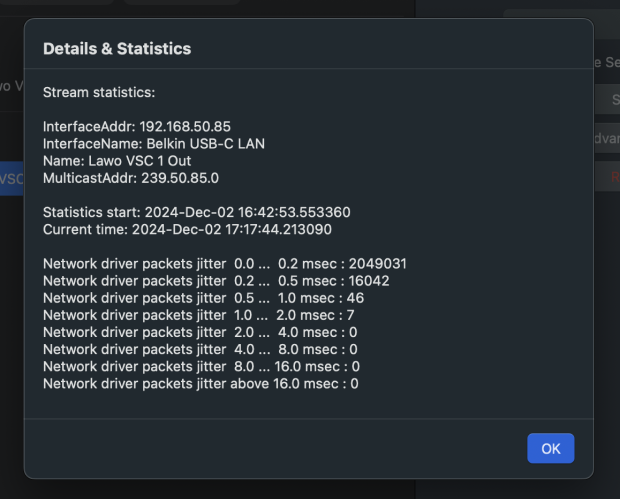
Click on this option to open a dialog which shows more information and statistics about the outgoing stream. This can be useful for diagnostic purposes.
The information includes the multicast IP address and statistics about the network packets such as the amount of jitter.
