mc²96 - Central GUI
The Central GUI (Graphical User Interface) is a high resolution touch-screen display that sits above the centre section controls. It is used to set up the console, and provide visual feedback and metering for the channel in access. A few of the elements are visible at all times, while the central metering (3) can be enabled or disabled. The main working area (2) is paged through the different SCREEN CONTROL displays.
Central GUI Overview
The GUI is divided into five separate areas.
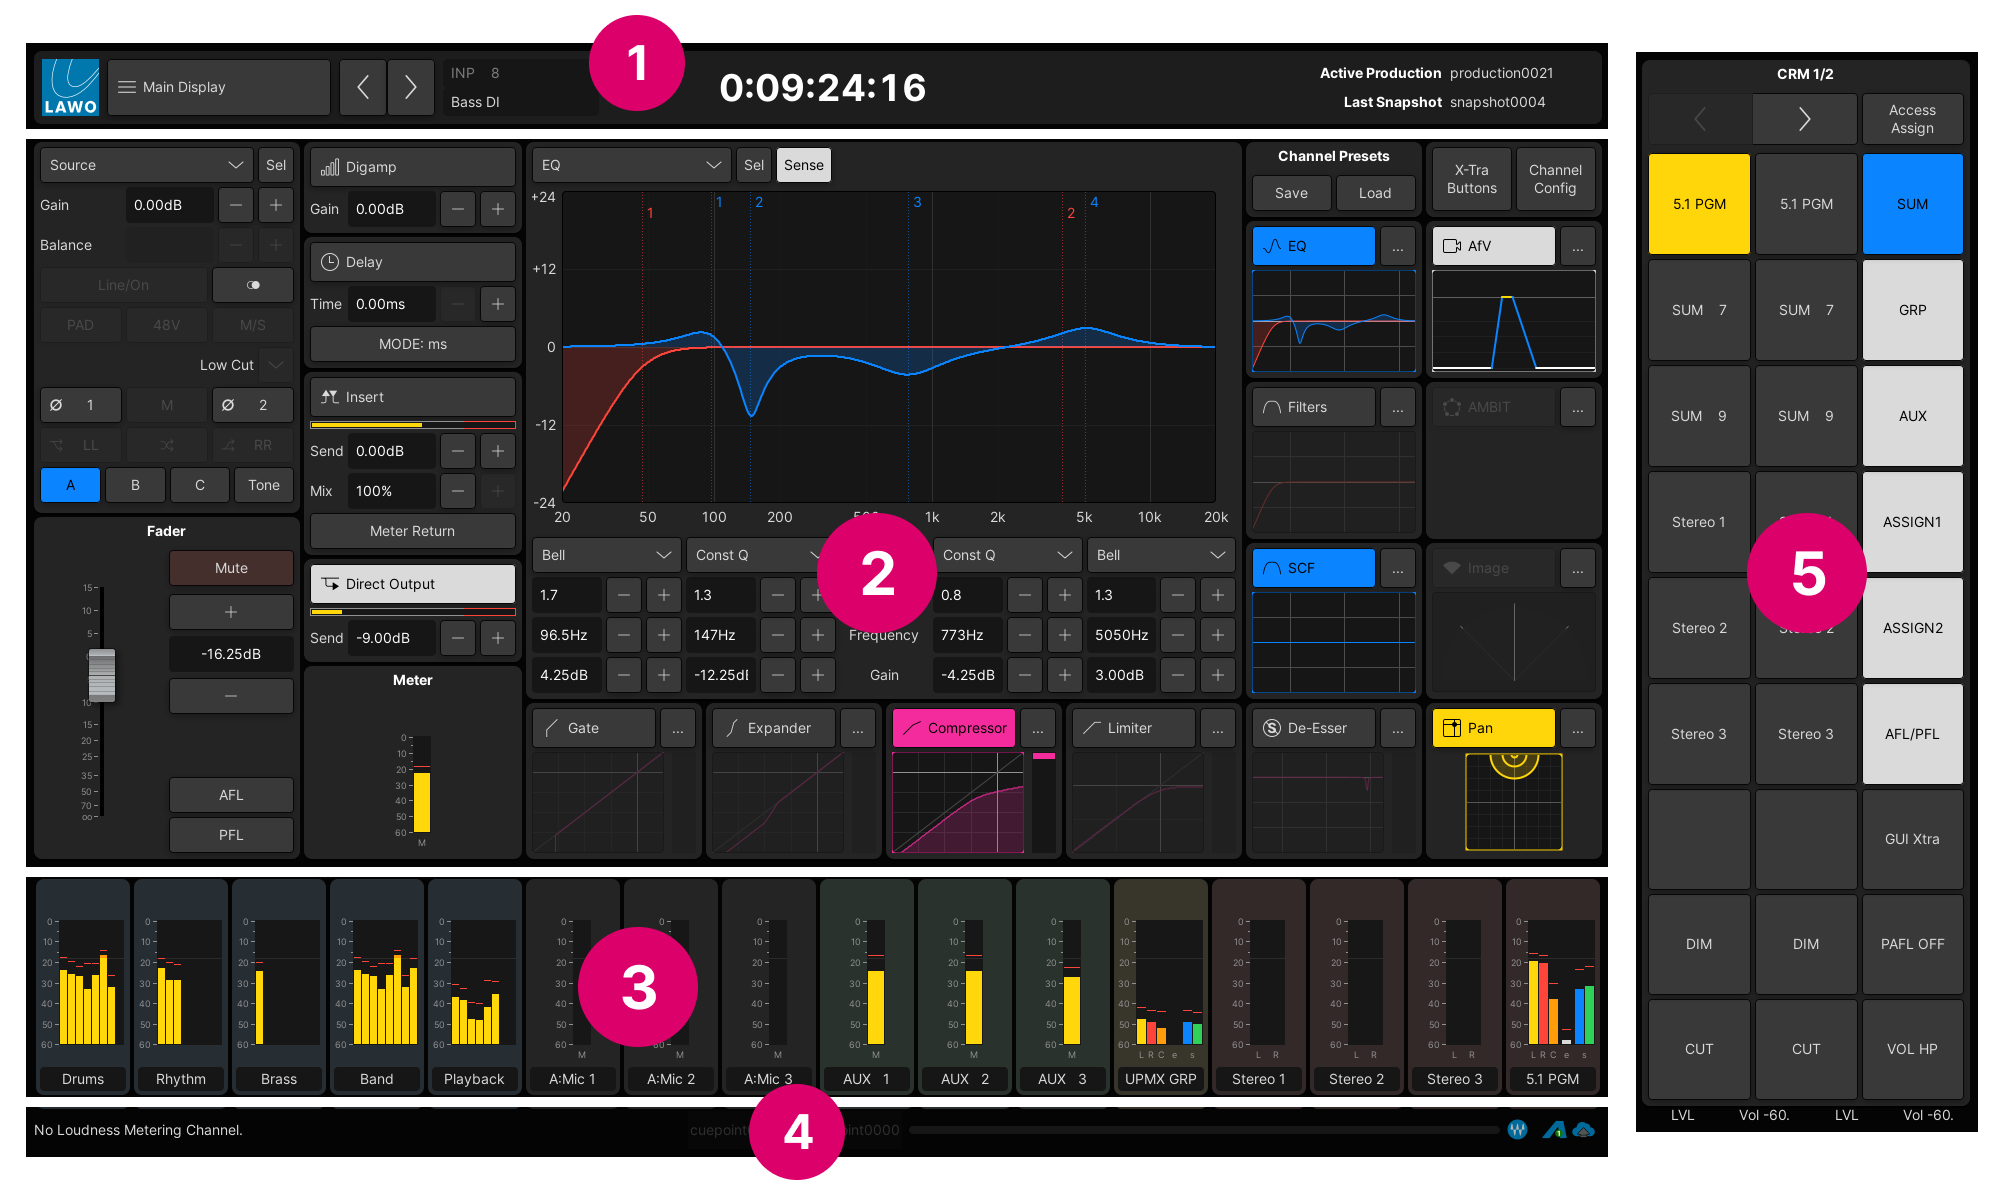
The title bar appears at the top of the Central GUI and is always visible.
From here you can change the SCREEN CONTROL display; check the channel in access; view the system time, timecode or integrated loudness (in the headline); and check the active production and last snapshot. For more information, see Title Bar Operations.
The main working area always shows one of the SCREEN CONTROL displays: the Main Display, Signal List, etc.
To change the display: press a dedicated page button on the SCREEN CONTROL panel (in the centre section); select an option from the page menu (in the title bar); or use a keyboard shortcut (on the console keyboard). For more information, see Changing the SCREEN CONTROL display.
The central metering is enabled and disabled using the " GUI → Display Central Metering" option (in the System Settings display).
When enabled, it provides metering for the channels assigned to the main fader strips. When disabled, the SCREEN CONTROL display (2) expands into the available space.
For convenience, the "Display Central Metering" option can be toggled on and off from a central user button (to show or hide the central metering on-the-fly). For example, to see more of the Signal List for a short while. For more information on programming user buttons, see the Custom Functions display.
The status bar appears at the bottom of the Central GUI and is always visible. It provides feedback on system statuses and shows the progress of operations such as loading or saving a production.
On the left you will see the alternate option for the headline. For example, if the local time or timecode is shown in the title bar, then the status bar shows the integrated loudness measurement.
The icons on the right indicate the status of the network connections to the Waves Plug-in Server, A__UHD Core and mc2 control system. In each case, use the trackball to hover over an icon to reveal more information.
The side panel appears on the right of the Central GUI and is always visible.
By default, it provides buttons for monitor source selection, cut, dim, etc. Alternatively, it can be switched to access/assign functions using the Access/Assign button. In each case, use the left/right arrow buttons to scroll through the available pages. For more information, see the Monitoring & Access/Assign Side Panel.
Changing the SCREEN CONTROL display
To change the display shown in the main working area, there are three possible methods.
1. Press one of the dedicated buttons on the SCREEN CONTROL panel.
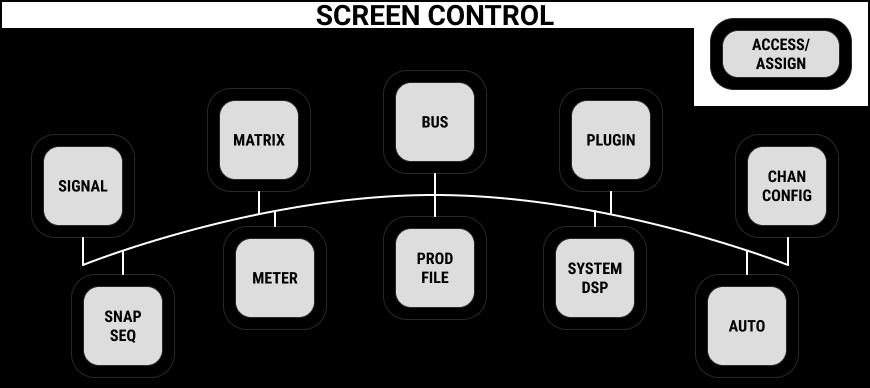
In most cases, the button provides access more than one page, so keep pressing to cycle through all available pages.
2. Select a page from the page menu.

OR, touch the Previous (or Next) page buttons.

These buttons navigate forwards or backwards through the last 16 page views. This makes it easy to go back and forth between pages. When you reach the first (or last) page in the sequence, the button turns grey indicating that no further selections are available.
3. Use a console keyboard shortcut.
- Press one of the quick key combinations shown in the page menu - for example, press CTRL + 2 to cycle through the Buses displays: Bus Assign, Buses Reverse, Automix and VCA Map.
- Press ALT + Left/Right to select the Next or Previous Page (as described in step 2).
- Press ALT + P to open the Page menu. Then use the Left/Right/Up/Down cursor keys to make a selection, and press ENTER to confirm.
All of the available SCREEN CONTROL displays are described at the end of this topic.
Navigation & Selections
To navigate around a display and make selections you can use the touch-screen, trackball & mouse keys, SCREEN CONTROL panel or console keyboard.

mc2 Snapshot List display
Touch-screen
Anything which is a button or menu option can be selected by touching the screen. Buttons change color when enabled (e.g. the DESK Global Snapshot ISO). List selections are highlighted in blue (e.g. Act 1 Scene 1).
Trackball & Mouse Keys
Use the trackball to position the cursor and press the left mouse key to make a selection. Additional functions appear if you right-click on a selection (e.g. Load, Update, Protect and Delete).
If a list is longer or wider than the current view, then a vertical or horizontal scroll bar will automatically appear (e.g. on the right side of the Snapshots list).
SCREEN CONTROL Panel
When focussed on a list, you can turn the rotary control on the SCREEN CONTROL panel, or press the Up/Down arrow buttons, to change the selection. Then press a soft key to perform an operation: Save, Update, Load, etc.
Console Keyboard
You can also use keyboard shortcuts ("Hot Keys") to move around the display and make selections:
- TAB or SHIFT+TAB - changes the focus area.
- Up/Down cursor keys - scroll up or down the entries in a list.
Adjusting Parameter Values
On displays such as the Main Display, you can adjust a value from the touch-screen trackball, SCREEN CONTROL panel or console keyboard.
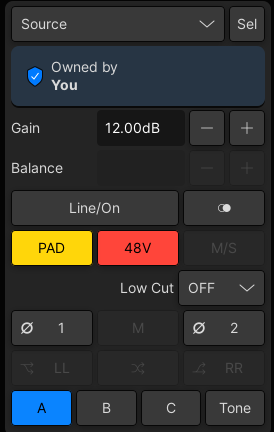
mc2 Main Display (INPUT section)
Touch-screen
Anything which is a button or menu option can be selected by touching the screen. For continuous values such as Gain, you can touch the + and - buttons to increase or decrease the value.
Trackball & Mouse Keys
Use the trackball to position the cursor and press the left mouse key to enable or disable a button or option. As above, continuous values can be adjusted using the + and - buttons.
SCREEN CONTROL Panel
Once a continuous parameter is selected, you can turn the rotary control on the SCREEN CONTROL panel to adjust its value.
Console Keyboard
Once a continuous parameter is selected, press the Up or Down cursor keys to increase or decrease its value. Or, type in a value and press ENTER.
Sorting Lists & Resizing Areas
On displays such as the Production List, you can click on the column headings to sort by Name, Date or Size.
If you see a separator bar, then an area can be resized. For example, to make the Productions list bigger (and Fallback productions list smaller), click and drag on the bar - the areas resize accordingly. You can use this method to "hide" an area if you wish.
You can also change the order of columns within a list – for example, to move the padlock (protection) column: click and drag the column heading to the left or right, and release when you are happy with the new position.
Note that any changes you make to the list orders and area sizes are reset after a system restart.
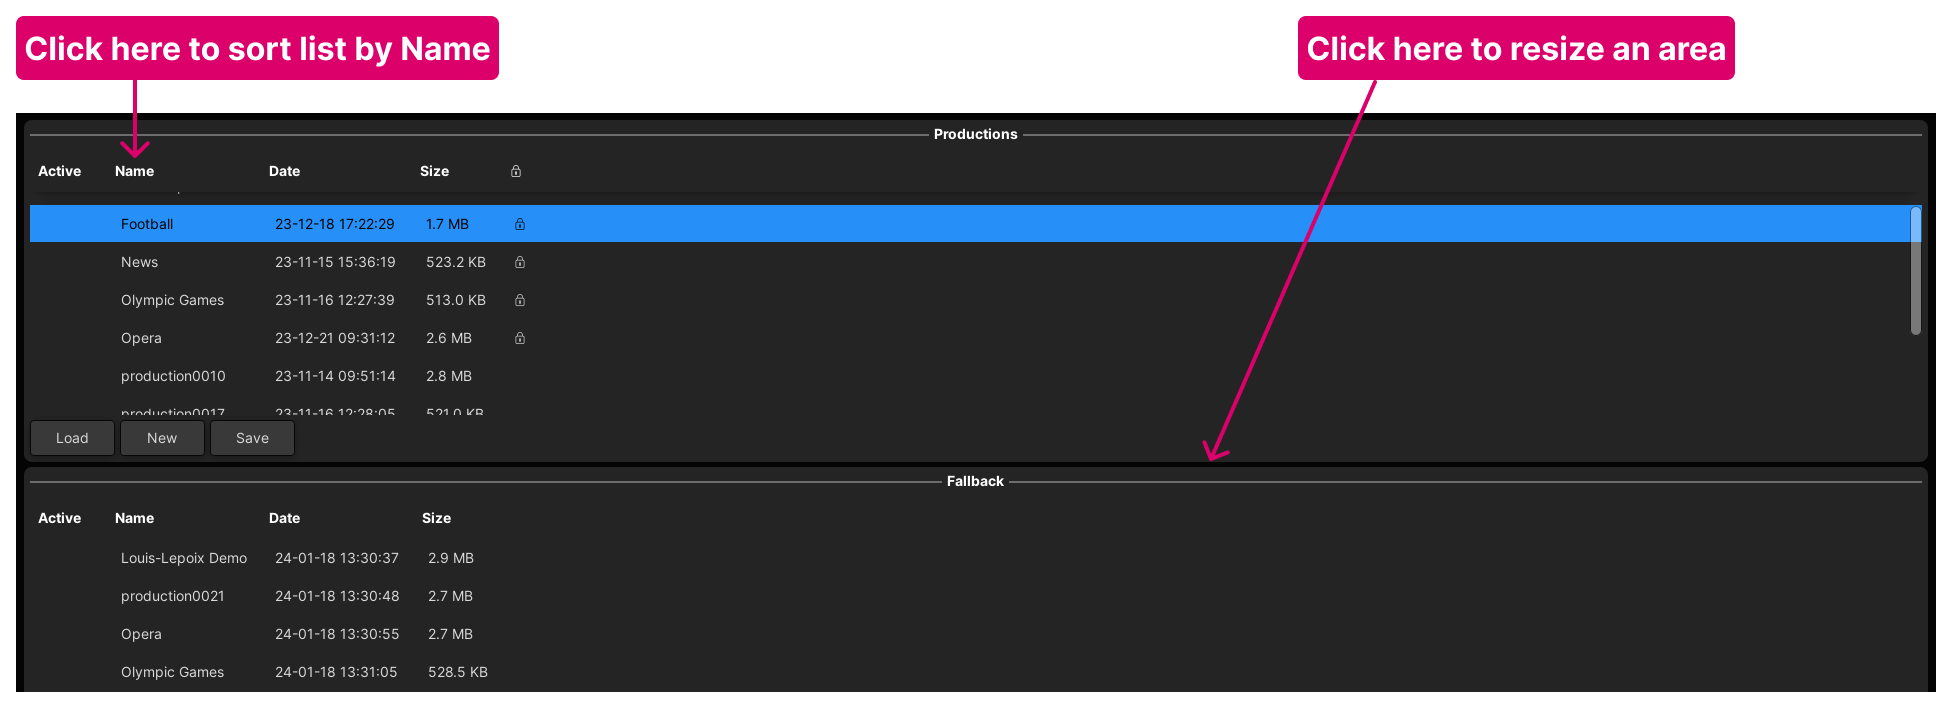
mc2 Production List display
Title Bar Operations
The title bar appears at the top of the Central GUI and is always visible. From here you can change the SCREEN CONTROL display; check the channel in access; view the time, timecode or integrated loudness; and check the active production and last snapshot

The following operations are possible.
- LAWO logo - touch to manually time stamp the system logfile. This marks the messages file at a moment in time, and can assist the support department when diagnosing system behaviour. Log files can be copied from the system via the File display.
- Page menu - touch to open the drop-down page menu. The current page is shown beside the menu icon (e.g. Signal List).
- Next/Previous page - touch to navigate to the previous (or next) page.
- Channel in access - these two fields show the system name and user label of the channel in access. You cannot change the channel in access from here, but you can edit its user label (by clicking in the label field).
- Headline - the central area can display Local Time, Timecode or Loudness metering. Touch to make a change (as described below).
- Status indicators - this area is reserved for important status indicators such as the HOME Health warning. If an indicator appears, then use the trackball to hover over the icon to reveal more information and instructions.
- Active production and Last snapshot - the two fields on the right are for information only. They show the name of the active production and last snapshot (saved or loaded).
Changing the Headline
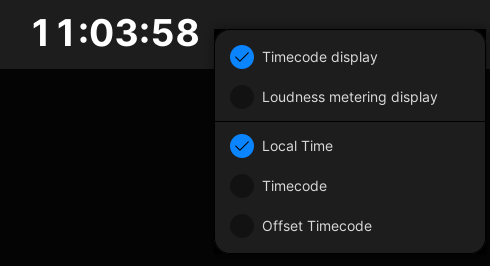
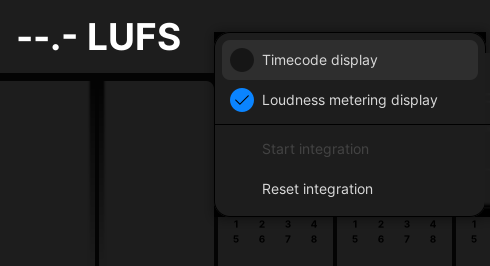
To change what is shown in the headline, touch or click on the central area. A drop-down menu appears with two main options: Timecode display or Loudness metering display.
|
|
With Timecode display selected, you can choose to show one of the following:
- Local Time = the local system time* in 24 hour clock.
- Timecode = SMPTE timecode from your selected timecode reference (defined using the Timecode options in the System Settings display).
- Offset Timecode = SMPTE timecode + the Midnight offset (defined in the Automation → Pass Tree).
Alternatively, select Loudness metering display to show the integrated loudness measurement for a particular summing channel. How to select the channel and control the measurement is described here.
*The system time can be set either manually (using the "Global → Date/Time → Set Internal Clock" option in the System Settings display) or automatically via an external NTP server (connected to the Lawo network). To use an NTP server, this option must be factory-configured (within the TCL files). In this instance, the NTP server time takes priority.
Monitoring & Access/Assign
The side panel on the right of the Central GUI is always visible. By default, it provides buttons for monitor source selection, cut, dim, etc. Alternatively, it can be switched to access/assign functions as follows.
1. Press the ACCESS/ASSIGN button, either at the top right of the GUI side panel or on the SCREEN CONTROL panel.
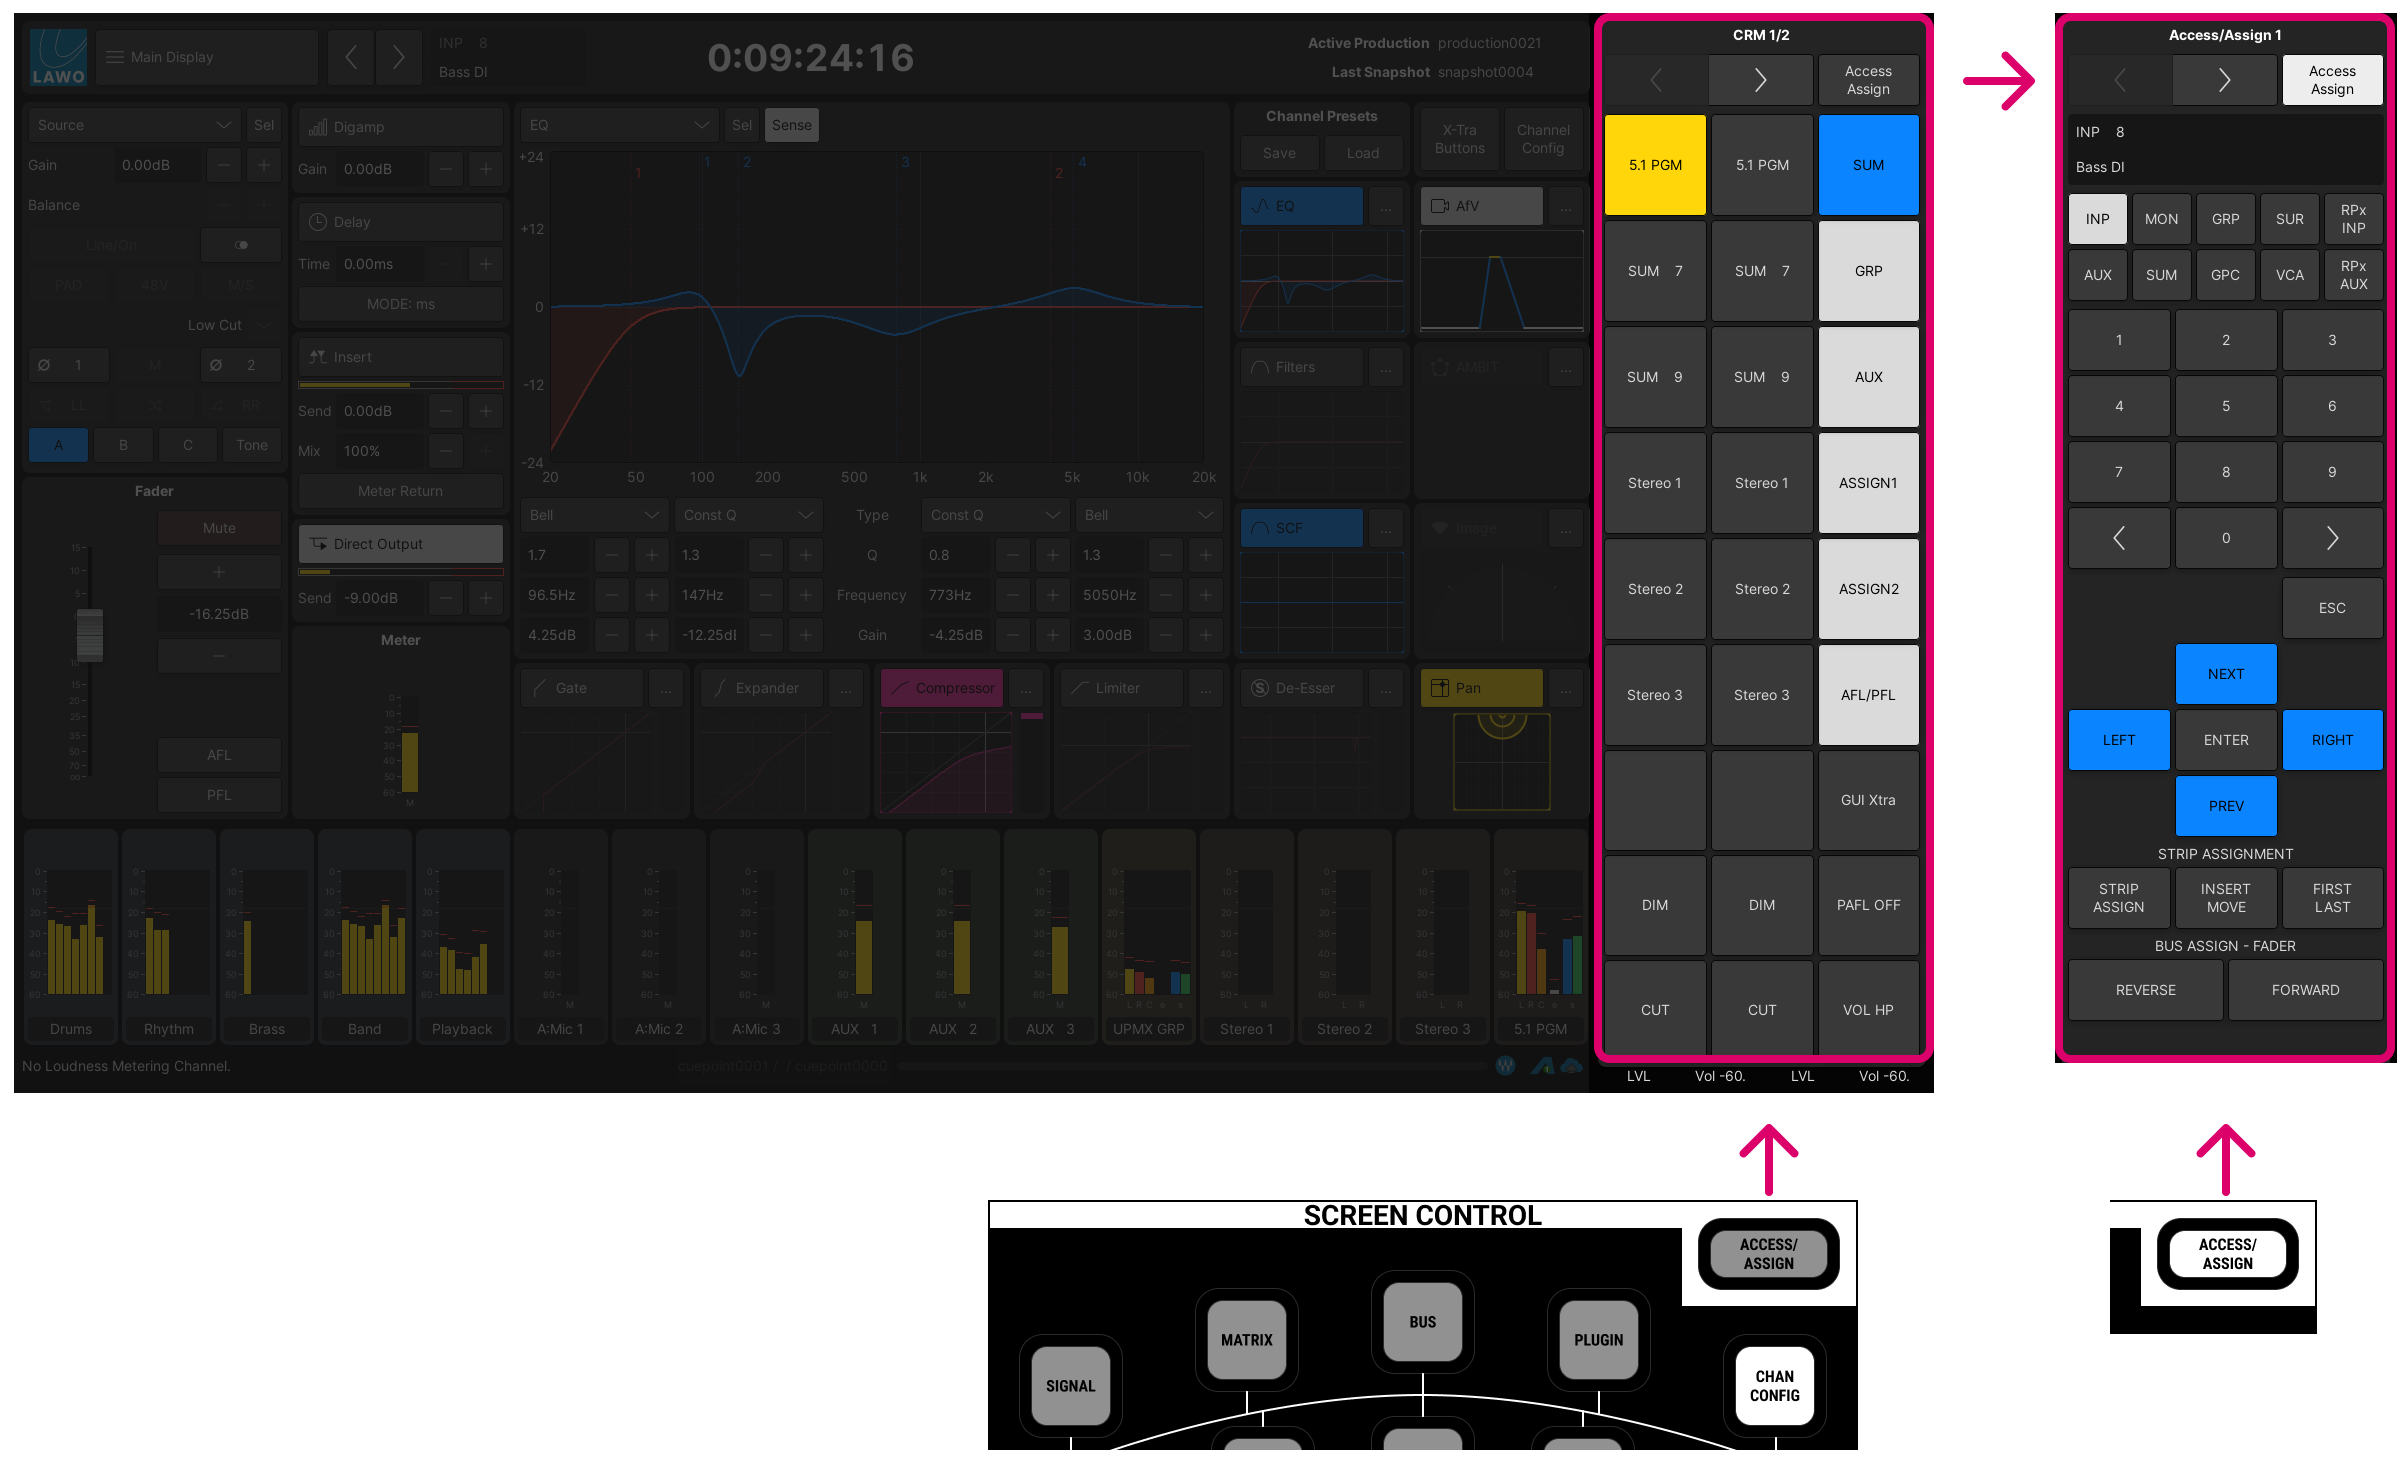
2. Use the left/right arrow buttons (on the GUI) to scroll through the available pages.
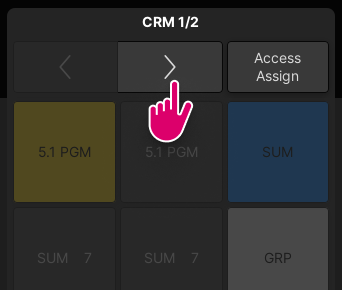
The side panel buttons are designed for touch-screen operation. Alternatively, you can use the trackball and left mouse-key to make a selection.
Monitoring Side Panel
In MONITORING mode, there are seven pages:
- CRM 1/2, CRM 1 & CRM 2 - contain the Control Room Monitoring functions and user buttons.
- Cuelist - contains the Previous and Next buttons for the cuelist automation.
- Automation 1 & 2 - contain the timecode automation functions.
- VSM Remote - can be used to emulate a VSM key panel (for broadcast system control). For more information, please refer to the separate VSM documentation.
The images below show each page. Please follow the links above for more information.
|
|
|
|
|
|
|
Access/Assign Side Panel
In ACCESS/ASSIGN mode, there are three pages:
- Access/Assign 1 - can be used to change the selected channel (also known as the "channel in access").
- Access/Assign 2 - contains the strip assignment functions and label editing for the BANK 1 to 6 buttons.
- Access/Assign 3 - can be used for copy/reset, link grouping, module ISO and cuelist functions.
The images below show each page. Please follow the links above for more information.
On the Access/Assign 2 page, you can edit the electronic labels for the BANK 1 to 6 buttons as follows.
1. Touch the button's label area to edit the existing text - you can enter up to 8 characters.
2. Press Enter to confirm - the label updates on both the GUI and console surface.
SCREEN CONTROL Displays
The table below describes all of the SCREEN CONTROL displays that can appear in the main working area. Please click on the links (in the Display Name column) to learn more about each display.
Page Menu | Display Name | Shortcut | What can I do from here? |
|---|---|---|---|
Signals | Ctrl+1 | Connect sources to destinations; edit user labels; define channel formats; adjust signal parameters. | |
Buses | Ctrl+2 | Edit bus assignments from the selected channel. | |
" | Ctrl+2 | Edit reverse bus assignments to the selected channel. | |
" | Ctrl+2 | Edit automix groups. | |
" | Ctrl+2 | Edit VCA group assignments. | |
Plugin (optional) | n/a | n/a | Edit Waves plugin parameters (if a plugin server is configured). Please refer to the separate "Waves for mc² - User Manual". |
Channel | Ctrl+3 | Edit mix parameters for the selected channel: input, EQ, Dynamics, panning, etc. | |
" | Ctrl+3 | Edit the signal flow for the selected channel. | |
Metering | Ctrl+4 | View additional metering. | |
" | Ctrl+4 | View Channel Display functionality for the main faders. | |
System | Ctrl+5 | Edit system settings (saved in the production). | |
" | Ctrl+5 | Define the number of input channels, auxes, groups and sums. | |
" | Ctrl+5 | Edit custom functions (saved in the configuration); changes apply to all users. | |
" | Ctrl+5 | Edit command triggers (saved in the production). | |
Snapshots | Ctrl+6 | Load, save and manage console snapshots. | |
" | Ctrl+6 | Create and play out a cue list (for real-time automation). | |
" | Ctrl+6 | Apply snapshot offset parameters. | |
" | Ctrl+6 | Create module-specific snapshot isolates. | |
" | Ctrl+6 | Setup module-specific snapshot crossfades. | |
Automation | Ctrl+7 | Record and play back timecode automation. | |
" | Ctrl+7 | Manage automation passes (within the active mix). | |
" | Ctrl+7 | Create and manage timecode locators. | |
Production | Ctrl+8 | Load, save and manage productions. | |
" | Ctrl+8 | Import or export productions to/from USB or a network server. | |
Extra Buttons | n/a | Access additional touch-screen functions. |
