mc²96 - Channel in Access
To adjust channel parameters (centrally), or perform an assignment operation (such as a fader strip or bus assign), you will need to select a channel. The selected channel is also known as the "channel in access".
The name and label of the channel in access are always shown in the title bar at the top of the Central GUI - for example, INP 8, Bass DI.

The channel in access is always assigned to the Central Control Section and Main Display for parameter control. It is also the channel which will be used when you perform an assign operation.
The channel in access can be locked, to keep the same channel in access, by pressing the Lock ACC button located on the Extra Buttons display. Therefore, if you cannot change the current selection, check the status of this option.
There are three ways to change the channel in access:
- Press a fader strip SEL button.
- Use the Access/Assign panel.
- Use the Signal List "Channel to Access" right-click option.
The rest of this topic describes each method.
Fader SEL (on the surface)
Usually the quickest method to select a channel is to press its fader strip SEL button.

The SEL button lights (in white) when selected.
To select a channel that is not assigned to the surface, you must use a different method: either the Access/Assign panel or Signal List "To Access".
Access/Assign Panel (on the Central GUI)
Any channel can be selected using the Access/Assign panel (on the Central GUI).
This panel appears on the right of the Central GUI when the Access/Assign button is enabled (either from the touch-screen or SCREEN CONTROL panel).
The same functions are available on the surface (if the console is ordered with a standard centre section).

1. Select a channel type - e.g. press INP. The button flashes and display shows TYPE NUM.
2. Enter the channel number - e.g. press 1, 5 and ENTER for the number fifteen.
Providing you make a valid selection, the display updates to show the name (and label): e.g. INP 15.
If you make an invalid selection, the display tells you by flashing NOTAVAIL for "Not Available". Press ESC to exit the operation and start again.
To select a Surround VCA master, there is an extra step: first press SUR, then the channel type (e.g. SUM); then enter a number and confirm with ENTER.
3. Press NEXT (or PREV) to increment (or decrement) the channel number - for example, if AUX 1 is in access, press NEXT to select AUX 2.
4. Press LEFT or RIGHT to select the next channel assigned to the surface - for example, if fader strip 8 is in access, press LEFT to select the channel assigned to fader strip 7.
Channel Types
The following channel types can be selected in this manner:
- INP – input channels.
- GRP – group masters.
- SUM – sum masters.
- AUX – aux masters.
- VCA – VCA masters (up to 128).
- SUR VCA – Surround VCA masters (of any type).
- GPC – General Purpose Channels (up to 256).
- RPx INP - Remote Production input channels.
- RPx AUX - Remote Production aux masters.
For DSP channels, the maximum number is determined by the DSP configuration.
RPx channels can only be selected if your system supports a remote production Power Core (Power CoreRP).
The MON option should be ignored as this is not supported by A__UHD Core systems.
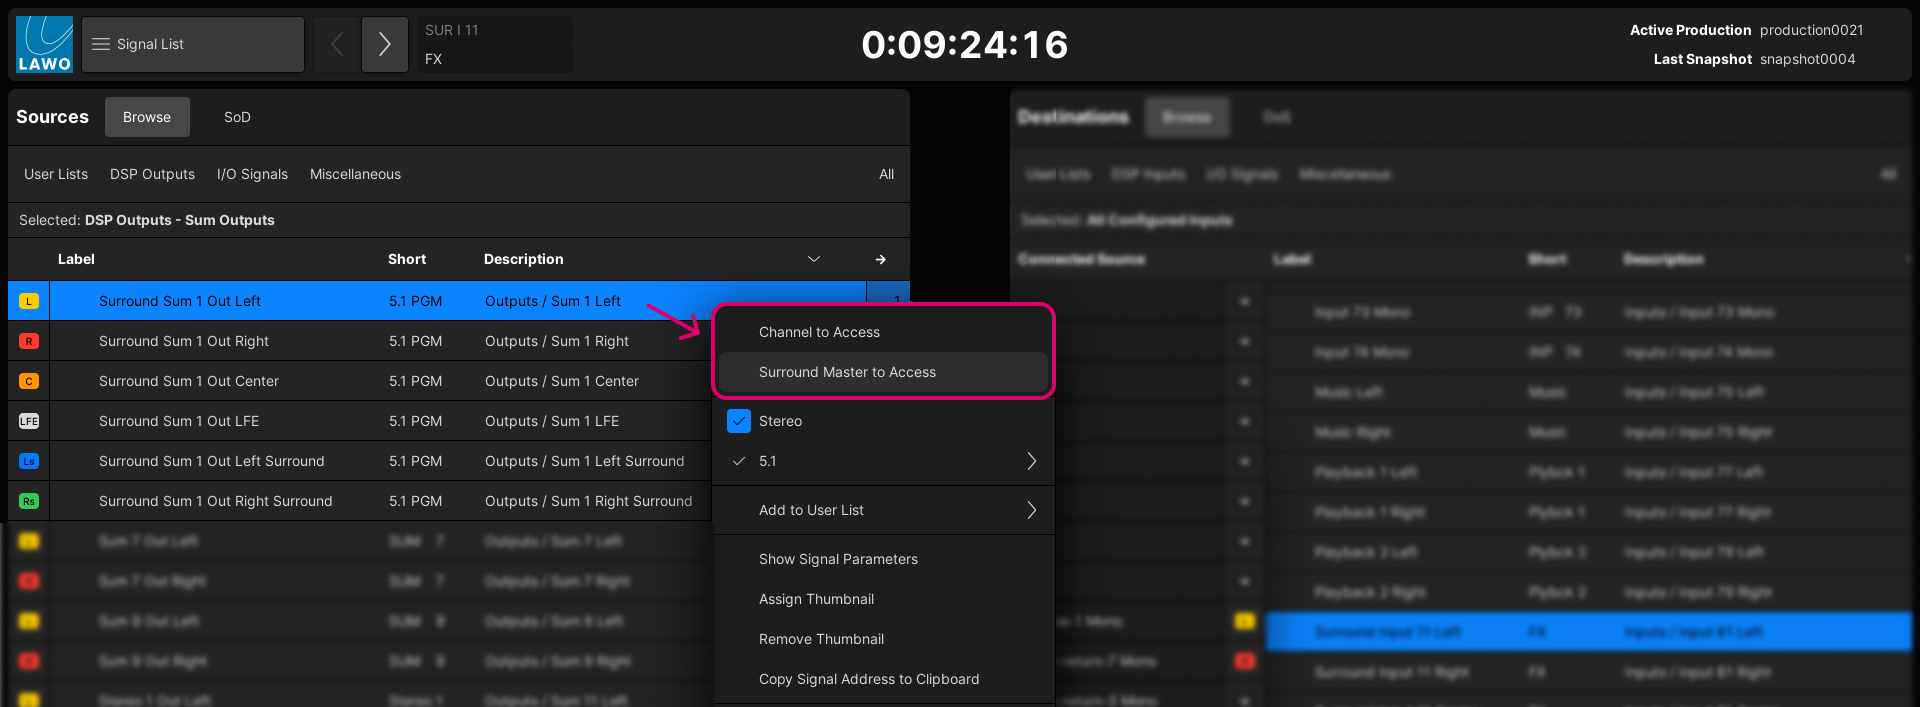
Channel to Access (in the Signal List)
This method can be used to select a DSP channel (or its Surround master) from the Signal List display.
The same method can be used for input channels (from the Destinations list) or for aux, group or sum outputs (from the Sources list).
- Press the SIGNAL button on the SCREEN CONTROL panel.
- Select Signals → Signal List from the GUI page menu.
- Press CTRL + 1 on the console keyboard.
2. Right-click on the source or destination channel you wish to select, and choose Channel to Access.
Note that for surround channels, you can select either the component channel or its Surround Master:
- Channel to Access - selects the component (e.g. SUM 1).
- Surround Master to Access - selects the surround VCA Master (e.g. SUR S 1).

Note that:
- The Channel to Access option only appears if you right-click on a DSP channel; you cannot place an I/O signal into access.
- The Surround Master to Access option only appears if you right-click on a surround channel. If the channel is mono or stereo, then there is no surround master.