Power Core - System Menu
In the System menu, there are ten pages/tabs. They provide status information about the main unit and its peripherals. Most of the information is for diagnostic purposes only. Values which can be modified are noted for each tab.
System → Information
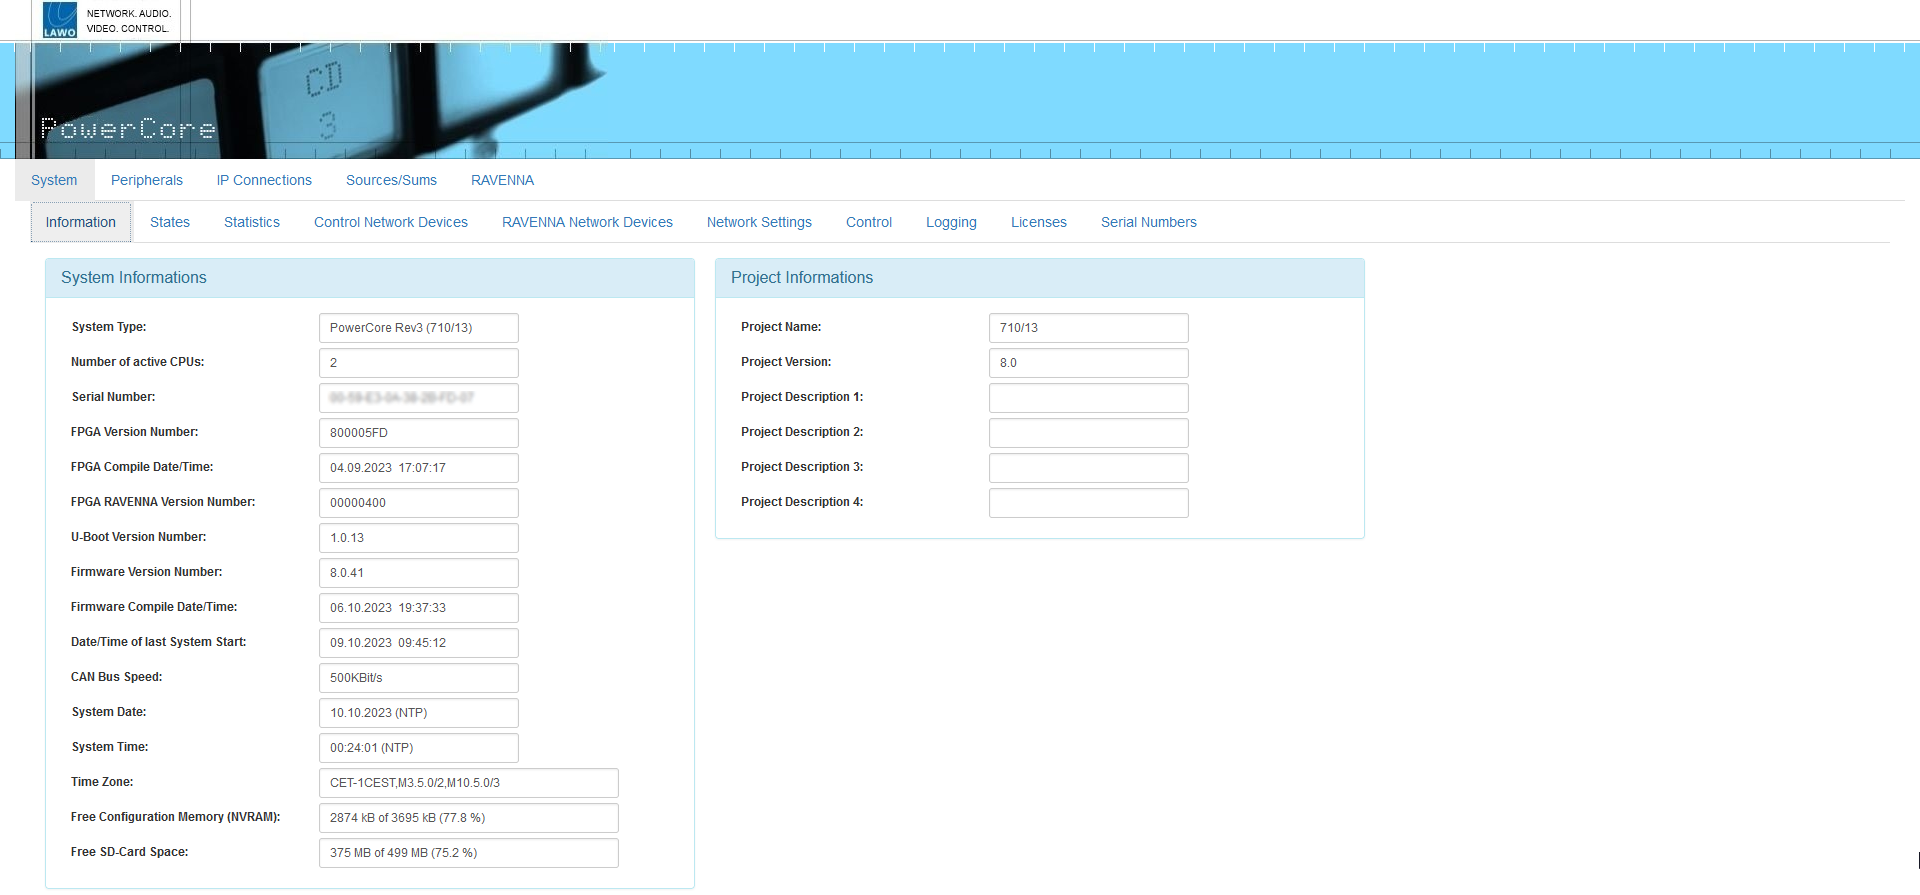
The System → Information tab is the first tab to be shown following a successful login.
On the left, you will see basic information about the device such as the serial number, software / firmware version numbers and system date and time. The system date and time is provided by your network's NTP server (if present), or by the device's internal Real Time Clock (RTC). In User mode, all fields are non-editable. In Supervisor or Administrator mode, you can edit the time zone (as described below).
On the right, the "Project Information" area shows the project name, version and description defined by the ON-AIR Designer configuration.
Setting the Time Zone
In Supervisor or Administrator mode you can edit the current Time Zone value. Type in a new value - any change takes immediate effect and so a restart is not required.
The time zone should be specified relative to Central European Time (CET).
For example, "CET+5CEST,M3.2.0/2:00,M11.1.0/2:00" is suitable for US East Coast, where CET is 5 hours ahead.
The second part of the syntax specifies the start and end of Central European Summer Time (CEST). e.g. from month 3, week 2, day 0, time 2am (the second Sunday in March) until month 11, week 1, day 0, time 2am (the first Sunday in November).
System → States
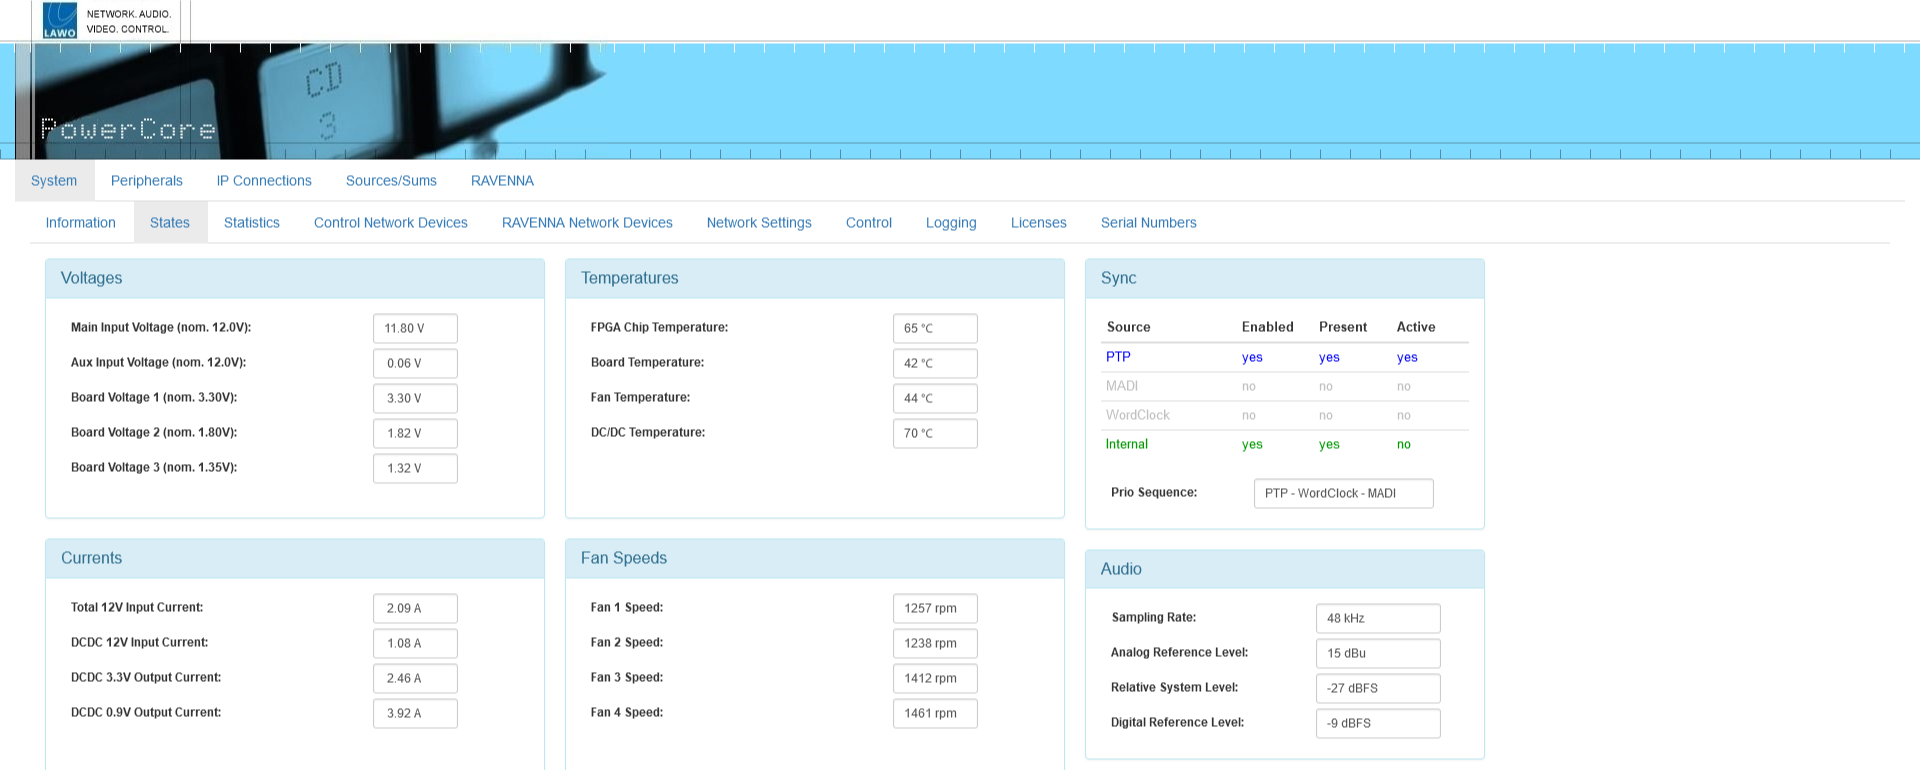 The System → States tab shows information about the physical state of the Power Core hardware. It is for diagnostic use only; there are no editable fields.
In the "Sync" area (on the right), you will see information about each of the sync sources defined in the ON-AIR Designer configuration. The color-coding indicates:
- Blue = sync source is enabled, present and active.
- Green = sync source is enabled and present, but not currently active.
- Red = sync source is enabled but not present.
- Light Grey = sync source is disabled in the configuration.
System → Statistics
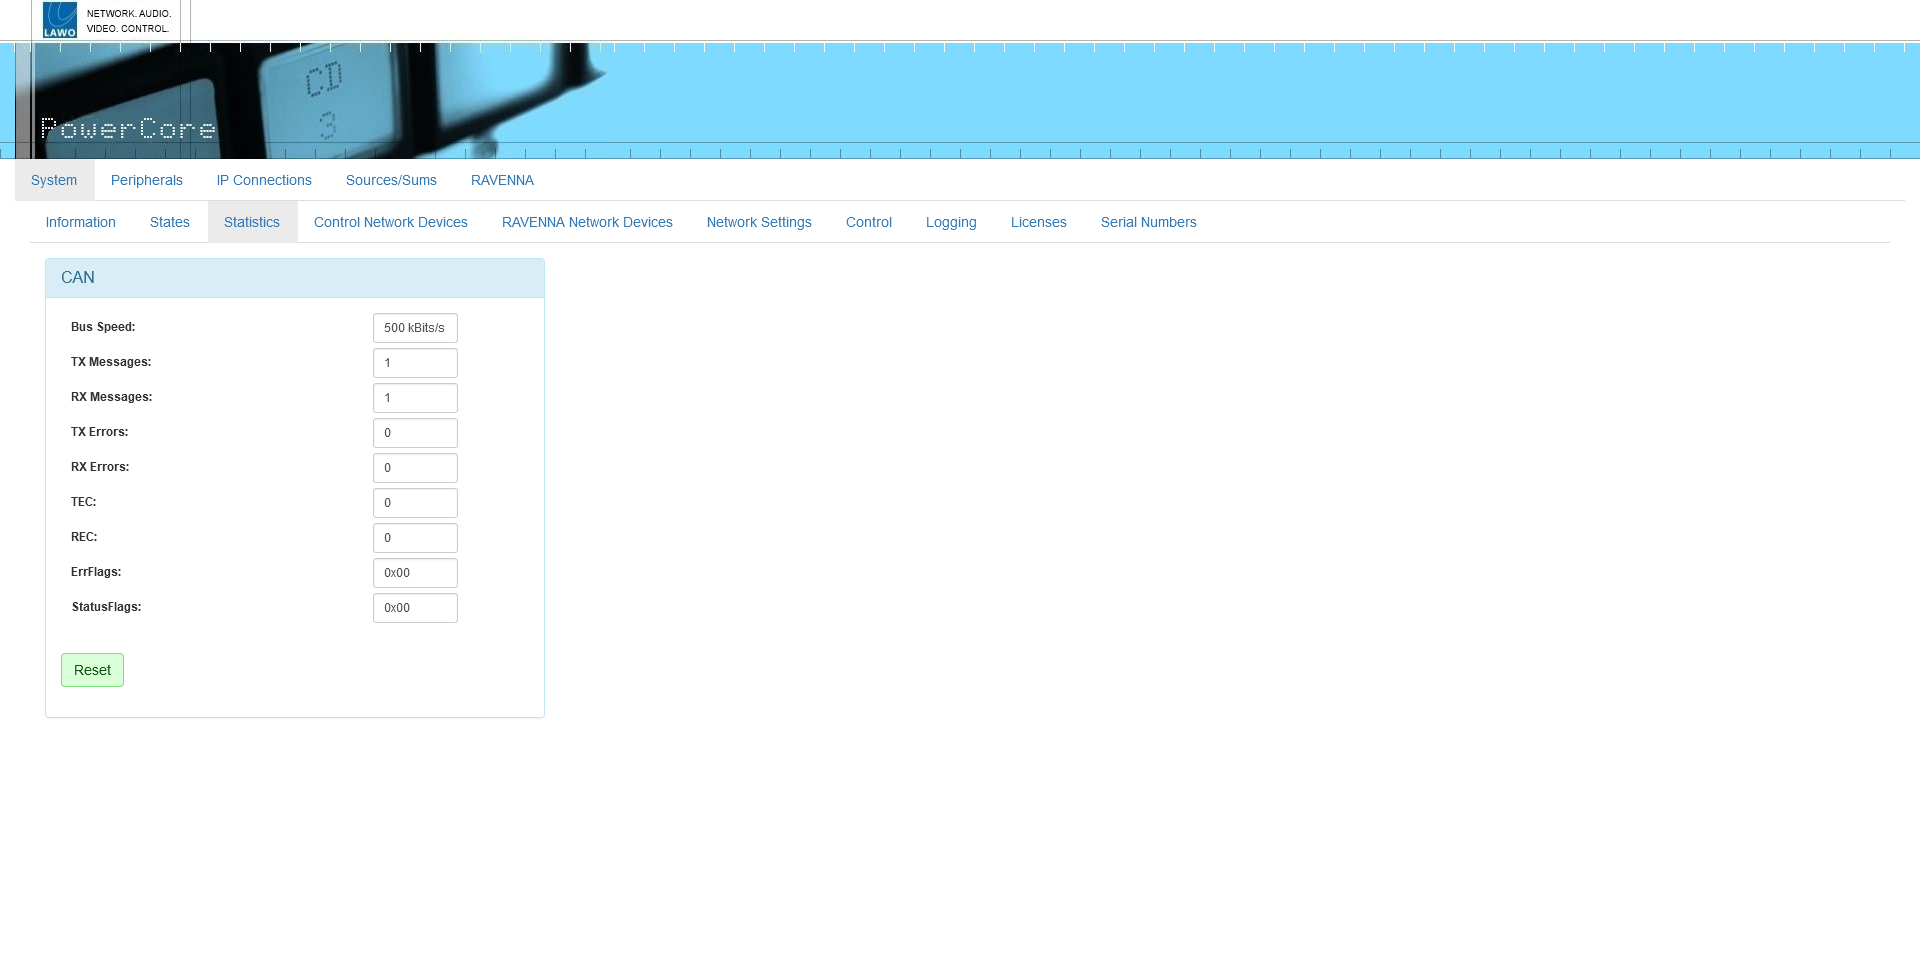
The System → Statistics tab shows information about the CAN bus. It can be used to analyse the number of messages sent and received, and if there are any TX or RX problems.
To reset all of the message/error/flag counters to zero, click on the Reset button at the bottom of the page.
System → Control Network Devices
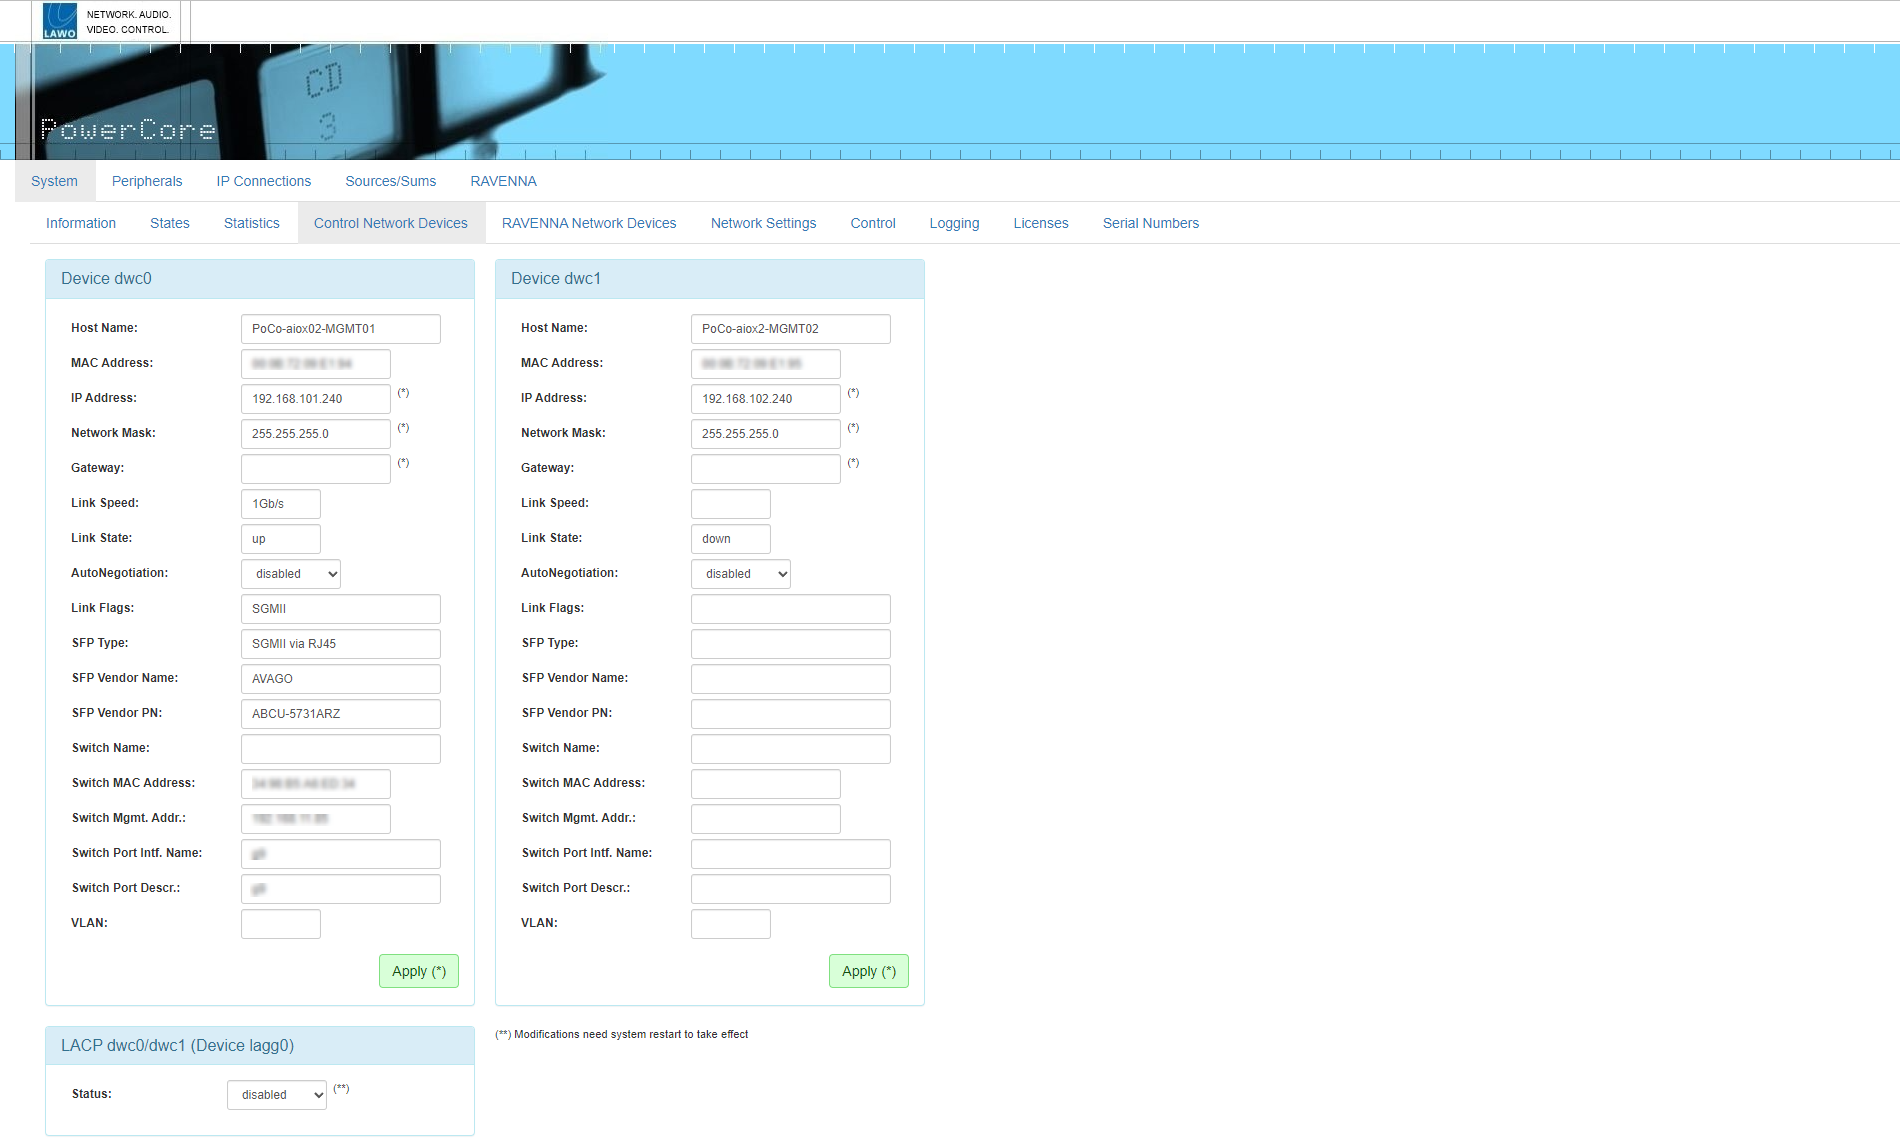 This tab provides access to the settings for the two control ports: Device dwc0 and Device dwc1.
Each "Device" section displays the port's Host Name (defined by the ON-AIR Designer configuration) and MAC address, plus the network IP Address, Network Mask and Gateway (if used). The Link Speed and State show the speed of the connection and its current status (up or down). You will also see information about the SFP module fitted to the port and the network switch connection (if a switch is in use).
In User mode, all fields are non-editable. In Supervisor or Administrator mode, you can enter a new IP Address, Network Mask and/or Gateway. If any settings are changed, you must click Apply to save the changes. IP Address changes are made immediately and so you will lose your browser connection once the settings are applied. To continue with the system administration, enter the device's new IP address into your browser and login again (from the Login screen).
Using LACP
LACP MUST be configured in the network switch as well as in Power Core. Otherwise you will not be able to reach Power Core via its CONTROL ports.
System → RAVENNA Network Devices
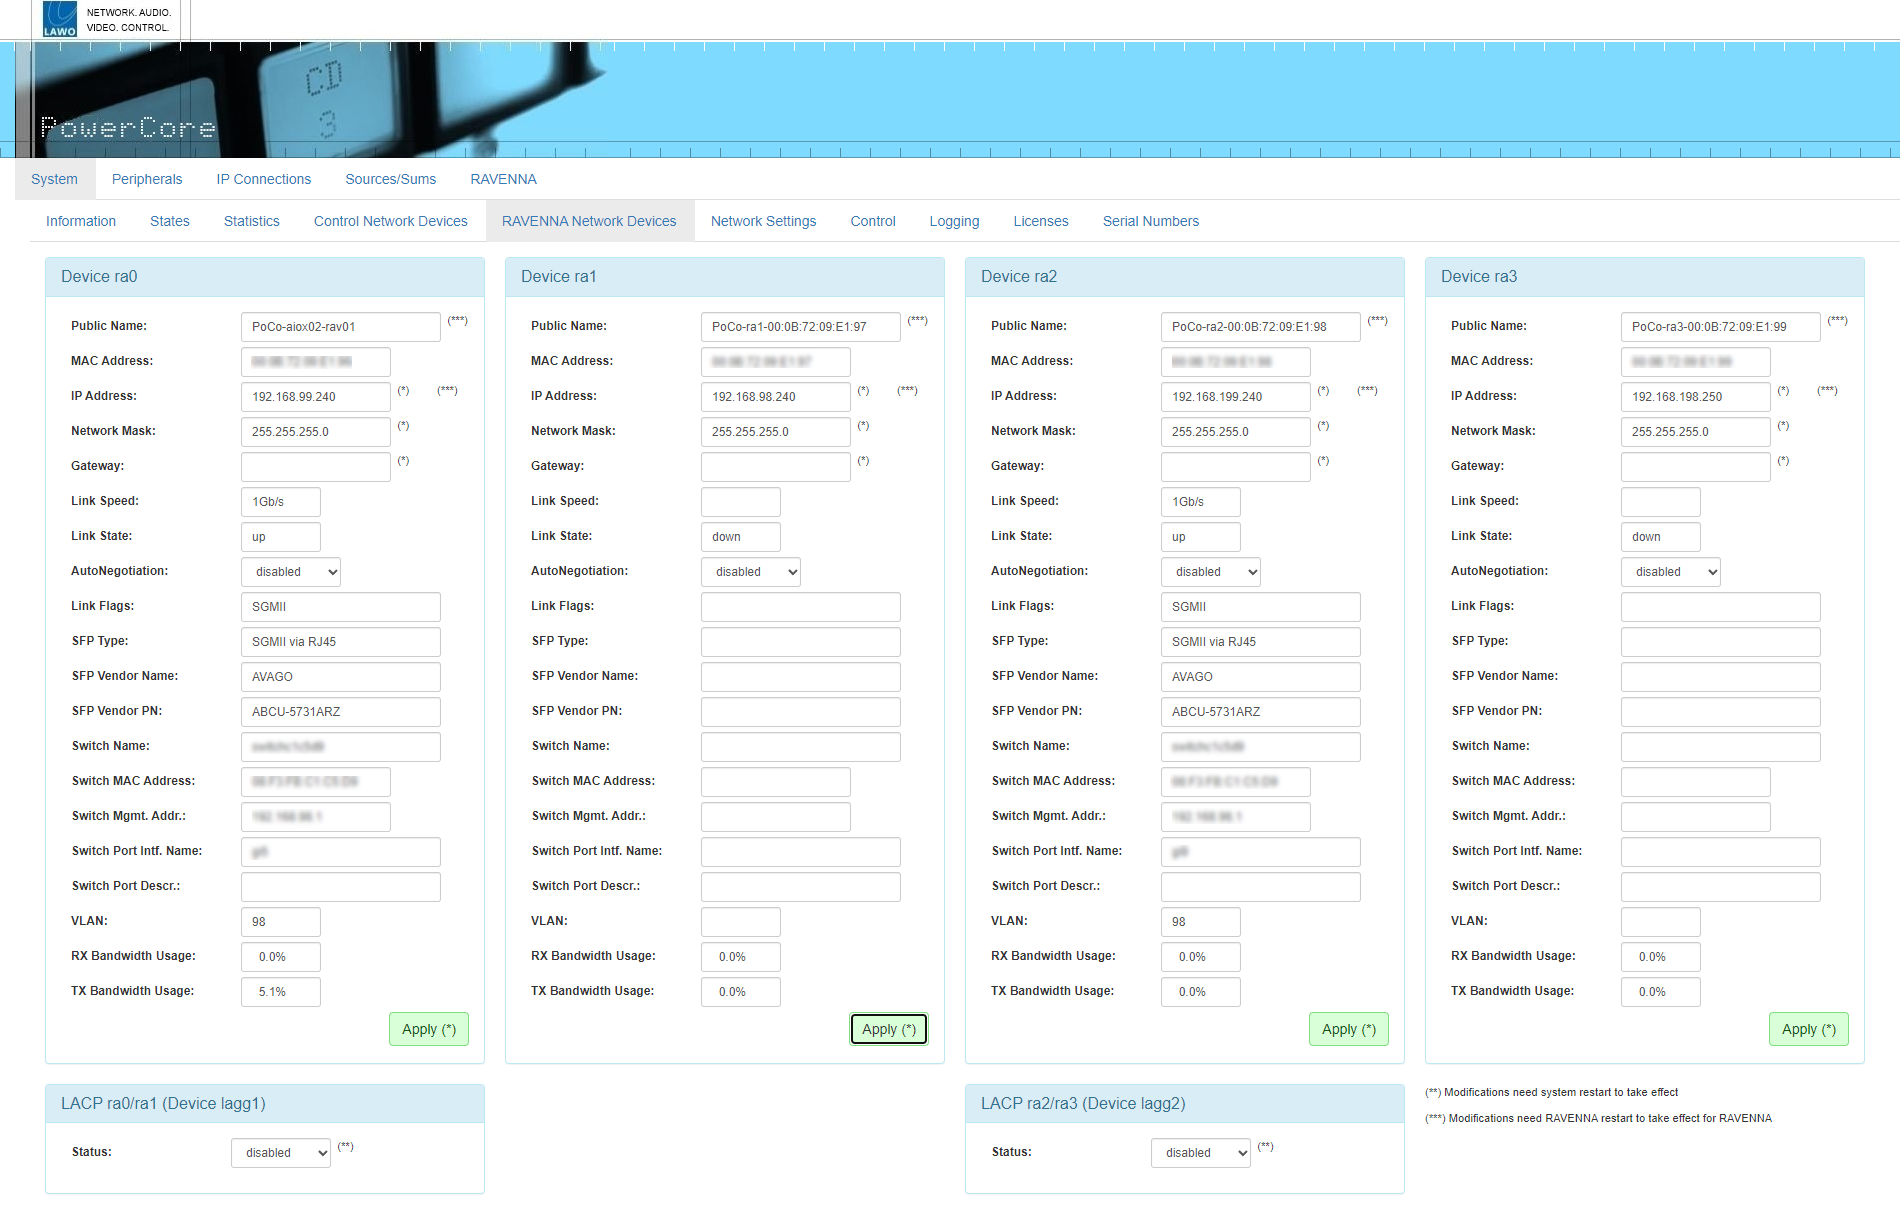
This tab contains similar settings for the streaming ports. The first two network interfaces (Device ra0 and Device ra1) are always available. The second pair of interfaces (Device ra2 and Device ra3) are supported by Power Core revision 3 with a valid RAVENNA Plus license/configuration.
As above, in Supervisor or Administrator mode, it is possible to change the IP Address, Network Mask and Gateway, plus the Public Name (a friendly name displayed during network searches). Remember to click Apply to save any changes. For the streaming ports (ra0, ra1, ra2 and ra3), IP address changes require a restart, and so you will need to reboot the device after settings are applied. This can be done using the Reboot (Warmstart) button in the "System → Control" tab.
Using LACP
LACP MUST be configured in the network switch as well as in Power Core (for correct operation of the RAVENNA/AES67 interfaces).
System → Network Settings
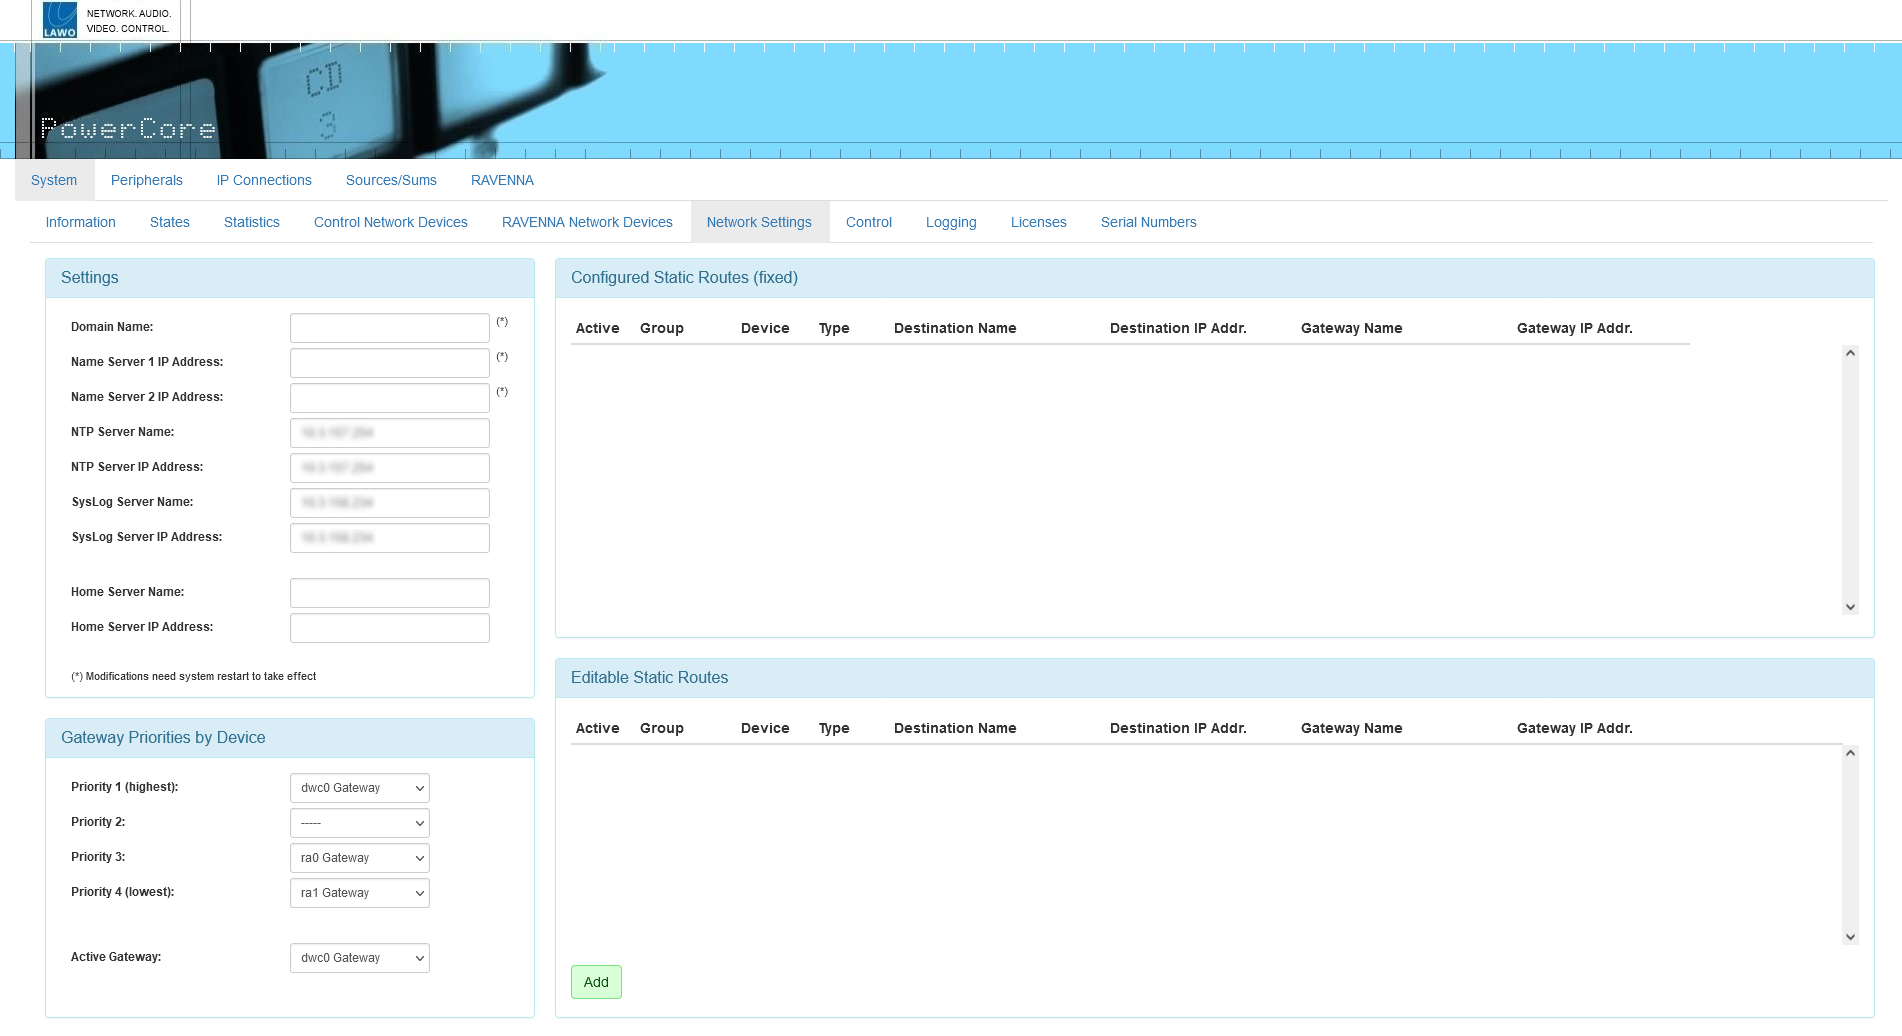 This tab provides access to Power Core's control network settings. It can be used to define a Domain Name Server, NTP Server or Syslog Server, the gateway priorities (should the primary control link fail) and any static network routes.
Settings
Using the fields in this area, you can enter the Domain Name of your network and DNS Name Server IP Addresses. In addition, you can configure settings for a NTP, SysLog and Home server.
- Your NTP server can be configured either by entering its name in the Server Name box, or its IP Address in the Address box. If you type "ntp.internal" in the Server Name box, the IP Address will be automatically filled.
- Your Syslog and Home server can be configured in a similar manner. Type "syslog.internal" or "home.internal" into the Server Name box to complete the IP address automatically.
Gateway Priorities By Device
These options allow you to determine which of Power Core's network ports will be used as the control port should the primary link be interrupted. Priority 1 is generally assigned to the "dwc0" port; use the remaining Priority fields to prioritize fallback ports.
Configured Static Routes (fixed)
This area shows any static routes which have been configured for your network (via the "Logic -> Static Network Route" element in the ON-AIR Designer configuration).
Editable Static Routes
Here you can add an editable static route by clicking Add and completing the dialog box.
If a Home server is defined, then the following information is made available (via MQTT heartbeat): system_type; project_name; project_version; serial_number; ember_target; timestamp; and timestamp_utc. The ember_target is always Provider 1. Therefore, it is mandatory to configure the Ember+ Local Provider (in "System -> Definition -> Parameter = Control Settings" and anything else used by Home) to Provider 1.
System → Control
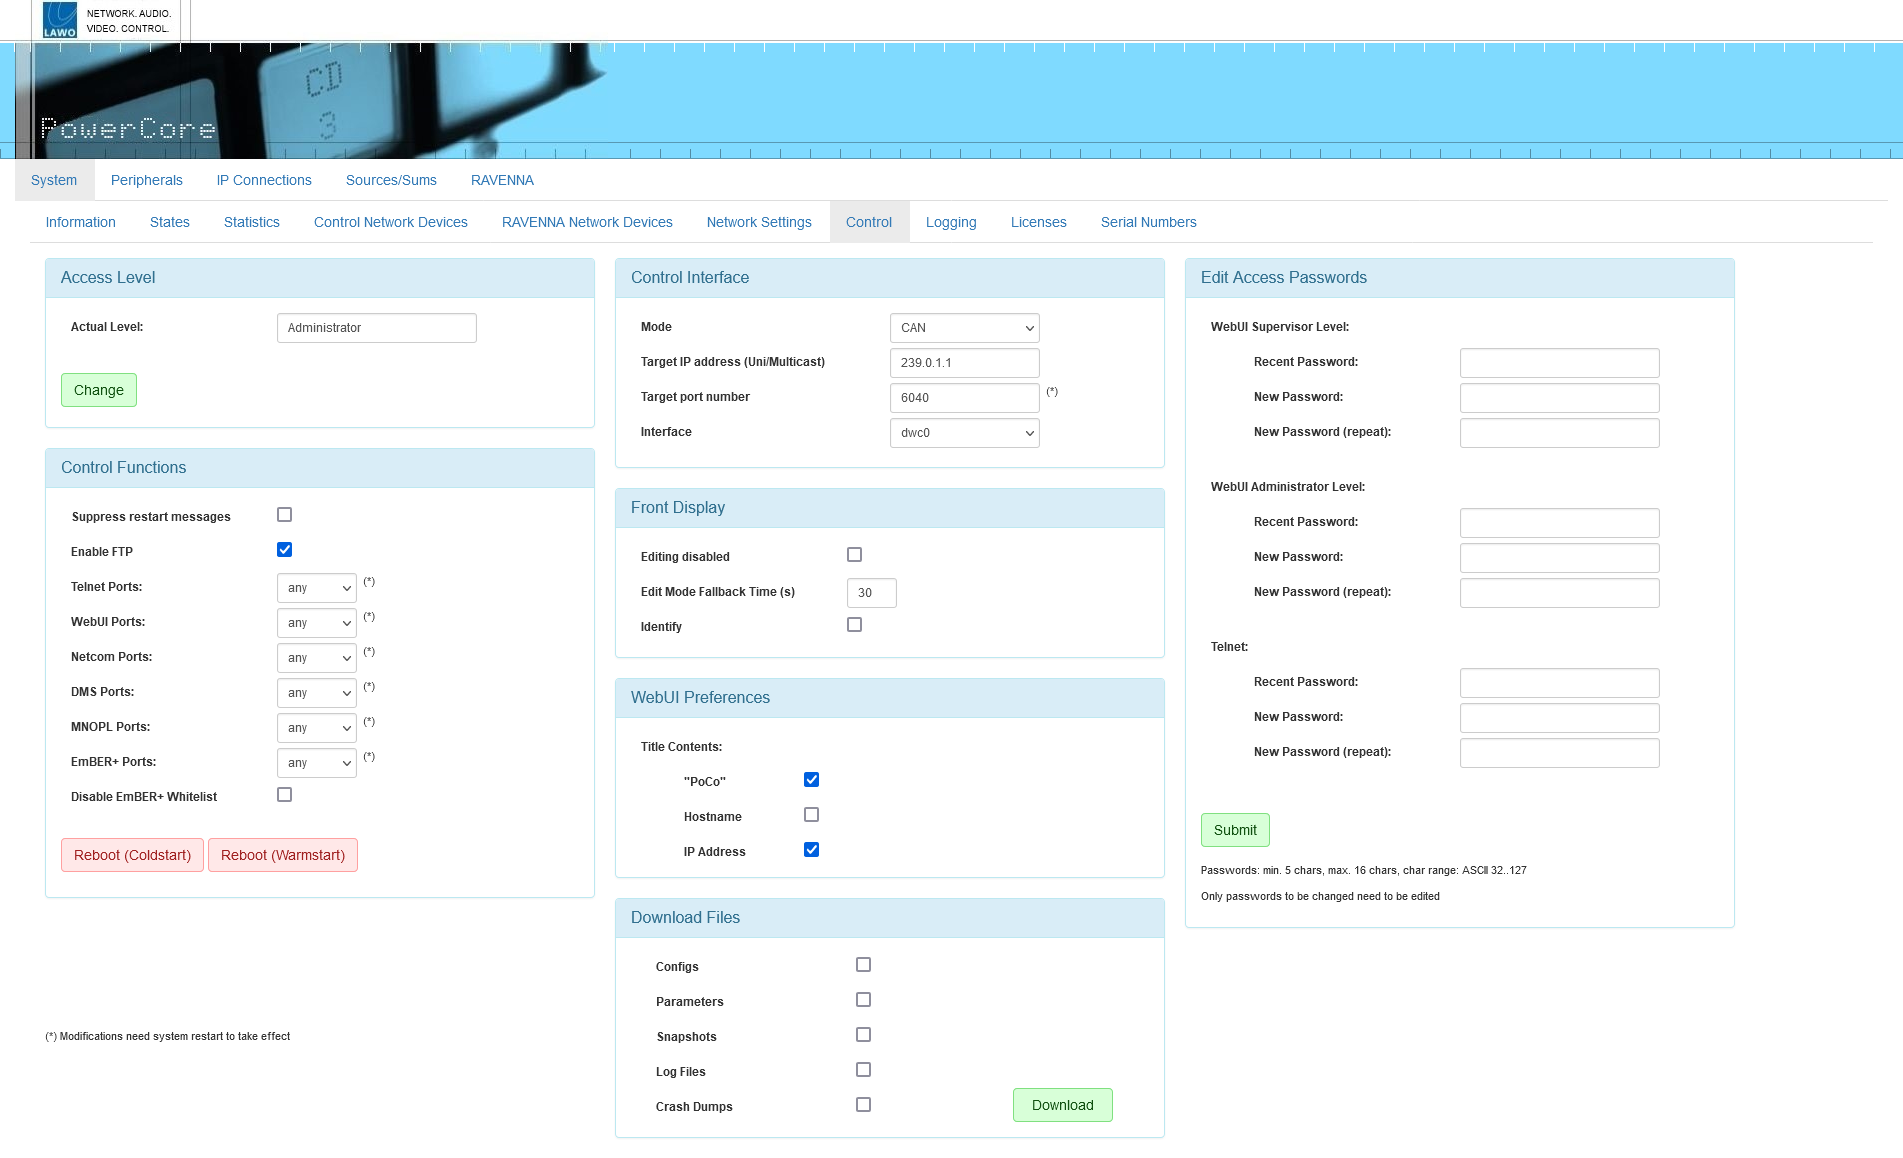
The System → Control tab can be used to configure the device's external control options. For example, to permit access via FTP, etc., reboot the device, define the control surface connection, permit editing or identify the device from the front panel display, and/or edit the passwords for the various user modes.
The options shown are determined by the current "Access Level". In User mode, this is the only section visible. In Supervisor mode, you will also see "Control Functions". In Administrator mode, there are more options in the "Control Functions" plus sections for the "Control Interface", "Front Display", "WebUI Preferences", "Download Files" and "Edit Access Passwords".
Access Level
The current user mode is displayed in the Actual Level field.
To change the current access level, click on Change - this opens the Login screen. Select a different Access Level and enter the Password:
- User (no password required).
- Supervisor (default password = orion).
- Administrator (default password = hydra).
Now re-select the System → Control tab to return to this page.
Control Functions
In Supervisor and Administrator modes, the "Control Functions" section becomes visible. Note that the following options are only visible in Administrator mode: Enable FTP, Telnet Ports and WebUI Ports.
- Suppress restart messages - by default, an on-screen message appears whenever the system restarts. You can turn the messages off by selecting this option.
- Enable FTP - by default, this option is turned on to allow file transfers to Power Core via FTP. Turn this option off to prevent FTP access.
- Telnet Ports, WebUI Ports, Netcom Ports, etc. - these options define which network port(s) can be used for Telnet, the Web UI, Netcom, DMS, MNOPL and EmBER+ communication. In each case, you can choose either any (to allow access via any network port) or dwc0 (to restrict access to CONTROL A only). Note that if you choose dwc0, then the restriction also applies to the local host and so access is not permitted via 127.0.0.1. The default setting for all protocols is any.
- Disable EmBER+ Whitelist - the Ember Whitelist+ (configured in ON-AIR Designer) can be used to restrict the access to the Ember+ providers so that only devices with a defined IP can talk to Power Core (via Ember+). For convenience, you can temporarily deactivate the whitelist by selecting this option. This will allow access from consumers with any IP address.
The two red buttons at the bottom of the area can be used to restart the system as follows:
- Reboot (Coldstart) - reboots the unit and loads the base configuration parameters (as defined by the ON-AIR Designer). This will clear any temporary changes made from the Web UI.
- Reboot (Warmstart) - reboots the unit keeping temporary changes intact.
Control Interface
In Administrator mode, the "Control Interface" section becomes visible. These parameters define the IP connection to the control surface (if applicable). Please refer to the documentation for your control surface. e.g. diamond - Control Interface Settings.
Front Display
In Administrator mode, the "Front Display" section becomes visible. These options affect the SYSTEM display on the device's front panel.
- Editing disabled - by default, this option is turned on. It can be turned off to permit editing of the unit's IP Address and other settings from the front panel. Lawo recommends keeping the option selected.
- Edit Mode Fallback Time (s) - when using the front panel controls, inactivity causes the display to return to its normal status. You can set a timeout period for this action by entering a value, in seconds, in this field.
- Identity - you can use this box to send a message to the front panel display so that a Power Core can be easily identified. Once activated, the display shows "HELLO I AM \[dwc0 IP Address\]". The message disappears once you de-activate "Identify" or push down on the encoder.
Web UI Preferences
In Administrator mode, the "Web UI Preferences" section becomes visible. These options adjust what is shown in the browser's "title" for the Web UI session. If nothing is selected, then the page address (URL) is shown. Any changes take affect after a refresh of the browser page.
Download Files
In Administrator mode, the "Download Files" section becomes visible. You can use these options to download files from Power Core to your computer. To proceed, first select the tick boxes and then click on the green Download button.
Edit Access Passwords
In Administrator mode, the "Edit Access Passwords" section becomes visible.
This area can be used to edit the passwords for the Supervisor and Administrator modes in the Web UI, and/or the device's Telnet login. In each case:
- Enter the current password into the "Recent Password" field, followed by the new password into the two "New Password" fields.
- The new password must meet the following requirements: minimum of 5 characters; maximum of 16 characters; permitted character range: ASCII 32..127.
- Click on Submit to apply the changes - an on-screen message appears to confirm (or deny) the operation.
System → Logging
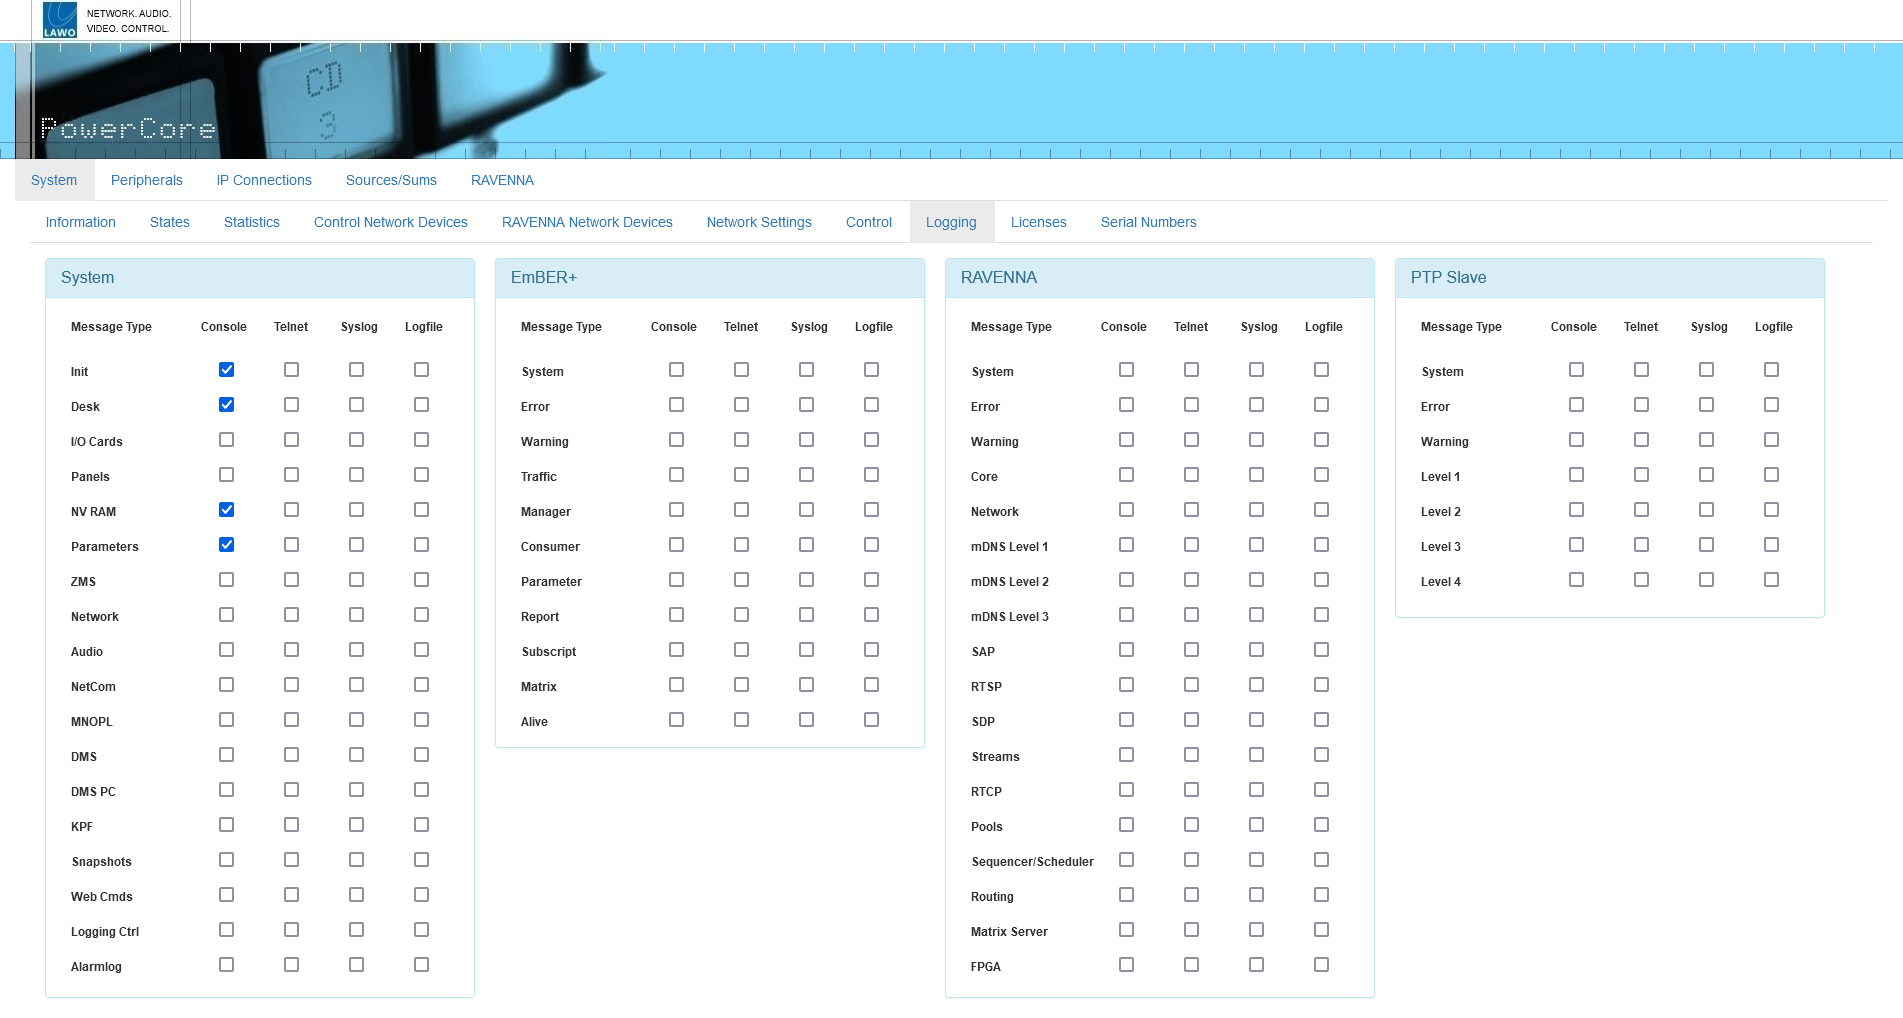 The options here are used for diagnostics. Please keep all options at their default values unless instructed otherwise by Lawo Support.
Log files can be obtained from the system by connecting your PC to the debugging port. How to do this is described later in Power Core - USB Service Port.
System → Licenses
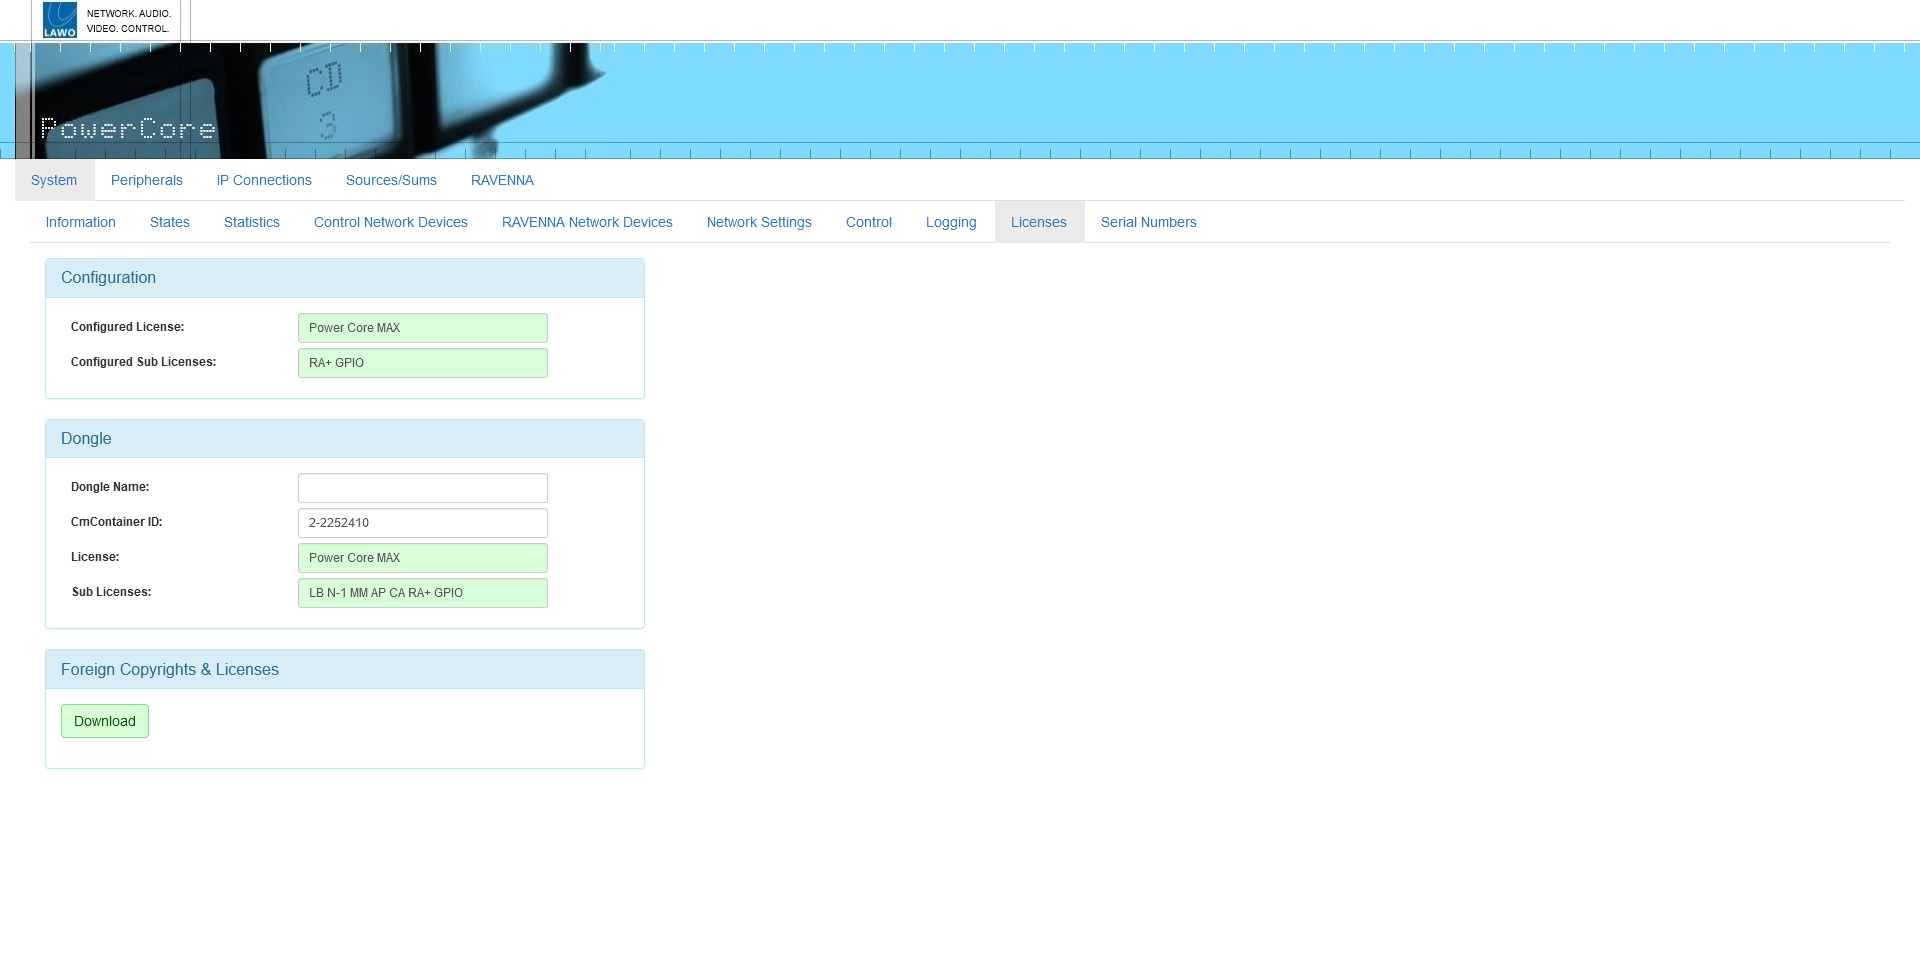 This tab displays two sets of licensing information describing what is configured (by ON-AIR Designer) and what is detected (on the USB dongle). In each case, the License field describes the main license, while the Sub Licenses list any active add-ons.
The Download button can be used to download a copy of the copyright and license information.
System → Serial Numbers
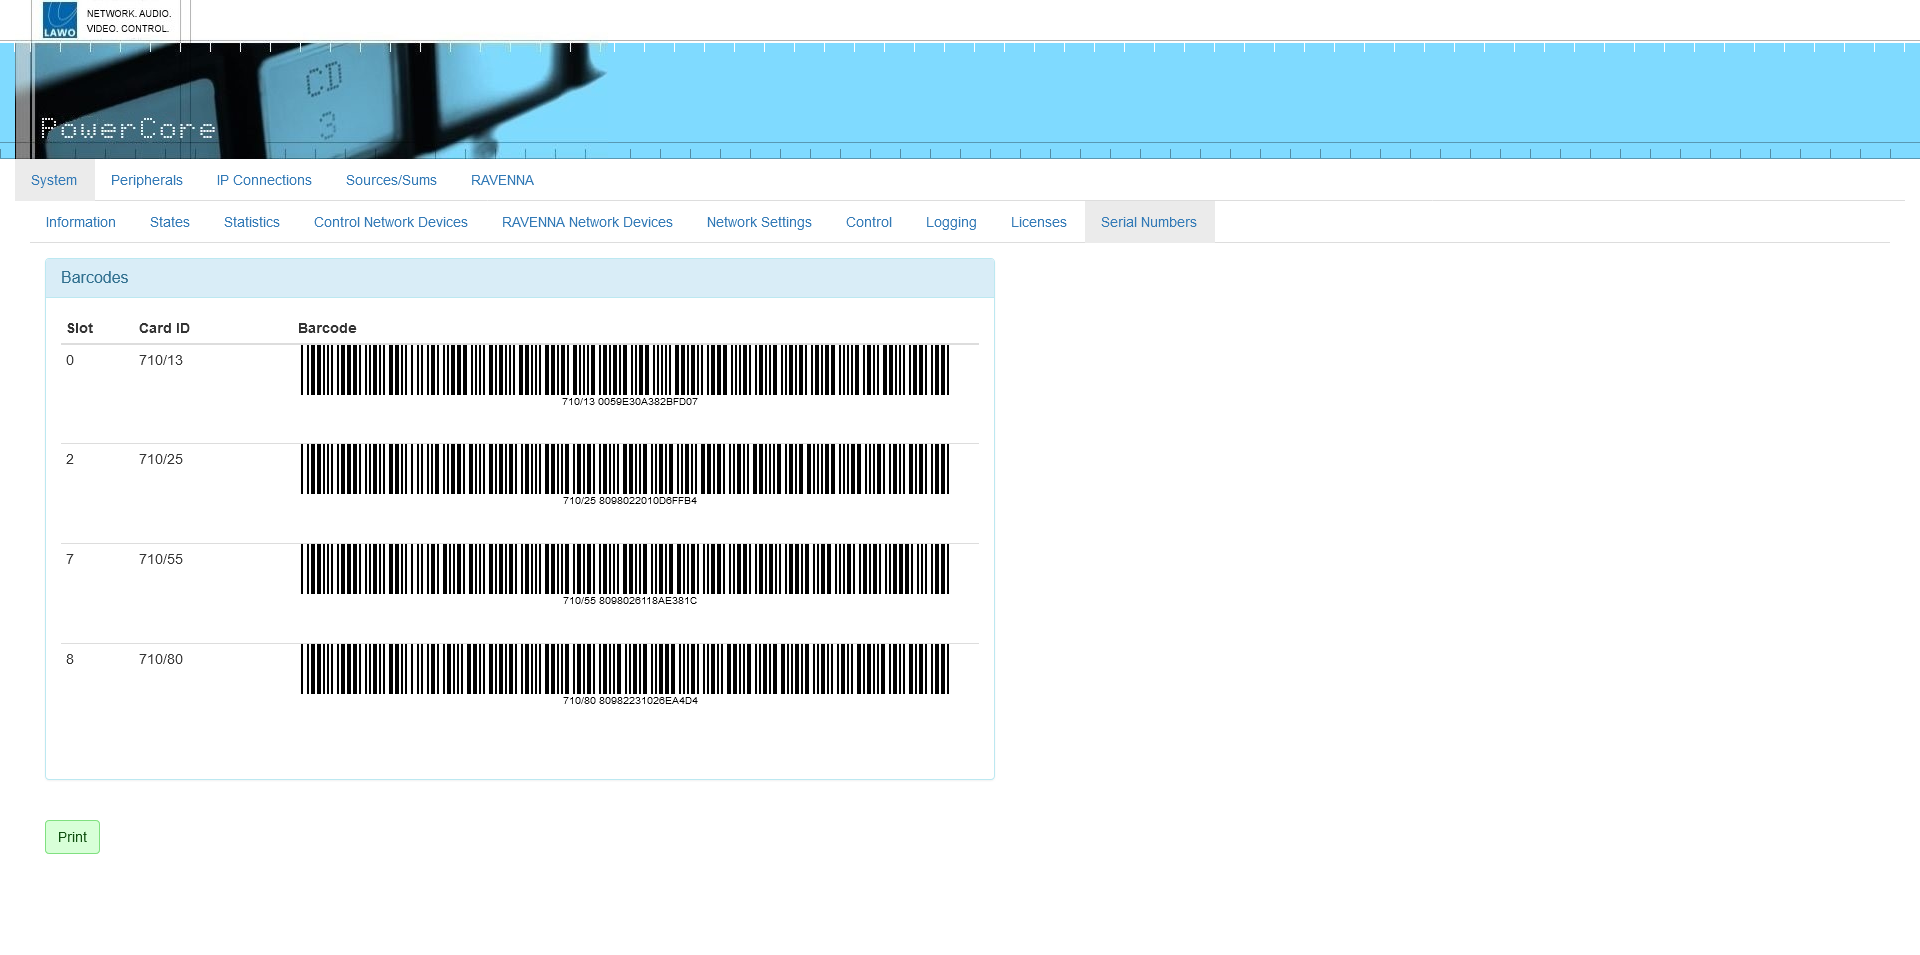 This tab shows the barcodes and serial numbers of the Power Core frame and expansion I/O cards. The Print button can be used to print a copy for your system documentation.