.edge - Advanced Parameter Control from HOME
All of the available parameters for a processing blade can be accessed from the Device → Advanced page (in HOME).
This page is designed for technical users who need access to more advanced settings and informational fields. The same parameters can be accessed via Ember+ or REST API.
Advanced Parameter Tree
The following topics describe each branch of the parameter tree.
- .edge - Advanced -> Identity
- .edge - Advanced -> System controls
- .edge - Advanced -> Health
- .edge - Advanced -> Synchronization
- .edge - Advanced -> SDI Inputs
- .edge - Advanced -> IP Sender Multicast
- .edge - Advanced -> Gearbox
- .edge - Advanced -> SDI Outputs
- .edge - Advanced -> Statistics
- .edge - Advanced -> Network Ports
- .edge - Advanced -> Factory
- .edge - Advanced -> License Configuration
Opening the Advanced Tab (in HOME)
From HOME's 'Devices' list, click on the label of a processing blade to open its 'General' settings. Then choose the Advanced menu tab.
If this is the first time you have opened the Advanced page in the current browser session, then there is nothing selected in the navigation tree.
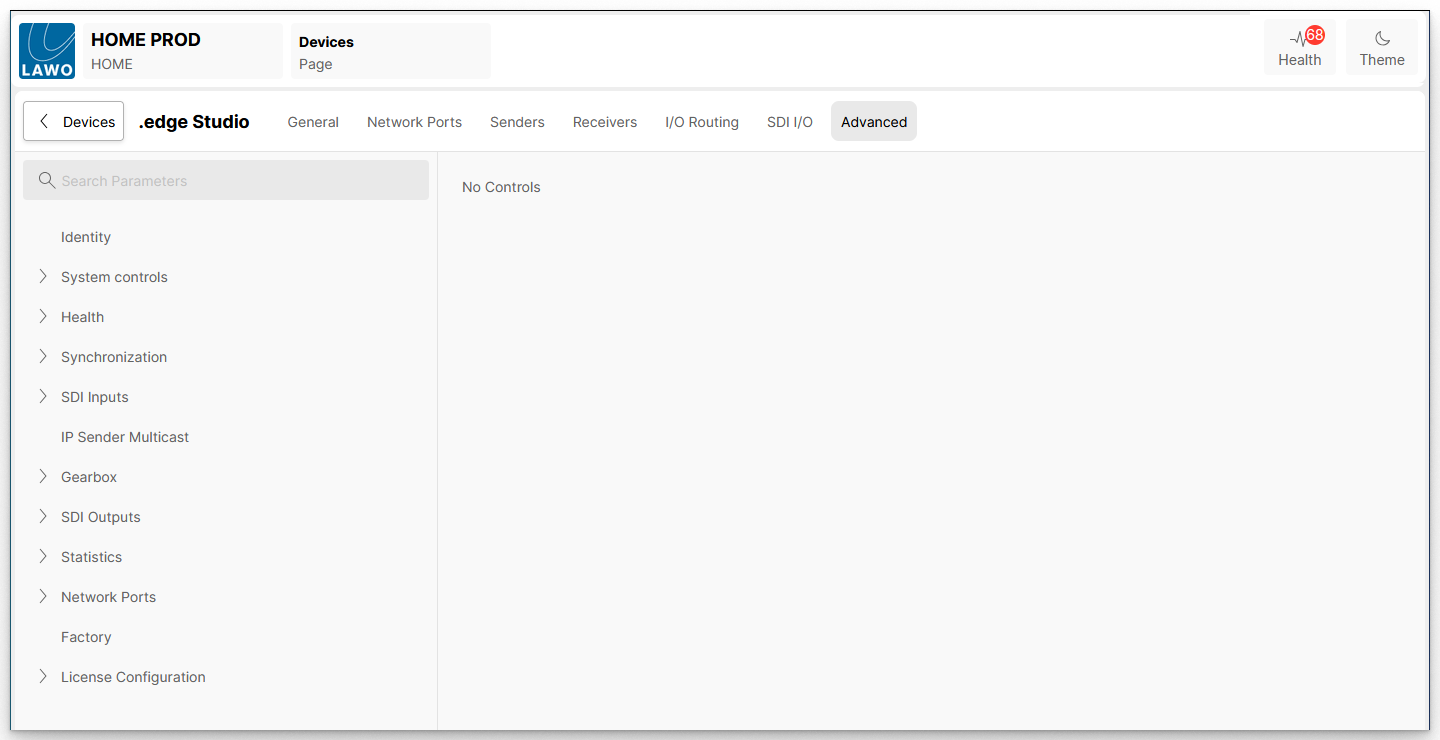
Viewing Parameters
- Select an entry in the tree to display its available parameters - for example, the Synchronization main page.
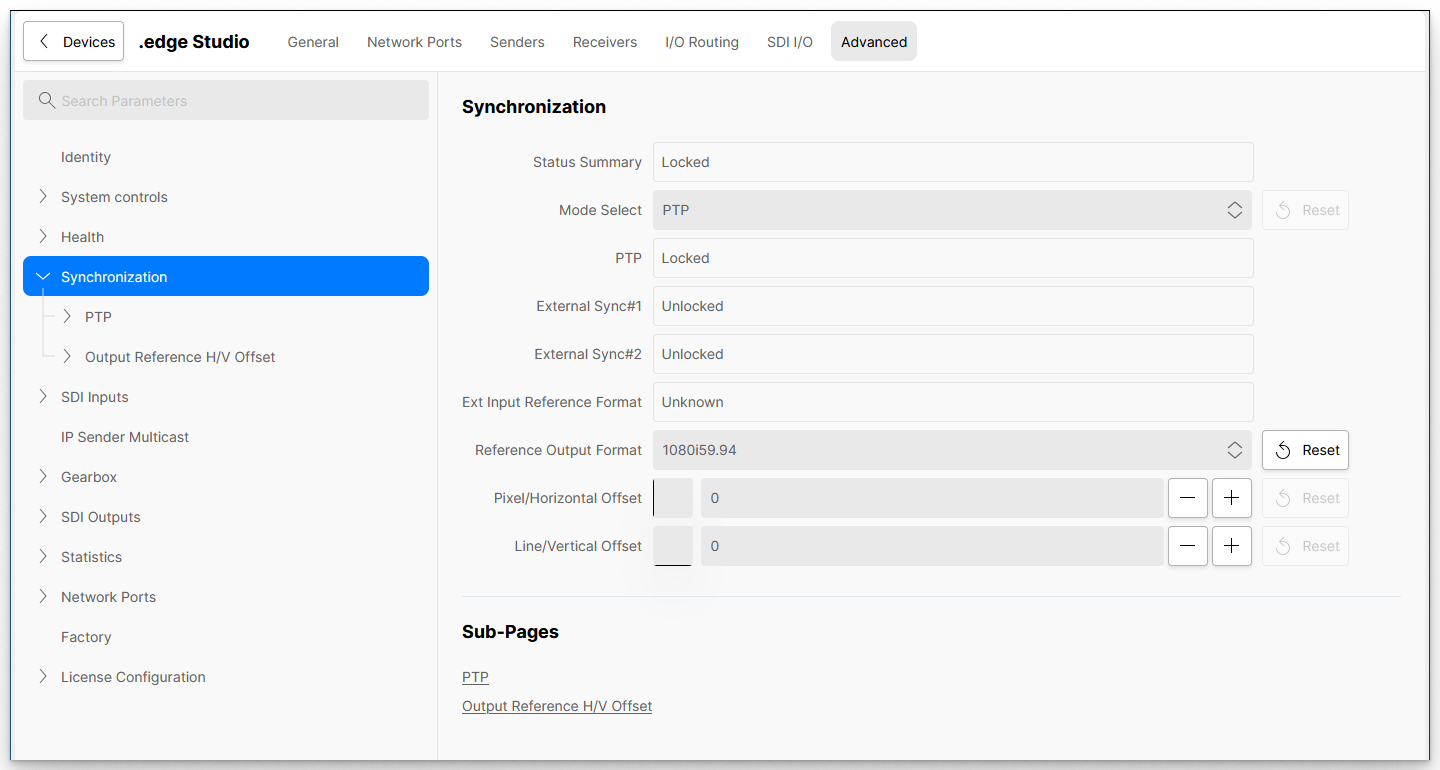
If there are sub-pages available, then these can be accessed in one of two ways:
- Click on the arrows in the navigation tree to show or hide the next level.
- Or, scroll down to the bottom of the parameter area to view the Sub-Pages (as a list).
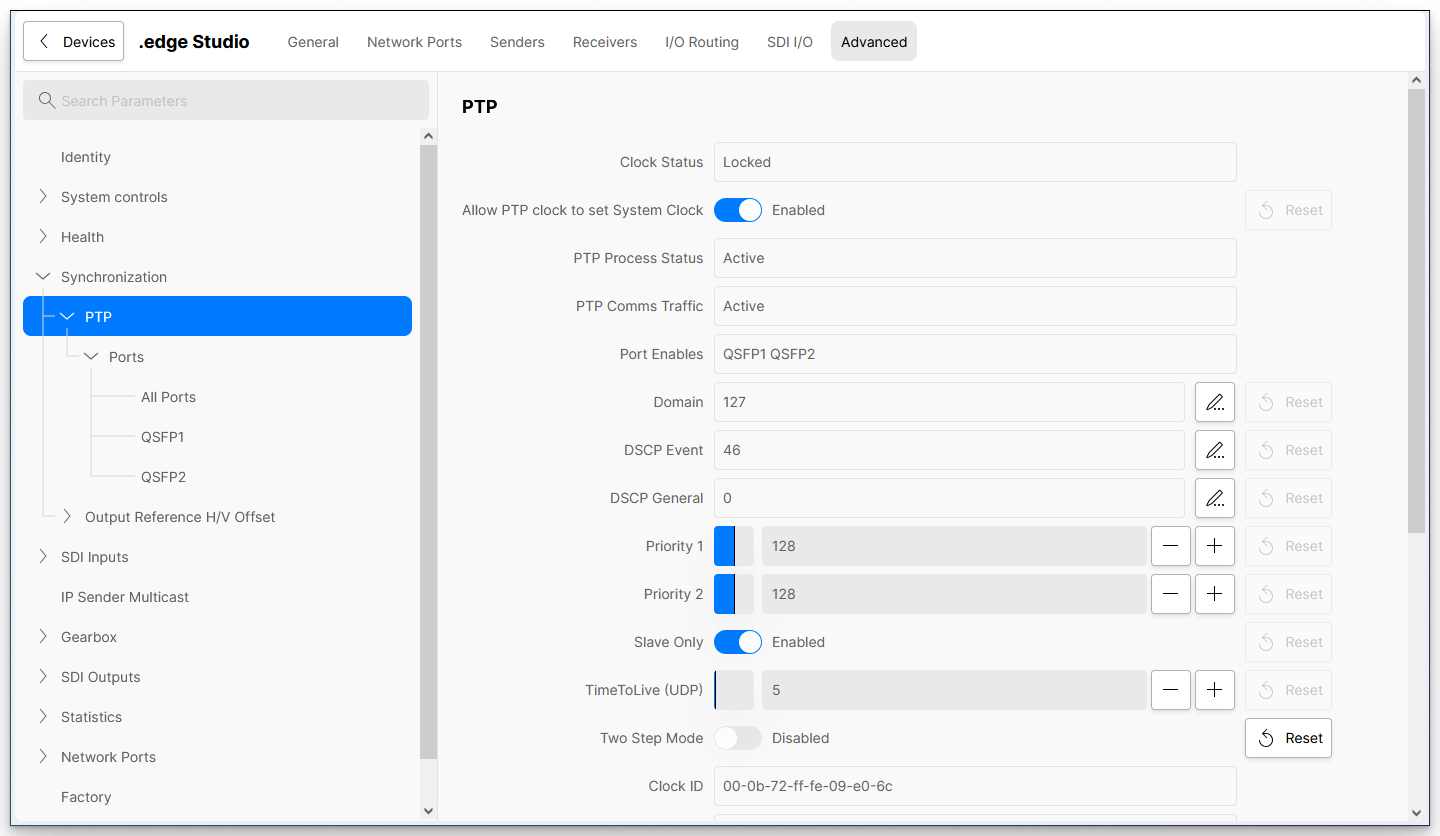
The example below shows how to navigate to the "Synchronization → PTP" page.
You can search for a parameter by typing into the "Search Parameters" field (at the top of the tree). All possible matches are displayed in the navigation area. Make a selection to open the parameter's page.
Click on the X (on the right of the "Search Parameters" field) to clear the search and revert to the unfiltered tree.
Editing Parameter Values
If there is no data entry method present, then a parameter cannot be edited and its value is displayed for informational purposes.
A parameter value can be adjusted as follows:
- On/Off sliders - click to enable or disable the option.
- Drop-down menu - click to select an option from the pre-determined list.
- Pencil icon - either click on the parameter field or pencil icon to type in the new value.
- +/- buttons - indicate that a numerical value must be entered. The current value is represented by the blue colored bar. Either click on the field (to type in a new number) or use the +/- buttons (to increment/decrement the value).
In each case, the Reset button can be used to reset a parameter to its default value or state. If the Reset button is not available (greyed out), then the default is already selected.
If a Trigger Event button is present, then this can be used to apply a change (trigger the event). For example, to force a restart from the "System Controls" page. Or, apply changes to the licensing from the "License Configuration" page.