mc²56 - User Button Numbering
This topic describes how to address the user buttons when assigning a custom function.
Fader User Buttons
When programming a Fader User Button, xxx function, you will need to specify the user button number (from 1 to 16).
The image below shows the button numbering (for the first page).

The remaining pages are numbered in a similar manner:
- Page 1 = User 1 to 4 (as shown above).
- Page 2 = User 5 to 8
- Page 3 = User 9 to 12
- Page 4 = User 13 to 16
Central User Buttons
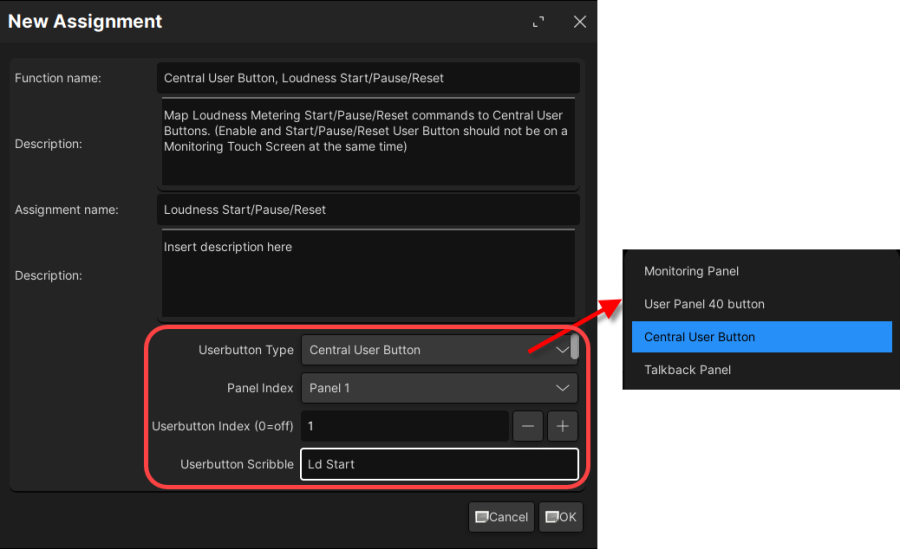
When programming a Central User Button, xxx function, you can choose one of the following Userbutton Types.
- Monitoring Panel - the touch-screen buttons on the Monitoring side panel (on the Central GUI).
- User Panel 40 button - the optional 40-button user panel that can be fitted to the overbridge.
- Central User Button - the buttons on the CENTRAL USER BUTTON panel (in the centre section).
- Talkback Panel - the buttons on the TALKBACK panel (in the centre section).
The rest of this topic describes the button numbering for each option.
Monitoring Panel
This panel type addresses the touch-screen buttons on the Central GUI side panel (in MONITORING mode).
There are three sets of user buttons that appear on the CRM 1-2, CRM 1 and CRM 2 pages.
CRM 1-2 Side Panel
On the first page (CRM 1-2), there are nine user buttons (at the bottom of the panel) that are not included in the layering. These are addressed using Panel Index 1 and Userbutton Index numbers 19 to 27. They are shown in light grey in the image below.
Please note:
- It is important to check the current functionality as, by default, some of the buttons are programmed for monitoring functions such as monitor DIM, CUT, etc.
- While it is possible to assign functions onto the layered buttons, this is not recommended as, by default, the layered pages are used for monitor source selection.

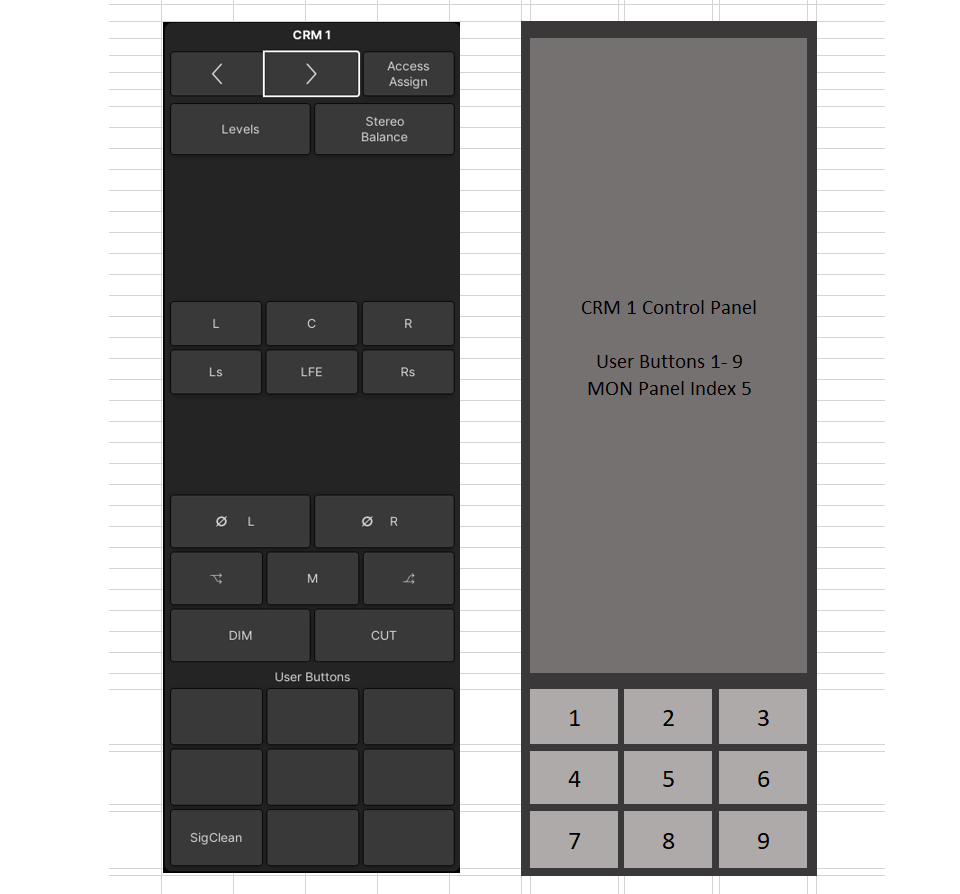
CRM 1 Side Panel
On the second page (CRM 1), there are another nine user buttons. These are addressed using Panel Index 5 and Userbutton Index numbers 1 to 9.
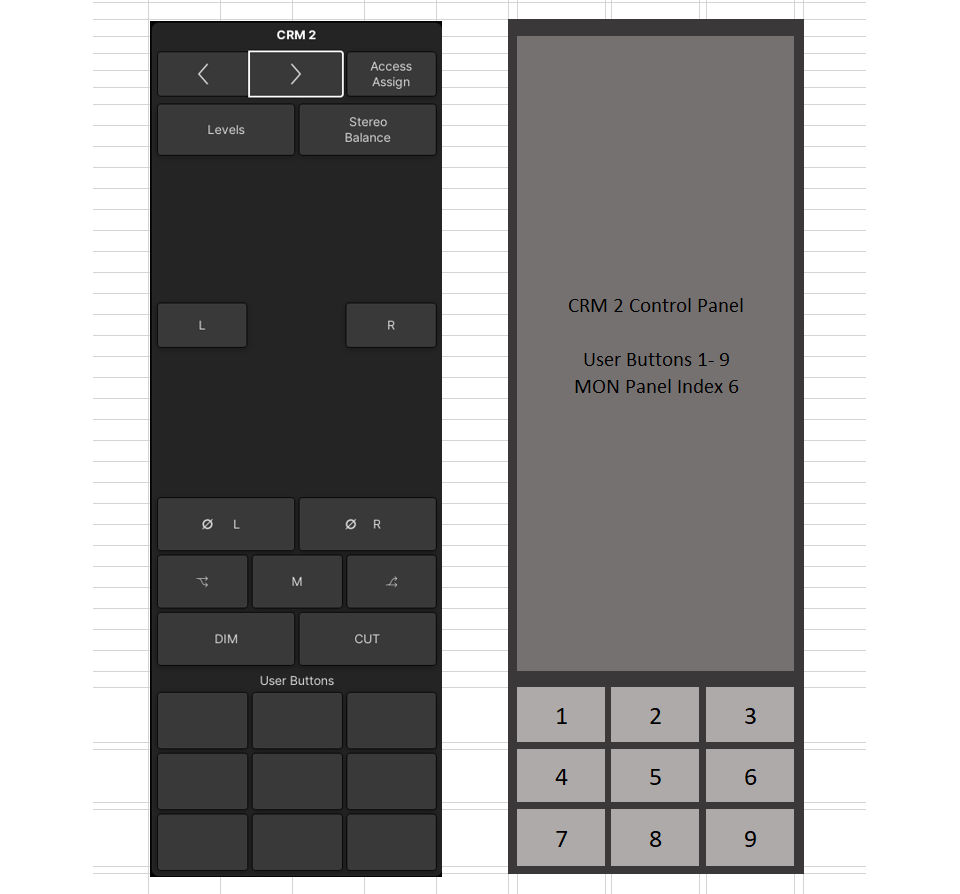
CRM 2 Side Panel
On the third page (CRM 2), there are a further nine user buttons. In this instance, use Panel Index 6 and Userbutton Index numbers 1 to 9.
User Panel 40 Button
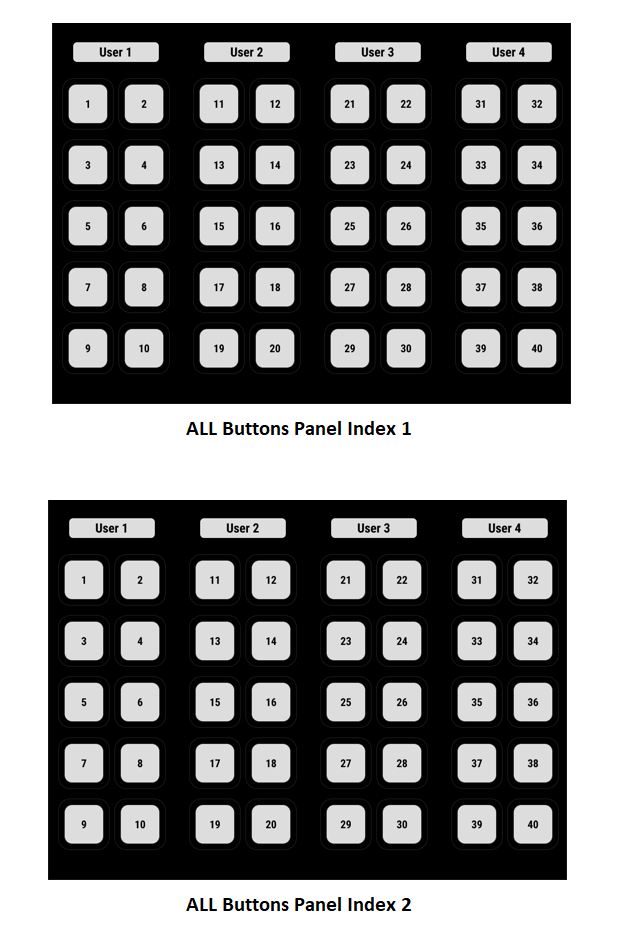
This panel type addresses the 40-button user panel that can be fitted to the overbridge.
If a single user panel is fitted, then Panel Index 1 should be used. If two panels are fitted, then use Panel Index 1 (for the upper panel) and Panel Index 2 (for the lower panel) as follows.
Central User Button
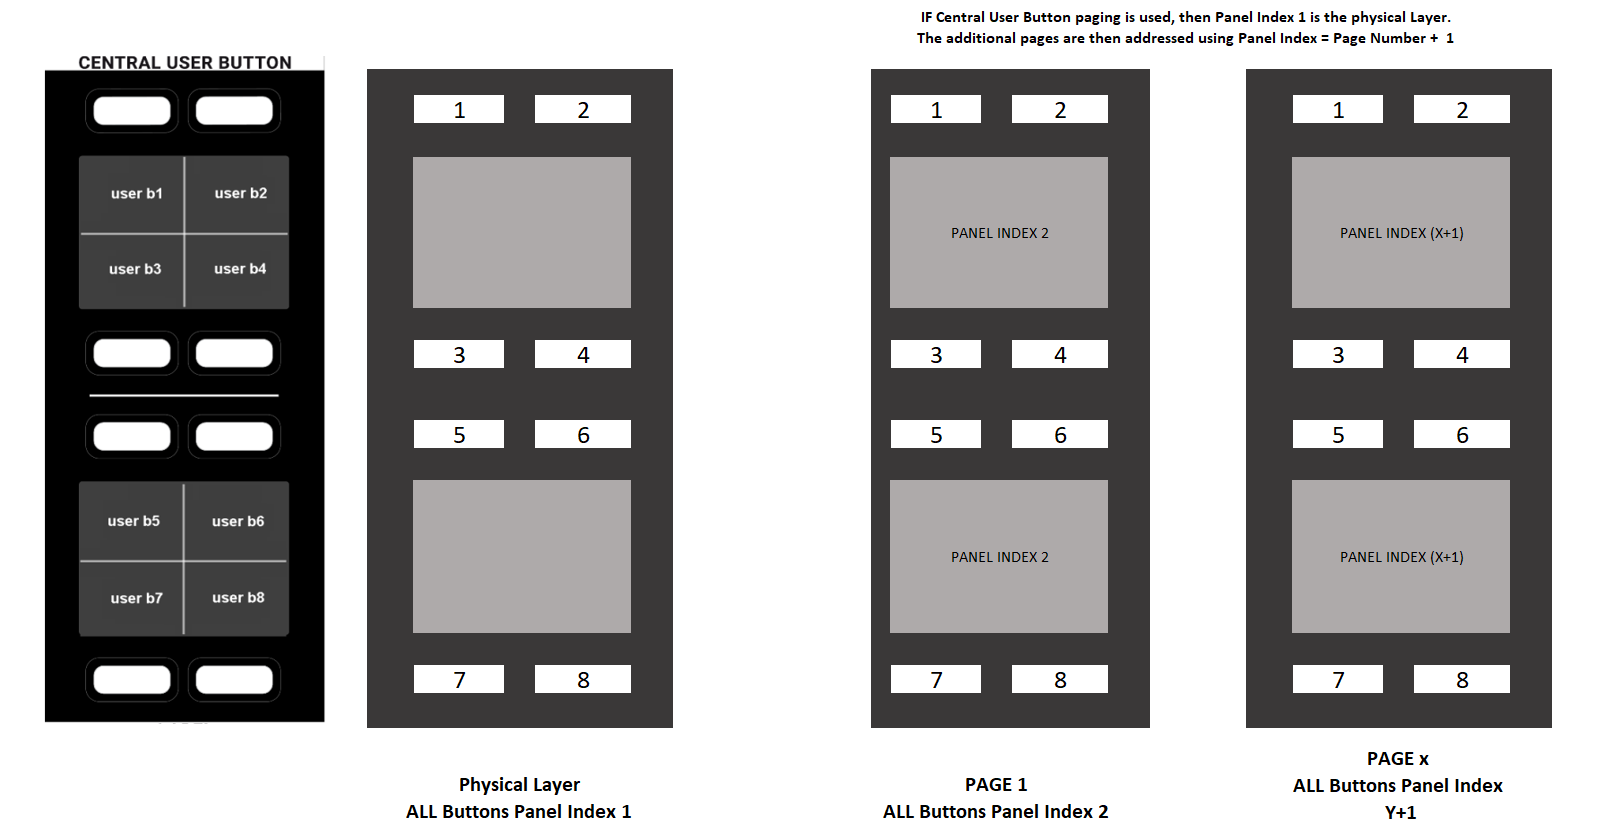
This panel type addresses the buttons on the CENTRAL USER BUTTON panel (in the centre section).
If there is no page switching, then Panel Index 1 should be used.
If page switching is configured, then the pages are addressed as follows:
- Physical Layer = Panel Index 1
- Page 1 = all buttons, Panel Index 2
- Page 2 = all buttons, Panel Index 3
- etc.
Talkback Panel
This panel type addresses the buttons on the TALKBACK panel (in the centre section).
In this instance, all buttons are addressed using Panel Index 1. The image below shows the button numbering.

