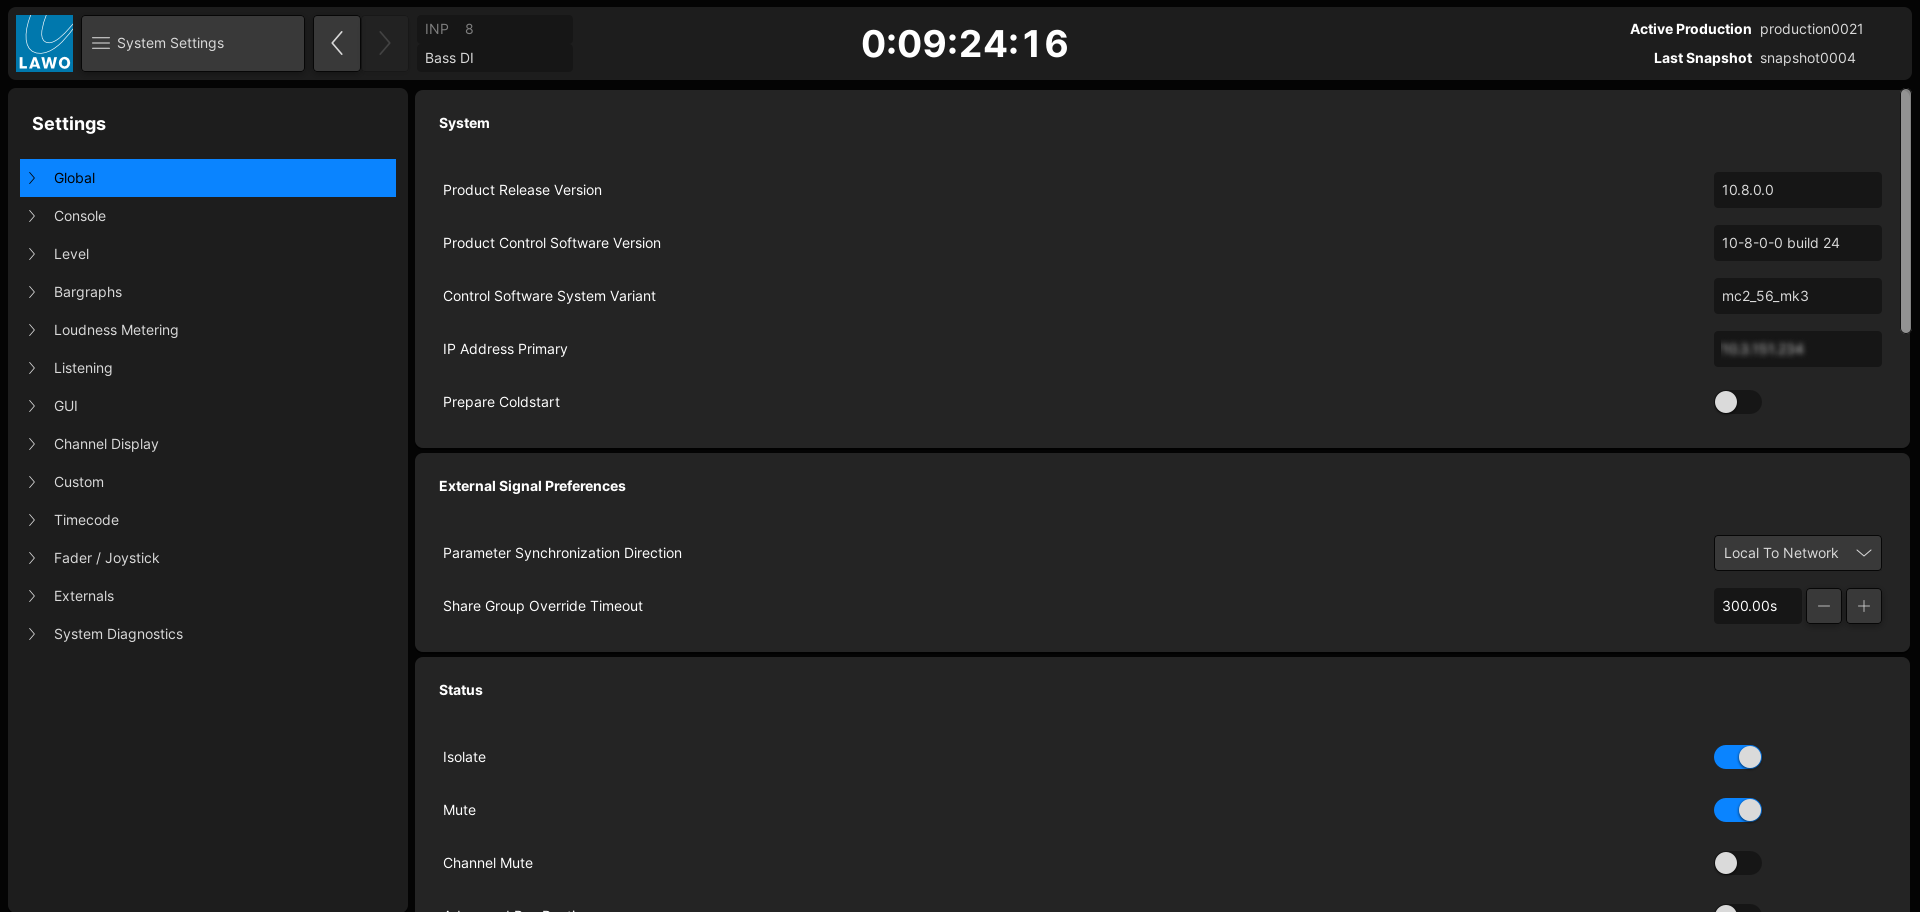
mc²56 - System Settings
The System Settings display contains a wide range of options that can be used to customize the operation. The settings are stored in productions, but not snapshots.
Operating Principles
1. Open the System Settings display on the Central GUI using one of the following methods:
- Press the SYSTEM button on the SCREEN CONTROL panel.
- Select System → System Settings from the GUI page menu.
- Press CTRL + 5 on the console keyboard.

On the left you will see the Settings menu. On the right are all available options for the current selection (e.g. Global).
2. Select a main topic – for example, Console.
The list of options (on the right) updates. Use the vertical scroll bar (on the far right) to view all available options.
Alternatively, open up the Settings menu (on the left) and select a sub topic (e.g. Reveal). The list (on the right) updates to show only the relevant options.

3. For each option, you can reveal a helpful description by hovering over the name or value field.

4. The options are modified as follows:
- On/Off states (e.g. Isolate) - use the touch-screen or trackball to change the on/off slider. The switch turns blue when an option is enabled.
- Drop-down menus (e.g. Parameter Synchronization Direction) – use the touch-screen or trackball to select an option.
- Numeric entries (e.g. Share Group Override Timeout):
- Select the option field and type in a value from the keyboard.
- Select the option field and press the SET soft key on the SCREEN CONTROL panel. Then use the rotary control to adjust the value.
- Touch or click on the up/down arrows to increment or decrement the value.
Index
The rest of this section describes all possible options: