mc²56 - Talkback
This topic describes the talkback functionality included with the console.
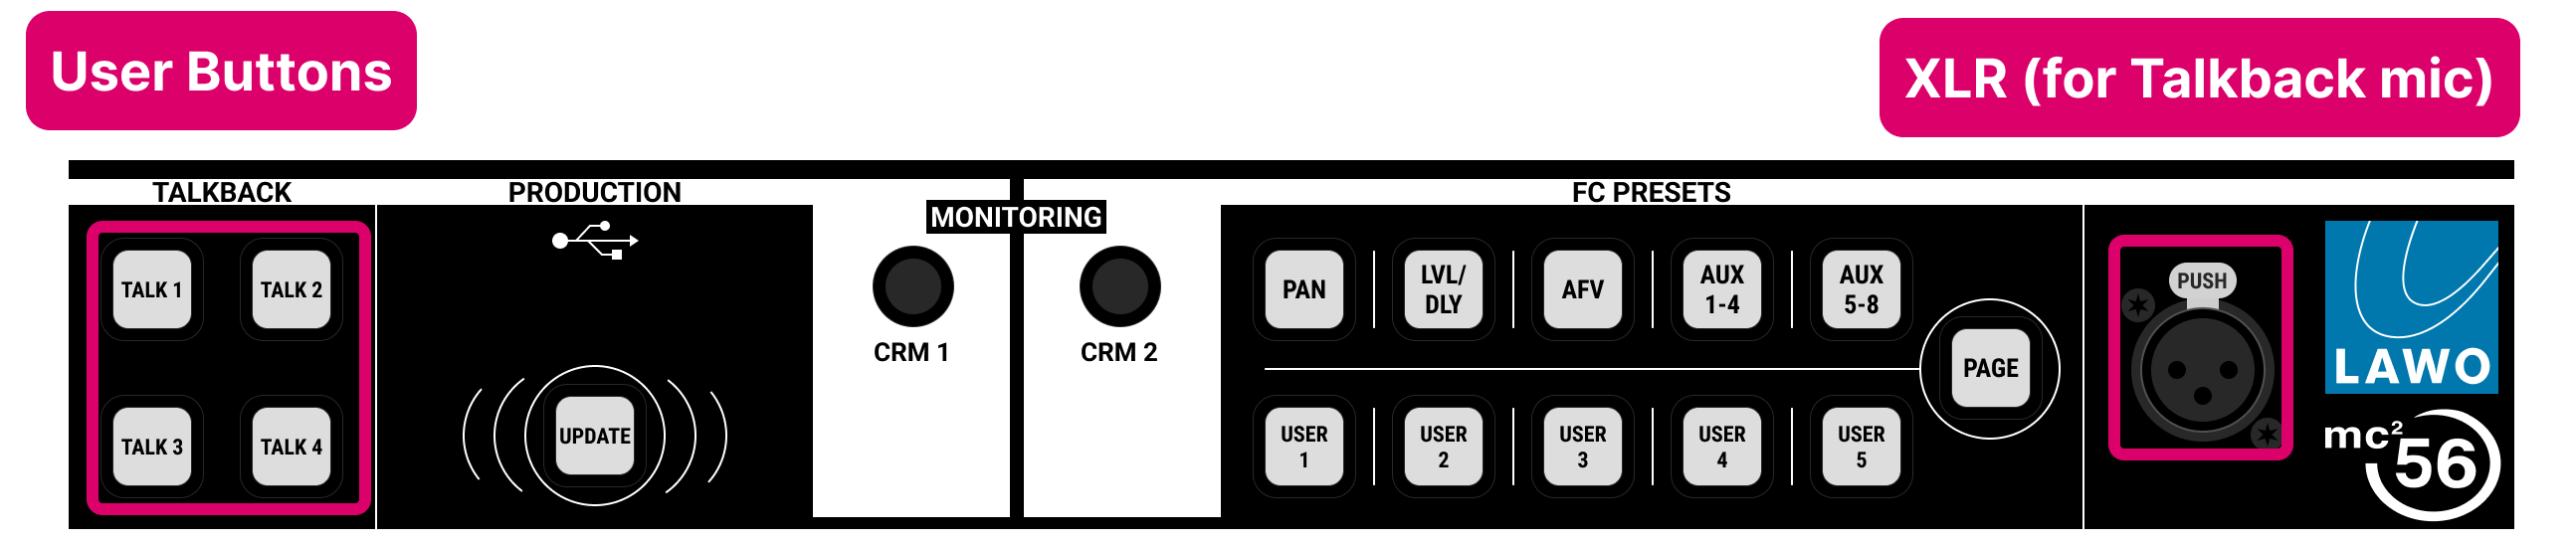
The image below shows the location of the TALKBACK user buttons and XLR connector (on the front panel).
Connecting a Talkback Mic
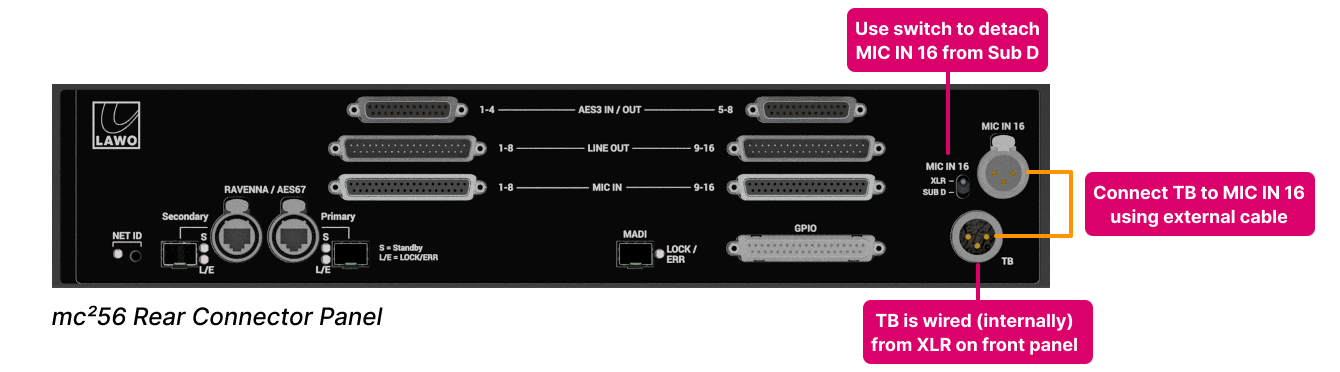
The centre section includes a female XLR connector that can be used to connect a talkback microphone. This is wired, internally, to the male XLR connector (marked TB) on the console's rear panel.
The console does not include a dedicated talkback mic preamp, and so the rear panel TB connector must be wired either to an external communications system (via a mic preamp), or to one of the console's local mic/line inputs.
Local mic/line input 16 is intended for this purpose, as it can be switched away from the MIC IN 9-16 Sub D and onto the MIC IN 16 XLR by adjusting the recessed switch (beside the XLR connector). Once this is done, you can connect the two XLRs, using a short cable, to complete the circuit (as shown below).
Defining the Talkback Source
The talkback source is defined when you create (or edit) the custom function(s). For our example (shown above), you should specify local mic/line input 16.
To adjust the gain of the talkback source, assign the mic/line input to a channel and use the input parameter controls in the usual manner.
Talkback Operations
The talkback operations are programmed from the Custom Functions display.
There are two custom functions that allow you to "talk to a channel": Fader User Button, Talkback to Channel and Central User Button, Talkback Function.
- The first option creates a fader user button that appears on every fader strip, and talks to the channel assigned to the strip.
- The second option can be triggered from any central user button, and talks to either a specific bus output or the channel in access (selected channel).
In each case, when talkback is active, the talkback source is routed onto one of 8 talkback buses. The talkback bus then feeds either the channel's N-1 return (for input channels) or the direct out (for groups, auxes and sums).
For each custom function, you can:
- decide whether talkback is permitted for different channel types. For example, to allow talkback to input channels but not to groups or sums.
- apply a talkback DIM value (to dim the console monitoring when the talkback user button is active).
- assign a different talkback bus (from 1 to 8) to talk to different sets of channels independently.
Note that the talkback buses appear in the Destinations side of the Signal List display (under the DSP Inputs directory.)
To learn how to configure the custom functions, please follow the links below:
Talkback User Buttons
The four TALKBACK user buttons (on the front panel) are ideal for use with the Central User Button, Talkback Function.
Please note: These buttons can be assigned to any central user button function, not only talkback switching. For a list of all possible central user button functions, please refer to the Custom Functions Index.