Power Core RP v2 - Preparing a Secure Connection (for https)
The Web UI can be opened with a secure connection (SSL) if the required certificates are stored on the Power Core device. This topic describes how to prepare the device. Once the SSL certificates are in place, the Web UI can be opened using a "https" connection. Apart from the connection method, there is no difference in the functionality.
You can find more information about OpenSSL at the following website: https://www.freebsd.org/cgi/man.cgi?query=openssl+
What you will need
The setup requires you to create the keys, requests and, if required, a self-signed certificate (using OpenSSL). The commands can be entered using a PC connected to Power Core either via telnet or the USB* port. You will also need to a suitable FTP client in order to perform the file transfers.
For more information, see Power Core RP v2 - Telnet Sessions, Power Core RP v2 - USB Service Port and Power Core RP v2 - File Transfer via FTP.
*For Power Core revision 1 and 2 systems, you can use the RS-422 serial port for the command line instructions.
Overview
In summary, the steps are:
- Create or adapt a config file, and copy this to Power Core using a suitable FTP client.
- Create the necessary keys, requests and, if required, a self-signed certificate (using OpenSSL). To enter the commands, you can either:
- Connect your PC to the control network and open a telnet session.
- Connect your PC directly to the RS 422 port and open a serial connection.
- Let an external CA sign the certificate - by downloading, signing and uploading the certificate.
- Clean up the files.
- Cold start the device.
Important: it is recommended not to use keys larger than 1024 bit, as to do so may affect the system performance.
Instructions
The instructions below provide more detail.
1. Create or adapt a config file (.conf), and copy this to Power Core using your FTP client.
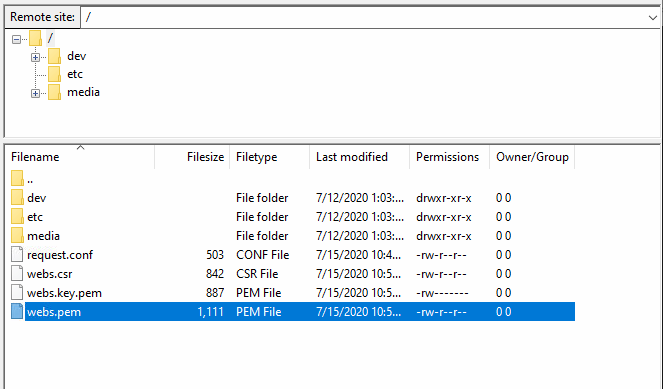
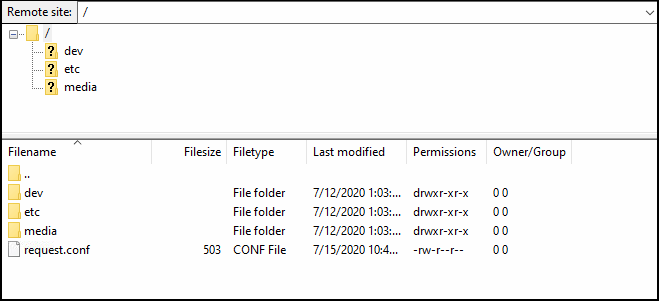
The file should be created on, or copied to, the root directory. The screenshot below shows the Power Core root directory. In this example, the config file is named "request.conf".
 A sample configuration is as follows.
[req]distinguished_name=req_distinguished_namereq_extensions=req_extprompt=no
[req_distinguished_name]C=DEST=Nordrhein-WestfalenL=Troisdorf-SpichO=DSA-VolgmannOU=DevelopmentCN=POWERCORE-DSA-DWC0-240.internal
[req_ext]extendedKeyUsage = clientAuth,serverAuthsubjectAltName = @alt_names
[alt_names]DNS.1 = POWERCORE-DSA-DWC0-240.internal#DNS.2 = [fqdn2]#DNS.3 = [fqdn3]#DNS.4 = [fqdn4]IP.1=192.168.101.240#IP.2=192.168.101.242#IP.3=192.168.101.243#IP.4=192.168.101.244
2. Now open a connection to the Power Core control system either using telnet or the USB service port.
3. Once login is complete, type the following command to create a RSA key with openssl genrsa.
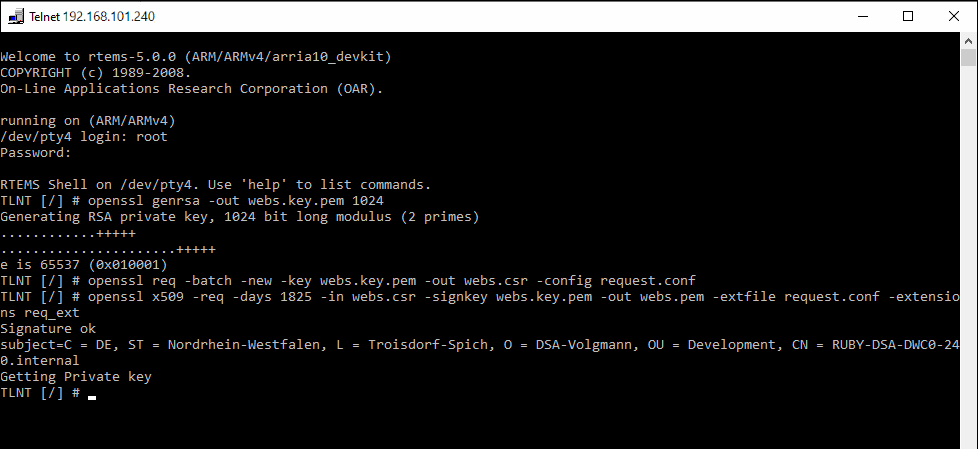
openssl genrsa -out webs.key.pem 1024
Press ENTER. The confirmation message "Generating RSA private key..." appears.
4. Type the following command to create a request with openssl.
openssl req -batch -new -key webs.key.pem -out webs.csr -config request.conf
Press ENTER. There is no message following this command.
5. Type the following command to create a self-signed certificate with openssl.
openssl x509 -req -days 1825 -in webs.csr -signkey webs.key.pem -out webs.pem -extfile request.conf -extensions req_ext
Press ENTER. The confirmation message "Signature ok...." appears.
The screenshot below shows the complete telnet session.
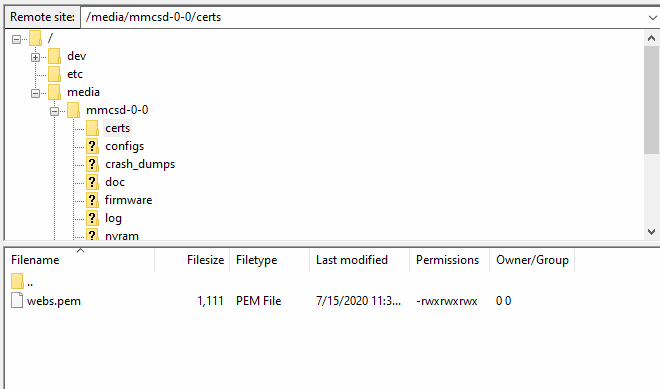
6. Using your FTP client, copy the resulting certificate "webs.pem" (in the root directory) to "/media/mmcsd-0-0/certs".
- You will need to create the "certs" directory (via a right-click), and refresh the FTP client connection to see the new files.
- To copy a file, download it to your computer (via a right-click); navigate to the new location on Power Core; then upload the file (via a right-click).
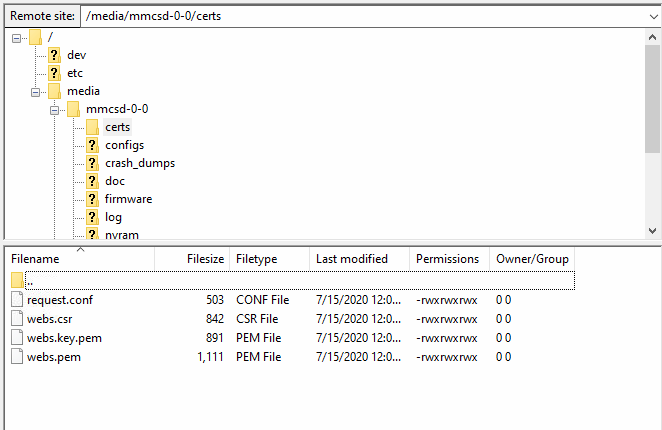
The screenshots below show the file/directory locations.
From
| To
|
7. Now let an external CA sign the certificate as follows.
- Using your FTP client, download the file "request.csr"
- Let it sign from CA
- Upload the certificate "webs.pem" to "/media/mmcsd-0-0/certs"
8. Using your FTP client, clean up the files.
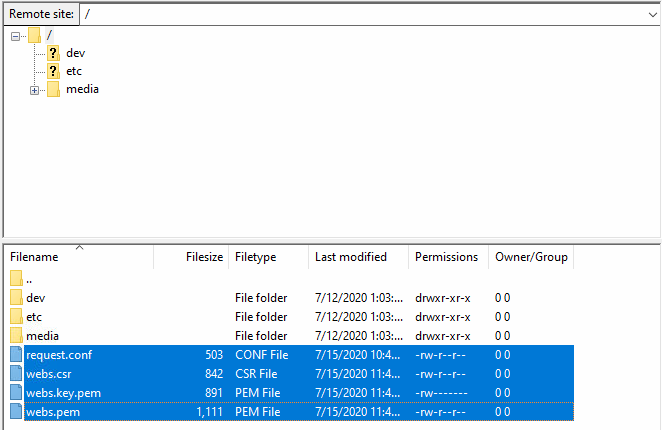
Copy all of the files "webs.pem", "webs.key.pem", "webs.csr" and "request.conf" to "/media/mmcsd-0-0/certs", and delete the originals.
The screenshots below show the file/directory locations.
From
| To
|
9. Cold start the Power Core control system by typing the following commands.
- Type
sys_cs(press ENTER). - Then type
YES(and ENTER) to confirm.
If you are connected via telnet, you will lose your connection as soon as the device reboots.
If you are connected to the serial port, then you will see the following confirmation messages.
DSK system: init: ---------- Starting Webserver -------------DSK system: init: Web Server started, result = 0DSK system: init: Starting Webserver completedWEBS system: init: Webserver bind https (certficate found)
10. Test the connection by opening a Web UI session and logging in.
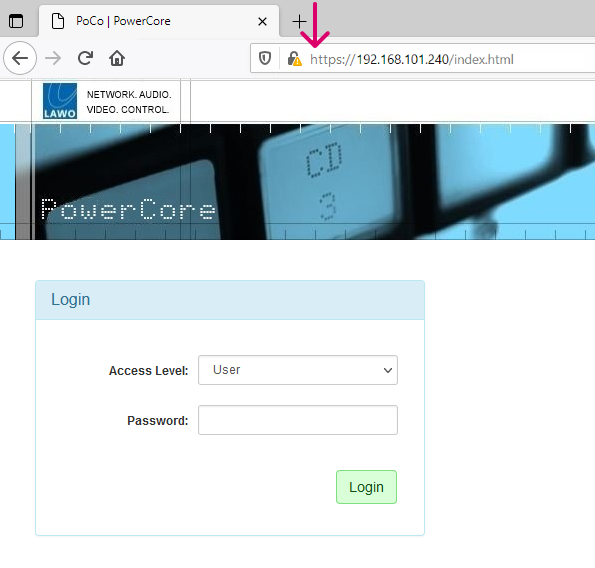
The padlock icon and "https" prefix indicates that the connection is secure.
