mc²96 - Create Stereo and Surround Channels
A stereo or surround channel can be created, either from the Signal List or Channel Config display.
The Signal List is recommended as it is easier to see where the stereo and surround options are permitted, and configure the signal connections at the same time.
Tip: For stereo channels, you can also use the STEREO button on the IMAGE panel to link (or unlink) the channel in access.
Before creating a stereo channel, please take care if the two mono channels have different parameter values.
- When two mono channels are linked for stereo, the settings from the odd (left) channel are copied to the right, and the channel is panned left/right.
- When a stereo link is removed, the two resulting mono channels will have the same settings and are panned centre.
Using the Signal List
If you open the Signal List in its standard view, then all channels are listed as mono resources. The channel format column shows whether a channel is mono (M) or a component channel (L, R, C, etc). The color-coding makes it easy to spot which channels are configured for stereo and surround.
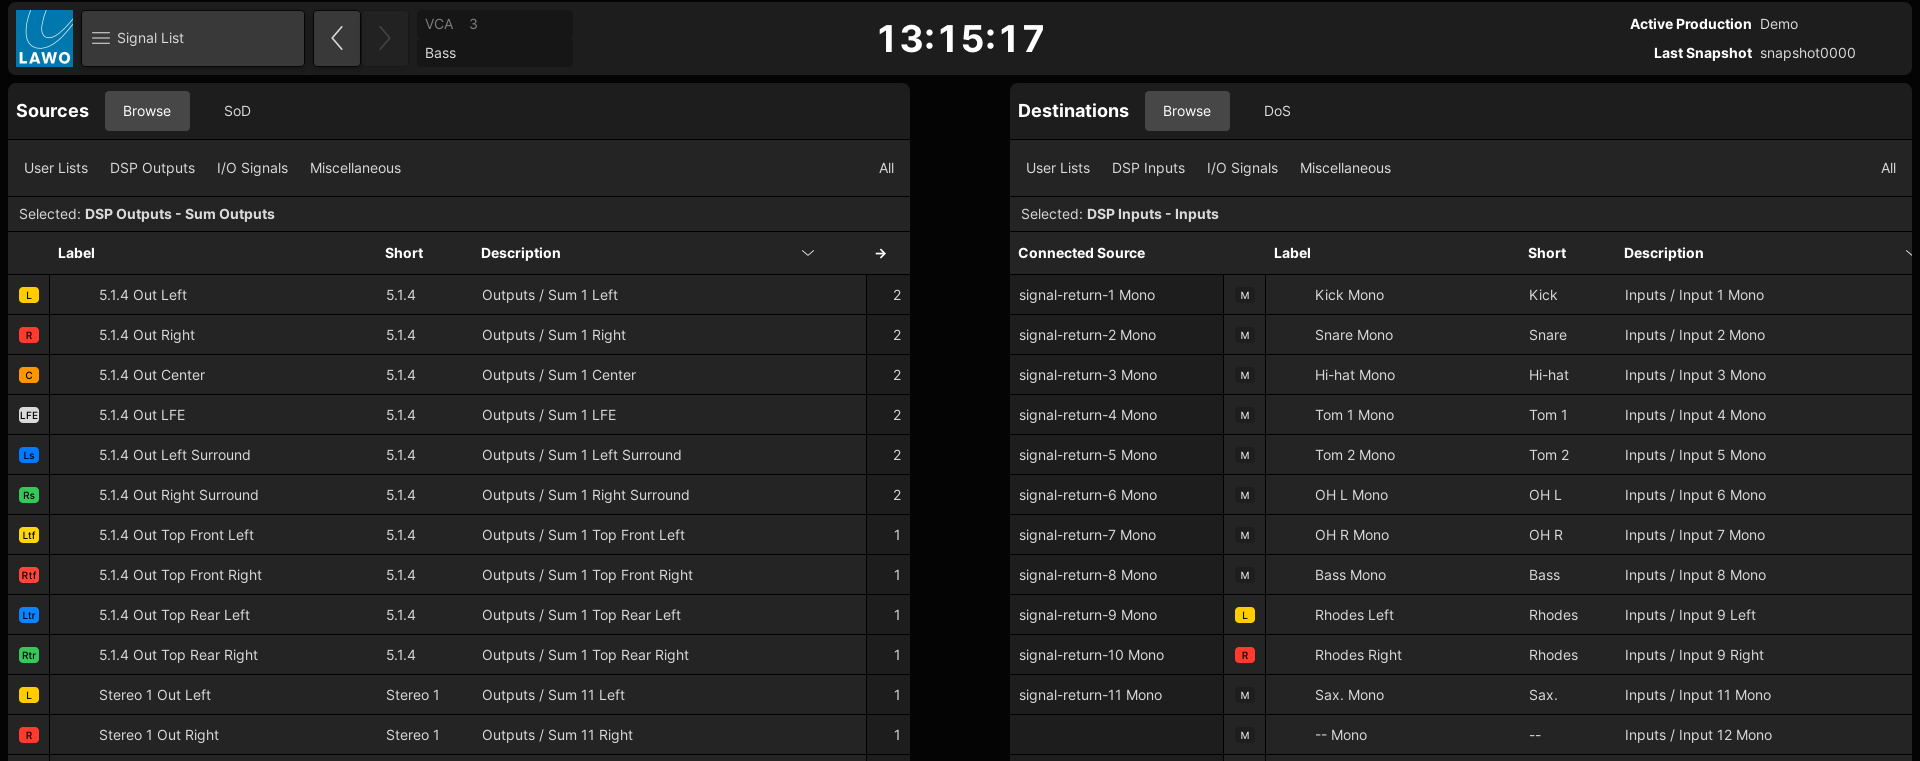
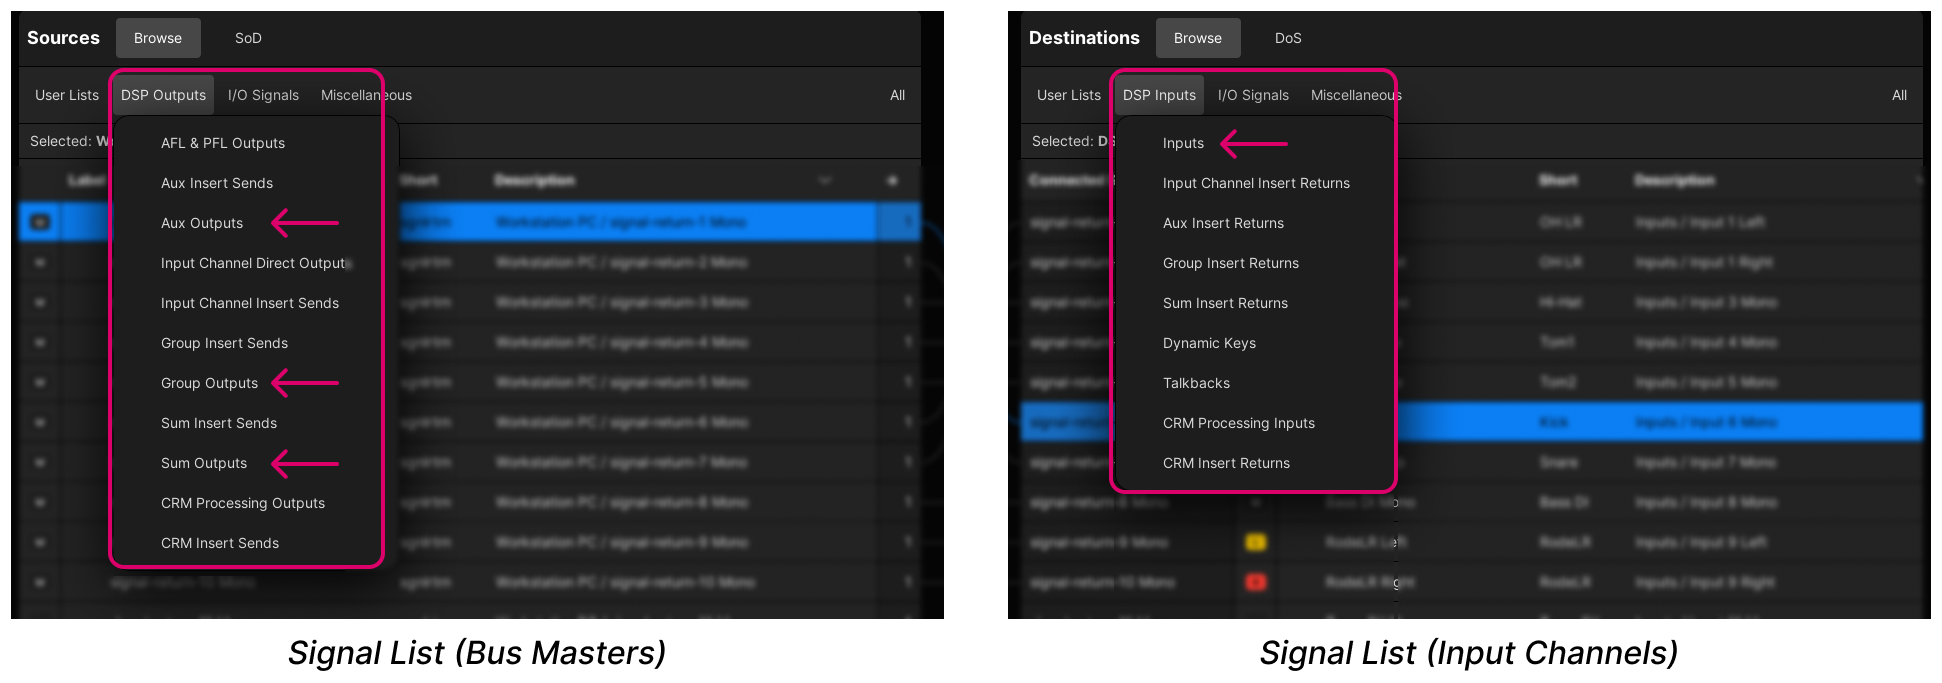
The steps below describe how to configure a stereo input channel and surround sum, but the same principles can be applied to any DSP channel type.
- All auxes, groups and sums can be found in the Sources list (on the left), under DSP Outputs.
- All input channels can be found in the Destinations list (on the right), under DSP Inputs.
If the Signal List is switched to Signal Mode, then each mono, stereo and surround channel appears as a single "grouped" entry. In this mode, you can access the individual component channels using the "reveal group" arrow.
Creating a Stereo Input Channel
- Press the SIGNAL button on the SCREEN CONTROL panel.
- Select Signals → Signal List from the GUI page menu.
- Press CTRL + 1 on the console keyboard.
2. Under Destinations (on the right), select DSP Inputs → Inputs.
3. Right-click on an odd numbered channel (e.g. Input 75) and turn on the Stereo option.
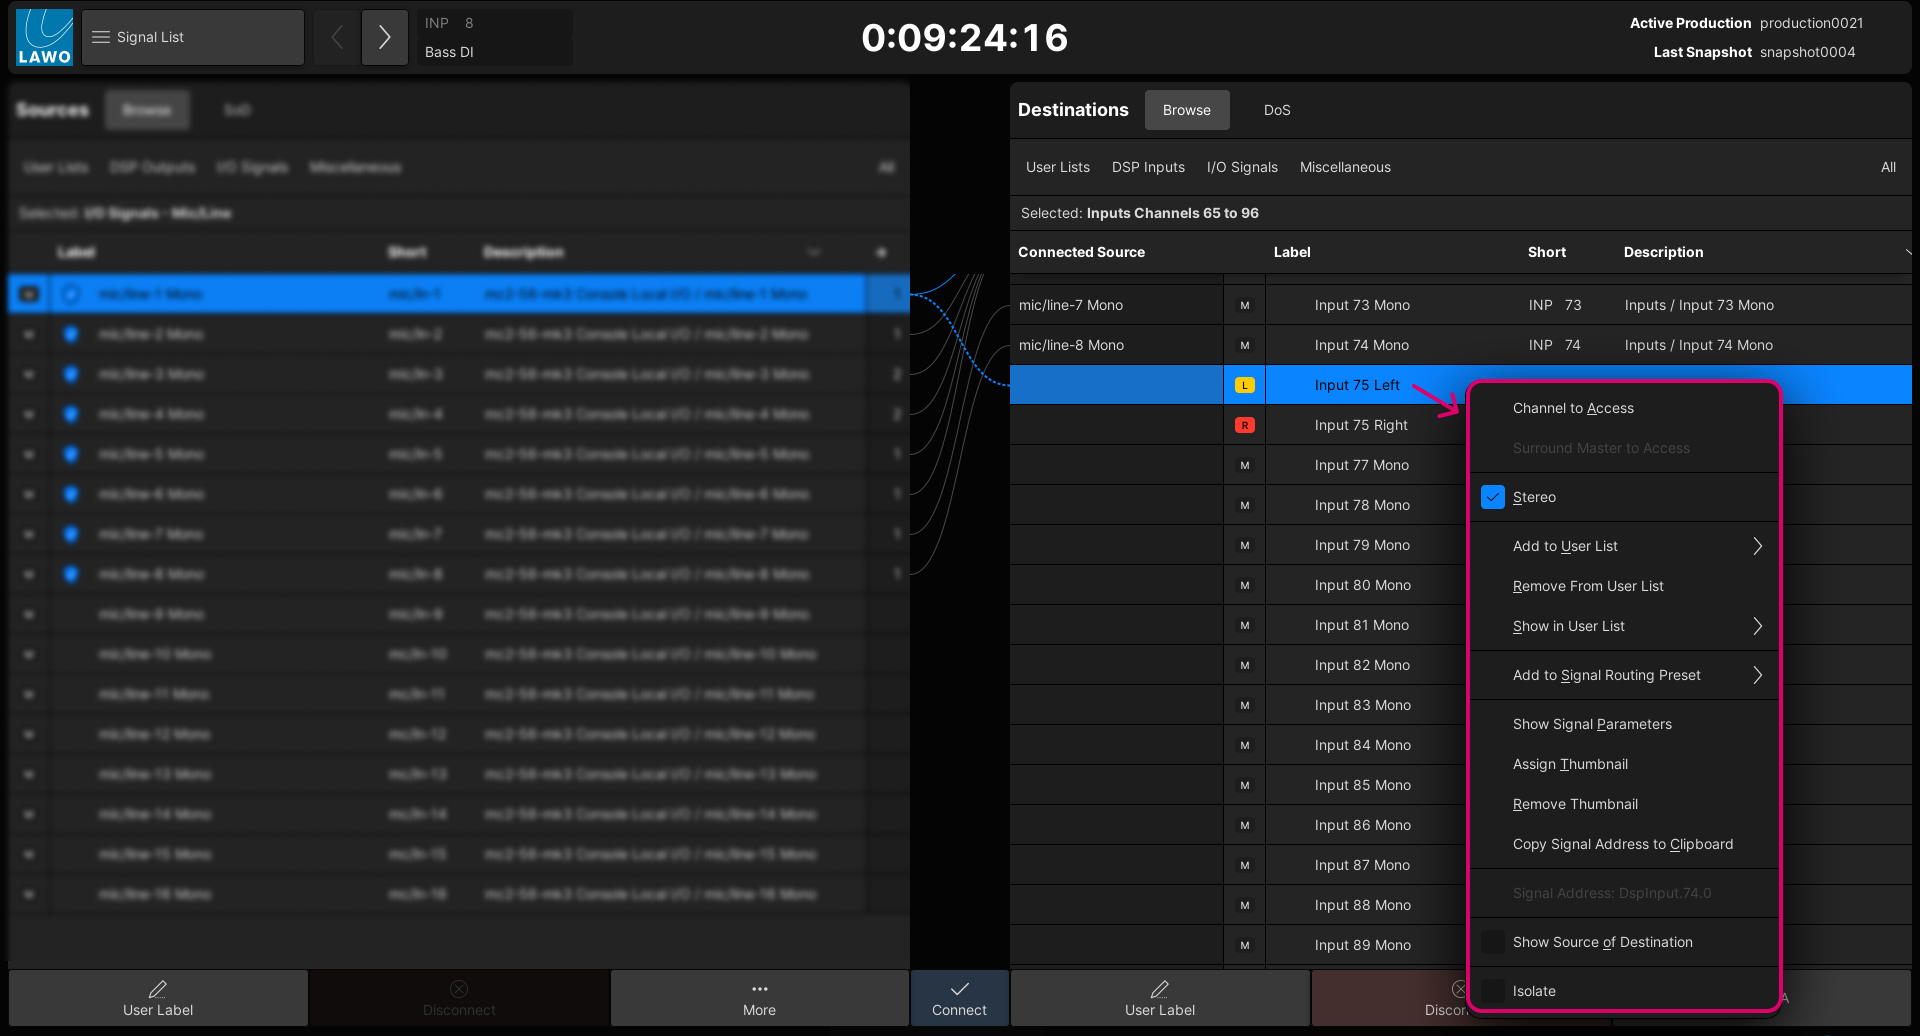
If you cannot see the Stereo option, then the selected channel number is not valid. Try again on an odd-numbered channel.
The selected channel is linked to its adjacent DSP path, and the channel format and "Label" fields update. If the channels have existing user labels, then it is the odd (left) channel label that is applied, with L and R added as a suffix.
If the two mono channels were assigned to fader strips, then the right channel disappears leaving a blank fader strip. At this stage, you can undo the Stereo option to reinstate the right channel. Note that this only works if there is still a blank fader strip. If you have assigned another channel to the original fader strip, then this is not replaced and you will need to reassign the (right) channel to the surface.
4. The same method can be used to link any odd/even pair of DSP channels: inputs, groups, auxes or sums.
Creating a Surround Sum
1. Under Sources (on the left), select DSP Outputs → Sum Outputs.
2. Right-click on a Sum output (e.g. Sum 1) and choose an option from the Surround drop-down menu (e.g. 5.1).
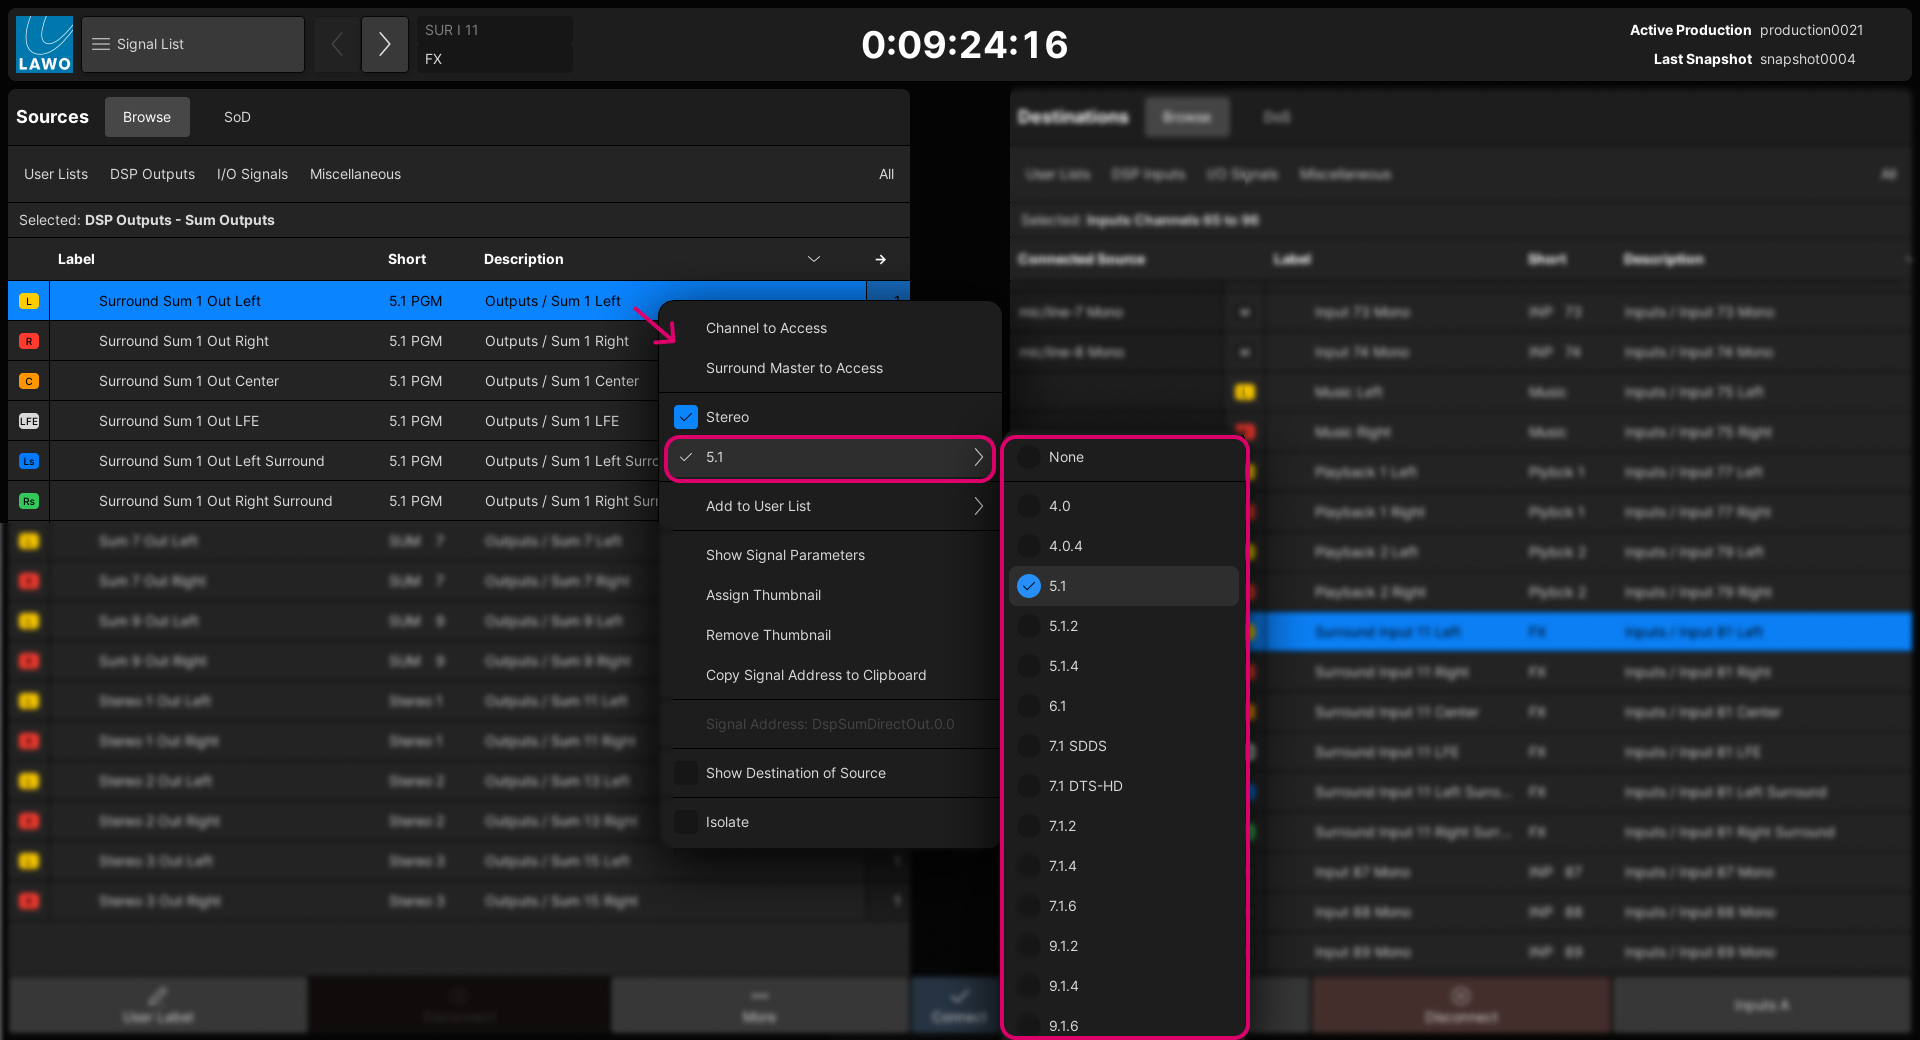
If you cannot see the Surround option, then the selected channel number is not valid. Try again on the first channel of any 8-channel block (e.g. on Sum 1, 9, 17, etc).
The selected channel is linked to its adjacent DSP paths, and the channel format and "Label" fields update. The number of resources used depends on the selected format. If the channels have existing user labels, then these are overwritten by the "Short User Label" of the Surround VCA master, with L, R, C, etc. added as a suffix.
Note that the left/right pairs of a surround channel are automatically linked for stereo. This is for convenience when revealing the surround slaves. The stereo linking can be deselected at any time: right-click on the odd-numbered component (e.g. Left) and turn off Stereo.
3. At this stage, you can assign the Surround VCA master to a fader strip as follows:
- Right-click on any of the surround components and select Surround Master to Access (to put the Surround VCA maser into access).
- Press ASSIGN on the STRIP ASSIGN panel (in the centre section).
- Press the fader SEL button (on a channel or main fader strip) - the assignment is made.
- Press ESCAPE to cancel out of fader strip assign.
4. The same method can be used to configure other DSP channel types: inputs, groups, auxes or sums.
Please note:
- For surround inputs, panning is automatically reset so that the left channel feeds Sum 1, right channel feeds Sum 2, and so on.
- The best way to position a surround channel within the surround field is using HyperPan.
Using the Channel Config display
Stereo and surround channels can also be configured using the options at the top of the Channel Config display as follows.
- Press the CHAN button on the SCREEN CONTROL panel.
- Select Channel → Channel Config from the GUI page menu.
- Press CTRL + 3 on the console keyboard.
2. Select a valid channel (e.g. SUM 1), either by pressing its fader SEL button or using the Access/Assign panel.
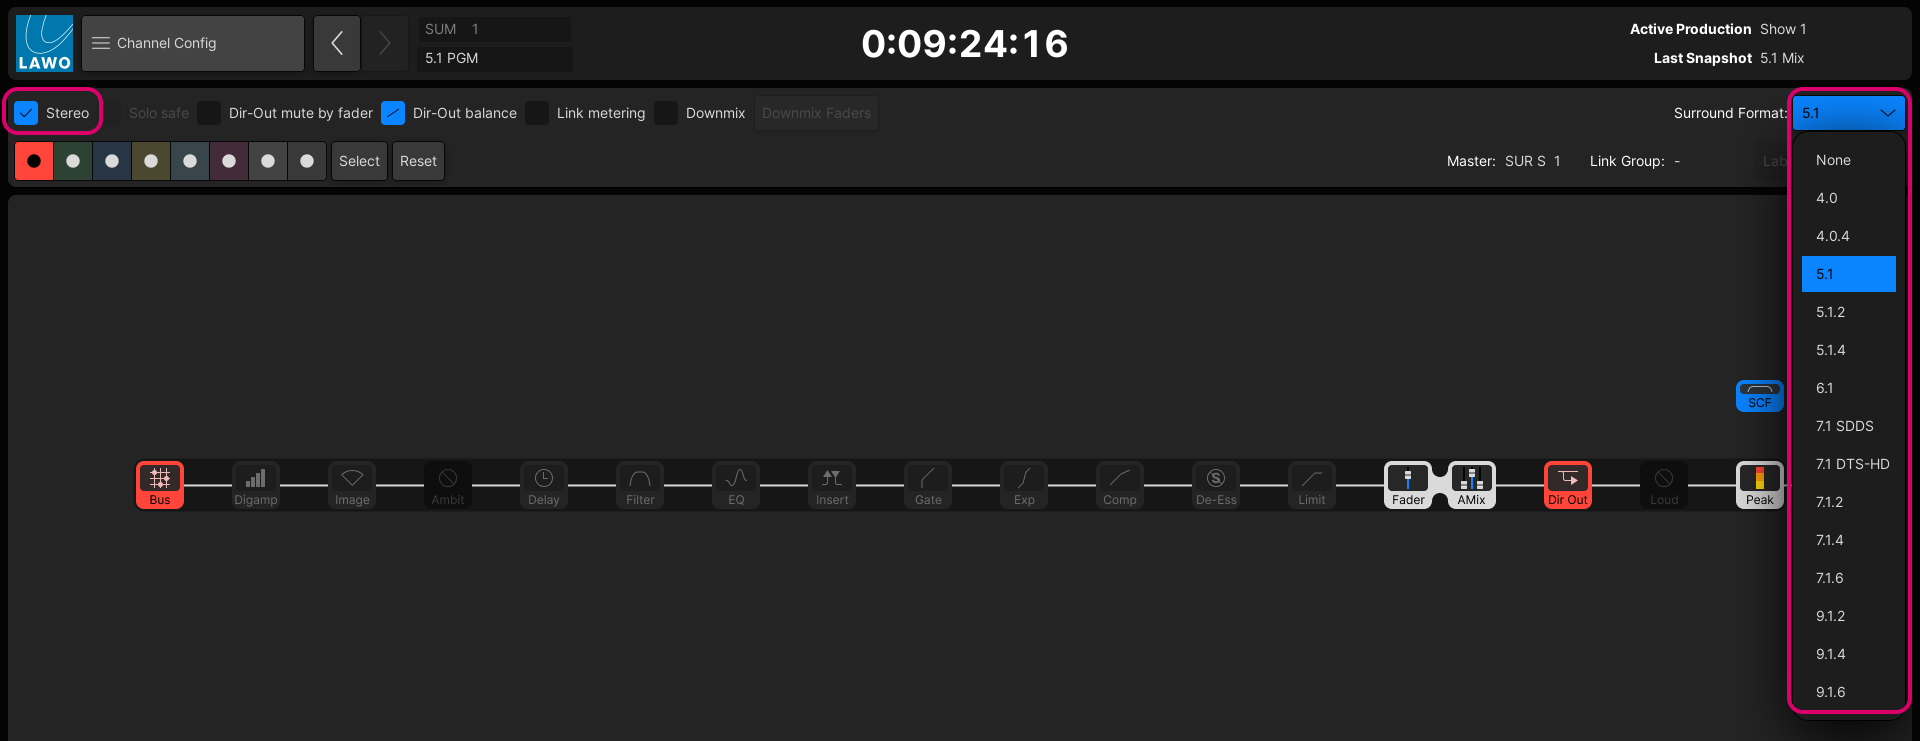
3. Enable the Stereo option (top left) or use the Surround Format drop-menu (top right) to configure the channel.
The Downmix option can be used to create a mono downmix from a stereo channel, or a stereo downmix from a surround channel. For more information, see mc²96 - Downmix.