mc²96 - Free Control Assignment
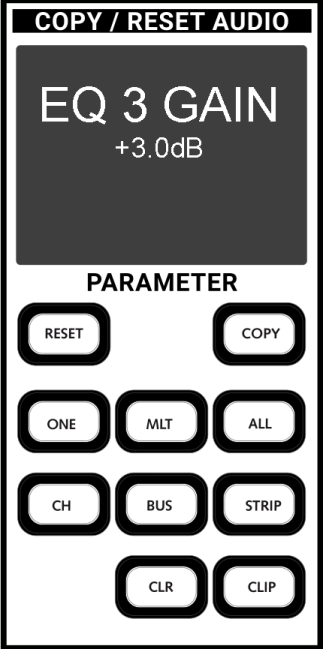
The Free Controls on each channel fader strip can be assigned to any available parameter using the COPY/RESET AUDIO assign panel in the centre section.
Free Controls can be assigned to any available channel parameter on an individual basis. The default assignments are then stored in snapshots and productions.
Note that the Free Control assignments relate to the DSP channel (i.e. they move with the channel, if the channel is assigned to a different fader strip).
At any time you can override the default assignments using an FC PRESET, selected from the Centre Section.
Assigning a Single Free Control
1. Press the ONE button (on the PARAMETER assign panel) to activate a one-shot assignment - the button flashes to indicate that parameter assign is now active. |
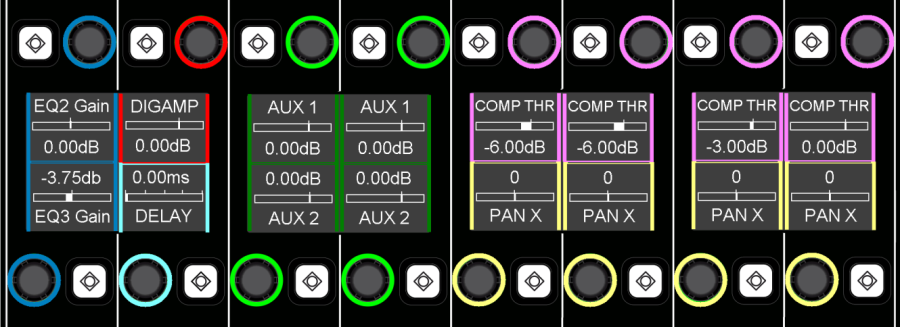
3. Now touch the Free Control on the destination channel strip - the assignment is made; the Free Control display updates; and the ONE button cancels automatically. |
Assigning Multiple Free Controls
To assign more than one Free Control at a time, use the MLT button to latch on the parameter assign mode. This saves you having to reselect the ONE button before each assignment.
1. Press the MLT button (on the PARAMETER assign panel) - the button flashes to indicate that parameter assign is now active.
2. Select the parameter you wish to assign, by touching a rotary encoder on the Central Control Section - the parameter is placed into the PARAMETER clipboard.
3. Now touch as many Free Controls across the surface as you wish - the clipboard parameter is assigned to each Free Control you touch.
4. Remember to deselect MLT, or press ESC on the SCREEN CONTROL panel, to exit the parameter assign mode. If you don't, then the next time you touch a channel free control, you will re-assign it!
Assigning a Free Control on ALL Channels
Another shortcut is to assign a parameter to the same Free Control position across all fader strips for a certain channel type. This is particularly useful when you are first building your layout.
1. Press the ALL button (on the PARAMETER assign panel).
This automatically selects the ONE button for a one-shot assignment. If you wish to make multiple ALL assignments, then select MLT instead of ONE.
2. Select the parameter you wish to assign, by touching a rotary encoder on the Central Control Section - the parameter is placed into the PARAMETER clipboard.
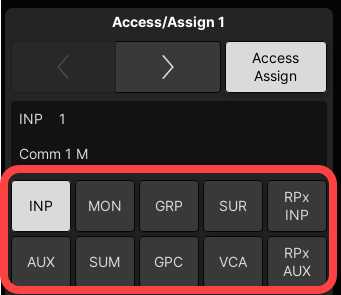
3. Now choose the channel type you wish to assign to, from the Access/Assign panel – for example, select INPUT:
|
|
Note that you can select multiple channel types if you wish – e.g. select INP, GRP and SUM to make a Free Control assignment across all input, group and sum channels.
4. Now touch a Free Control (e.g. FC 1) on any input channel fader strip (INP) - EQ 3 GAIN is assigned to FC 1 across all input channels.
Note that the assignment is made to all input channels, even those not assigned to a fader strip.
Clearing a Free Control Assignment
To clear a Free Control assignment so that it becomes inactive:
1. Press the CLR button (on the PARAMETER assign panel).
This automatically selects the ONE button for a one-shot assignment. If you wish to clear multiple assignments, then select MLT instead of ONE.
2. Select the Free Control you wish to clear by touching it on the fader strip.
The assignment is cleared and Free Control display becomes blank.
3. If you have selected MLT, remember to deselect MLT, or press ESC on the SCREEN CONTROL panel, to exit the parameter assign mode. If you don't, then the next time you touch a channel free control, you will clear it!
Free Control Functionality
When parameters are assigned to Free Controls, the functionality is allocated as follows:
- EQ
- EQ1, EQ2, EQ3, EQ4 = Gain, Frequency, Q and EQ Type for the 4-band parametric EQ.
- FI1, FI2 = Gain, Frequency, Q and EQ Type for the 2-band Filter section.
- SC1, SC2 = Gain, Frequency, Q and EQ Type for the 2-band dynamics Sidechain Filters.
Press the button beside any of the EQ1 free controls to turn EQ band 1 on or off, and so on for the remaining bands/filters.
- DYNAMICS
The following controls as applicable for the Gate, Expander, Compressor and Limiter:
- Threshold (THRS) and Ratio (RAT).
- Attack time (ATT) and Release time (RLS).
- Hold time (HOLD).
- Floor level (FLR).
- Make-up gain (GAIN).
- Look ahead delay (LAHD)
- Hysteresis (HYST) or mix level (MIX).
The buttons beside each set of free controls can be used to turn each section on or off.
- AUX
Aux send level and on/off for all available aux sends.
If an aux is stereo, then you can adjust the gain and pan, or gain and balance, for the stereo send.
- OTHER MODULES
- IN GAIN = channel input gain (INMIX gain).
- IN BAL = channel input balance (INMIX balance, if the input is stereo).
- DIGAMP = digital amplifier gain.
- DELAY = channel delay; press the button to switch in/out.
- INS SEND = insert send/return; press the button to switch in/out.
- DOUT LVL = direct output level; press the button to mute the direct output.
- PAN = panning parameters; press any of the PAN free control buttons to switch panning in/out of circuit.
- ON LEVEL, OFF LEVEL, etc. = Audio Follow Video (AFV) parameters.
- AMX WT = automix weighting factor.


