mc²96 - Panning
The panning module can be used to position a channel within the stereo or surround field. It operates in one of three modes:
- Pan - conventional X/Y/Z panning.
- Hyper Pan - a panning tool for surround sources.
- 3D Pan - a panning tool for 3D immersive formats.
In each case, the pan law applied depends on the format of the bus master. For example, if a channel is assigned onto a 5.1 sum and a stereo group, then only the X axis (left/right) position is applied to the stereo output.
To learn more about configuring buses for stereo and surround, see mc²96 - Channel Formats. The supported 2D and 3D surround formats are described here.
Operating Principles
Pan and Hyper Pan can be adjusted from the Central Control Section, Main Display and fader strips.
The 3D Pan tool must be operated from the Main Display.
Panning for the Channel in Access
Start by checking the channel in access by looking at the channel name in the title bar of the Central GUI and COPY / RESET AUDIO display.
- The selected channel can be changed, at any time, by pressing a different fader SEL button or using the Access/Assign panel.
- For now, it is best to select a mono channel to learn about the X/Y/Z pan tool OR a Surround VCA master to learn about Hyper Pan.
Important: The channel must be assigned to a multi-channel bus to turn on the panning.

Using the Central Control Section:
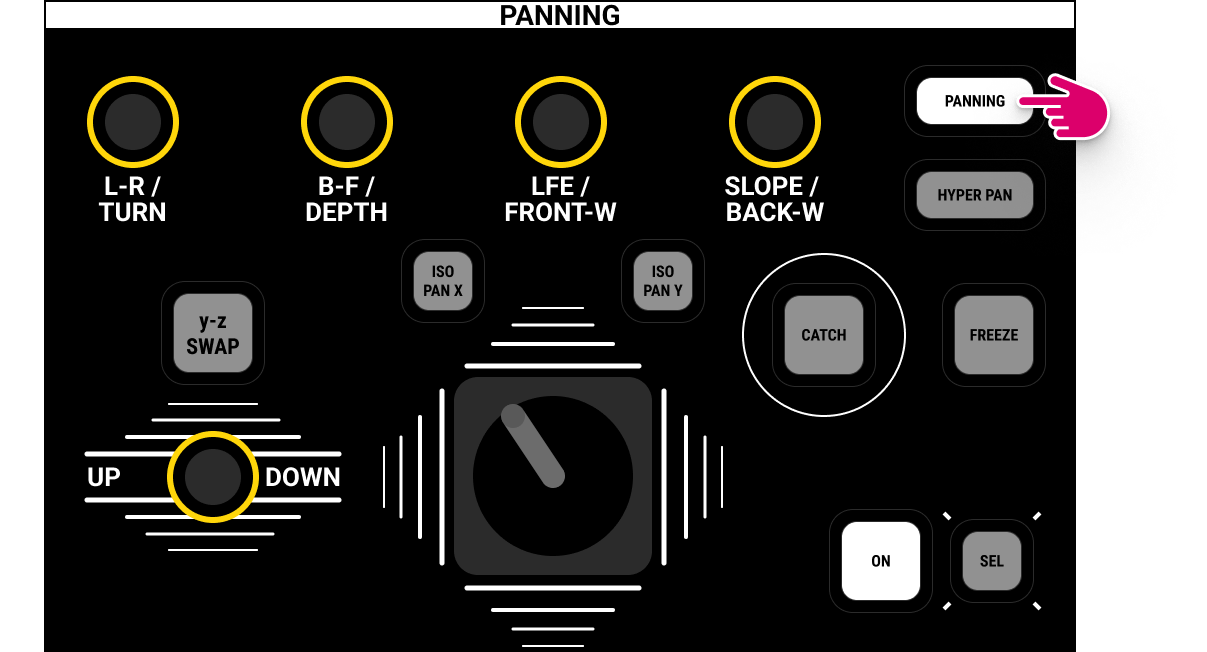
- On the PANNING panel, press either PANNING or HYPER PAN (to choose the mode).
- Press ON to switch panning into circuit.
- Use either the rotary controls or joystick to adjust the parameters.
- For the rotary controls, there are two rows of engravings:
- In PANNING mode, the upper labels apply: L-R, B-F, LFE and SLOPE.
- In HYPER PAN mode, the lower labels apply: TURN, DEPTH, FRONT-W and BACK-W.
- The current values are shown on the Central GUI module pop-up window or Main Display.
- The operation of the joystick (and ISO PAN X, ISO PAN Y and Y-Z SWAP buttons) is described later.

Using the Main Display:
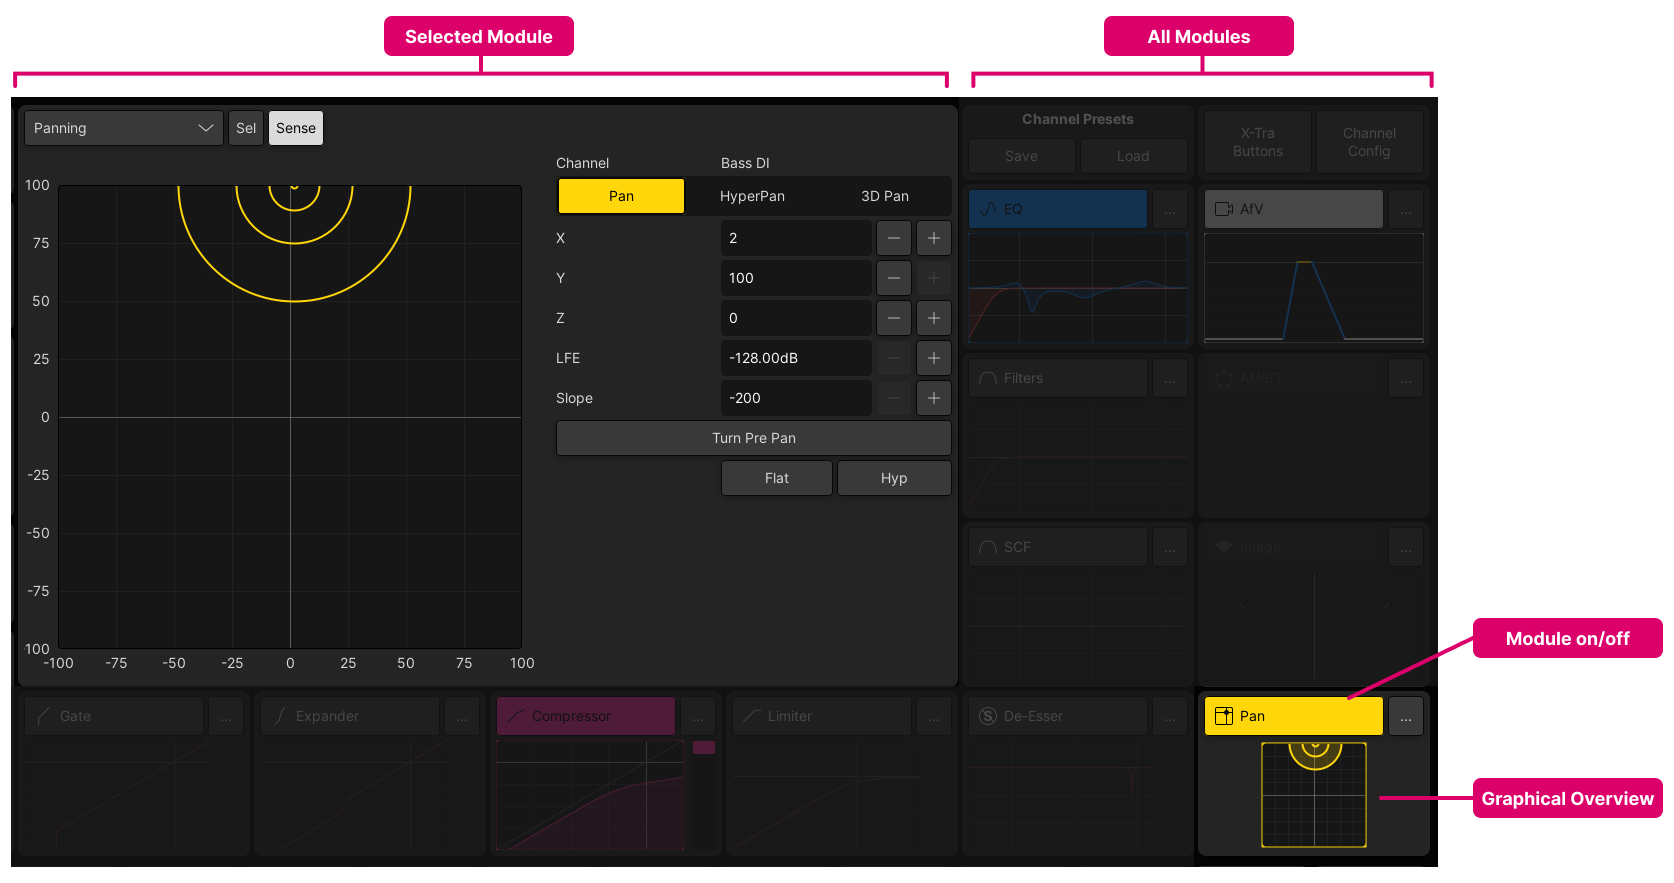
- Make sure that the Pan on/off button is enabled (to switch panning into circuit).
- If Sense is enabled, touch the module's graphical overview (or a rotary control on the Central Control Section) to update the selected module area. You should now see the Panning module parameters.
- From the top of the selected module area, select Pan, Hyper Pan or 3D Pan (to choose the mode).
- Use the touch-screen buttons to change the parameter values.
Panning from the Fader Strips
The following operations are possible from the fader strips:
- An individual parameter can be assigned to a Free Control (using the default FC assignments).
- Parameters can be paged onto the Free Controls globally (using an FC PRESET).
- In an isolated bay, parameters can be expanded across all available Free Controls (using the ISO Bay MISC function).
- The module on/off state can be programmed onto a Fader User Button.
- The mini display area on the Channel Display can show either a specific module (e.g. Pan) OR follow the fader strip Free Controls.
Pan Tools
The next few topics describe how to use the panning modes and joystick controls.