vsmWebPanel - Operation
Preparing vsmWebPanel for Operation
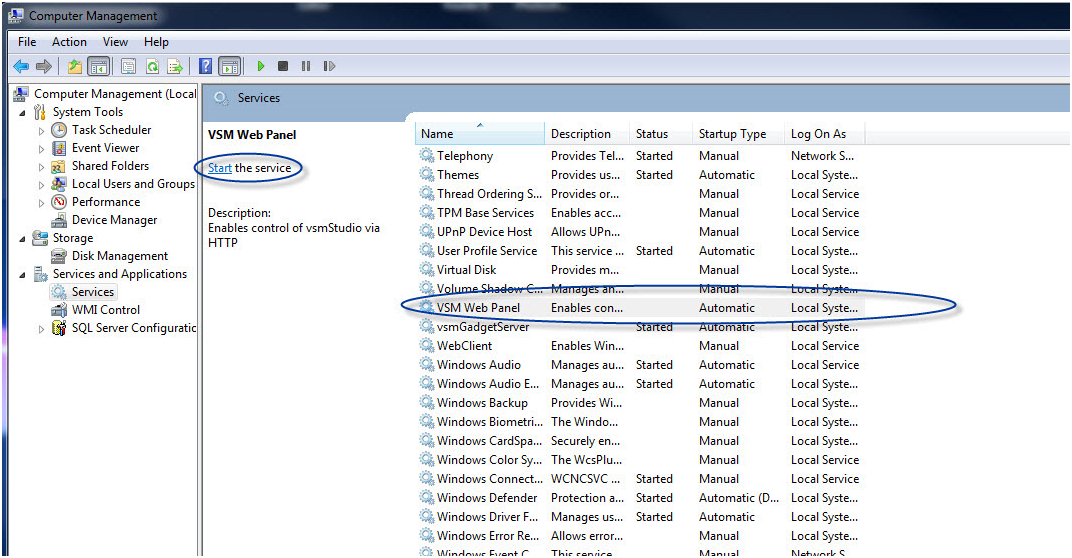
Starting the vsmWebPanel Service
vsmWebPanel is started through the Windows Computer Management. After the installation, it is automatically listed under Services and can be started through this list.
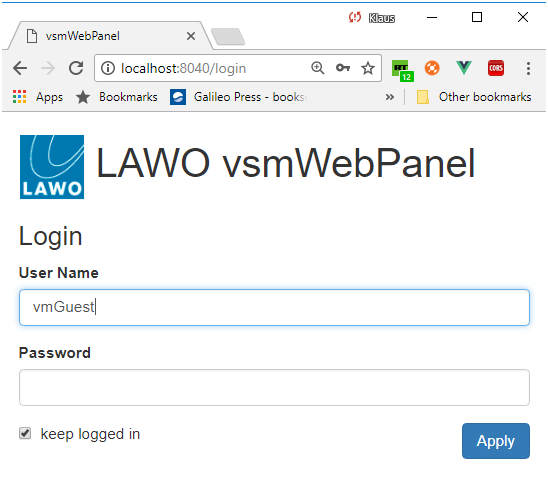
Opening vsmWebPanel
To access the configuration of vsmWebPanel, enter the address https://localhost:8040 in the browser; a login page will open. Use the user name vmAdmin to log in there for configuration. Initially, the matching password is also vmAdmin.
When the user logs in as vmGuest (with an empty password, just apply the window), he has no right to change the Panel ID or most other configuration properties. These settings can be changed later (see User Management).
The vmGuest user has initially no assigned panel - someone with administrator rights (like vmAdmin) needs to assign a panel first, before vmGuest can be used at all.
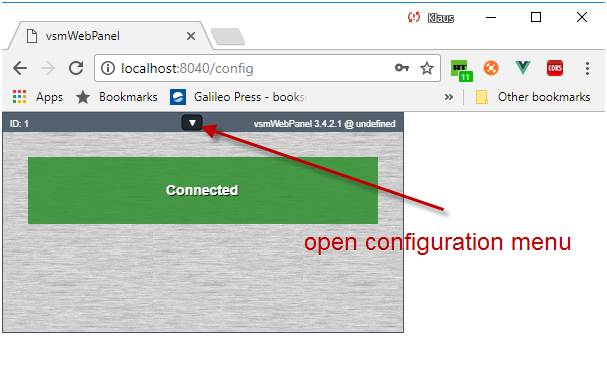
After a successful login, you will see a window with an empty panel. It should display a green connect message, showing that the web page has a valid connection to the vsmWebPanel back end service, but that service is not yet connected to any vsmStudio host.
Select the checkbox keep logged in to enable automated logins - on all subsequent openings of vsmWebPanel pages, the panel will be shown directly (without requiring a login). If this is not desirable for you, then leave the checkbox unticked. However, you will need to login each time you connect to that panel.
For security reasons browsers cannot directly access local file systems other than via a few exceptions such as the download folder and cookies. Thus, the vsmWebPanel app must use cookies to store the credentials. This means that if you do not allow cookies, or delete cookies, the automated login function is not possible.
WebPanel vsmStudio Host Configuration
Click on the small button in the middle of the panel's title bar to open the configuration menu. As a vmAdmin user you can select the following tabs to configure:
Tab Caption | Purpose |
Panel | select panel ID, panel background appearance or relog as another user |
Hosts | establish connections to up to 4 vsmStudio hosts |
Users | manage users, change passwords and grant access rights |
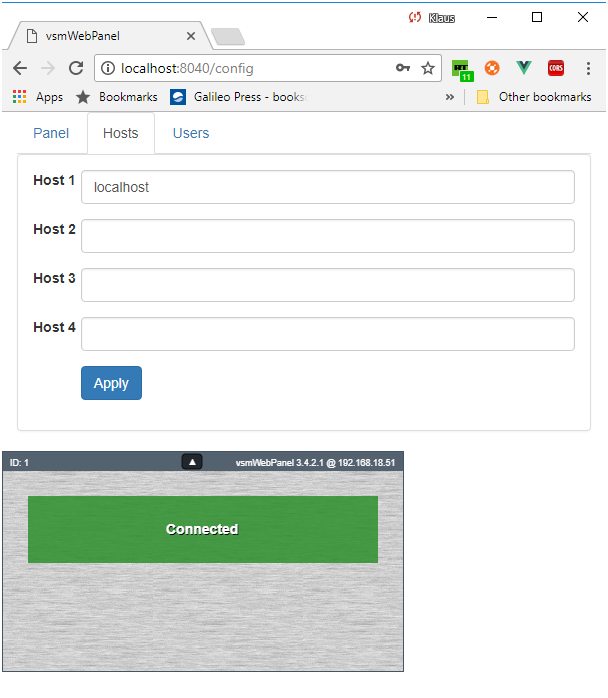
To configure a panel, select the Hosts tab first and enter the IP address of the vsmStudio host under Host 1 and, if existing, the IP address of the redundant vsmStudio hosts under Host 2 up to Host 4. If vsmStudio is installed on the same server, you can use “localhost”.
Commit your entries by clicking the Apply button:
WebPanel Panel Configuration
Click the tab Panel to choose a known panel ID of the running vsmStudio configuration:
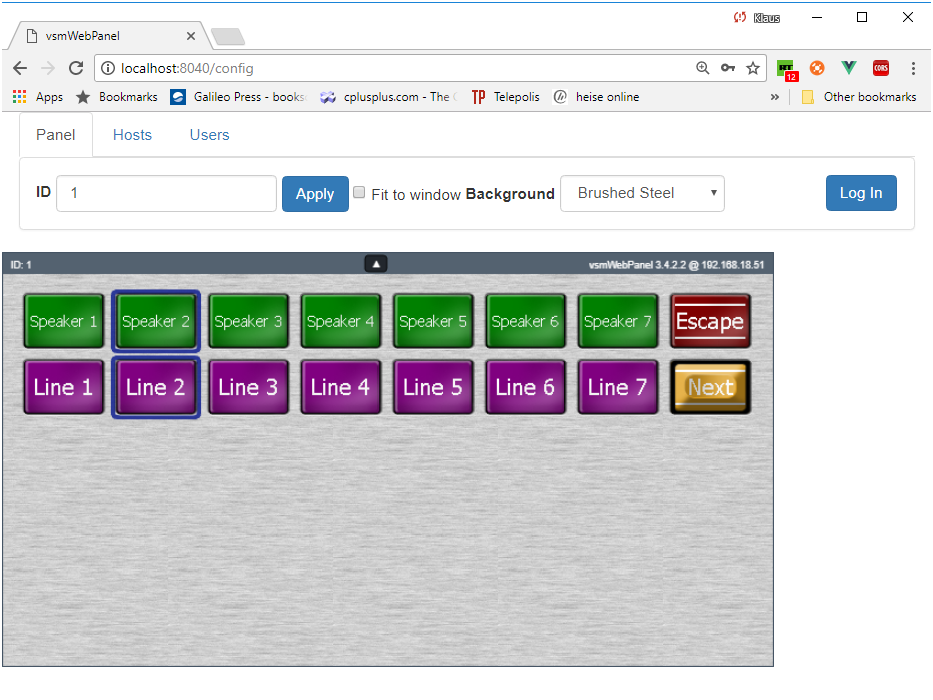
Just enter a panel ID which can be found in the running vsmStudio configuration and commit it with the Apply button. Instead of the Apply button, the ENTER key can be used as shortcut for switching panels. The content of the panel should update following your commit.
The Panel tab contains some other settings:
Feature | Function |
Fit to window | Enable this checkbox to align the panel size to the window size (the panel will not get enlarged, but will shrink to fit smaller windows) |
Background | This selection allows you to choose a background color / picture for your panel |
Log In | This button reopens the login view and allows you to access the panel with different access rights |
User Management
The Users tab is only visible for users with admin rights (like the pre-defined vmAdmin). Use it to create, update and delete user profiles.
There are 3 categories of user accounts with differing rights:
user category | can use panel | can change panel id | can manage users |
guest | yes | no | no |
panel user | yes | if granted | no |
administrator | yes | yes | yes |
You can also temporarily block users by enabling the option “Access Denied” or restrict user access to a specific workstation IP by entering an address into the field “Bound to IP”.
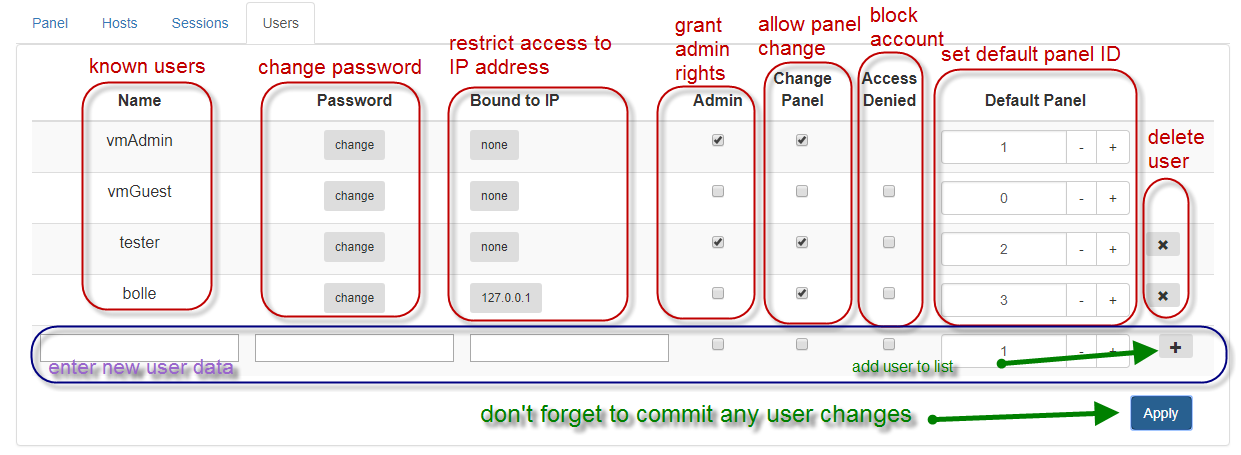
The Users tab lists all users and provides access to all of the account management options:
Changing a panel in the “panel” section is always temporary until a reload.
After a browser reload, vsmwebPanel always loads the "Default Panel" specified.
Note:
- The user "Name" cannot be changed.
- There are several options and buttons to set the "Change panel" and "Admin" status of the user, and also set their "Default Panel" (or only allowed panel).
- The X button allows a user to be deleted.
- The empty line at the bottom of the list allows you to set all the properties for a new user, and then add the user by clicking on the + button (on the right).
Don't forget to click on the + button to add a new user to the list.
All changes must be committed by clicking on Apply.
Password Change
You should change, at least, the default password for the user vmAdmin.
To change the password, click on the Change button for that user and enter an individual password:
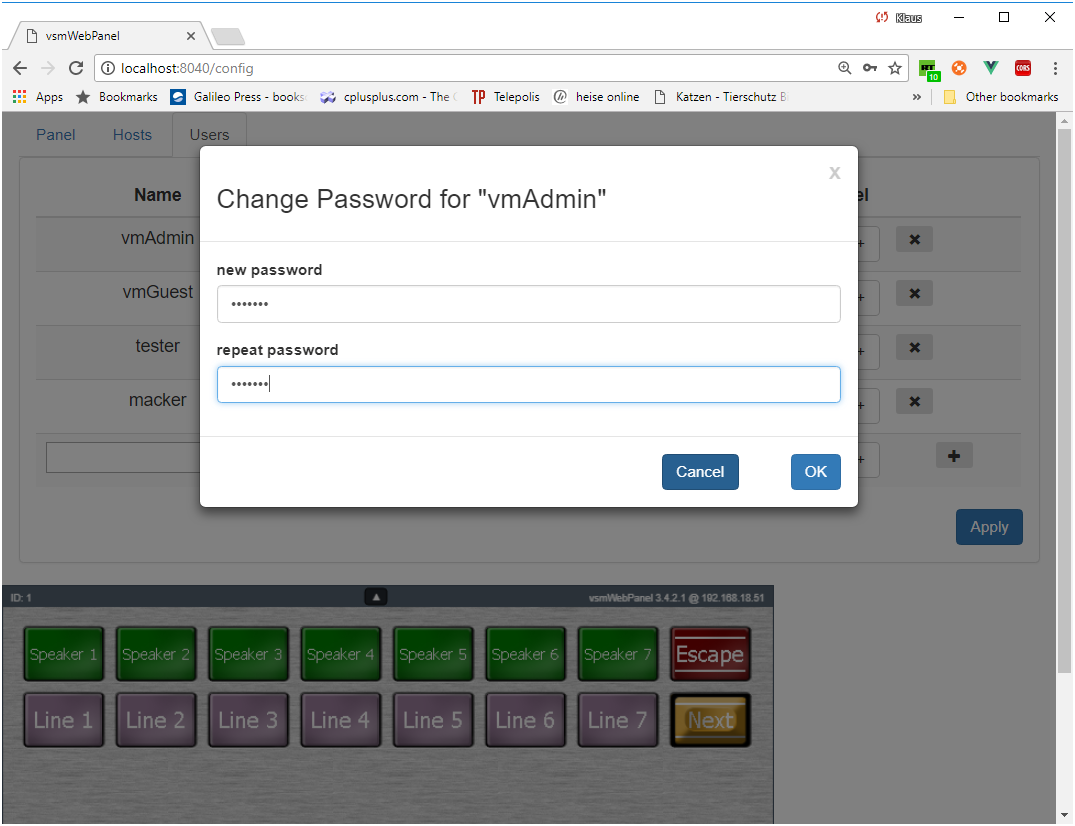
All passwords are encrypted, for storage, to provide a moderate level of security.
Bind User Account to Device
By default, a user can access all of his permitted panels from any device. However, sometimes it is required to restrict the access from a specific workstation or device.
To resolve this, an administrator can assign a specific device IP-address to a user account - click on the None button in the "Bound to IP" field and enter a valid IPv4 address:
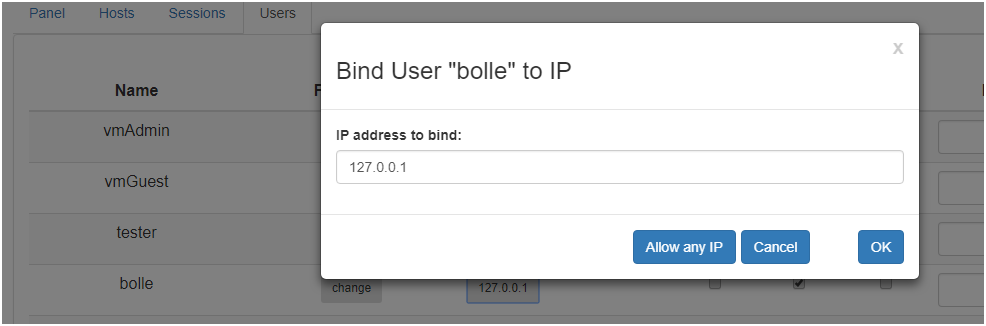
The button Allow any IP can be used to remove the binding.
Binding to address 127.0.0.1 (localhost) can be used to limit users to the server where the vsmWebPanel instance is running.
Temporary Block User Account
If, for some reason, a user should not have access to some panels, then select the "Access Denied" checkbox for the user and confirm by clicking on the Apply button. Note that this option is disabled for pre-defined users (vmAdmin) and the current user.
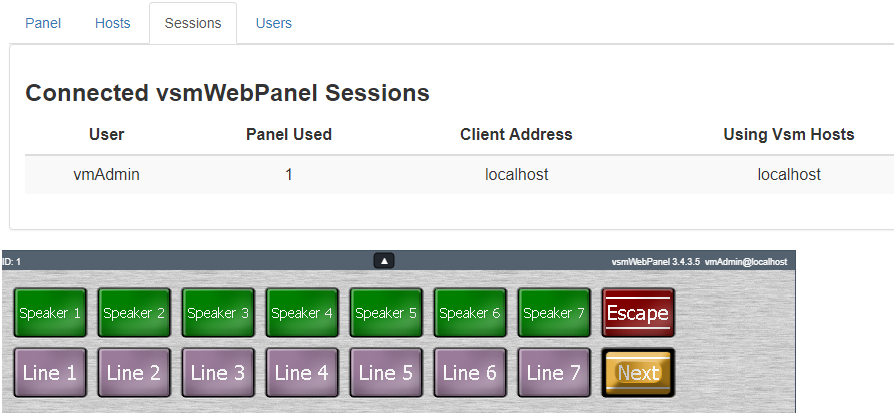
Session List
Another tab of the User Management view is labeled Sessions. This is useful when managing several panel devices from one vsmWebPanel instance, as it lists the current connections; which user is accessing which panel ID from which vsmStudio server and client device:
Error Handling
If for some reason the connection to the vsmWebPanel service on https://localhost:8040 (or wherever it is hosted) gets lost, the following error message might appear:
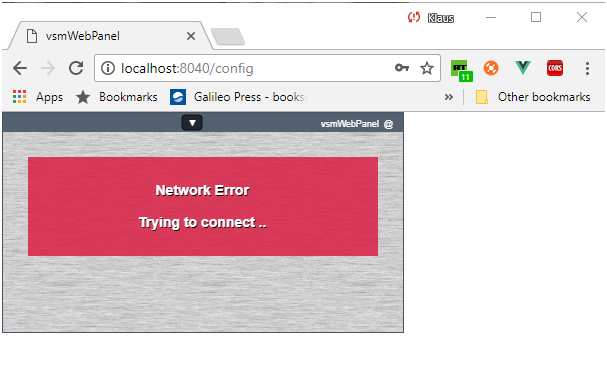
The vsmWebPanel web application, running in your browser, will try to reconnect its service back end until you restart that service or solve the connection problem. The "Connected" message will be displayed as soon as a connection to the back end service is made. All errors shown in this way are severe, and will result in a continuous reloading of the application.
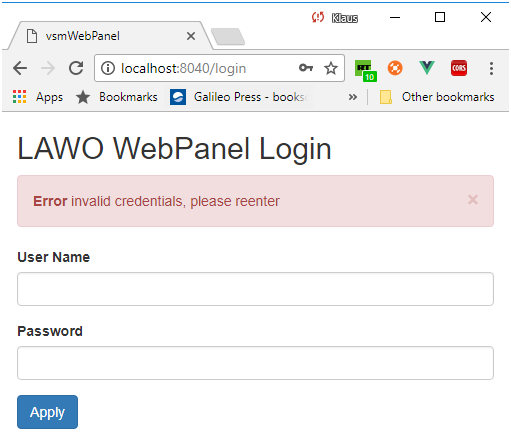
Less severe errors, such as incorrect passwords, are indicated using a small alert bar at the top of the page. The alerts can be removed by clicking their X (close) button:
For help resolving potential problems, please see the Troubleshooting section.
Working with vsmWebPanel
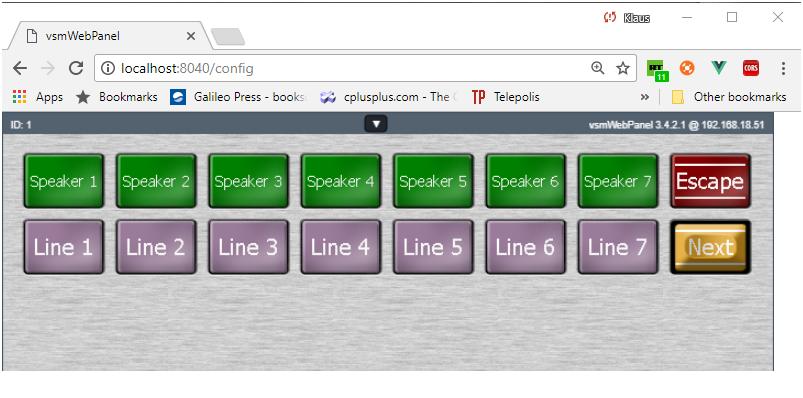
After login (or auto-login) the configuration menu is collapsed. It can opened by clicking the ∇ button in the panel's title bar (the triangle points to the next movement of the panel when toggling to show/hide the menu bar).
The title bar displays the current panel ID (on the left), plus the vsmWebPanel version and the IP address of the vsmWebPanel back end service (on the right).
vsmWebPanel browser windows will update constantly while using the panel editor for direct control of panel changes.
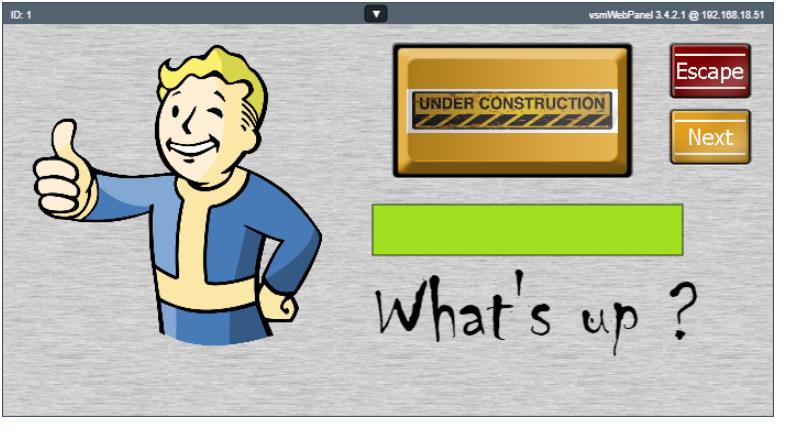
Although vsmWebPanels only mimic hardware panels, they can render some graphics and available fonts as part of a button, or with the picture and text page items. Other (unsupported) page items are rendered as simple rectangles, where you can customize their background and border colors (as in the green rectangle on the Scheduler page shown below):