diamond VX - Settings
The 'Settings' dialog box can be used to customize the operation for the current user.
Please note that any changes made are not persistent, and are reset to the default values once the app restarts. The default values can be changed by editing the "Emberdefault.ini" file (as described later).
1. To open the dialog box, touch the user icon and select Settings (from the user menu).
You must be logged in to access the Settings button.

2. Use the tabs on the left to select a page of settings.
3. To close the dialog box, select the X icon (top right).
In the current release, there are five pages of settings.
'Settings → Meters'
This tab includes two options for the meters in the 'Channel Strip' page.
The Channel Strip option defines whether the input meters show peak metering, momentary loudness or both.
To make a change, touch the current value and select an option from the drop-down menu:
- Peak = peak metering only.
- Loudness = momentary loudness only.
- Peak & Loudness = peak metering + momentary loudness.
The Correlation Meters option enables (or disables) the correlation meters.
'Settings → Source Input'
This tab opens the 'Source Input' page. It can be used to assign a Power Core input to a source.
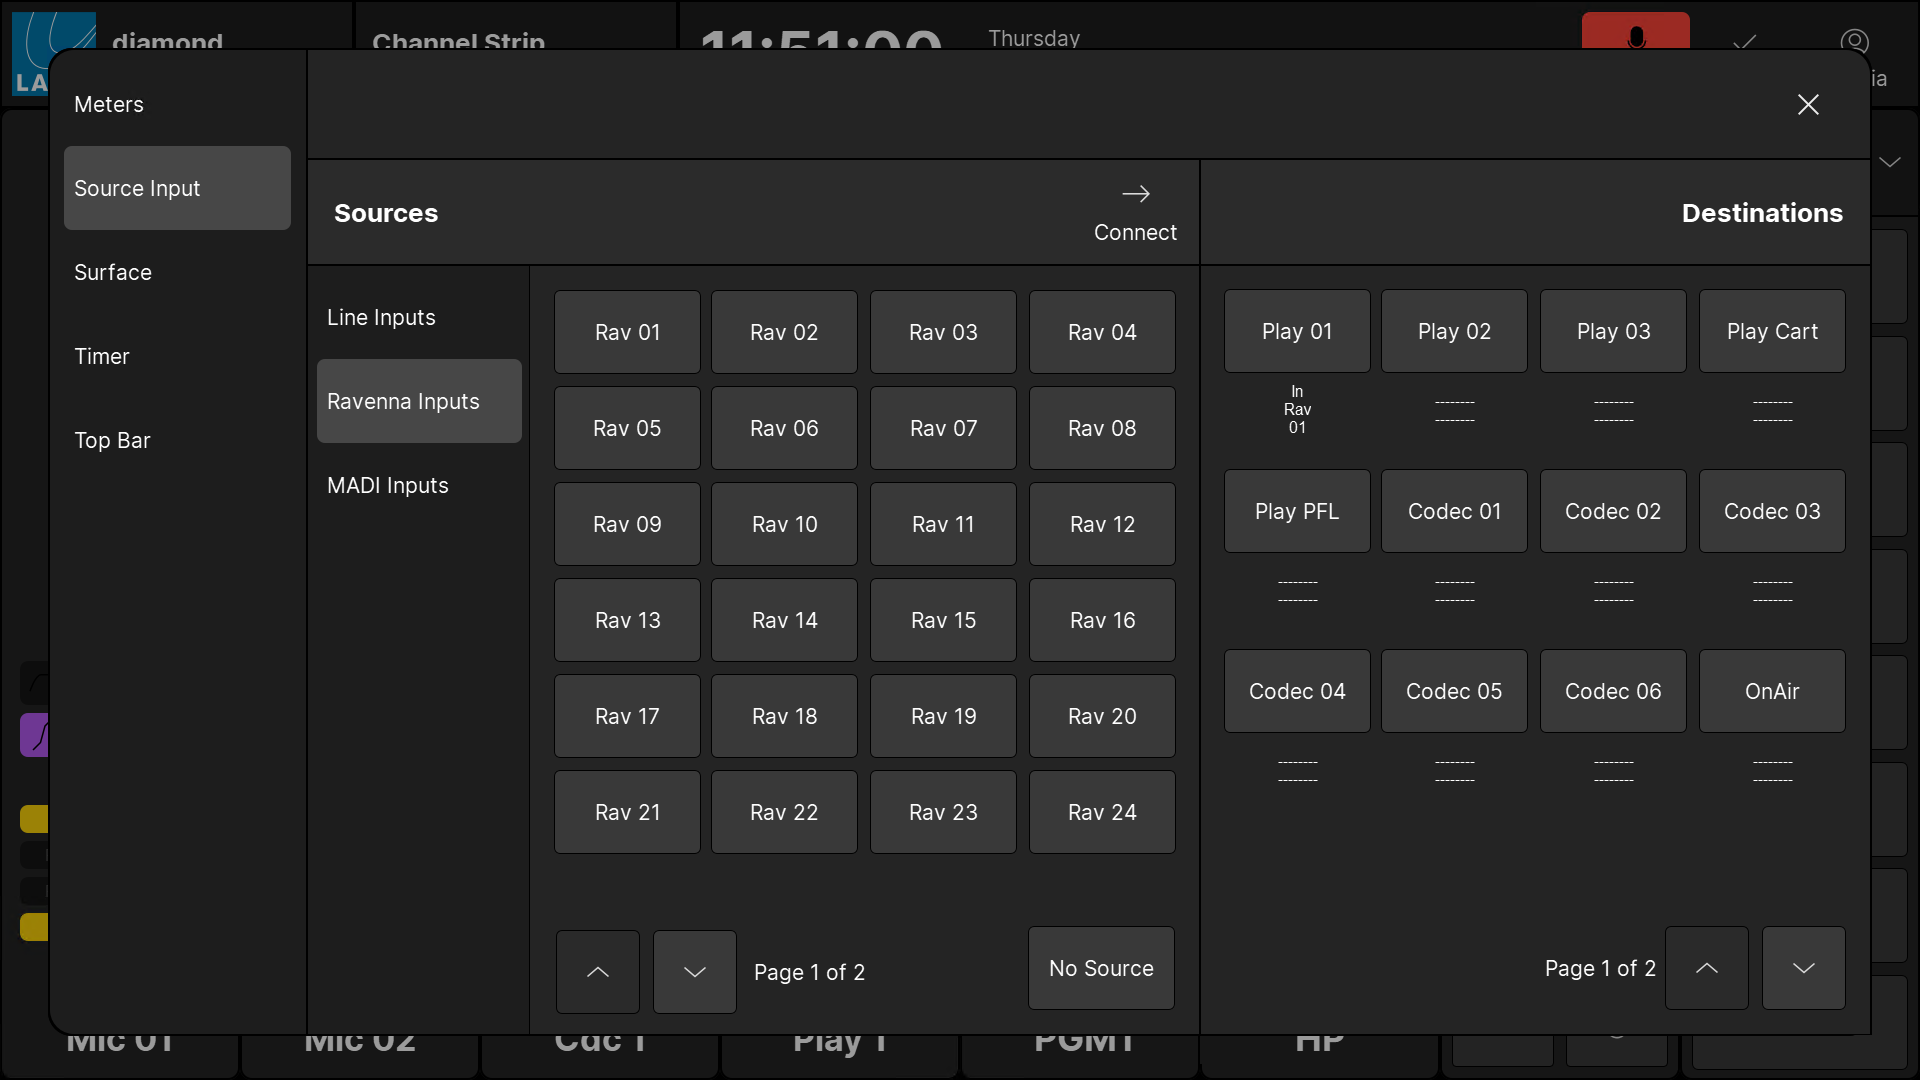
It is designed so that any Line, Ravenna or MADI input can be assigned to the more generic sources, such as Playouts and Codecs. The page is divided into two halves: Sources (on the left) and Destinations (on the right). The available sources and destinations are defined by the configuration. Note that, in this instance, the Sources are all Power Core inputs, and the Destinations are "sources" that can be assigned to a fader strip.
On the left, the Sources are divided into categories using the side panel tabs. On both sides, you can page through the available options using the up/down arrows beside "Page x of y".
To interrogate the existing connections:
- Under 'Destinations', use the up/down arrow buttons to select a page.
- If a destination is connected, then the source name appears below the output. For example, the Power Core input "In Rav 01" is connected to the source "Play 01".
- If a destination has no source, then you will see two dashed lines.
To make a connection:
- Under 'Sources', select an input category and page, and choose a source - the selection flashes in blue.
- Under 'Destinations', select a page and choose an output - the selection flashes in blue.
- Press Connect - the connection is made.
To disconnect an output:
- Under 'Destinations', choose the output you wish to disconnect - the selection flashes in blue.
- Under 'Sources', select No Source.
- Press Connect - the source is removed.
'Settings → Surface'
This tab includes five options that affect the displays on the surface or the GUI layout.
The first two options change what is shown in the fader strip 'Source Display'. Each option can be turned on or off independently.
- Show Icons in Fader Displays - shows the icon assigned to the source.
- Show Userlabels - shows the two user label lines.
The next option changes the behavior of the ambient light detectors on the central controls module:
- Surface Ambient Light Sensor (on) = surface brightness adjusts automatically according to the ambient light levels.
- Surface Ambient Light Sensor (off) = surface brightness remains the same.
The last two options can be used to change the layout of the 'Channel Strip' page so that it matches the surface hardware. Each option can be turned on or off independently.
- Swap Slots - swaps the position of the channel strips from left to right. This option should be enabled if the Fader module is fitted to the right of the central controls.
- Combo Module - changes the layout from 4 channel strips + 4 master slots to 6 channel strips + 2 master slots. This option should be enabled if the surface is fitted with a Combo module.
'Settings → Timer'
This tab defines the trigger for each timer when Auto mode is enabled. The option can be set independently for Timer 1 and Timer 2. In each case, there are two possibilities:
- Mic Only = the timer counts only when a Mic source fader is open (applies to all Mic sources).
- All Faders = the timer counts when any fader is open (applies to all faders).
Note that this option only becomes active once Auto mode is enabled. If Auto is turned off, then the timer operation is manual.
'Settings → Top Bar'
This tab controls what is visible in the top bar (of the GUI). Each option can be turned on or off independently.
- Show Clock - shows the system time and date.
- Show Mic timer - shows the mic timer. This lights in red and counts up from 00:00 once a Mic source fader is open.