SoP Explorer - Other Update Methods
This topic covers the other two update methods: Selected and Force. You can use the first method to update a specific component. The second method can be used if both the Software Update Wizard and Selected Update fail.
'Selected' Software Update
This method updates the software on a specific component.
1. Using the system tree (on the left), select the component (e.g. IOs).
2. Then select the module(s) you wish to update.

You can select multiple modules by using the SHIFT or CTRL buttons on your keyboard.
- To select a range: click on the first entry, press and hold SHIFT, and then click on the last entry.
- Once a range is selected, press and hold SHIFT and click to increase (or decrease) the selected range.
- Alternatively, press and hold CTRL and click to select (or deselect) individual modules.
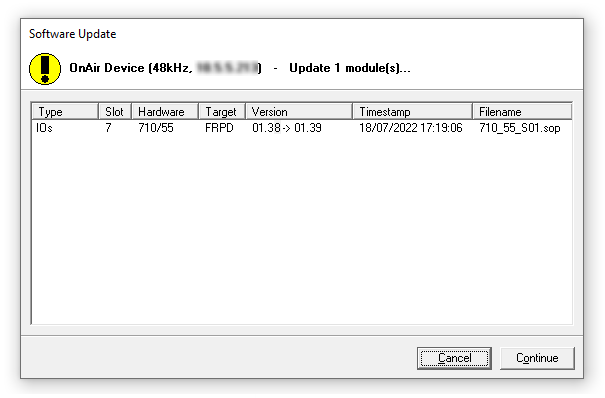
3. Open the 'Software Update' dialog box, either from the main menus (Run → Software Update → Selected) or toolbar (![]() ).
).
 3. Check the actions and click on Continue to start the update.
Software updates can take several minutes. The progress is shown in the status bar at the bottom of the SoP Explorer window. Once the update is complete, the system cold starts.
4. Wait for the system to reboot and then click on the refresh button on the toolbar ![]() .
.
5. Now check the status of the updated modules.
If they are equalized ![]() , then the update is successful.
, then the update is successful.
'Force' Software Update
This method can be used to transfer a specific set of software to a component.
Important: It is recommended to use this function with caution and only if all other update methods have failed.
A forced update does not check the hardware status of the component before performing an update. Thus, it is possible to transfer the wrong software to a module in error and, potentially, leave the system inoperative!
1. As before, use the system tree to select a component (e.g. IOs).
2. Then select the module you wish to update.
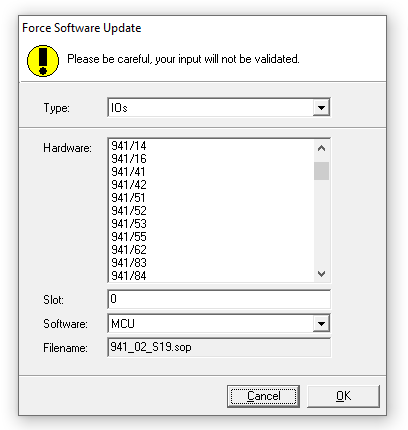
3. Open the 'Force Software Update' dialog box by selecting Run → Software Update → Force from the main menus.

4. From the drop-down Type menu, select the device type.
5. From the Hardware list, select the type of component.
6. In the Slot box, enter the slot position where the software modules should be loaded to. (This box is only active for IOs.)
7. From the drop-down Software menu, define the software module.
8. Check the settings and click on OK to start the update.
Software updates can take several minutes. The progress is shown in the status bar at the bottom of the SoP Explorer window. Once the update is complete, the system cold starts.
9. Wait for the system to reboot and then click on the refresh button on the toolbar ![]() .
.
10. Now check the status of the updated modules.
If they are equalized, then the update is successful.