HOME Apps - New App
The New App button in HOME's 'Devices' page can be used to create and configure a new app. This can be done, at any time, with or without an app server.
Overview
The process of creating a new app is a simple one: click on New App, choose an app type, enter a label (that is unique), check/edit the initial configuration and click on Add (to confirm).
New App vs Duplicate App
Apps can be added to the HOME system in one of two ways: using New App (to create a new instance) or Duplicate App (to copy the initial configuration of an existing instance). Please bear in mind that New App creates a single instance, while Duplicate App can make several copies. For more information on duplicating an existing app, please see HOME Apps - Duplicate App.
In each case, a unique label must be entered for each app added to the HOME system.
Initial Configuration
These initial configuration parameters appear in the 'New App' dialog. To streamline the process, a set of default values are entered and so, in most cases, all you need to provide is a label for the app.
When an app is started for the first time, the initial configuration values are loaded and saved (elsewhere). From here on, there are some parameters that can only be changed when the app is stopped (by editing the initial configuration), and others that can be modified while the app is running (using the 'runtime' controls). If parameters can be edited in both the initial configuration and during runtime, then the initial configuration is overwritten by the runtime controls as the latest (runtime) value always wins.
An example of how this works in practice is provided here. For now, it is useful to know that:
- If a parameter can only be edited in the initial configuration, then the user must first stop the app, edit the initial configuration (via 'Edit App' or 'Edit Apps'), and then restart the app. Any changes are applied on the next start up of the app. If there is a change to the resource usage, then this is displayed in the 'Start App' dialog.
- The 'runtime' controls appear, once the app is running, in the other 'Device' settings pages: Senders, Receivers, Advanced, etc. The latest values are saved (by HOME) whenever a change is made and loaded on the next start up of the app. Note that the runtime controls have no impact on the resource usage. If a parameter has a runtime control then, after the first start-up of the app, any changes must be made using the runtime control (and not the initial configuration), as the initial configuration will be overwritten by the runtime value on the next start up of the app.
Device ID
The Device ID is displayed in the app's general settings page.
Creating a New App
The instructions below describe how to create a new HOME Multiviewer. The same principles can be applied to other HOME Apps.
1. From HOME's 'Devices' page, select the New App button.
2. Choose an App type (from the available options) and select Next.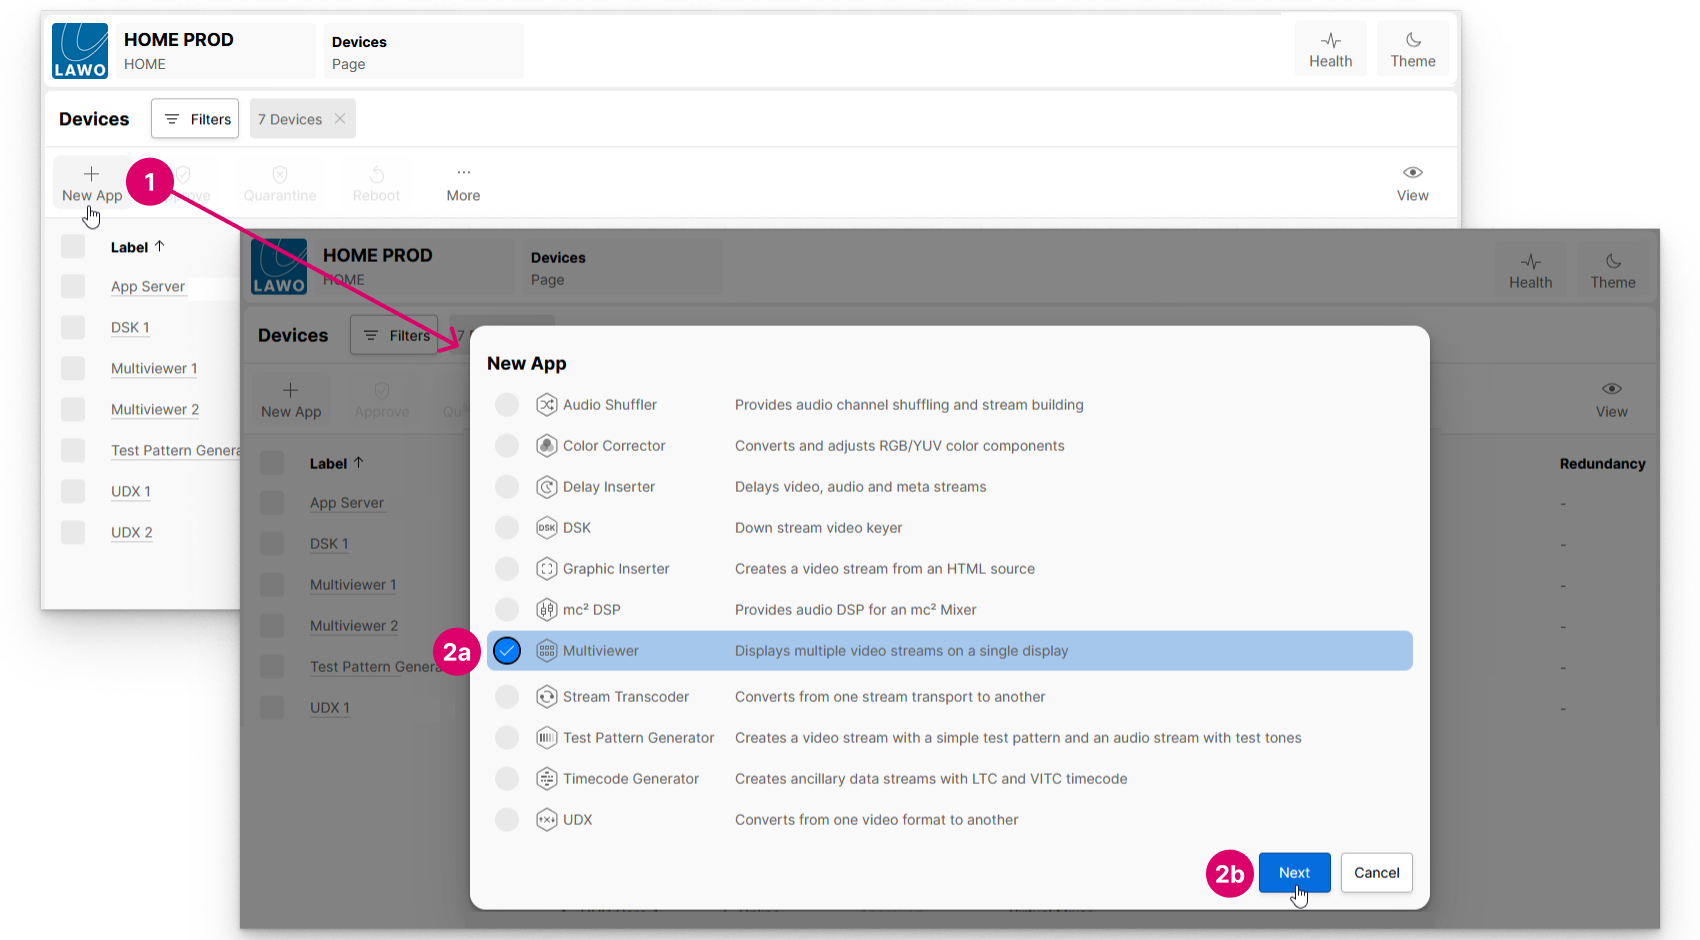
3. The "New App" dialog appears showing the initial configuration of the app.
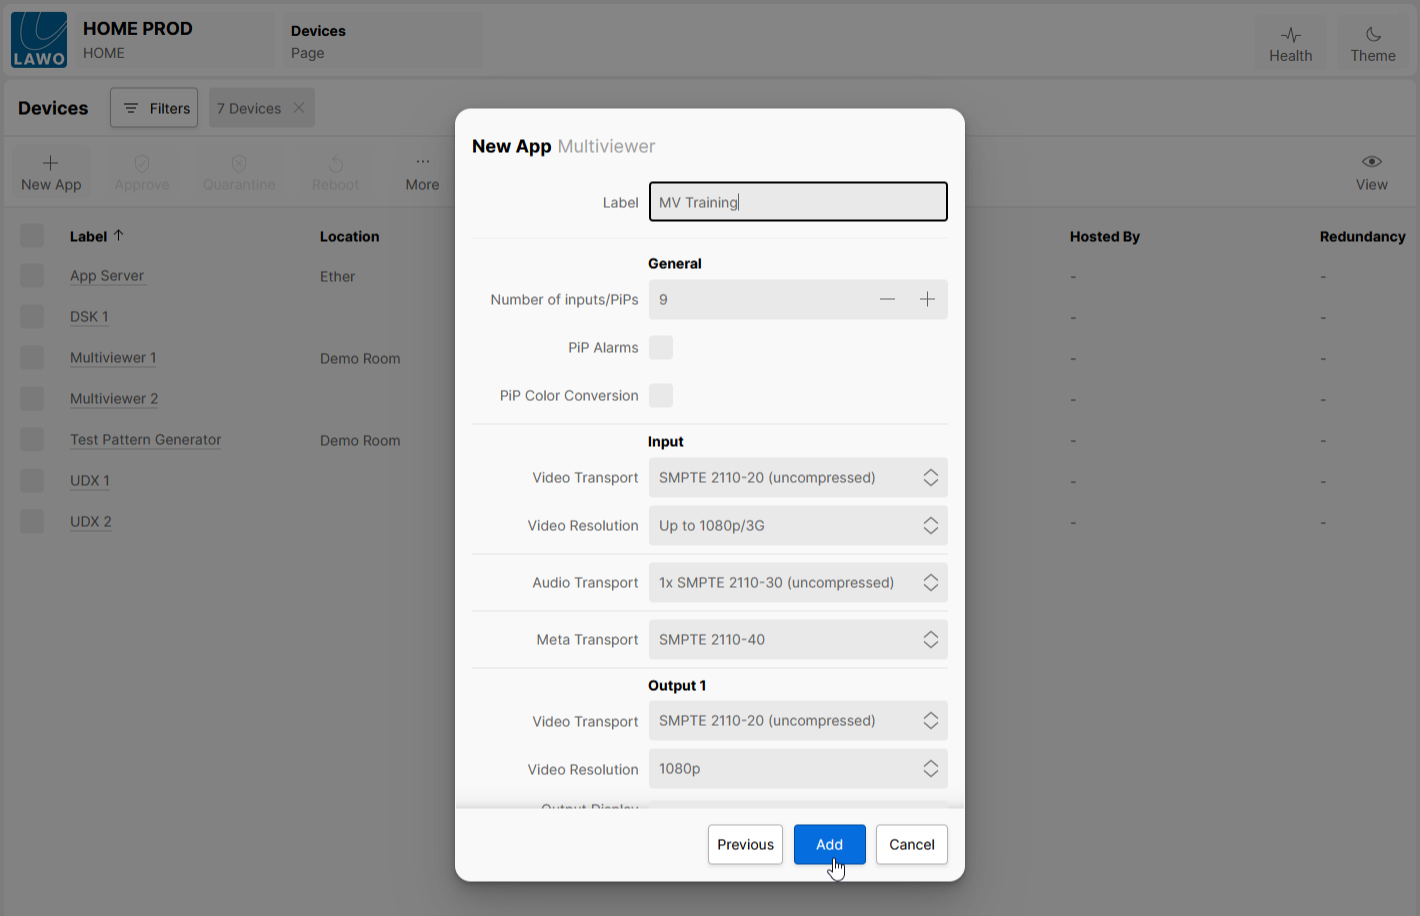
The available options define the fundamental functionality of the app, and vary depending on the App type. By default, the fields are completed automatically, apart from the Label field which must be entered manually.
- Enter a label for the app. This must be unique (within the HOME system).
- Then check and, if necessary, edit the initial configuration parameters.
Important: It is recommended to check the initial configuration parameters carefully, so as not to over specify the app. Options such as the number of I/O, the stream transport type, etc. determine how many licenses and/or credits are required to start the app, and also have a cost in terms of the CPU resources (in an app server) and streaming bandwidth (in the network). If you need to edit the parameters later, then this can be done from the app's 'Device → General' settings page (as described here).
4. Once you are happy with the options, select Add. The app is created and added to the 'Devices' list.
If the 'Devices' list has one or more Filters applied, then you may need to clear or edit these in order to see the new app.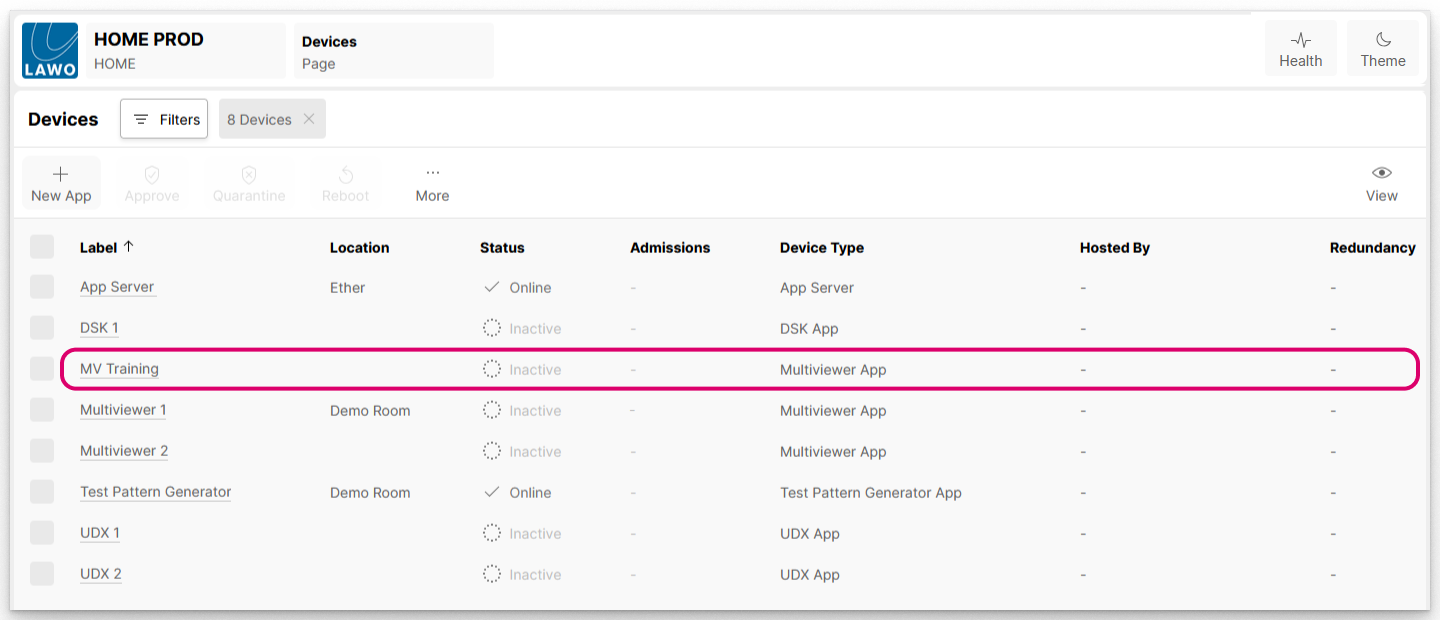
Please note:
- The app label must be unique (to the HOME system). If the label is not unique, then an error appears (when you select Add).
- At this stage, the app is prepared but not started and so its Status shows as Inactive.
- Clicking on the app label opens the 'Device → General' settings where you can start (or stop) the app, edit its label, add a location and edit the initial configuration.

In a larger network, it is a good idea to enter a location so that you can filter the 'Devices' list.
Once created, an app can be started using the Start App function (described here).