This topic describes how to enable the Power Core RP v2 integration on the Lawo mc2 console.
Introduction
On Lawo's mc2 consoles, a custom function must be used to define each Power Core RP v2 that can be connected.
Each mc2 console can mount up to four Power Core RP v2 units simultaneously, but it is possible to define more connections.
More information about custom functions can be found in mc²56 - Custom Functions.
Configuring a Custom Function to mount the Power Core RP v2
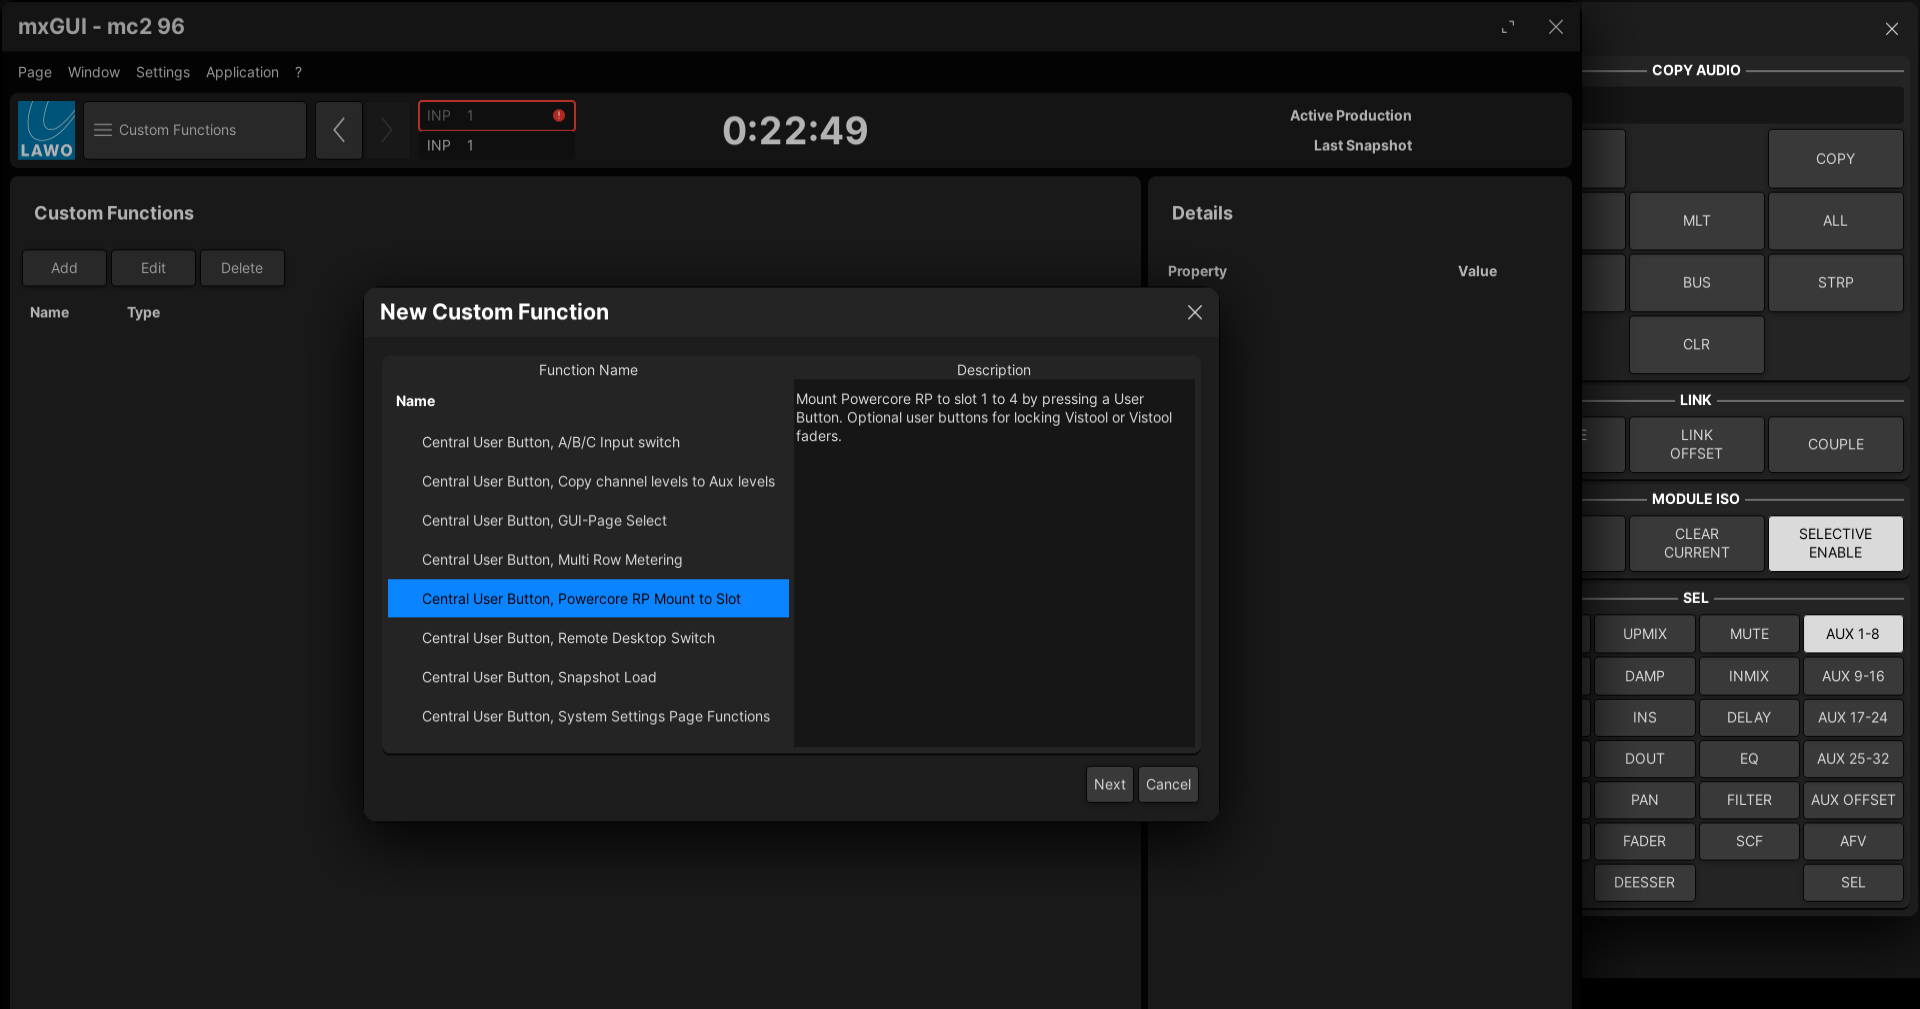
1. Open the Custom Functions display on the Central GUI. Select the Central User Button, Powercore RP Mount to Slot function and click Next.

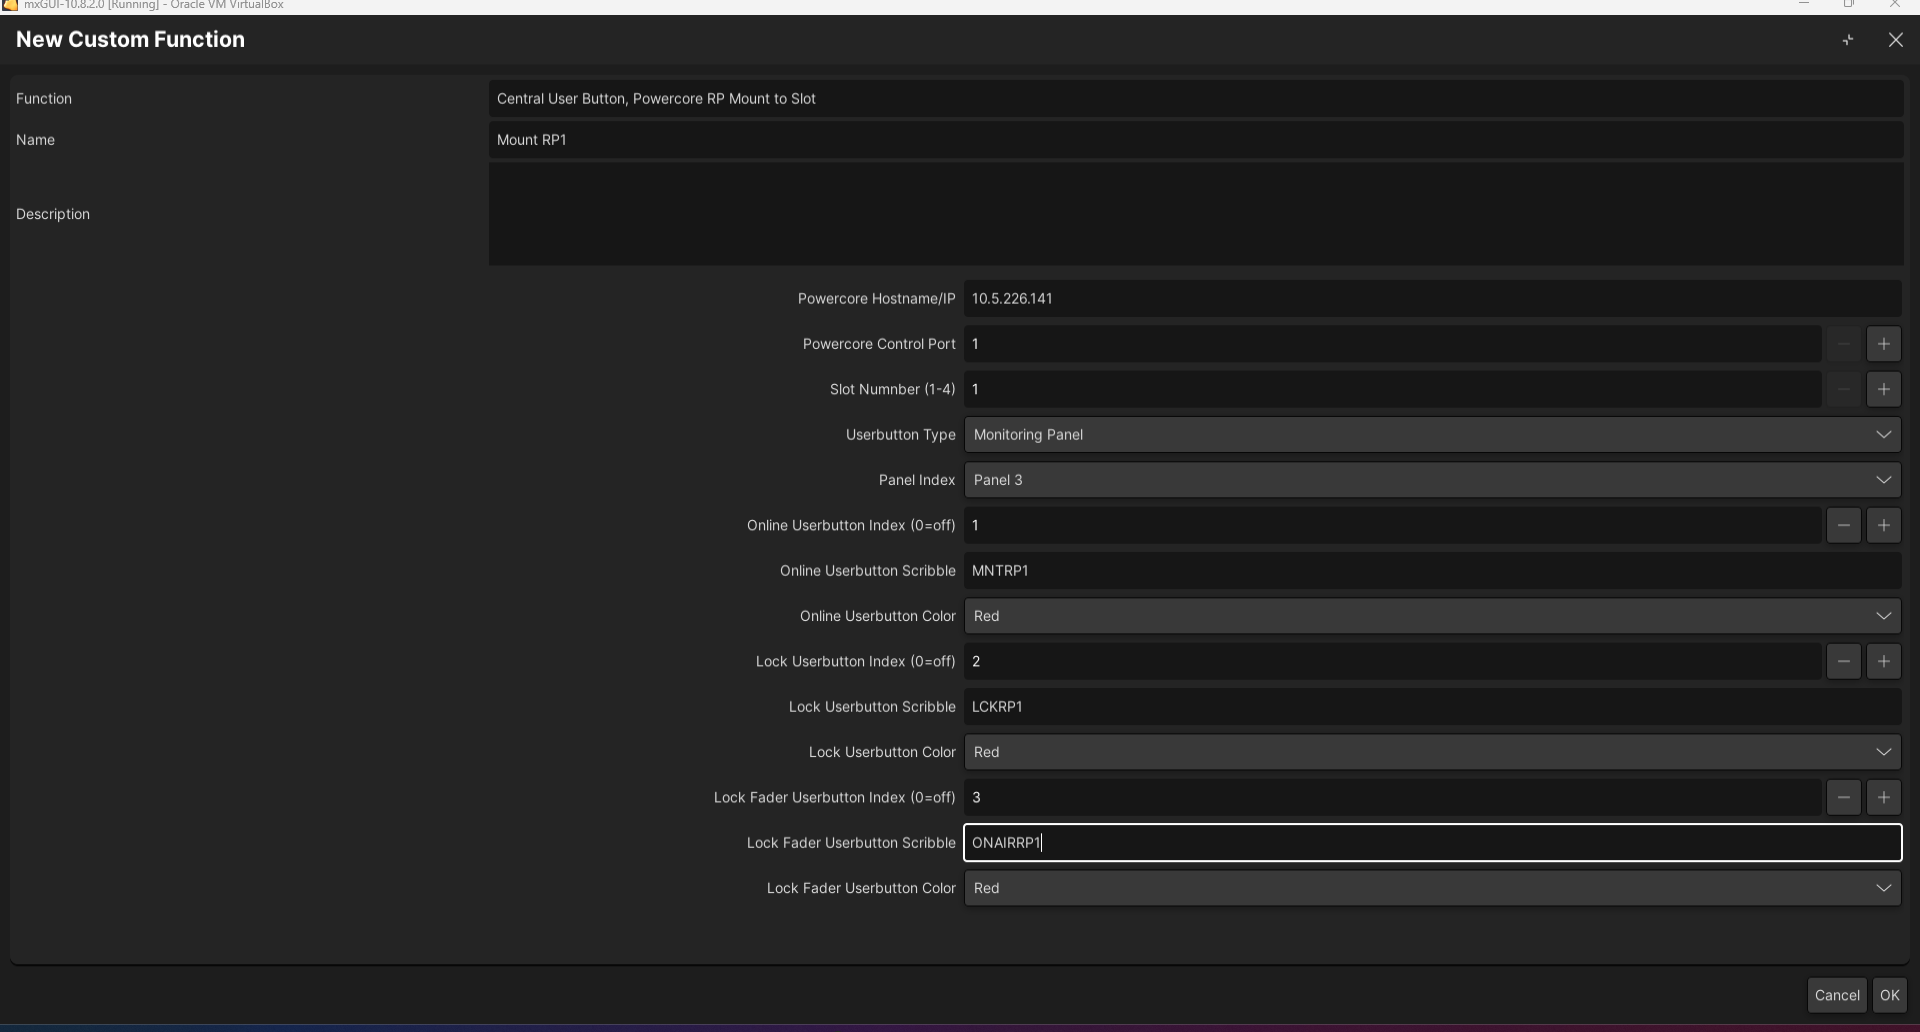
2. Set the name of the Custom Function and provide a description if desired.
3. The Powercore Hostname/IP should be set to the control IP address of the Power Core RP v2.
4. Set the Powercore Control Port to 9001.
5. Select a Slot Number to mount the Power Core RP v2 into.
6. Select a Userbutton type and Panel Index to use for the RP Mount and Control keys. For more information about the Userbutton panel types and indexes, see Programming User Buttons.
7. Select a Userbutton Index for the Online, Lock, and Lock Fader user buttons. Set the Scribble strip label for each button, as well as the color the button will turn when the function is active.

8. Click OK to create the custom function.
Mounting the Power Core RP v2
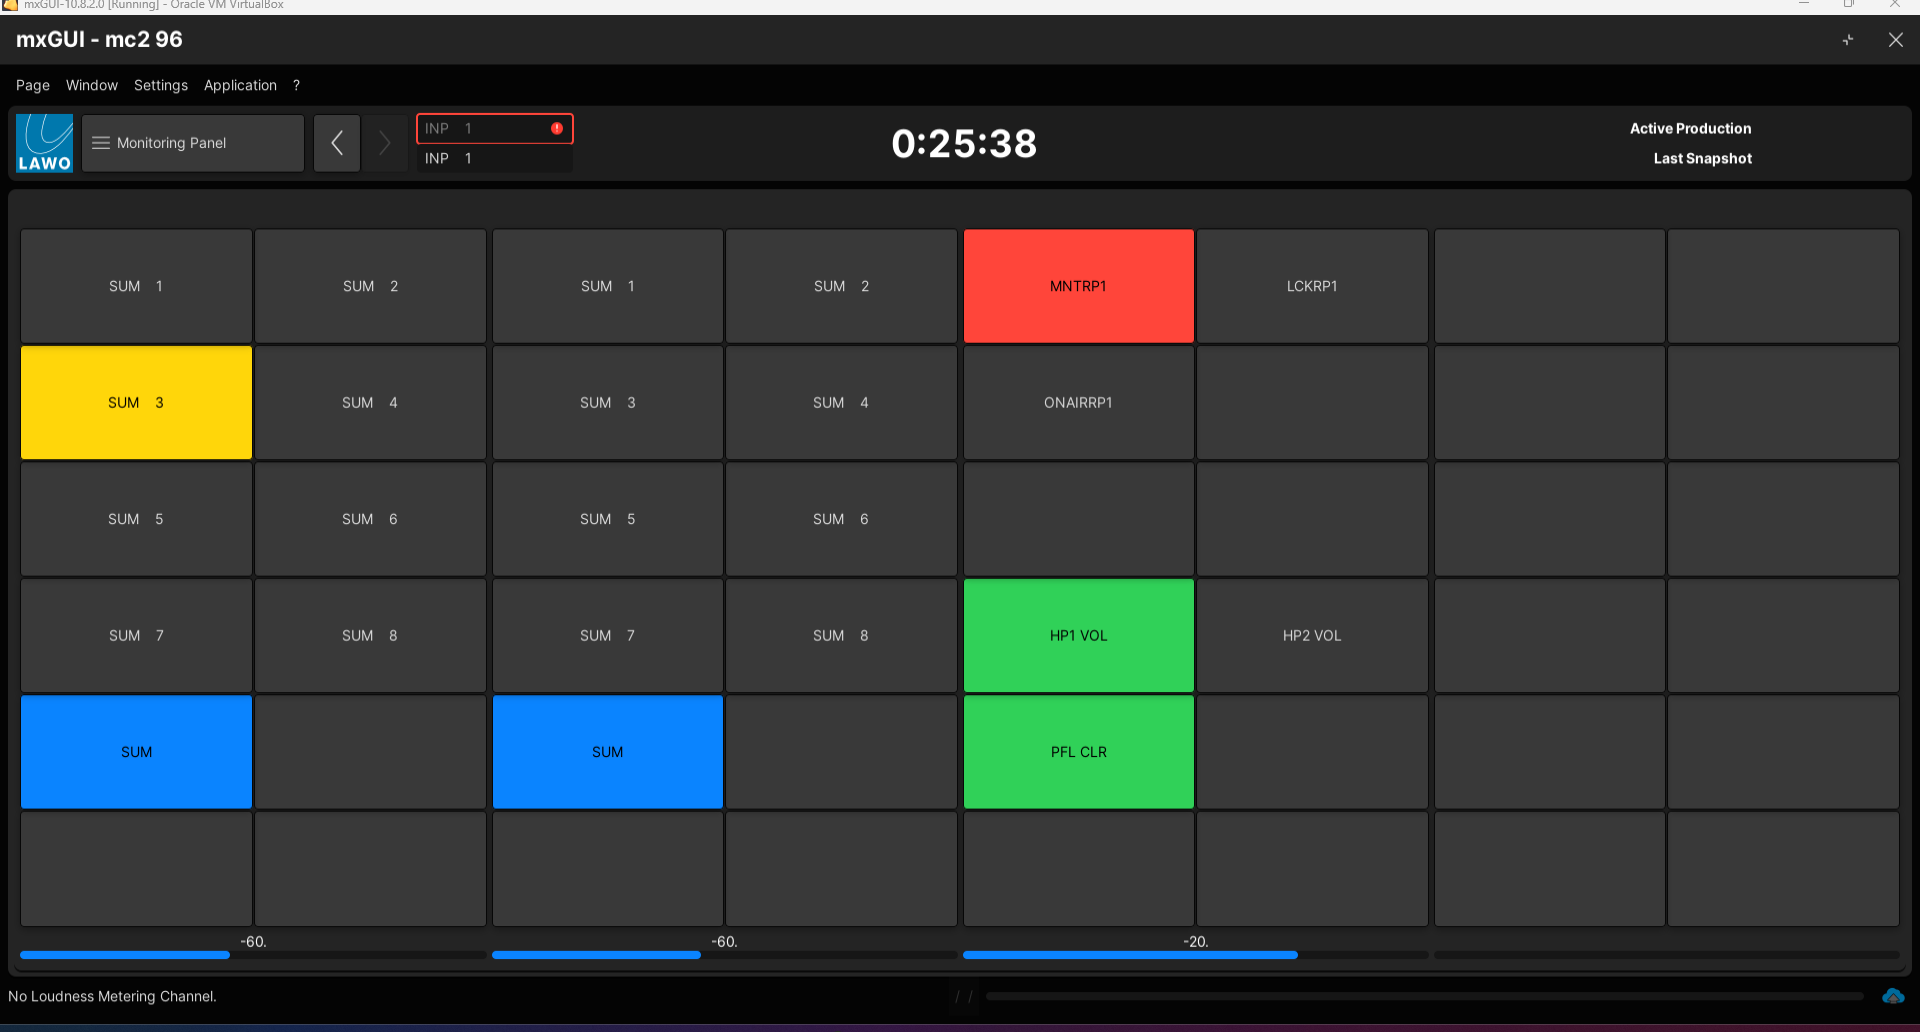
To mount to Power Core RP v2, press the Userbutton defined in the custom function associated with the Power Core RP v2 that you wish to mount. If the connection is sucessful, the Userbutton lamp will illuminate.
Once a Power Core RP v2 is mounted, the channels and auxes can be assigned to fader strips using the normal workflow.

Next Steps
Once you have completed the steps above, the system is now ready to use. Go to VisTool RP - First Steps to learn more about the VisTool RP GUI, or go to Power Core RP v2 - Remote Operation from the Console to learn how to control the Power Core RP v2 from the mc2 console.
If you haven't done so already, connect and check your sync reference. Optionally, you may wish to set the system date and time or configure the network security.