Power Core RP v2 - Setup Quick Start
This topic describes the recommended workflow to configure a system from scratch.
The VisTool RP Admin tool will be available later this year.
Overview
Power Core RP v2 is supplied with a VisTool RP installer which includes two components: VisTool RP and VisTool RP Admin. VisTool RP is used to control Power Core RP v2 from a networked PC (via a GUI). VisTool RP Admin is used to update the device firmware, load different RP configuration files, and configure the VisToolRP application. To launch VisTool RP for remote operation, you must activate the "VisTool RP" license.
Power Core RP v2 ships from the factory with the default RP DSP configuration, but you can use VisTool RP Admin to load a configuration with a different streaming configuration, or you can manually load a configuration file if you require additional customization. To unlock the DSP resources, you must activate the "AP IO Node" license onto the USB dongle (supplied). After inserting the dongle, Power Core will automatically reboot and load the default configuration file. You will then need to open a Web UI connection to the CONTROL port (dwc0) to configure the correct network settings and then use VisTool RP Admin to update the device firmware.
To control Power Core RP v2 from a mc2 console. you must specify the device using a custom function.
Instructions
The instructions below describe how to install a single Power Core RP v2 device into an existing mc2 network.
To set up the system you will need a PC that is installed with a suitable web browser and the VisTool RP software. How to prepare the configuration PC is described here.
1. To boot and configure the system, the device must be powered.
Once power is applied, Power Core boots in a few seconds. The boot-up progress is shown on the front panel display.
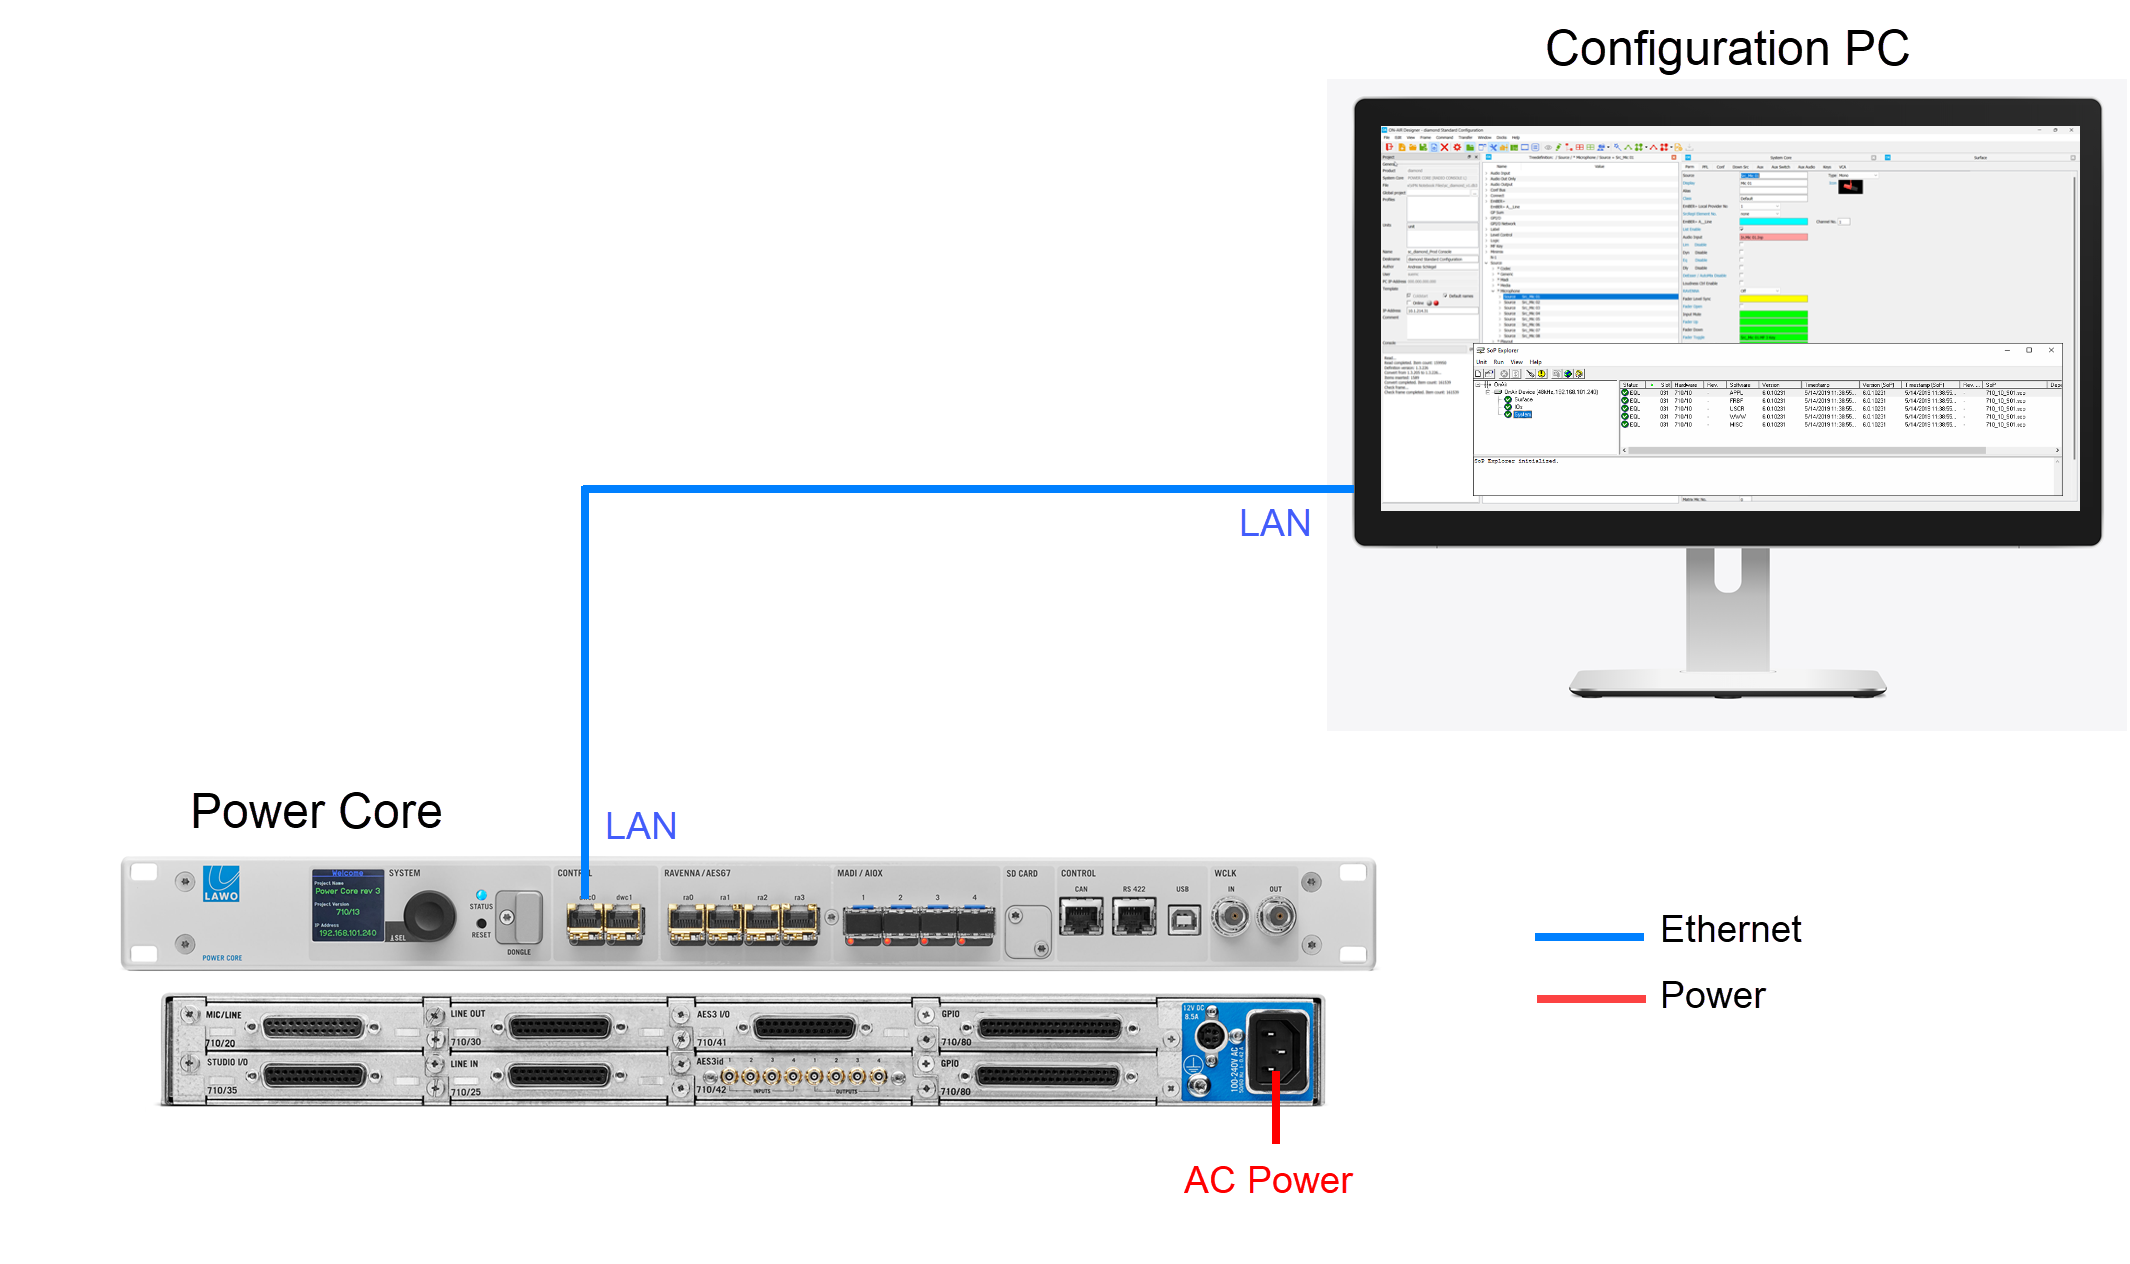
2. Start the configuration by connecting your PC's LAN port directly to Power Core RP v2 (as shown below).
It is recommended to use the first control port: dwc0 (so that you can use its default IP address 192.168.101.240).
For the cabling and network requirements, see Power Core RP - Wiring: CONTROL.
3. Configure the network settings of the first control port.
This step is necessary if you wish to fit Power Core into an existing network OR install more than one Power Core device (to avoid IP conflicts).
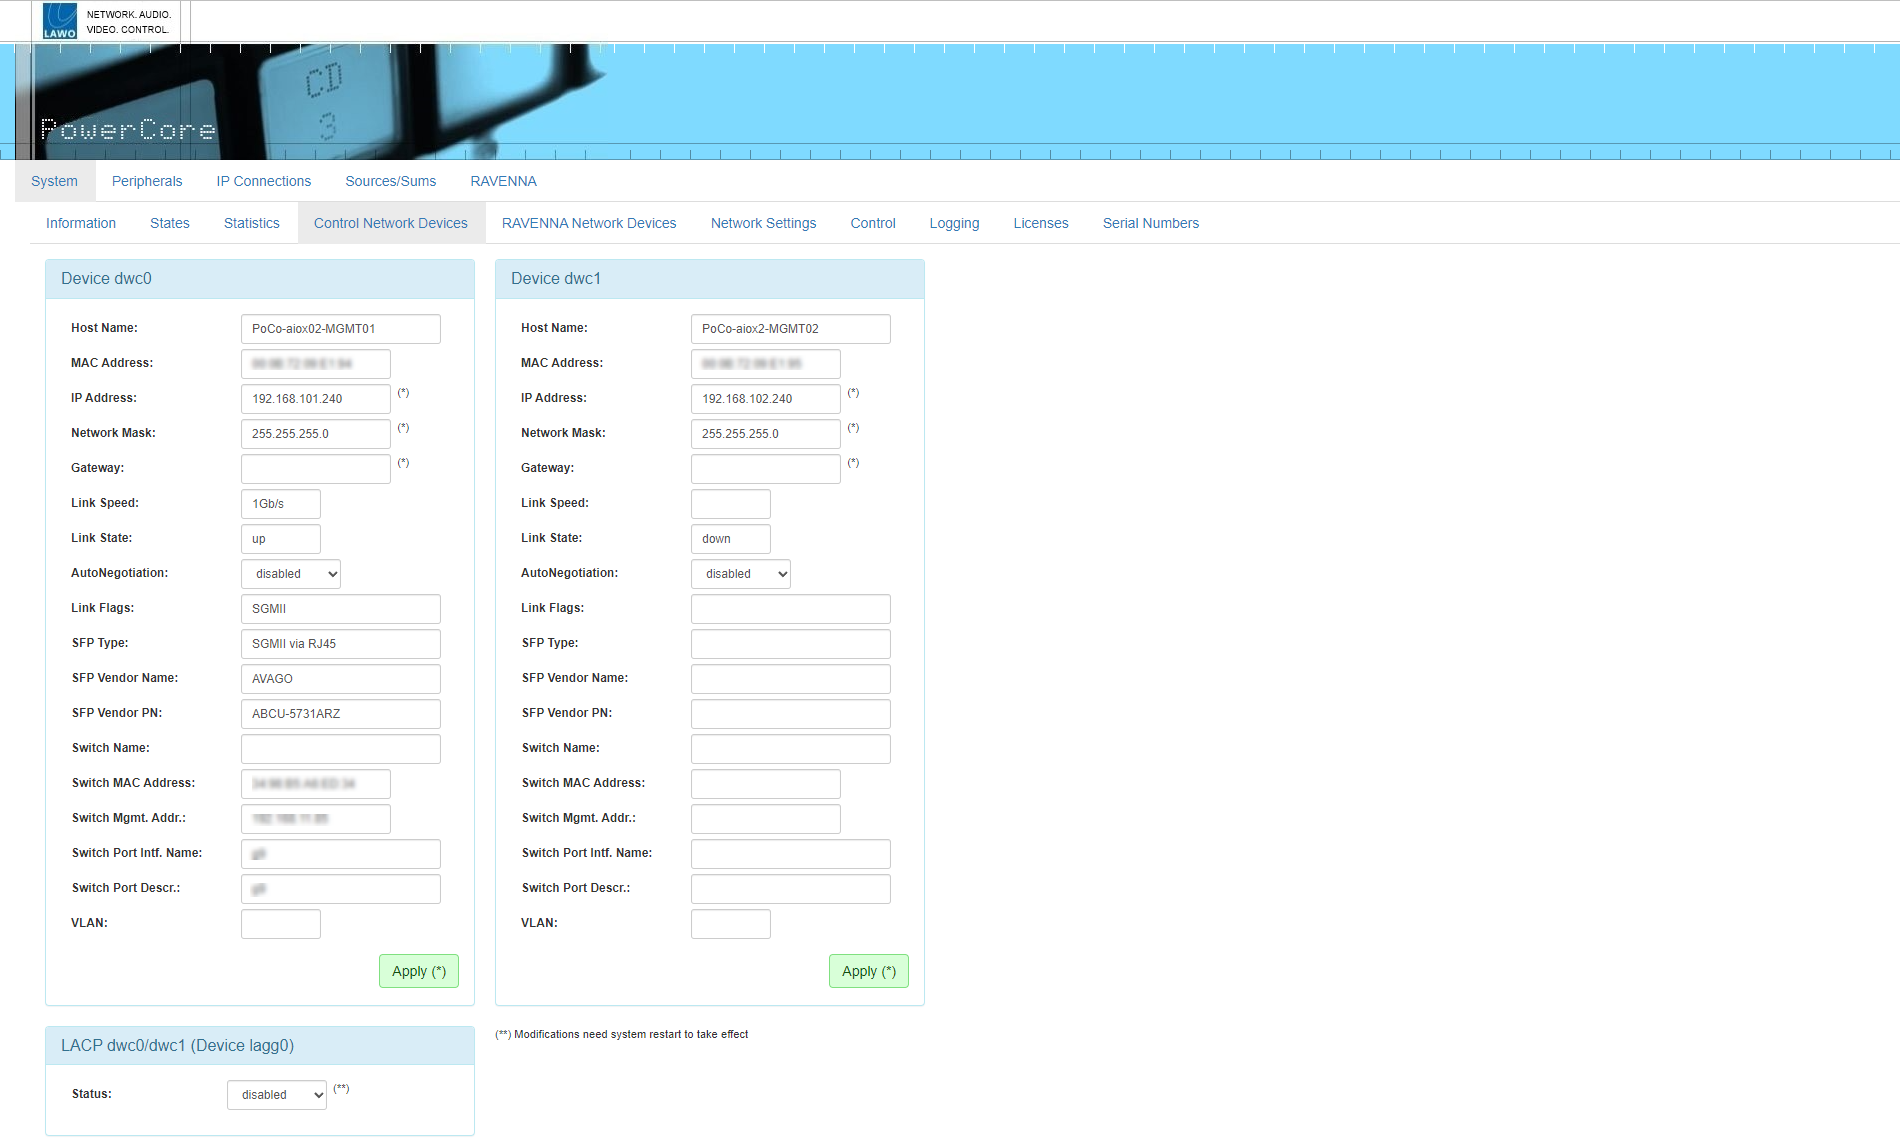
The settings are edited by opening a Web UI connection to Power Core and adjusting the "Device dwc0" parameters (in the "System → Control Network Devices" tab).
- The Web UI can be reached by entering the current IP address: 192.168.101.240
- Log in as either Supervisor or Administrator. The default passwords are orion for Supervisor and hydra for Administrator.
- Open the "System → Control Network Devices" tab and enter the required network settings.
Device dwc0 defines the first control port. If you are using the second control port, then edit the parameters for Device dwc1.
The following fields can be edited: IP Address, Network Mask and Gateway. Type in the new value(s) and select Apply to save the changes.
The screenshot below shows an example.
For more information, see Power Core RP v2 - Network Settings.
At this stage, you can reconnect your devices via the control network.
It is recommended to check the network connection to your configuration PC by re-opening the Power Core Web UI.
4. Add a summary of the remaining steps.
Next Steps
Once you have completed the steps above, the system is ready for operation.
If you haven't done so already, connect and check your sync reference. Optionally, you may wish to set the system date and time or configure the network security.
Then go to Power Core RP v2 - Getting Started to learn more about the functionality of the device.