vSNMP - Working with Device Classes
Introduction
- Configuring device classes is central to working with vSNMP. A device class models a particular type of device, e.g. a “HP LaserJet 1522” printer. To address the LaserJets in your network, you need to add a device of the “HP LaserJet 1522” device class for each LaserJet on the network.
- A device can be described and contained by multiple device classes. For example, you can create a generic device class that only contains standard network-management objects from IF-MIB and IP-MIB, adding all devices on your network to this device class. Then you can create dedicated device classes modeling the actual types of devices present on your network.
- In vSNMP, a device class contains a set of object entries which are displayed in a tree view when selecting a device class:
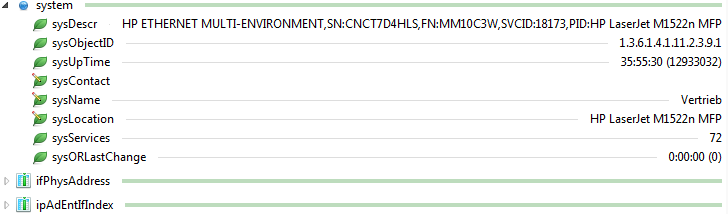
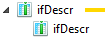
- The green bars are state indicators: The bar is green when the object entry has been saved to vSNMP.Manager and yellow when it is new or modified. Saving the device class to vSNMP.Manager (by clicking “Check In” or “Save but keep checked out”) will turn the bar green.
- Object entries usually contain one or more object cells, which represent actual MIB objects (either single values or conceptual columns).
- You can create object entries by dragging the following kind of MIB nodes to the device class:
- OBJECT-TYPE (non-columnar): Creates an object entry with a single cell.

- OBJECT-TYPE (columnar): Creates an object entry with a single cell which identifies a conceptual column.
- OBJECT-TYPE (tabular): Creates an object entry with cells identifying all column objects in the conceptual table.

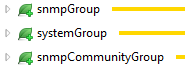
- OBJECT-GROUP: Creates an object entry with cells identifying all objects contained in the group.

- NOTIFICATION-TYPE and TRAP-TYPE: Creates an object entry with cells identifying all objects that are listed under the node’s OBJECTS or VARIABLES clause.
NOTE: Creating an object entry from a trap object does not imply any trap handling logic.
- AGENT-CAPABILITIES: Creates an object entry for each of the OBJECT-GROUPs listed under the INCLUDES clause, taking into account the VARIATION clauses defined for the included objects.
- OBJECT-IDENTIFIER, MODULE-IDENTITY and OBJECT-IDENTITY: Creates an entry containing cells identifying all objects directly below the source node.

- OBJECT-TYPE (non-columnar): Creates an object entry with a single cell.
- In the Devices tab on the left side of the vSNMP.Editor window, you can either select a device class or a device to edit the entries of the device class.
- If a device is selected, expanding an object entry node in the tree view will GET the values of the cells contained in the entry. If the device responds to the GET request, the values will be displayed next to the object cells.
- If a device does not respond to a GET request, you see a notification saying that ‘device xyz reported state XXX’. This either means that the device has gone offline, or it just does not support the requested objects.
SNMP Tables
- Conceptual tables in SNMP consist of a set of “columnar” objects, which yield multiple values when requested. A single value can be requested by appending one or more indices to the object’s object identifier (OID).
- Most of the significant data exchanged via SNMP is organized in tables, so working with tables is a central aspect of vSNMP.
- To get started with tables, select a device in the Devices Add the node
IF-MIB::ifTableto the device class. This is the standard SNMP table that lists all interfaces (like NICs, serial ports etc.); any device should support this object.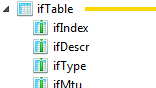
- Right-click the object
ifDescrand select Get Value, which should bring up a dialog displaying all values of this conceptual column:
In this example, two IP interfaces are present: the loopback adapter and one NIC. - Now click the “Select All” check box and then click “Create New Entry”, which adds a new object entry to the device class containing two object cells:

Both cells refer to the same MIB object (IF-MIB::ifDescr), but have different indices (1 and 2). - You can change the index of an object cell by selecting the cell and clicking on the index link:

Note that object cells in the device class need to be unique – e.g., you cannot addIF-MIB::ifDescr@1 - If the device is currently offline, you can manually configure indexed objects. To do so, right-click the columnar cell
ifTypein theifTableobject entry and click the Clone with new Index… menu item.
In the upcoming dialog, enter “1..2” as the index value. This will create cells for the indices 1 through 2. If your device has more interfaces, you can also type in a greater range.

Now click the Create New Entry button to add another columnar object entry calledifTypeto the device class. - Indices in SNMP can consist of many parts and managing them can be quite complex. Though the two ways of creating indexed object cells in vSNMP work for any index complexity:

- Up to now, you have arranged tabular data by column. You can also arrange tabular data by row. To do this, right-click the tabular object entry
ifTableand click Clone with new Index….
Enter the index as described above and you will have a new row entry:
- Arranging tabular data in row entries can give you a good overview over a specific device feature, but arranging data in columns is much more common for the following reasons:
- Columnar object entries can define formulas common to all contained cells.
- You can specify value aliases for all cells contained in a columnar object entry.
SNMP Walk
- “Walking” an SNMP device means requesting all values under a specific OID from the device. This can be very useful to determine which parts of the MIB tree are present on the device.
- To walk a device with vSNMP, select the device in the device tree and drag the MIB node from where you want to start the walk onto the device – you will see the following message below the object entry tree:

- Drop the MIB node on the message to walk the device; this process can take some time. As soon as the walk has finished and if it yielded results, the following dialog will appear:

This for example is the result of walking the OIDTCP-MIB::tcp(1.3.6.1.2.1.6). - You can now mark the objects you want to create object entries from and click “OK”. For each object decorated with the symbol
 , an object entry with a single cell will be created. For each object decorated with the symbol
  , a column entry will be created, containing cells for all marked sub-objects.
Polling
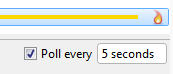
- If the value of an object may change spontaneously, you can configure vSNMP to poll the object entry containing the object. To do so, right-click the object entry you want to have polled and click “Poll”. In the details pane below the object entry tree, you can specify the poll interval:
- Polled object entries are marked with the symbol
 in the object tree.
 - Note that polling a lot of objects on a device may significantly decrease the device’s performance and use up a lot of network bandwidth.
SNMP Traps
- An SNMP Trap is a message spontaneously sent from the SNMP agent to signal a state change. Usually, traps include the following information:
- An implicit semantic meaning of the trap (e.g.
IF-MIB::linkDownmeans “interface link offline” - A set of SNMP objects that have changed value and the new values of these objects.
- An implicit semantic meaning of the trap (e.g.
- Configuration-less trap support:
- If a trap is received, the SNMP objects and their new values included in the trap message will be handled just like a response to a GET request, without taking the semantic meaning of the trap into account.
- For example, when the
IF-MIB::linkDowntrap is received and if it includes the information “interface 1 hasifOperStatus‘down’”, the object cellifOperStatus@1will receive the value ‘down’.
If the trap only includes the information “interface 1” and the newifOperStatushas to be inferred from the semantic meaning of the trap, the object cellifOperStatus@1will not change value.
- Trap-triggered polling:
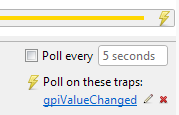
- In the common case when a trap only conveys a semantic meaning but does not transport any usable objects, you can instruct vSNMP to poll an object entry when receiving the trap.
- To do so, select the object entry you want to configure.
- Navigate to the MIB object that describes the trap. This object is either of type
TRAP-TYPE(SNMPv1) or of typeNOTIFICATION-TYPE(SNMPv2). - Drag the selected MIB object from the MIB tree to the details pane of the object entry.
- The object entry is now marked with the lightning symbol and the trap is displayed in the details pane:
- You can assign multiple traps as poll triggers of an object entry.
- Everytime any of these traps is received, vSNMP requests the values of all objects contained in the object entry.
- Trap configuration on the agent:
- How to set up traps on the managed agent differs from agent to agent, but you should always be able to enter a trap destination, which is the address traps should be sent to.
- As the trap destination you should enter the address of the vSNMP multicast group:
224.161.22.1 - Every vSNMP Manager service joins this group on startup.
- If multicast is not supported on your network, you can enter the addresses of all machines that run the vSNMP Manager service.
- The default destination port for traps is
162. If an agent sends traps to a different port, you can change this setting under “Advanced” in the “Edit Device” dialog.
Formulas
- Formulas provide a way to project values received from an agent to another value range or representation.
- For example, an agent might send gain values as INTEGERs ranging from 0 to 65535, while the actual gain range in is -64db to 12db. Obviously, the user of a vSNMP front-end application (e.g. vsmStudio) prefers to deal with the gain values in db instead of the technical INTEGER range.
- To accommodate for this need, vSNMP provides the concept of formulas.
- Formulas can be attached either to single object cells or to columnar object entries. If the formula is attached to an object entry, all cells contained in the entry use the formula. This is only possible for columnar object entries, because all objects in one column share the same syntax.
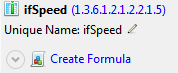
- To get started with formulas, create a columnar object entry for the object
IF-MIB::ifSpeed, containing all values the device yields:
- Now click on the link Create Formula in the lower details pane:
- This will create a basic formula which does not alter the input value – meaning it returns the identity of the input value:
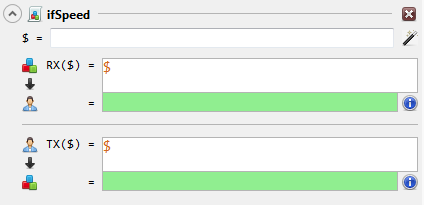
- The input value of the formula is denoted with the symbol
$. You can use this symbol in an arithmetic expression which yields the desired output range. - The line “
$ =“ defines the input value (as sent by the device) of the formula. - The following line “
RX($) =“ defines the expression used to convert values that have been received from the device. - The following line “
TX($) =” defines the expression used to convert values that are about to get sent to the device. This expression has to reverse the projection made in the RX expression. - To follow the
ifSpeedexample, let’s display the speed of the interface in megabytes per second instead of bits per second:- Enter a test input value in the “
$ =” field, e.g. “10000000” (10 megabit) - Enter the expression
$/ 0 into the “RX” field. 8000000 is the factor used to turn unit bits into unit megabyte. - To reverse the RX expression, enter the expression
$* 0 into the “TX” field. - You will now see the following:

- You can see that the result of the RX expression is 1.25 (megabytes) and the result of the TX expression, which uses 1.25 as input value, is 10000000 (bits per second, which is equal to the input value of the RX expression).
- Enter a test input value in the “
- To assist the user in creating formulas for INTEGER values, the formula wizard can be used. To open the formula wizard, click on the symbol
 :
: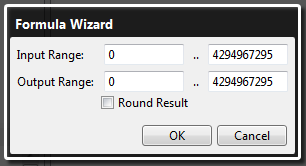
- Now enter the actual input range and the desired output range and click “OK”. This will automatically create the RX and TX expressions necessary for the projection.
- All formulas created for a device class can be viewed and edited in the device tree:
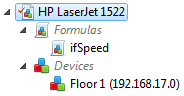
- You can see that a formula with the name
ifSpeedwas inserted under the Formulas You can rename and edit the formula from the tree. You can also use this formula for other object entries or cells of the device class, simply by selecting the cell or entry and dragging the formula from the device tree to the details pane of the device view.
Value Aliases
- A lot of SNMP objects use an enumeration-like syntax, defining names for specific integer literals (e.g.
INTEGER { off(1), on(2) }). - Often these values convey too much information for use in front-end applications (e.g. vsmStudio). This is why you can add aliases for enumeration values.
- To get started with value aliases, create a columnar object entry for the object
IF-MIB::ifOperStatus, containing all values the device yields:
- Click the link labeled Create Value Aliases in the details pane:

- This will create aliases for each of the possible values the column syntax defines:
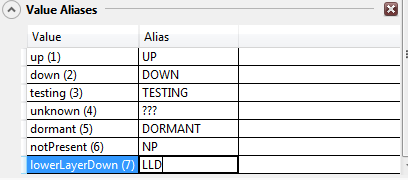
- Now you can enter a free-form alias for each possible value. This alias will be displayed instead of the original value in front-end applications.
- When selecting an object cell contained in the entry which defines value aliases, the aliased value of the cell will be displayed next to the original value:

Resource Access Control
- Device classes are subject to Resource Access Control, which means they can only be edited by one vSNMP.Editor instance at a time.
- The terms used in Resource Access Control are the following:
- “Check Out”: make the resource editable by the local vSNMP .Editor instance. This in turn makes the resource read-only for other instances of vSnmp.Editor.
- “Check In”: release the write-lock on the resource and upload the modifications made to the resource to vSNMP.Manager.
- “Save”: upload the modifications made to the resource to vSNMP.Manager, but keep the resource checked out.
- “Undo Checkout”: release the write-lock on the resource and undo all modifications made to the resource since the last check-out.
- vSNMP.Editor will automatically check out device classes when:
- You drop object nodes on the device view.
- You select any modifying operation through the context menu of the device view.
- If you want to edit any of the properties in the details pane, you need to check out the device class manually.
Import and Export
- Device classes can be exported as standalone files. These files have to be signed by Lawo in order to make them importable. This way, the sanity of the device class configuration can be assured and a database of device classes can be built.
- To export a device class, right-click the device class in the device tree and select Export…. This will bring up the following dialog:
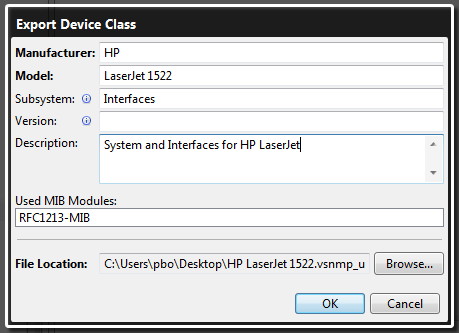
- Fill in all available information and click “OK”. This brings up the following dialog:
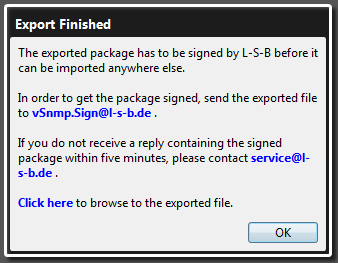
- When following the given instructions, you can click the email links on the dialog to open your email program and the “Click here” link to open Windows Explorer. Please send the exported file by contacting Lawo Support.
- As soon as you have received the signed package, save the attached file with the extension “.vSNMP” to a location reachable from the computer you want to import the device class to.
- In vSNMP.Editor, click the symbol
 atop the device tree. This will bring up a standard “Open File” dialog which allows you to select a vSNMP package file to import.
 - If all the MIB modules required by the device class you are about to import are present, vSNMP.Editor will present the “Create Device” dialog.
- If not all of the required MIB modules are present, the following dialog will appear:
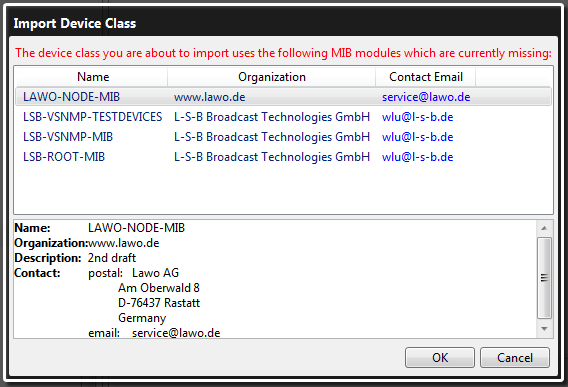
- This dialog lists all MIB modules which are not included in the vSNMP standard MIB library, but are used by the device class you are about to import. vSnmp lists enough information for you to be able to acquire the missing MIB modules.
- Even if some MIB modules are missing, you can still import the device class, though this will yield unresolved references to objects which are defined in the missing MIB modules.
Navigation
vSNMP - Connecting to a Device
vSNMP - Working with Device Classes