HOME - Operating Principles
This topic describes how to navigate and work with the HOME user interface (UI).
HOME UI Overview
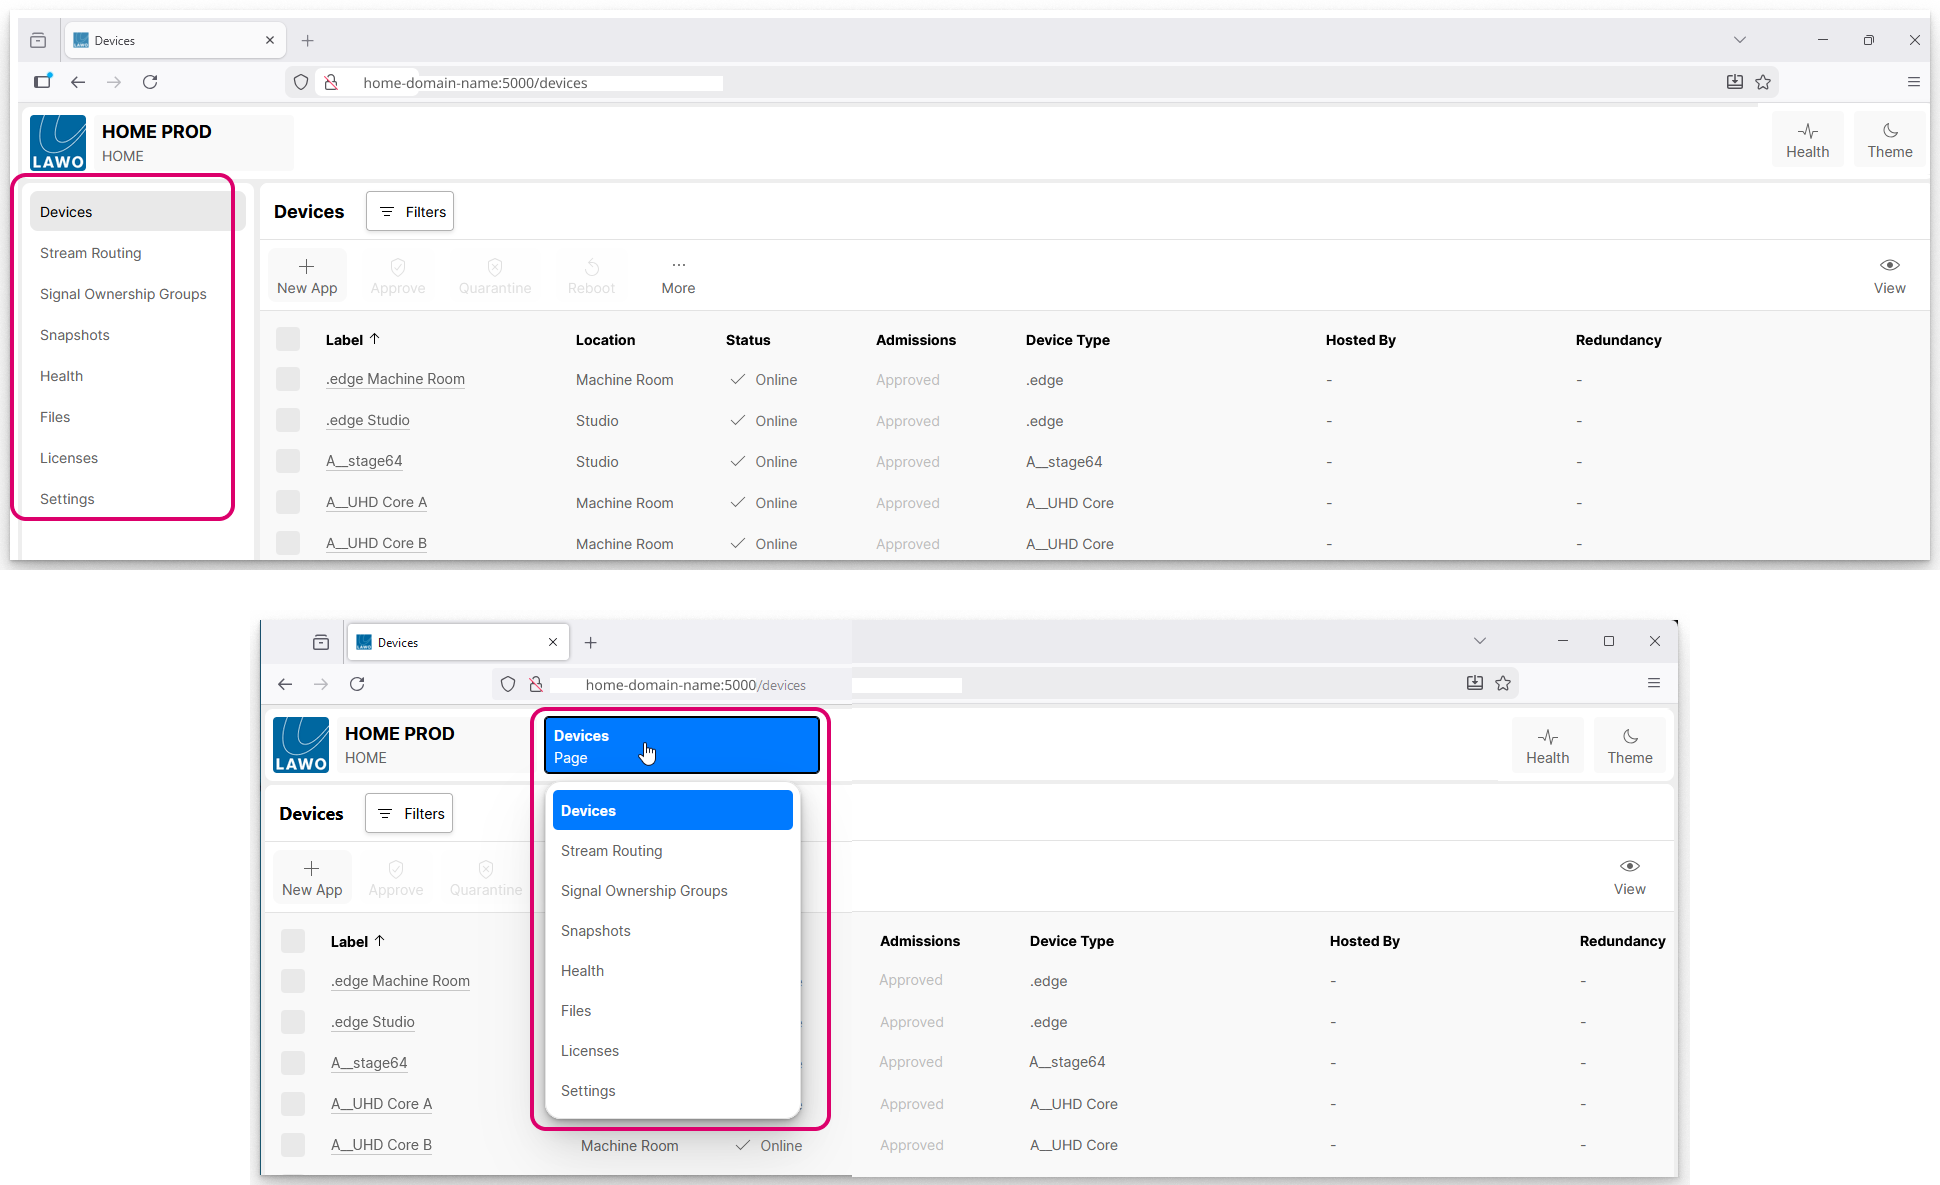
The HOME user interface appears in one of two views, depending on the width of the browser window. The only difference is the location of the page menu.
- In a full-width window, the page menu appears in a sidebar on the left of the screen.
- If the width is reduced, then the sidebar disappears and the page menu moves to the headline bar.
The example below shows the 'Devices' page (at full width).
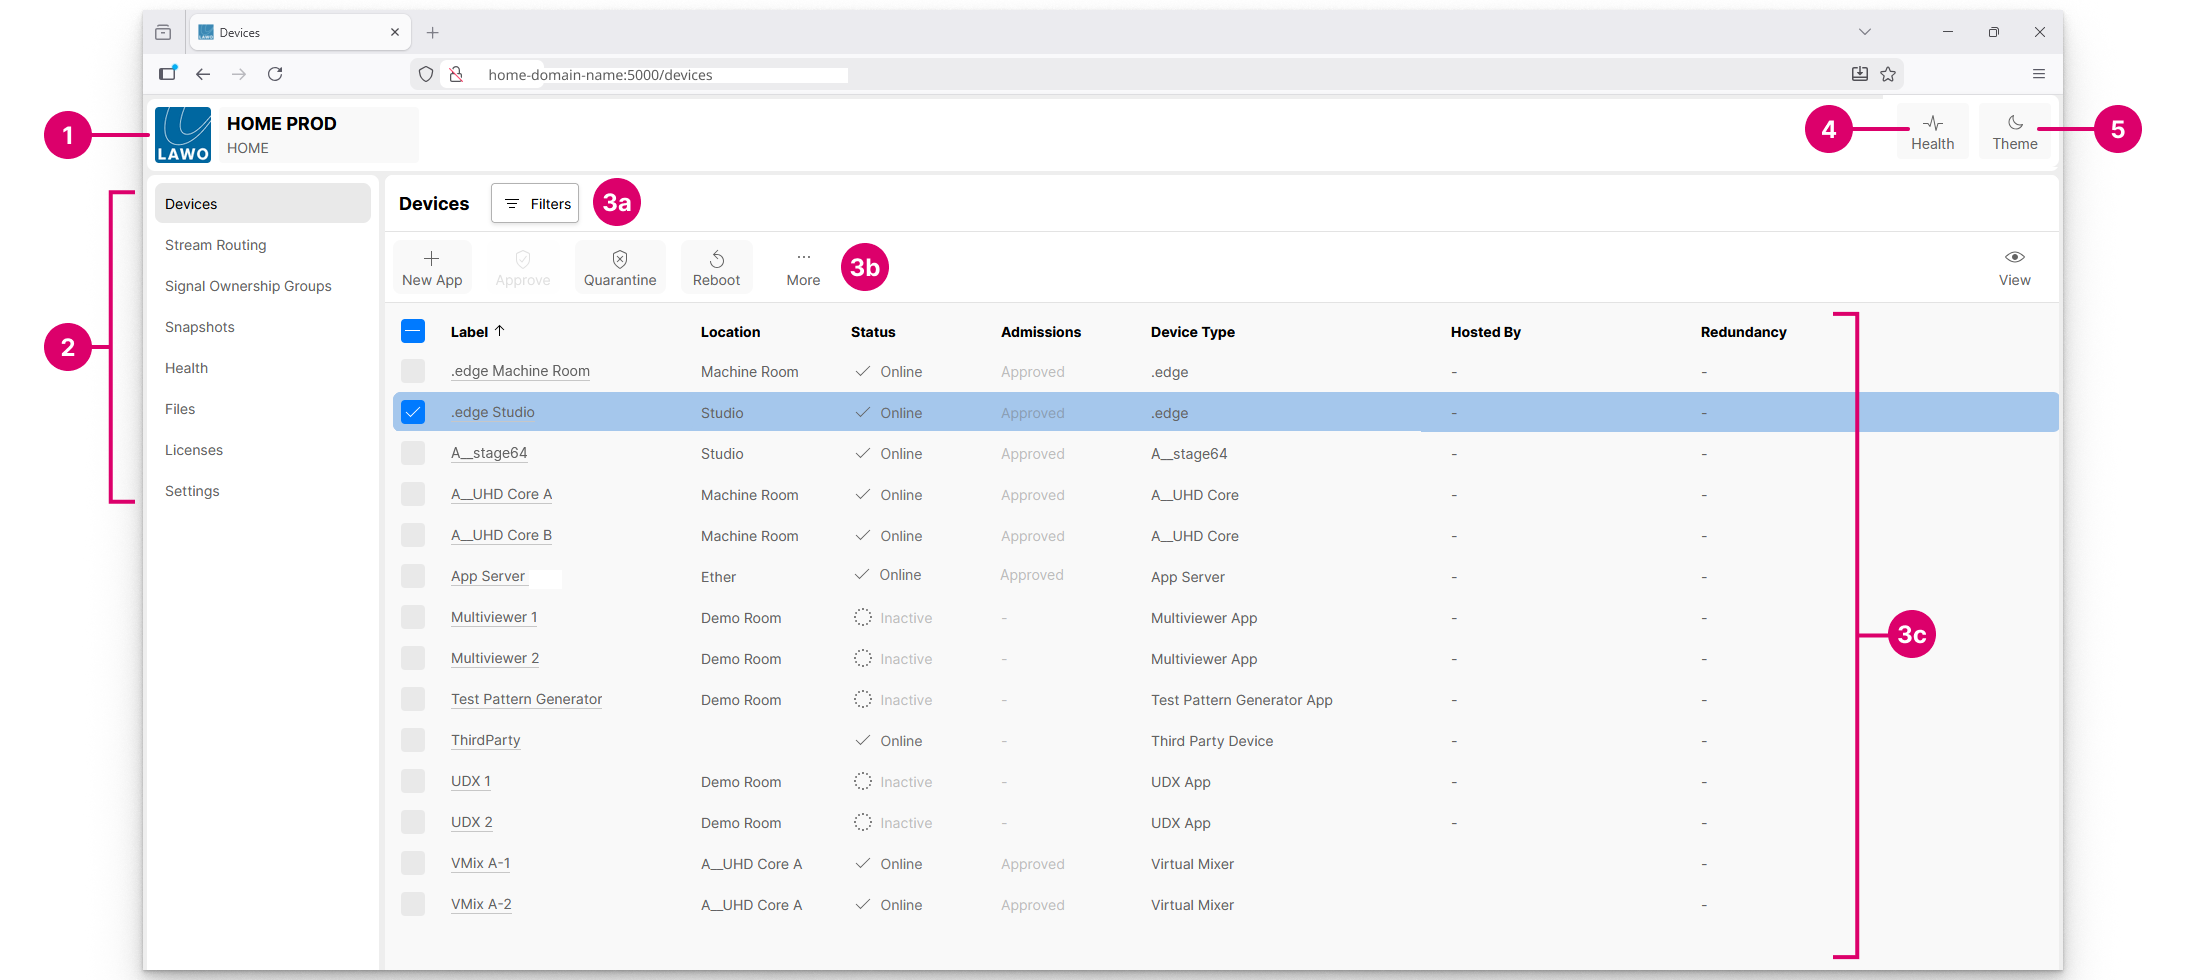
All pages have five main elements.
1. LAWO Logo – click here to view the HOME UI release version and get directed to the debug information and application log file screens.
2. Page Menu – click here to select a page.
3. Working Area – shows the page contents. For the 'Devices' page, there are three areas: filters (3a), available functions (3b) and the devices list (3c).
4. Health – the health icon shows the number of issues reported by HOME-native devices. For more information, click on the icon to open the 'Health' page.
5. Theme – the HOME UI can be viewed in either light or dark mode. Click on the Theme icon to toggle between the two modes.
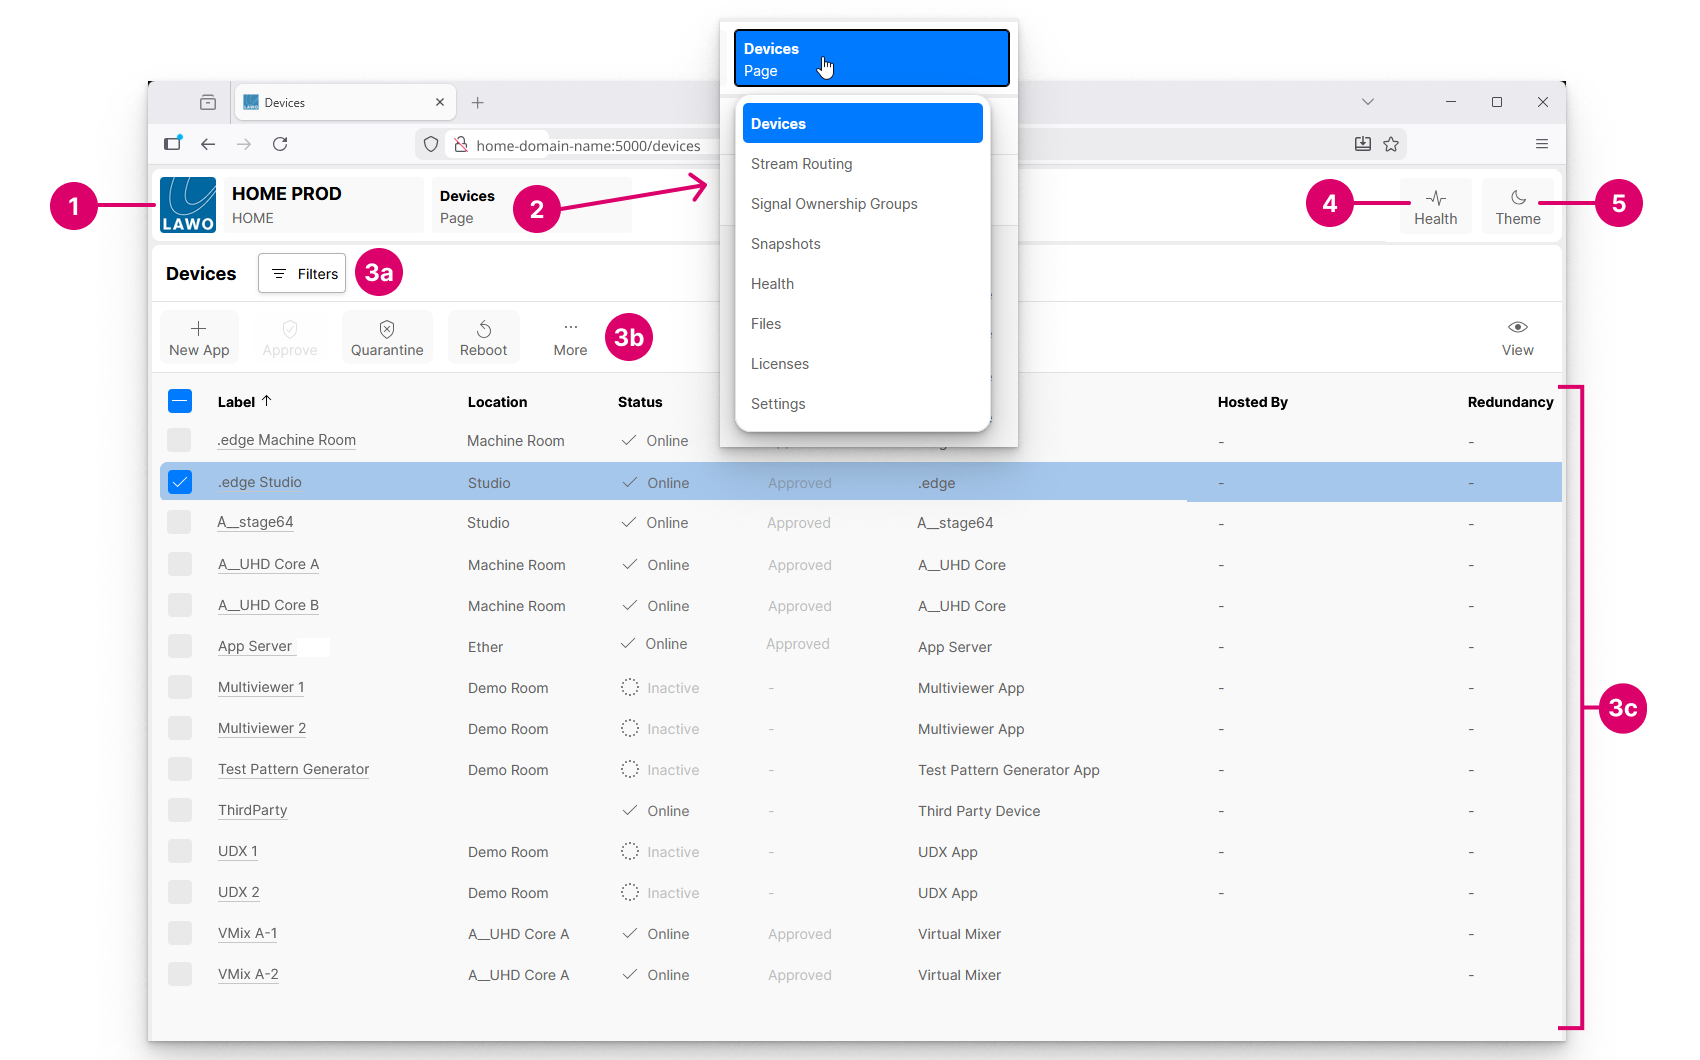
Below is the same page at reduced-width. The sidebar is gone. To change page, click on the current page name (2) to open the drop-down menu.
Page Navigation
You can navigate to a different page by clicking on an option in the sidebar or drop-down menu.
Page Functions
In the current release, there are eight pages in the UI.
- Devices - lists all devices known to HOME. From here you can manage the devices (e.g. approve or quarantine a device, create a new app or edit the device settings).
- Stream Routing - manages the streaming connections. From here you can connect a sender to a receiver, interrogate and lock existing connections, disable the sending streams and view or edit the stream configuration parameters.
- Signal Ownership Groups - manages the ownership of signal parameters. For example, to allocate mic preamp control to a particular audio console.
- Snapshots - lists the system snapshots. Snapshots can be used to create a backup of the complete configuration (i.e. all devices and stream routing).
- Health - shows all active issues reported to HOME.
- Files - can be used to upload files to HOME. For example, to add some new perpetual licenses.
- Licenses - shows the available perpetual licenses and Lawo Flex credits. From the Credits tab, you can check and refresh the available credits.
- Settings - access to the HOME system settings.
Most of the work is done in the first two pages: 'Devices' and 'Stream Routing'. Please follow the links for more information.
Sort Lists
If the page contents are listed in a table, then the header row describes each column.
Click on a column header to sort the table alphabetically (e.g. to sort by Label).

Each click toggles the sort mode between ascending (A -> Z) and descending (Z -> A). An up or down arrow appears beside the header to indicate the current sort mode.
Make Selections
In order to unlock some functions, you must first select an entry in the table. For example, to Quarantine or Reboot a device (in the Devices page).
Each row can be selected (or deselected) by clicking on the box in the first column. Selected rows are highlighted in blue, with a blue tick in the box.
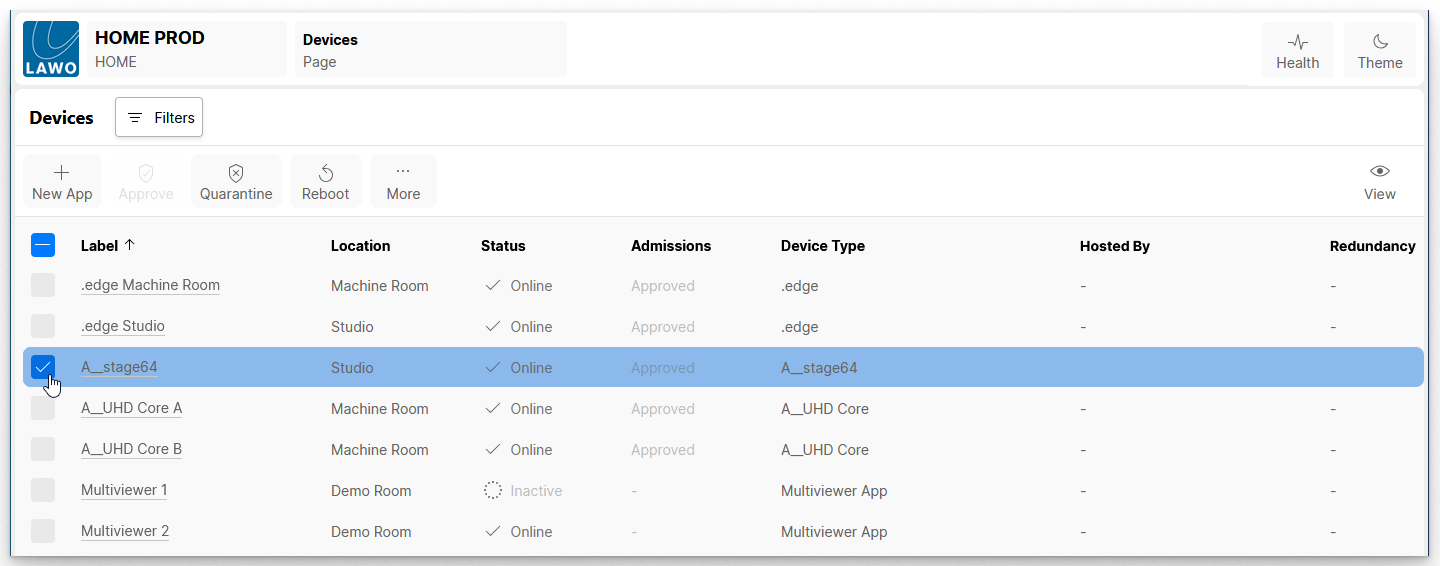
You can select more than one row by ticking several boxes.
To select (or deselect) all rows, click on the tick box in the header row. This allows you to work in reverse by selecting all devices and then editing the selections.
Using Filters
The Filters button can be used to filter the contents of a table. For example, to view only the devices in a particular location (in the 'Devices' page). Or, to view only the senders from a particular device (in the 'Stream Routing' page).
Apply a Filter
To apply a filter, click on the Filters button (1) and either:
- Start typing into the search field (2) and then select a checkbox (3).
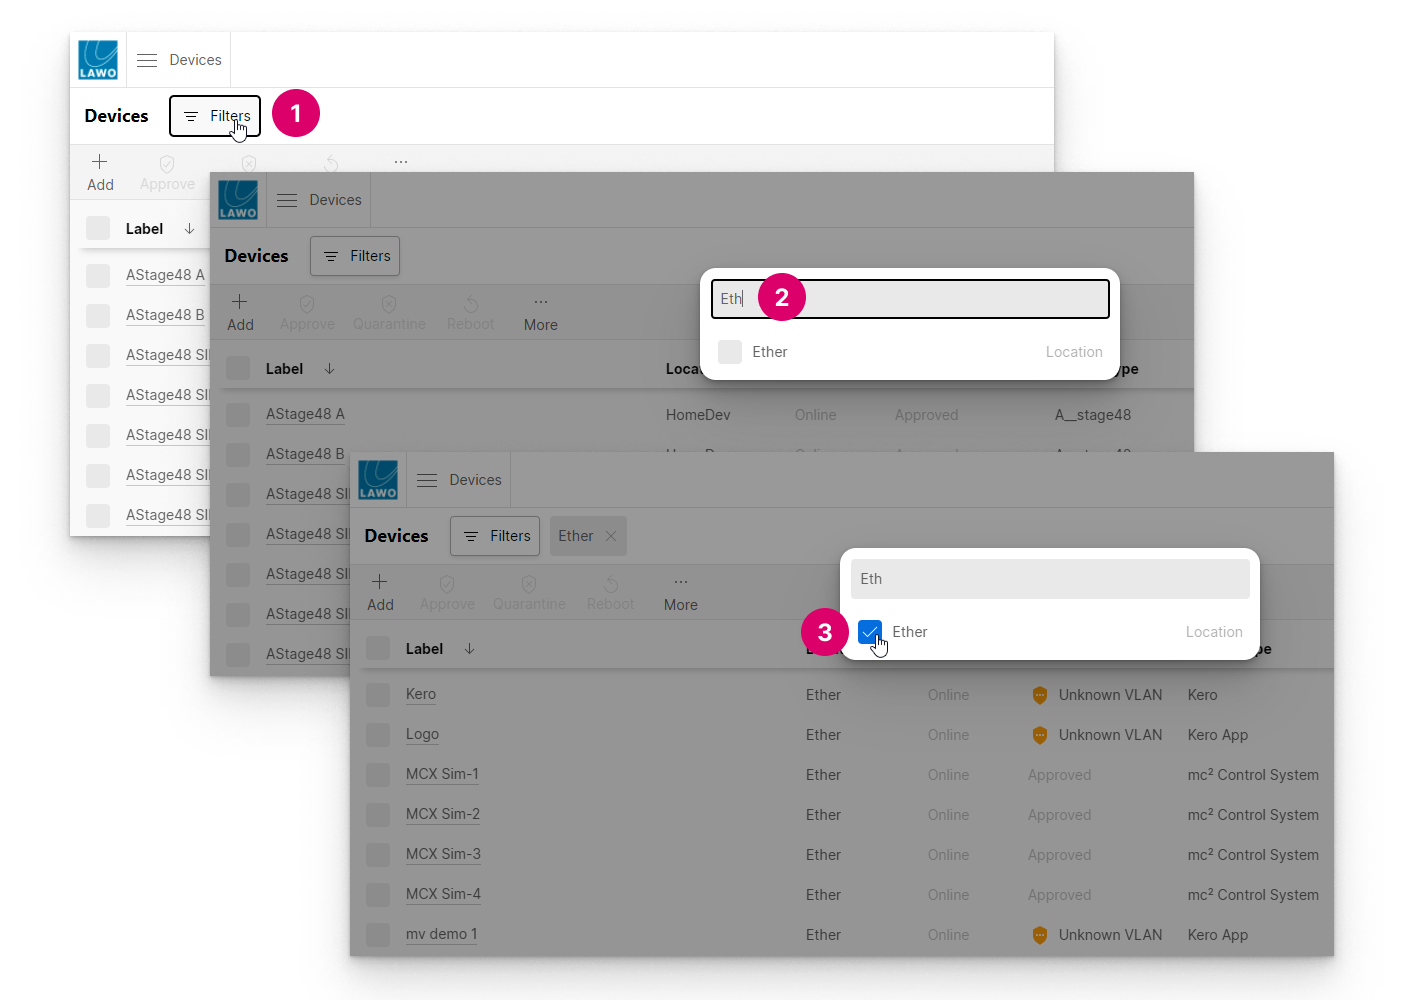
- Or, choose one of the 'Filter by' options (2) and then a checkbox (3).

The first method is great if you know exactly what you are looking for, as the text entered is used to search across all filter types. The second method can be used to browse all of the available options for each type.
Once an option is selected, the table updates to show the filtered results. You can select more than one option if you wish.
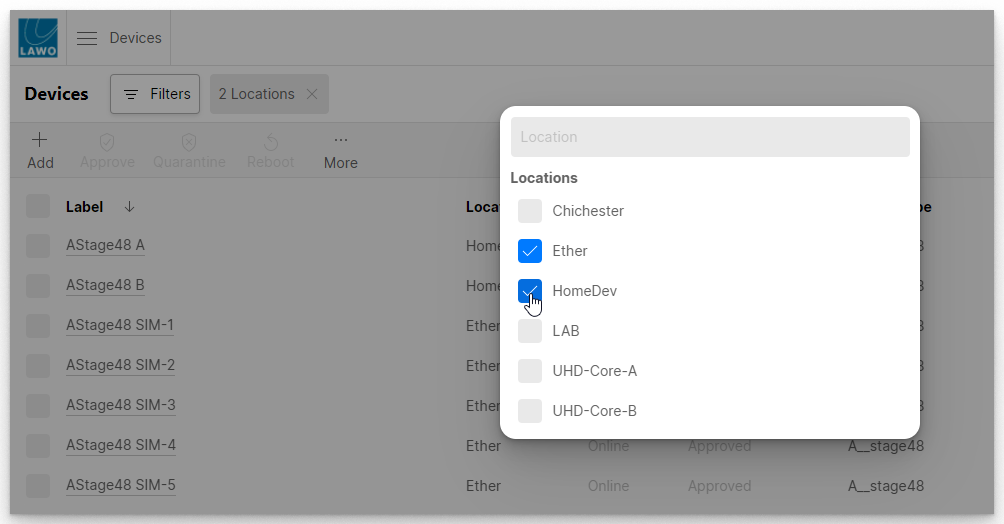
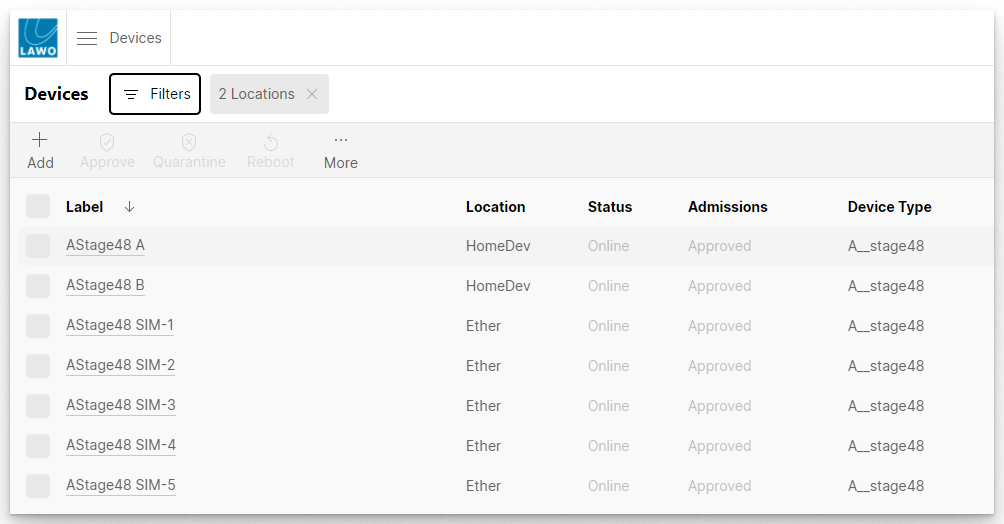
Click anywhere outside of the 'Filter selection' window to close it and view the results. The applied filter(s) are displayed beside the Filters button. In our example, for the two locations.
Combine Filters
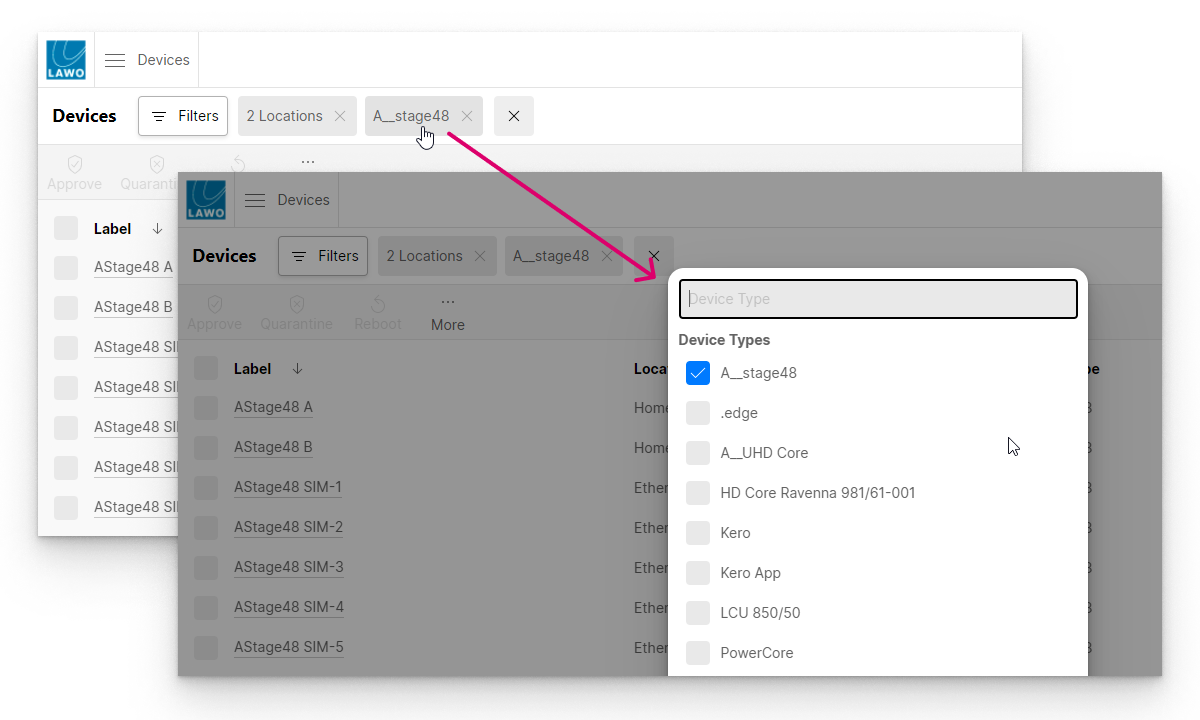
Filters of different types can be combined by repeating the process to add another filter type. For example, to view all A__stage48 devices in the selected locations.
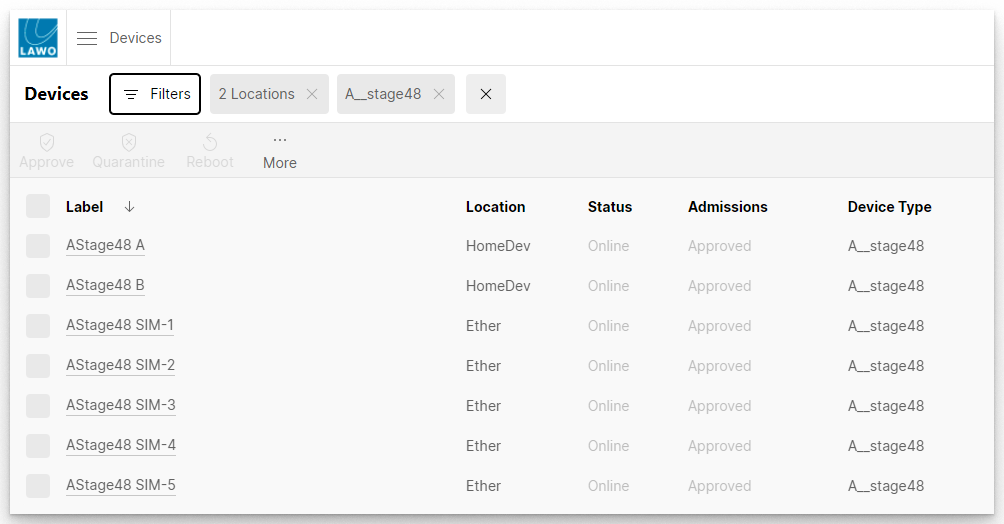
Edit & Clear Filters
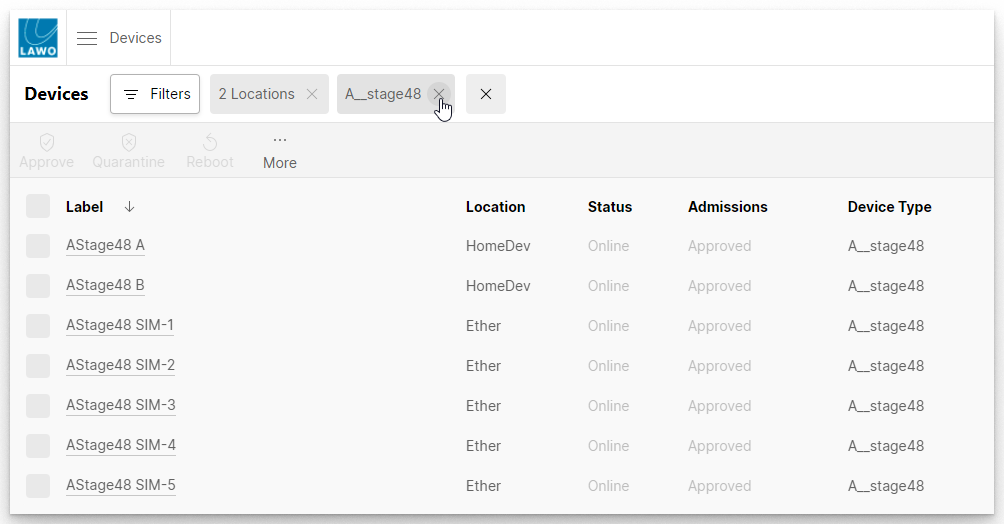
All existing filters are grouped by type and displayed beside the Filters button.
- Click on an existing filter to re-open the 'Filter selection' window. From here you can edit the filter selections for a particular type.
- Click on the X beside an existing filter to clear all filters of that type.
- If more than one filter type is applied, then a master X appears. Click on this to clear all filters.
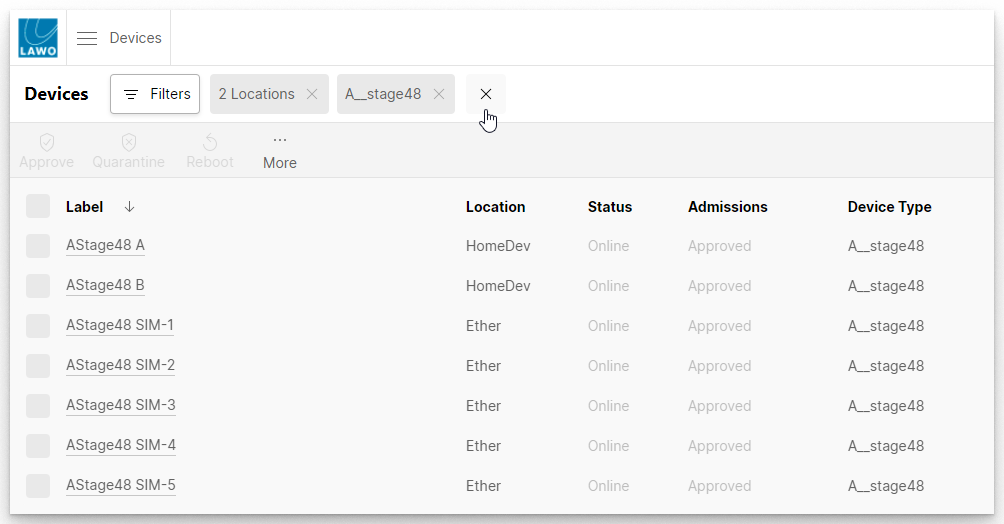
- The view resets to show all of the devices known to HOME.