HOME - Introduction
HOME is an IP management technology from Lawo.
In Lawo systems, HOME is used to manage the devices within the network and configure the connections required for control and streaming. Depending on the device portfolio, HOME may also be required to manage the available perpetual licenses and Lawo Flex credits, and the ownership of signal parameters.
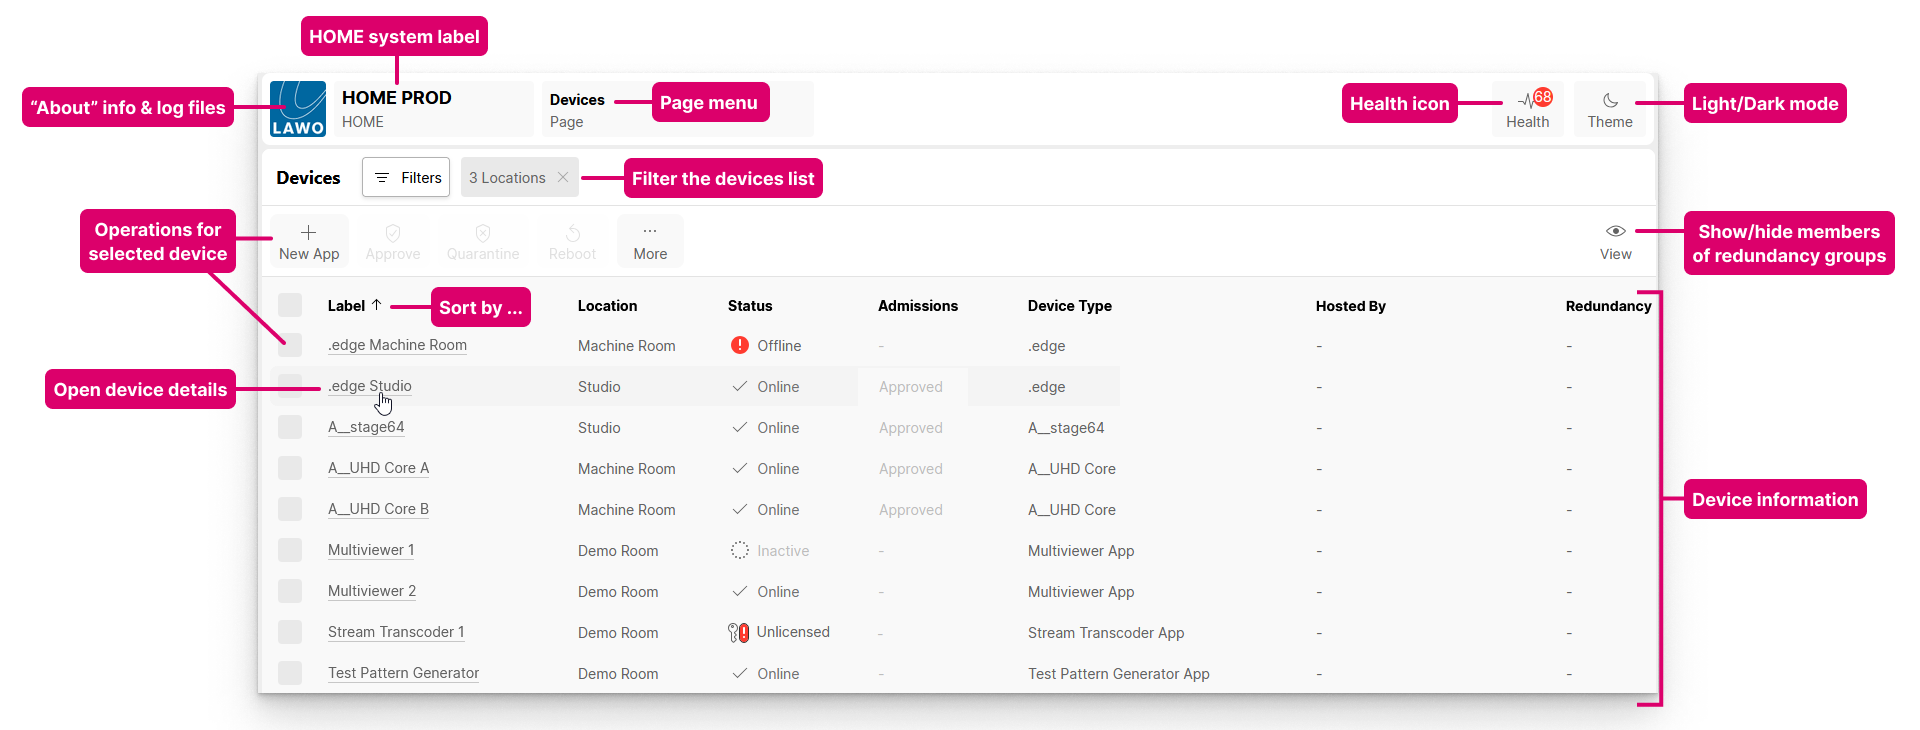
All settings are adjusted using the HOME web-based user interface (shown below). This is accessed by entering the IP address or domain name of the HOME server into a web browser and then signing in.
Device Management
The 'Devices' page lists all devices known to HOME. A device must appear here before it can be configured.

How are devices discovered?
Whether automatic discovery is possible depends on the device type as follows:
- HOME-native devices. All Lawo IP nodes and devices which "live@HOME" are discovered automatically when they are connected to the network.
- NMOS-compatible devices. Devices that are compatible with NMOS IS-04/IS-05 can also be discovered automatically, if HOME is running a valid NMOS license.
- Third-party devices. Devices that are not detected automatically can be added manually by configuring a proxy. An example is included here.
- HOME Apps. Each HOME Apps server is discovered automatically (as a HOME-native device). The individual apps must be created manually (using either New App or Duplicate App).
What can be controlled?
From the 'Devices' page, the following operations are possible:
- Check the status of a device.
- Approve or quarantine a device (if the network admissions service is enabled).
- Configure a device - to edit its label, IP settings, senders and receivers, etc.
- Manage the apps (running on a HOME Apps server).
In addition, the Health icon (top right) shows the number of health issues reported by HOME-native devices.
For more information, please see HOME - The Devices List and HOME - Health Monitoring.
Device Configuration
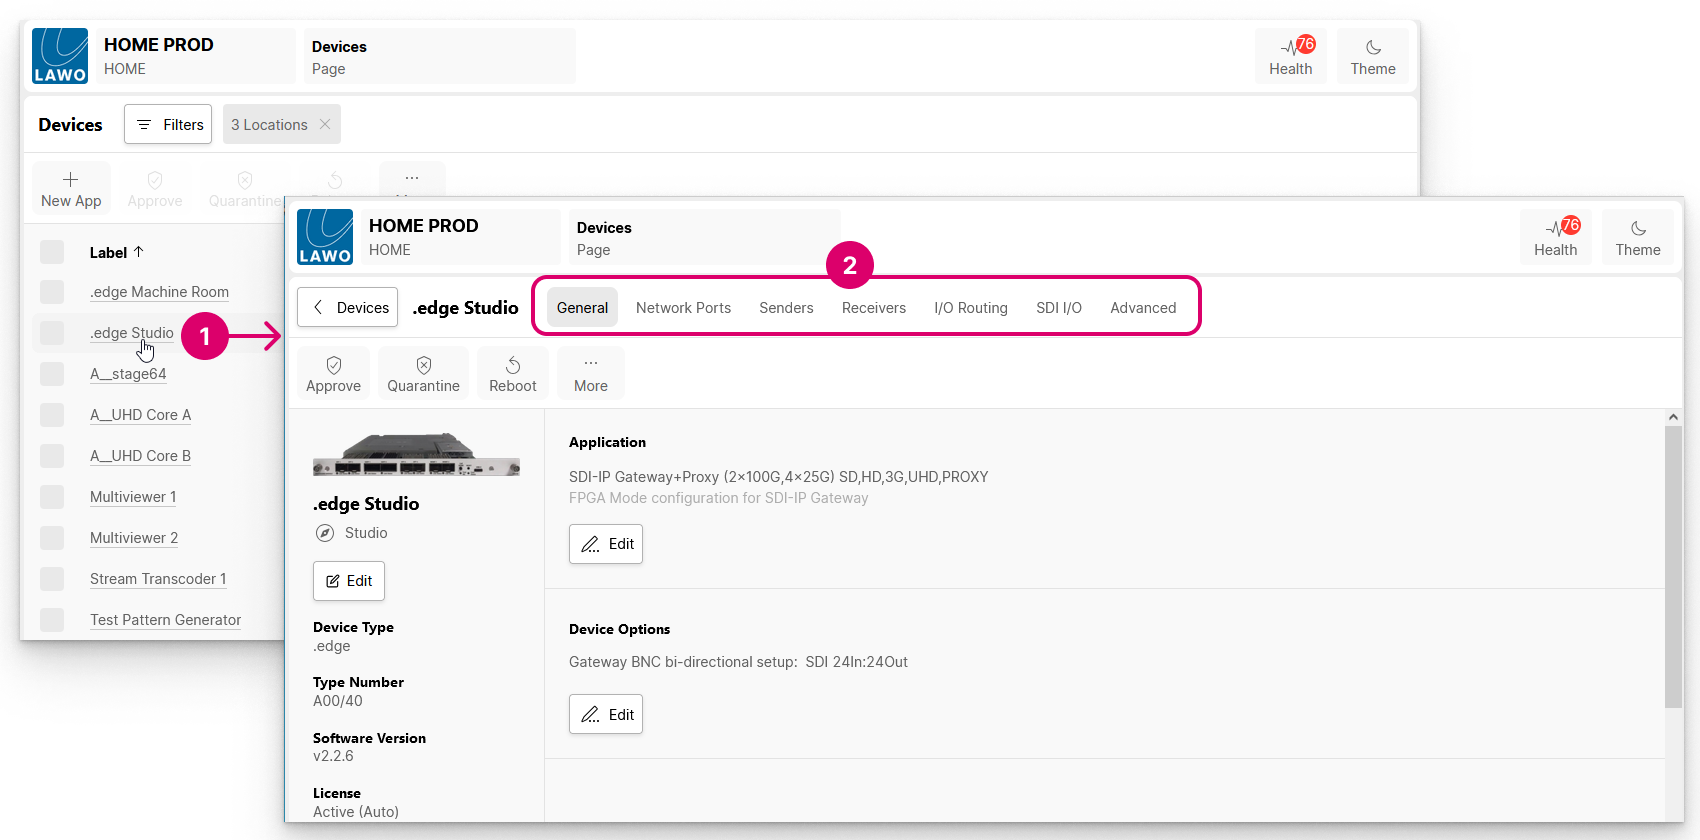
The settings for an individual device can be viewed and edited from the 'Device Details' pages. These are opened by clicking on the device label (1) from the main 'Devices' list. Then choose a menu tab (2) to open each page of settings.

The available settings vary depending on the device type. For more information, please see HOME - Device Settings.
Stream Management
The physical connections are made via the device's network interface cards (NICs).
The IP senders and receivers are either pre-defined (according to the device configuration) or created manually. You can check the current configuration from the Device → Senders or Device → Receivers tabs (as described here).
Depending on the device, up to four stream essence types are supported: video, audio, metadata and GPI/O.
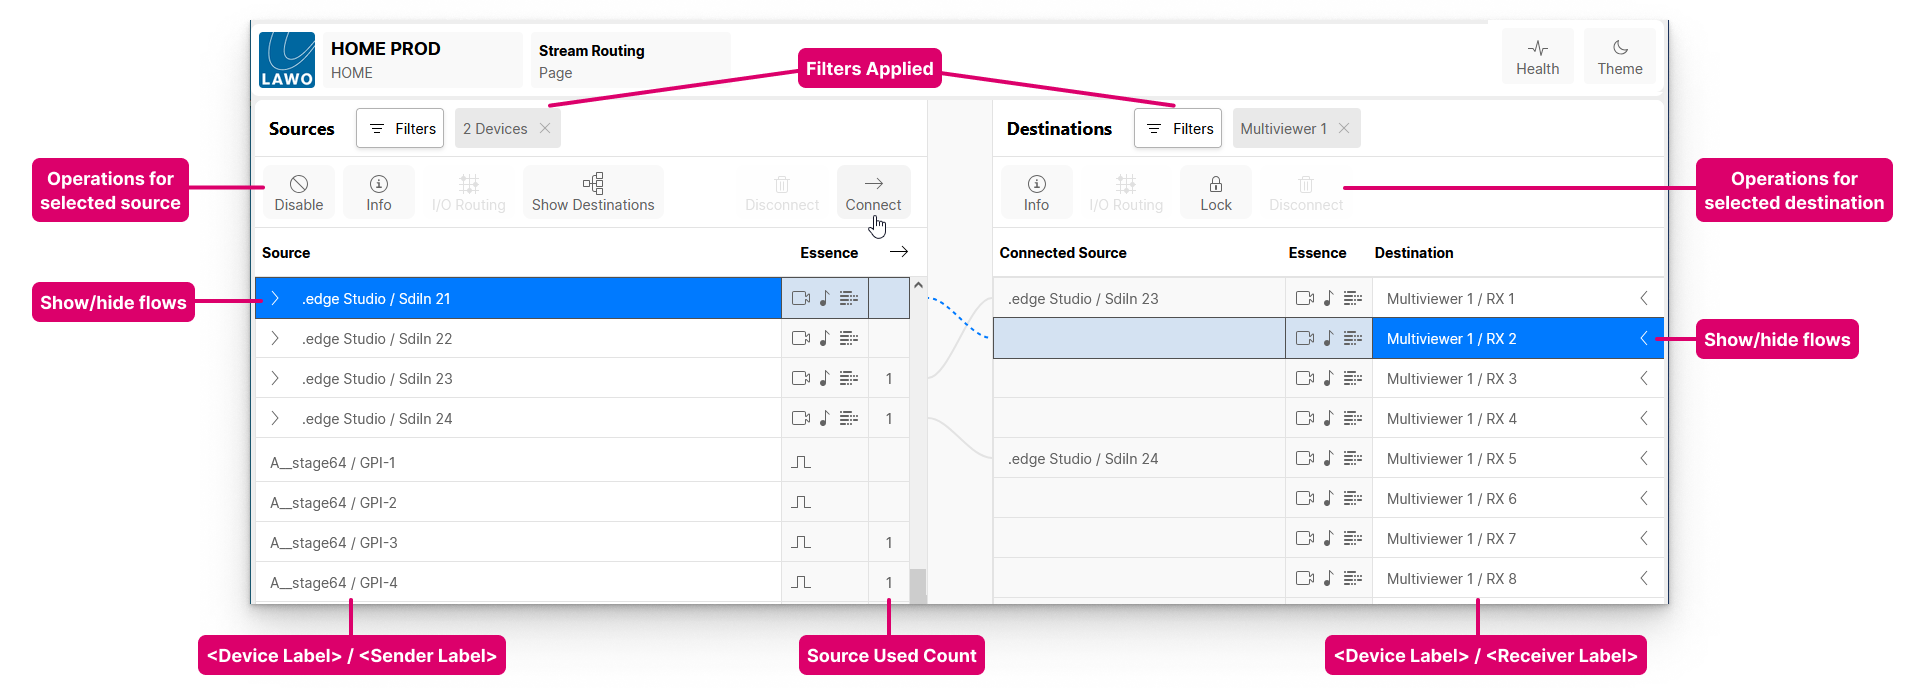
The easiest way to manage the connections is from HOME's 'Stream Routing' page. From here, you can connect a device's sender(s) to any receiver on the network. Or, connect any incoming stream to the device's receiver(s).
If a device supports audio streams, then the 'I/O Routing' (for the senders and receivers) can be used to map the audio channels carried by the streams to the device's local audio inputs and outputs.

For more information, please see HOME Device - Senders and Receivers, HOME - Stream Routing and HOME Device - I/O Routing.