HOME - Stream Routing
The 'Stream Routing' page is used to manage all of the network's streaming connections. From here you can connect a sender to a receiver, or interrogate the existing connections.
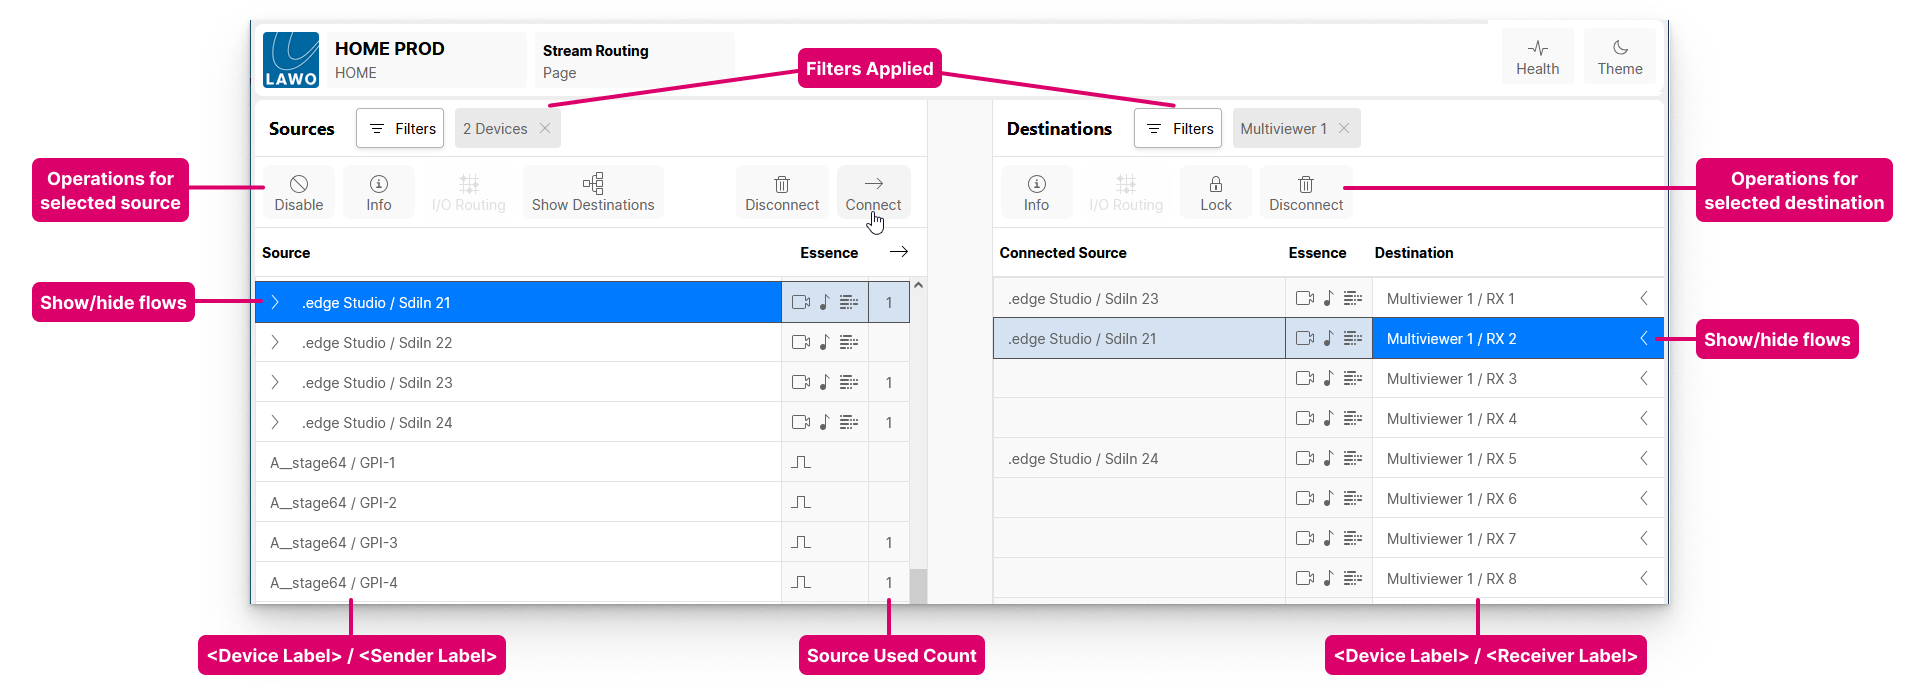
Overview
- For each source and destination, there are two parts to the label: <device>/<sender> or <device>/<receiver>.
- The icons in the Essence column describe the type of flow: Video, Audio, Metadata and/or GPIO.
- If a sender or receiver handles more than one flow, then an arrow appears beside its label to show (or hide) the individual flows.
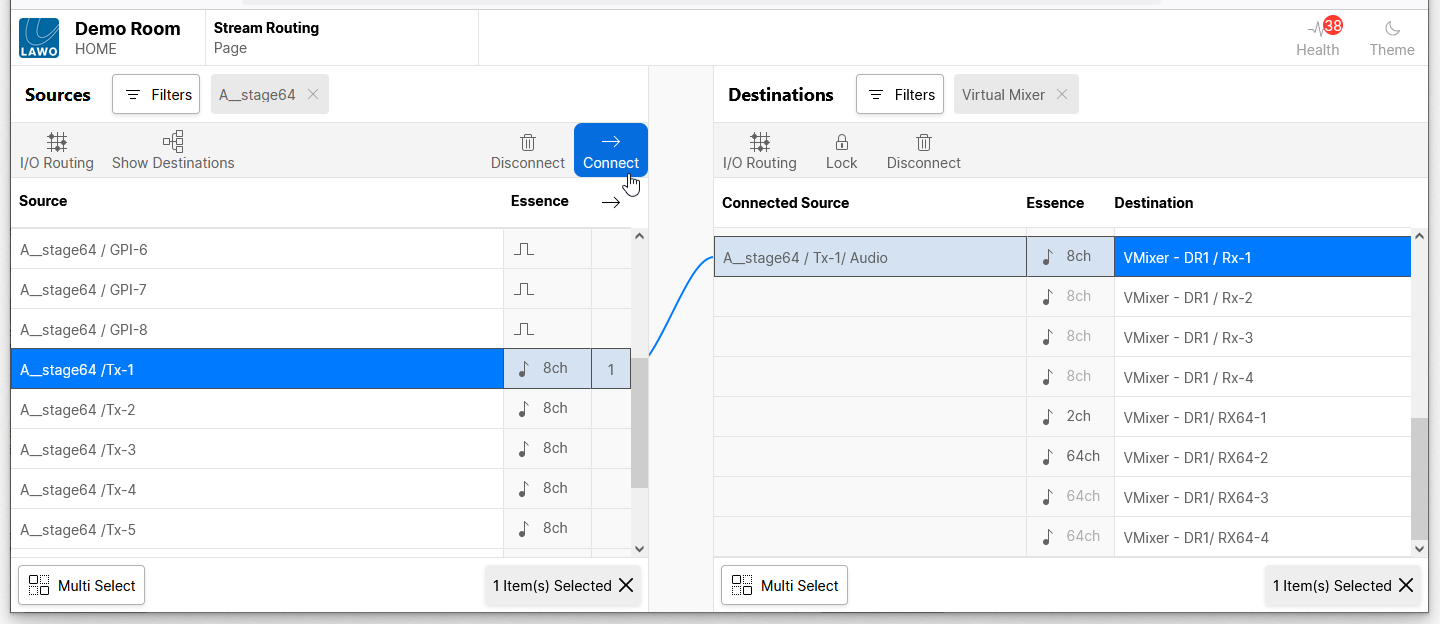
To make a connection, select a source (on the left) and a destination (on the right); then click on Connect.
- A blue dotted line appears when a connection is prepared but not made. This changes to a blue solid line once the connection is successful.
- An orange dotted line appears if a connection is not possible. For example, if there is a mismatch between the selected sender and receiver.
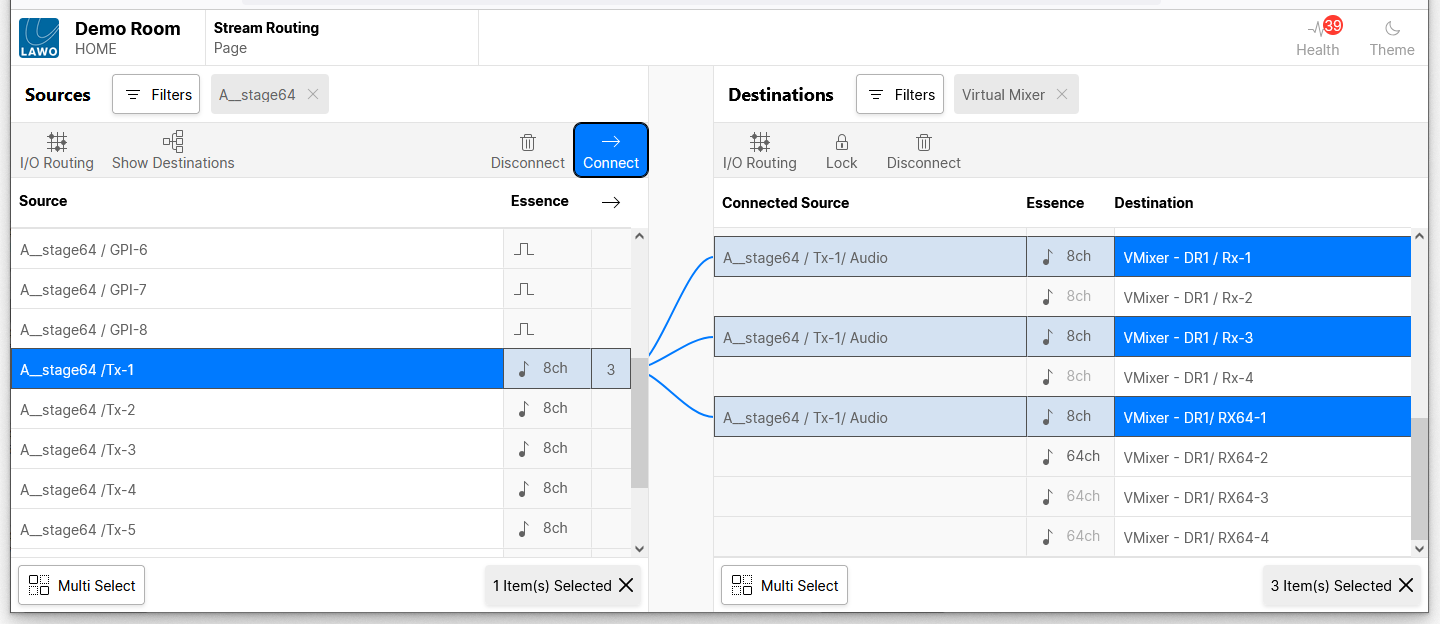
- Once a source is connected, a number appears in the "source used" column. This indicates the number of times the source is used. i.e. the number of connections made.
- Once a destination is connected, the "Connected Source" column shows the label of the connected stream.
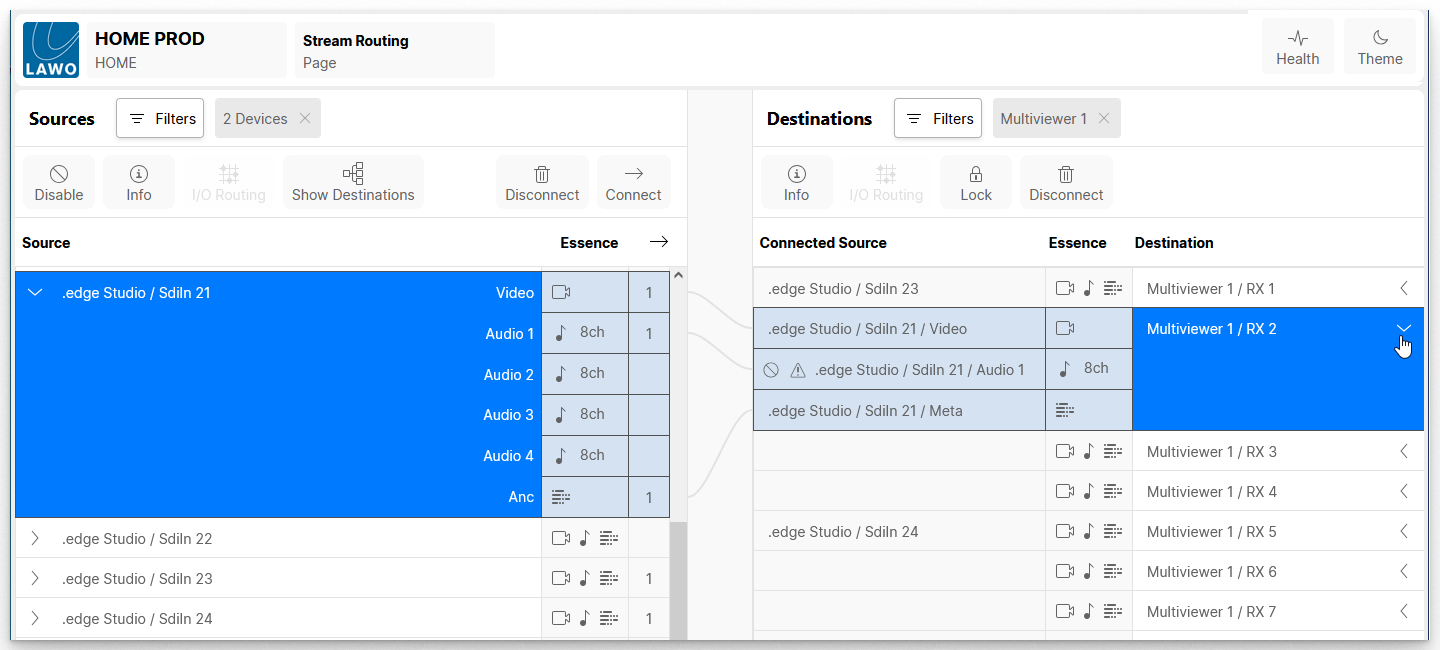
If the source and destination consist of multiple flows, then you can view and edit the individual connections once the flows are revealed.
A useful tooltip is displayed if you hover over a label or icon. This can be used, for example, to interrogate a warning icon or view more information about an essence.

Why is my device or app missing?
If your device or app is missing from the source and destination lists, check the following points:
- Are any Filters applied (to restrict the view)?
- Is the device online? Go back to the 'Devices' list and check the Status.
- For HOME Apps, is the app running and healthy? Open the 'Device → General' tab and check the Lifecycle information.
- Are the senders and receivers configured? Open the 'Device → Senders/Receivers' tabs to check the available flows.
Where are the connections saved?
The stream routing (for all devices on the HOME network) is stored automatically whenever a change is made. This data is stored on the HOME server.
- If the server restarts, then the configuration is re-instated at the end of the reboot.
- If a networked device restarts, or is disconnected, then any streaming connections to and from the device are lost. However, the connections are still prepared. This means that as soon as the device comes back online, its streaming connections are re-established.
If you wish to make a backup of a particular point in the setup, then you can save the complete configuration in a snapshot. For more information on how to do this, please see HOME - Snapshots (in the "HOME - User Manual").
Applying a Filter
To restrict the view, you can apply one or more filters. For example, to view only the senders or receivers for a particular device or device type.
In the example below, the Sources list is filtered to show only the A__stage64 senders.
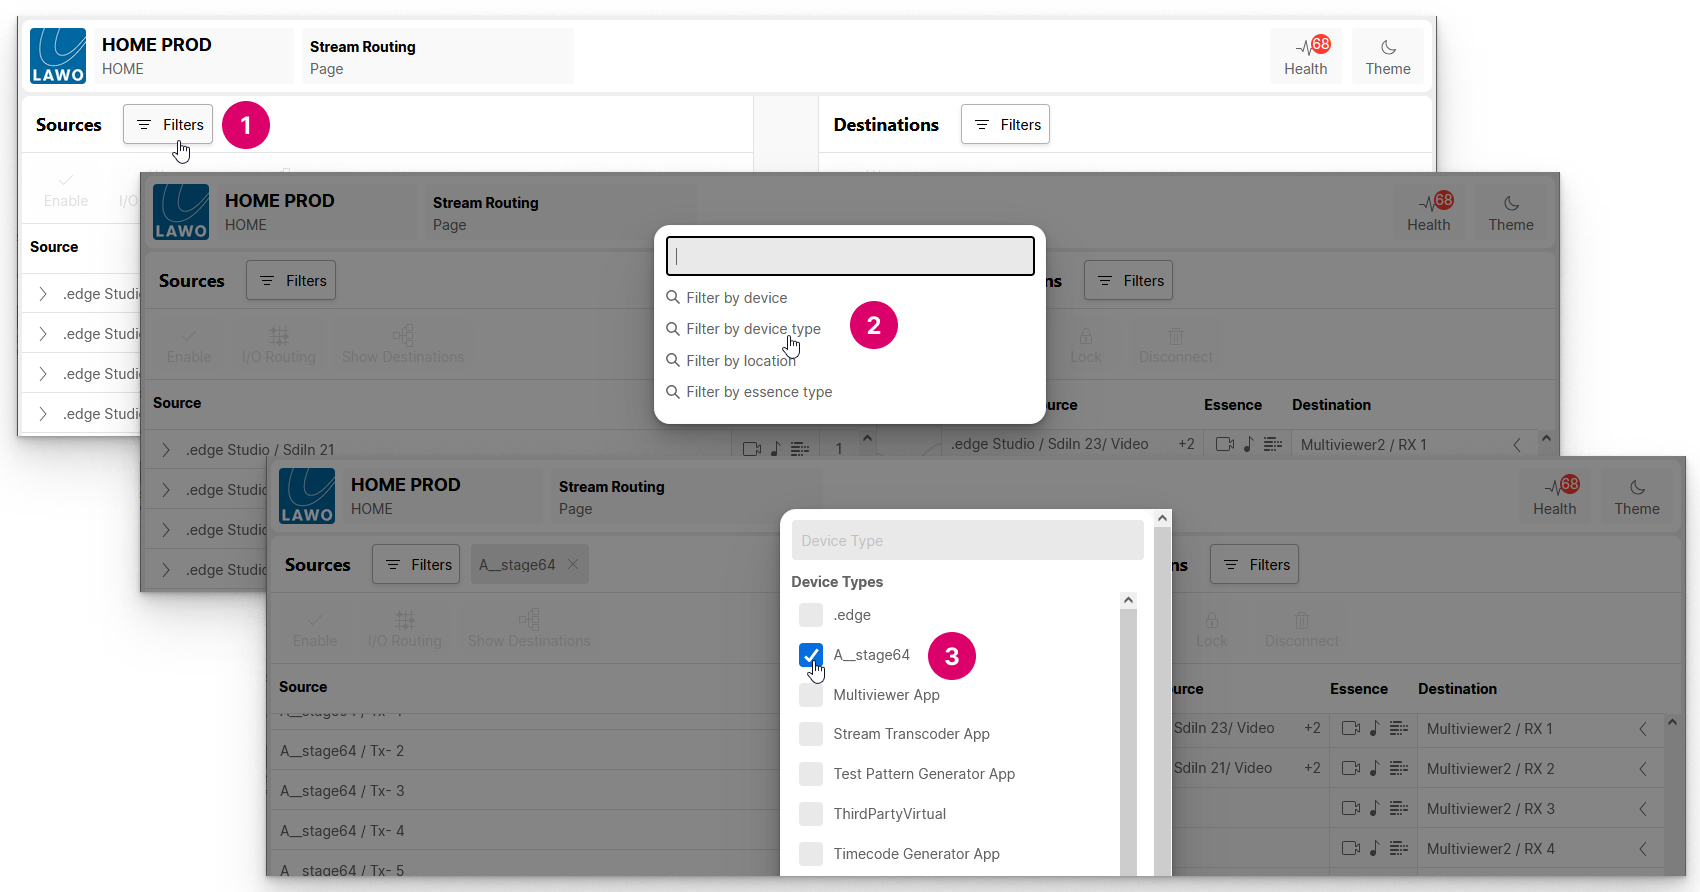
The resultant view (described next) makes it easy to connect the streams from this device to other receivers on the network.
Making (and Breaking) Connections
The Connect and Disconnect buttons are used to make and unmake the streaming connections.
Connecting a Sender to a Receiver
To make a connection, select a source and a destination - the selections are highlighted (in blue) and a dotted blue preview line appears.
Then, click Connect - the dotted (preview) line changes to a solid line and the "Connected Source" field updates.
Please note: If an orange dotted line appears, then a connection is not possible. This can occur if there is a mismatch between the selected sender and receiver.
Using Disconnect
To remove a connection, select either a source or destination and click Disconnect.
- If you disconnect a source, then all of its connections are removed and the "source used" field clears.
- If you disconnect a destination, then only the one connection is removed and the "Connected Source" field clears.
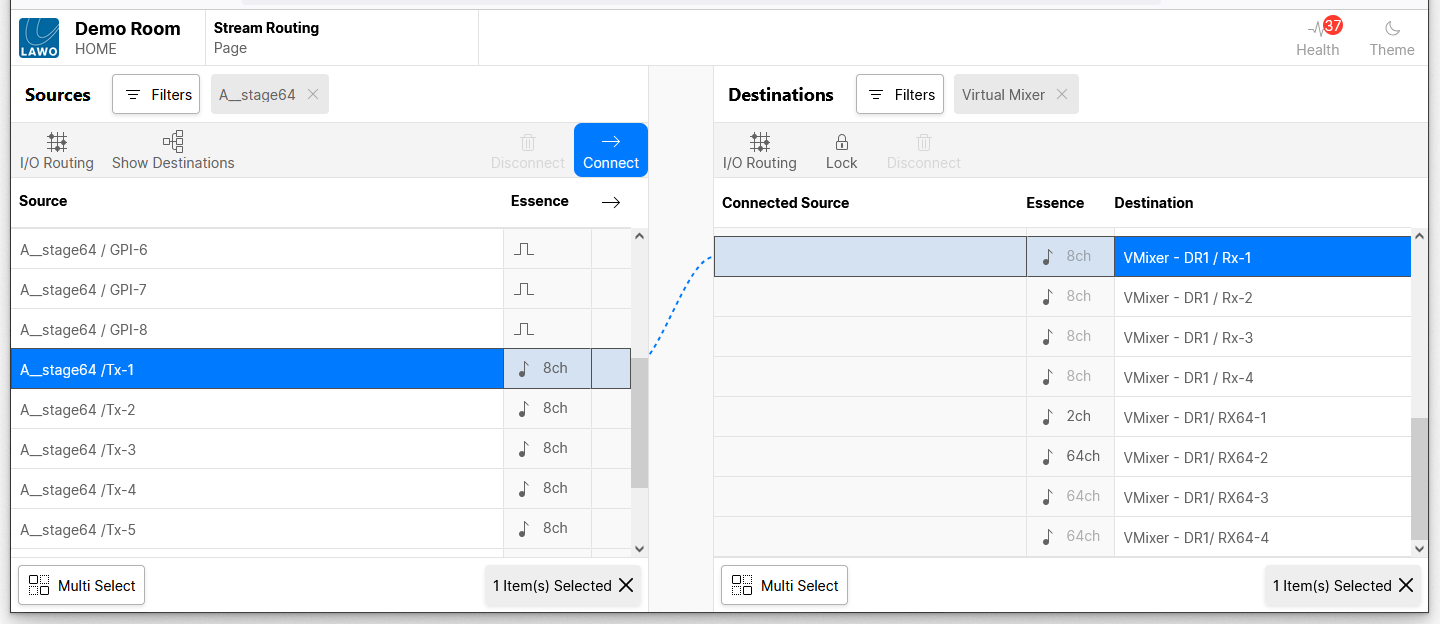
Connecting Multiple Senders to Multiple Receivers
You can select multiple sources and destinations in one of two ways: press and hold SHIFT or CTRL (on your keyboard) or turn on Multi Select (at the bottom of the page). This makes it easy to connect or disconnect multiple streams in one operation.
Follow the same steps as before, but press and hold SHIFT to select a range. Once a range is selected, press and hold SHIFT to increase (or decrease) the selected range. Alternatively, press and hold CTRL or turn on Multi Select to select (or deselect) individual streams.
When you click Connect (or Disconnect), the assignments are made in one operation. For example, to connect four senders to four receivers.
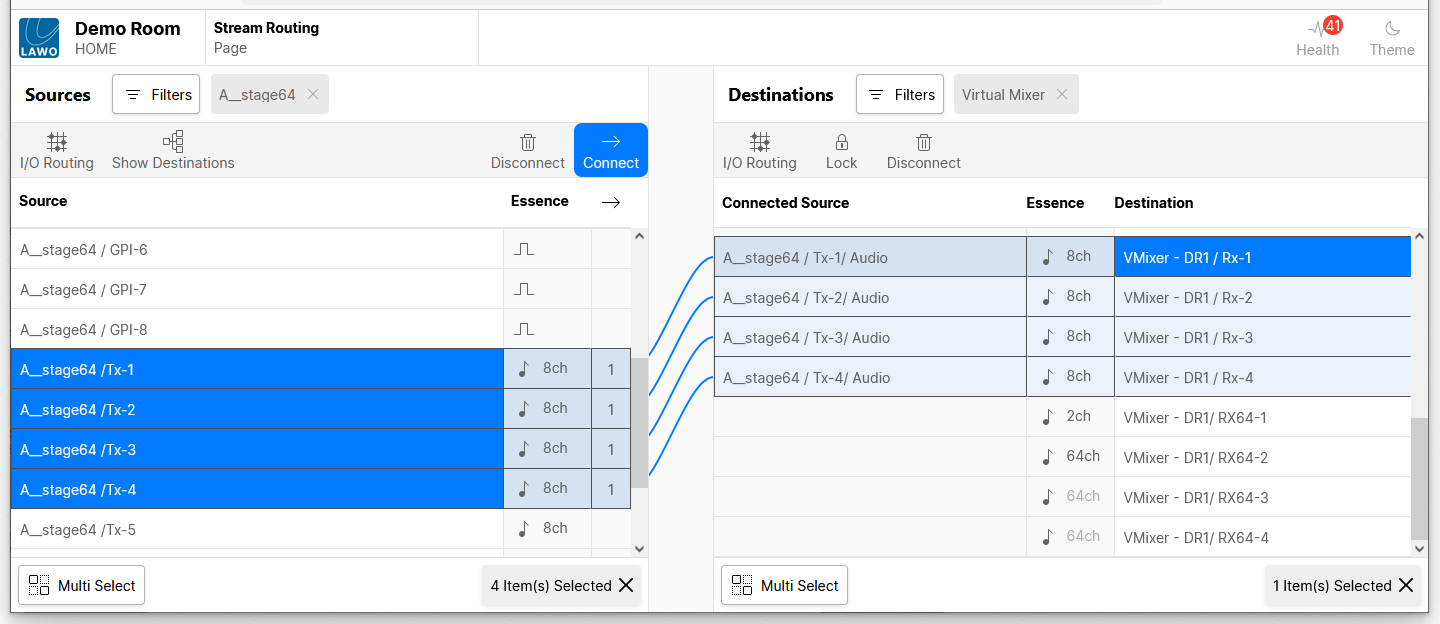
If there is a mismatch between the number of selected sources and destinations, then the sources are assigned consecutively to the available destinations. The exception is for a single source and multiple destinations: in this instance, the source is connected to all selected destinations (as shown below).
Connecting Individual Flows
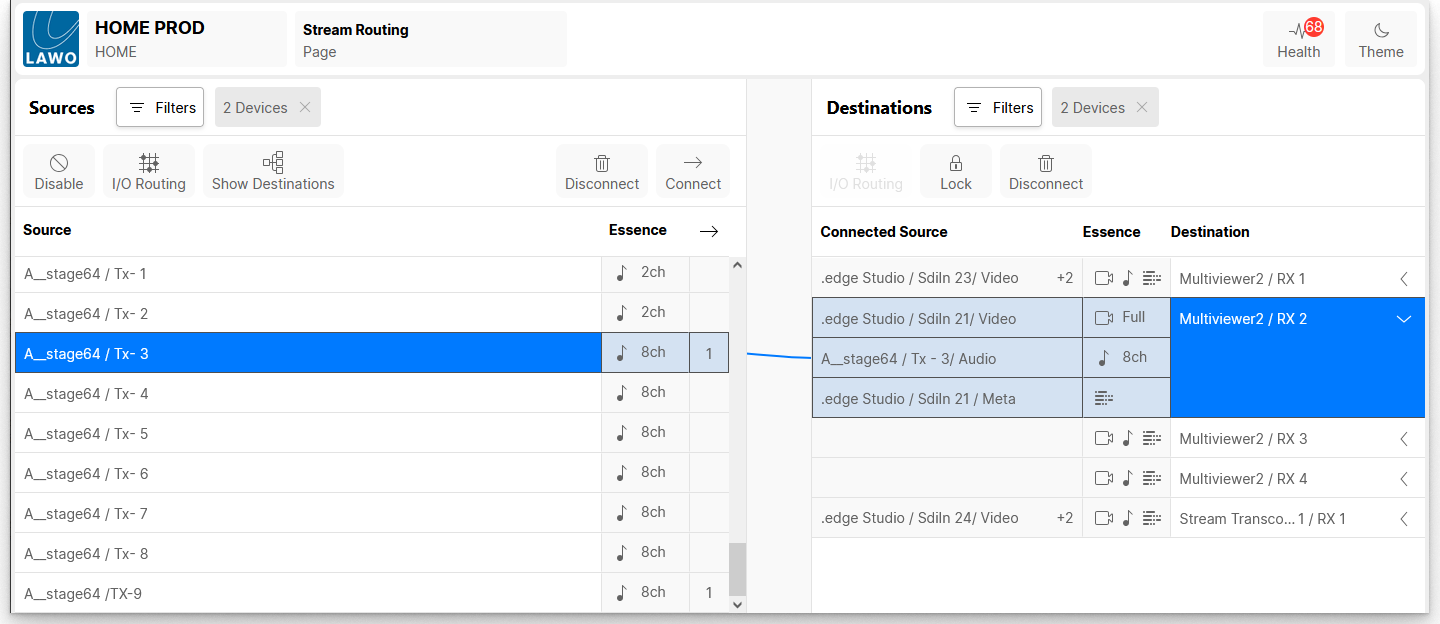
If a source or destination handles more than one flow, then they can be treated independently as follows.
- Click on the arrow (beside the stream labels) to reveal the flows.
- Then edit the connection(s).
In the example below, Multiviewer2 / RX 2 is connected from .edge Studio / SdiIn 21: Video, Audio 1 and Metadata.

The screenshot below is taken after the audio stream is replaced by an 8-channel audio stream from the A__stage64.
Interrogating Senders
If a sender is connected, then it can be interrogated as follows.
1. Select a source and click on Show Destinations.
The view updates to show only the destinations of the selected source (or sources).
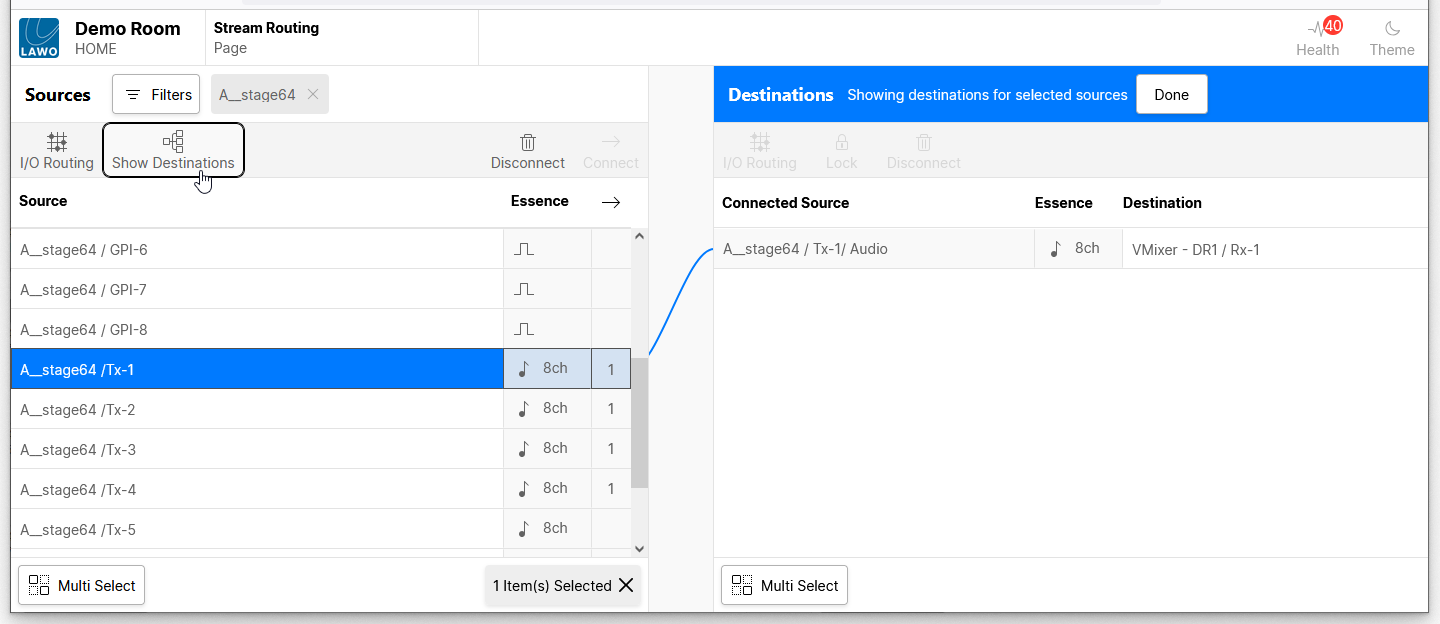
Tip: You can select a different source, or use SHIFT or CTRL to select multiple sources, while Show Destinations is active.
2. Click on Done to exit the "Show Destinations" view and return to the list of all sources and destinations.
Opening the I/O Routing
For convenience, it is possible to open the I/O Routing page for an audio sender or receiver. This allows you to map the stream's IP channels to the device I/Os, and vice versa.
- Select a sender (or receiver) and click on I/O Routing.
- The "Routing" window opens. The operation is described here.
Note that the I/O Routing button is not available if you select more than one sender or receiver.