HOME - Replace a Device
HOME V4.6 (OR HIGHER)
From HOME v4.6, the system offers a new streamlined device replacement procedure that allows users to replace a device with another device of the same type. For example, due to a fault.
As part of the process, both devices must be powered off so that they can be removed from HOME. The Device ID of the original device is then transferred to the new device. Once the replacement device is powered back on and connected to the network, the former device's configuration can be reinstated (if this is required). Note that this must be done manually, either by loading a previously saved snapshot or editing the device configuration. In some cases both steps are required.
If the device you wish to replace is online, then its Device ID can be checked from the 'Device → General' settings page.
Creating a Snapshot
If you have not already done so, it is best to create a snapshot for the device you wish to replace, so that this may be loaded later (to restore the configuration).
This can be done either globally from the 'Snapshots' page, or selectively using the Create Snapshot option (in the 'Devices' list ...More menu). Full instructions can be found in HOME - Create and Load Snapshot (for selected devices).
Note that a snapshot can only be created for devices that are online. For this reason, it is recommended to regularly create snapshots for all individual devices listed in HOME.
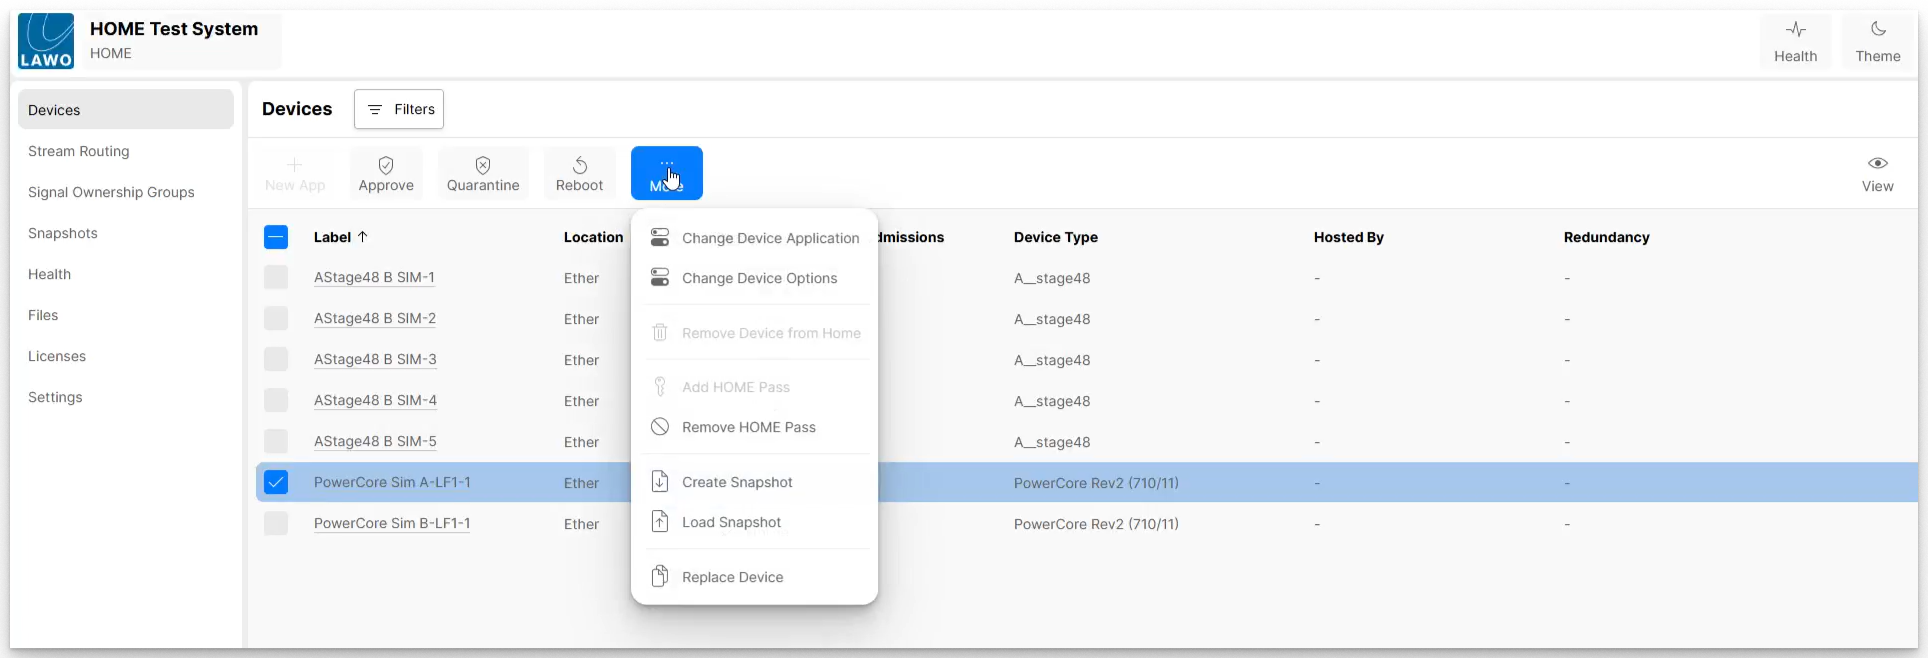
Replacing a Device (in HOME)
Once you have created a backup snapshot, follow the instructions below (to remove the original device from HOME and transfer its Device ID).
- Start by selecting the device you wish to replace (n HOME's 'Devices' list), and choose Replace Device (from the ... More menu).
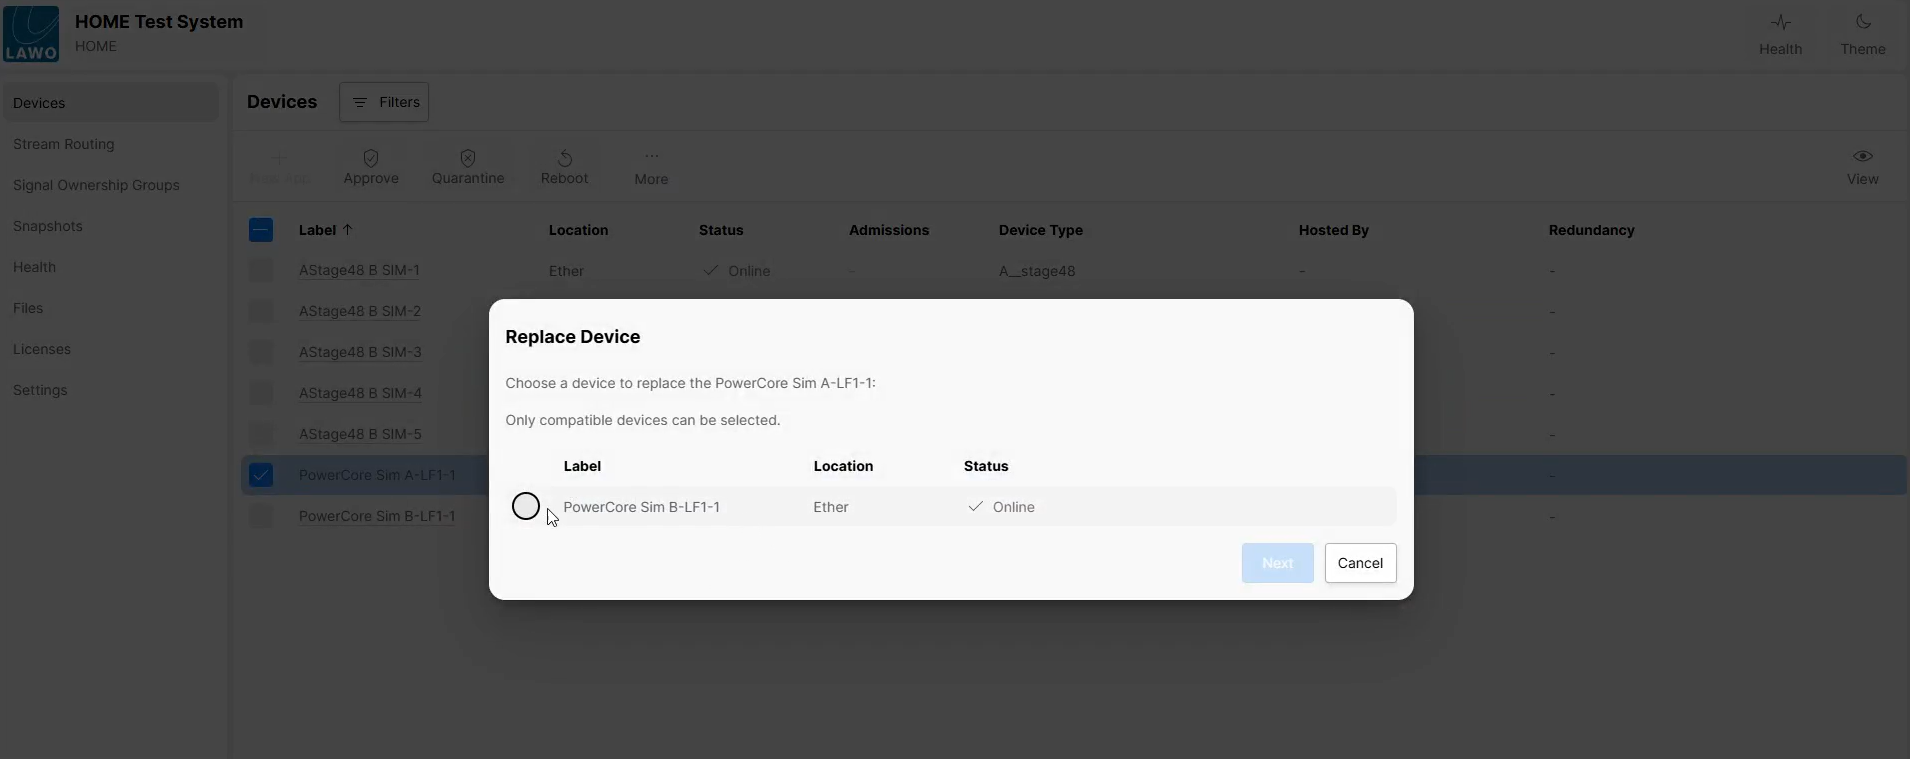
- The "Replace Device" dialog opens offering a choice of devices. Note that these can only be online devices that are of the same type as the device being replaced. Choose a device from the list and click Next.
- HOME now lists both devices involved in the operation. To continue, please follow the on-screen instructions and power off both devices.
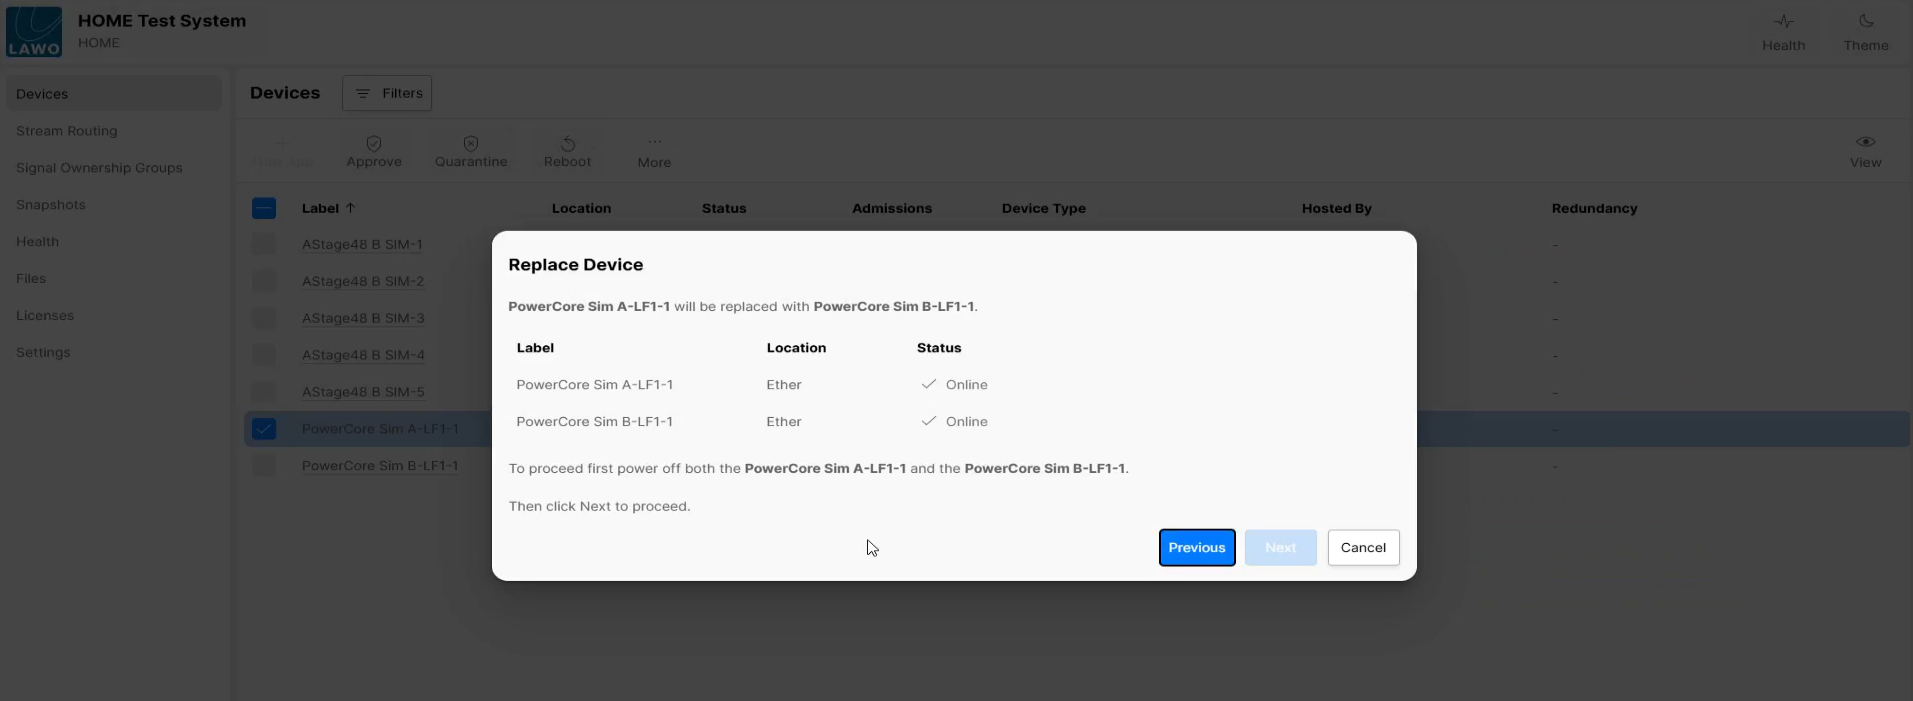
- Once both devices are powered off, their status updates to Offline. It is now possible to proceed by clicking Next.
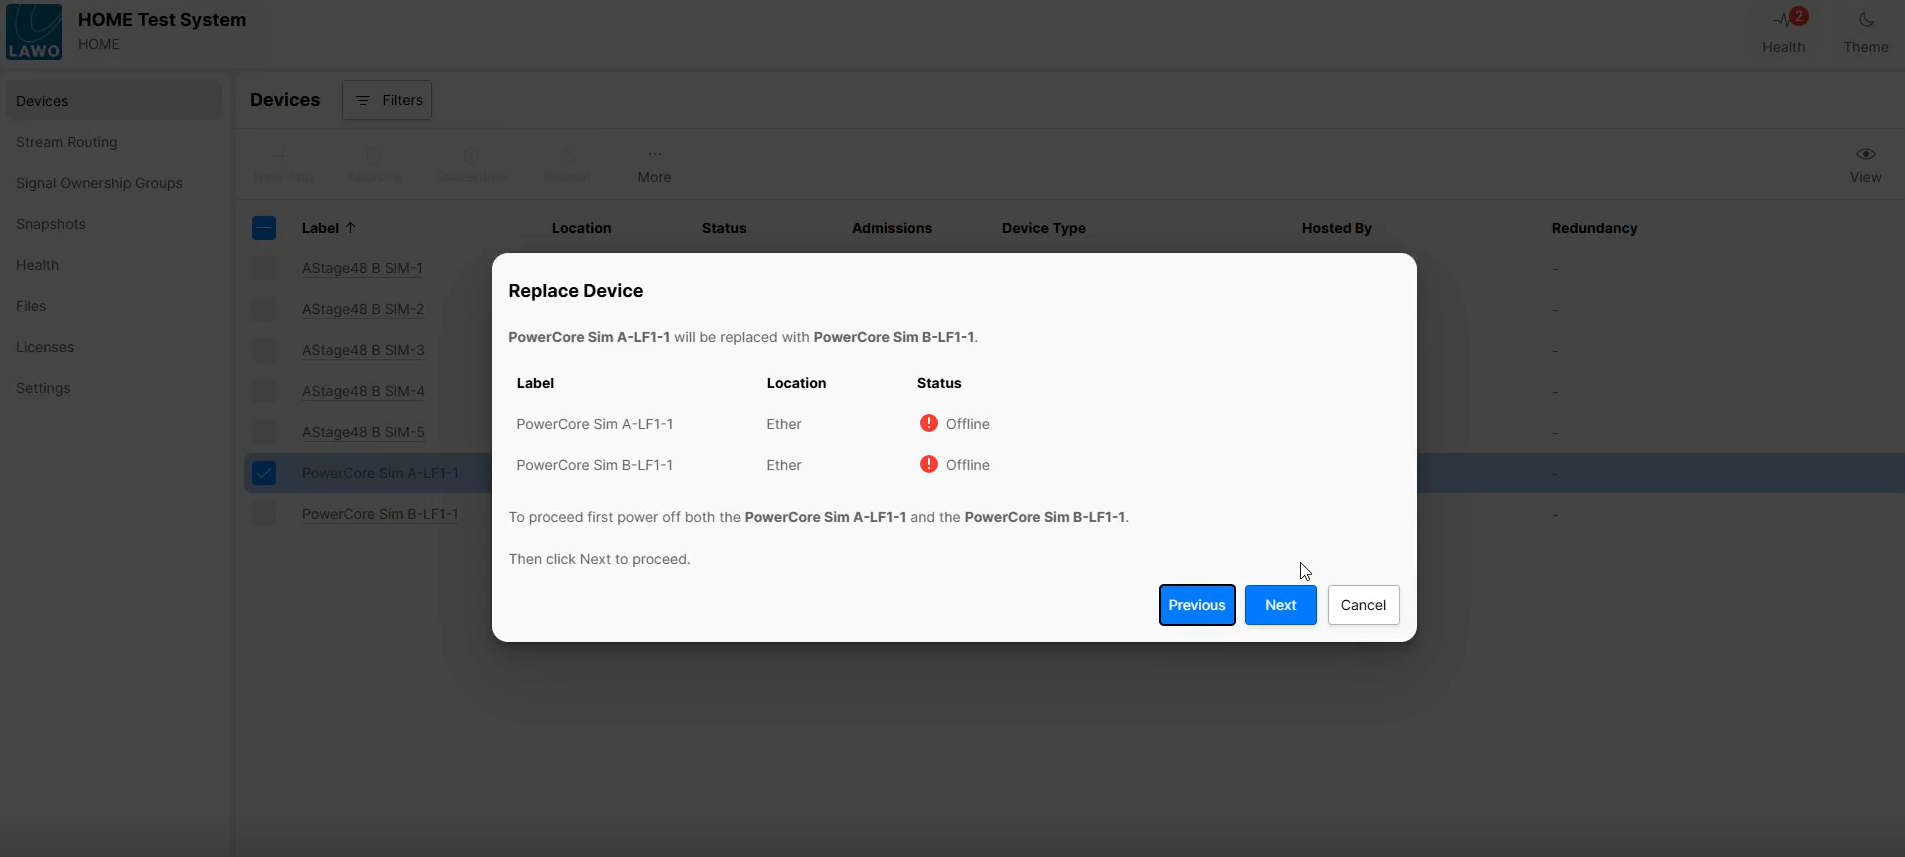
- At the next dialog, read the on-screen information carefully (as this describes what will happen when you confirm the device replacement).
Please note: The device replacement process only replaces the Device ID. The configuration of the replacement device is not changed and must be changed manually later (if this is required).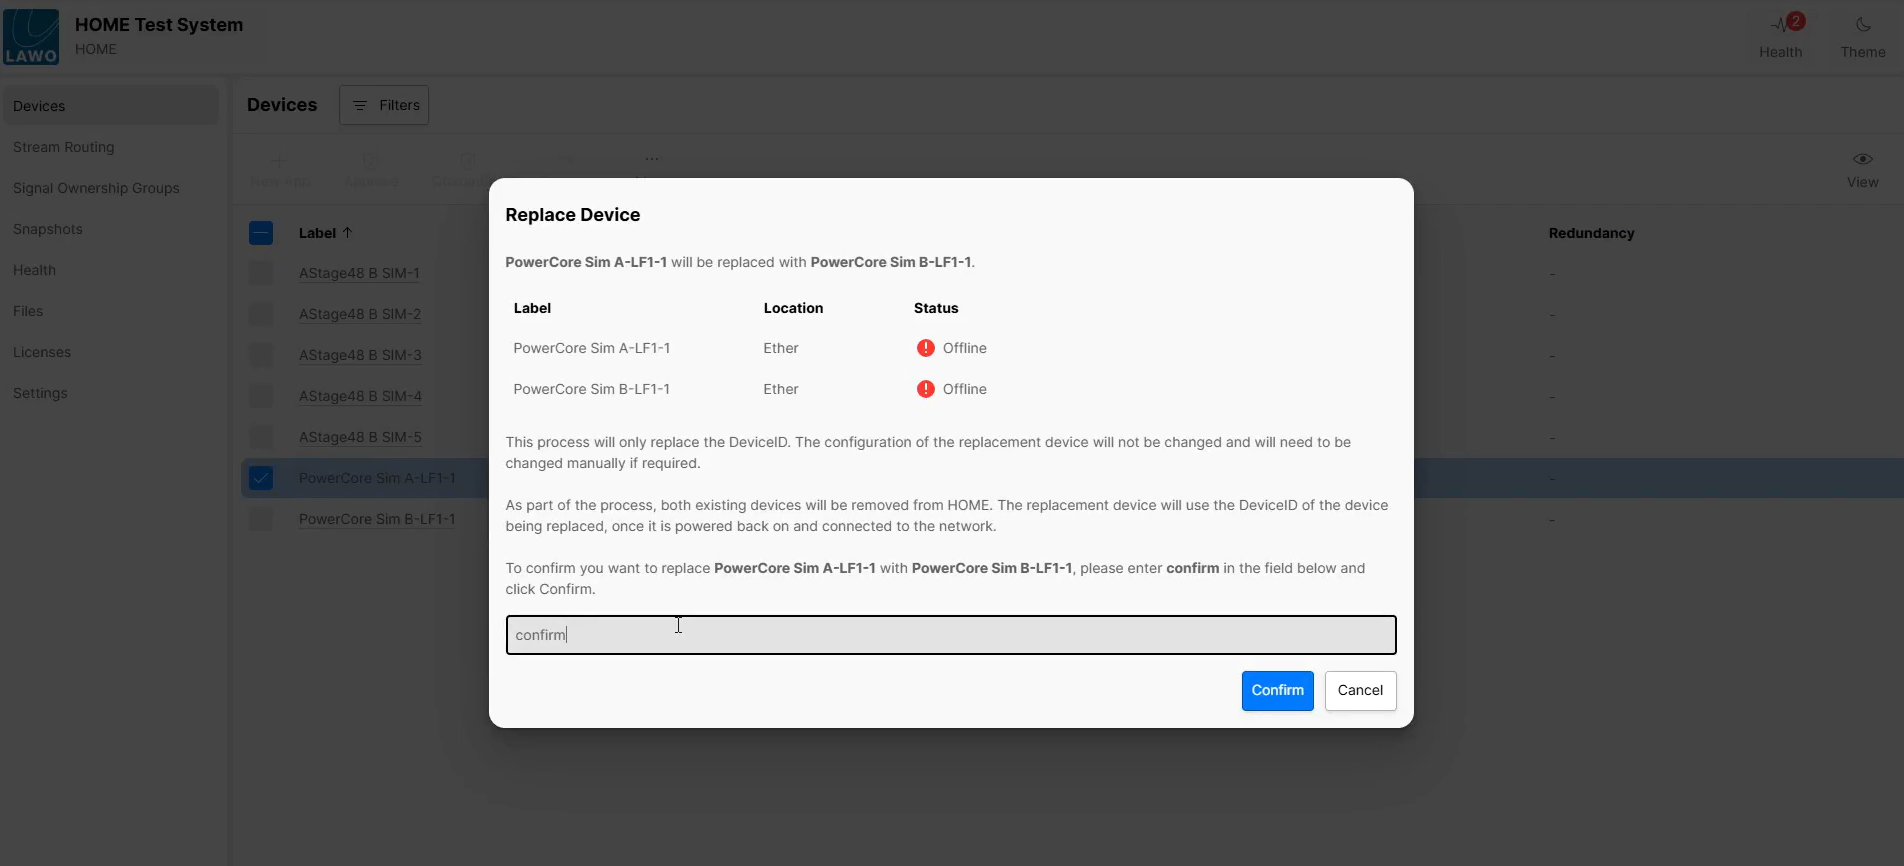
- To confirm, type in the confirmation text (confirm) and then click Confirm.
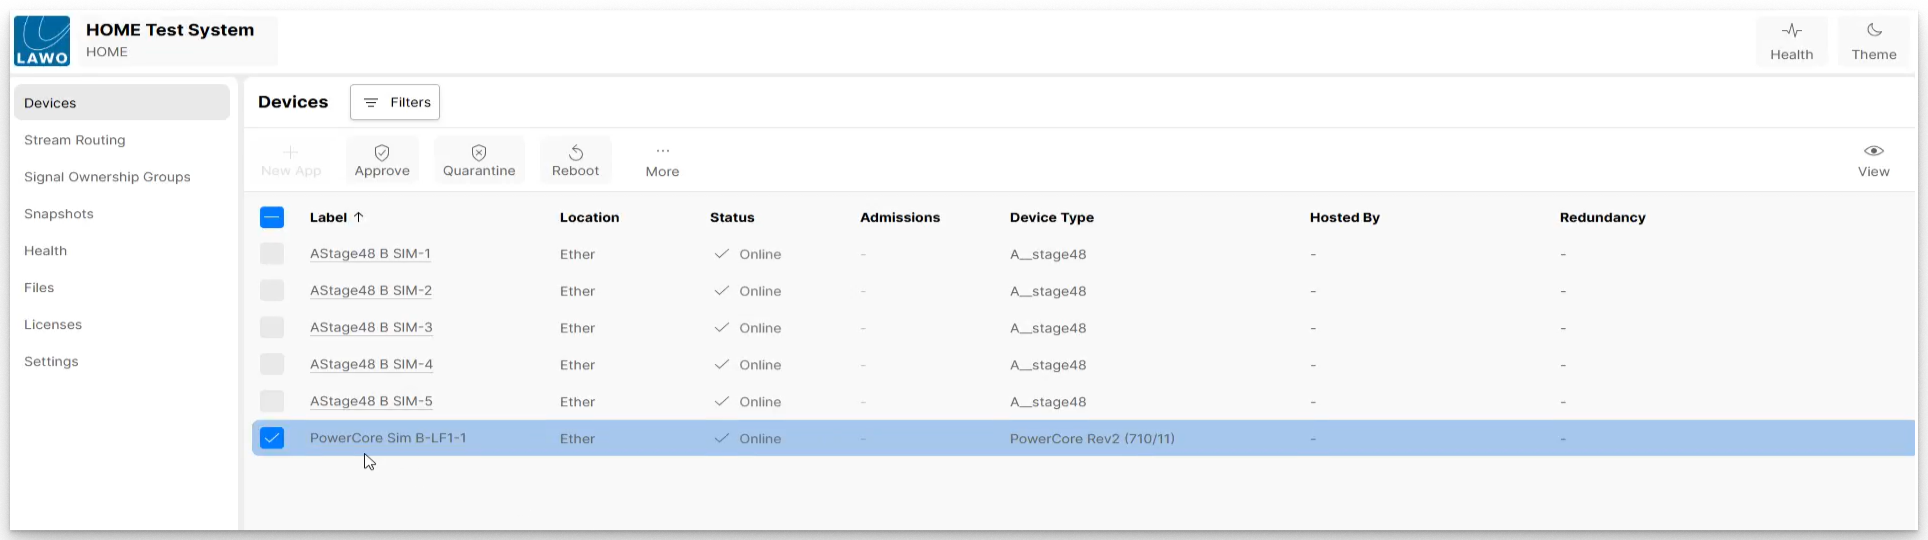
- Once the replacement device is powered back on and connected to the network, it takes over the Device ID of the former device:
Restoring the Configuration
At this stage, only the Device ID has been replaced. This means that the replacement device appears in HOME with the former device's attributes (e.g. Label and Location), but no changes have been made to its configuration.
If you wish to reinstate the configuration of the former device, then this must be done manually, either by loading a previously saved snapshot or editing the device configuration. In some cases both steps are required.
- To load a previously saved snapshot, use the Load Snapshot option (above Replace Device in the ...More menu). Full instructions can be found in HOME - Create and Load Snapshot (for selected devices).
- To edit the configuration manually, use the device settings pages. See HOME - Configuring a device.
Watch the video
The full procedure can be visualized by watching the following video: Device_Replacement.mkv