Waves for mc² - Offline Setup of Axis Scope PC
This topic describes how to setup the Waves host PC if it does not have an internet connection.
Before you start, please read the Important Notices in Waves for mc² - Prerequisites and prepare the software as follows:
- Waves Central - download and install on a computer with an internet connection.
- DirectOut GlobCon - copy to a USB key or transfer through Windows Remote Desktop.
- TightVNC - copy to a USB key or transfer through Windows Remote Desktop.
To complete the setup, there are four steps.
- Configure the Management IP.
- Configure the user password, disable the firewall and enable Windows Remote Desktop.
- Create a Waves offline package installer.
- Install the Waves products (using the offline installer).
Step 1: Configure the Management IP
The instructions below assume that you are on-site. If not, you will need the support of an on-site technician and remote computer (aka jump PC).
- Connect the management Ethernet interface of the Waves Axis Scope PC to the Management network switch.

- Configure a static IP address for the Waves Axis Scope PC (as described in Waves for mc² - Management IP Setup).
Step 2: Configure the password, firewall and Windows Remote Desktop
The next step is to define the AXIS user password, disable the firewall and enable Windows Remote Desktop.
- Go to Windows start menu.
- Using the search bar, enter "Windows PowerShell".
- Select "Run as administrator".
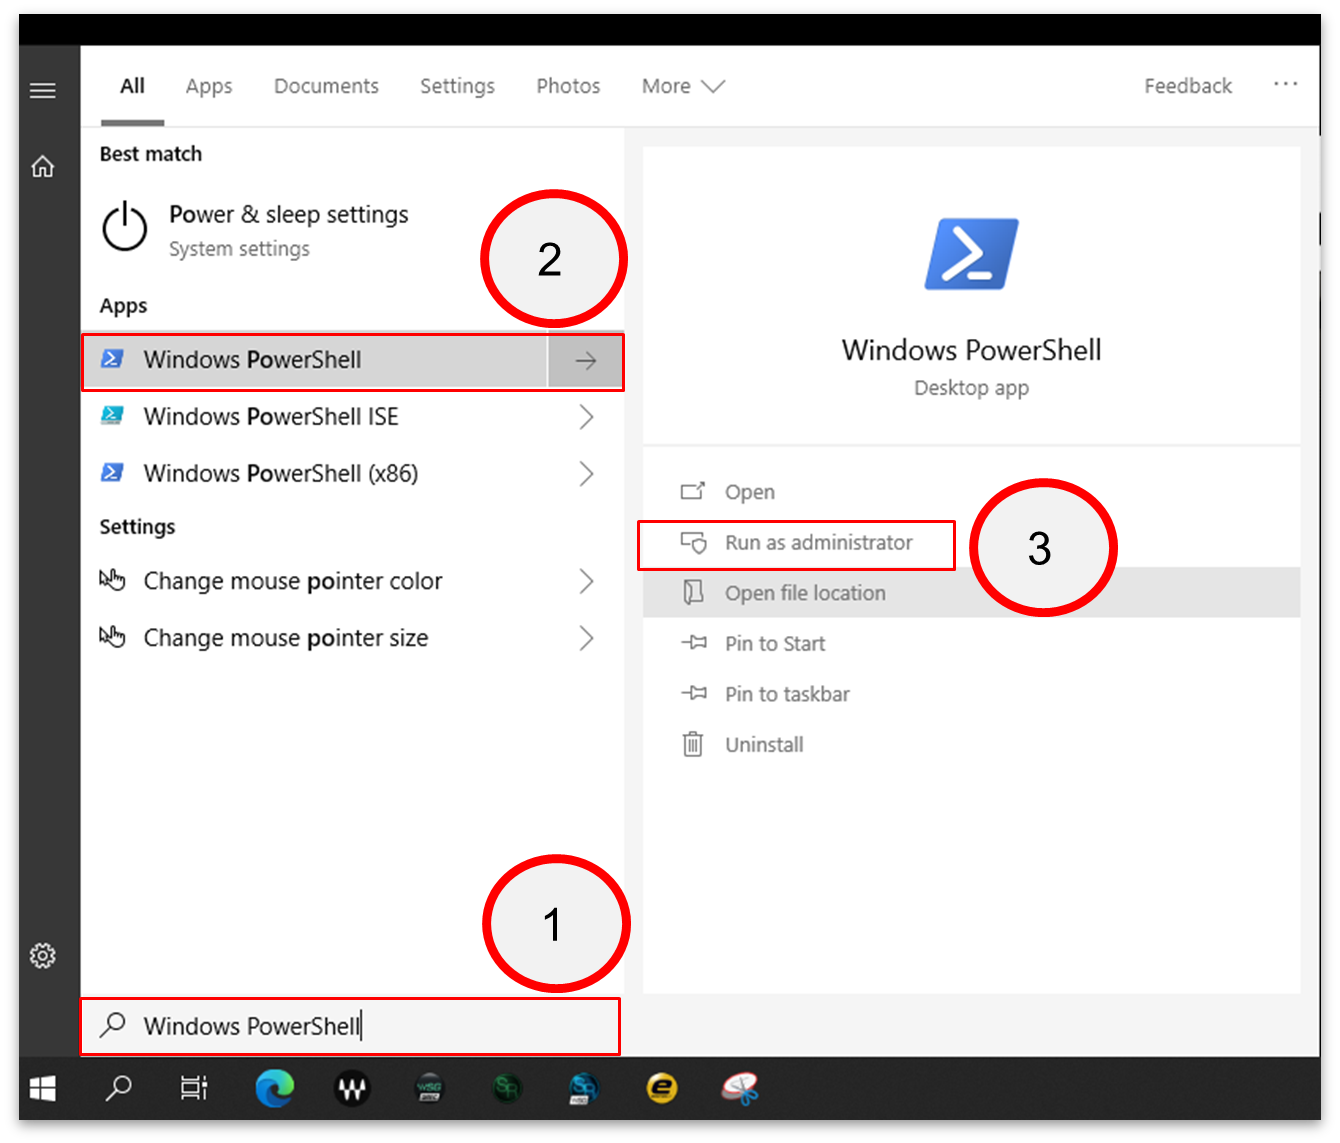
- Copy and paste the following commands into the Windows PowerShell terminal.
net user AXIS AXIS
Set-LocalUser -name "AXIS" -PasswordNeverExpires 1
netsh advfirewall set allprofiles state off
Set-ItemProperty -Path "HKLM:\System\CurrentControlSet\Control\Terminal Server" -name "fDenyTSConnections" -value 0These commands set the password "AXIS" for the default user AXIS, set the password to not expire, disable the windows firewall and enable the Windows Remote Desktop
If you wish to connect to the Waves Axis Scope PC, using a Windows Remote Desktop connection, please follow the steps in Waves for mc² - Prerequisites.
Step 3: Create a Waves offline package installer
The next step is to create a Waves products installer package that can be used offline.
To do this you will need a computer with an internet connection.
- Start Waves Central.
- Log in to your Waves account (as described here).
- Register the Waves products (as described here).
- Transfer the licenses onto a USB Key. For help, please see Waves support at:
https://www.waves.com/support/install-activate-products-on-offline-computers - Go to "Offline Installer".
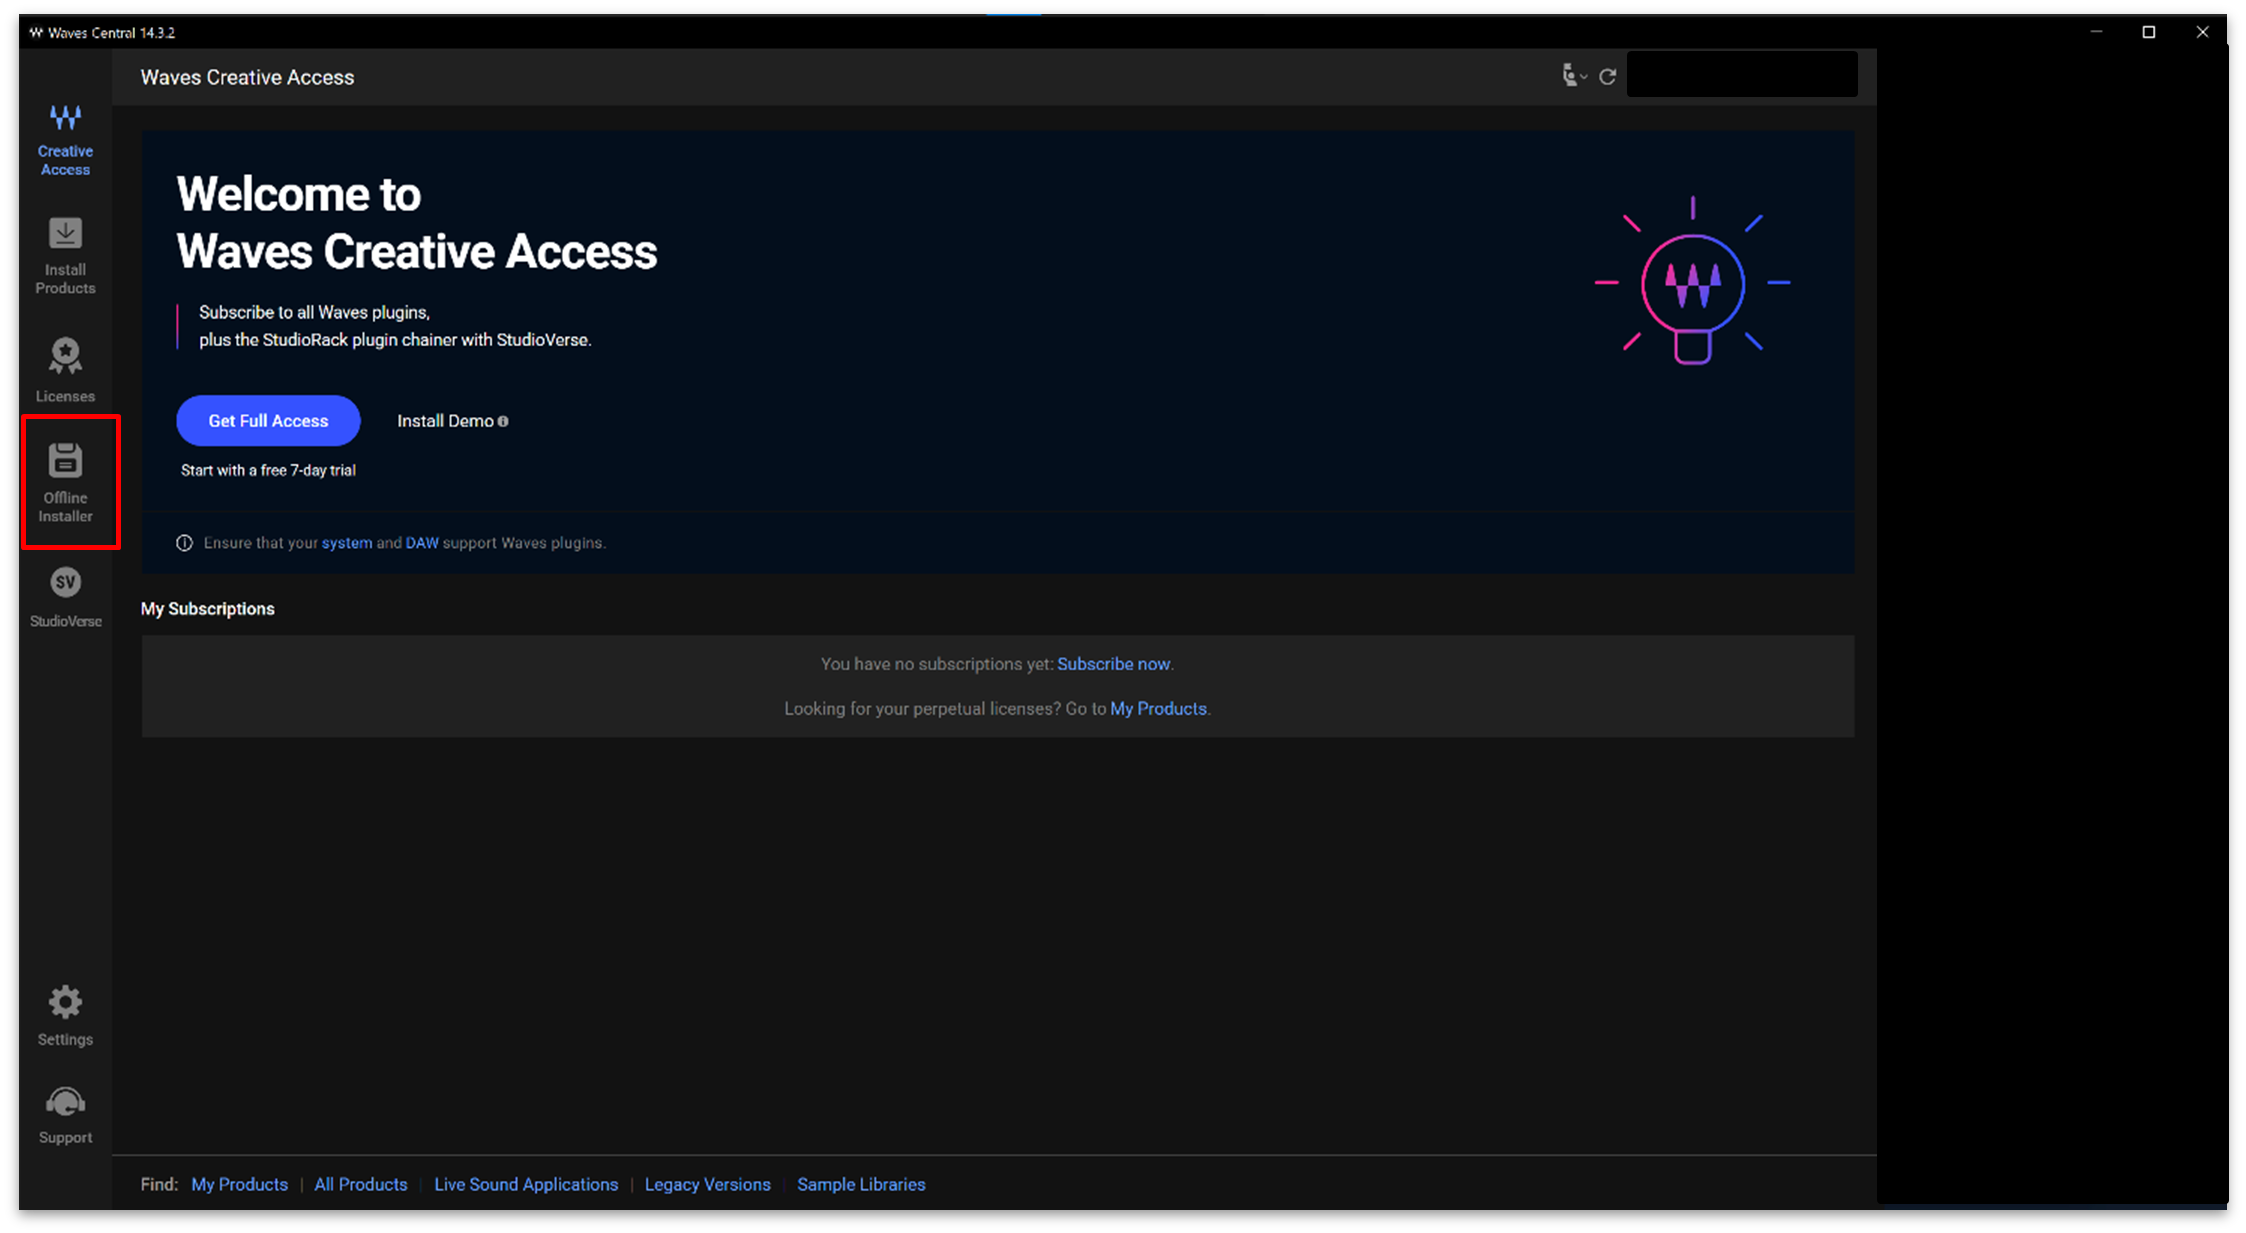
- Click on "Create".

- You are redirected to "Install Products" page.
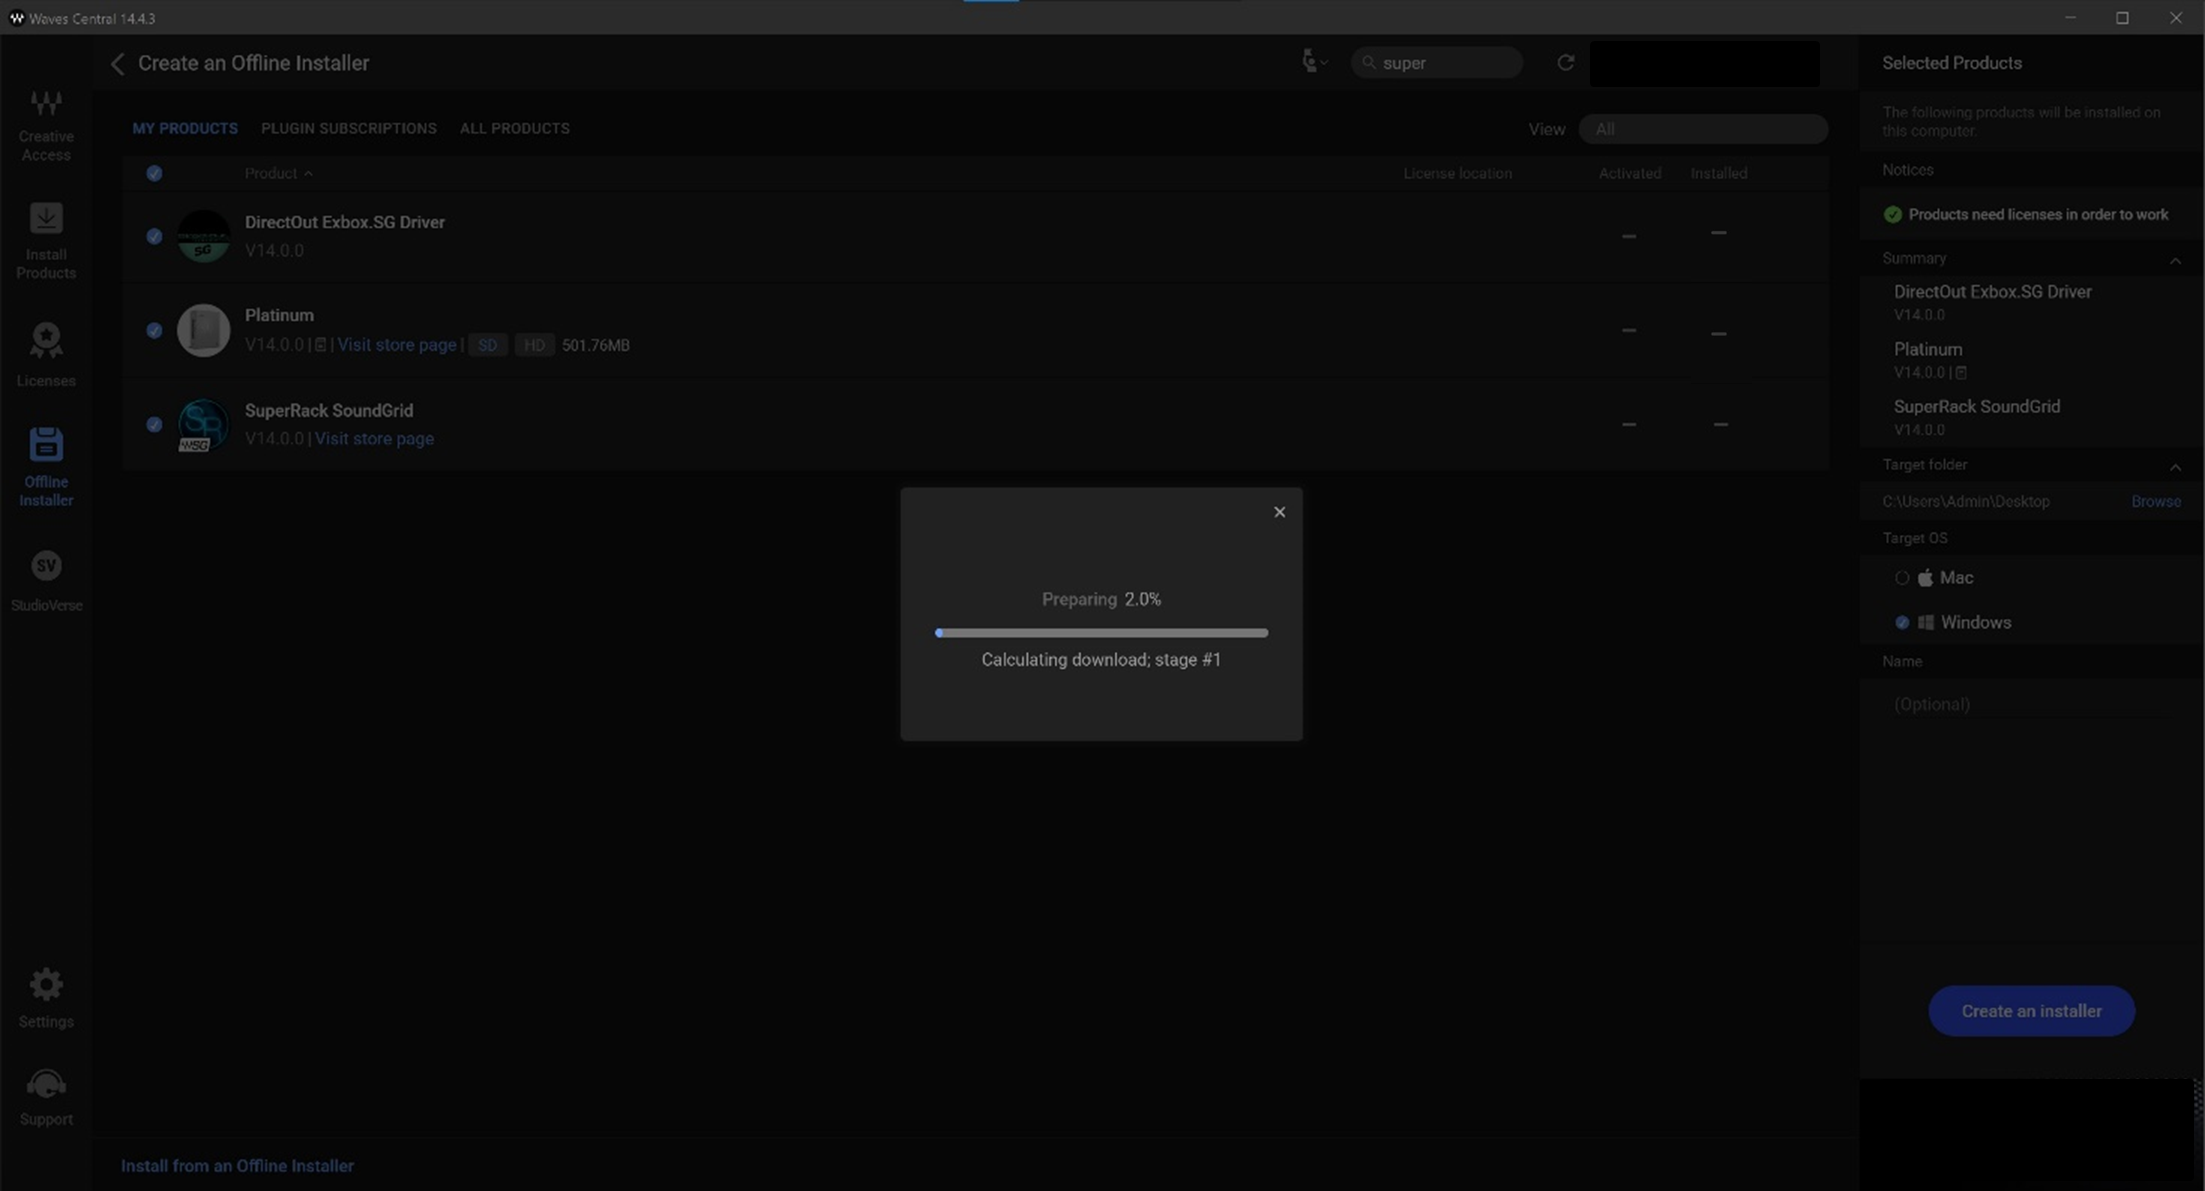
- Select "ALL PRODUCTS".
- Type in the search bar: DirectOut EXBOX.SG driver and select it.
- Select "MY PRODUCTS"
- Click on "I understand".

- Select as target OS Windows.
- Select the target folder. (The default folder location is the desktop).
- Click on "Create an installer".

- Waves Central now creates the installer package.
- Once the package is created, you will see this message. Click on "OK".

The installer package is created in a folder called "Waves" in the target folder location..
Step 4: Install the Waves products
The final step is to install the Waves products (on the Axis Scope PC).
- Copy the "Waves" folder from your computer to a USB key.
- Insert the USB key into the Waves Axis Scope PC and copy the "Waves" folder to the desktop.
- Start Waves Central (on the Waves Axis Scope PC).
- Click on "Offline installer".
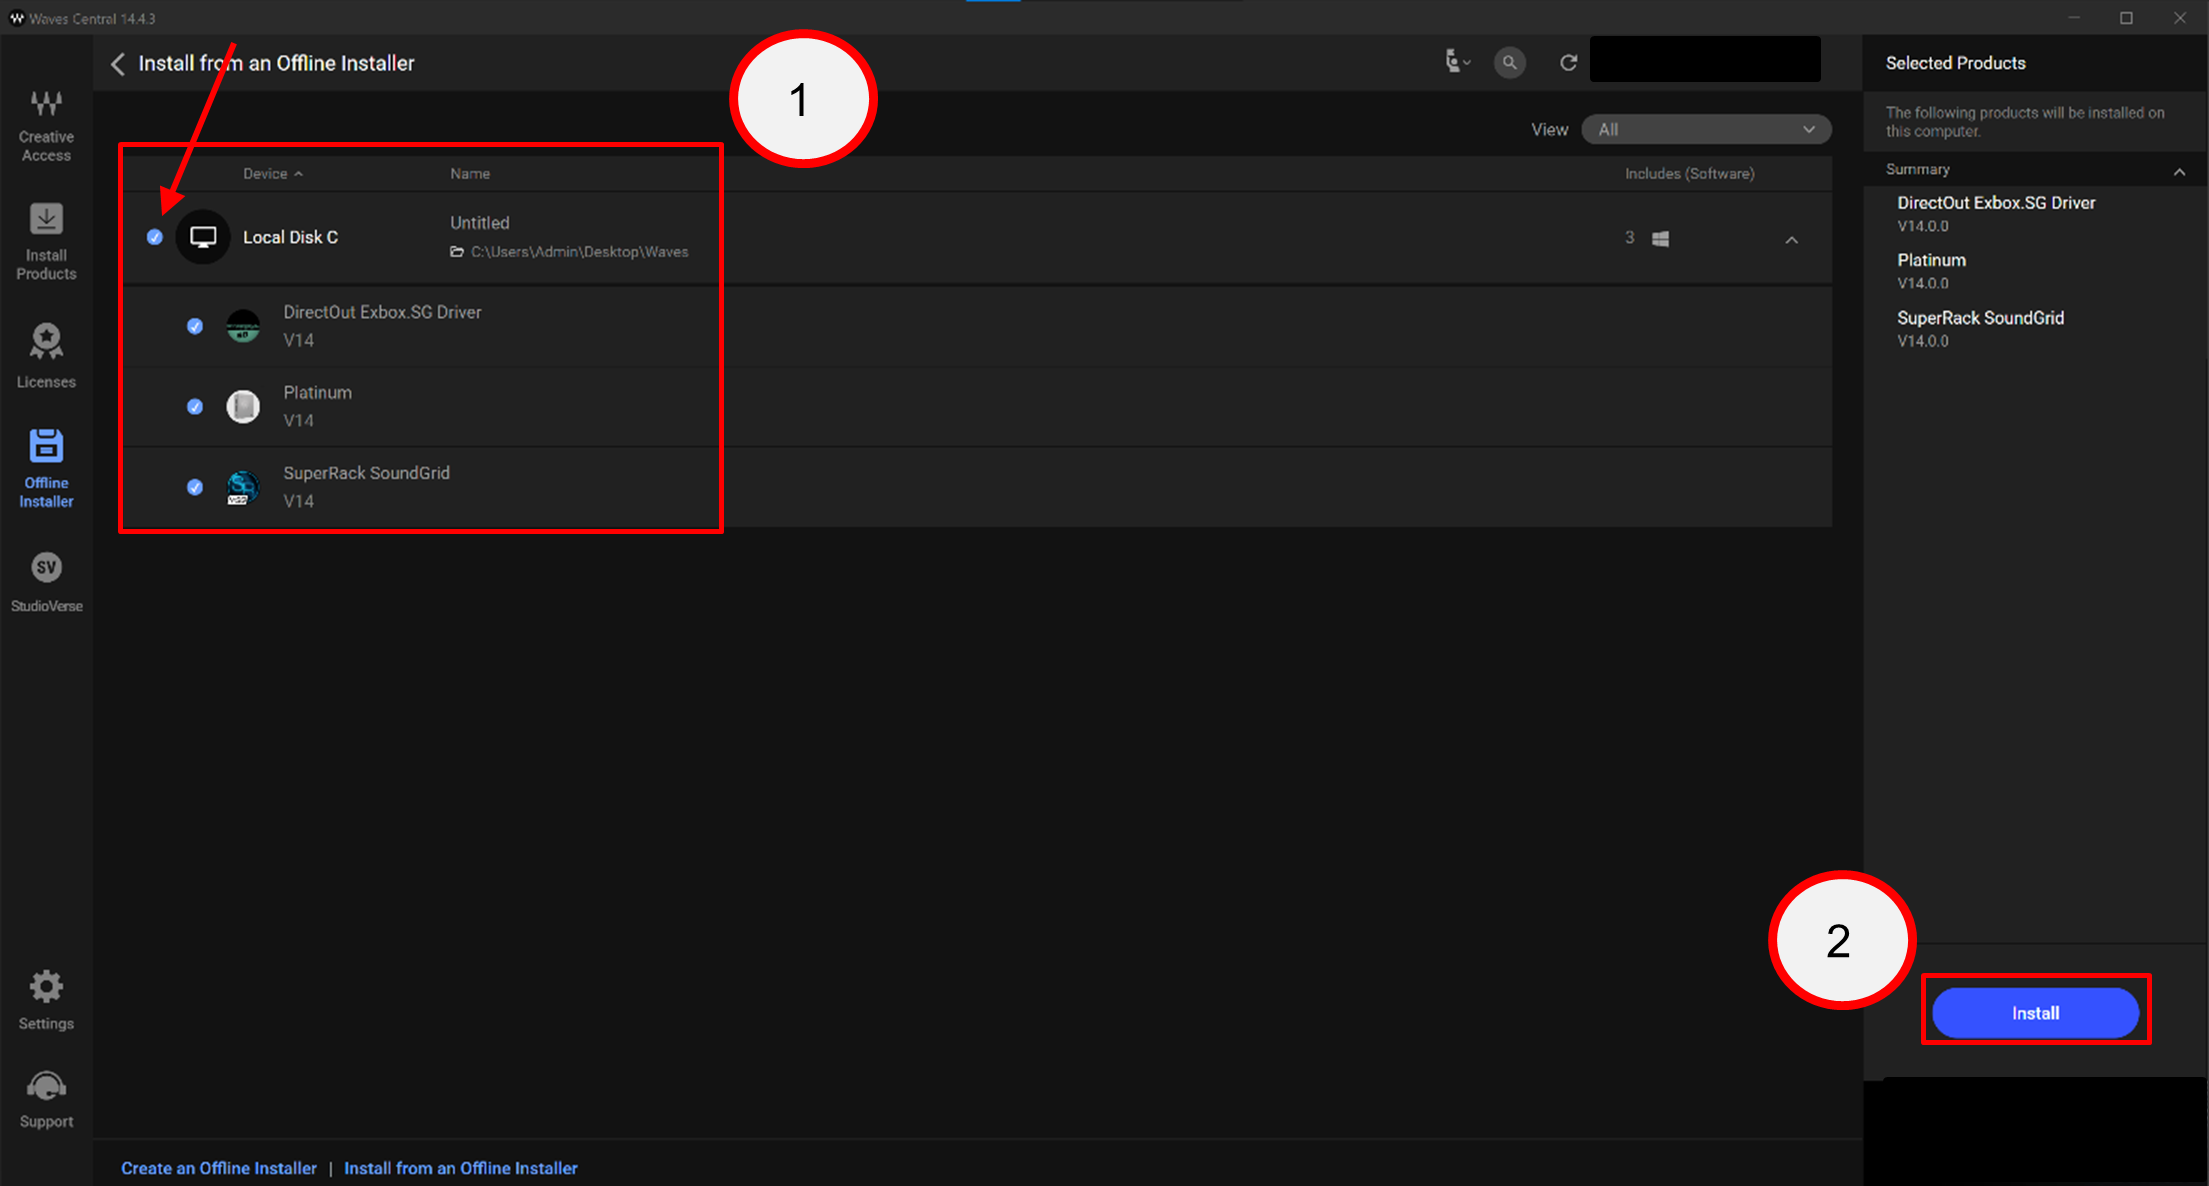
- Click on "Install from an Offline Installer".

- A box dialog opens. Select the "Waves" folder (copied to the desktop) and click on "Select Folder".

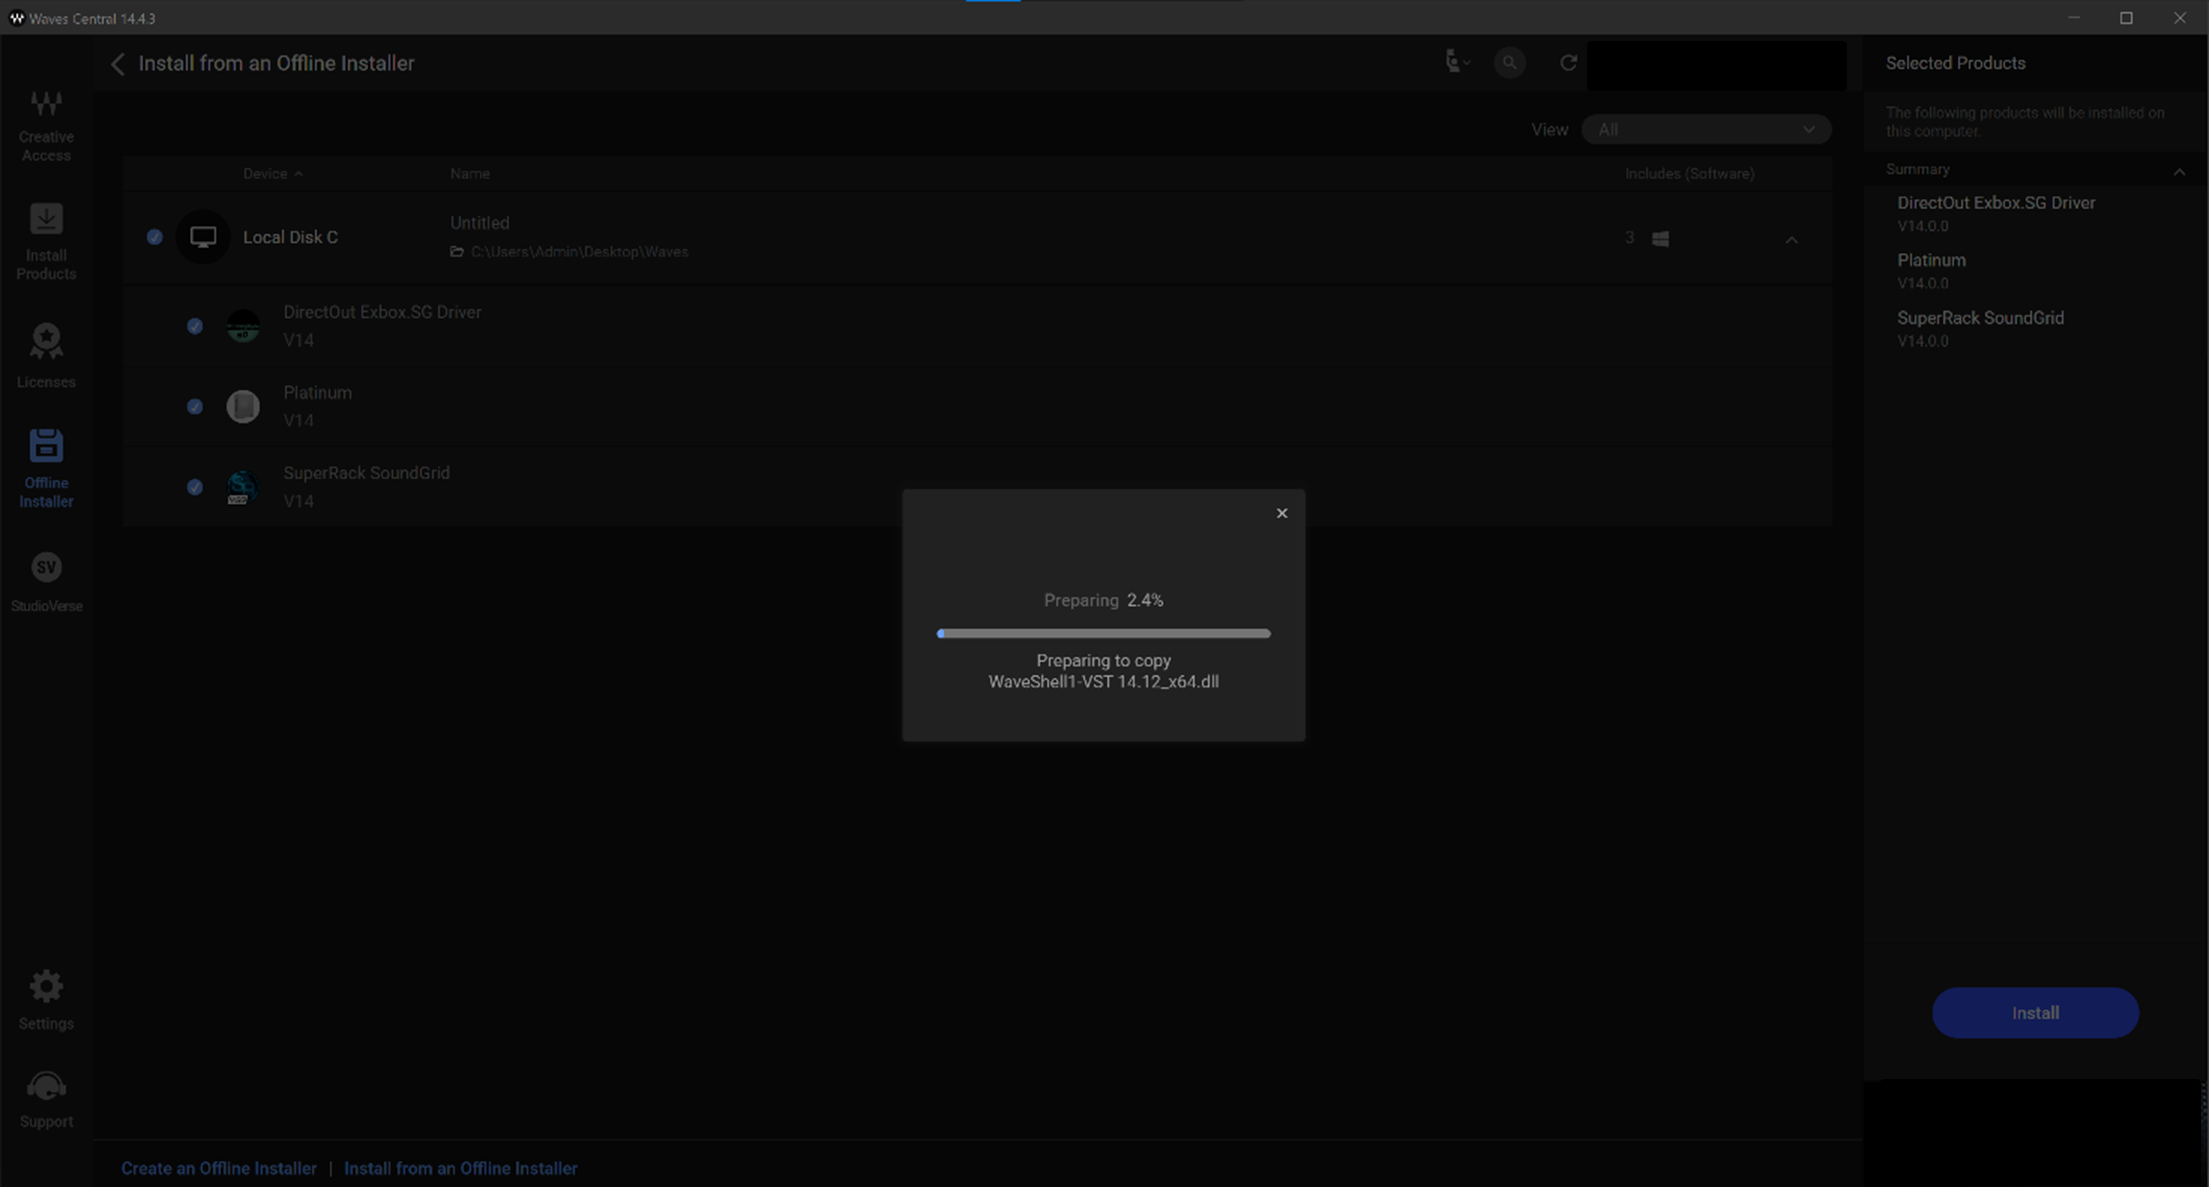
- Select all of the package and click on "Install".
- The installation starts.
- Following a successful installation, you will see this message. Click on "Restart" to restart the PC.

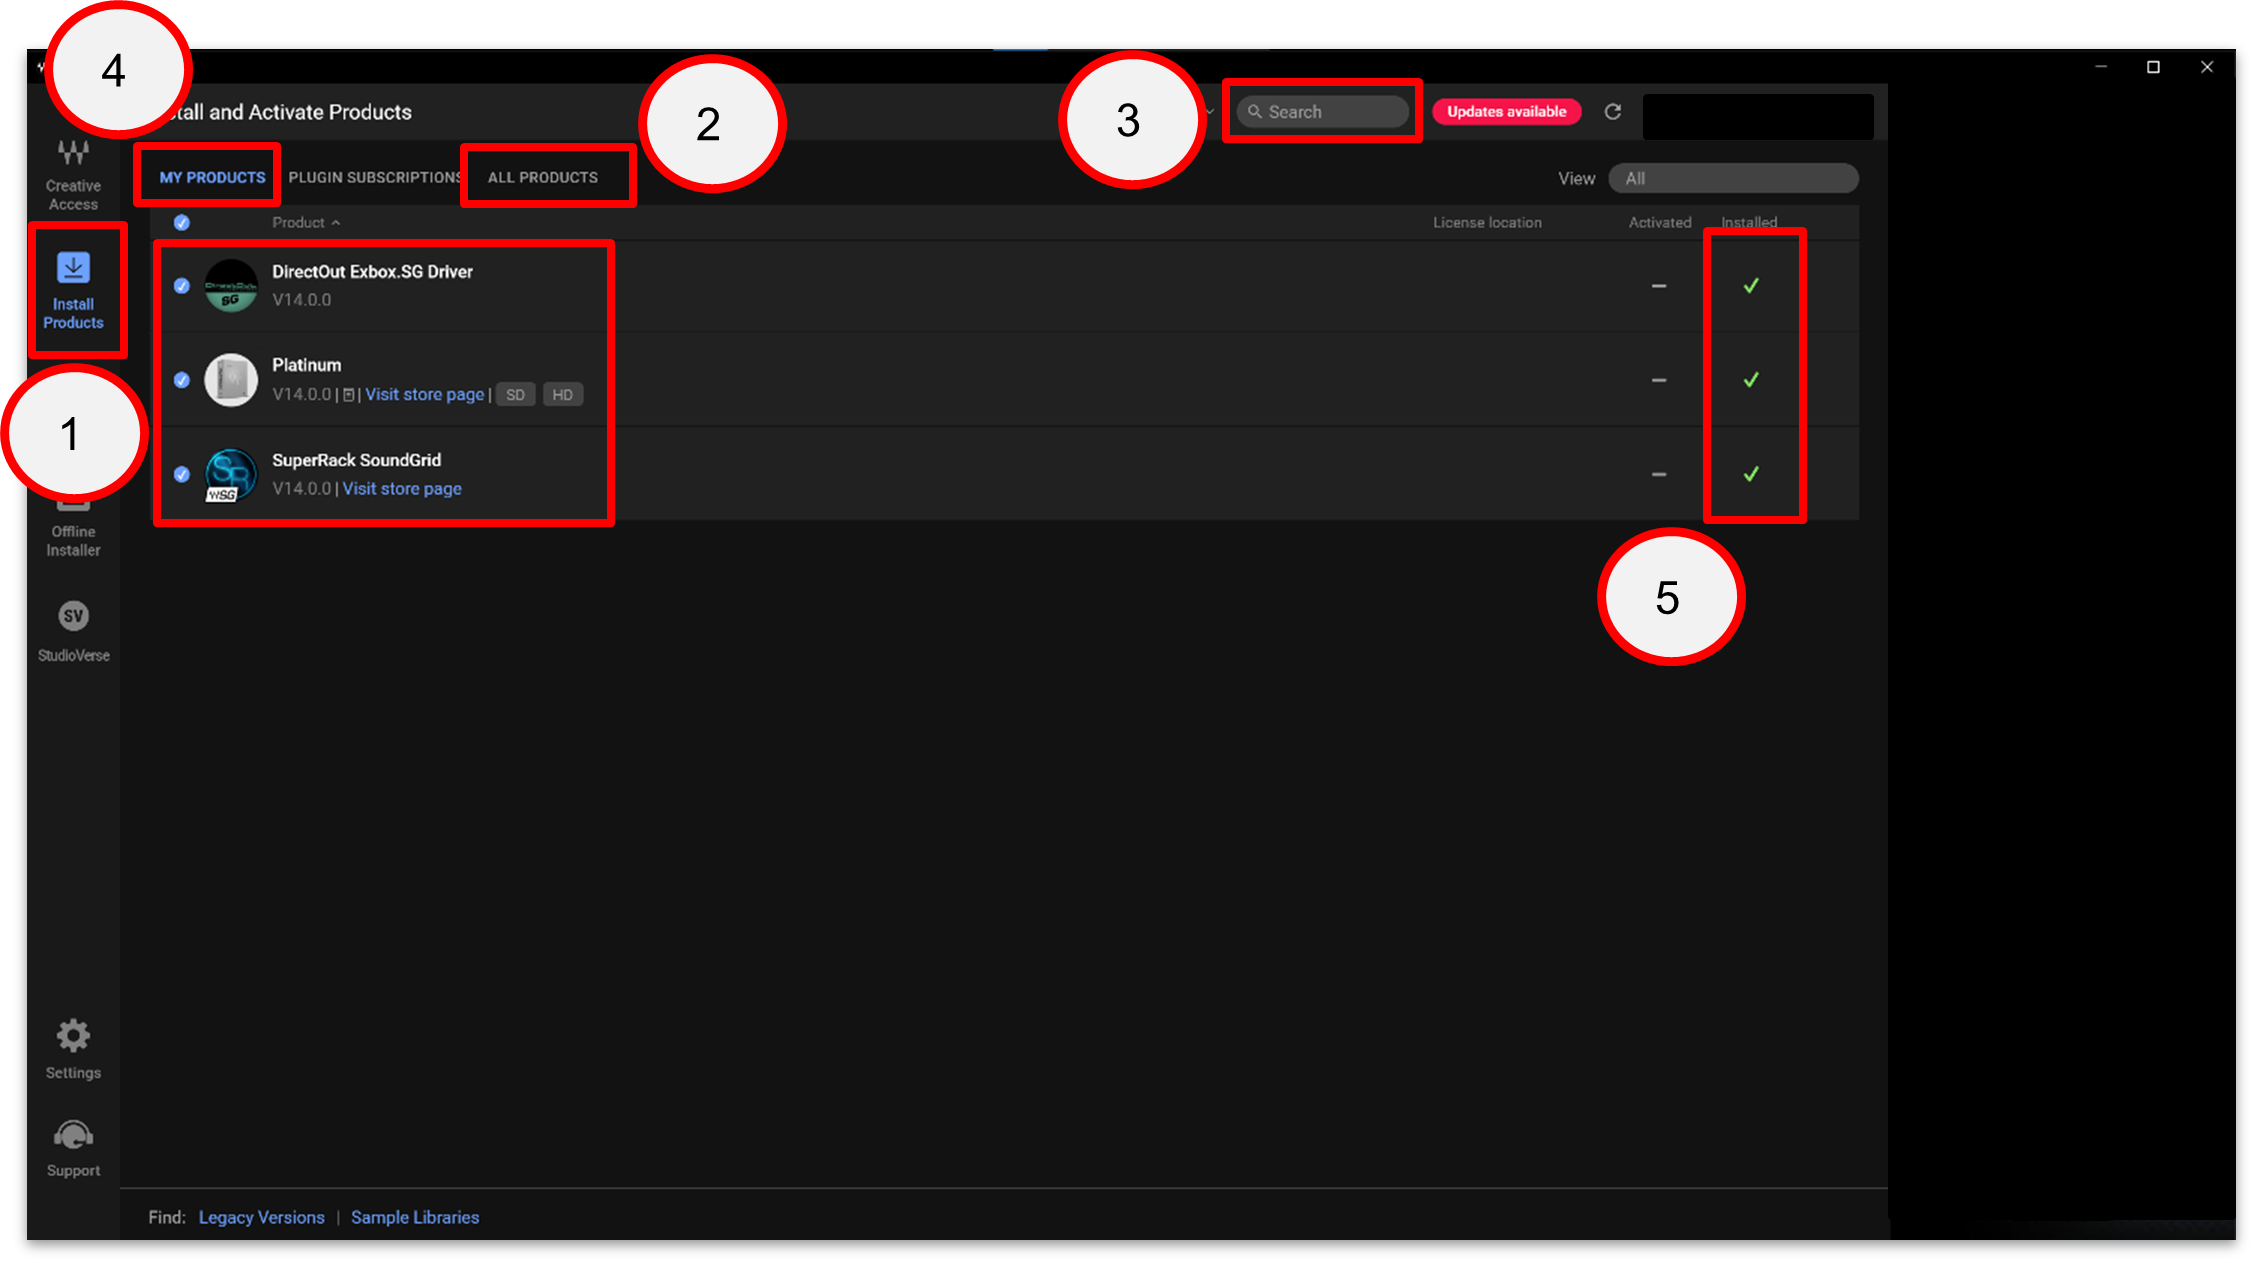
- After the restart, open Waves Central.
- Click on "Install Products".
- Click on "ALL PRODUCTS".
- Type in search bar: DirectOut EXBOX.SG driver and select it.
- Click on "MY PRODUCTS".
- The software and drivers are installed.
- To activate the software, insert the USB key with the licenses that you transferred earlier.
The Waves products are now active, and you can continue with the setup by installing GlobCon (as described here).