mxGUI - Operating Principles
The mxGUI operating window is virtually identical to the Central GUI on an mc2 console, except for the main menus at the top of the display and some additional pages.
This topic describes the elements that are new to mxGUI users.
- Main Menus
- Available Pages
- Adjusting Settings
- Strip Assign display
- Access/Assign window
- File Transfer display
- Shared Folder
Main Menus
In the current release, there are five main menus.
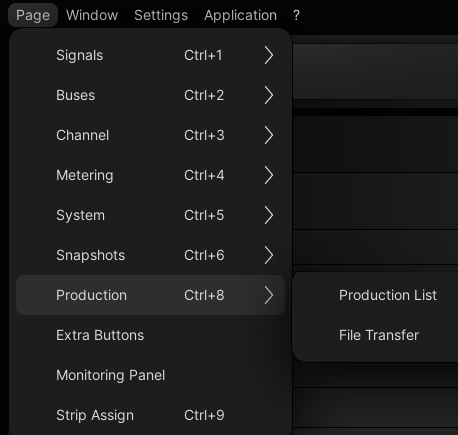
- Page - provides access to the available pages.
- Window → Access/Assign - opens the 'Access/Assign' window (to perform access/assign operations).
- Settings → Connection - opens the 'Connection' window (to get online or offline).
- Application → Quit – closes the current emulation.
- ? → Info – shows information about the mxGUI release.
Available Pages
Most of the mxGUI displays are identical to the ones on the console. You can learn more about these here.
The exceptions are the Strip Assign and File Transfer displays which appear only in mxGUI. The File Transfer display replaces the File display on the console GUI. It can be found under Production (as shown below).
To change page, click on the Page (main menu) or page icon (beside the Lawo logo). Or use one of the keyboard shortcuts (shown in the page menu).
Adjusting Settings
Settings are adjusted in the same way as on the Central GUI. Instead of touching an option, you can use the mouse and keyboard on your computer.
- Left-click to enable a button or option.
- Right-click to reveal the context menu (if applicable).
- Left-click on a text field to edit a name.
Click on the up/down arrows beside a parameter, or use the keyboard up/down cursor keys, to adjust the value.
If you have a mouse wheel, then this can be used to adjust a parameter value, or scroll up/down a list, once it is in focus.
You can use any of the usual console Keyboard Shortcuts to speed up the page navigation and editing of parameters.
Strip Assign display
The Strip Assign display provides a virtual representation of the console fader strips. You can use this to check what channels are assigned to the surface, select a fader and adjust levels and mutes.
1. Open the display by selecting Strip Assign from the page menu.
The vertical "strips" represent the physical fader strips on the console. If you hover at the bottom of the display, a horizontal scroll bar appears. This can be used to scroll left and right to see all available faders.
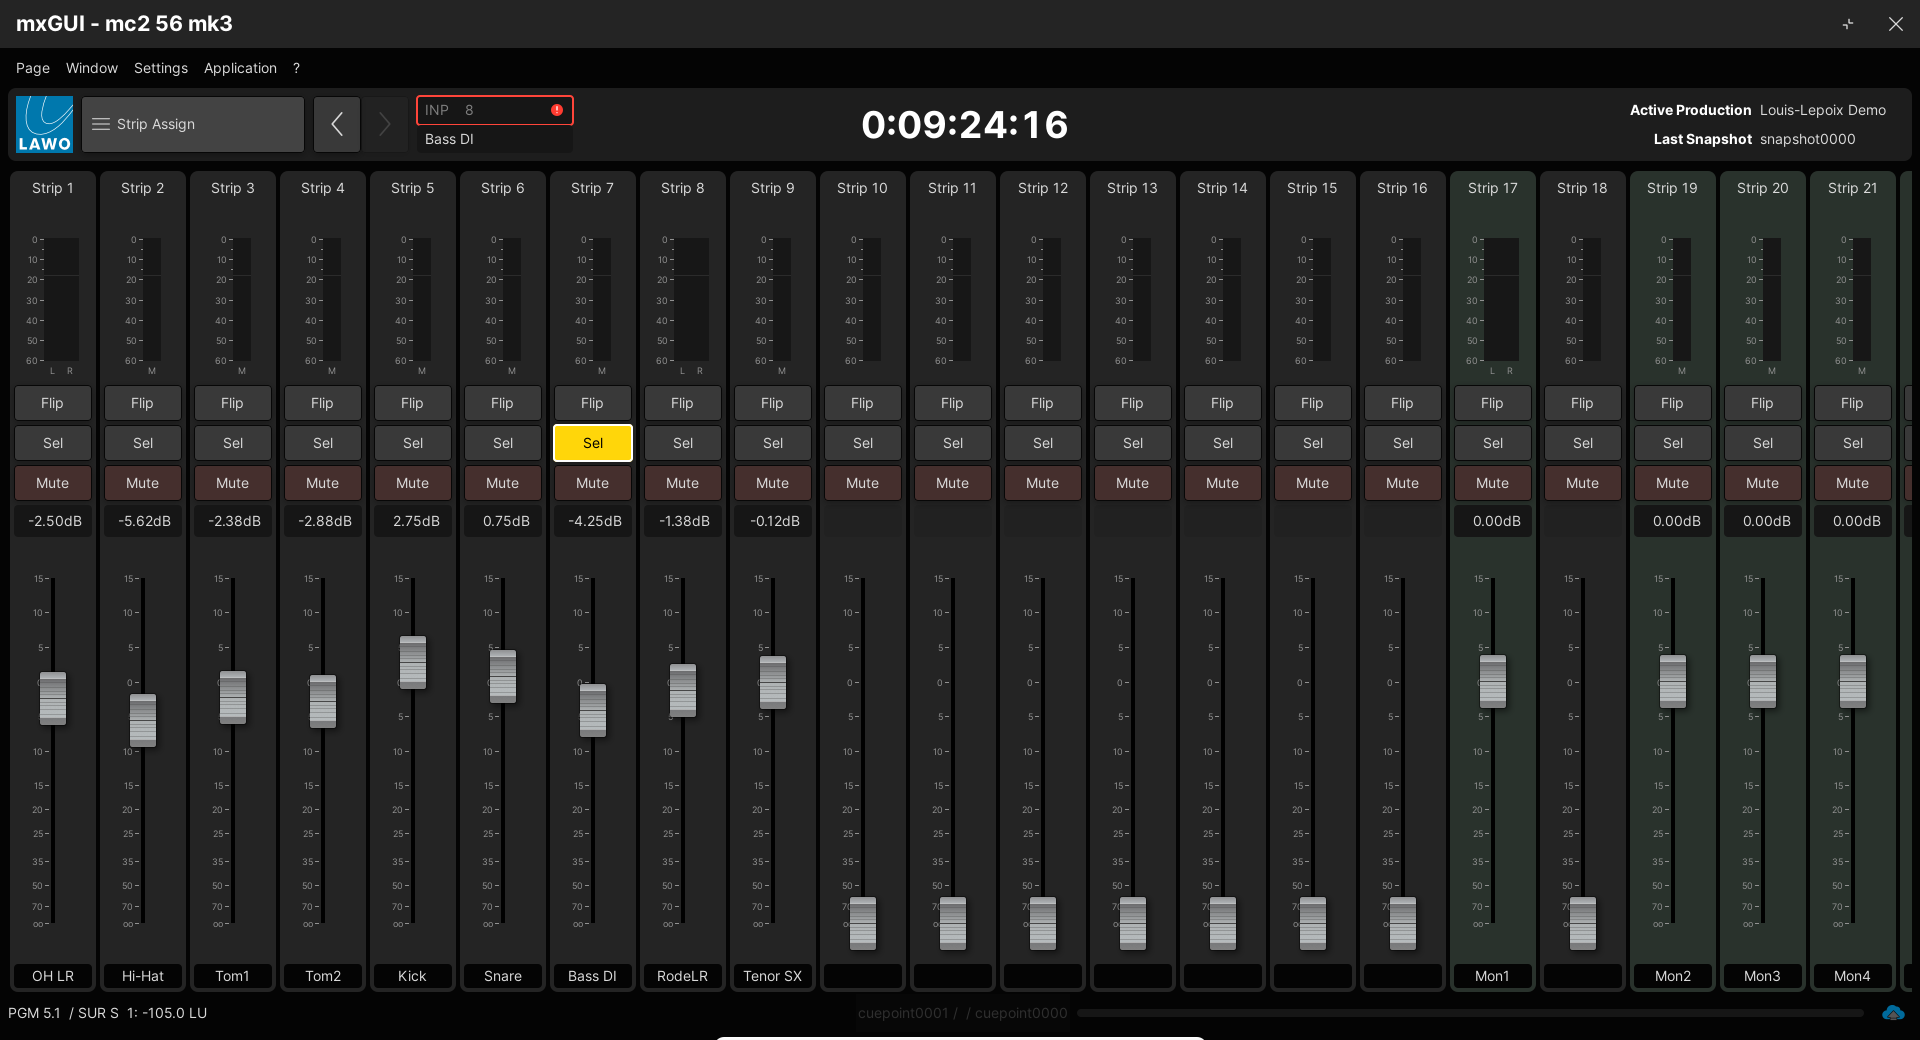
2. Working from top to bottom, each "strip" provides:
- Strip # – identifies the fader strip. Note that main fader strips are marked as Main #.
- Meter - channel meter. Right-click to change the meter mode or pick-up point.
- Flip - layer flip. Click to switch to the alternate layer.
- Sel - fader select. Click to select the fader strip (to change the channel in access).
- Mute - channel mute. Click to mute the channel.
- Level (in dB) & Fader - channel level. There are two ways to adjust the level.
- Click on the dB field and type in a value or scroll the mouse wheel up/down.
- Click and drag up/down on the fader.
- Label - short label (identifies the channel). The labels can be switched globally using the LABEL buttons in the Access/Assign window.
If you open the Access/Assign window (as described below), you can use the Sel buttons to change fader strip assignments, copy audio parameters, create a couple group, etc.
Access/Assign window
The Access/Assign window can be floated above any of the main pages. It provides a virtual representation of the console centre section control panels. You can use this to perform a range of operations including strip assignment, bus assignment, and bank and later switching.
1. Select Window → Access/Assign (or press CTRL + Q) to open the window.
This is a floating window and so its position can be moved as required.
In the example below, it is being used to perform a FIRST LAST fader strip assignment in conjunction with the Sel buttons on the Strip Assign display.
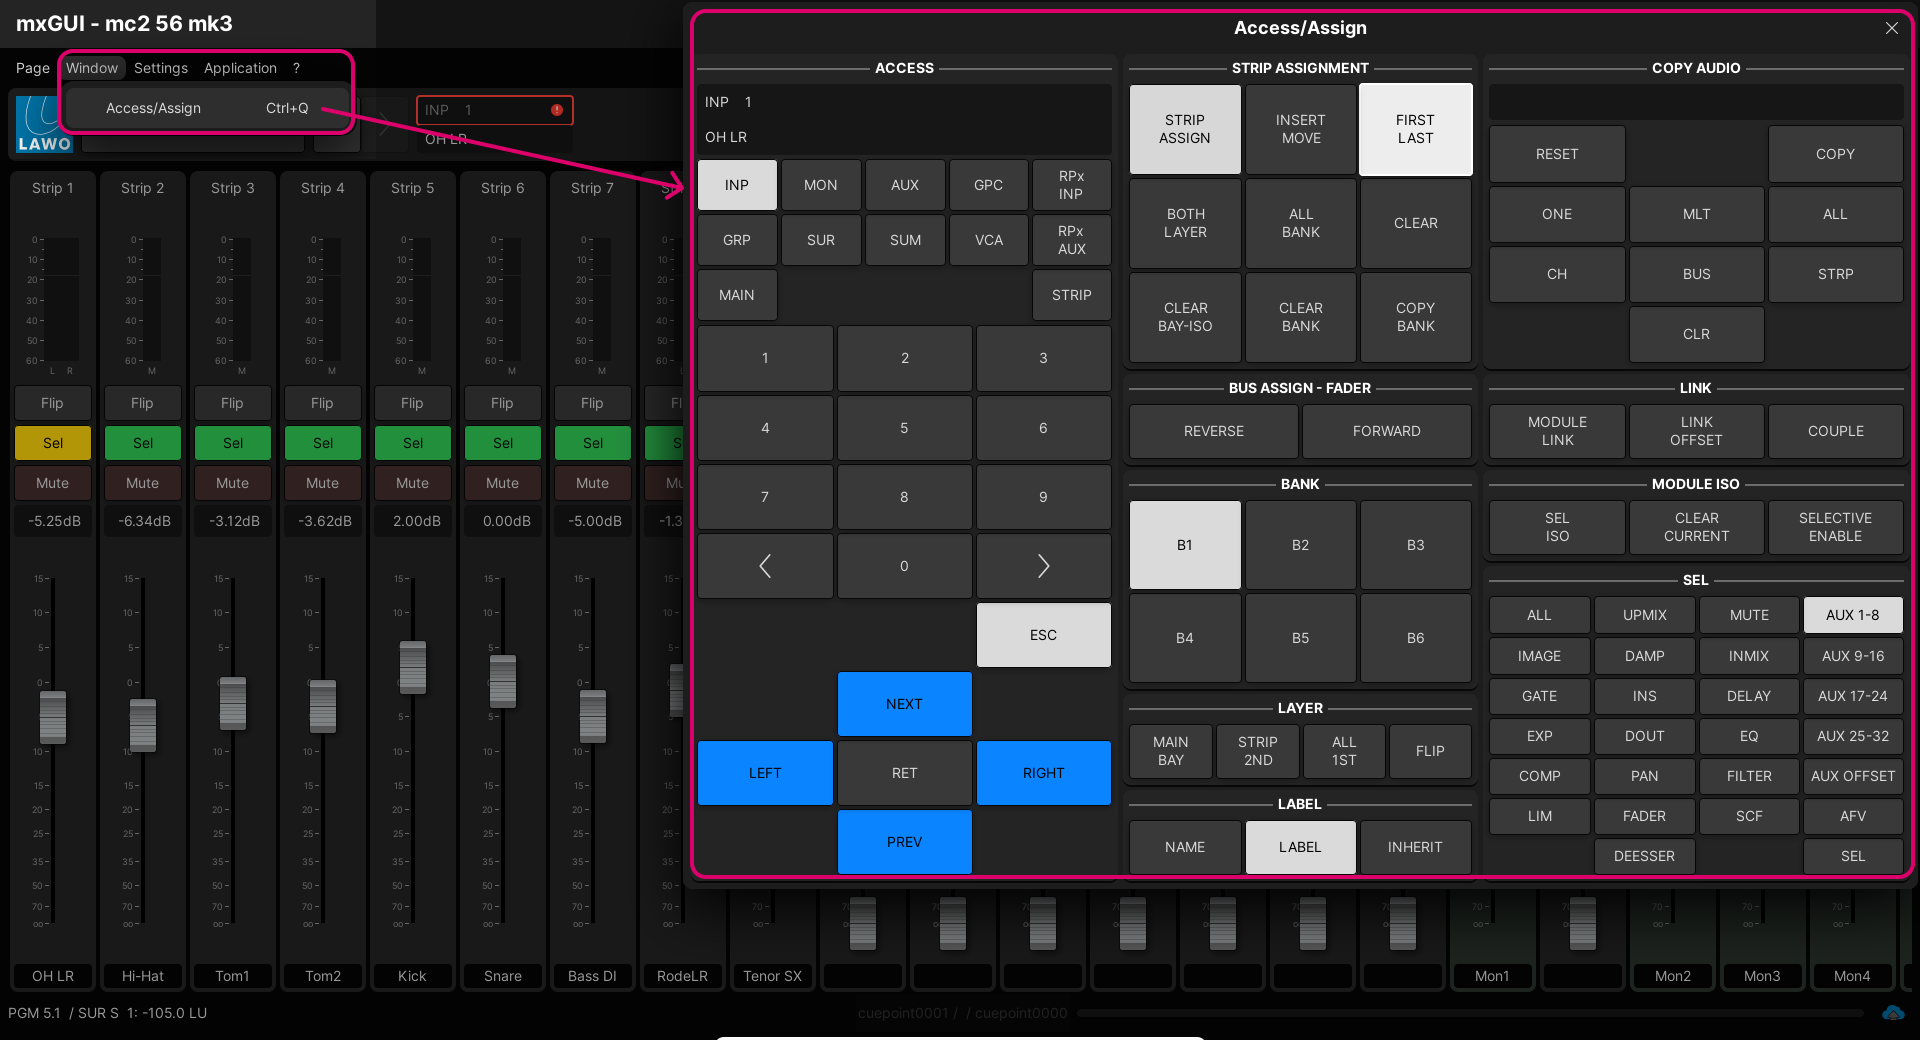
The on-screen controls work in exactly the same way as on the console front panel. Please click on the links below for more information about each function.
- ACCESS – shows/selects the channel in access. See Access/Assign.
- STRIP ASSIGNMENT - assigns channels to fader strips. See Fader Strip Assignment.
- BUS ASSIGN - FADER – these are the FADER FORWARD Assign and FADER REVERSE Assign functions.
- BANK and LAYER - switches Banks and Layers globally.
- LABEL – switches the fader strip Labels.
- COPY AUDIO – used to copy or reset audio parameters. See Copy & Reset.
- LINK – used to create link or couple groups.
- MODULE ISO – used to isolate DSP modules from snapshot loads.
- SEL – replicates the SEL buttons on the Central Control Section. See Selecting Channel Parameters.
File Transfer display
The File Transfer display is used to transfer files between the local control system (on the mxGUI computer), the online system (if connected) and the shared folder (in your host operating system). It can be used to backup user data or prepare mxGUI for offline working.
1. Open the display by selecting Production → File Transfer from the page menu.
![]()
On the left is the Local Control System (used when mxGUI is offline) and the Shared Folder (Host OS).
On the right is the remote control system (if a system is connected) and the Shared Folder (Host OS).
The remote control system provides access to the data stored on the mc2 system, and so this only appears when mxGUI is online. The system is identified by the Name and Primary IP entered in the 'Settings → Connection' window.
The Shared Folder (Host OS) appears on both sides of the display so that it can accept files from either the local or remote system.
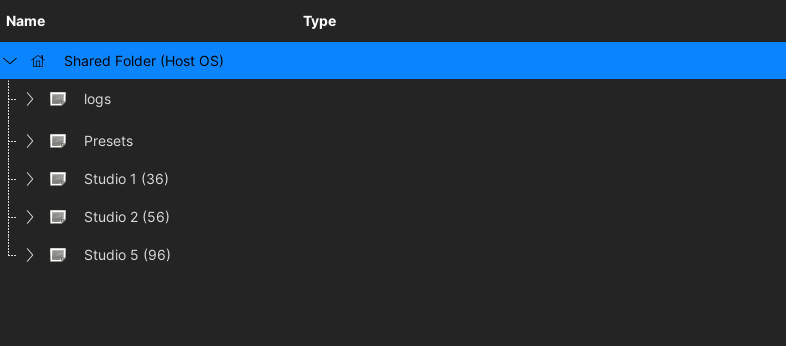
2. Open or close directories by double-clicking on the directory name (or click on the arrow beside the directory name).
![]()
The data structure is the same for both the local and remote control system. They contain the following parent folders.
- Active Production – contains the snapshots and mixes stored in the active production.
- Productions – contains all zipped productions (as a complete file).
- Presets – contains all module and channel presets.
- Configuration – contains the custom function template files.
- User Thumbnails - contains images for the user label thumbnails.
Each file and folder is clearly marked with its Type – e.g. production, channel preset, EQ preset, etc. The Type is important as files can only be transferred to a valid destination. For example, you cannot transfer a snapshot into the Automation folder!
It is possible to resize the display areas (by clicking and dragging on the vertical separator bar) OR sort files by Name or Type by clicking on the column headers.
3. To transfer a file (or folder), select a valid source and destination. Then right-click, and select Transfer.
Transfers can be made from left to right or right to left. If an operation is not permitted, then the Export or Import option is greyed out.
If a file with the same name already exists, then a copy is made and a suffix added to the file name. e.g. (0001).
Shared Folder
The mxgui_user_share folder can be used to copy user data to and from your host operating system. For example, to transfer a production to a USB memory stick or make a backup of your system's user data.
To use this function, the folder must be defined within the virtual machine (as described earlier). The mxgui_user_share folder will then appear in both mxGUI and your host operating system.
Shared Folder (in mxGUI) |
Shared Folder (in Windows Explorer) |

Operations in mxGUI
From mxGUI, you can perform some basic file management tasks.
1. Right-click on the Shared Folder and select New Folder.
A new folder is added with a generic name.
2. Type to rename the folder.
You can create folders within folders simply by right-clicking on the sub folder name.
3. Right-click on the file or sub folder and select Delete. Then select OK to confirm.
Note that the Delete option is only available for files and folders in the Shared Folder.
To delete a file from the local (or remote) control system, you must open the relevant page. For example, to delete a production, open the Productions display; to delete a preset, open the Main Display; etc.
Operations in the Host OS
From your host operating system, you can perform any of the usual file management tasks: create folder, move or delete files, etc.
Note that each file has a specific file extension which should not be modified, otherwise the file cannot be loaded by the mc2 system.
File Types & Extensions
Note that it is not possible to transfer the Active Production or Presets folders.
| File Type | File Extension | Description |
|---|---|---|
| Production | .lpn | This is a zipped file that must be transferred to/from the Productions folder. |
| Snapshot Folder | .lsf | This is an individual snapshot folder (containing snapshots and cuelists). This is a zipped file that must be transferred to/from the Active Production folder. |
| Snapshot | .lsn | This is an individual snapshot file. It must be transferred to/from a Snapshot Folder in the Active Production folder. |
| Mix | .lau | This is an individual mix (containing mix passes). It must be transferred to/from the Active Production folder. |
| Channel Preset | .pch | This is an individual channel preset. It must be transferred to/from the Presets folder. |
EQ Preset | .peq | As above, but for the individual DSP modules. In each case, the module is described by the file type/extension. |
Compressor Preset | .pco | |
etc. | ||
| Complete Configuration Set | .lcf | This is a zipped file that is created when you transfer the Configuration folder. It contains all of the system's custom functions. |
| User Thumbnail | .jpg | This is an individual user thumbnail image that complies with the permitted image requirements. |
| Log | .log | This is a system logfile (visible only on the console's File display). |