Waves for mc² - Connecting the Signals
Audio passes to and from the Waves SoundGrid server via MADI.
- On the console side, any available MADI SFP port can be used, as long as the SFP meets the required specification (described here). In the example below, we are using the console's local I/O MADI port.
- On the Waves side, the connection is made via the EXBOX.SG converter (from DirectOut).
In order to connect audio to and from the Waves system, there are two steps:
- Check (and edit) the I/O patching in Waves SuperRack.
- Connect signals to the MADI I/Os in the console's Signal List.
Step One: Configure the I/O patching (in Waves)
In Waves SuperRack, there are two ways to setup the I/O patching: either automatically (using AUTO ROUTE) or manually (for each Rack).
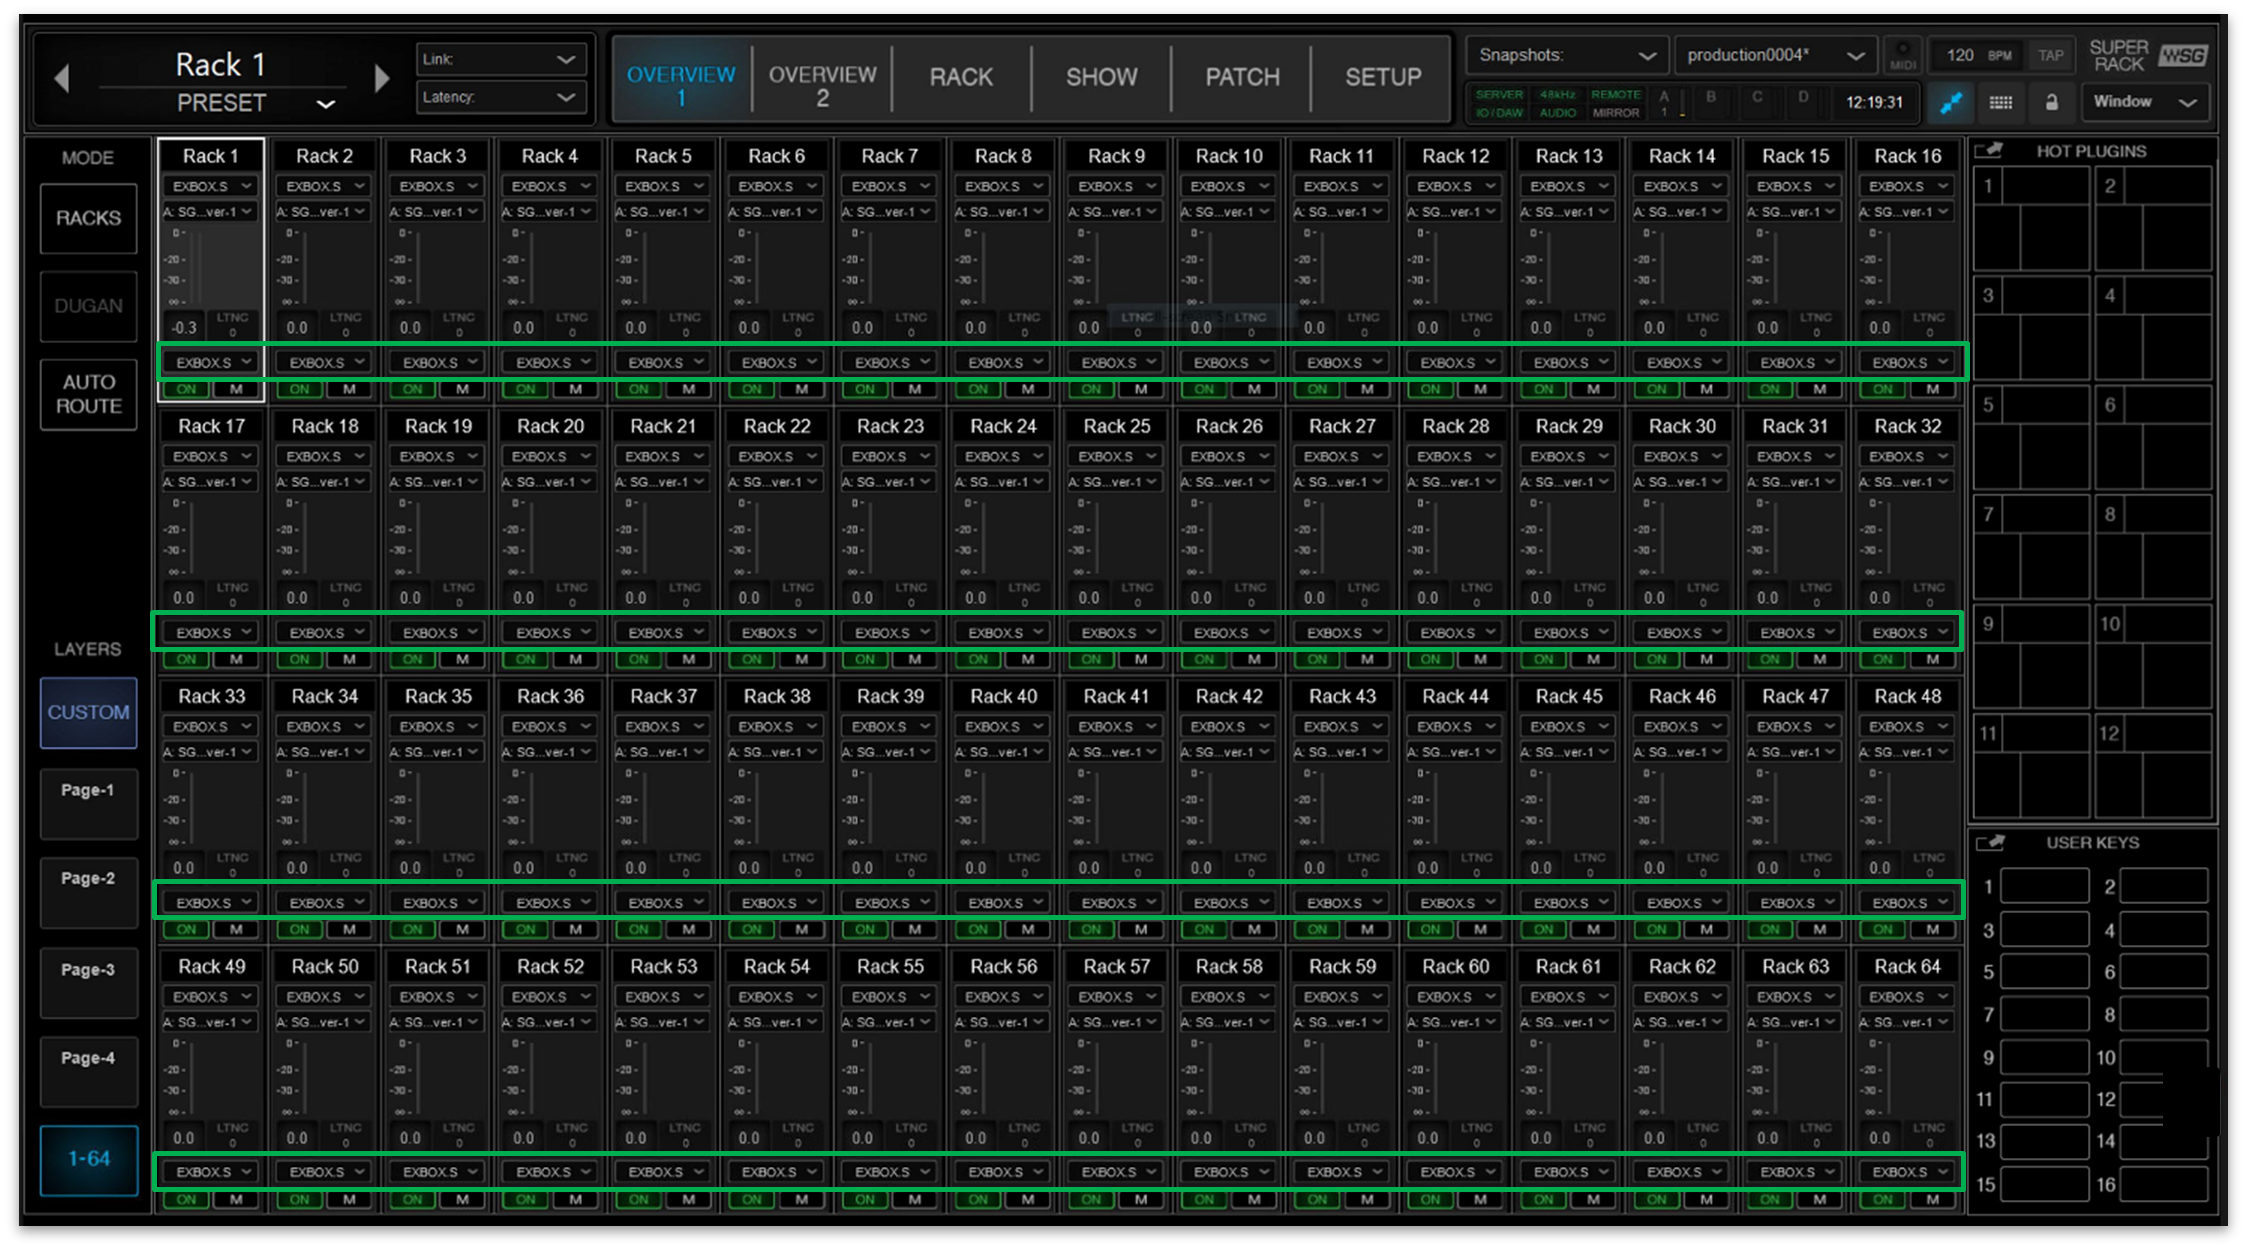
Using AUTO ROUTE
As a first step, it is recommended to use AUTO ROUTE to configure a 1:1 routing.
- Open either "OVERVIEW 1" or "OVERVIEW 2" (at the top of the page).
- Click on the "AUTO ROUTE" button (on the left).
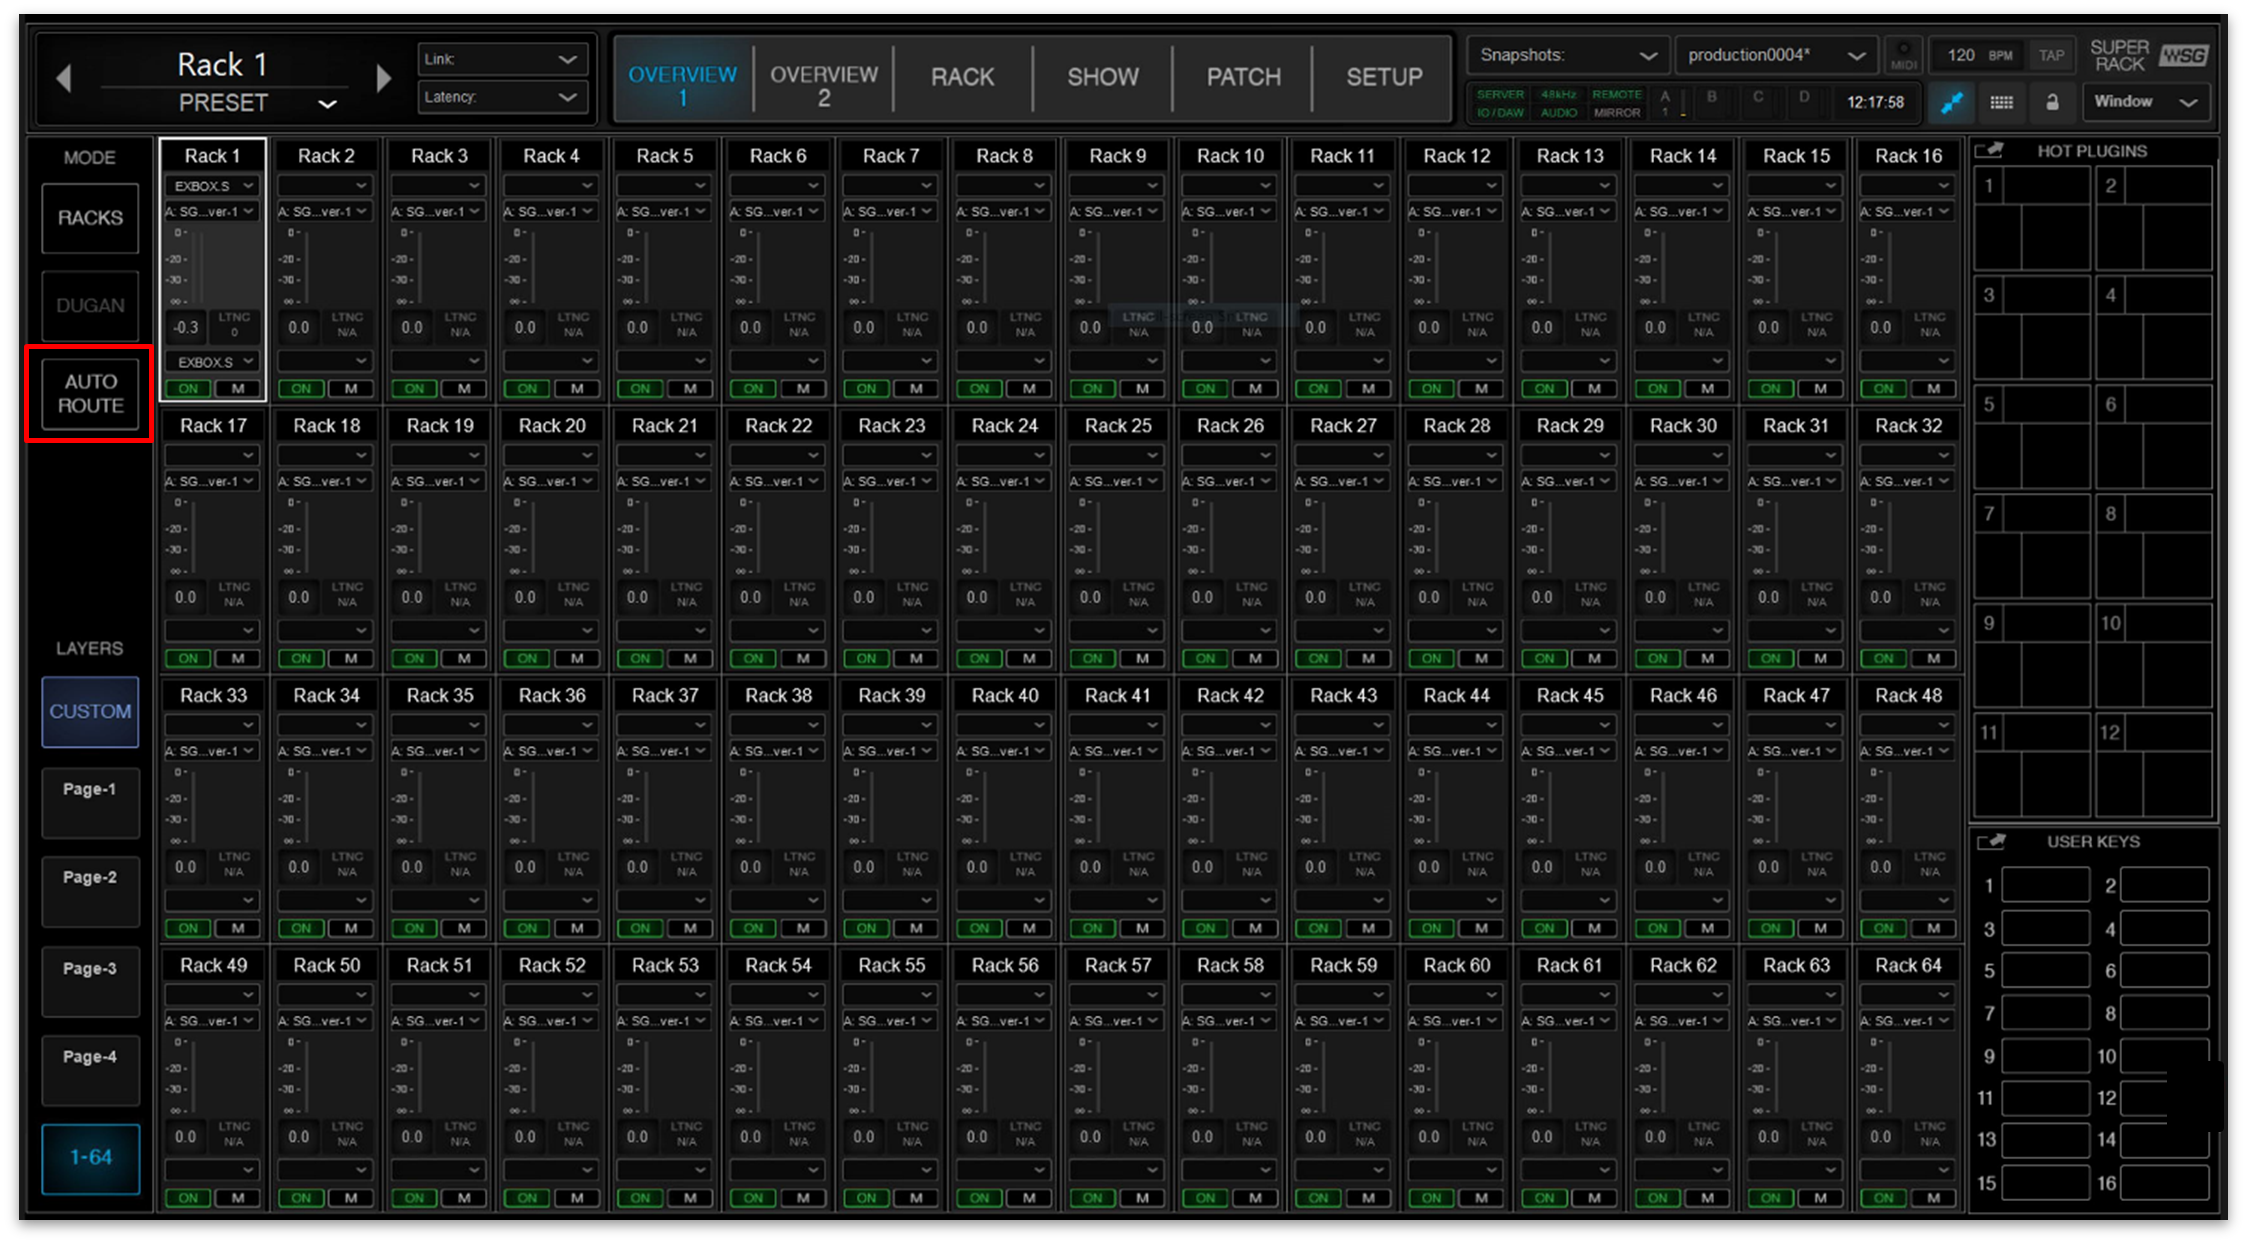
- Select "OK" (to confirm).

- The Racks are patched incrementally on a 1:1 basis.
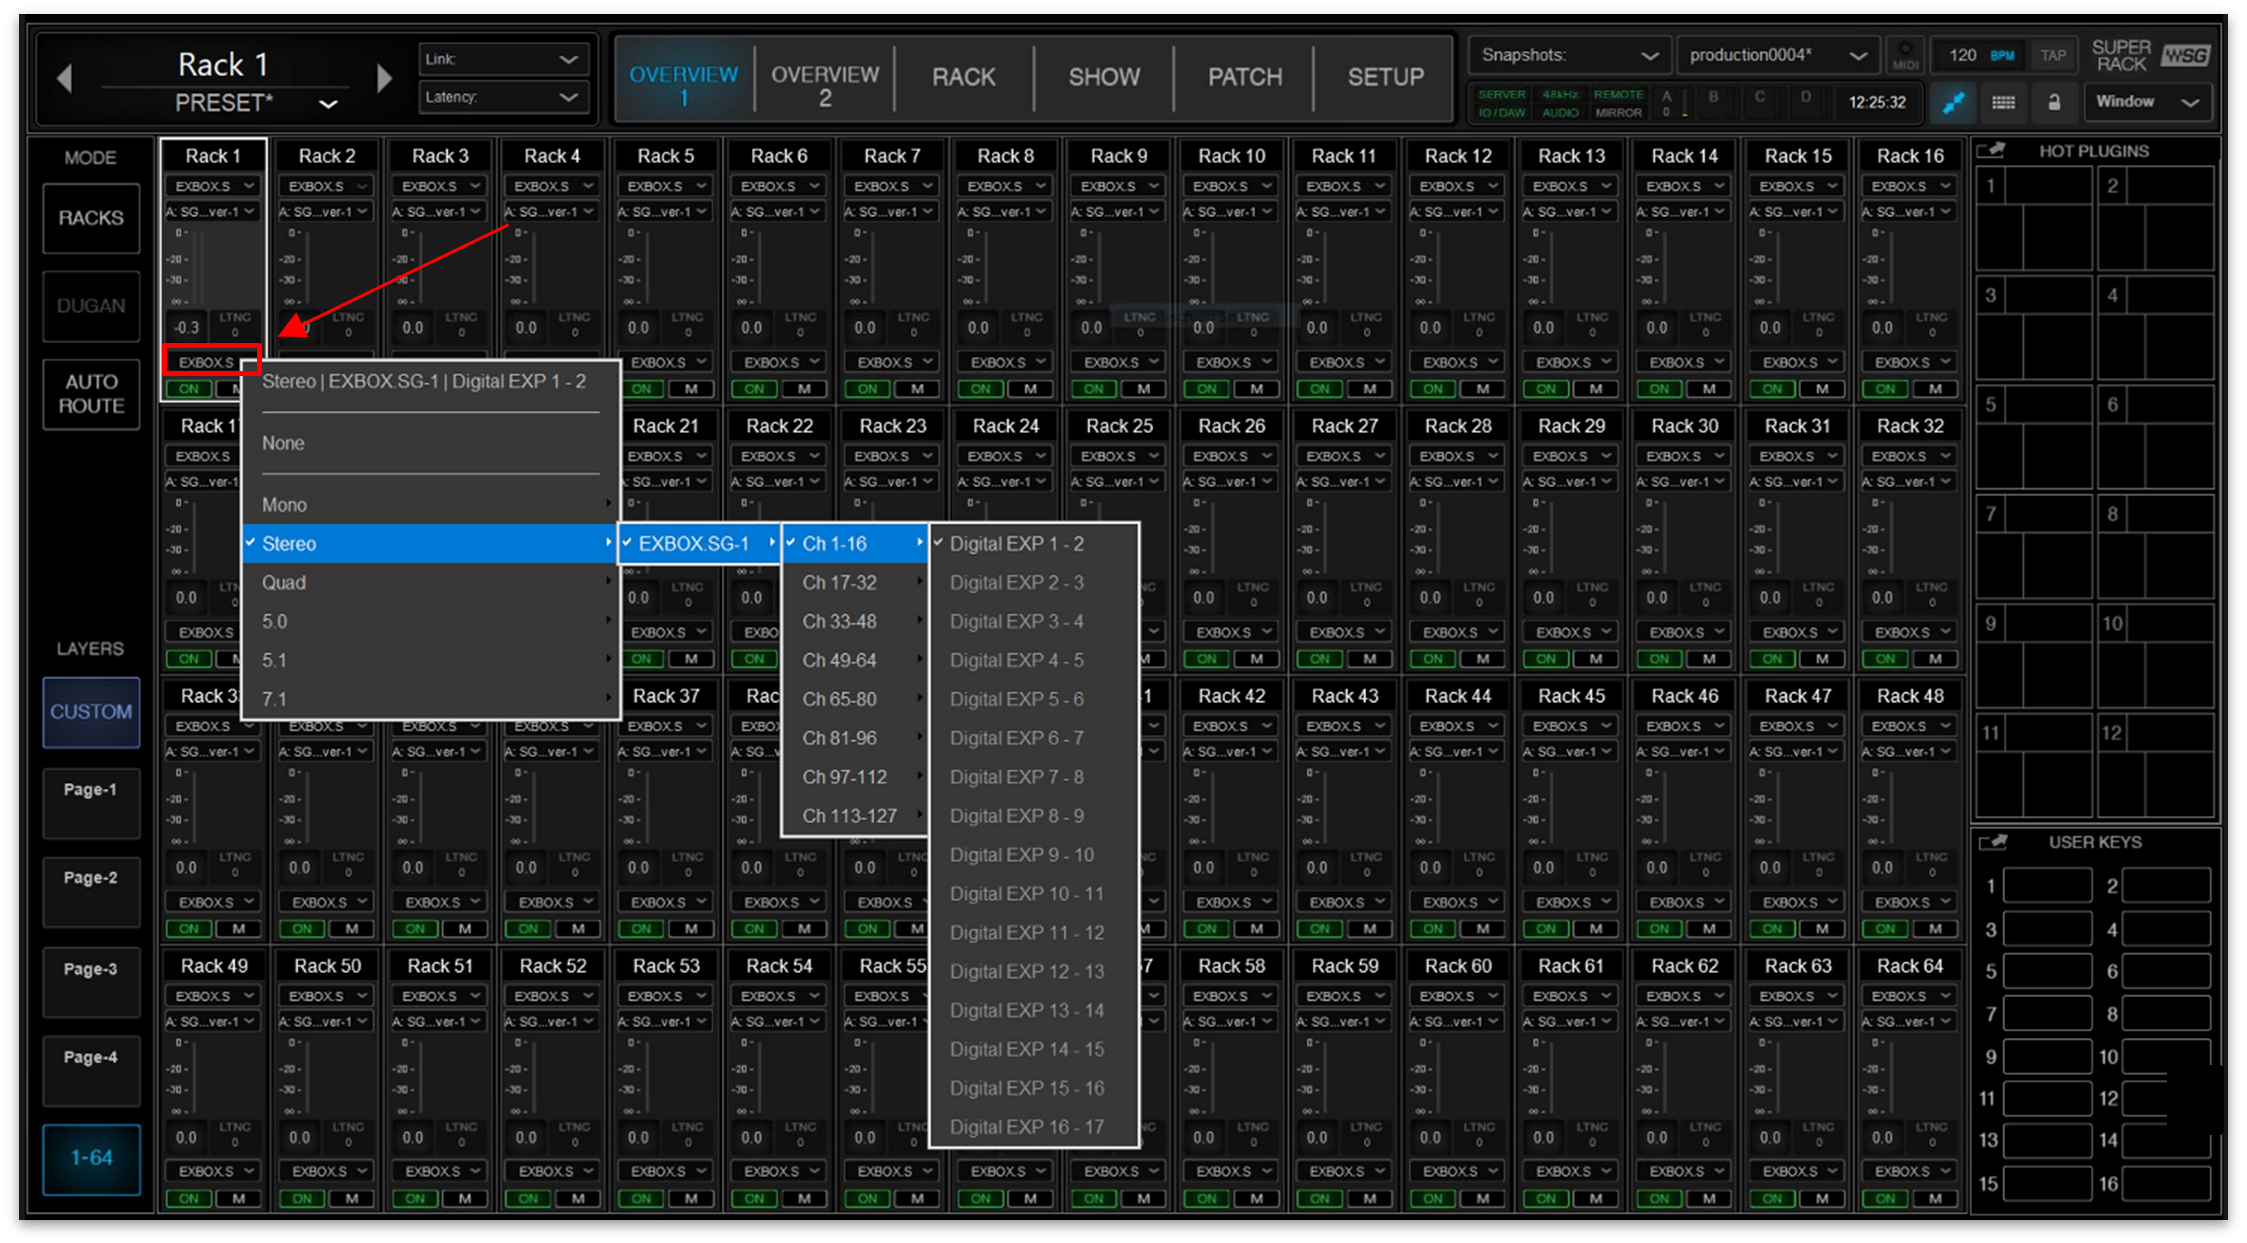
Manual Patching
The I/O patching can be edited manually if, for example, you wish to change the format of a rack or reassign the I/O channels. This can be done from one of the "OVERVIEW" pages or directly from a rack.
To edit the patching from "OVERVIEW 1" or "OVERVIEW 2":
- Click on the input box (under the label "Rack 1") and use the drop-down menus to select a channel format (e.g. Stereo) and then the channel(s) of the I/O device.
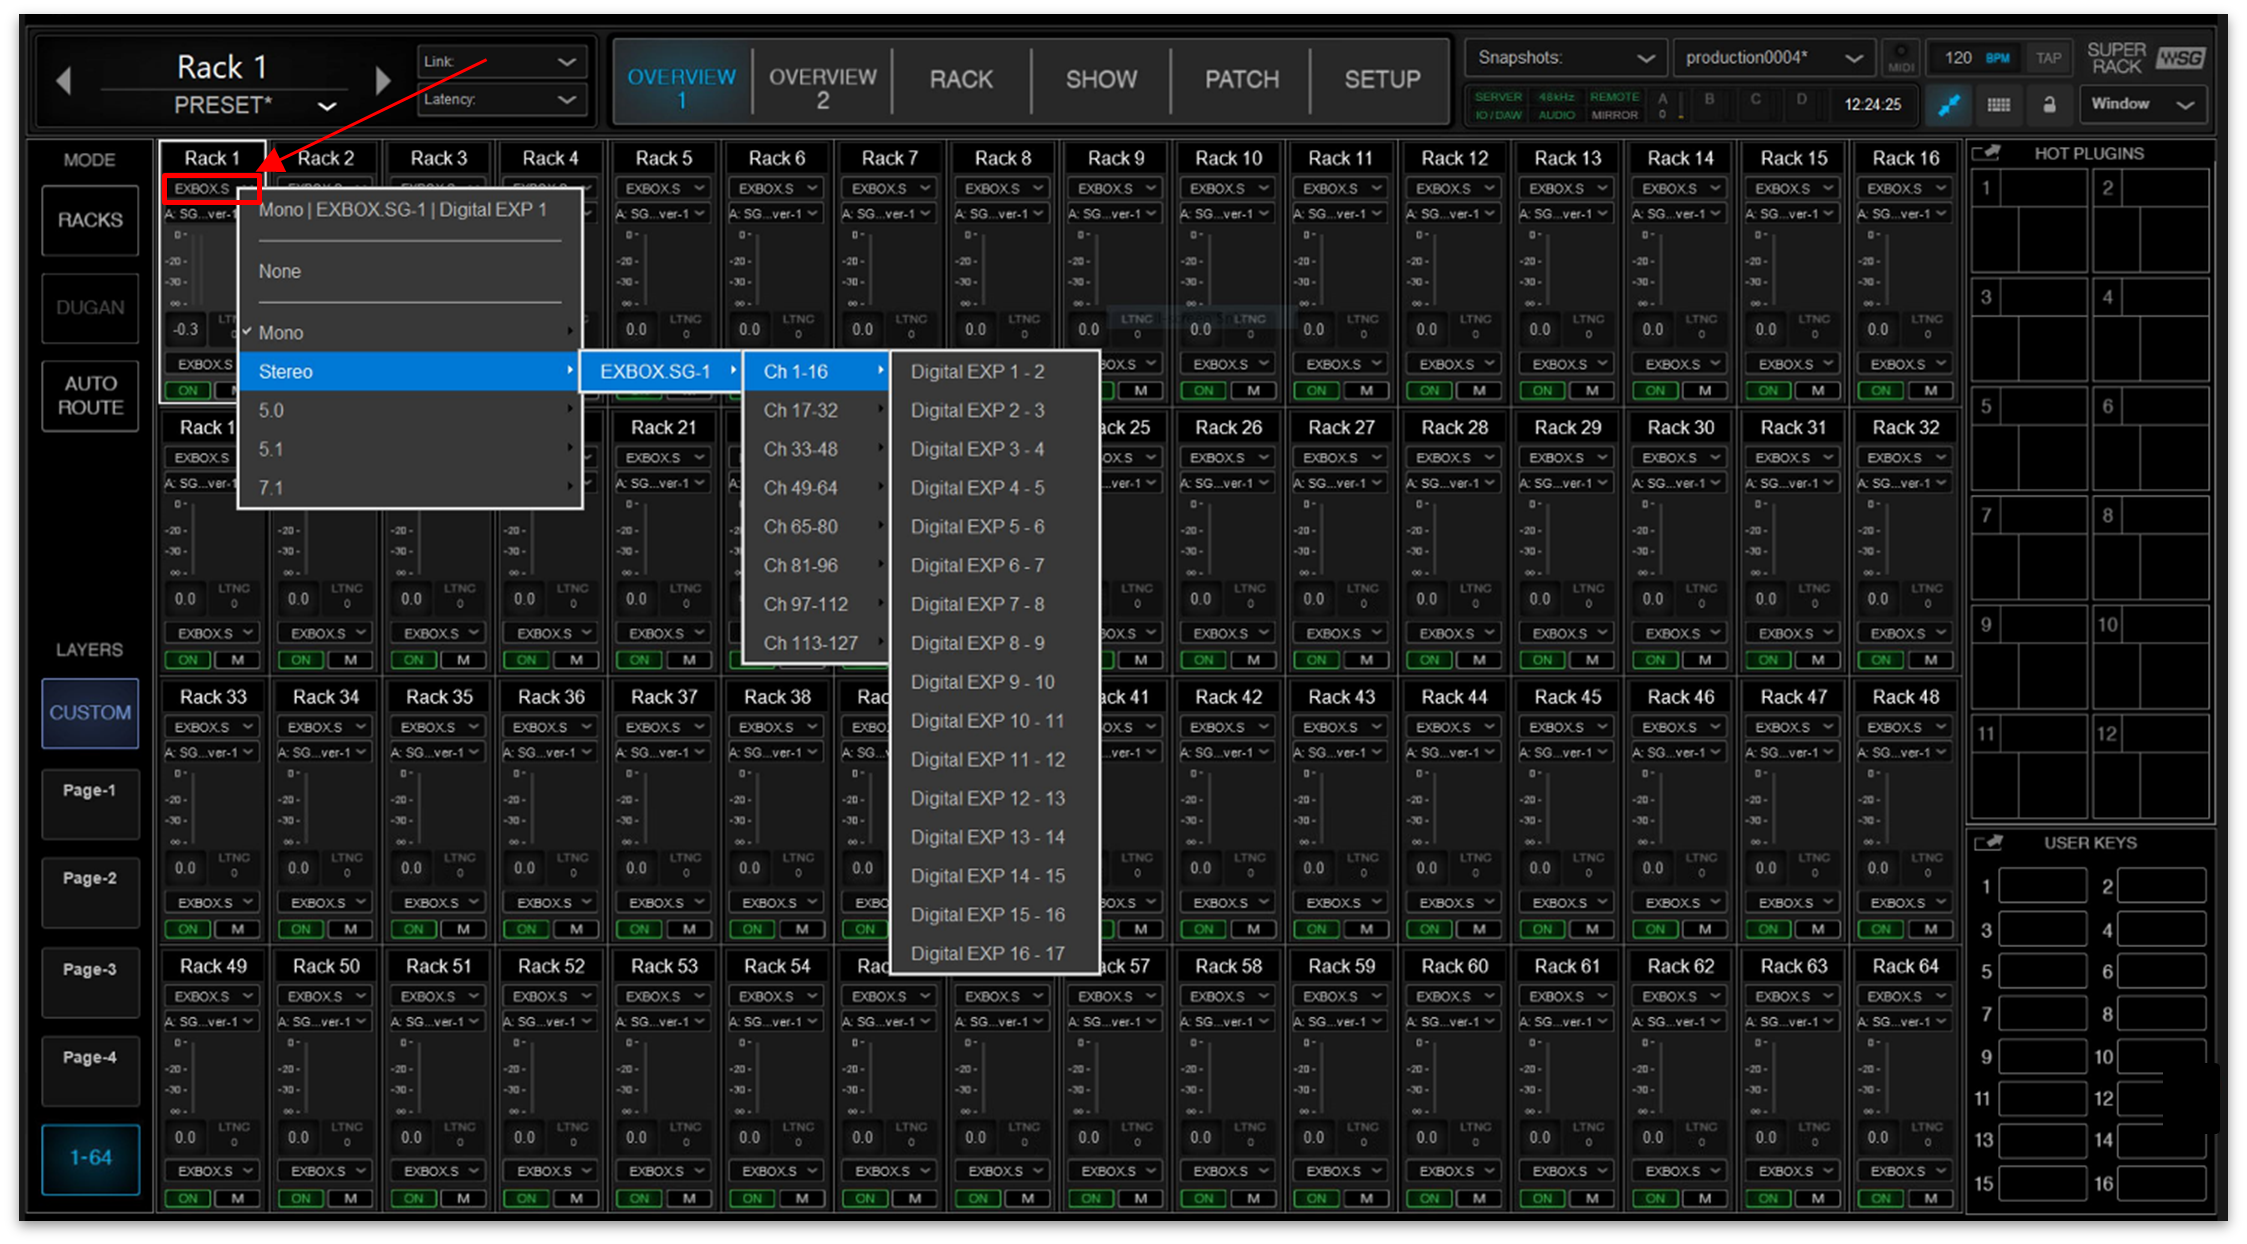
- The output channel is assigned automatically (according to the input selection).
- If you want to change the output channel, then click on the output box (above the rack ON button) and use the drop-down menu to make a selection.
To edit the patching directly from the rack:
- Click on "RACK" (to open the Racks view).

- Click on INPUT (on the left) and use the drop-down menu to select a channel format (e.g. Mono) and then the channel of the I/O device.
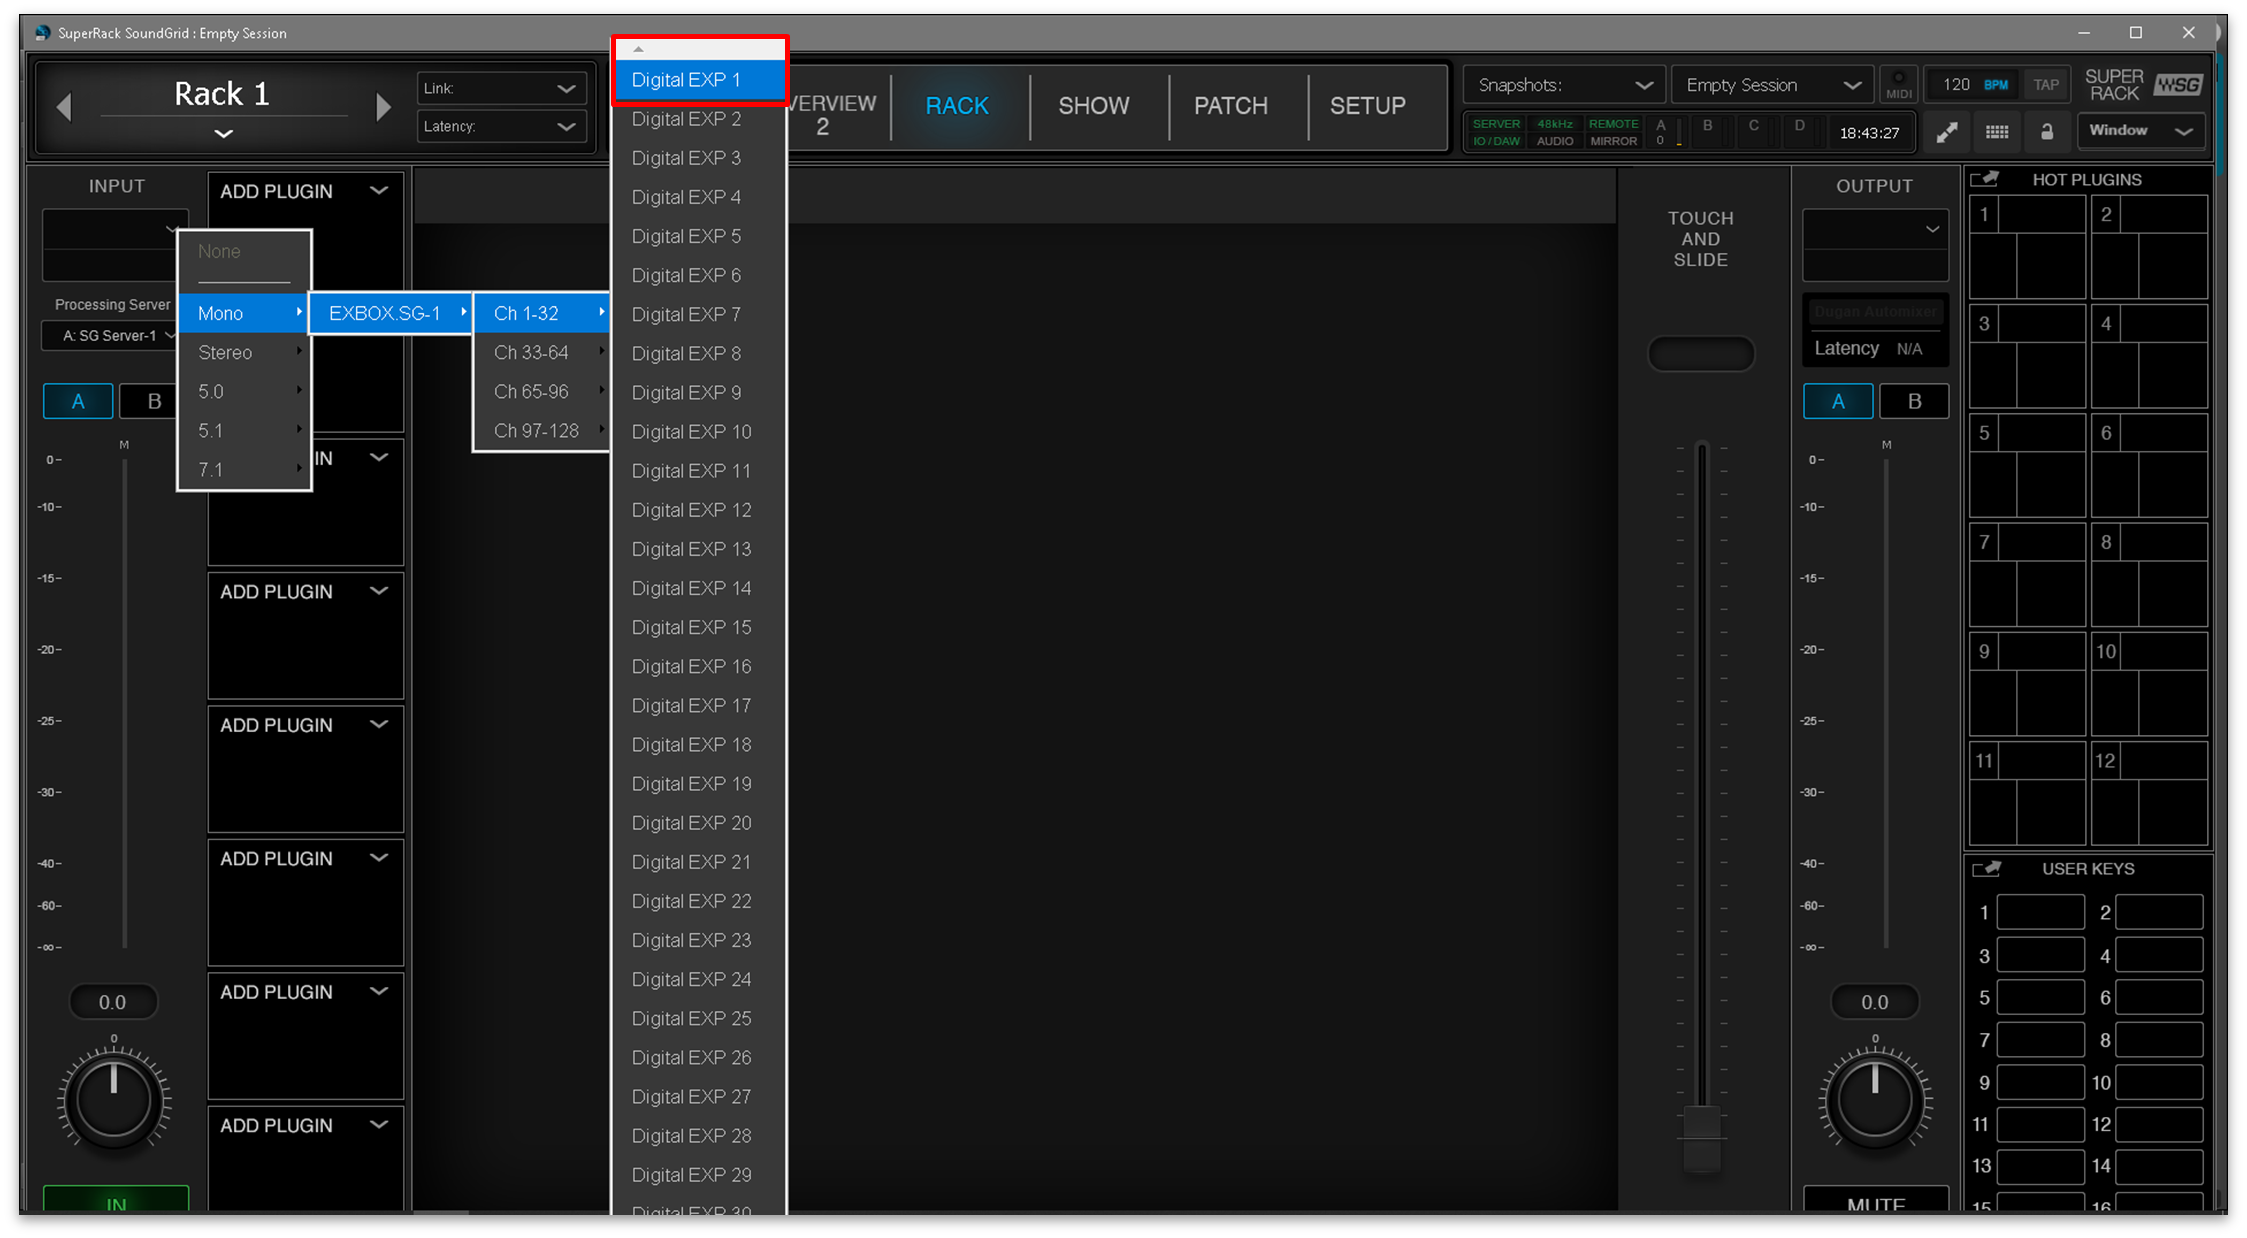
- The output channel is assigned automatically (according to the input selection).
- If you want to change the output channel, then click on OUTPUT (on the right) and use the drop-down menu to make a selection.

The audio patching on the Waves side is now complete.
Step 2: Connect signals to the MADI I/Os (on the console)
Once the Waves Rack I/O patching is configured, it's time to connect the audio signals to the corresponding MADI I/Os. This is done using the console's Signal List display.
In the example below, it is assumed that the Racks (in Waves) are patched on a 1:1 basis, so MADI in/out 1 (on the console) feeds Rack 1 (in Waves), MADI in/out 2 feeds Rack 2, and so on.
- Press the SIGNAL button on the SCREEN CONTROL panel.
- Select Signals → Signal List from the GUI page menu.
- Press CTRL + 1 on the console keyboard.
2. Locate the Sources and Destinations from/to the Waves system.
Where the plugin server signals appear, and how they are named, depends on which MADI I/O port you are using and whether a User List has been created. In the example below, the signals are connected to the console's local I/O MADI port.
3. The signals are connected in the usual manner, so select a source and a destination, and press CONNECT.
For a channel insert, remember to connect both the insert send (to the Waves rack input) and the insert return (from the Waves rack output).
In the examples below, the insert sends and returns are prepared for the first twelve input channels.
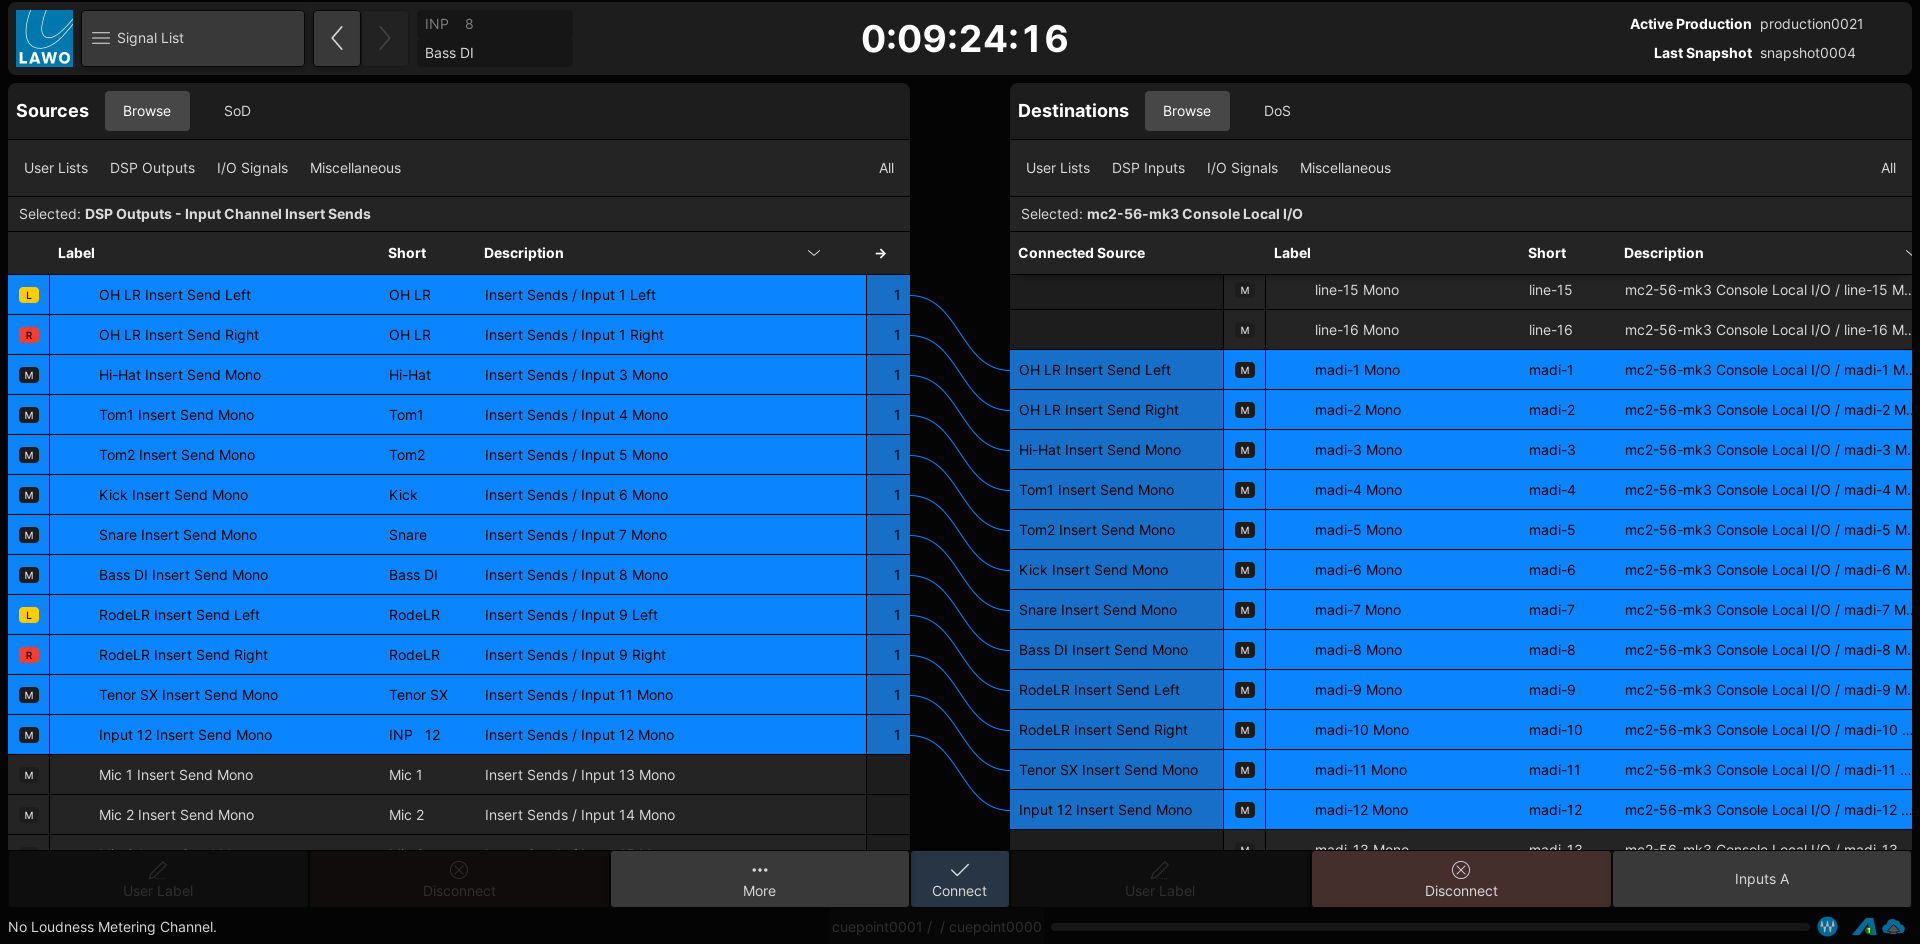
Input channel insert sends → Waves Rack inputs (Local MADI I/Os)

Waves Rack outputs (Local MADI I/Os) → Input channel insert returns
4. Press PLUGIN (on the SCREEN CONTROL panel) to switch back to the Waves host PC.
If audio is present on your input channels, you should see level on the SuperRack meters. And, if the channel insert is switched on, you should hear the effect of the plugin processing.
5. The same method can be used to connect any type of signal to the Waves Racks: channel inserts, aux sends and returns, etc.
Saving the I/O Configuration
On the console side, the connections made in the Signal List are saved and loaded by snapshots (unless a signal is isolated) and productions. In addition, it is possible to use Signal Routing Presets to save a specific set of connections.
On the Waves side, the I/O patching for the Racks is saved in sessions, but not in snapshots.
In practice, this makes it possible to save one version of the Waves I/O patching per session/production. If you need to make changes to the routing on-the-fly, then this should be done from the console side, using either a snapshot or signal routing preset.