Waves for mc² - System Setup
This topic describes how to set up the system once the Waves Axis Scope PC and Lawo console are prepared.
There are eight steps to complete.
- Connect the devices.
- Setup the Waves SuperRack SoundGrid.
- Update the Waves Extreme Server C firmware.
- (Optional): Add another Waves Extreme C Server.
- Update the DirectOut EXBOX.SG firmware.
- Assign the DirectOut EXBOX.SG to digital clock.
- Assign the DirectOut EXBOX.SG to SoundGrid MIDI.
- Assign the Lawo Console as the Waves SuperRack SoundGrid controller.
Step 1: Connect the Devices
The diagram below shows the connections required for the final installation.
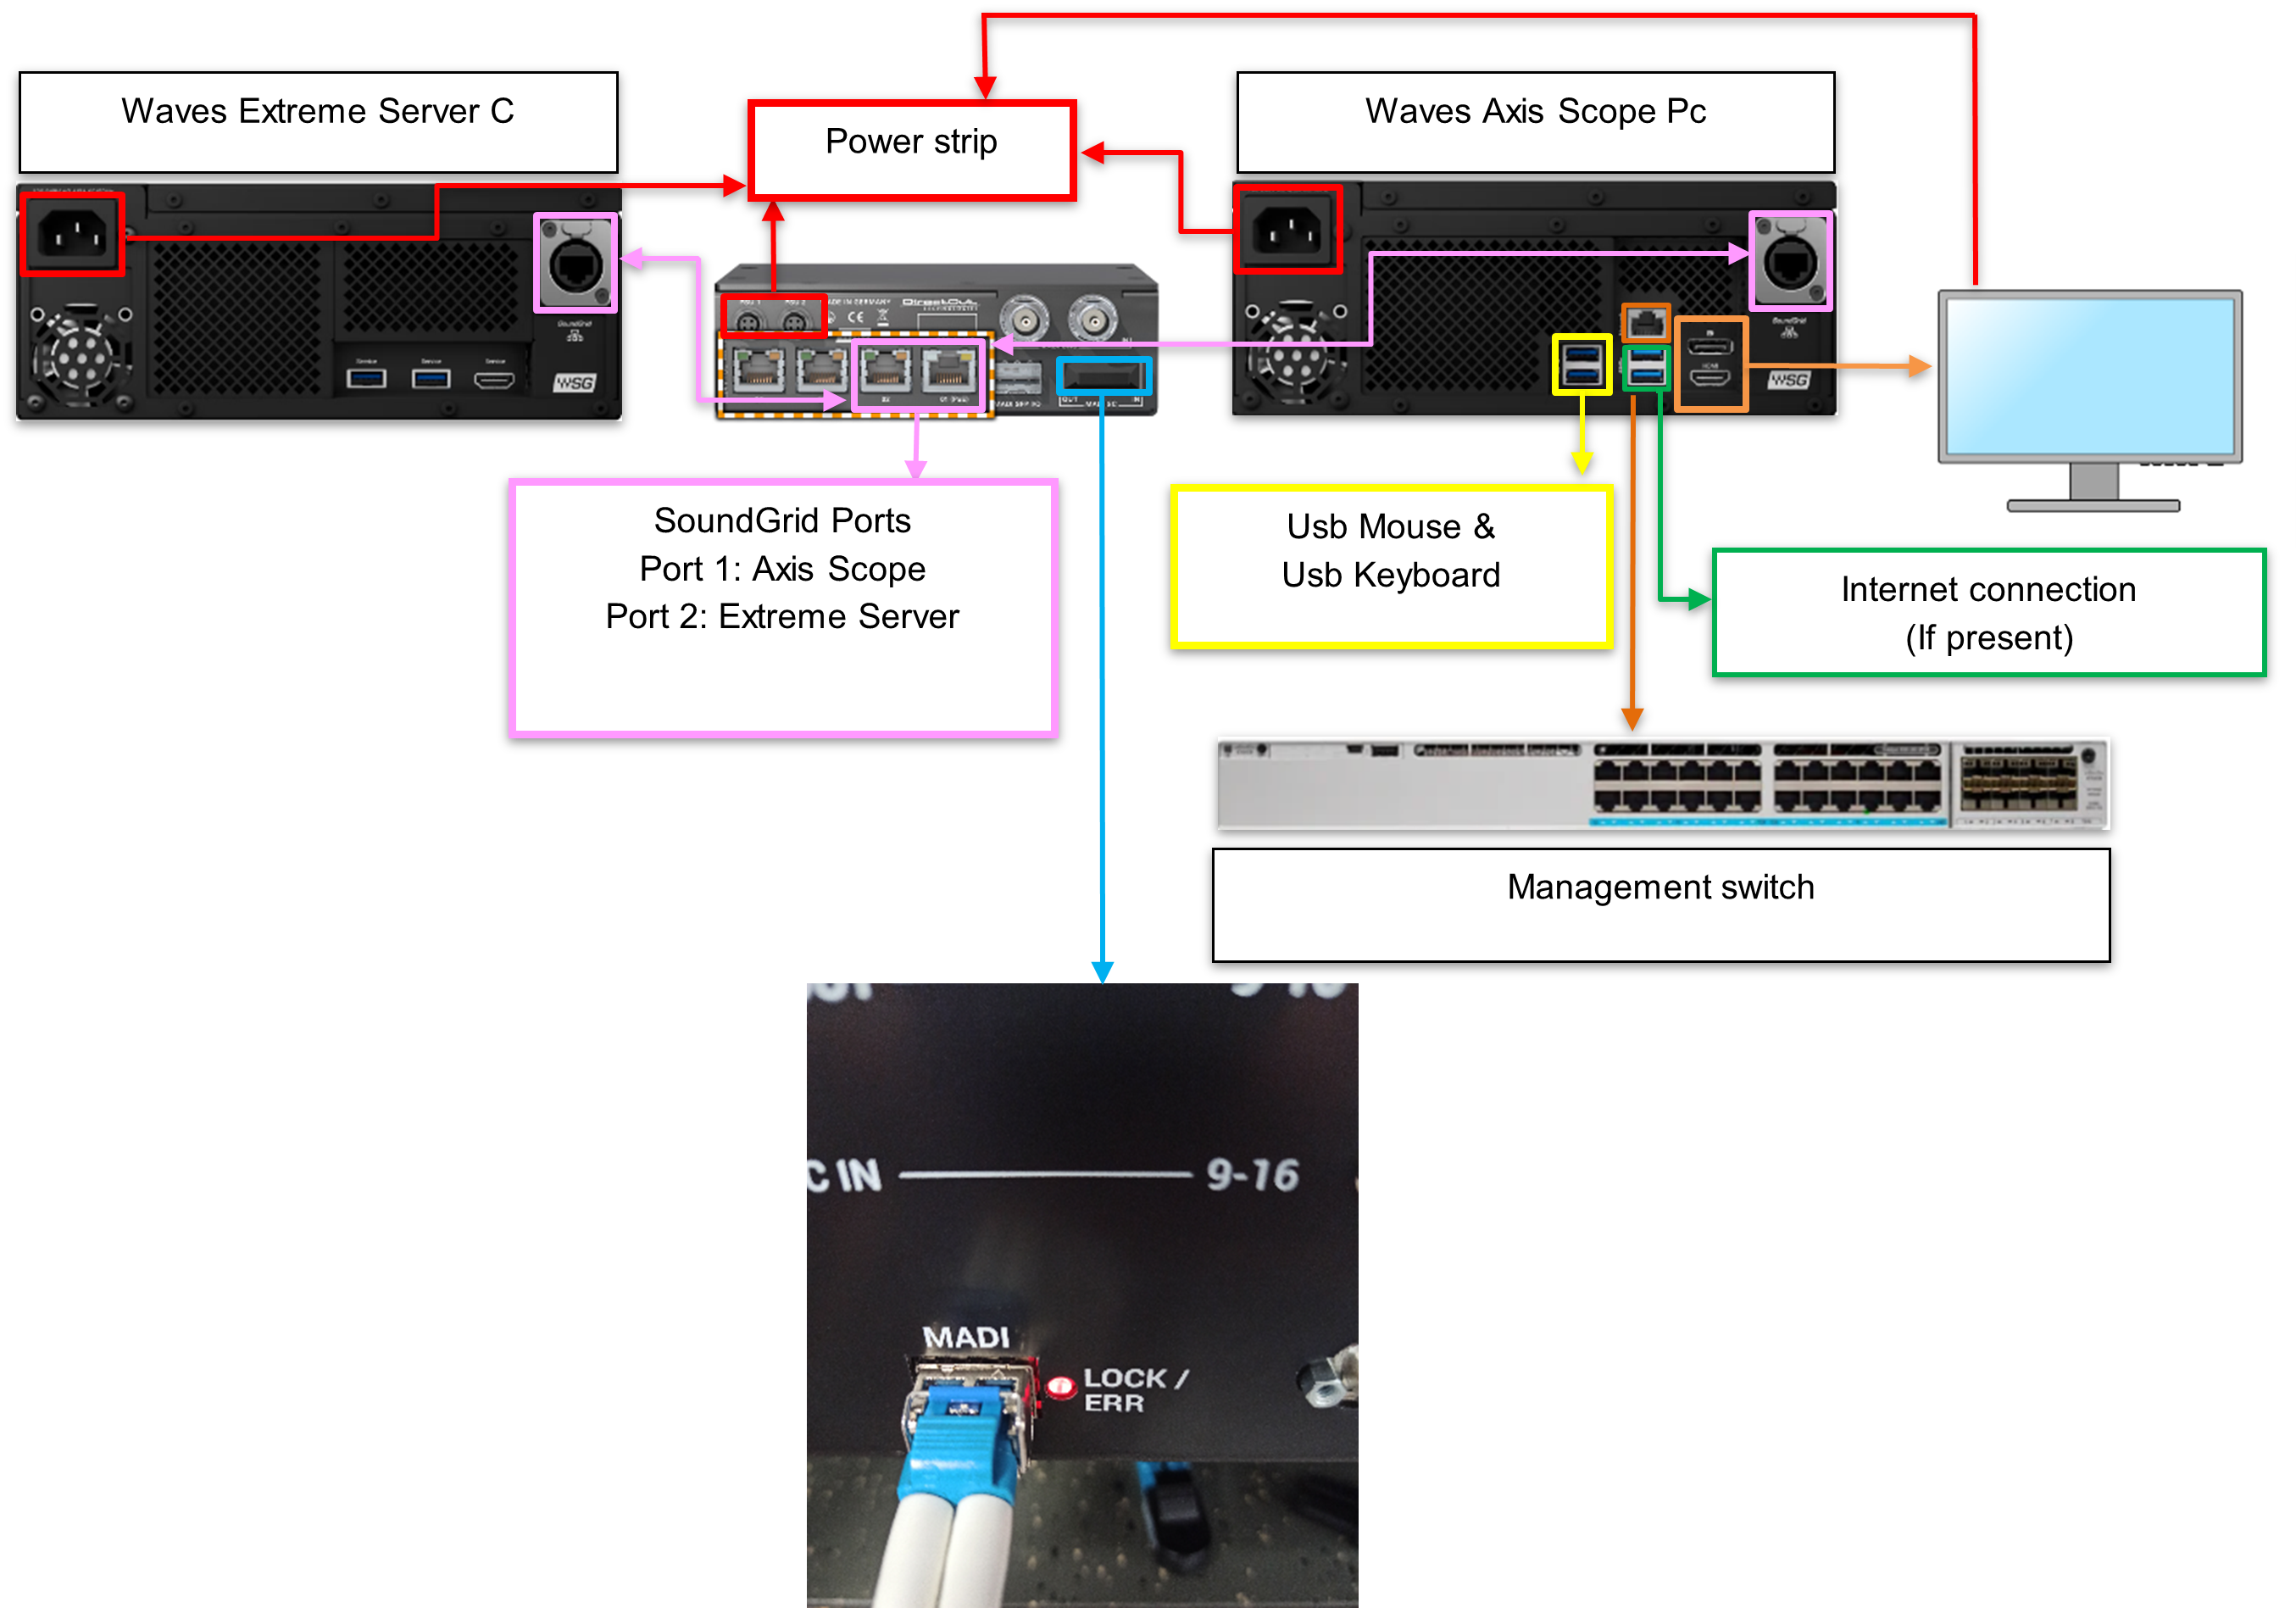
To cable the system:
- Connect the two power supplies to the EXBOX.SG.
- Connect the power cable to the Waves Extreme Server C.
- Connect the Waves Axis Scope PC SoundGrid Ethernet port to the EXBOX.SG port number 1. (The port number is not mandatory, see note below).
- Connect the Waves Extreme Server C Ethernet port to the EXBOX.SG port number 2. (The port number is not mandatory, see note below).
- Connect the Fiber multimode cable SC-LC from the SC Exobx.SG socket to the LC MADI socket of the console's MADI I/O.
Please note:
- The two EXBOX.SG Ethernet ports can be used in any order.
- In step 5, we are using the console's local I/O MADI port, but this is not mandatory. Any available MADI SFP port can be used, as long as the SFP meets the required specification (described here).
- The Lawo Management network switch must be configured properly (as described here).
- In step 2, we are using the integrated switch in the EXBOX.SG for the Waves SoundGrid audio network. If you do NOT wish to use the integrated switch, then an alternative can be installed. This must be a Waves supported switch (as described here).
Step 2: Setup the Waves SuperRack SoundGrid
Once all of the devices are connected and powered, you can start the setup by adding the DirectOut converter and Waves server to the Waves SuperRack SoundGrid application.
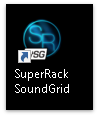
- Double click on the icon "SuperRack SoundGrid" (to start the application).
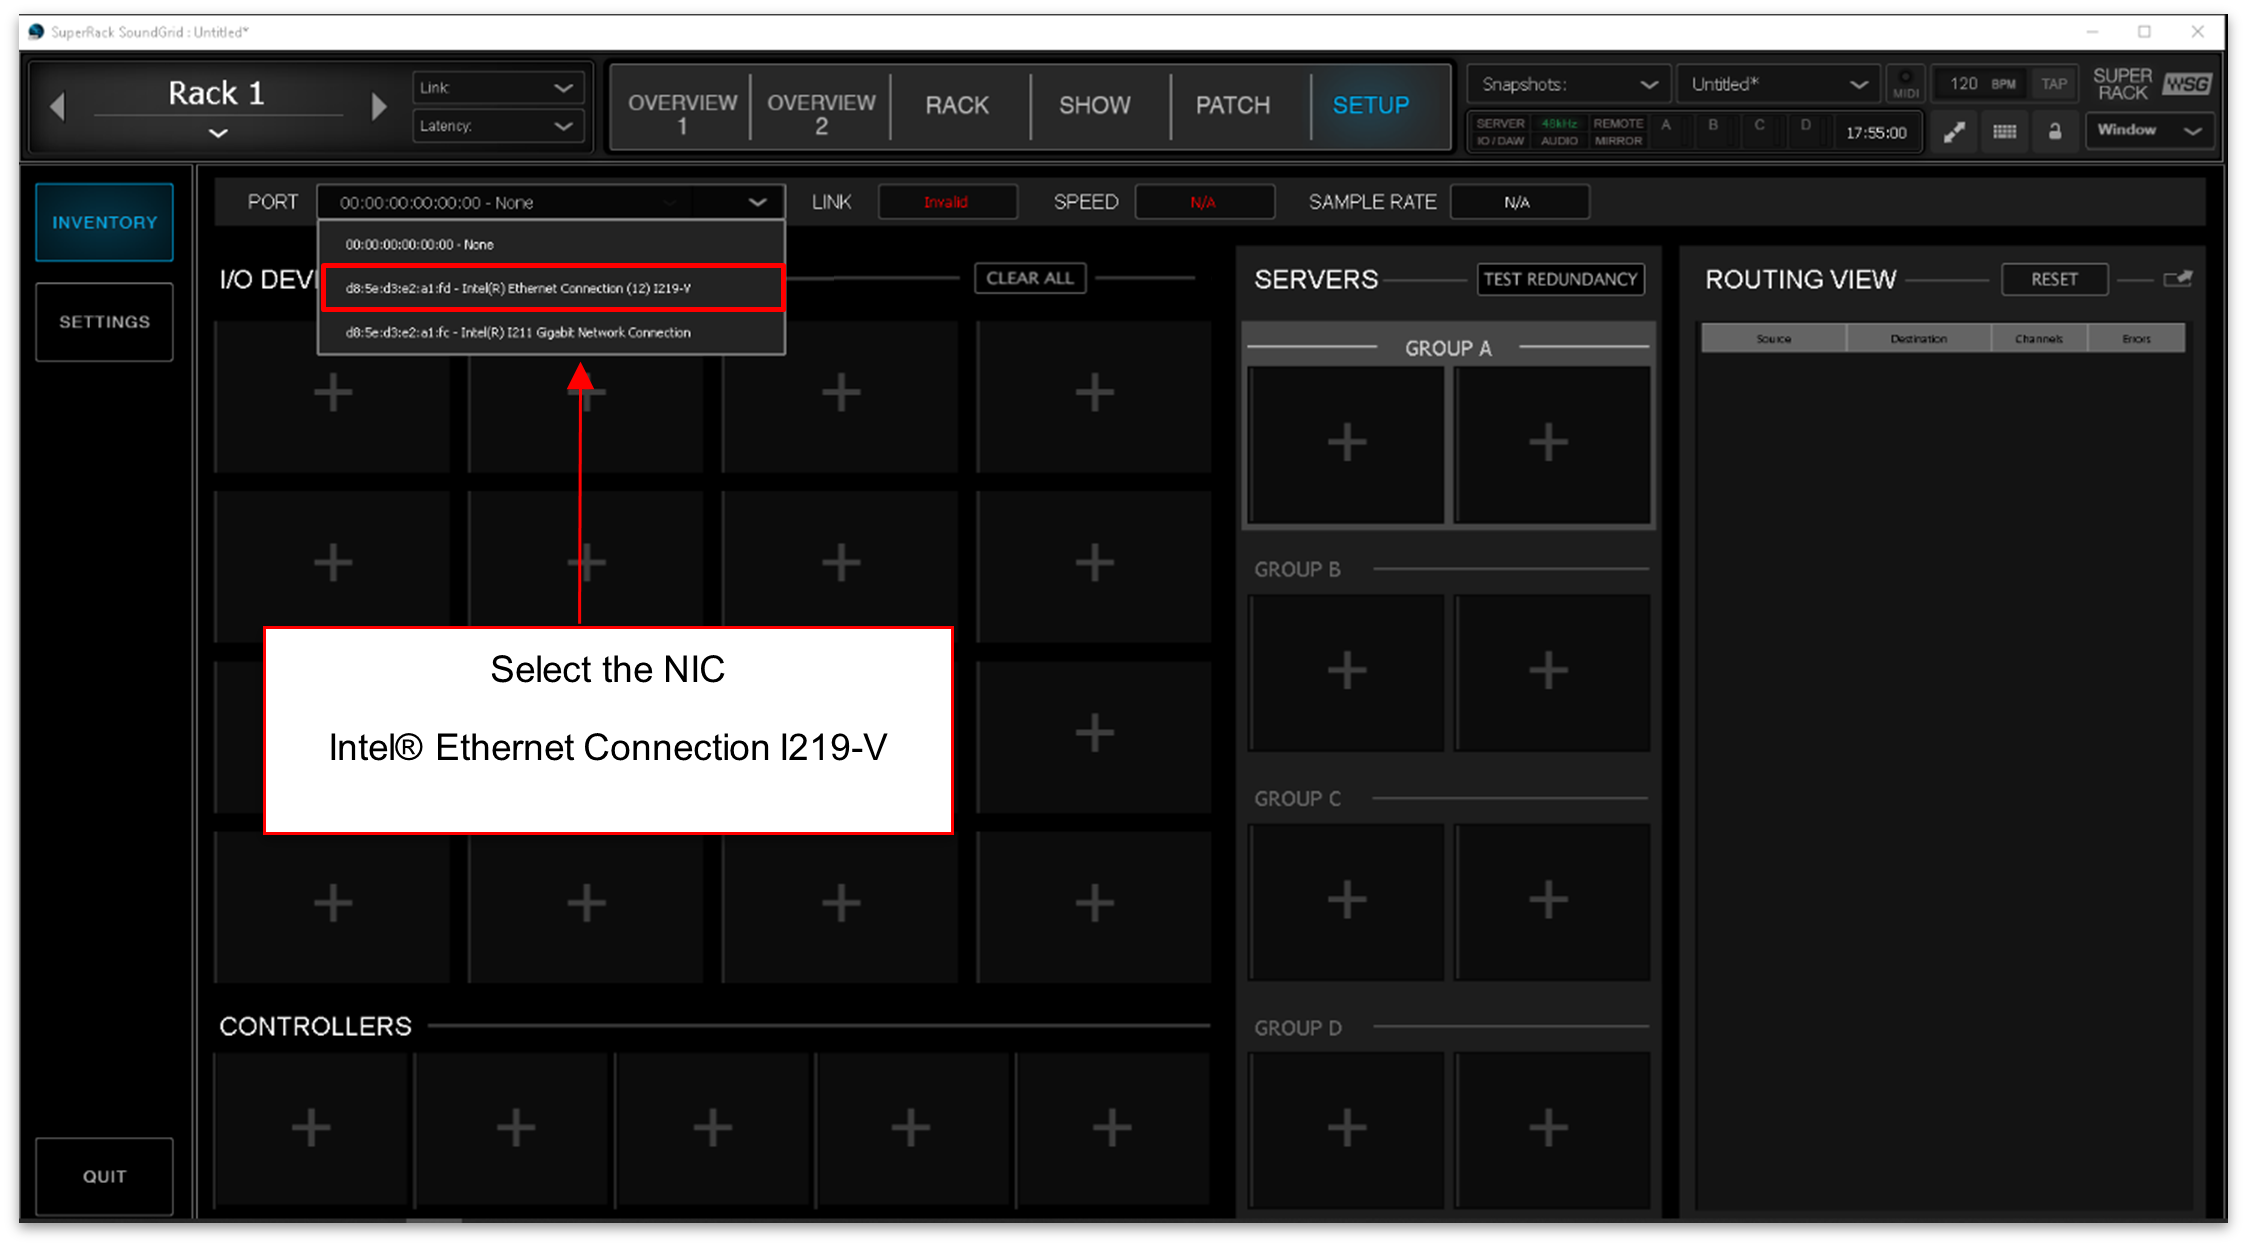
- Click on "SETUP".
- Select "Intel(R) Ethernet Connection(12) I219-V".
- Add the EXBOX.SG device as follows.
- Click on the first box under "I/O DEVICES / DRIVERS / HOSTS".
- Add the EXBOX.SG
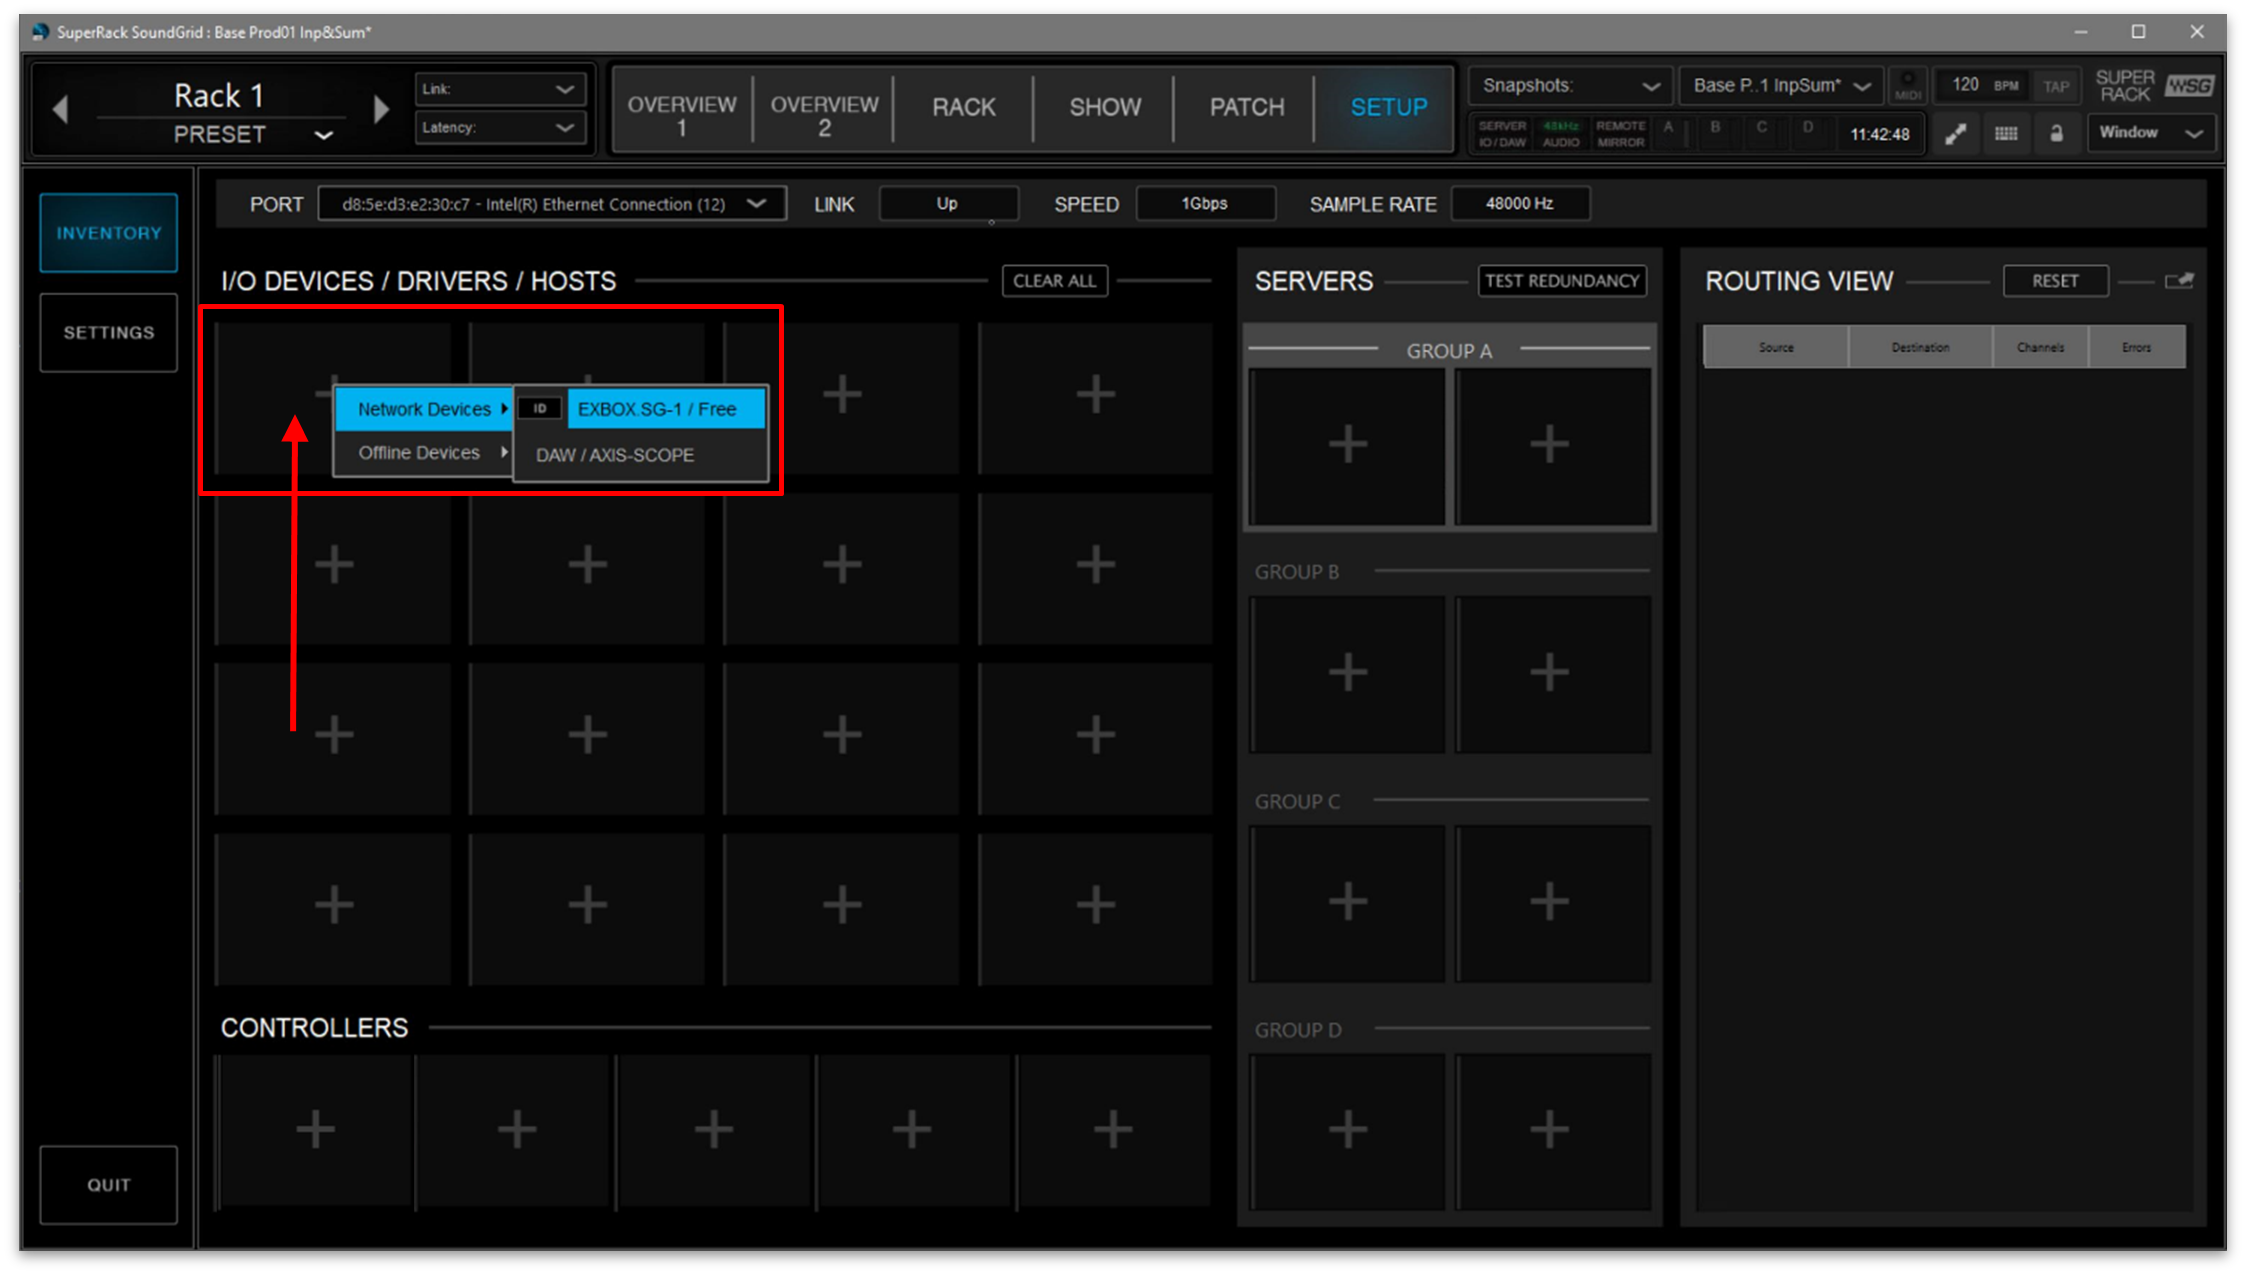
- Under "I/O DEVICES / DRIVERS / HOSTS" you will see the device: EXBOX.SG-1.
- Repeat the process to add the Waves Extreme Server C.
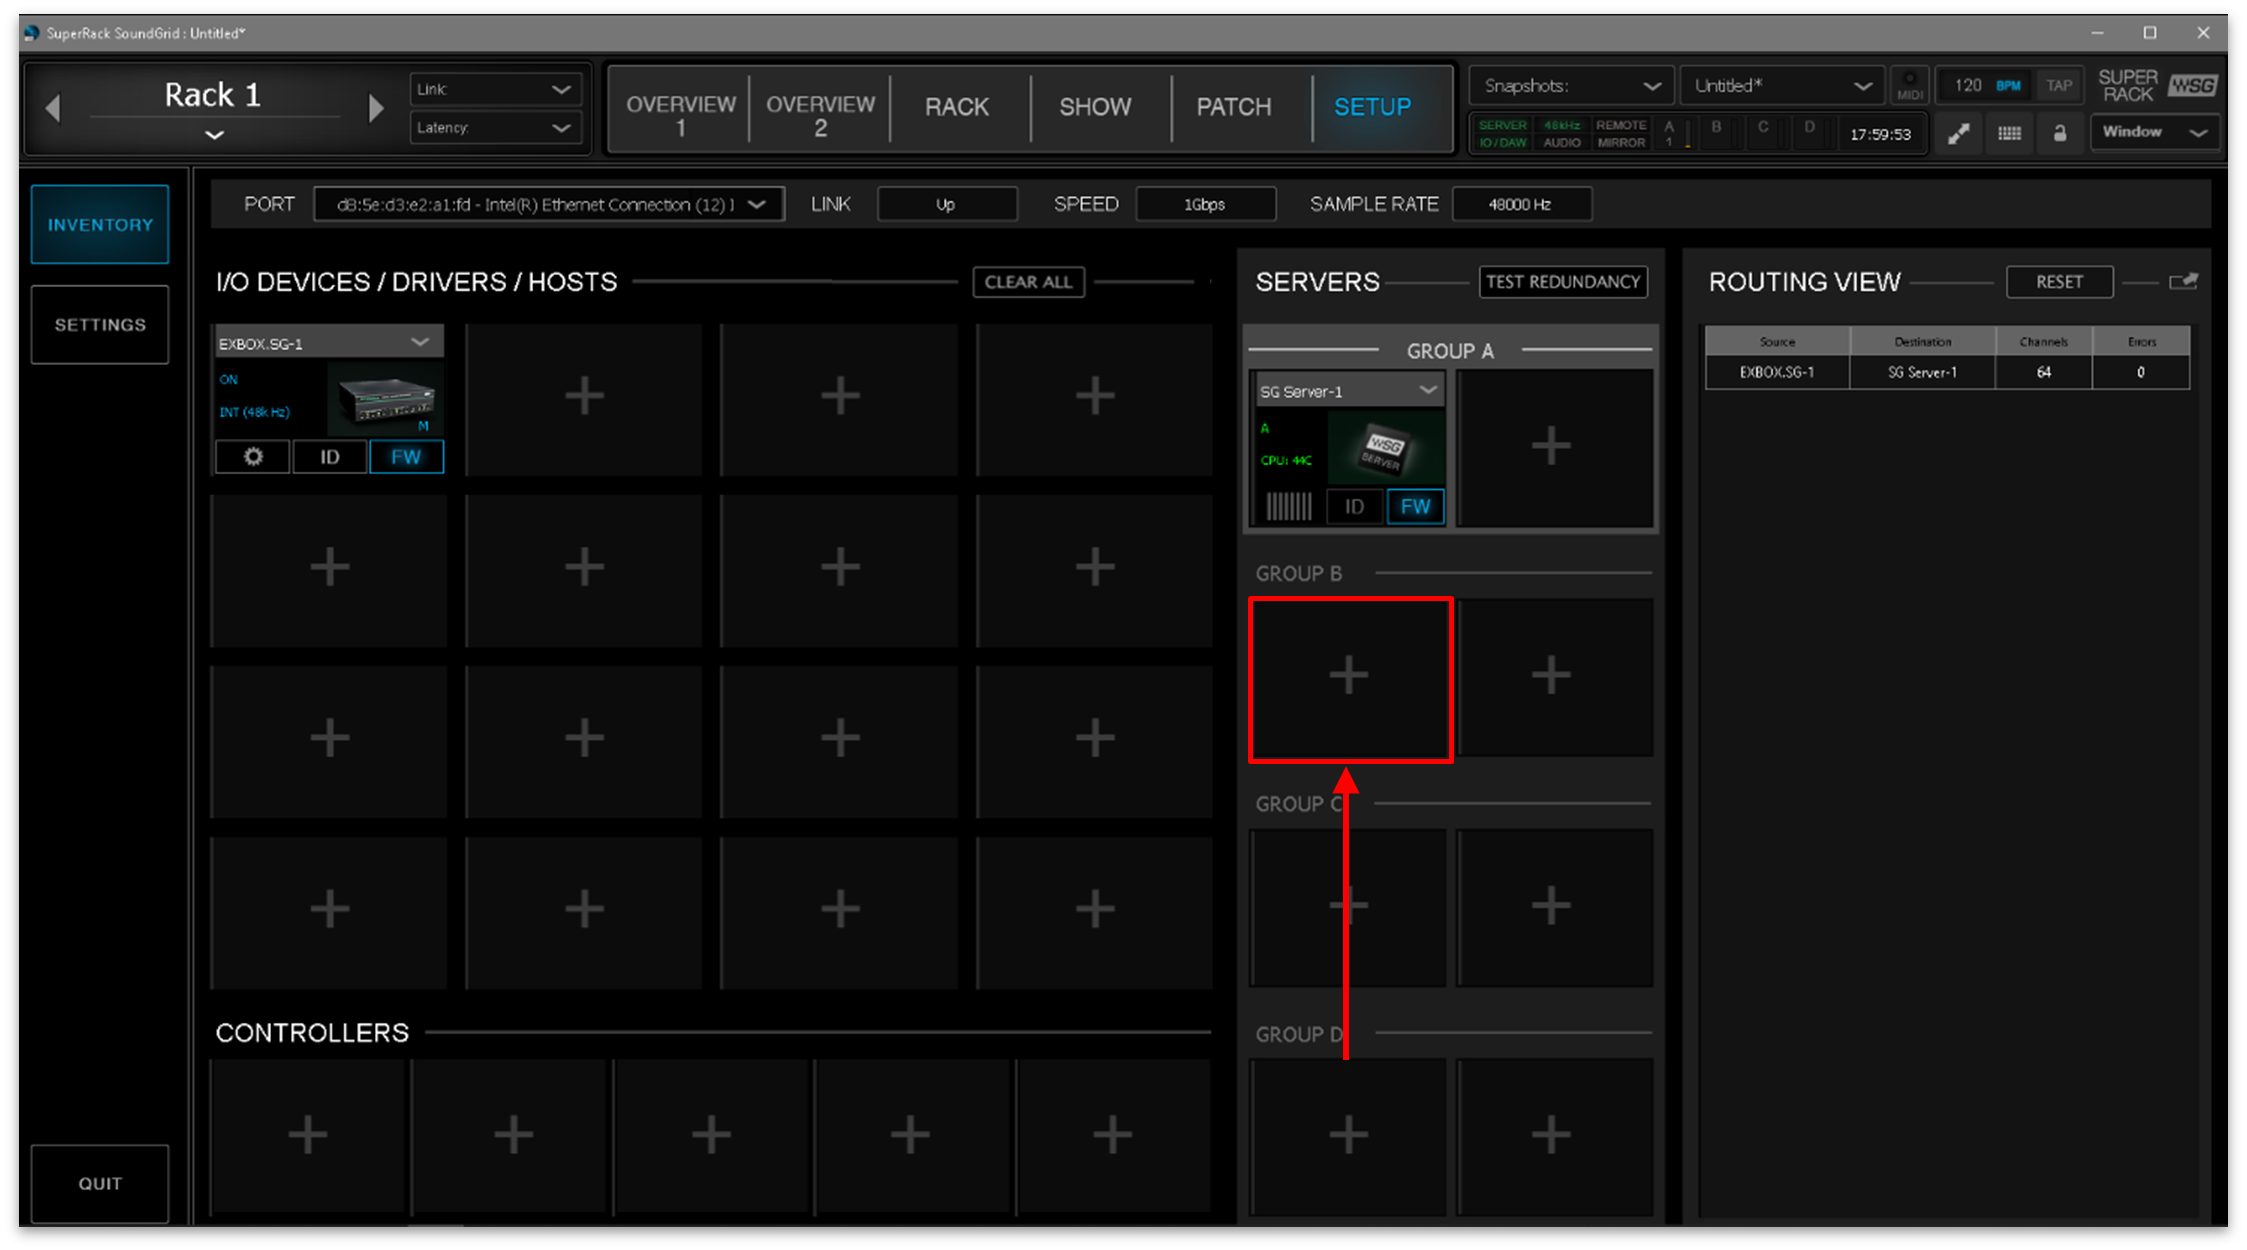
- Click on the first box under "SERVERS" - "GROUP A".
- Add the Waves Extreme Server C.

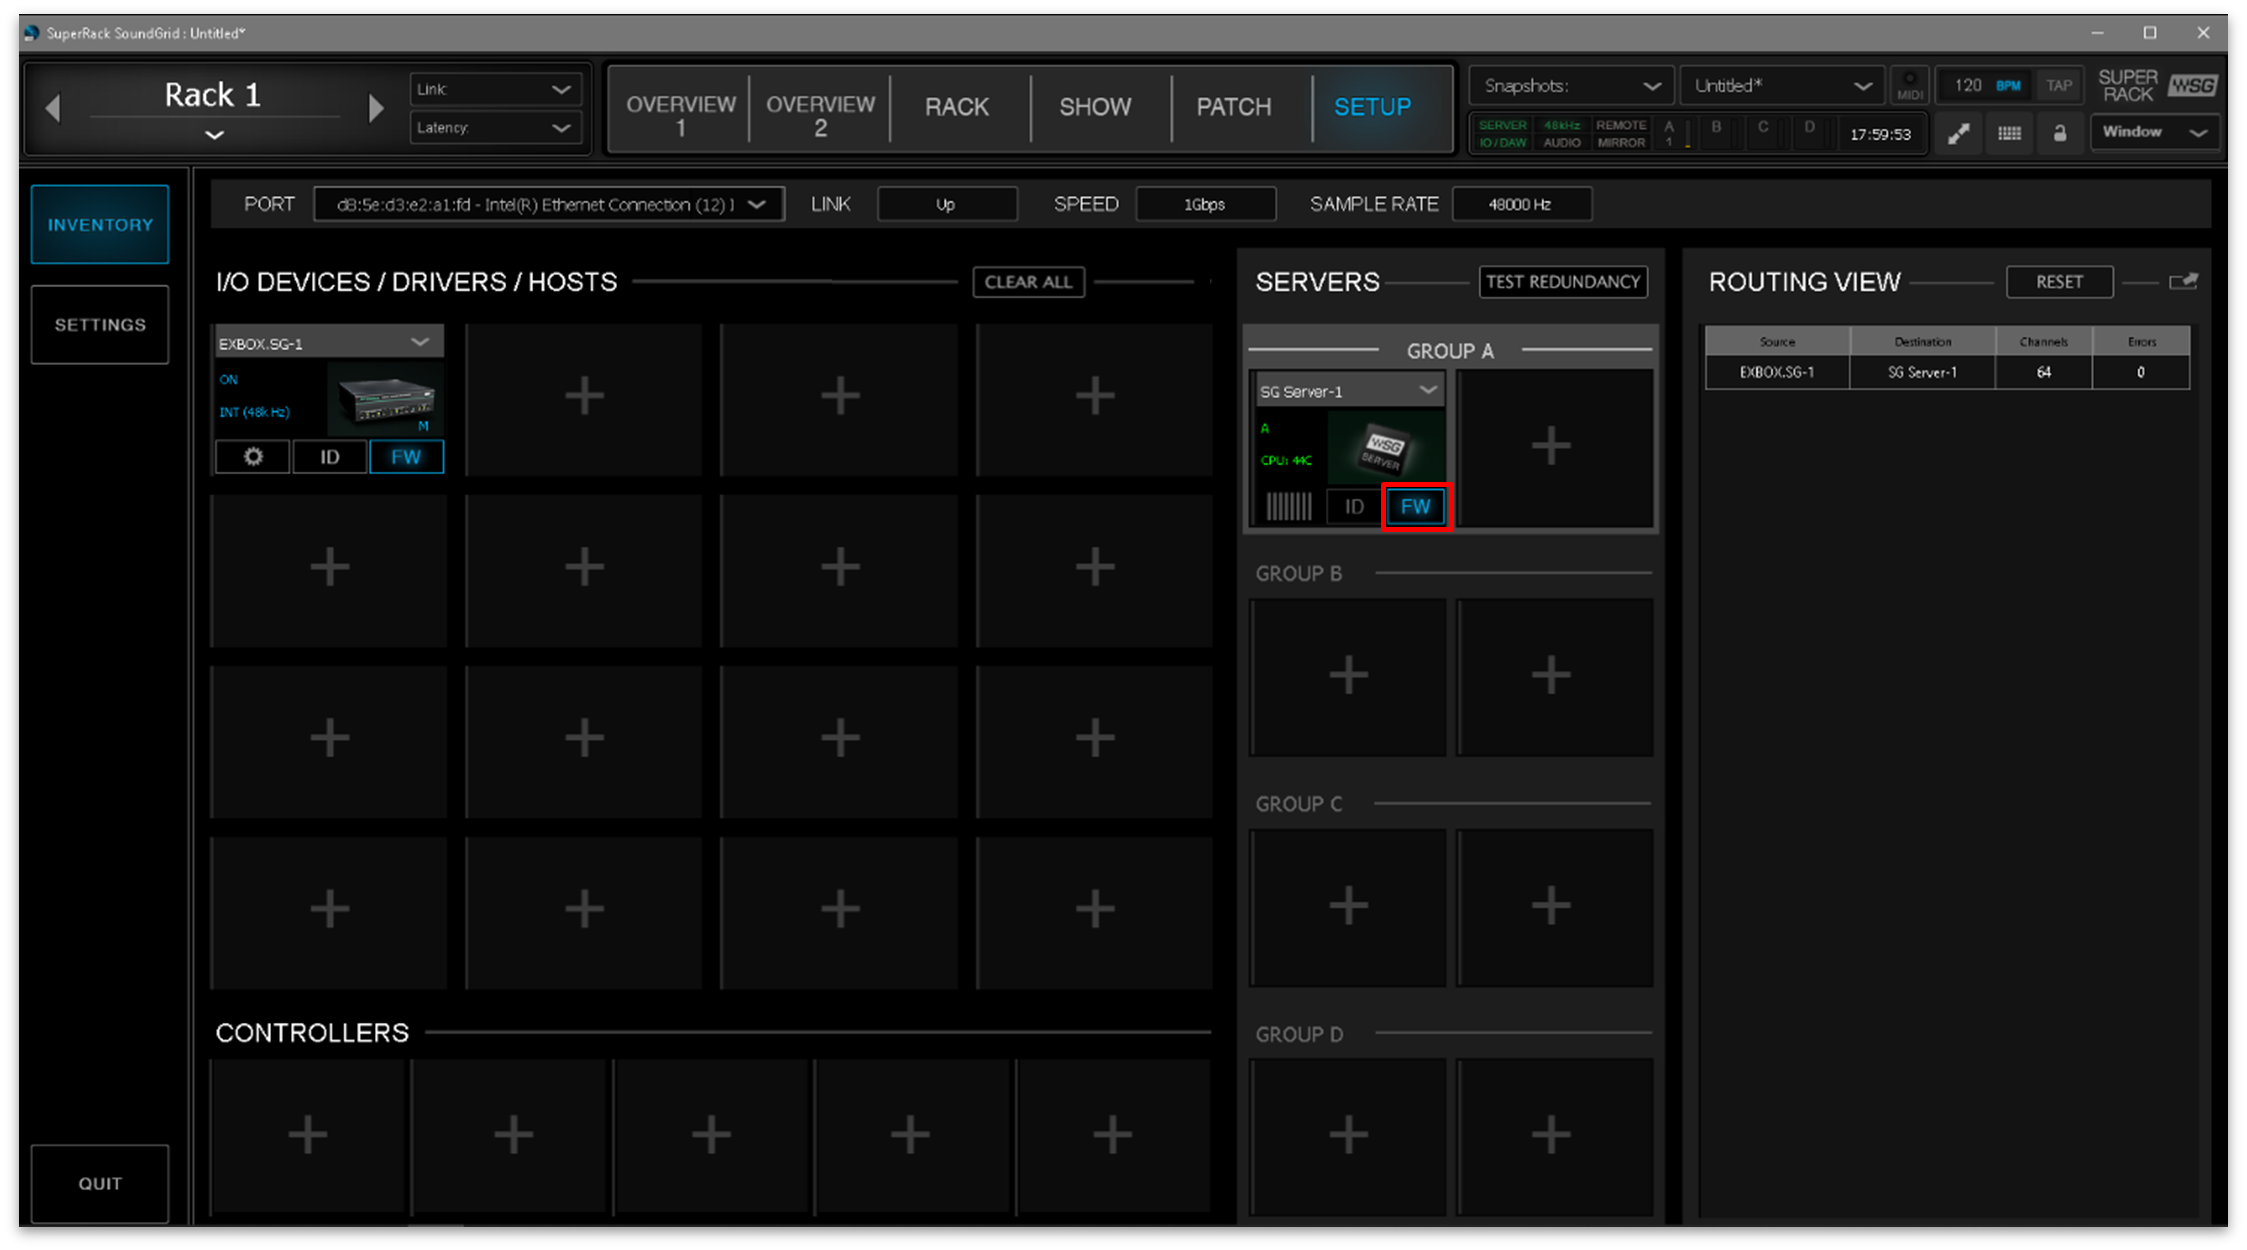
- Under "SERVERS" - "GROUP A" you will see the device: SG Server-1.
Step 3: Update the Waves Extreme Server C firmware
The next step is to check and, if necessary, update the firmware of the Waves server.
For the SG Server, the "FW" LED is lit in blue, red or gray to indicate whether an update is required:
- "FW" (blue) = the server firmware is compatible with the version of SuperRack, but there is a newer firmware available. An update is recommended but not necessary.
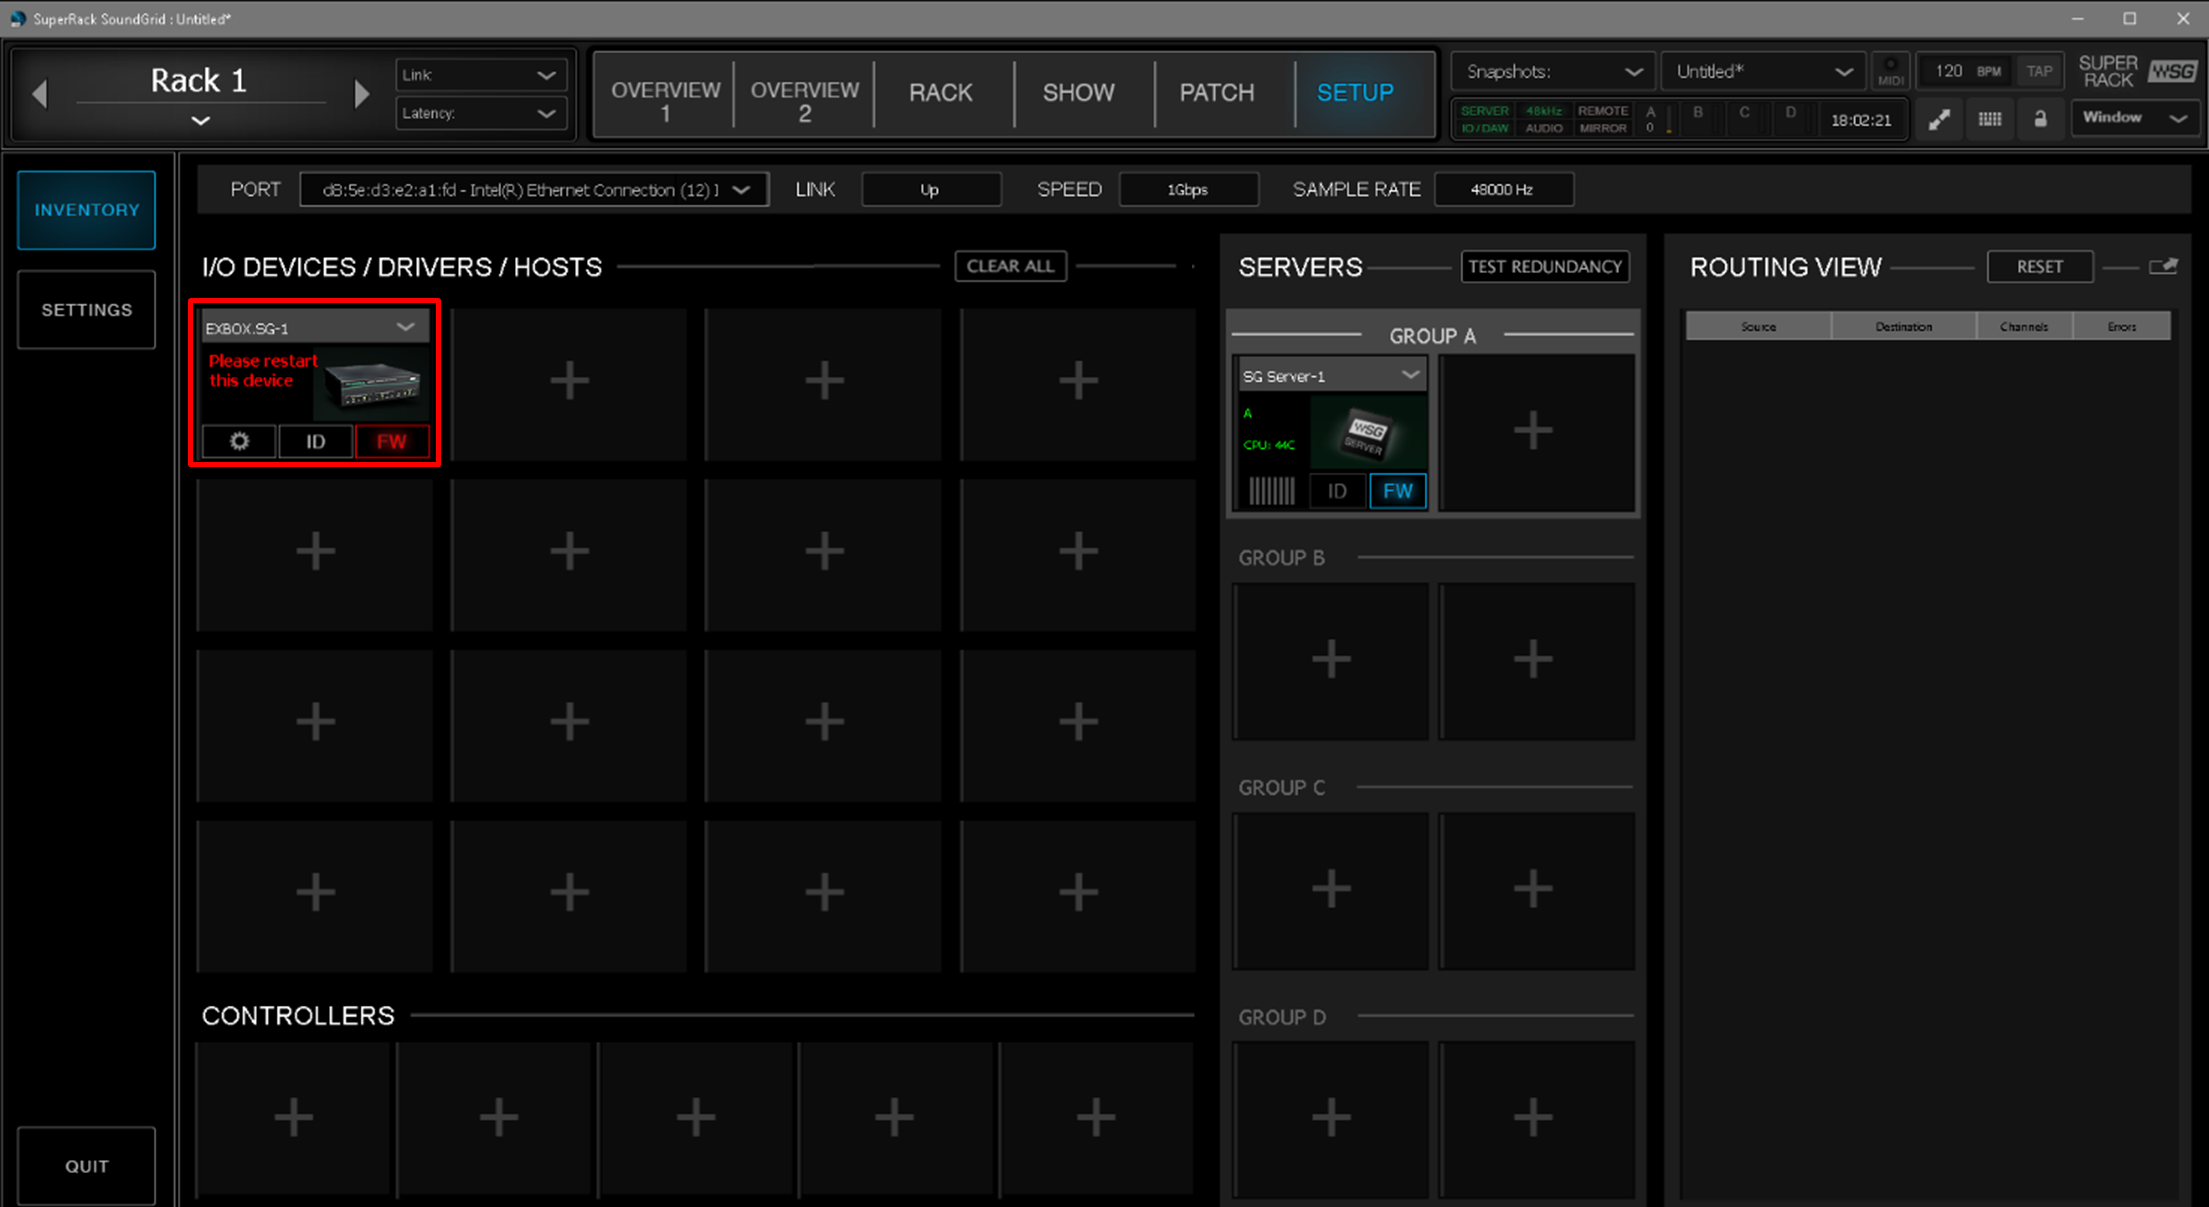
- "FW" (red) = the server firmware is not compatible with the version of SuperRack. An update of the server firmware is mandatory.
- "FW" (gray) = the server firmware is compatible with the version of SuperRack, and is the latest version. In this instance, there is no action required and you can skip to Step 4.
If you need to update the firmware, then follow the instructions below.
- For the SG Server, click on "FW".
- Click on "UPDATE".
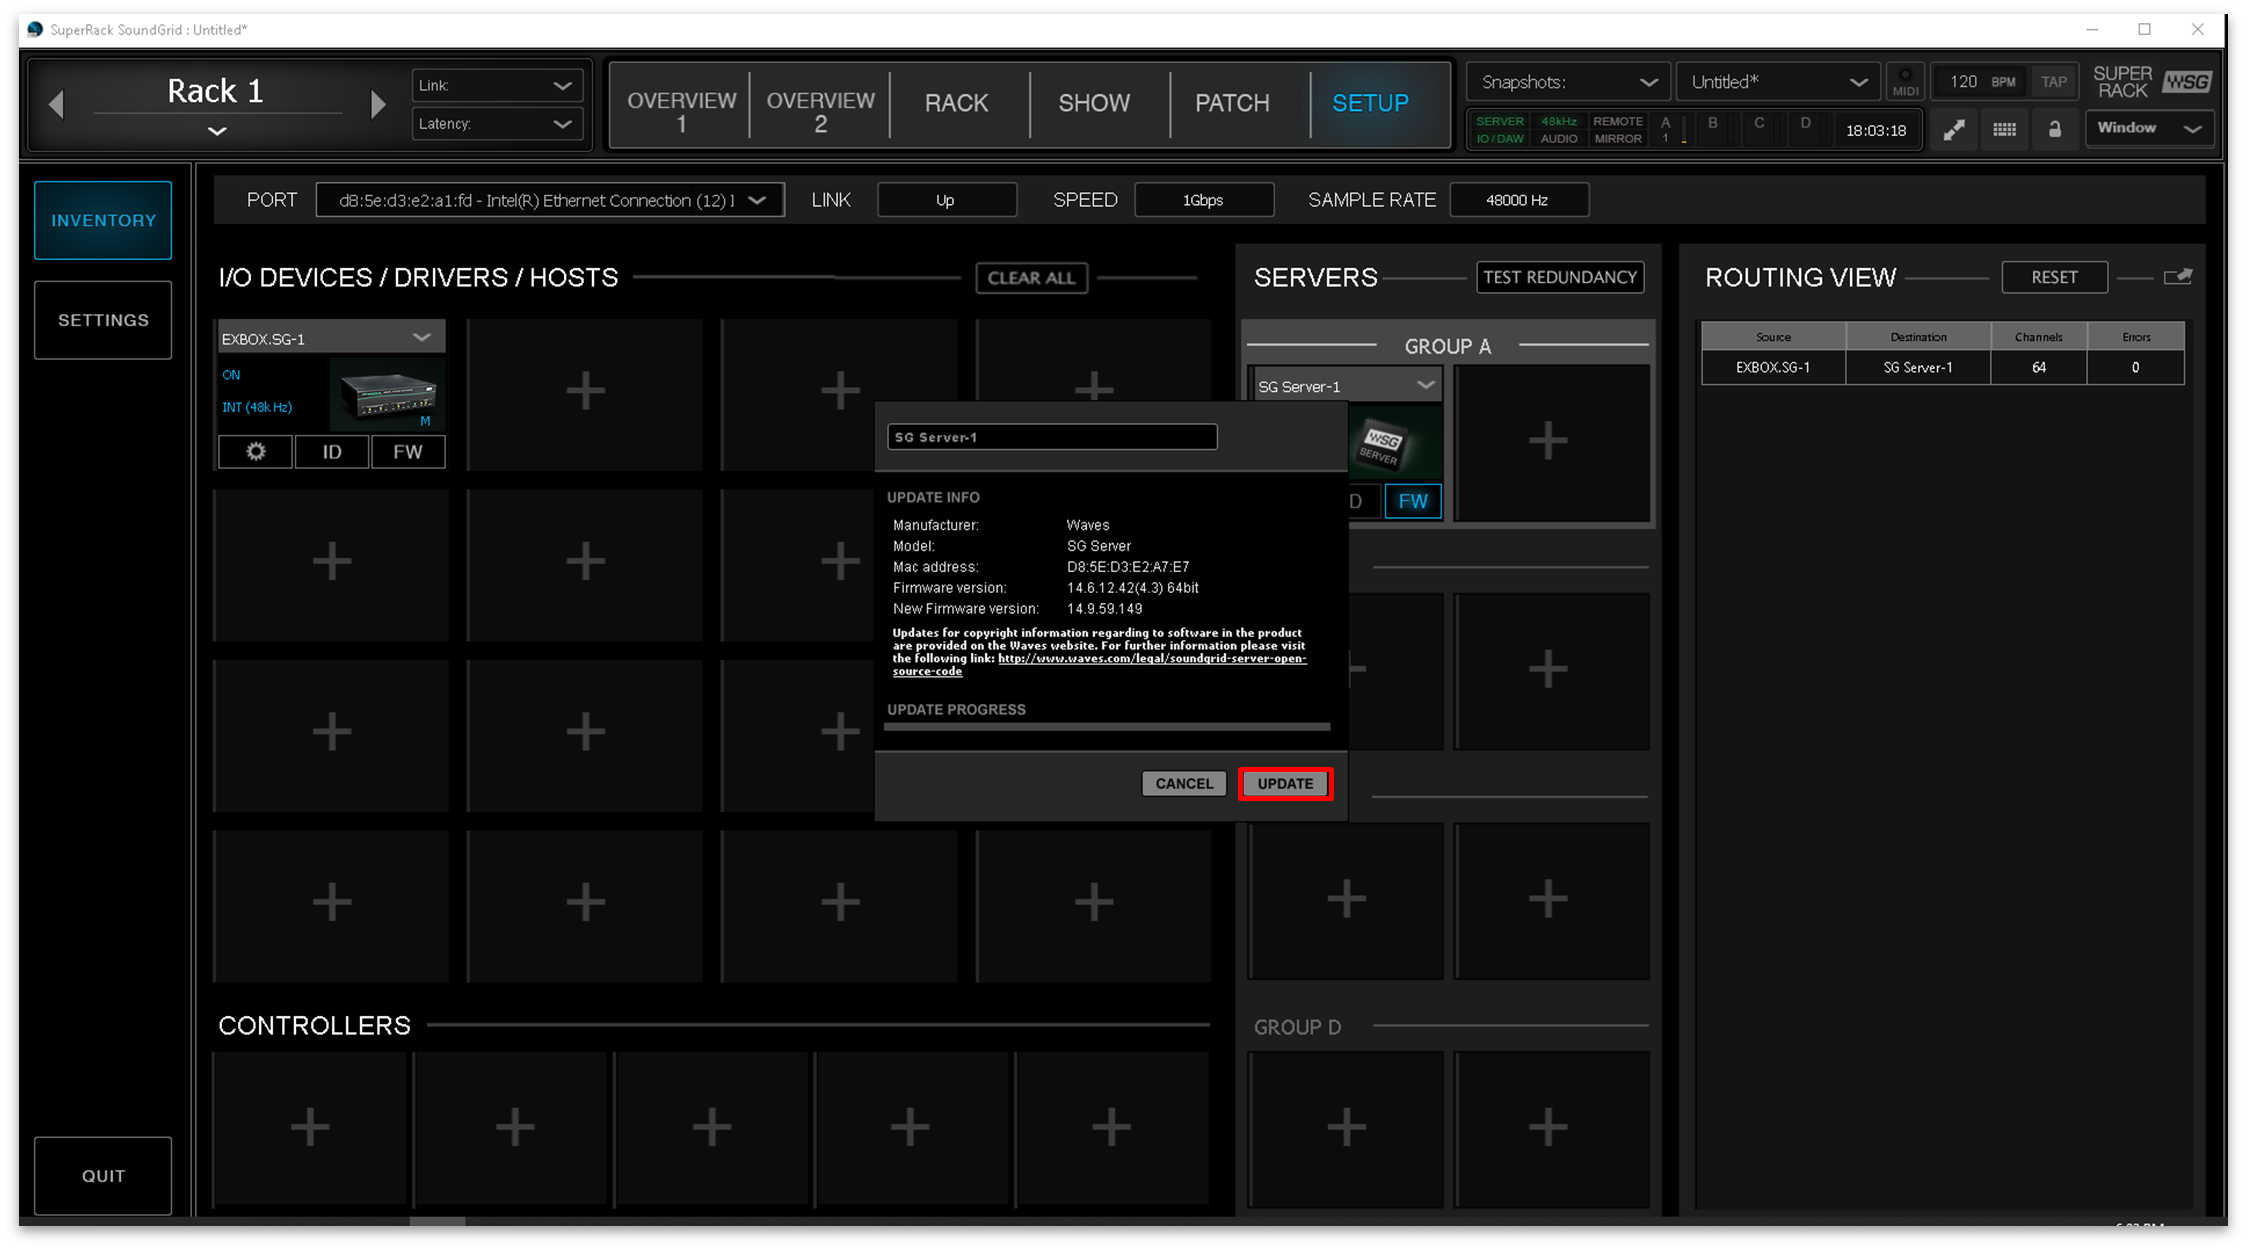
- The firmware update process starts...

- At the end of the update, click on "DONE".
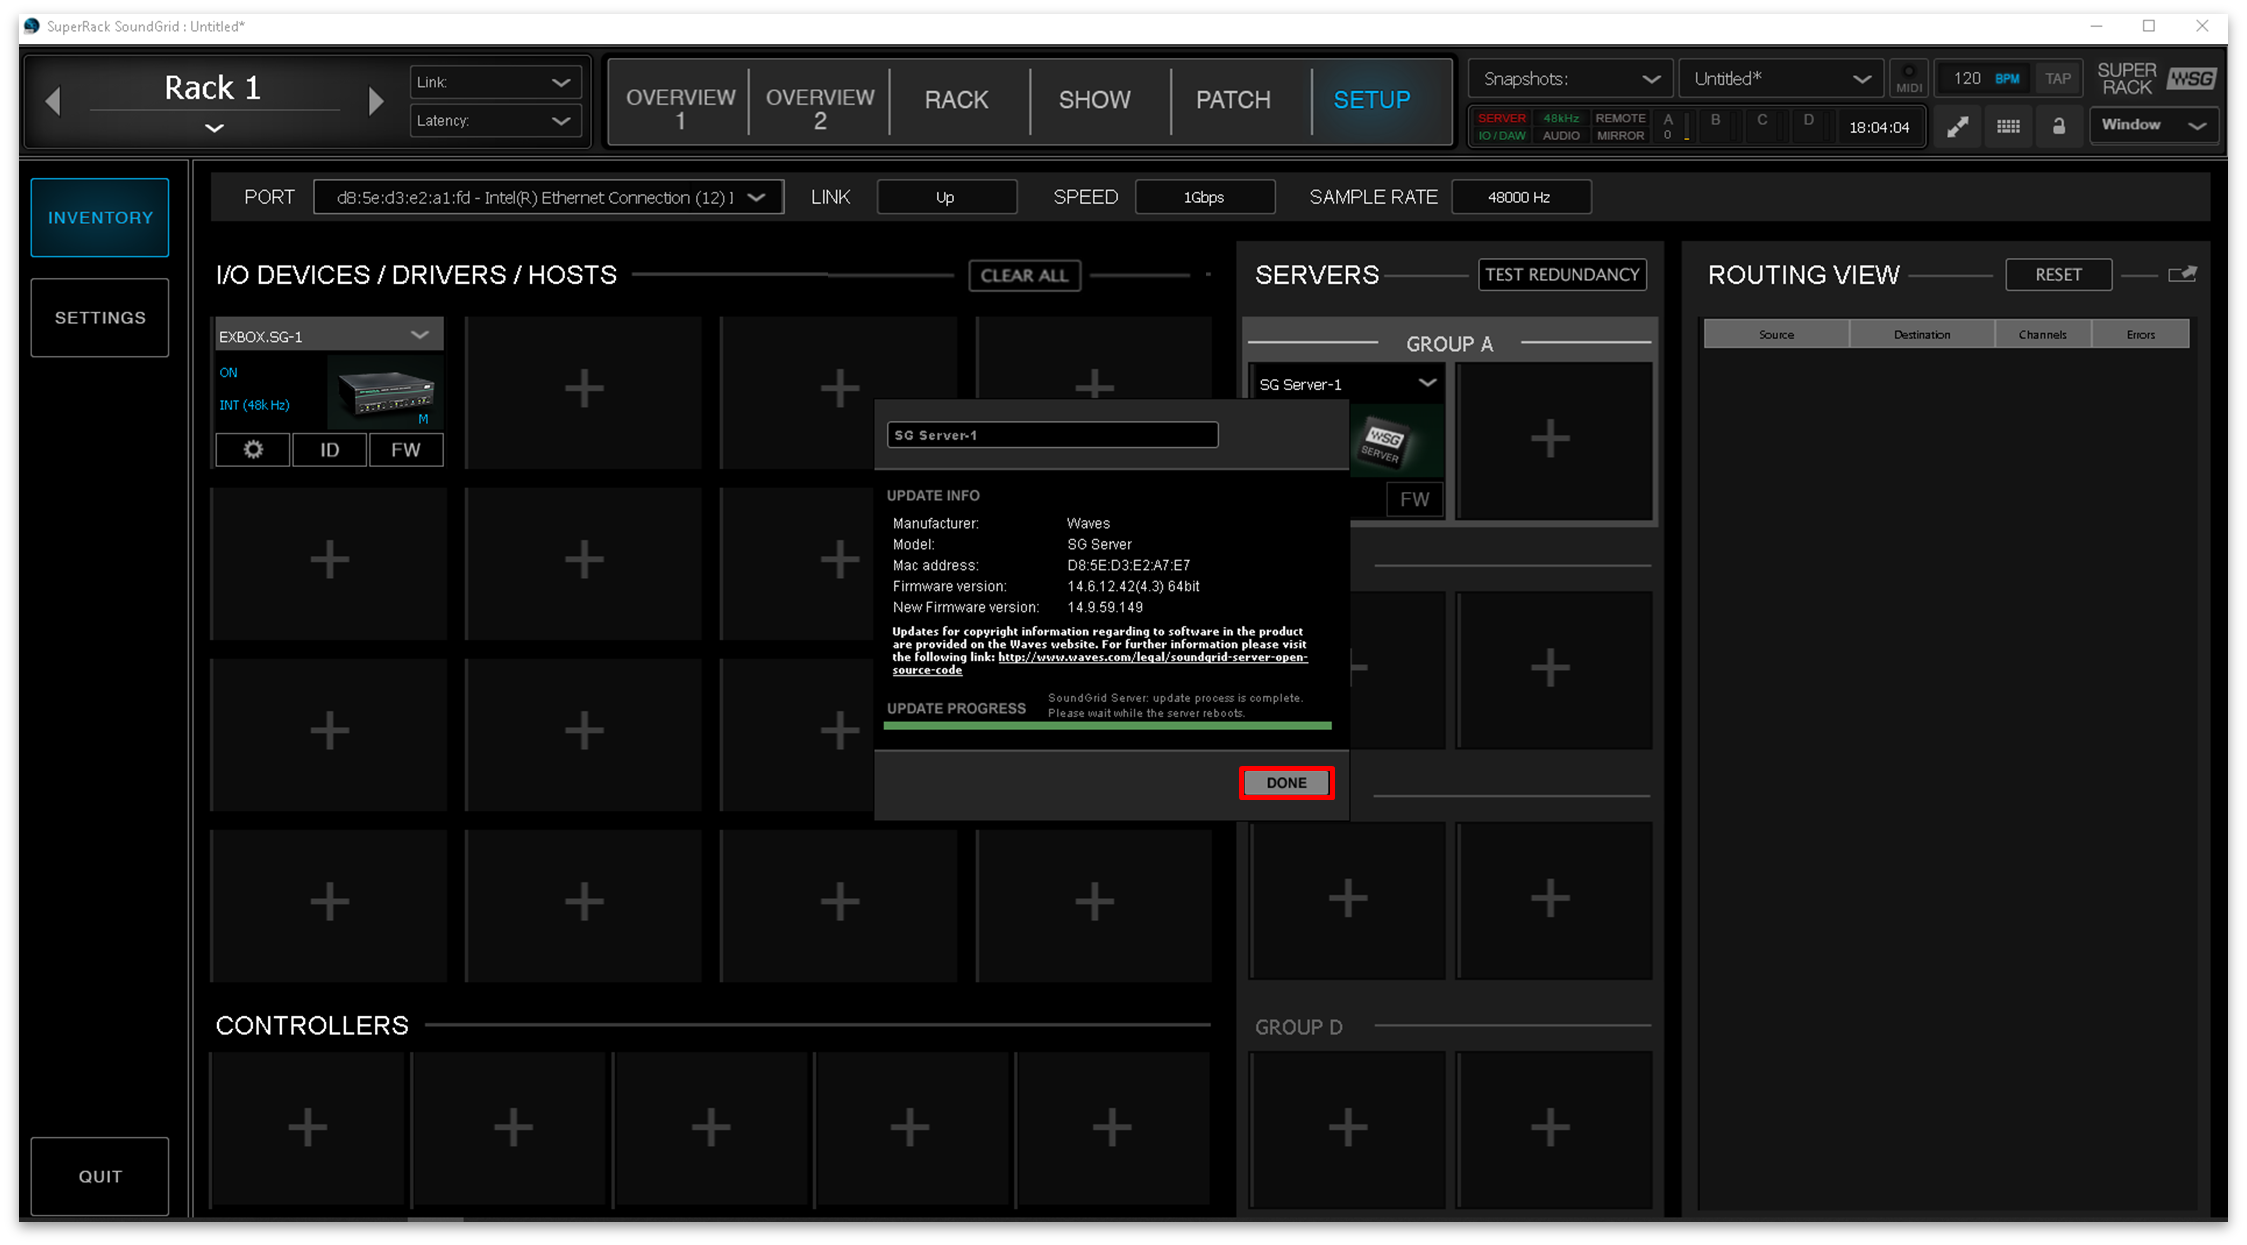
- After a firmware update, the Waves Extreme Server C reboots itself.
- After the reboot, check the color of the "FW" LED: either blue or gray are fine to continue.
Step 4 (optional): Add another Waves Extreme C Server
If you need to add more servers, then follow the instructions below. Otherwise, skip to step 5.
There are two instances when you may have more than one Waves Extreme C server: for redundancy or to add more resources. In each case, the server(s) must be added to Waves SuperRack SoundGrid configuration.
Note that it is important to add the server to the correct box, as this determines its functionality: for each Group, the first box (on the left) is used for the main resources, while the second box (on the right) is used for redundancy.
For example:
- To add a second server for redundancy, use the second box under "SERVERS" – "GROUP A".

- To add a second server to add more resources, use the first box under "SERVERS" – "GROUP B".
- In each case, you should check and update the firmware of the server (by following the instructions in Step 3).
Step 5: Update the DirectOut EXBOX.SG firmware
The next step is to update firmware of the DirectOut converter.
- For the EXBOX.SG, click on "FW".

- Click on "UPDATE".

- The update process starts…
- At the end of the update, click on "DONE".

- After a firmware update, the EXBOX.SG must be restarted. Disconnect the two power supplies from the EXBOX.SG to power cycle the device.
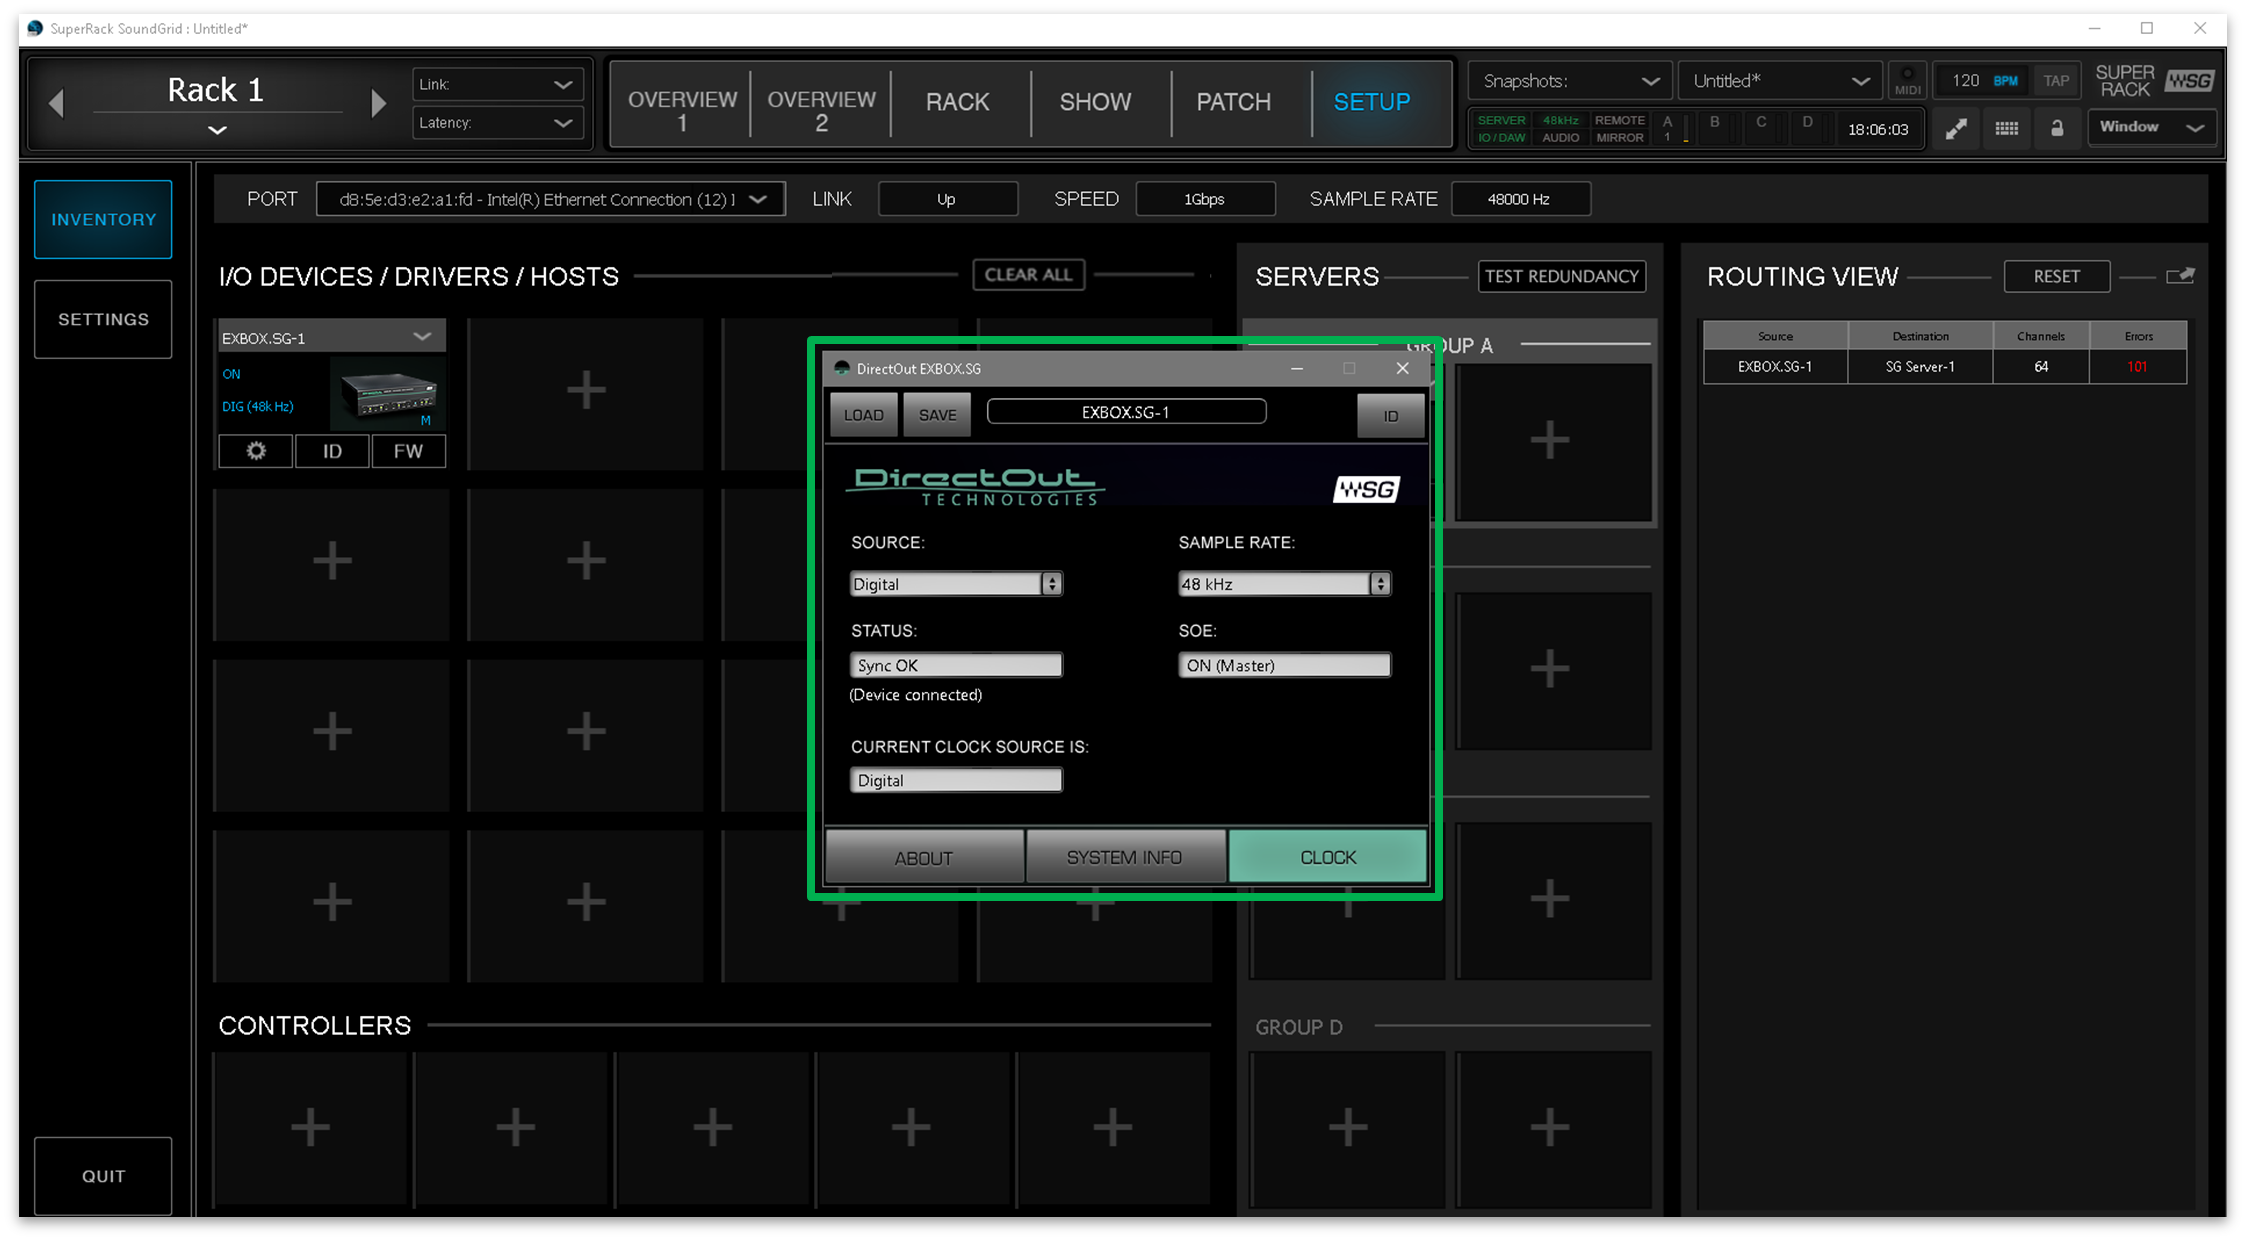
Step 6: Assign the DirectOut EXBOX.SG to digital clock
The DirectOut converter must now be set to digital clock.
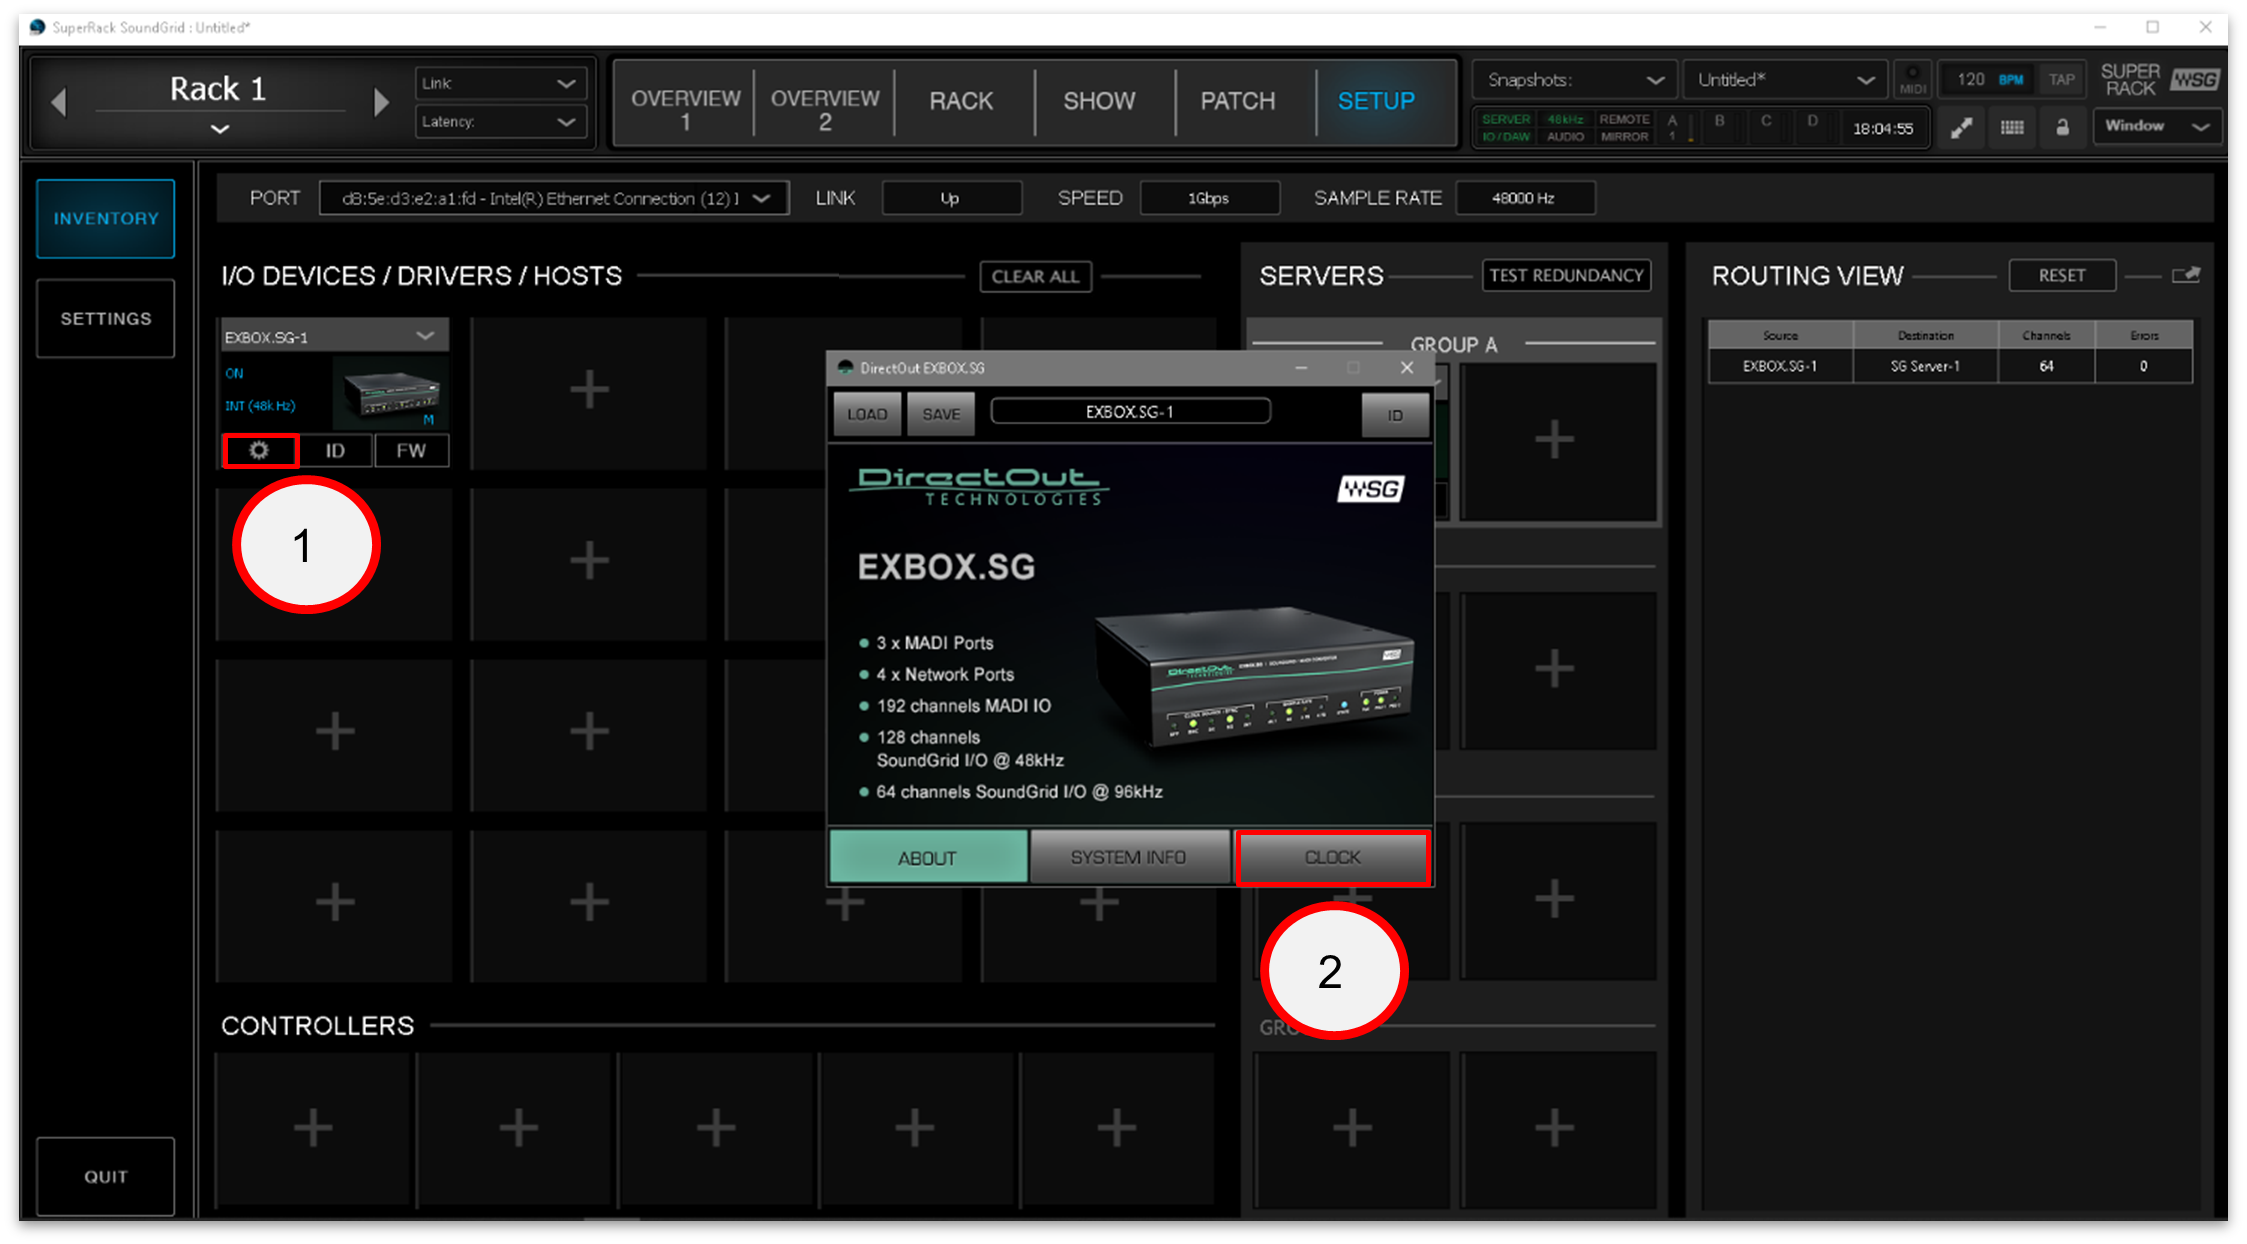
- For the EXBOX.SG, click on the settings icon and then click on "CLOCK.
- In the "SOURCE" drop-down menu, select "Digital".
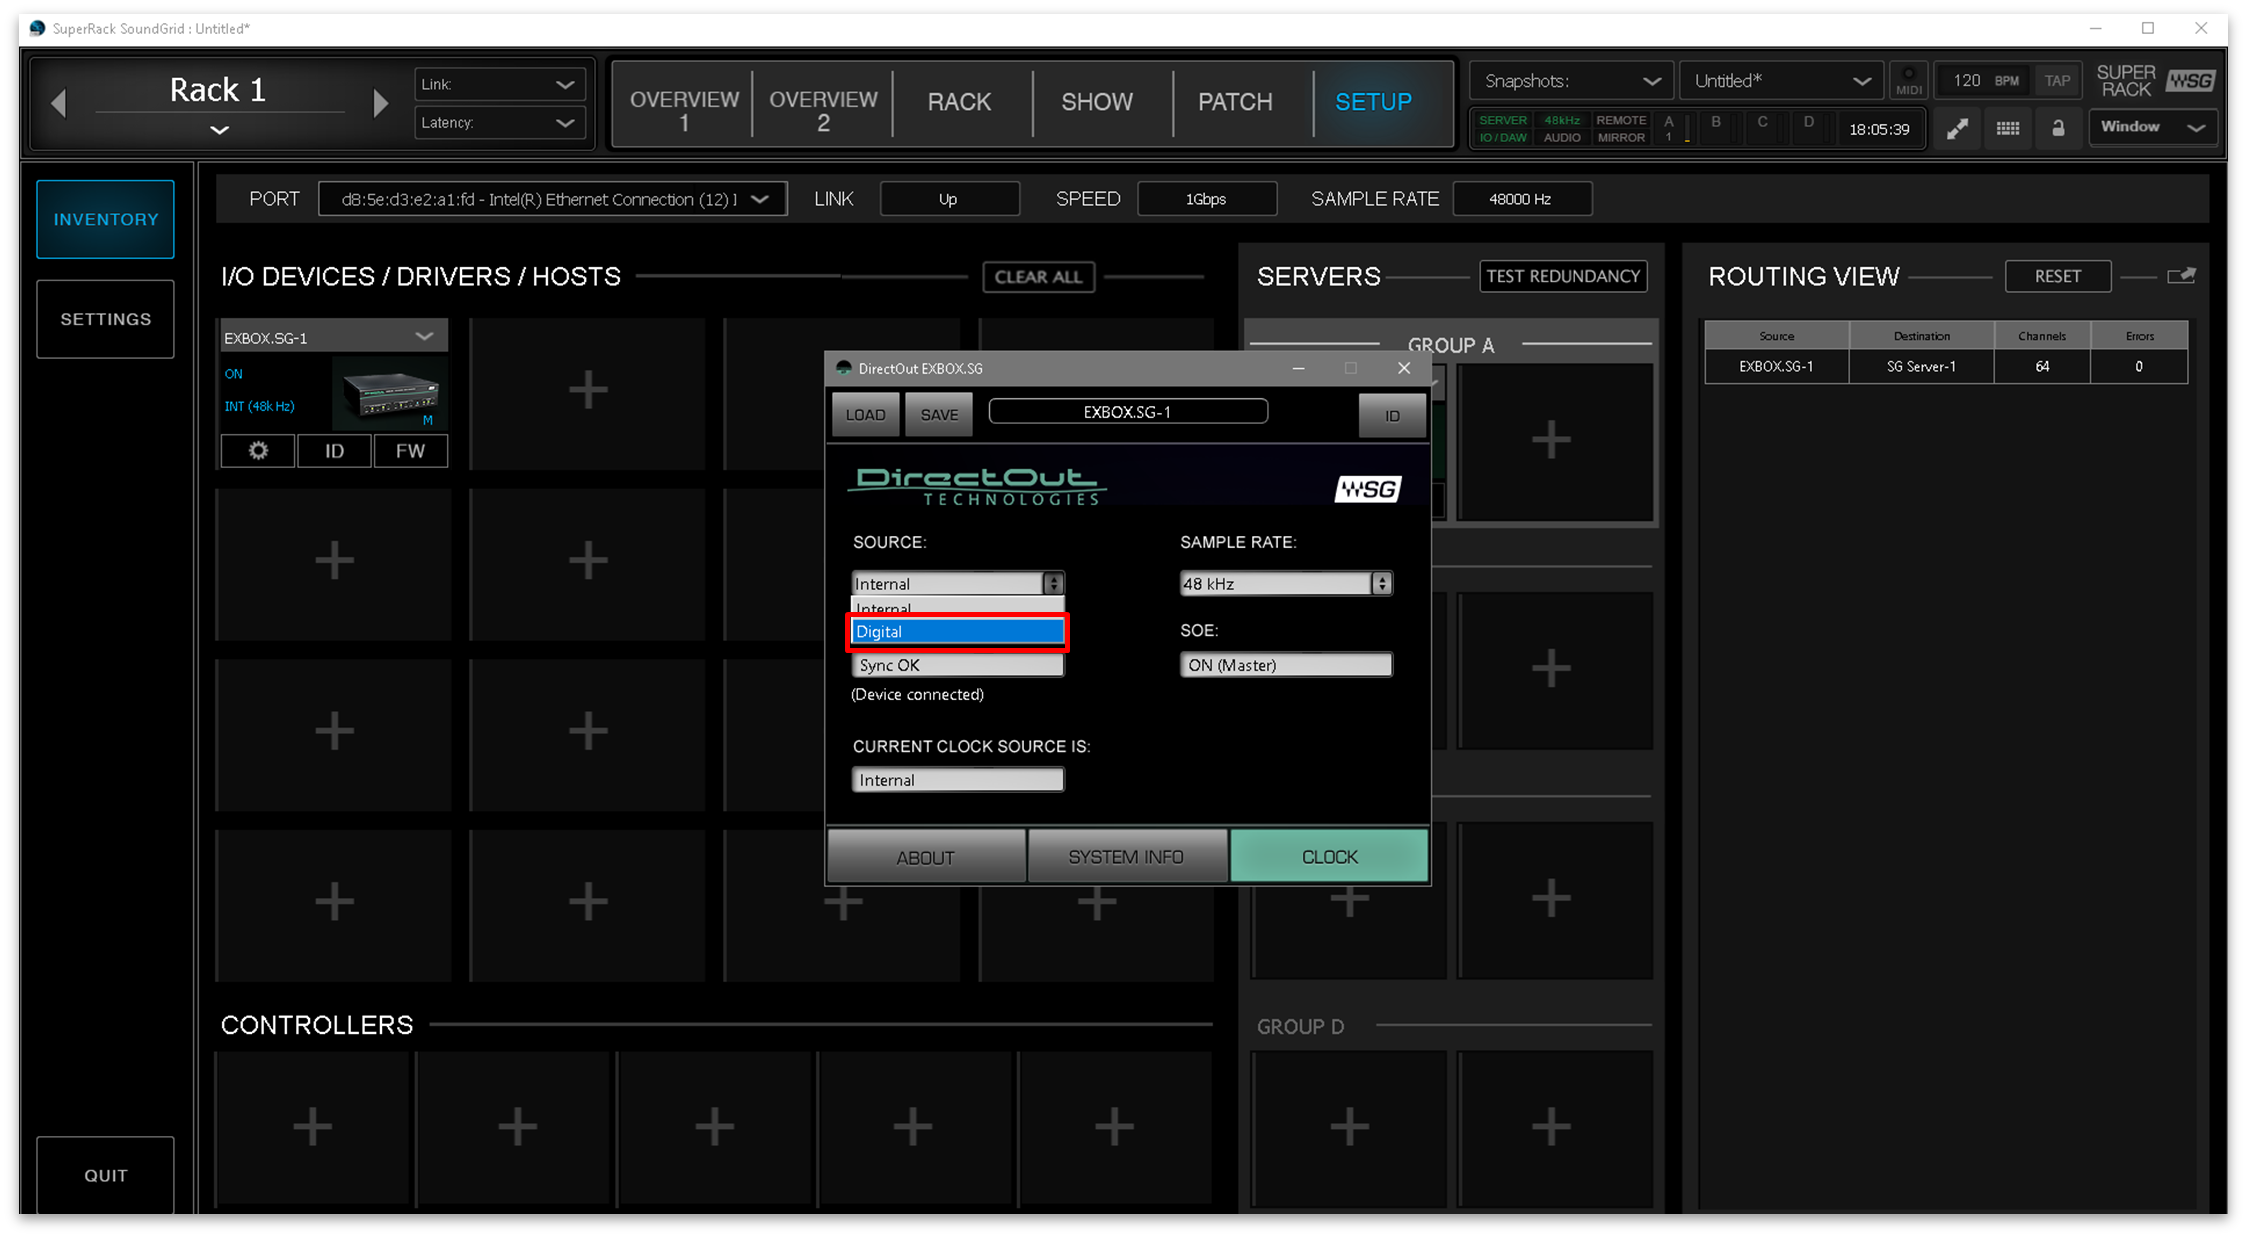
- The screenshot below shows how the options should look.
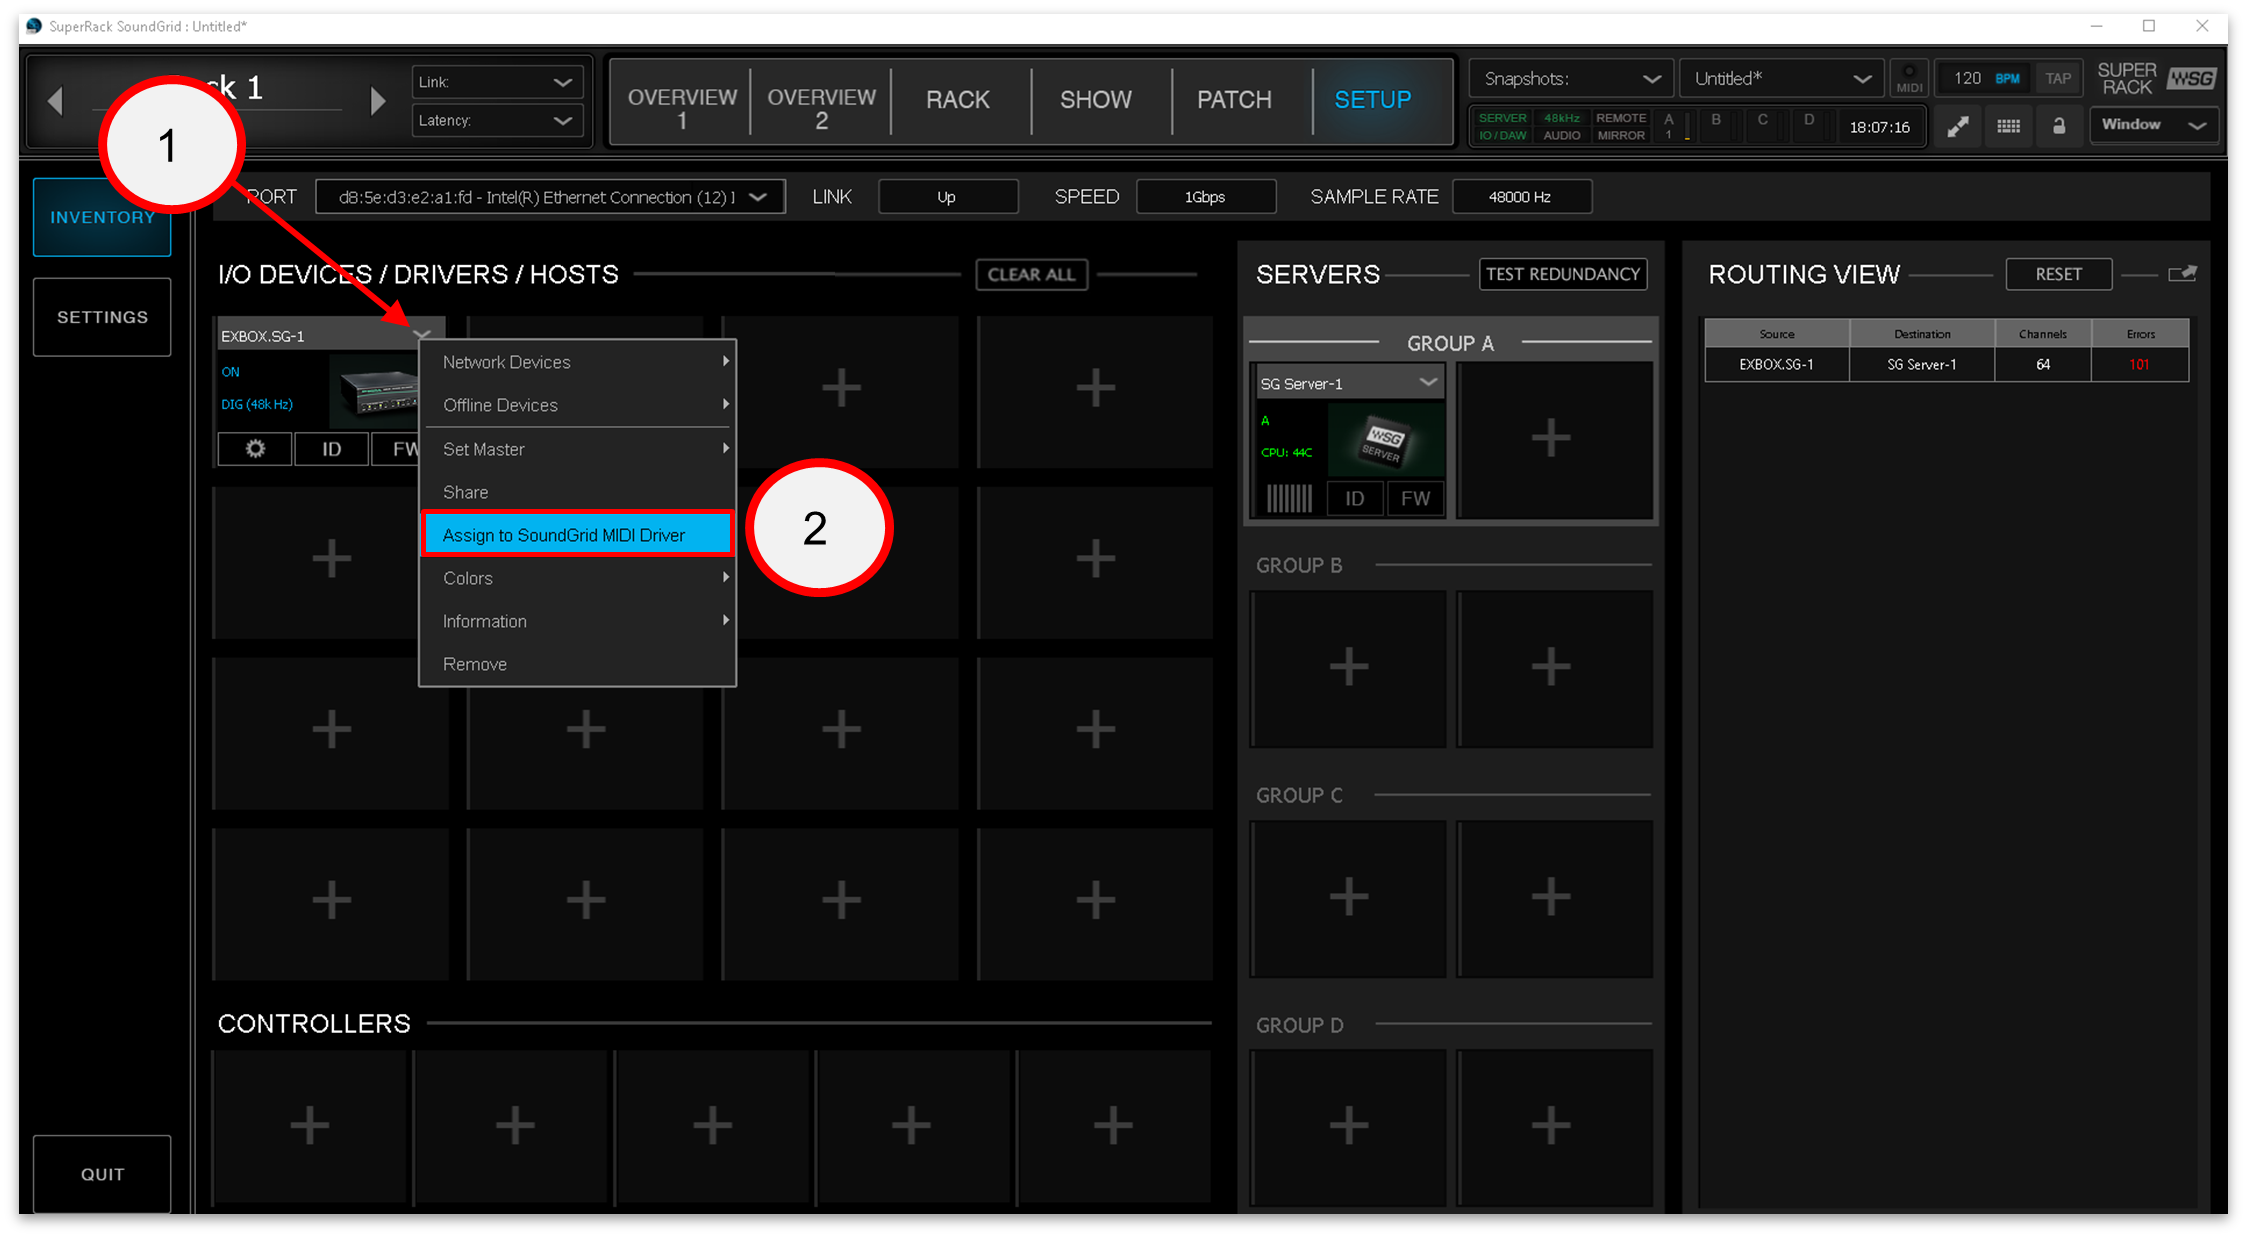
Step 7: Assign the DirectOut EXBOX.SG to SoundGrid MIDI
The DirectOut converter must also be assigned to the SoundGrid MIDI driver as follows.
- Click on small arrow beside the EXBOX.SG name (to open the context menu), and select "Assign to SoundGrid MIDI Driver".
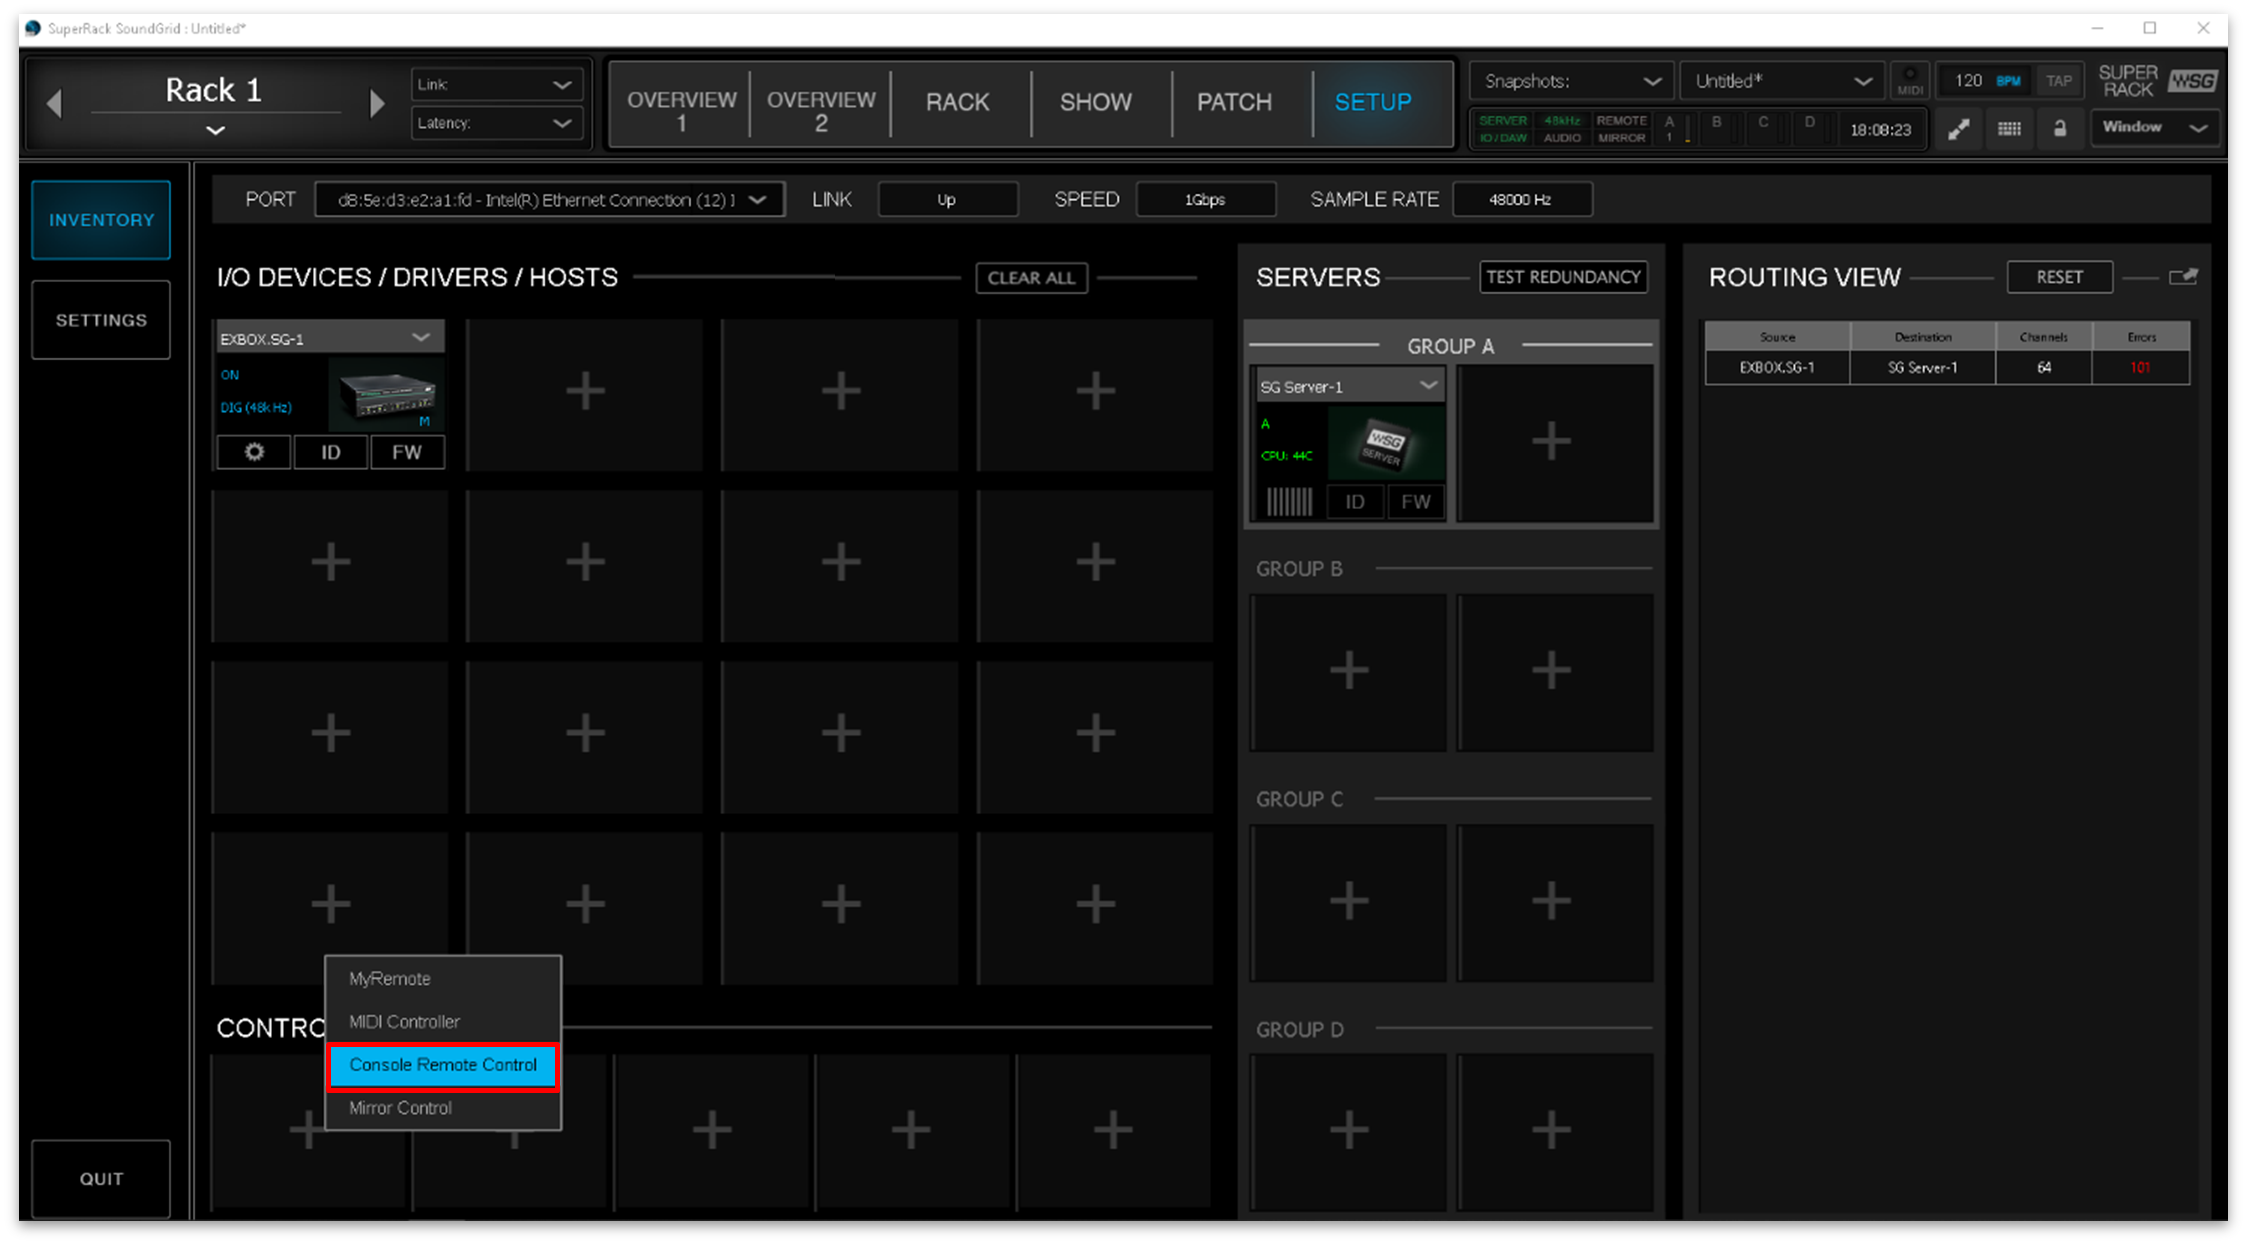
Step 8: Assign the Lawo Console as the Waves SuperRack SoundGrid controller
The final step, in this section, is to assign the mc2 control system as the controller of the Waves SuperRack SoundGrid.
- Click on the "CONTROLLERS" tab and select "Console Remote Control".
- Select the settings icon.

- Click on the "PORT" drop-down menu and select the "Intel® I211 GigabitNetwork Connection".

Please note: If the "Intel® I211 GigabitNetwork Connection" does not appear in the list of ports, then check that the "Waves SoundGrid Protocol" is enabled in the "Network Properties" for the NIC.
- Click on the refresh button (beside the port menu). The console's control system(s) now appear in the dialog box. In the example below, there are two entries: one for the primary and one for the secondary control system.
- Click on the "Assign" field to enter an ID number: ID 1 for the primary and ID 2 for the secondary control system.

- Click on "Apply" to confirm.
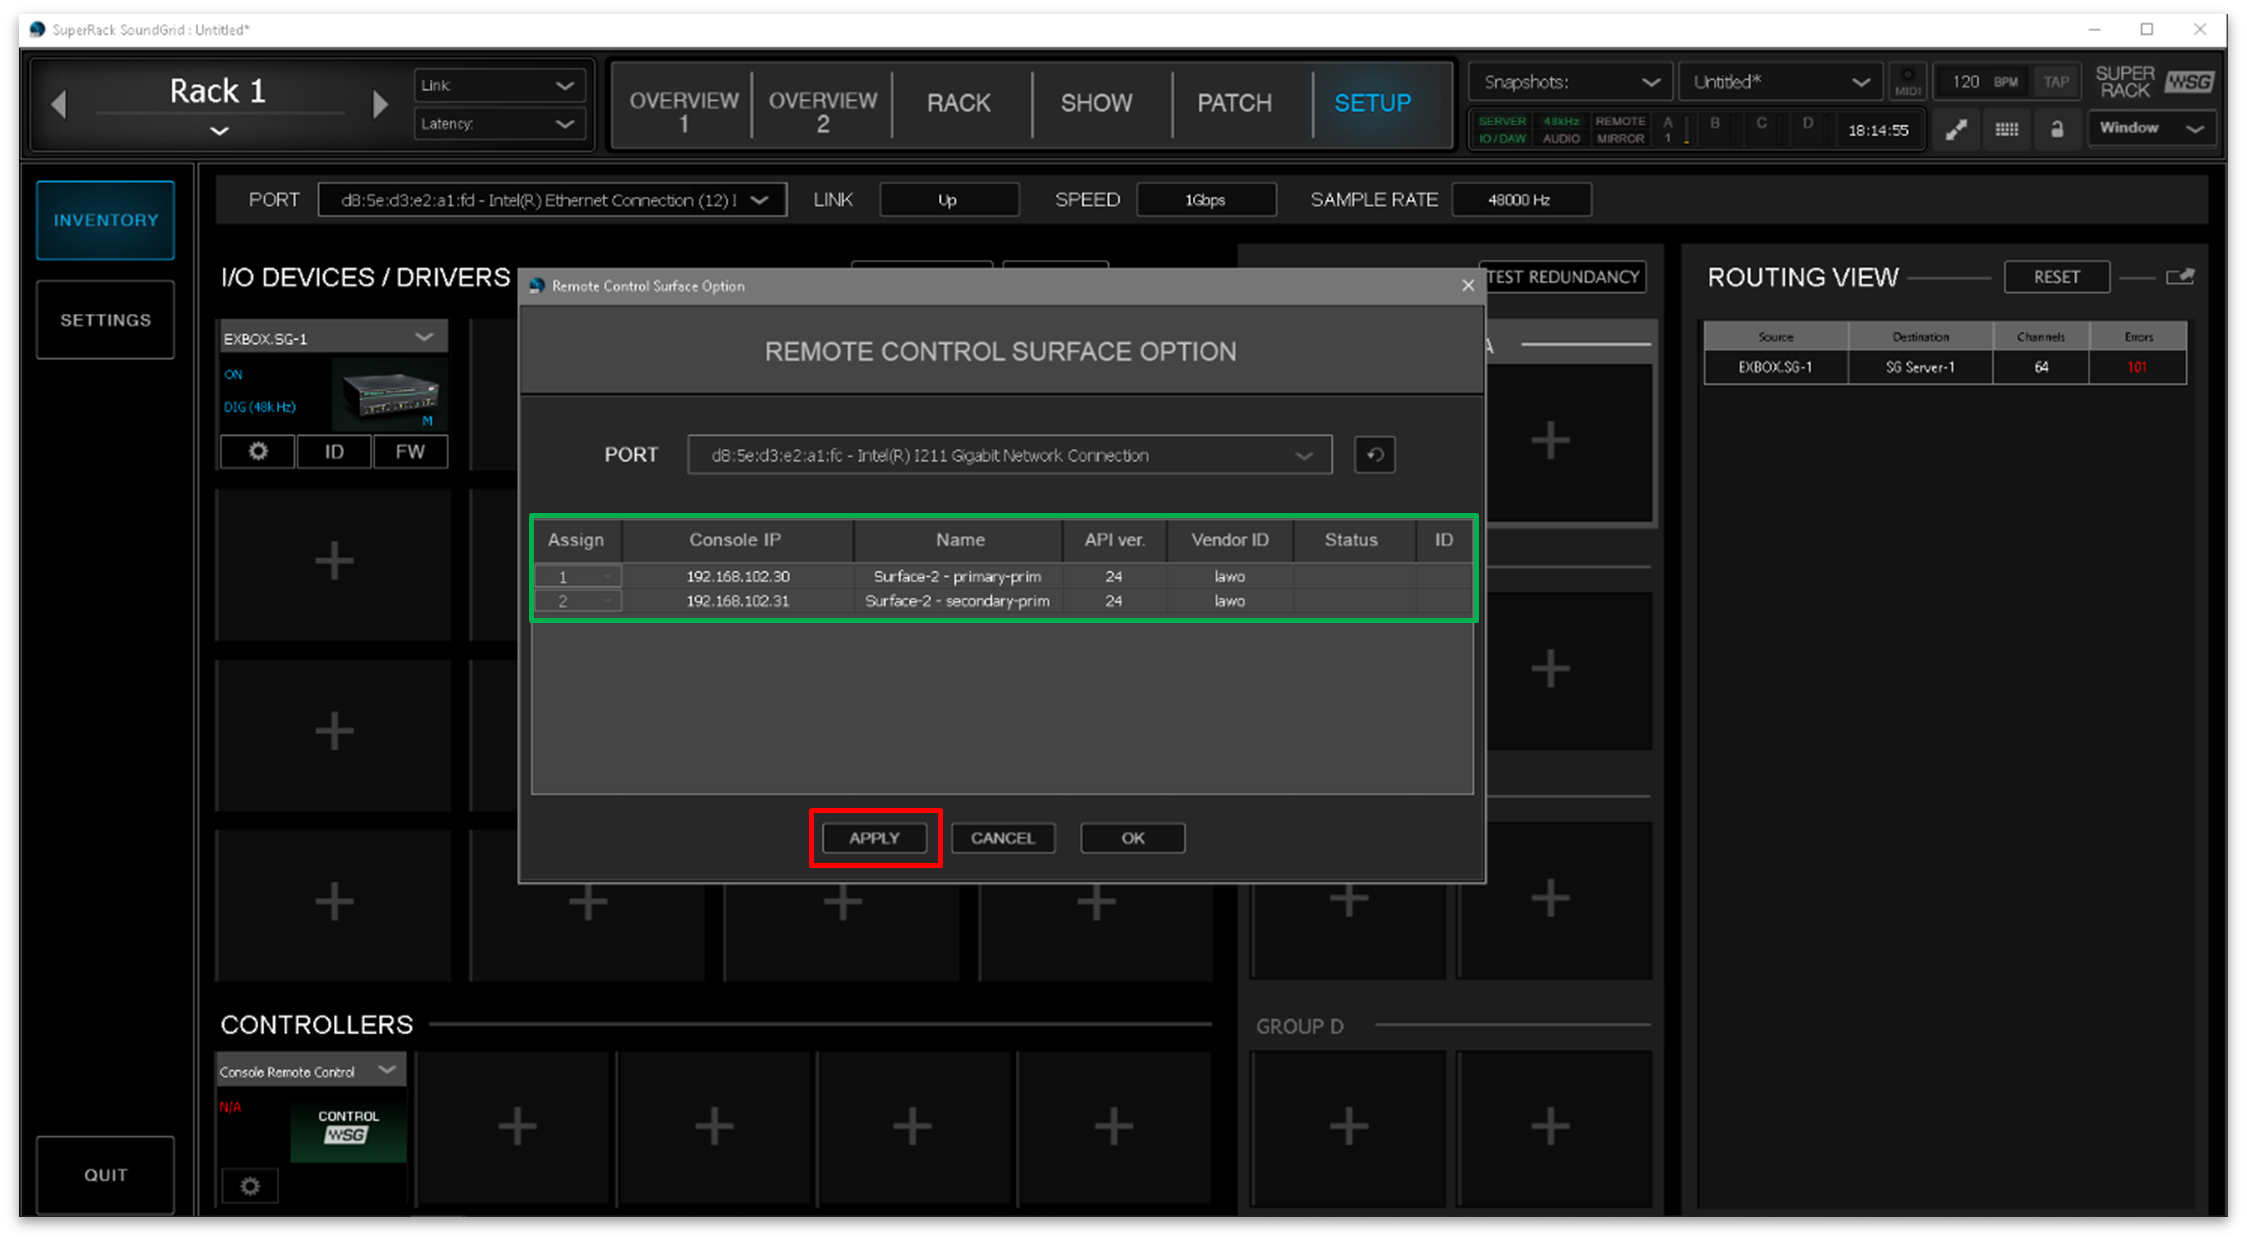
- The mc2 control system(s) are now correctly connected to the SuperRack SoundGrid.
On the Waves side, the "Remote Control Surface Options" dialog box should update to look something like this: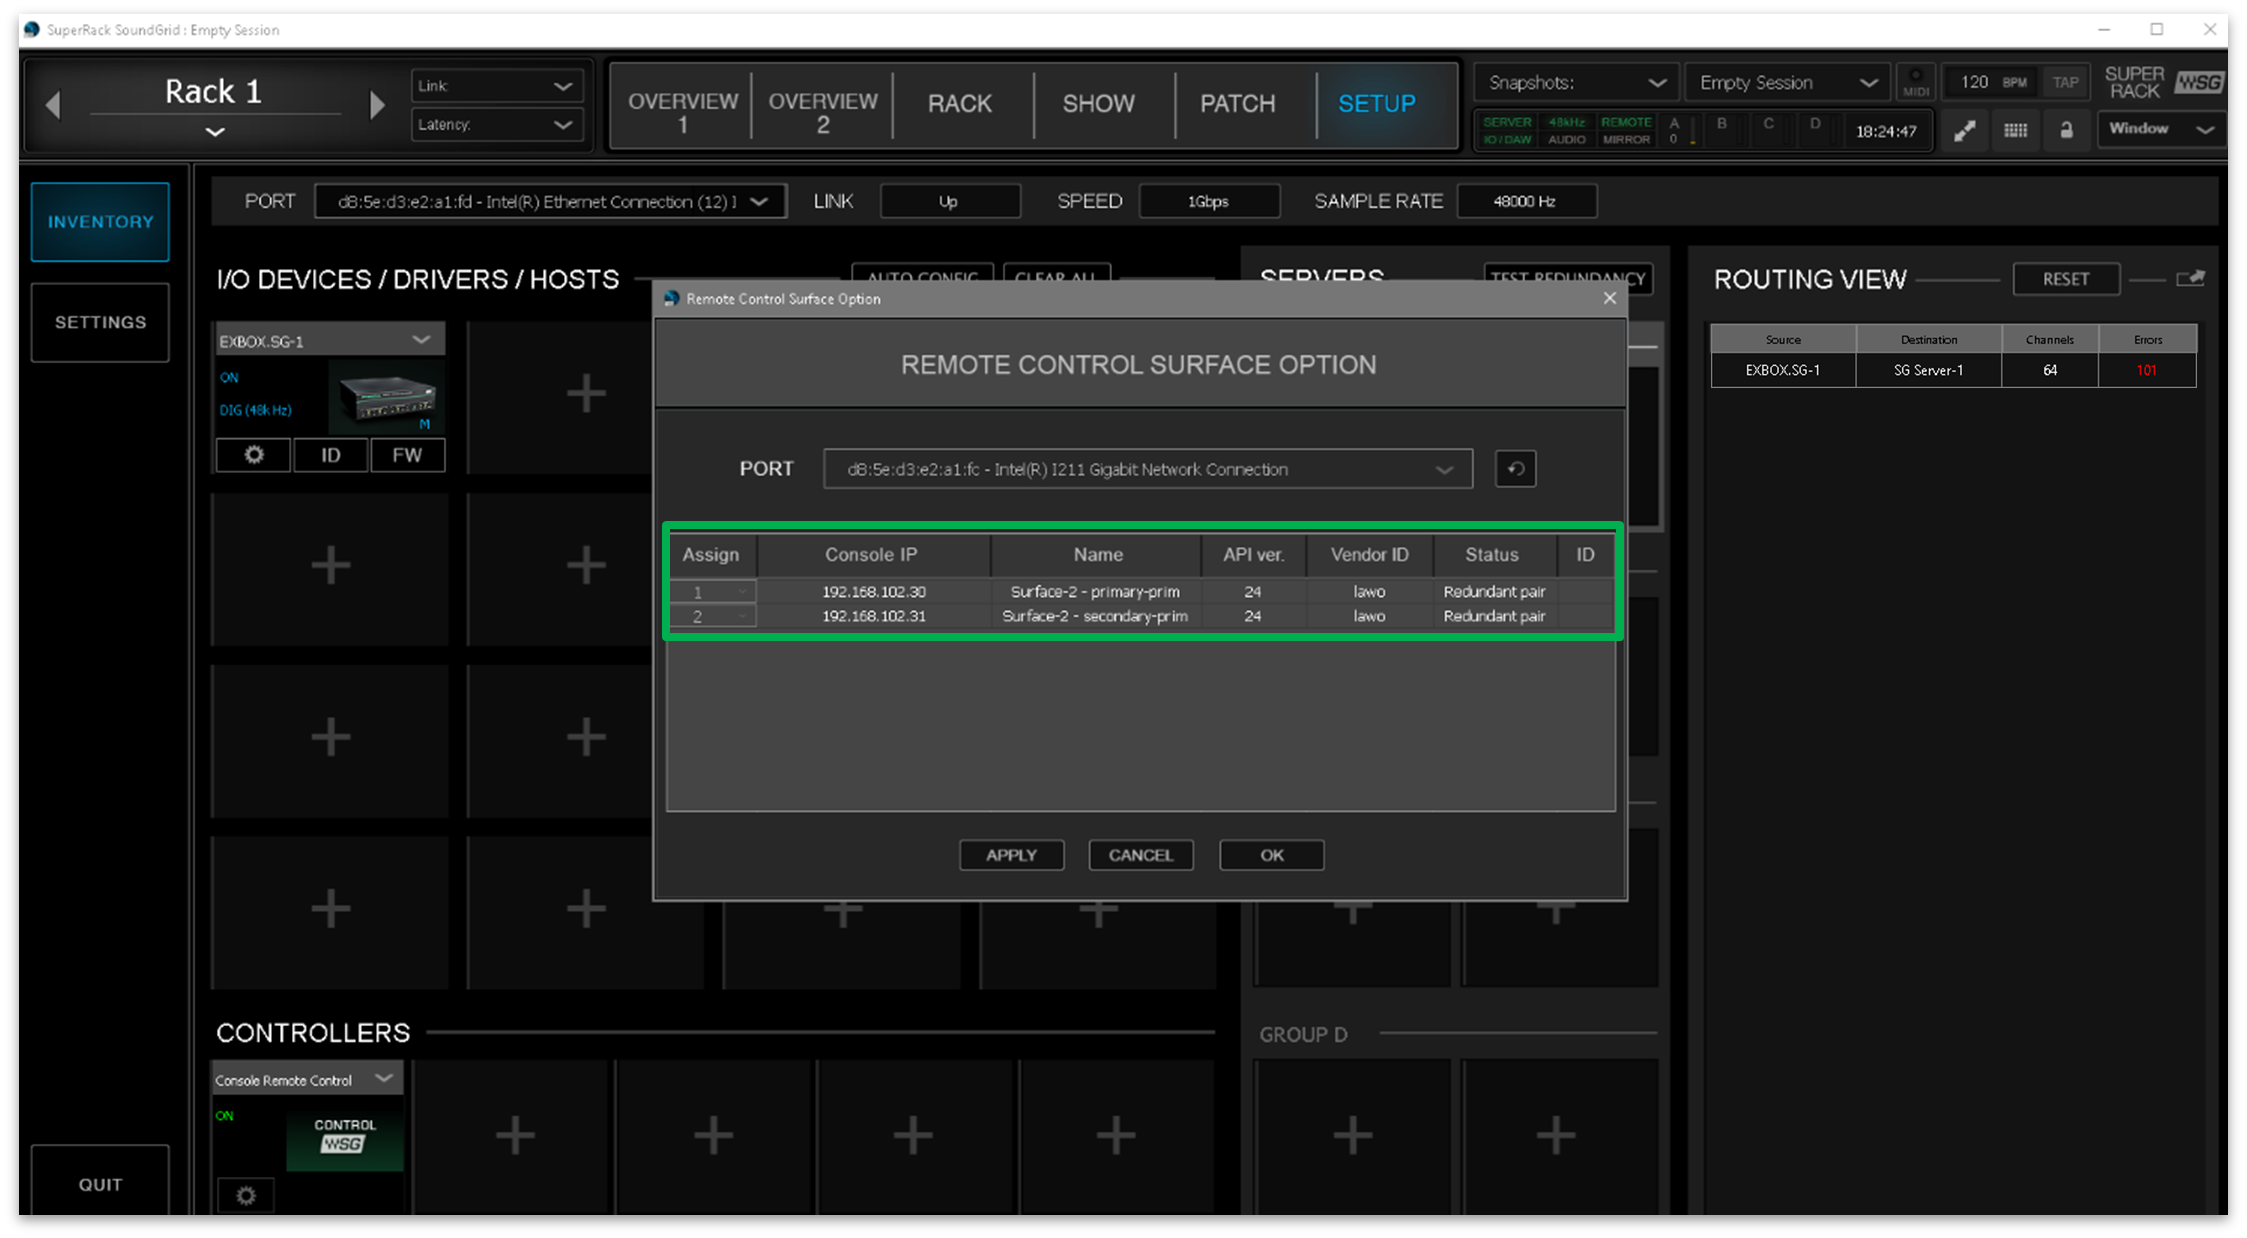
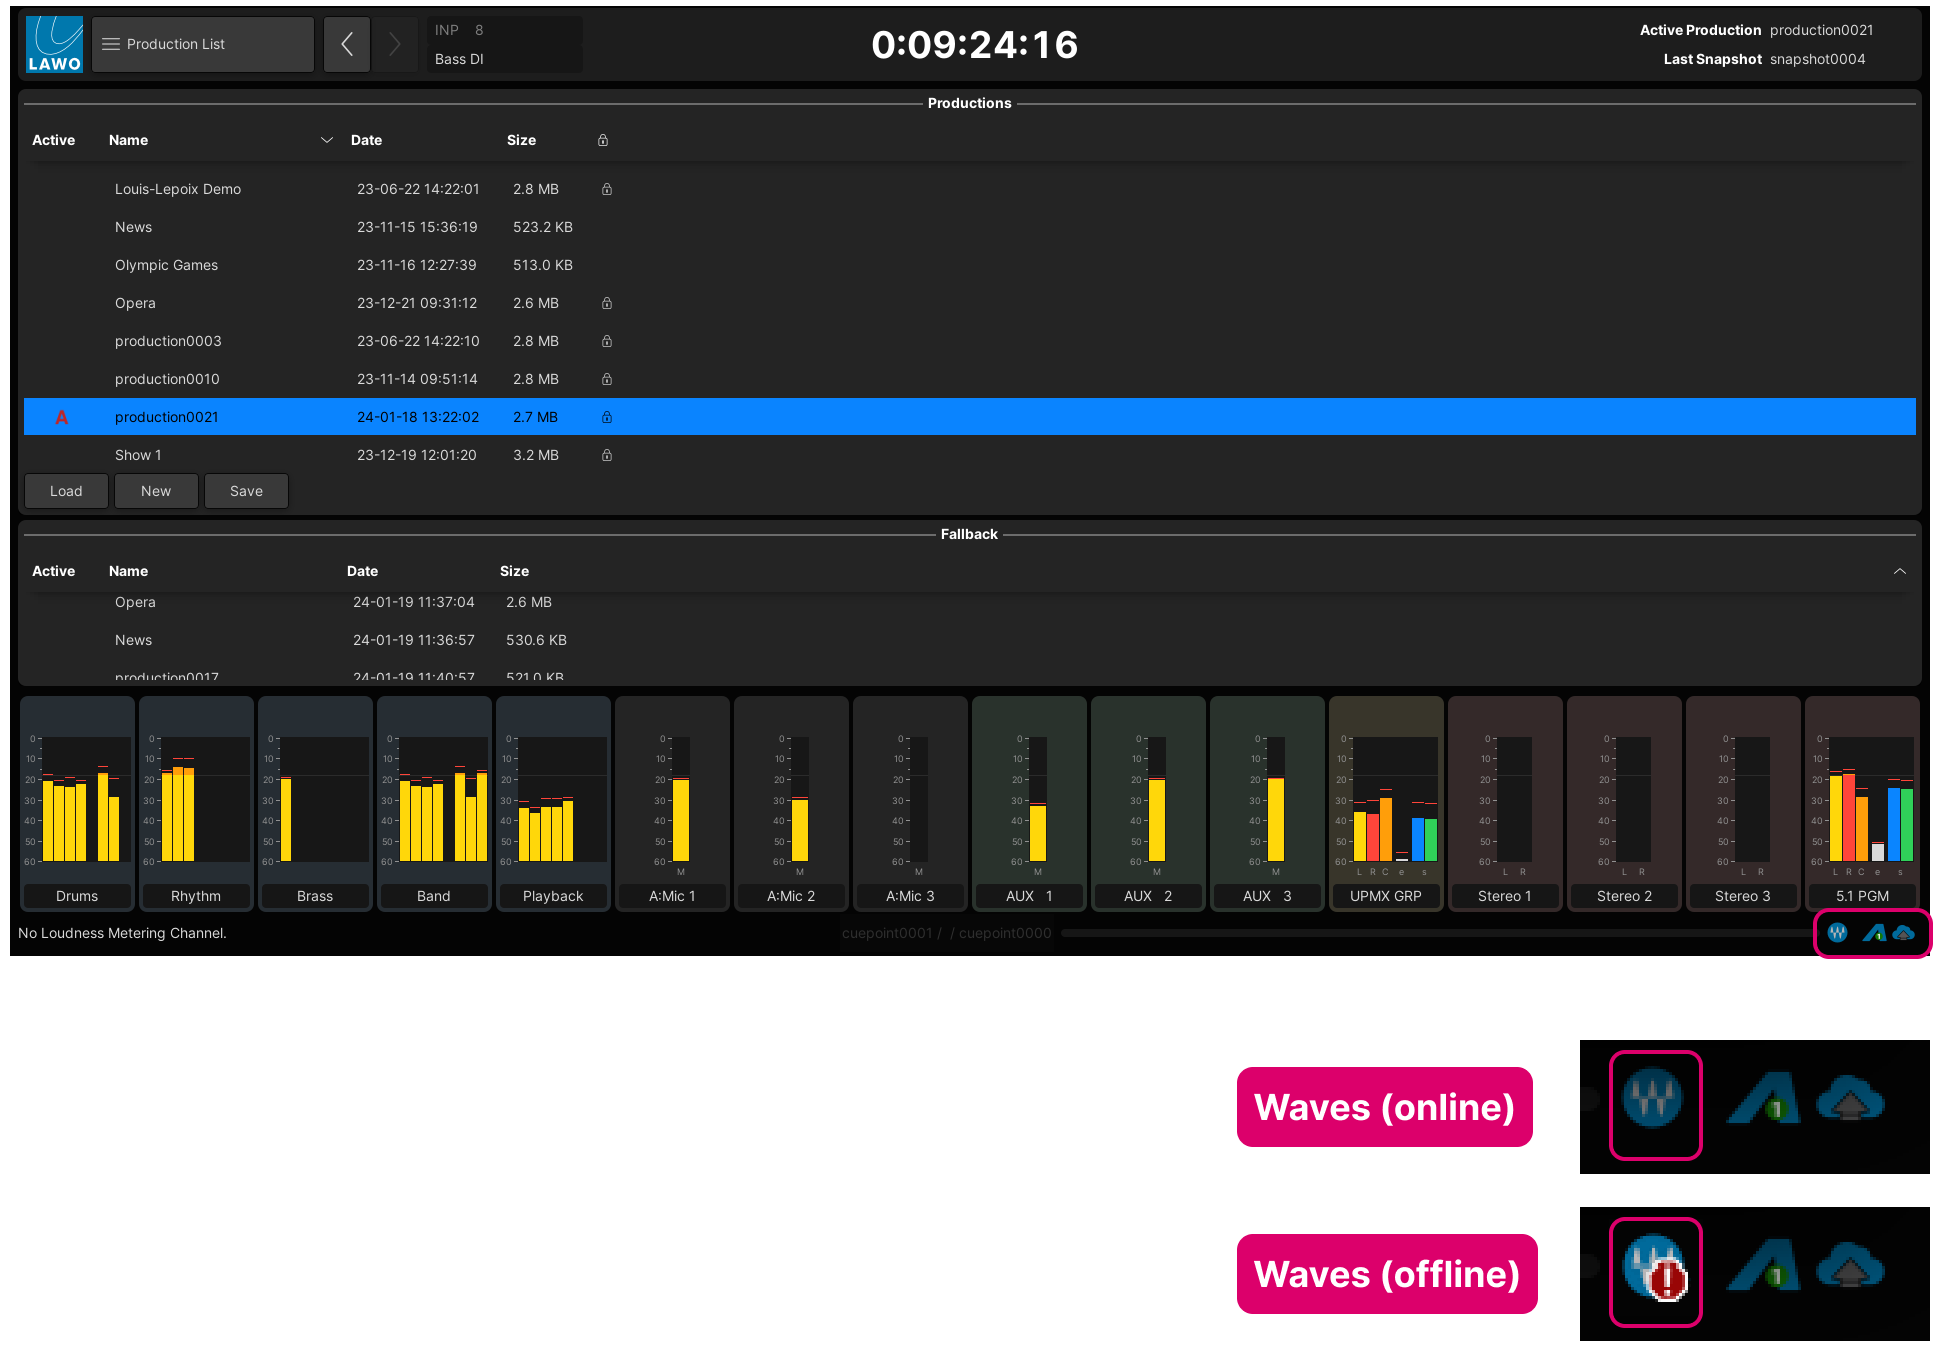
On the console side, the Waves icon (at the bottom right of the Central GUI) updates. It should now be blue to show that the management network connection is online.