Power Core RP v2 - Installing VisTool
This topic describes how to install VisTool and configure the RP Sessions.
User Access In Windows
If you wish VisTool to be available to any Windows User, then you should make sure that all files and applications are accessible to all users:
1. With the PC's main monitor connected, make sure that you are logged into Windows as an Administrator.
2. Prepare a "projects" folder that can be seen by all users of the PC.
Later you will use this folder to store all of the relevant project files required to run the VisTool RP application. We recommend using the following file path:
C:\users\public\Lawo
In Windows, set up the Users so they have access to this folder and its contents.
3. When you run the VisTool MK2 installer, make sure that you run the ".exe" file as an Adminstrator.
Installing the Software
The VisToolMK2.exe installer performs an automatic install of all VisTool components and Codemeter Runtime (the software license manager).
1. The VisTool installer will be included in the Software folder of the Release zip file provided by your Lawo Project Engineer.
2. Double click on the installer icon, or right-click and run the VisToolMK2.exe as an Administrator.
The latter is recommended if you wish VisTool to be accessible to all users of the PC. Both operations start the 'VisToolMK2 Setup Wizard'. Select the language to be used for the installation, either English or German, and the following window appears.

3. Follow the Wizard's instructions accepting the default options provided.
At the 'Select Components' window, all of the components should be ticked.
Note that the CodeMeter software is necessary for licensing. If an existing License Container is already installed, then this option can be deselected.
Leave the option ticked to update the CodeMeter release and create a new container.
At the 'Additional Tasks' window, make sure that the Create Desktop Icons and Install Firewall Rules options are selected:
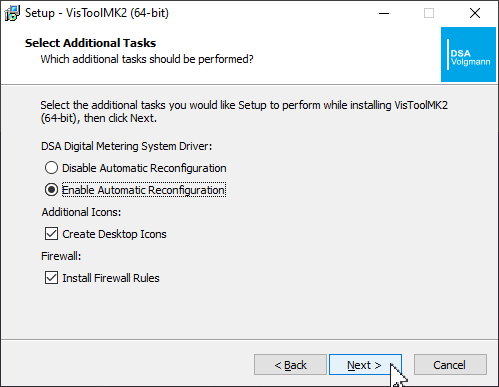
By default, the installer will add firewall rules to ensure the smooth operation of VisTool during runtime.
4. When you reach the 'Summary' window, check the options and click Install - the software will be installed onto your computer; this may take a few minutes.
By default, files are installed in the location: 'C:\Program Files\VisToolMK2'.
5. When the installation is complete, the following window will appear:
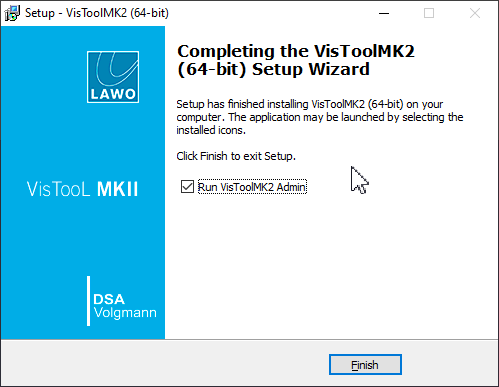
Leave the default "Run" options selected and click on Finish. You can now use VisToolMK2 Admin to configure the connection from VisTool to the Power Core.
Configuring VisAdmin
VisAdmin is used to configure the DMS connections from VisTool to the Power Core. DMS (Digital Metering Service) is a Lawo control protocol supported by the Power Core.
It is used by the VisTool RP application to control functions within the Power Core and provides metering data from the Power Core to the VisTool UI.
1. VisAdmin starts automatically at the end of the VisTool installation procedure.
Alternatively, it can be started by clicking on the VisToolMK2 Admin desktop icon, or by selecting the program from the Windows "Start" menu. On startup, the VisAdmin home page appears:
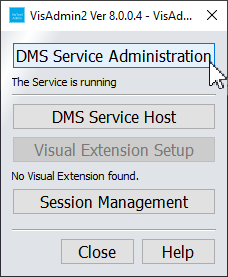
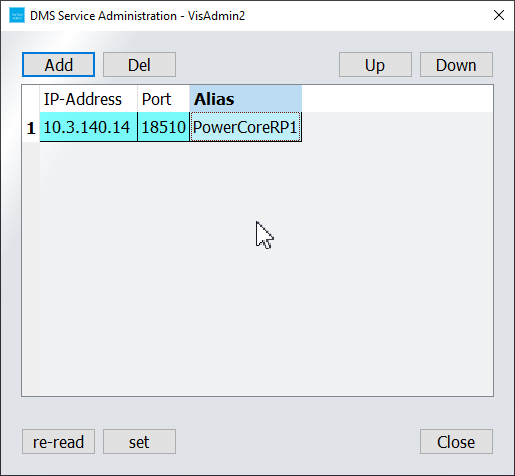
2. Click on the DMS Service Administration option. This window defines all of the DMS endpoints supported by the VisTool PC. It is possible to configure up to 4 DMS connections to different Power Cores.
3. Select Add to add a new device and then double-click in each filed to define the connection.
The IP-Address and Port fields must be completed; the Alias field is optional.
- IP-Address - this must match the IP address of the Power Core RP you wish to control.
- Port - this should be set to 18510 (the default port number)
- Alias - this field is used in the Session Management window. It can be useful to enter an alias name to help identify the device such as RP1-Paris. Spaces are not supported in the Alias.
4. Repeat step 2 for each Power Core RP v2 you wish to control from the PC.
5. Once all fields are complete, select set to store the settings and refresh the DMS service - the list updates and the set button will become greyed out:
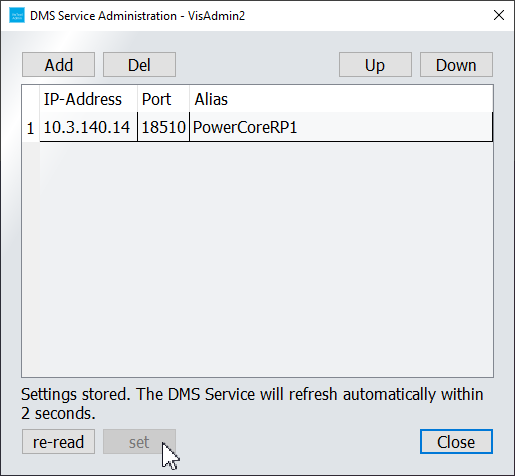
Note that you must use set to confirm your changes. If the set button is not greyed out, then the settings are still in edit mode and will not be saved if you Close the window.
6. Once the settings have been stored, select Close to close the window and return to the VisAdmin home page.
Configuring VisTool RP Sessions
VisTool Sessions are used to configure how the VisTool RP application will appear on your PC's monitor(s) and to generate a start script that can launch the application.
Sessions are used to associate a VisTool file (for either the Local or Remote users) with a Power Core and define some default settings.
1. VisToolMK2 Sessions can be launched by clicking on the Session Management button in VisAdmin or by clicking on the VisToolMK2 Sessions desktop icon, or selecting the program from the Windows "Start" menu.
On startup, the Session Managment page appears:
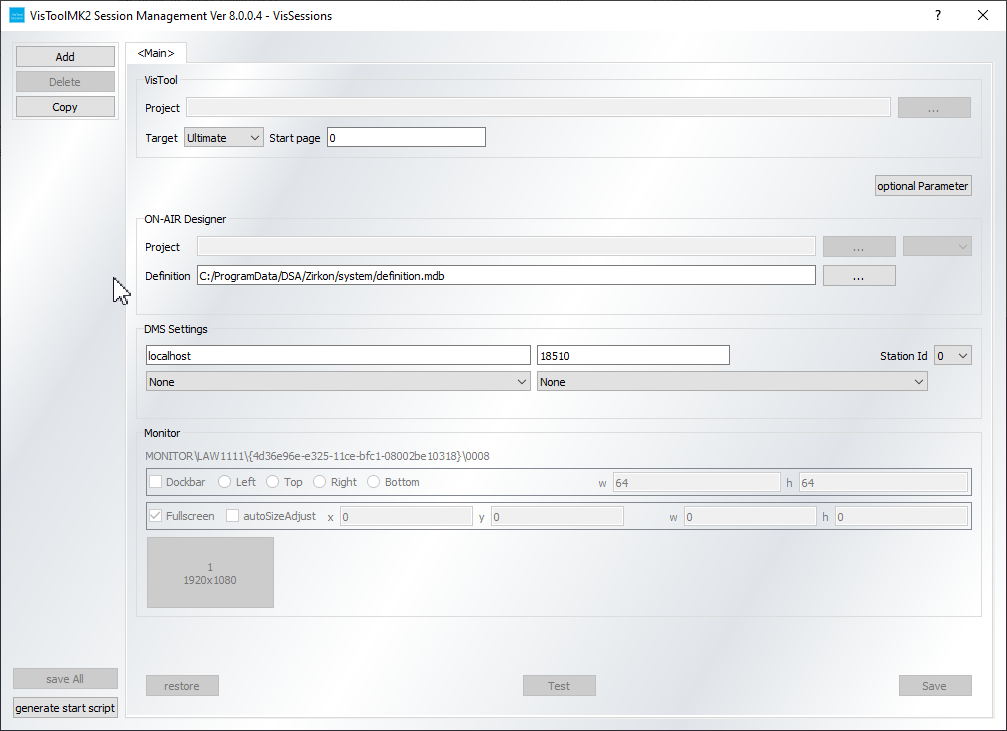
2. Click Add to create a new session.
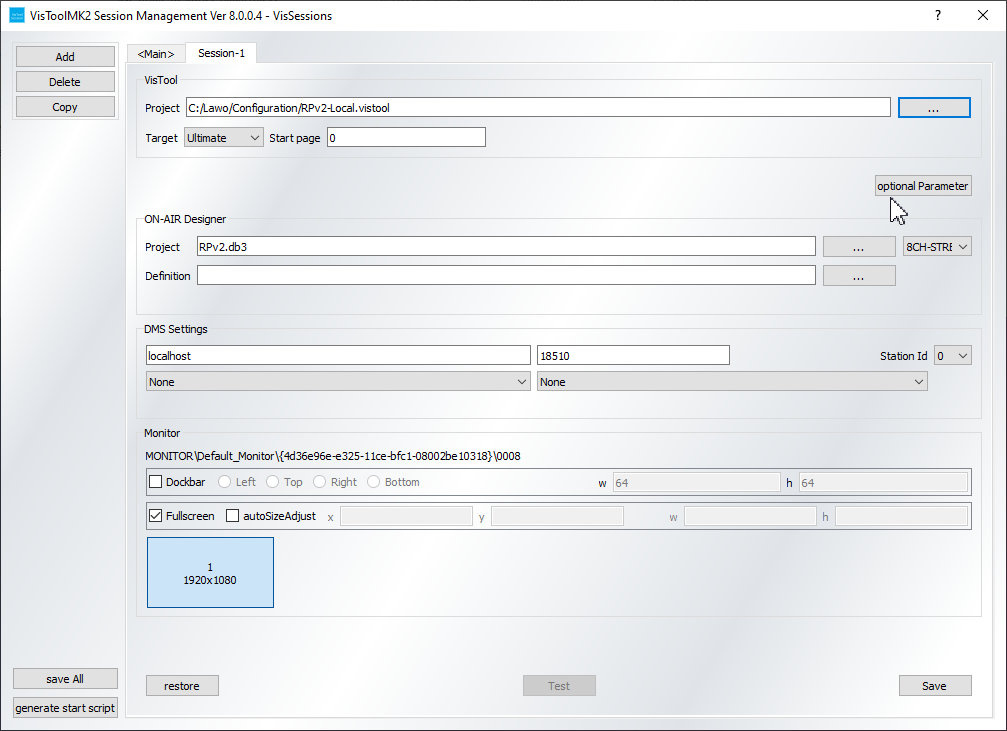
3. Click the ... button in the VisTool section to select the VisTool project file.
Select the RPv2-Local.vistool file if you are configuring the PC for the Local user (located with the MC2 console) or the RPv2-Remote.vistool file if you are configuring the PC for the Remote user (located on-site with the Power Core RP).
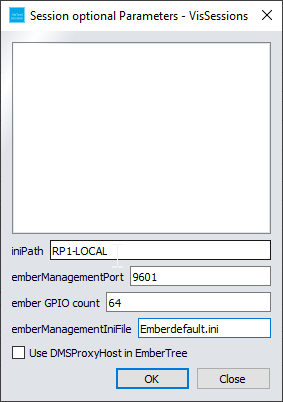
4. Click the optional parameter button
- iniPath - This is used to define the folder where the Emberhosts.ini and Emberdefault.ini files will be located. These files are used to define the devices that VisTool will connect to using the EmBER+ protocol and set some default settings for the VisTool RP instance. Setting this option allows the settings to be unique for each VisTool session.
- emberManagementPort - Each VisTool RP instance acts as an EmBER+ provider. This option is used to set the TCP port used by the VisTool RP instance. This value should be unique for each session.
- ember GPIO count - This should be set to 64.
- emberManagementIniFile - This is the name of the file used to configure the bookmarks for the VisTool RP instance. This should be set to Emberdefault.ini.
Click OK to set the optional parameters.
If you will only be running one VisTool RP instance on the computer, you can leave the iniPath field blank and copy the Emberhosts.ini and Emberdefault.ini files to C:\ProgramData\DSA
5. Click the left dropdown under DMS Settings and change the device from None to the Power Core RP v2 device the VisTool should connect to.
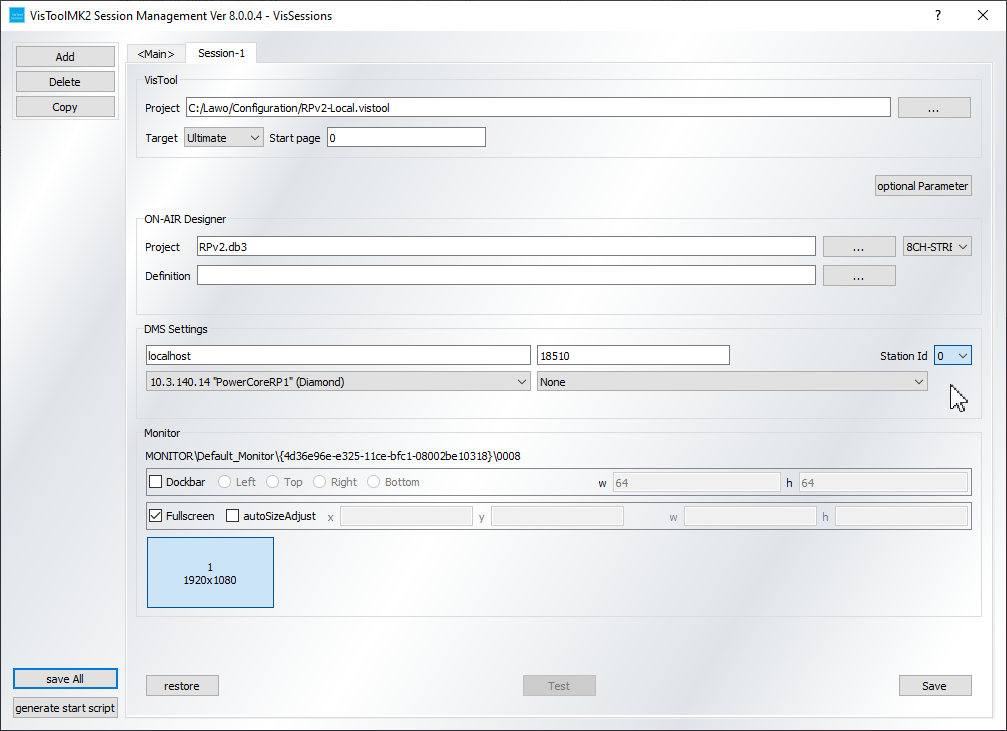
6. Set the Station ID to 1 if you are configuring the session for a local user. Set the Station ID to 2 if you are configuring the session for a remote user.
7. Tick the Dockbar check box and select the Top radio button. Set the Width to 1920 and the Height to 72.

VisTool RP was designed to run on a screen with a resolution of 1920x1080. If you are running VisTool RP on a smaller or larger screen, you may need to adjust the Dockbar Width and Height values based on your screen resolution and Windows Display scaling factor.
For example, on a computer with a 4K screen (3840x2160) with a 100% scaling factor, the Dockbar Width should be set to 3840 and the Dockbar height should be set to 288.
8. Connected monitors will be displayed at the bottom of the screen. Click on a monitor to set VisTool to launch on that monitor. The monitor will be highlighted in blue once it has been selected.
9. Click Save to save the session configuration. The Save button will become greyed out.
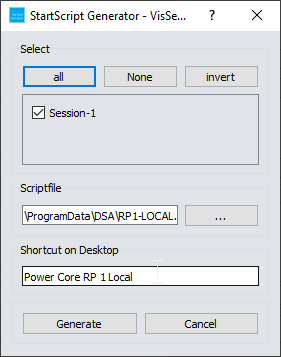
10. Click on generate start script. This will create a script file and a shortcut on the desktop that can be used to launch the VisTool RP instance. The scriptfile will have a default file name of vistoolsession.cmd. If you intend to run more than one VisTool session per computer, you should set the script file name to a unique value, such as RPx-Local.cmd. The name of the Desktop Shortcut can also be set. Click Generate and the shortcut will be created on the local desktop.
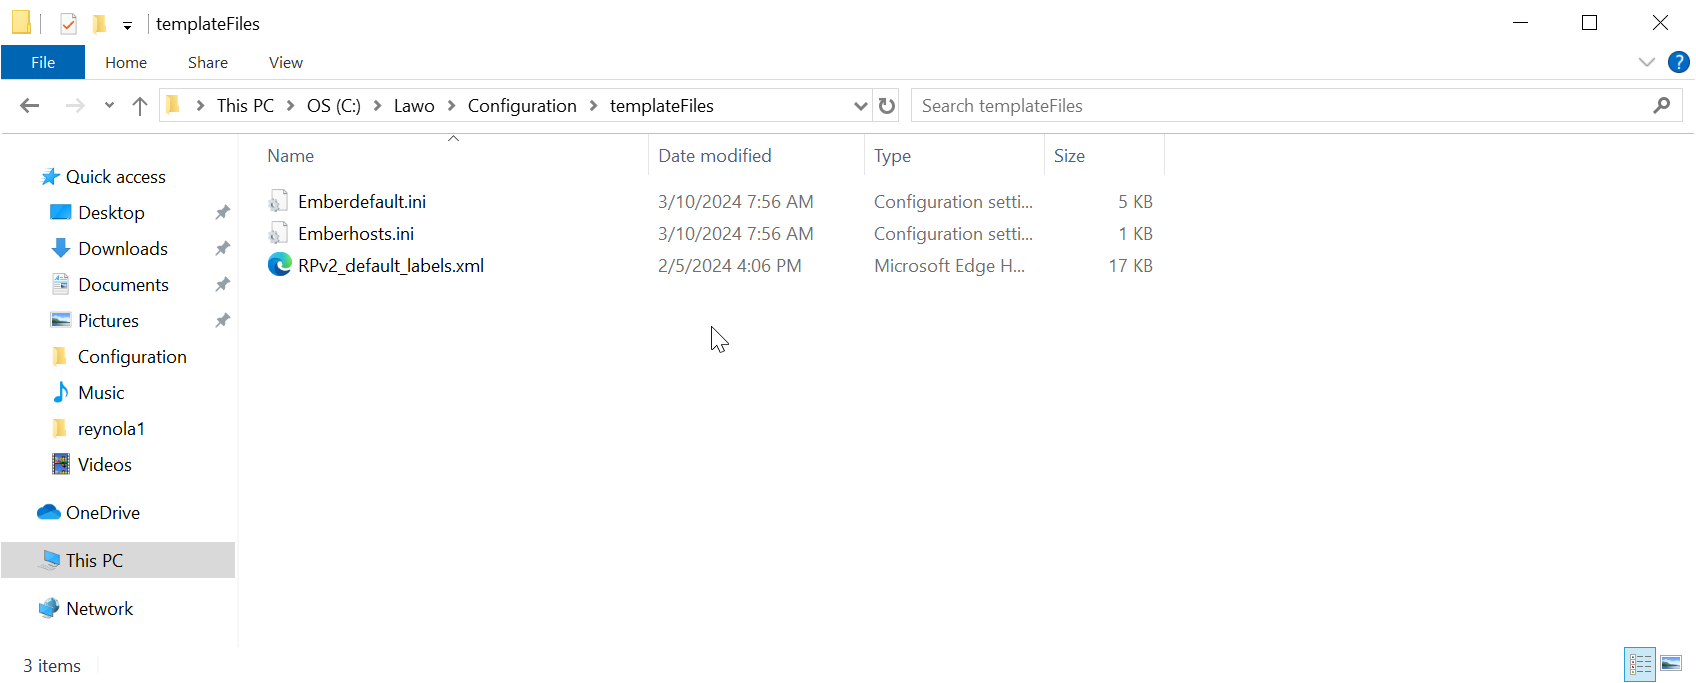
Installing the Ember Ini files
In each release.zip file provided by your Lawo Project Engineer, there will be a folder called templateFiles. Inside this folder are the Emberhosts.ini file and Emberdefault.ini files.
The Emberhosts.ini file is used to define EmBER+ connections from VisTool. In order for the VisTool RP application to run properly, VisTool must be able to connect to the Power Core RP v2 EmBER+ API. Optionally, the VisTool RP application can also connect to two Lawo A__Mic8 units to provide microphone preamp control from within the VisTool RP application.
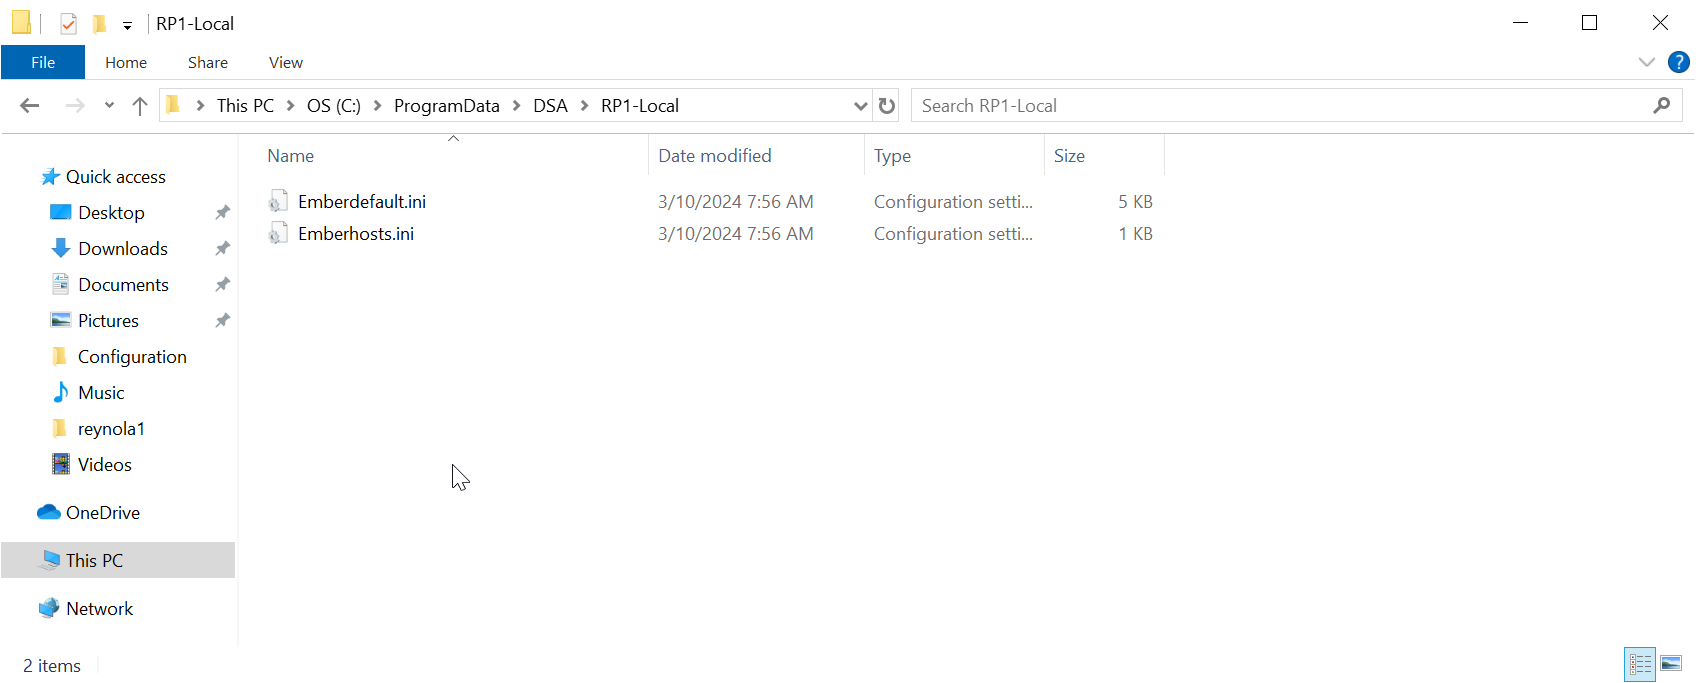
1. Copy the Emberhosts.ini and Emberdefault.ini files to C:\ProgramData\DSA\ or C:\ProgramData\DSA\RP1-Local (if you configured a custom iniPath for the VisTool RP session in step 4 in the section above).
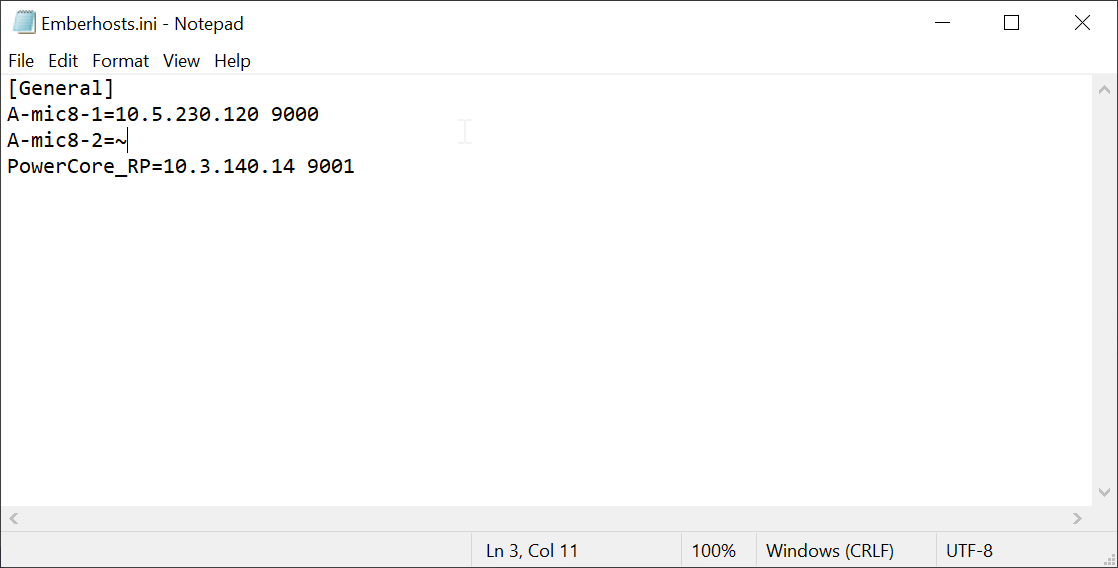
2. Use a suitable text editor to edit the Emberhosts.ini file.
Each line in the General section consists of a device alias, an IP address for the device, and the port number the EmBER+ API is listening. For Lawo A__Mic8s, the EmBER+ port is 9000. For the Power Core RP v2, this port is set to 9001 by default.
In the below example, only one A_Mic8 is in use, so the second A__Mic8 connection has been disabled by setting the value to ~.
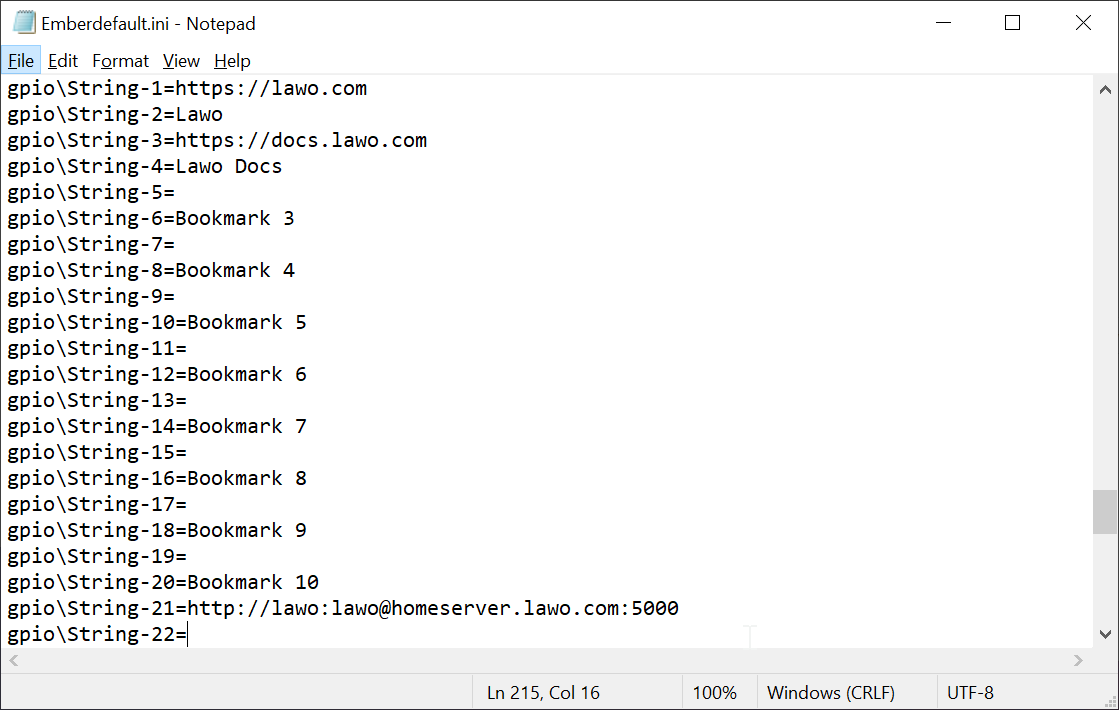
3. Use a suitable text editor to edit the Emberdefault.ini file. This file is used to set the values for the bookmark URLs and Labels in the VisTool RP application.
 The table below describes the EmBER+ parameters.
Emberdefault.ini String Parameters
The following parameters can be used to define the 'Web Page' bookmark URLs and labels.
| Name | Description | Default | Additional Information |
|---|---|---|---|
| gpio/String 1 | Bookmark 01 URL | - | - |
gpio/String 2 | Bookmark 01 Label | Bookmark 1 | - |
| gpio/String 3 | Bookmark 02 URL | - | - |
| gpio/String 4 | Bookmark 02 Label | Bookmark 2 | - |
| gpio/String 5 | Bookmark 03 URL | - | - |
| gpio/String 6 | Bookmark 03 Label | Bookmark 3 | - |
| gpio/String 7 | Bookmark 04 URL | - | - |
| gpio/String 8 | Bookmark 04 Label | Bookmark 4 | - |
gpio/String 9 | Bookmark 05 URL | - | - |
| gpio/String 10 | Bookmark 05 Label | Bookmark 5 | - |
| gpio/String 11 | Bookmark 06 URL | - | - |
| gpio/String 12 | Bookmark 06 Label | Bookmark 6 | - |
| gpio/String 13 | Bookmark 07 URL | - | - |
| gpio/String 14 | Bookmark 07 Label | Bookmark 7 | - |
| gpio/String 15 | Bookmark 08 URL | - | - |
gpio/String 16 | Bookmark 08 Label | Bookmark 8 | - |
| gpio/String 17 | Bookmark 09 URL | - | - |
| gpio/String 18 | Bookmark 09 Label | Bookmark 9 | - |
| gpio/String 19 | Bookmark 10 URL | - | - |
| gpio/String 20 | Bookmark 10 Label | Bookmark 10 | - |
| gpio/String 27 | Top Bar Label Line 1 | Power Core | |
| gpio/String 28 | Top Bar Label Line 2 | RP Local | |
| gpio/String 64 | HOME Server URL | http://lawo:lawo@homeserver.lawo.com:5000 |
Next Steps
Once you have completed the steps above, proceed to the instructions on activating a VisTool license.