There are two parts to the software installation: the virtual machine and mxGUI appliance.
- For the virtual machine, please download and run the installer from the third-party provider.
- Once you have installed the virtual machine, the next step is to import the mxGUI appliance.
It is possible to install multiple versions of mxGUI on the same virtual machine. There is no need to uninstall or delete older versions.
The instructions below describe how to install the mxGUI appliance if you are using the Oracle VM VirtualBox Manager. The same principles can be applied to the other virtual machine options.
1. Double-click on the mxGUI-x-x-x-x.ova file.
The VirtualBox Manager opens along with the 'Import Virtual Appliance' window and its suggested settings.
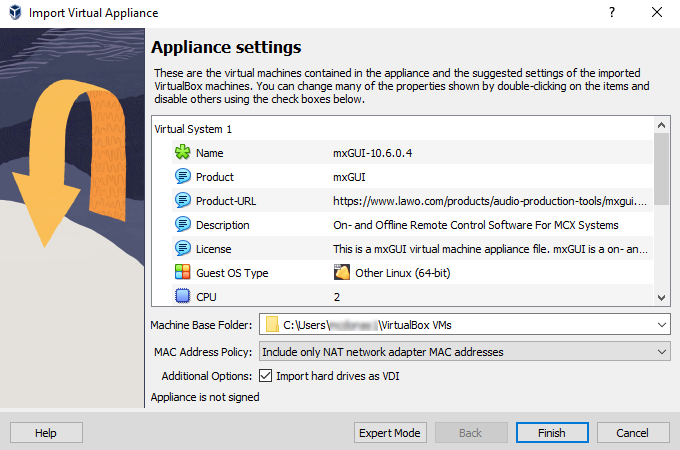
2. Select Finish to import the mxGUI appliance, and Agree to accept the terms and conditions of the software license.
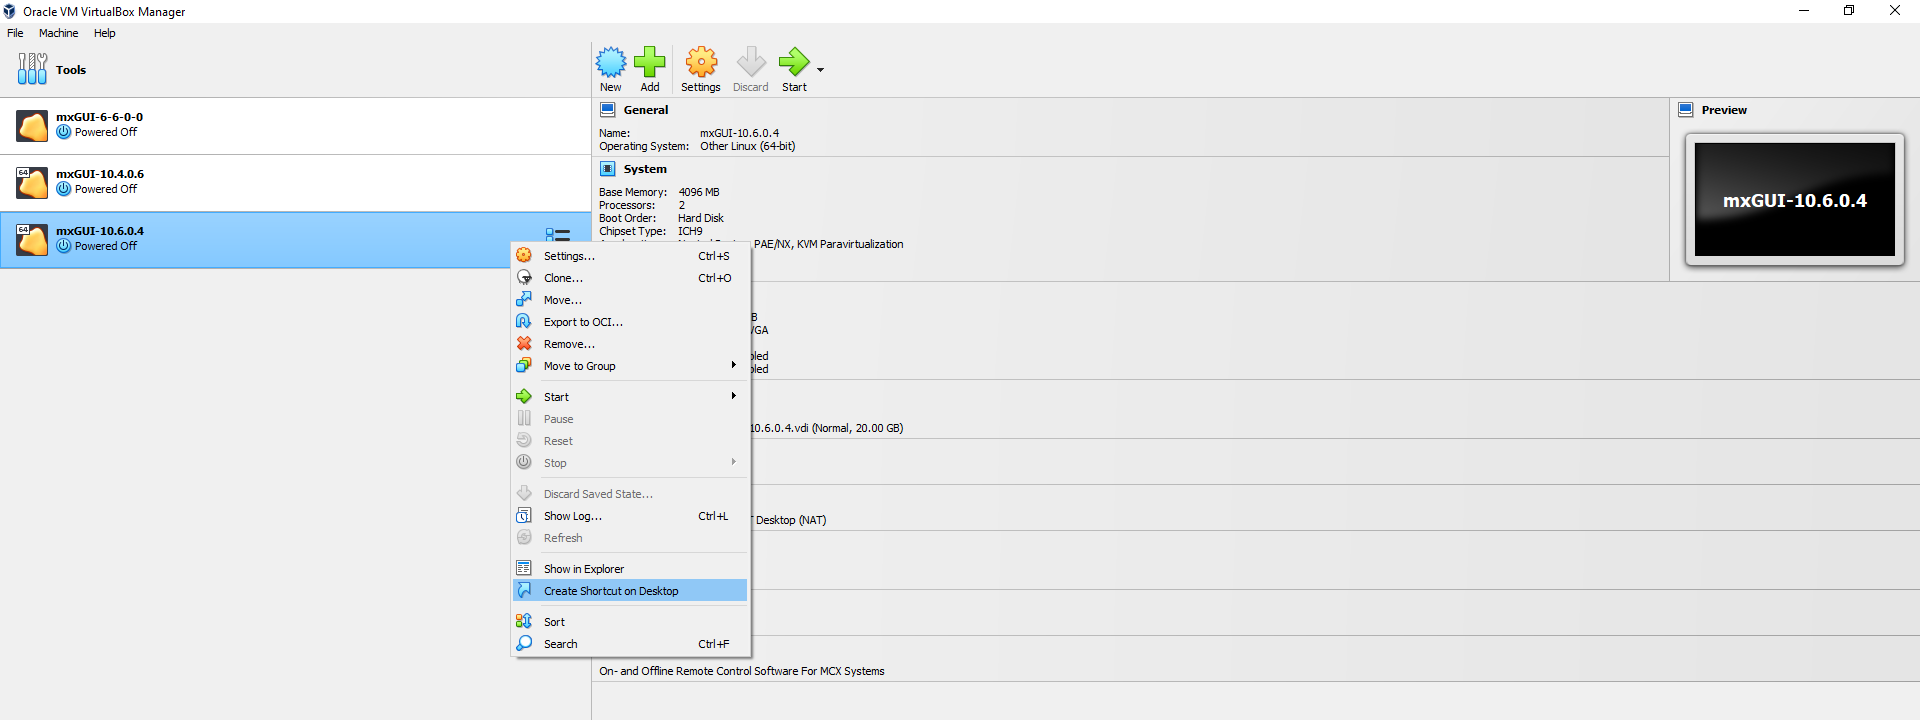
The import process can take a few seconds. Once complete, mxGUI-x-x-x-x is added to the list of virtual machines (on the left of the display).
At this stage, you can configure the Shared Folders (if they are required) or continue on to create a desktop icon (to start mxGUI).
3. Right-click on the mxGUI-x-x-x-x virtual machine and select Create Shortcut on Desktop to add an alias to your desktop.
4. You can now close the Oracle VM VirtualBox Manager, and start mxGUI x.x.x.x from the desktop icon.
What happens next is described in mxGUI - First Steps.
If you need to re-open the VirtualBox Manager, then you will find it in your list of programs (or Applications).