mc²36 - Automation of Controls and Switches
In addition to faders, you can write automation for any other channel control - for example, mutes, panning, EQ, even functions such as signal processing order and bus routing.
- Faders and rotary controls are touch sensitive which allows them to step into write whenever you touch a fader or control.
- Switches step into write whenever you change the state of the switch or force a step in using Write R/W.
Start by using Select Auto to enable automation for say the fader, mute and pan.
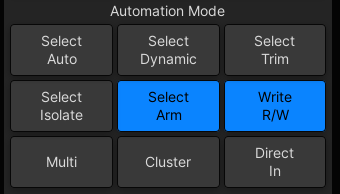
You can check which parameters are in read or write on an individual channel, by assigning the channel to the Central Control Section and pressing Select Arm (on the VAP 1 side panel):
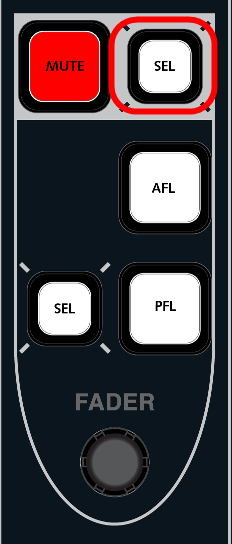
The SEL button on each audio module now lights as follows:
- SEL button lit (green) = the complete audio module is in read.
- SEL button lit (yellow) = at least one parameter within a module is in write. For example, the EQ1 Gain.
- SEL button lit (red) = the complete audio module is in write. For example, the 4-band EQ section.
- SEL button off = the complete audio module is disarmed (read only).
The topics which follow describe two examples: an automated mute and dynamic pan move.
Writing Switch Automation
Switches step into write whenever you change the state of the switch or force a step in using Write R/W mode. Assuming that you have enabled automation for the desired module (e.g. MUTE), you should be ready to go. In the examples which follow, the stepout mode is Step Out.
You will not be able to write dynamic automation if the switch has been disarmed or is running in static mode. |
1. With automation on, go into play and press the MUTE button either on the fader strip, or Central Control Section, to write your changes.
2. To check that you are writing automation, assign the channel to the Central Control Section, and press Select Arm (on the VAP 1 side panel).
The mute SEL button turns yellow when it is in write:
3. Finish the pass, either by pressing Finish Pass or locating backwards, and play back the automation.
The mute SEL button turns green when in replay.
Updating Switch Automation
You can update switch automation by rewinding and overwriting the switch change. However, to remove a switch change you will need to step in and out of write while in play. This can be done by using the Write R/W mode.
1. Assign the channel you want to update to the Central Control Section.
2. Turn on Select Arm and Write R/W (on the VAP 1 side panel):
The SEL buttons beside each Central Control Section module now allow you to step in and step out of write for that module. (i.e. they behave like the fader R/W buttons described earlier).
3. Rewind before the switch change you want to remove.
4. Step in to write by pressing the SEL button beside the switch on the Central Control Section - for example, beside the MUTE:
The switch goes into write in its current state – e.g. mute off – and the SEL button turns red to show that the complete MUTE section is in write.
5. Locate or play past the end of the unwanted mute.
6. To step out of write, press the SEL button again.
The SEL button turns green to indicate it is now in replay and the mute button reverts to the data from the Play pass.
7. Finish the pass, either by pressing Finish Pass or locating backwards.
The updates you have made are recorded in the new Play pass.
Another great way to update switch automation is to step out of write automatically using Next Change. |
Writing Rotary Control Automation
Rotary controls, like faders, are touch sensitive and go into write whenever you touch them or force a step in using Write R/W mode. Assuming that you have enabled automation for the desired module (e.g. PANNING), you should be ready to go. In the examples which follow, the stepout mode is Step Out.
You will not be able to write dynamic automation if the control has been disarmed or is running in static mode. |
1. With automation on, go into play and move the left/right pan control either from a free control on the fader strip, or Central Control Section, to write your changes.
2. To check that you are writing automation, assign the channel to the Central Control Section, and press Select Arm (on the VAP 1 side panel).
The panning SEL button turns yellow when an individual control is in write:
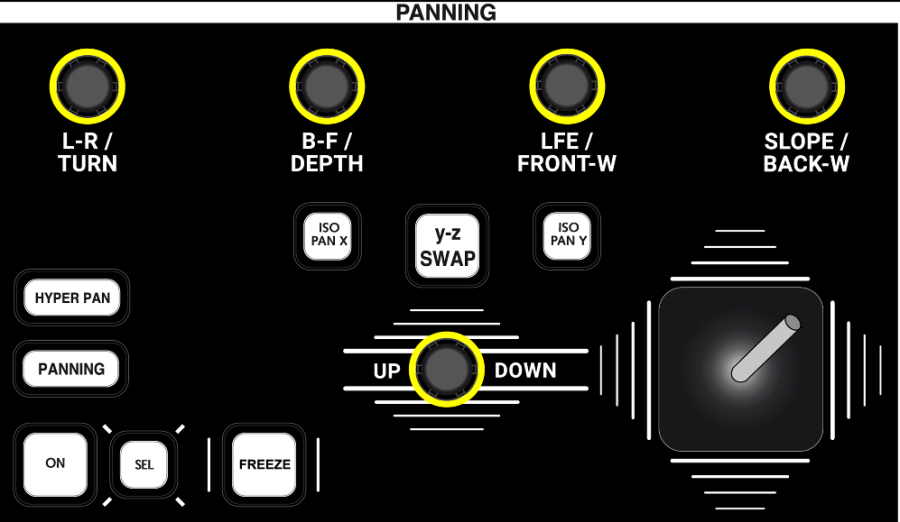
Central Control Section
3. Finish the pass, either by pressing Finish Pass or locating backwards, and play back the automation.
The panning SEL button turns green when the module is in replay.
Updating Rotary Control Automation
You can update the pan move by rewinding and overwriting the move. However, if the move starts too early you will need to step in and out of write while in play.
1. Assign the channel you want to update to the Central Control Section.
2. Turn on Select Arm and Write R/W (on the VAP 1 side panel):
The SEL buttons beside each Central Control Section module now allow you to step in and step out of write for the complete module.
3. Rewind before the start of the pan move you want to update.
4. Step in to write by pressing the SEL button beside the pan module on the Central Control Section:
The pan module goes into write in its current state – i.e. left/right pan at its starting position. The SEL button turns red to show that the complete module is in write.
5. Now go into play and move the left/right pan control to rewrite your move at the correct timecode.
6. To step out of write, press the SEL button again.
The left/right pan control jumps back to the Play pass position, and its SEL button turns green to indicate that the module is now in replay.
If you wish the control to glide back to the Play pass position, then change the stepout mode to Glide.
If you wish the control to step out of write automatically, as soon as the Play pass crosses the current value, then turn on Out If Cross.
7. Finish the pass, either by pressing Finish Pass or locating backwards.
The updates you have made are recorded in the new Play pass.
If you wish the control to automatically step out of write when you release it, then turn on Touch. |
Updating Automation on Individual Controls
When using Select Arm and Write R/W, you have the option to step in either on the complete audio module, or on an individual control as follows:
1. Turn on Select Arm and Write R/W (on the VAP 1 side panel).
2. Assign the channel to the Central Control Section.
3. With automation on, go into play.
4. Do one of the following:
- Move the EQ1 Gain rotary control to step in to write on the one control - the EQ SEL button turns yellow indicating that only a part of the module is in write.
- Press the EQ SEL button to force the complete module into write in its current state - the EQ SEL button turns red indicating that ALL controls and switches within the EQ module are in write.
5. Make your changes and step out either by pressing the EQ SEL button or finishing the pass in the usual manner.