Power Core - System Date and Time
The system date and time is provided by your network’s NTP server (if present), or by the device's internal Real Time Clock (RTC). In both cases, a different time zone can be applied. This topic describes how to define the NTP server, reset the date/time manually and change the time zone.
Defining an NTP Server
The network's NTP server can be defined in the "System → Network Settings" page of the Power Core Web UI. Once present, the system uses the NTP server to provide the system date and time.
1. Open a Web UI session for Power Core (as described earlier).
2. Log in as either Supervisor or Administrator. The default passwords are orion for Supervisor and hydra for Administrator.
3. Select the "System → Network Settings" page.
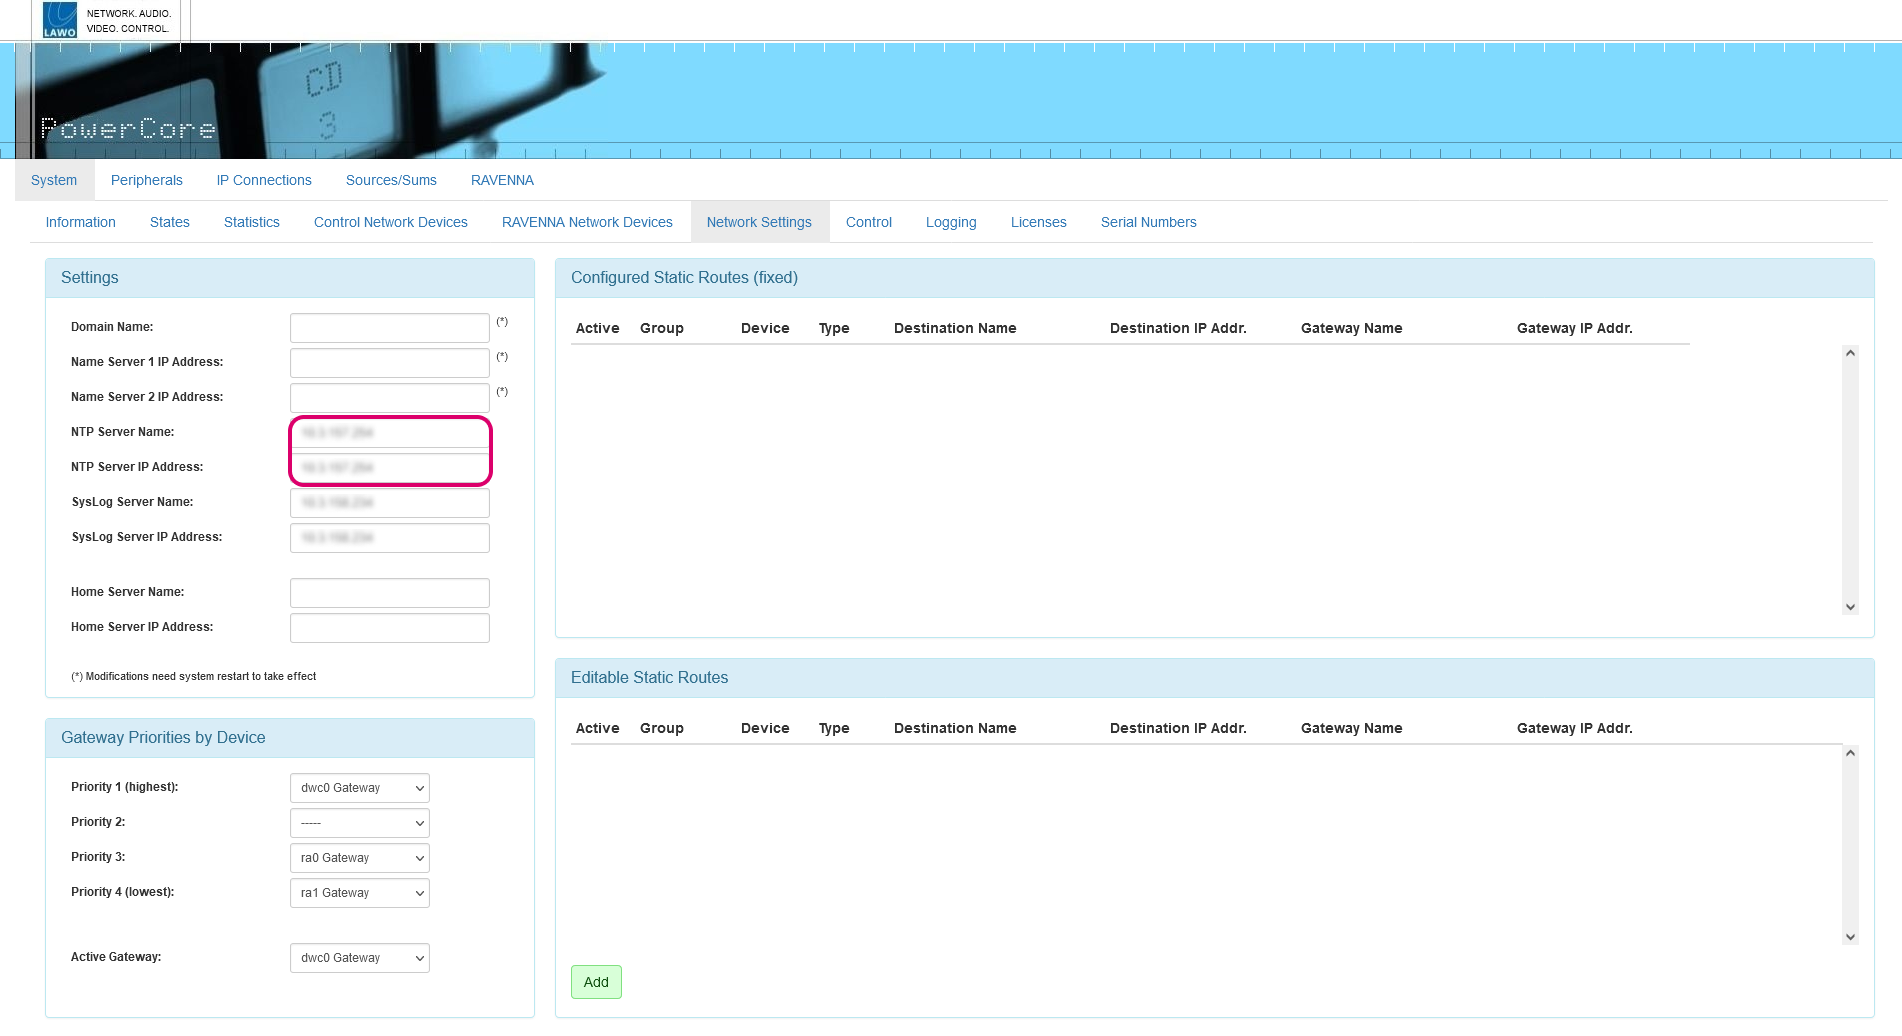
4. Use the NTP Server Name or NTP Server IP Address fields to define the server.
If you type "ntp.internal" in the Server Name box, then the IP Address is automatically filled.
Setting the Date/Time Using SoP Explorer
1. If SoP Explorer is not already open, start the application from either its desktop icon or Windows START menu.
All units that have been previously defined appear in the system tree (on the left).
If the unit you wish to configure is not listed, then select Unit → New... (from the main menus), enter the IP address of the Core and select OK - the unit is added to the "OnAir" device group in the system tree. SoP Explorer connects to the device and analyses the current firmware revisions.
2. Right-click on the unit and select Set System Time. Confirm by selecting OK.
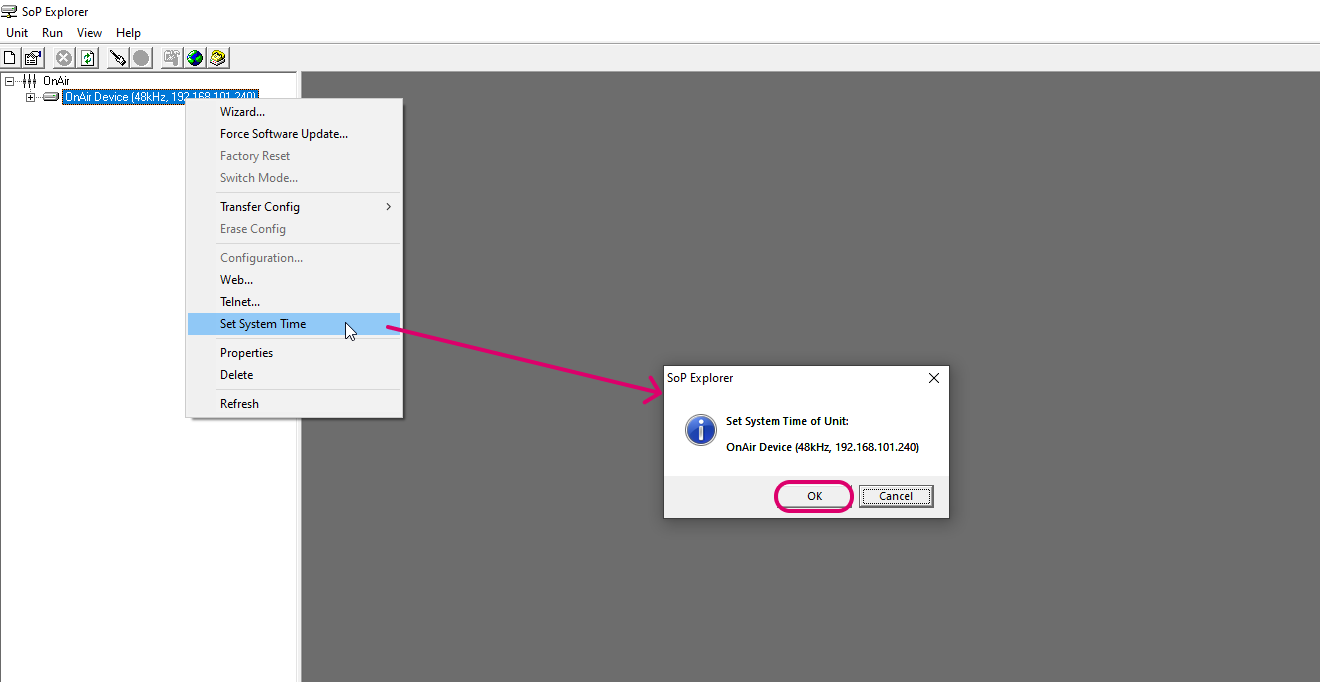
The software now sets the system date and time to match that of the configuration PC. The success (or failure) of the reset is shown in the SoP Explorer status bar area.
Changing the Time Zone
The time zone can be edited by opening a Web UI connection to the device.
1. Open a Web UI session for Power Core (as described earlier).
2. Log in as either Supervisor or Administrator. The default passwords are orion for Supervisor and hydra for Administrator.
3. Select the "System → Information" page.
4. Click to edit the Time Zone value - any change takes immediate effect and so a restart is not required.
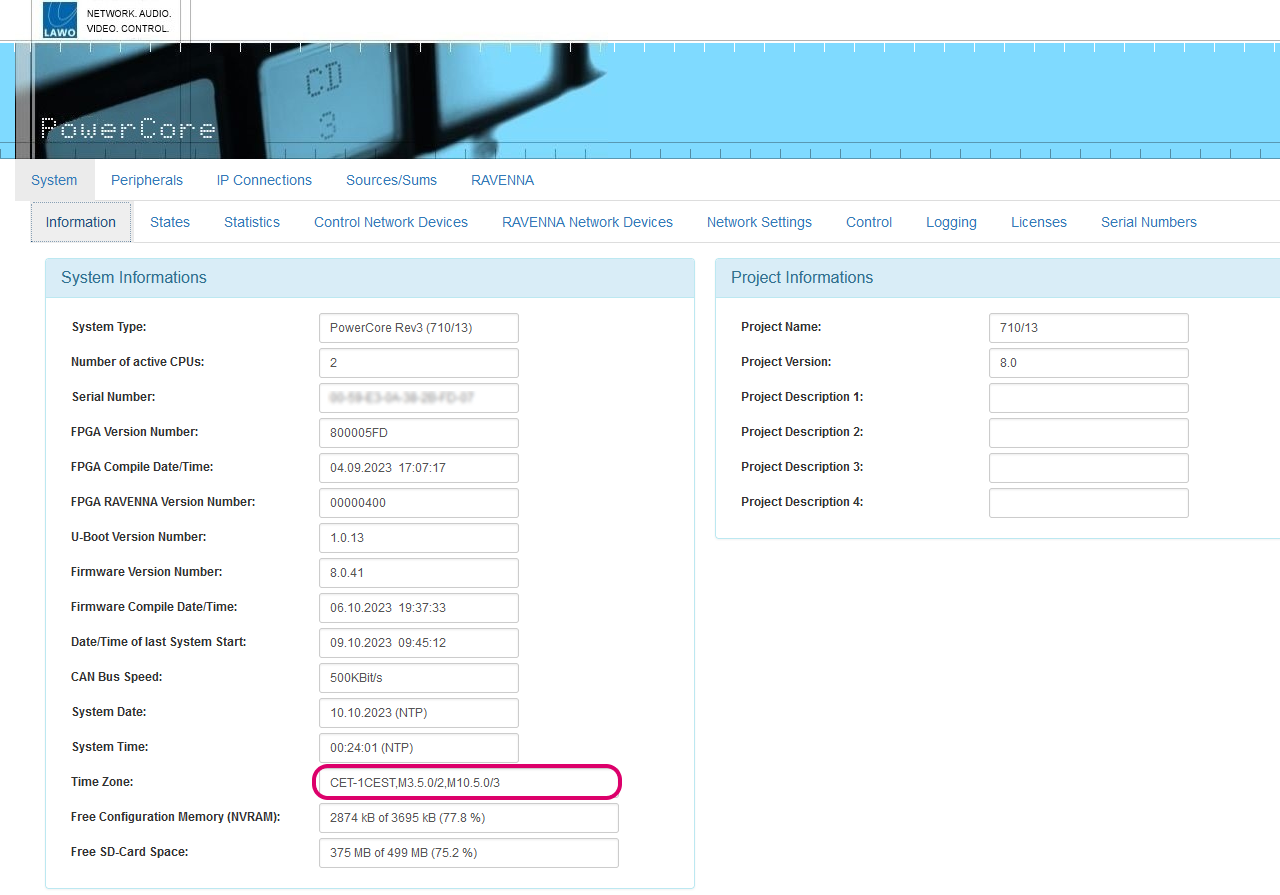
The time zone should be specified relative to Central European Time (CET).
For example, "CET+5CEST,M3.2.0/2:00,M11.1.0/2:00" is suitable for US East Coast, where CET is 5 hours ahead.
The second part of the syntax specifies the start and end of Central European Summer Time (CEST). e.g. from month 3, week 2, day 0, time 2am (the second Sunday in March) until month 11, week 1, day 0, time 2am (the first Sunday in November).