Power Core - Network Settings
This topic describes how to configure the network settings for Power Core.
Active Network Ports
Power Core (revision 3) is equipped with six network interfaces: two control and four streaming ports.
- The two control ports (dwc0 and dw1) and first pair of streaming ports (ra0 and ra1) are always active.
- The second pair of streaming ports (ra2 and ra3) can be enabled if there is a valid RAV+ add-on license.
Power Core (revision 2) is equipped with four network interfaces that are always active: two control ports (dwc0 and dwc1) and two streaming ports (ra0 and ra1).
Default Network Settings
By default, the network interfaces are assigned the following IP addresses. Note that Power Core can handle static IP addresses only; DHCP is not supported.
| Network Port | IP Address | Subnet Mask | Gateway | |
|---|---|---|---|---|
| Power Core - dwc0 | Static only | 192.168.101.240 | 255.255.255.0 | 0.0.0.0 |
| Power Core - dwc1 | Static only | 192.168.102.240 | 255.255.255.0 | 0.0.0.0 |
| Power Core - ra0 | Static only | 192.168.99.240 | 255.255.255.0 | 0.0.0.0 |
| Power Core - ra1 | Static only | 192.168.98.240 | 255.255.255.0 | 0.0.0.0 |
| Power Core - ra2 | Static only | 192.168.199.240 | 255.255.255.0 | 0.0.0.0 |
| Power Core - ra3 | Static only | 192.168.198.240 | 255.255.255.0 | 0.0.0.0 |
Current Network Settings
The network settings for the first control port (dwc0) are shown on the front panel display.
Editing the Network Settings
The network settings for the control and streaming ports can be edited by opening a Web UI connection to Power Core. You will need to do this if you are installing more than one device (to avoid any IP conflicts).
1. For the initial setup, best practice is to connect your configuration PC directly to the first control port: dwc0.
2. The Web UI can be reached by entering the IP address of the connected port.
- For Power Core (dwc0), the default IP = 192.168.101.240
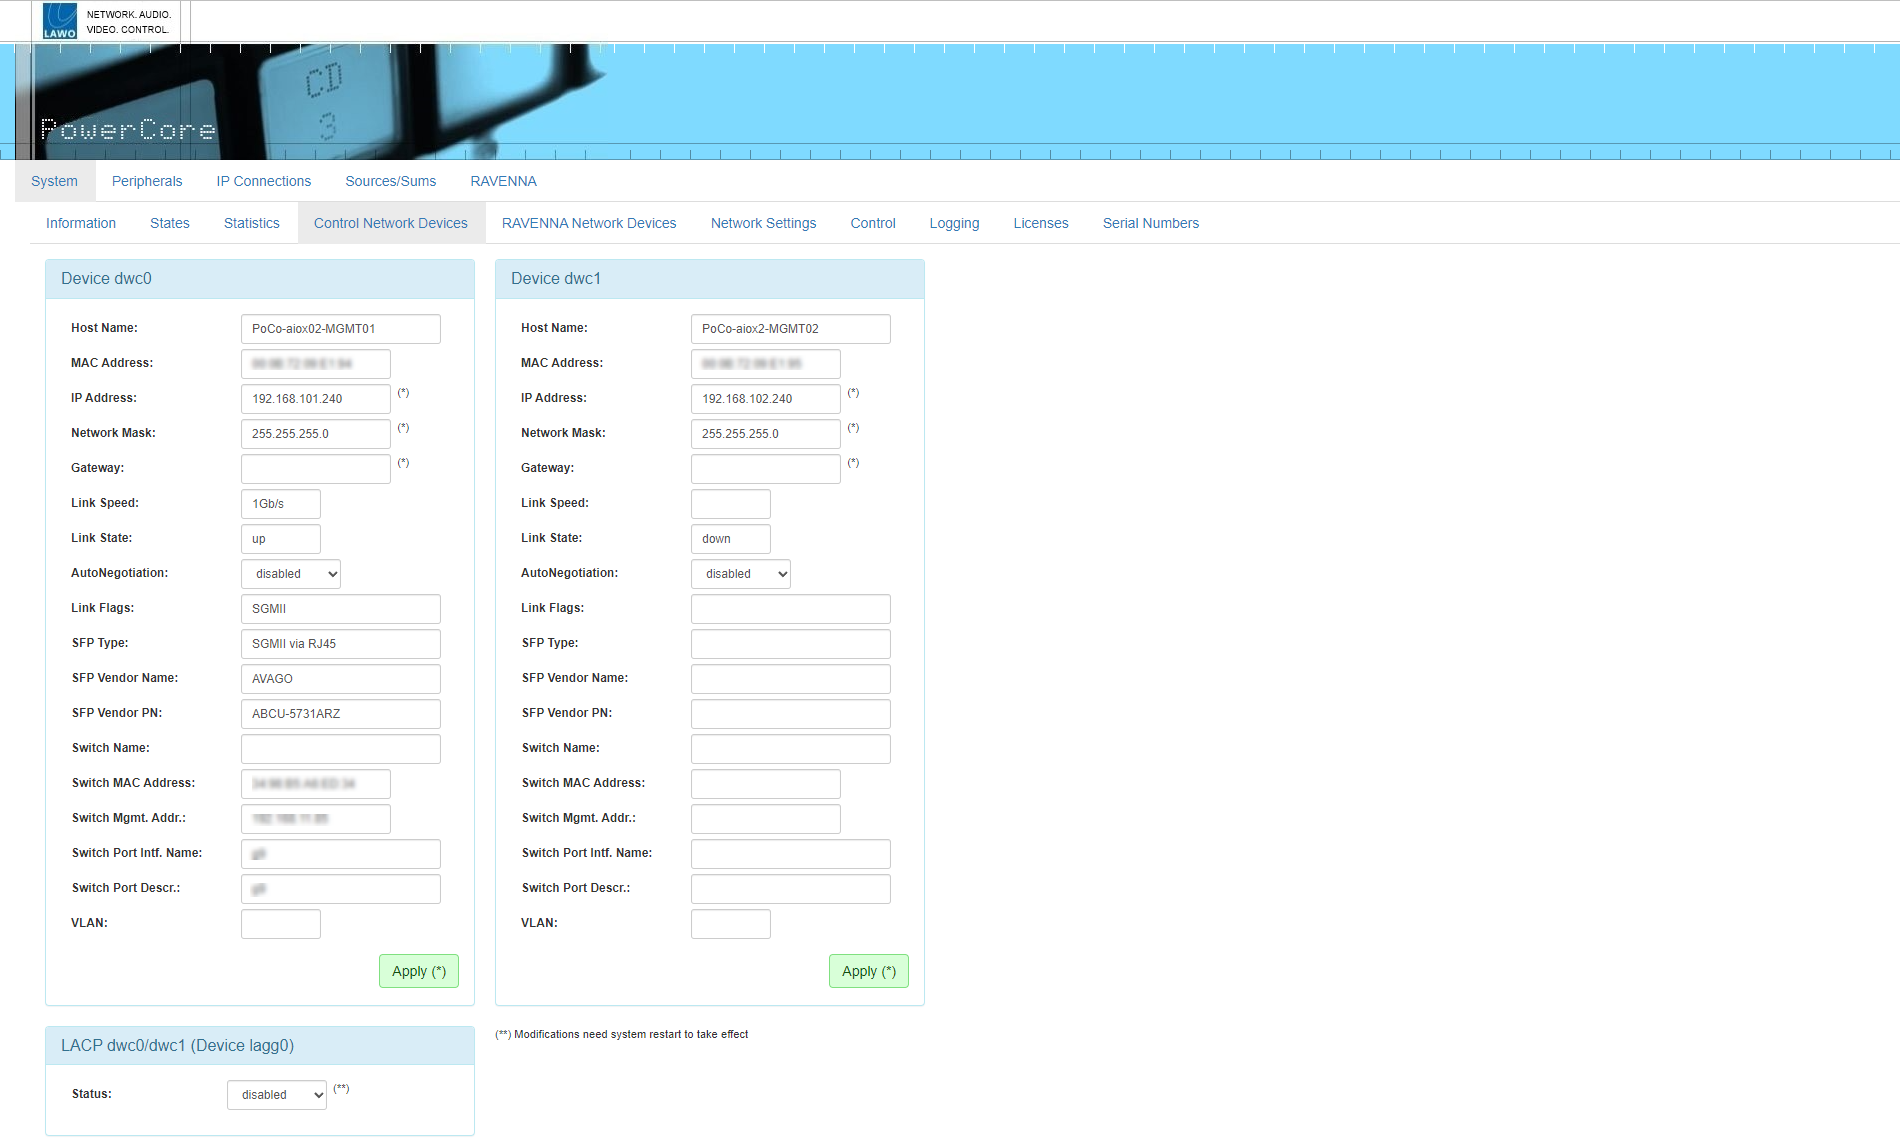
3. Select either "System → Control Network Devices" or "System → RAVENNA Network Devices".
The first page shows the settings for the control network interfaces: Device dwc0 and Device dwc1.
The second page shows the settings for the streaming network interfaces: Device ra0 and Device ra1 (plus Device ra2 and Device ra3 if these ports are enabled/available).

Important: After updating the system to a new version, it is recommended to clear the cache of the web browser (to avoid old information being displayed).
The editable fields are marked with an asterisk (*) and include the IP Address, Network Mask and Gateway.
4. Type in the new value(s) and select Apply to save the changes.
For the control ports (dwc0 and dwc1), IP address changes are made immediately, and so you will lose your browser connection once settings are applied. It is recommended to check the communication by re-opening the Web UI using the new IP address.
For the streaming ports (ra0, ra1, ra2 and ra3), IP address changes require a restart, and so you will need to reboot the device after settings are applied. This can be done using the Reboot (Warmstart) button in the "System → Control" tab.
A Domain Name Server, NTP Server or Syslog Server can be entered via the "System → Network Settings" tab.
5. Once the correct settings are in place, you can connect Power Core to the control network.
6. To continue with the setup, enter the new IP address into your browser and log in again (as described above).
Backup and Restore
It is possible to make a backup of the current network settings by copying the parm.xml file from the SD card (via ftp). This can then be copied back to the system if a restore is required.
The parm.xml file can be found in the following location on the SD card: /media/mmcsd-0-0/parm
After replacing the file, you will need to reboot Power Core using a cold start. This can be done using the Reboot (Coldstart) button in the "System → Control" tab.