crystal - Central Controls
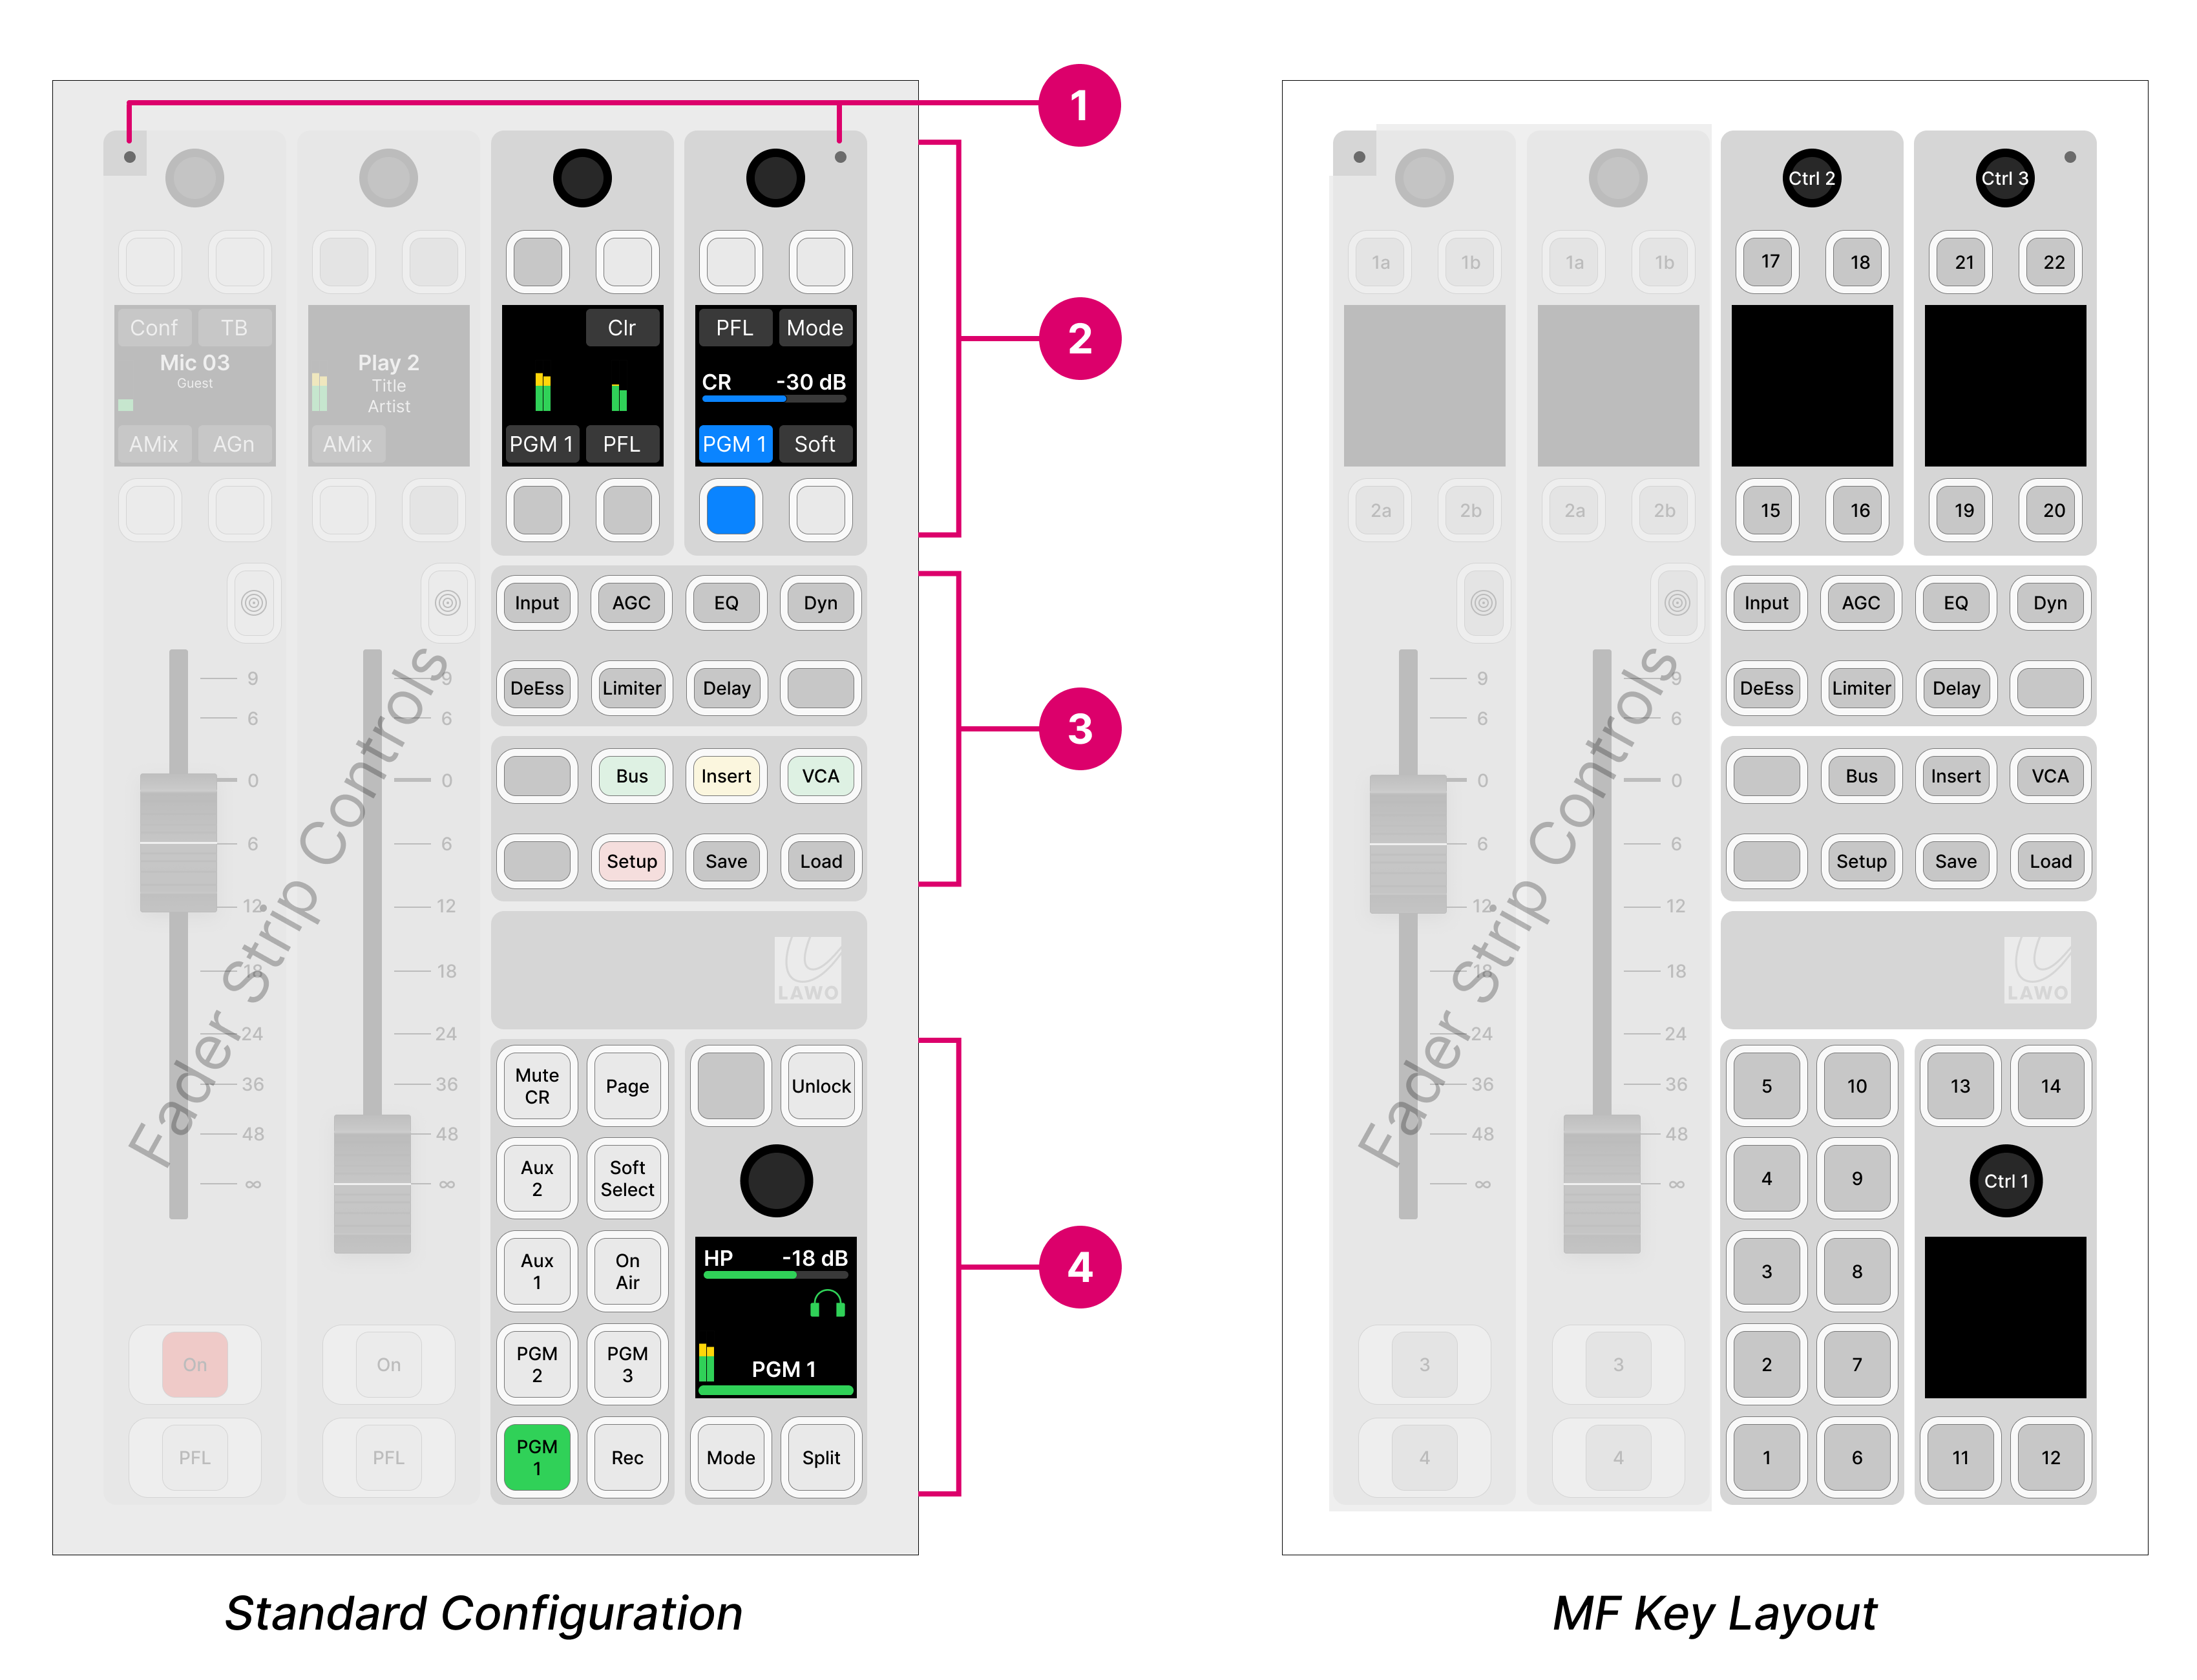
On crystal, the Main module provides six fader strips plus the central controls. The image below shows the right-hand side of the module (with two fader strips and the central controls).
Controls Overview
The central controls are divided into the following areas.

The operation of the Ambient Light Detectors (1) and Central Function Keys (3) are system-defined. The MF keys and rotary controls (4) are defined by the configuration. The Central Rotary Controls (2) are configurable (when all Function Keys are off) and system-defined (when a Function Key is selected).
Operation
Ambient Light Detectors
The two detectors at the top of the module provide automatic adjustment of the surface brightness according to the ambient light levels. The detector receiving the most light always wins. So if something covers just one of the detectors by accident, this is ignored.
This function can be disabled by the configuration. In the standard configuration, it is enabled or disabled using the Surface Ambient Light Sensor option in the 'Settings → Surface' dialog box (on the GUI).
Central Rotary Controls
Each of the upper rotary controls comes with a display and four small MF keys. The controls are labelled by the display and have two modes of operation:
When all Function Keys (3) are off, the controls are configurable.
When a Function Key (3) is selected, the controls update to adjust the selected function. For example, press Input to adjust the input parameters for the channel in access. In this mode:
The functionality is system-defined, and the controls work in the same way regardless of the configuration.
The upper controls from the two adjacent fader strips are borrowed (to provide four sets of Central Rotary Controls).
Metering & PFL/CR Monitoring
In the standard configuration, when all Function Keys are off, the Central Rotary Controls are defined for metering and monitoring.
On the left, the display shows two stereo meters: PGM 1 and PFL.
- The two lower keys are used to label the meters and have no function.
- The Clr key (above the PFL meter) clears all active PFL selections.
- The rotary control has no function.
On the right, the controls adjust the control room (CR) monitor output.
- The rotary control adjusts the monitor level. It is color-coded for easy identification: blue = CR.
- The PGM 1, PFL and Soft keys select the monitor source.
- The Mode key changes the monitoring mode (e.g. to mono or left/right reverse).
- Both the Soft and Mode keys work in conjunction with the GUI (as described later).
The Mute CR key on the lower panel (4) can be used to quickly mute the control room monitor output.
Central Function Keys
The 16 function keys are system-defined and work in the same way regardless of the configuration.
The first 8 keys provide source parameter control for the channel in access. The second 8 keys are used for global functions. With the exception of VCA and Snapshot Management, the function keys work in conjunction with the Central Rotary Controls (2). Please follow the links below for more information.
- Input, AGC, EQ, Dyn, DeEss, Limiter, Delay - press to adjust source parameters for the channel in access.
- Bus - press to select a bus assign page.
- Insert - press to select the insert assign page.
- VCA - press to select a VCA assign page.
- Setup - press Setup to adjust the surface setup options.
- Save, Load - press and hold Unlock + Save (or Load) to save (or load) a system snapshot memory.
MF Keys & Rotary Controls
The remaining MF Keys and rotary controls are defined by the configuration. If you are running the standard configuration, then the controls provide master functions and monitoring.
Master Functions
The top row of keys provide master functions:
- Mute CR - mutes the control room monitor output.
- Page - press to toggle the VX GUI page between 'Playout' and 'Channel Strip'. This key has no function if you are working with the Desktop App.
- MF key 13 has no function. It may be configured by the customer (using ON-AIR Designer).
- Unlock - press and hold to unlock the Save and Load keys in the Central Functions area (3).
HP Monitoring
The remaining keys and large rotary control adjust the headphone (HP) monitor output.
- The rotary control adjusts the monitor level/balance; turn for level; press down and turn for balance. It is color-coded for easy identification: green = HP.
- The surrounding MF keys provide monitor source selection and other options. For more details, see Monitoring.