crystal - Bus Assign
Once a source is assigned to the surface, it can be routed to any of the available summing buses.
The list of available summing buses is defined by the configuration. Up to 32 buses are supported, where each one can be mono, stereo or 5.1. The configuration defines the name of each bus plus whether the bus can be assigned pre or post-fader, or post-fader only; and which page the bus assignment is made from.
Up to eight bus assign pages can be configured, where each page can access up to four buses.
From each source, the operator can adjust:
- Bus assign on/off and pre/post (if the bus is configured for pre or post-fader assignments).
- Bus send level - from -120dB to +9dB.
Operation
The standard configuration defines 8 stereo summing buses and two bus assign pages: PGM and Aux.
- Page 1 (PGM) - handles the assignments to the four main buses: PGM 1 to 3 & REC.
- Page 2 (Aux) - handles the assignments to the four auxiliary buses: Aux 1 to 4.
The assignments can be either pre- or post-fader for Aux 1 to 4, and post-fader only for PGM 1 to 3 & REC.
The 'Channel Strip' page (on the GUI) provides the best overview of the current assignments. Note that this page is for information only; you cannot edit the bus assignments from here.
To edit the assignments, you can use either the surface or 'Source Parameter' dialog box as follows.
On the surface...

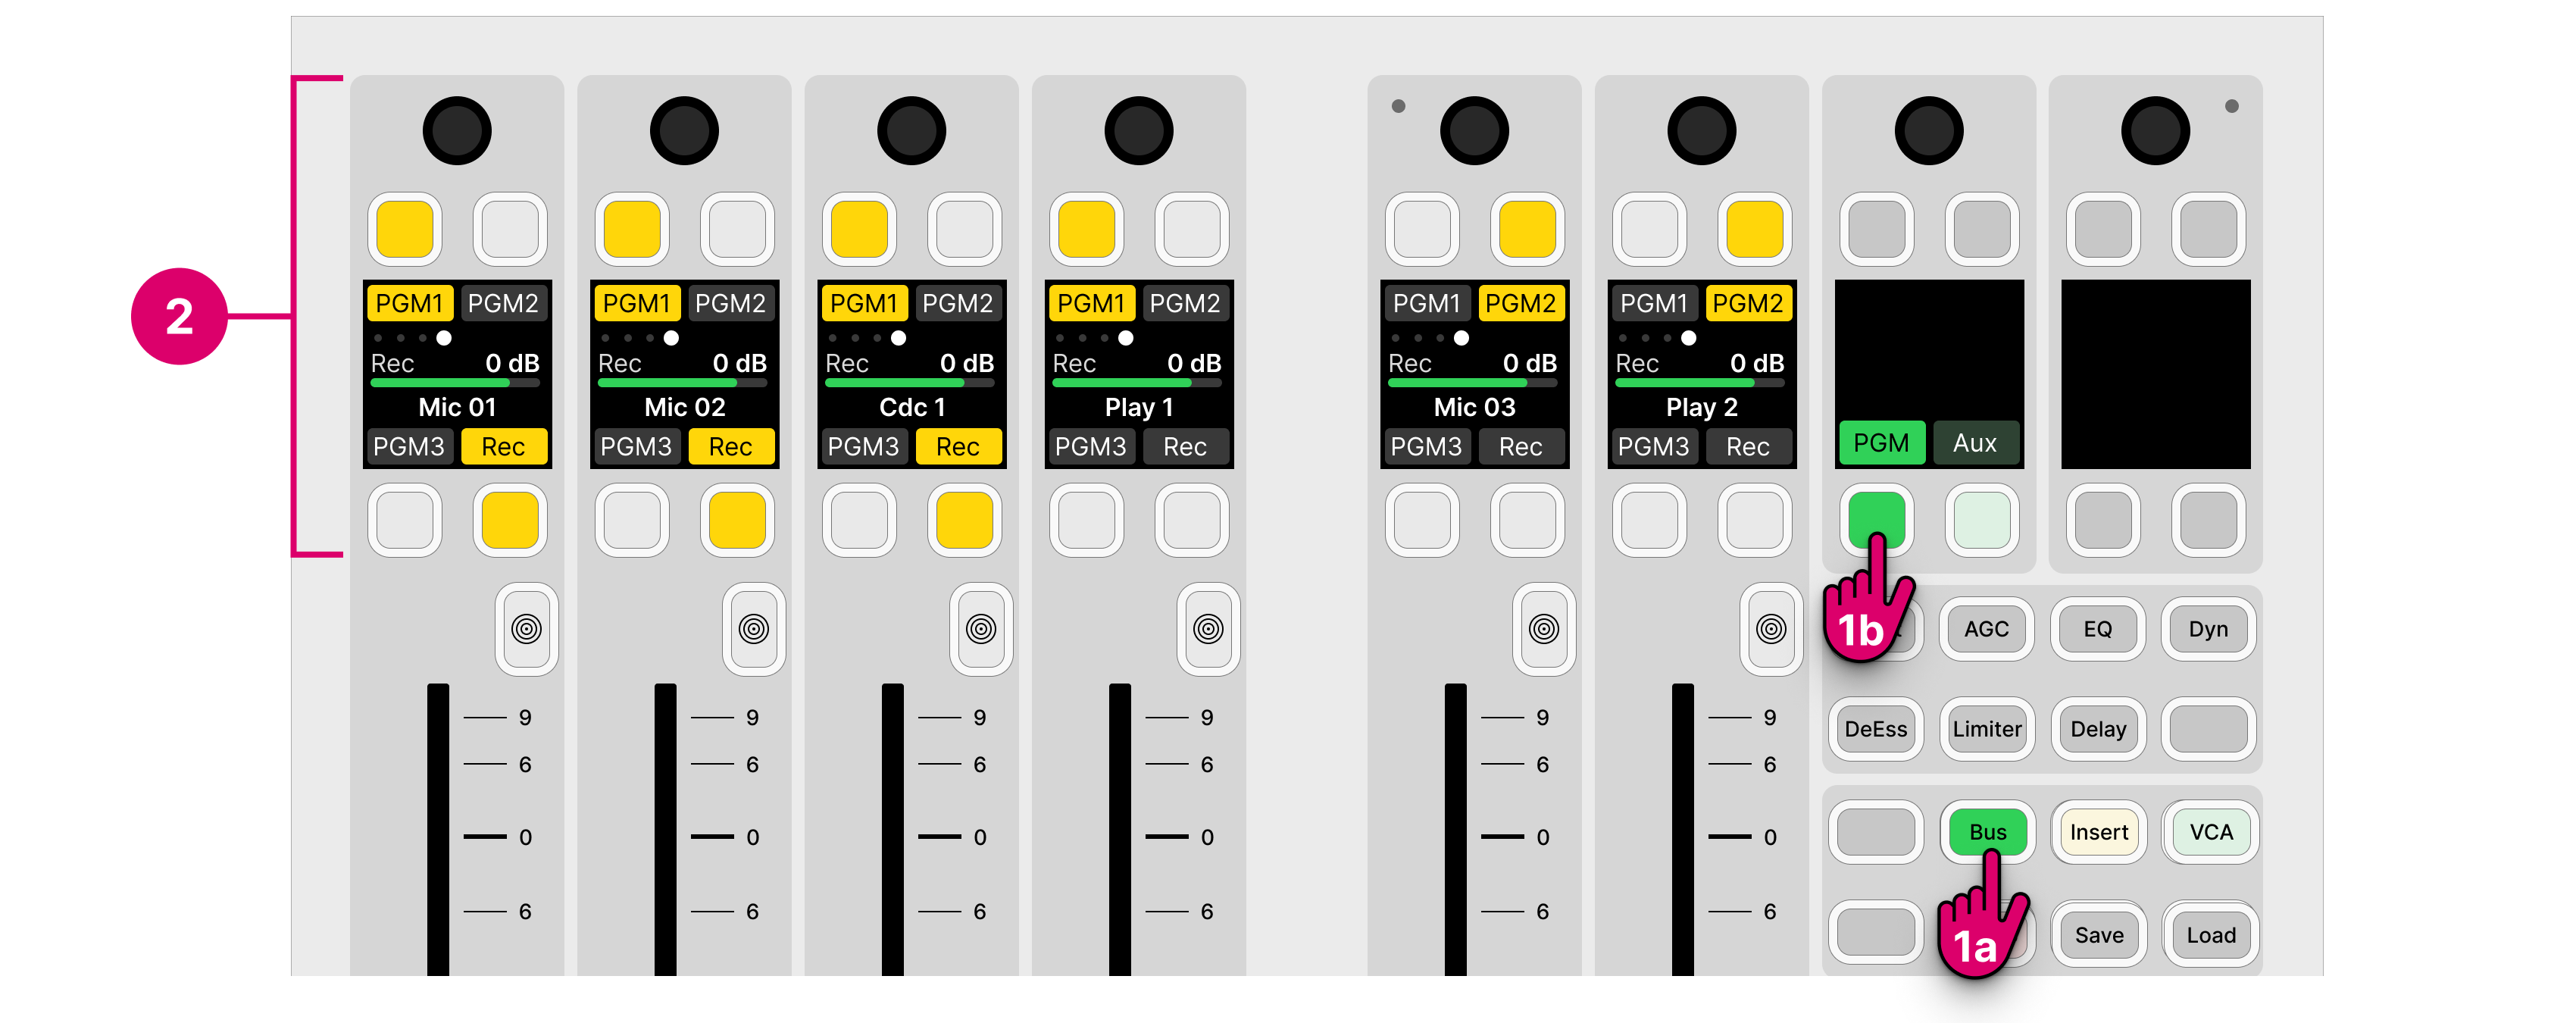
1. From the central controls, press Bus and select a page (e.g. PGM).
The upper controls on each fader strip switch into "bus assign" mode. The four soft key labels show the name of the available buses. If a soft key has no label, then there is no bus allocated (in the configuration).
The soft key colors show the assignment status:
- Dim white = source is not assigned (off).
- Yellow = source is assigned (post-fader).
- Red = source is assigned (pre-fader).
At any time, you can select a different page to access more assignments. If a page key is unlit, then there are no buses allocated to the page (in the configuration).
2. Use the fader strip soft keys (and rotary control) to change the assignments (and adjust the send levels).
- To toggle an assignment, press the soft key.
- If a bus is configured for both pre and post-fader assignments, then there are three possible states: on (pre-fader), on (post-fader) and off.
- The order of the pre/post states is defined by the ON-AIR Designer configuration, and so also possible is: on (post-fader), on (pre-fader) and off.
3. When you have finished editing the assignments, deselect BUS (on the central controls module).
The fader strip controls return to their default functions.
On the GUI...
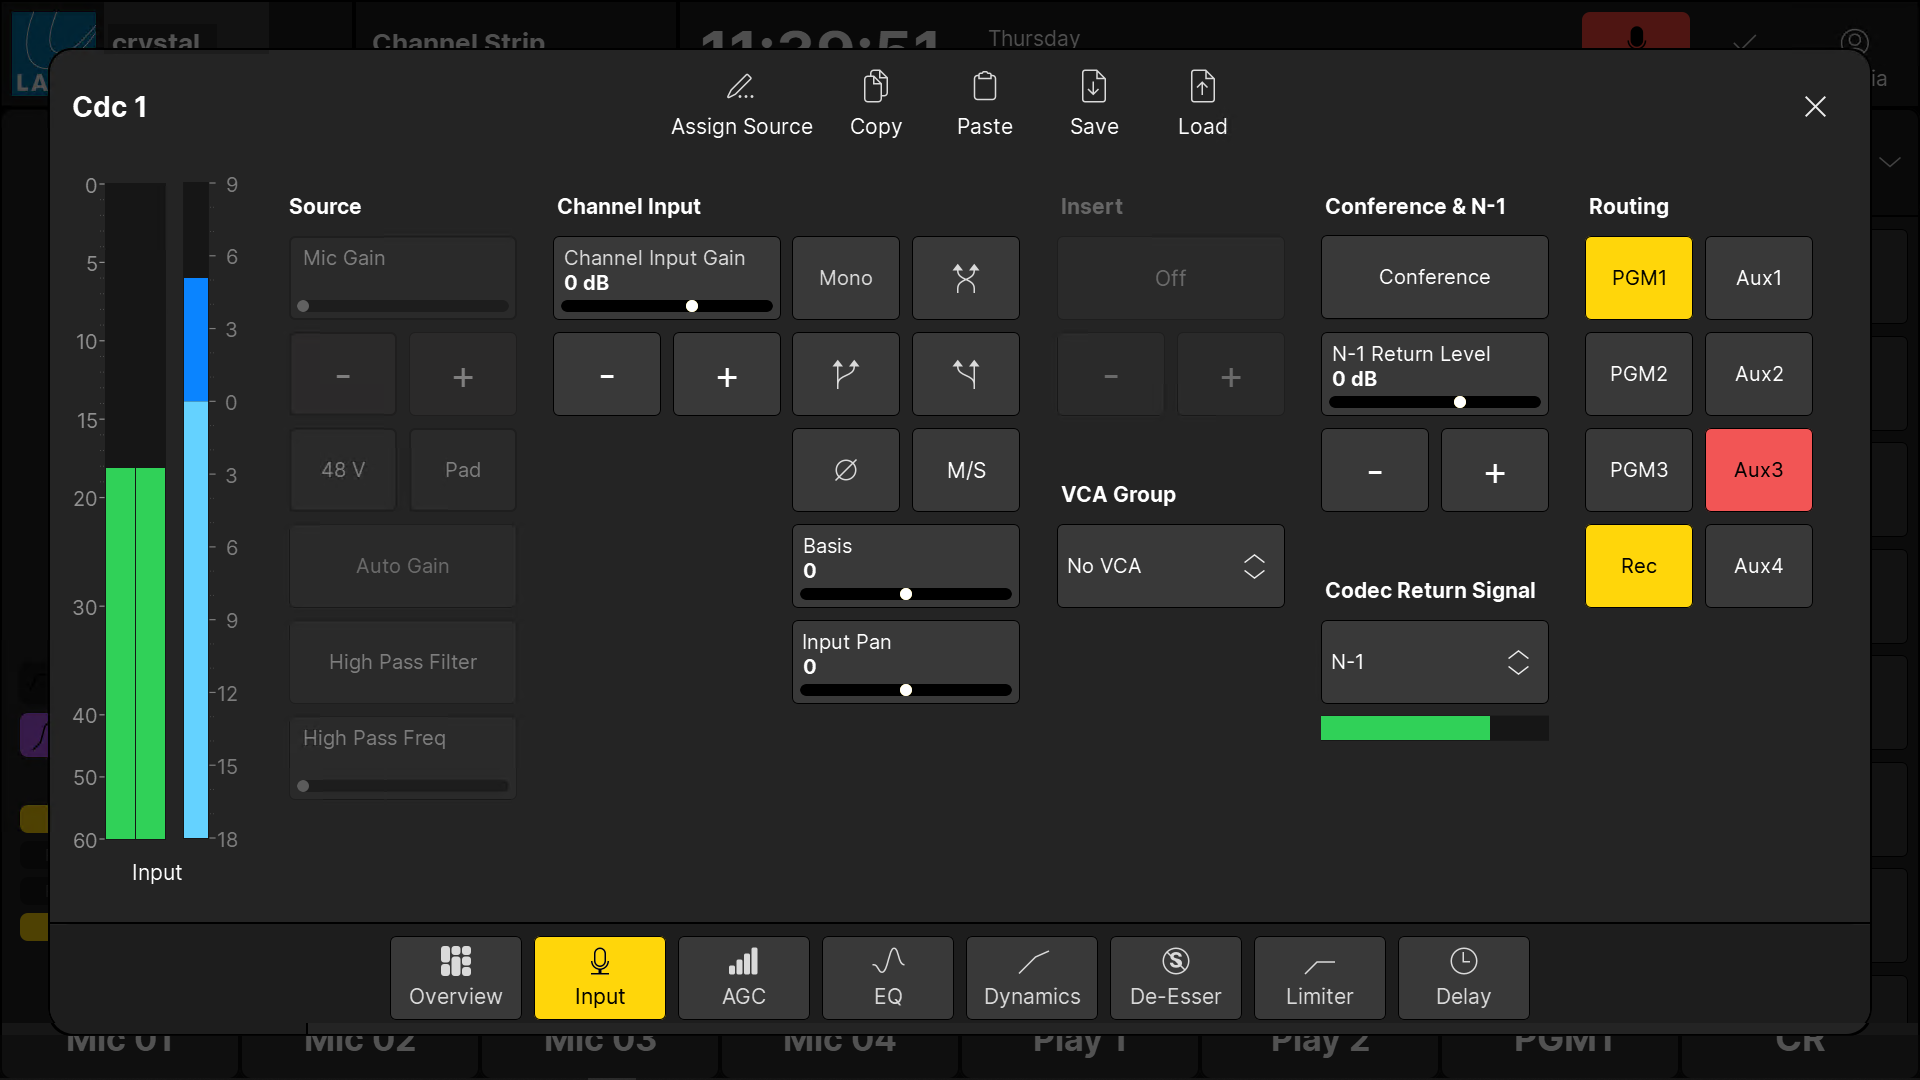
Open the 'Source Parameter' dialog box by pressing a fader strip Access key, and choose the Input page.

1. Use the buttons under 'Routing' to change the bus assignments.
2. If a bus supports both pre and post-fader assignments, then keep pressing to cycle through the options.
The button colors are the same as on the surface:
- Grey = source is not assigned (off).
- Yellow = source is assigned (post-fader).
- Red = source is assigned (pre-fader).
Connecting a Bus to an Output
Usually, the configuration defines some default audio connections from the summing buses. This can be checked or edited using the ON-AIR Designer (under "Audio Output → <I/O> Out → Default Audio"). The default audio connections are described later in the Standard Configuration Specification.
If you are running the standard configuration, then you can also use the 'Routing' page (on the GUI) to connect a bus to a destination:
- Select Routing (from the GUI page menu) to open the 'Routing' page.
- Under 'Sources', select the Busses tab and choose a bus (e.g. Rec) - the selection flashes in blue.
- Under 'Destinations', select an output category (e.g. Ravenna Outputs) and choose an output (e.g. Rav Out 02) - the selection flashes in blue.
- Press Connect - the connection is made.