HOME DSK - A/B Mixing
Underneath the keyer(s), a HOME DSK allows for A/B mixing of two video background sources.
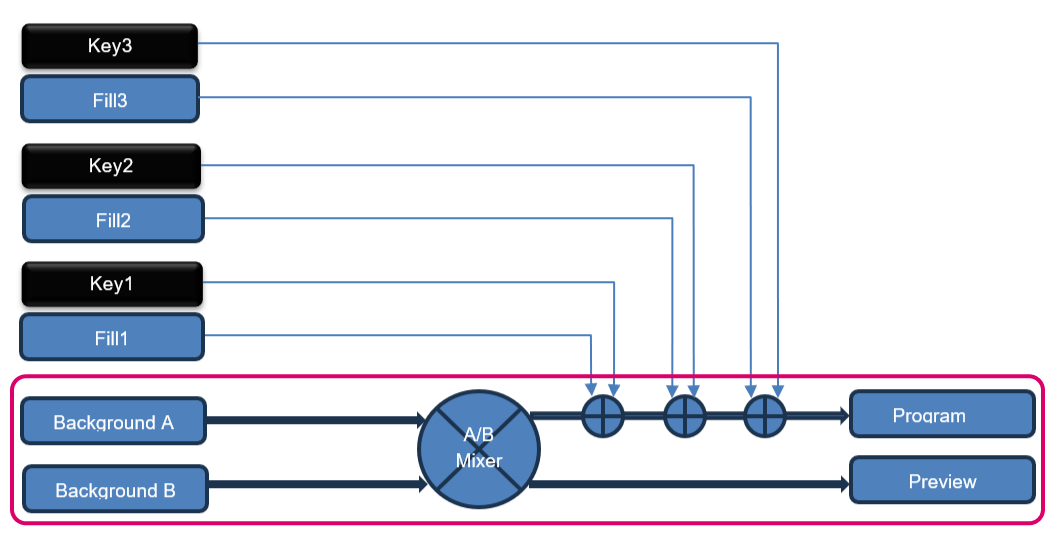
The A/B mixer can provide 'Make-Before-Break' type switching with a choice of transition types including Cut, Fade and Cross Fade. The user is able to define the duration of the transition in milliseconds.
If all three keyers are disabled (or not configured), then the HOME DSK can be used as a simple A/B mixer without any keyers.
Basic Operation
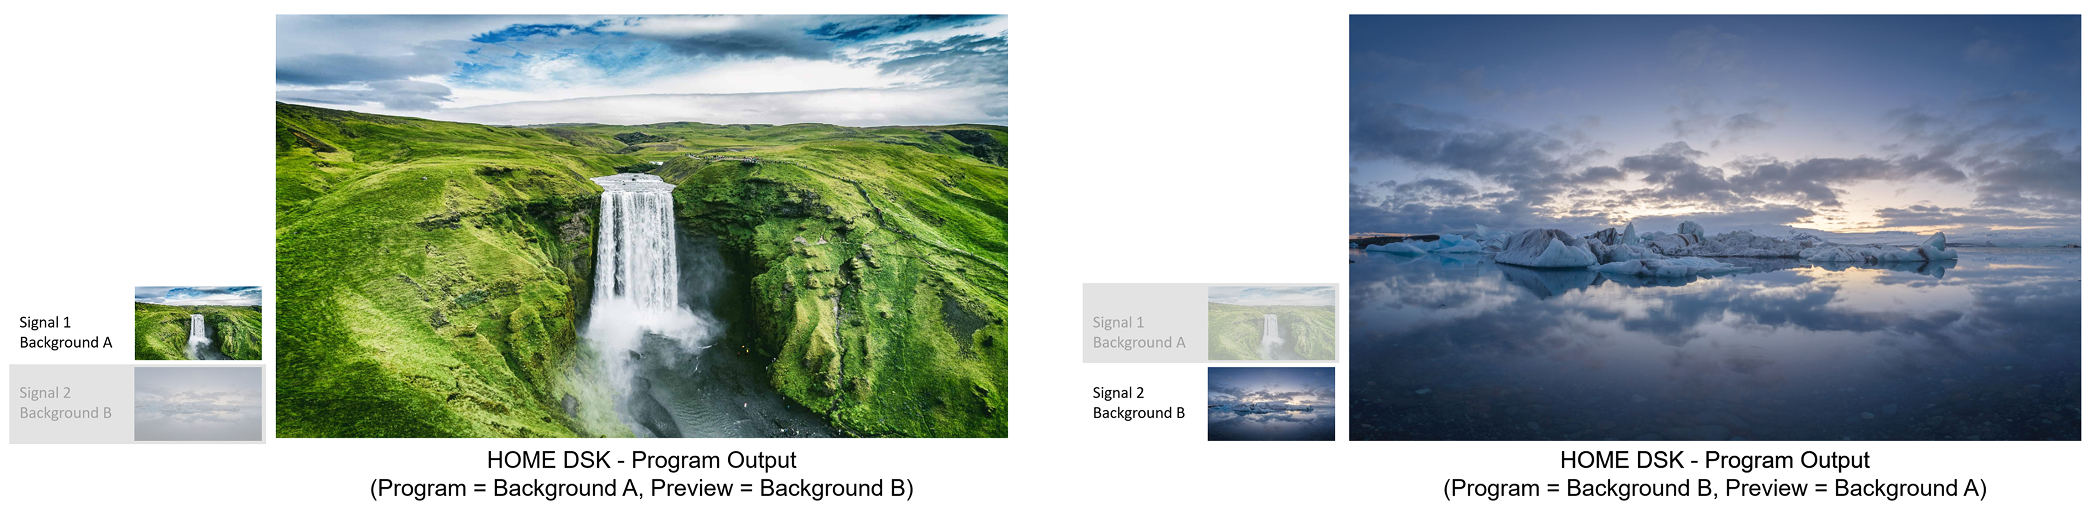
When a Program Take function is triggered, the Preview source switches to the Program output, and the Program source switches to the Preview output.
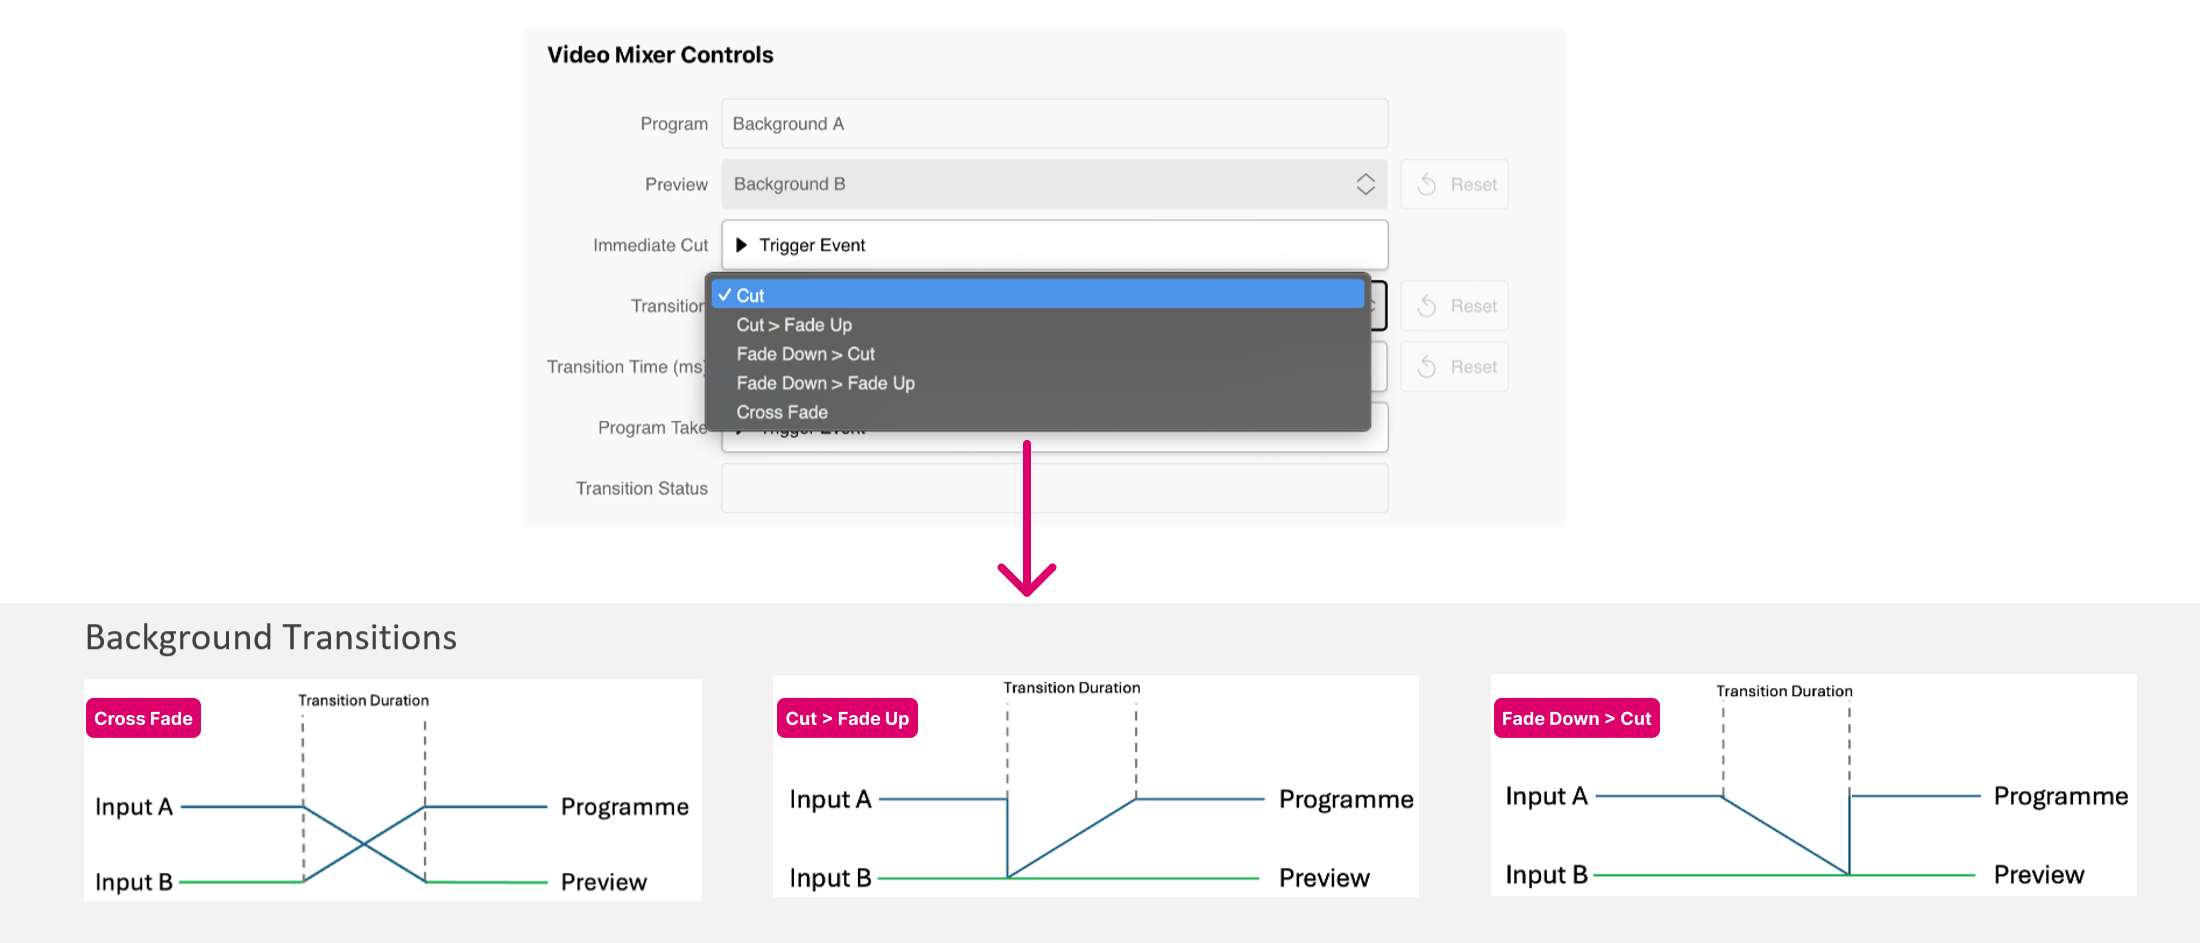
The user can define the transition type and its duration in milliseconds. Multiple transition types are available, including Cut, Fade and Cross Fade.
A typical workflow might be:
- Signal 1 is routed to Background A, Signal 2 is routed to Background B.
- Background A (Signal 1) is seen in the Program output, Background B (Signal 2) is seen in the Preview output.
- The user prepares the next transition type and its duration. Then presses Program Take - Trigger Event to start the transition between Backgrounds A and B.
- At the end of the transition, Signal 2 (routed to Background B) is seen on the Program output, Signal 1 (routed to Background A) is seen on the Preview output.
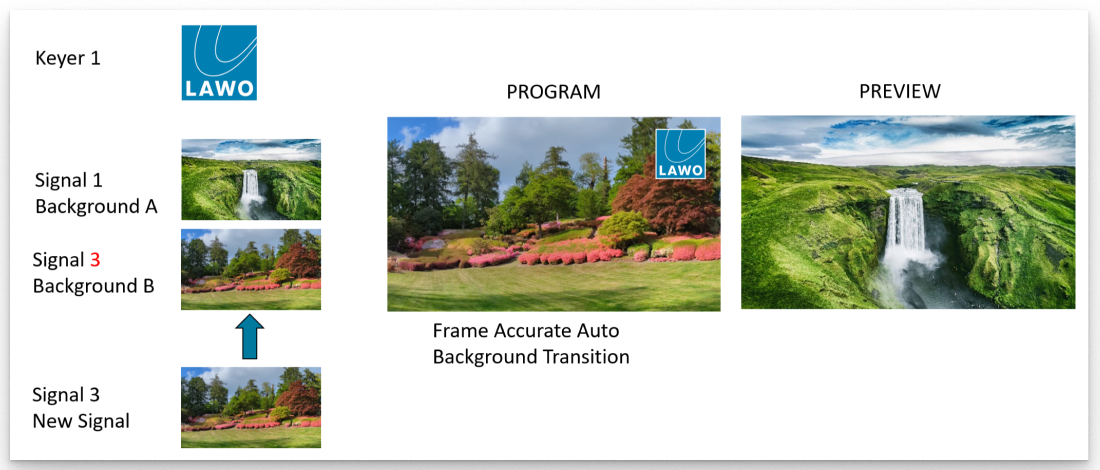
If the Auto Transition option is enabled, then the transition starts automatically when the user routes a new signal to the inactive background (shown on the Preview output). This can be used to reduce the number of operational steps if more than two background signals are required. See Auto Transition.
Please note: When a video transition is started, the audio remains unchanged.
Runtime Controls
Once a HOME DSK is configured and running, the app provides two sets of runtime controls: for the Video Mixer and Video Keyer(s).
In each case, the latest settings are stored automatically (by HOME) whenever a change is made.
The controls are accessed from the app's Advanced parameters page (in the HOME UI). The same controls are available via the HOME API. This allows transitions to be triggered (and adjusted) from an external control system such as Lawo's VSM.
Video Mixer Controls
The Video Mixer Controls allow the user to control the A/B mixing between the two video background sources.
For general information about how to edit the parameter fields, please see HOME Apps - Advanced parameter control. Here we describe the function of each control.
The main points of operation are:
- The Program Take function starts the prepared transition: flipping the Preview source to Program, and the Program source to Preview.
- The Transition Type and Transition Time can be used to prepare the type of transition: Cut, Fade or Crossfade.
- If the Auto Transition option is enabled, then a Program Take is triggered automatically when the user routes a new signal to the inactive Background.
Please note: When a video transition is started, the audio remains unchanged.
The table below describes all available controls.
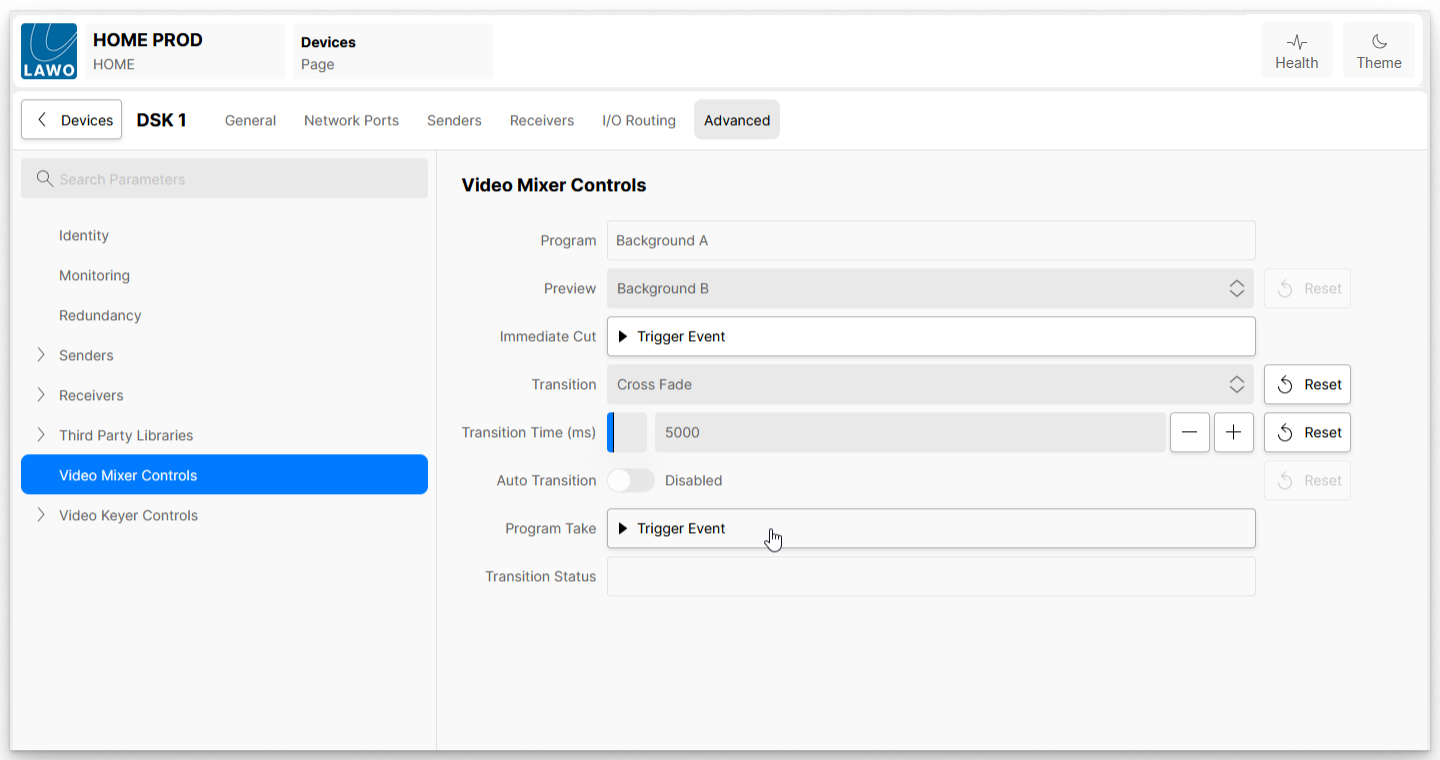
| Control | Description |
|---|---|
| Program | Displays which background video source is currently on the Program output: either Background A or Background B. The current source can be changed using the Program Take function. |
| Preview | Displays and controls which background video source is currently on the Preview output: either Background B or Background A. The current source can be changed using the Program Take function. In addition, the Preview output can be forced to particular Background source by making a selection from the drop-down menu. |
| Immediate Cut | When the ‘Trigger Event’ button is pressed, the video source on the Preview output cuts to the Program output, and the video source on the Program output cuts to the Preview output. This happens immediately, regardless of the Transition type. This function provides a useful emergency cut. |
| Transition | Defines the type of transition applied (to the video background layer) when a Program Take is triggered. The available options are:
|
| Auto Transition | See Auto Transition. |
| Transition Time (ms) | Sets the duration of the transition in milliseconds (for 'Fade' transitions). The value can be set from 10 to 30000 milliseconds (0.1 to 30 seconds). |
| Program Take | When the ‘Trigger Event’ button is pressed, this starts the prepared transition between the two video background sources. |
| Transition Status | Displays the status of the transition, while the transition is in progress. e.g. Background A > Background B. |
Auto Transition
The HOME DSK has two background inputs: Background A and Background B. Unless the app is in the middle of an active transition, one of these backgrounds can be seen on the Program output and the other on the Preview output. Using the Program Take function, the user can cut or transition between the two backgrounds onto the Program output.
If the user wishes to use a third signal on the background, then usually they would need to route the new signal onto the inactive background (being shown on the Preview output). Then, once the signal is prepared, press Program Take – Trigger Event to start the cut or transition to the Program output.
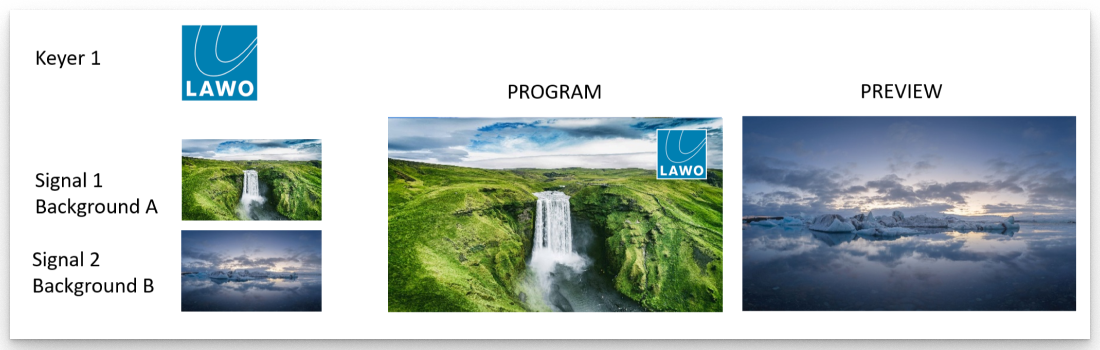
The Auto Transition option can be enabled to reduce this to a single step, thereby streamlining the operation when more than two background signals are required.
Once Auto Transition is enabled, the (background layer) transition starts automatically when the user routes a new signal to the inactive background (shown on the Preview output). This means that the new signal transitions from the Preview to Program output as soon as it is connected, and the previous signal transitions from the Program to Preview output.
The type (and duration) of transition is defined using the Transition (and Transition Time) controls as described earlier.
A typical workflow might be:
- Auto Transition is enabled.
- Signal 1 is routed to Background A, Signal 2 is routed to Background B.
- Background A (Signal 1) is seen in the Program output, Background B (Signal 2) is seen in the Preview output.
- The user routes a new signal, Signal 3 to Background B. This triggers the DSK's auto-transition and starts the transition between Backgrounds A and B.
- Once the transition is completed, Signal 3 (routed to Background B) is seen on the Program output, Signal 1 (routed to Background A) is seen on the Preview output.