For each input channel, you can assign up to three sources: A, B and C.
The alternate sources can be switched either individually (per channel) or across multiple channels (using a Central User Button custom function). Typically, the alternate sources are used to provide fast access to a backup source if the main source fails.
Signal Connections
In each case, the signals are connected using the Signal List display as follows.
- Under Destinations (on the right), select DSP Inputs → Inputs to access the input channels.
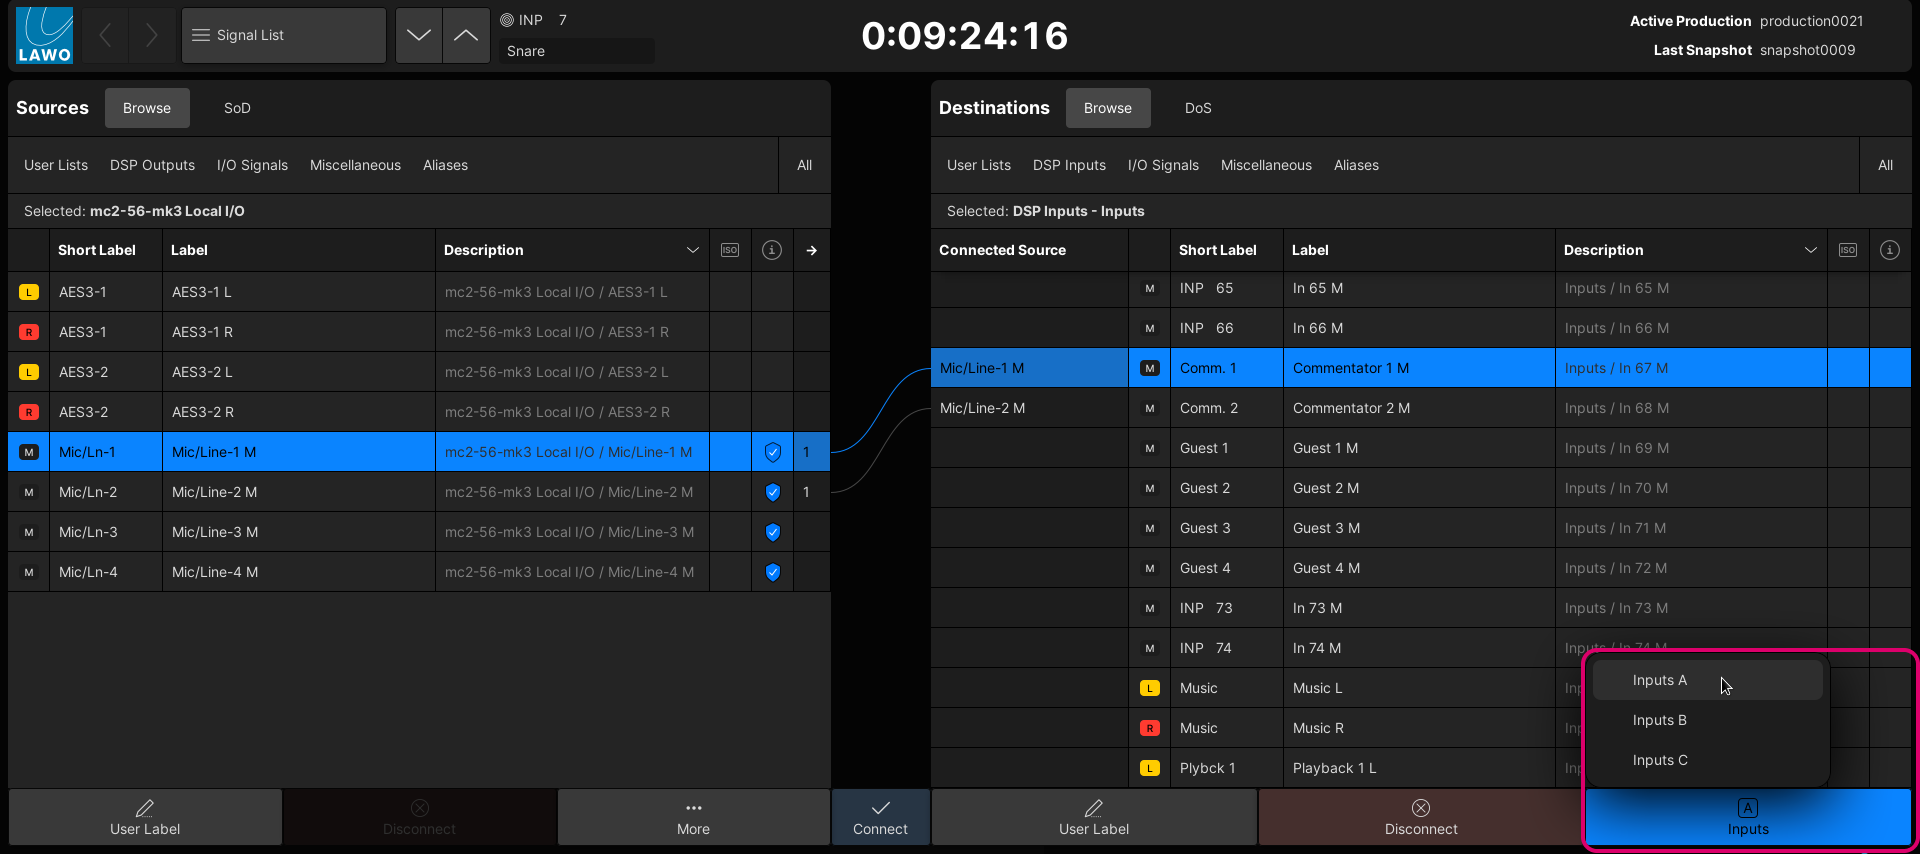
- Select Inputs A (at the bottom of the list) and connect a main source to each input channel.
- Select Inputs B and connect the backup/alternate sources to the same channel numbers.
- Repeat for Inputs C.
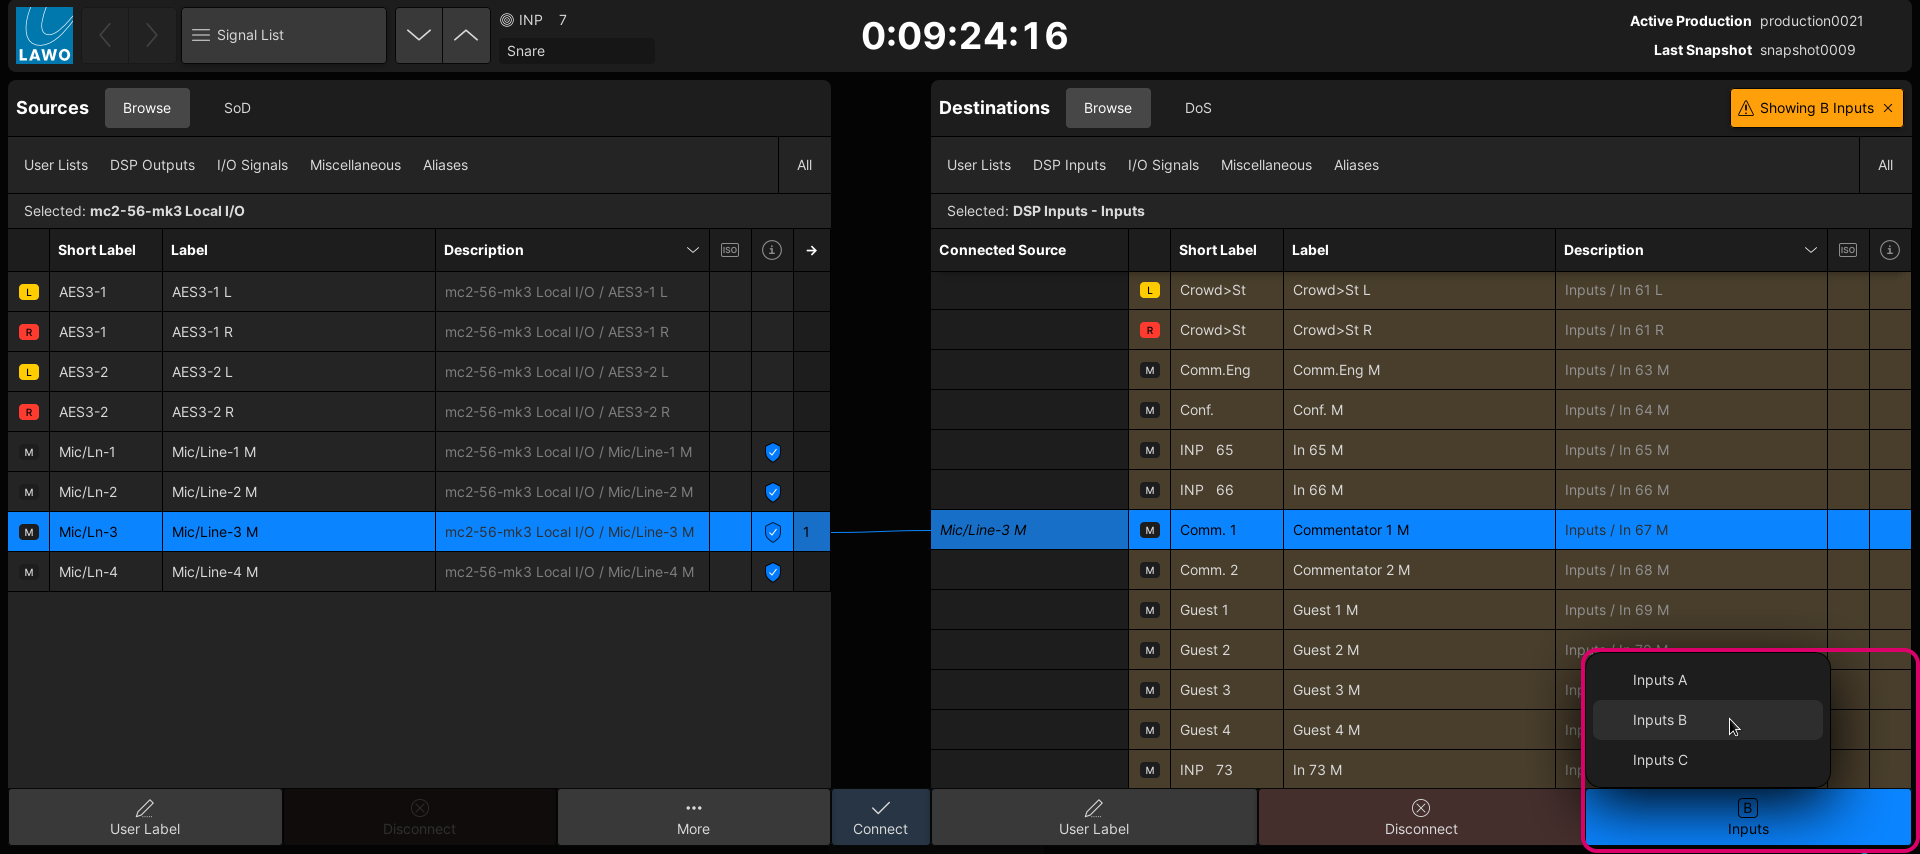
The screenshots below show an example.

mic/line-1 to Input 67 (A input)

mic/line-3 to Input 67 (B input)
Please note: When the Destinations list is switched to either the B or C inputs, the list is highlighted in yellow (as shown above). This acts as a warning that you are now working on the alternate inputs.
To return the Destinations list to the A inputs, either select Inputs A (from the drop-down menu) or click on the close icon beside the "Showing B inputs" message.
Now go to the fader strips that are assigned to the channels and use the A and B buttons to switch the source. Alternatively, put the channel into access and use the A and B buttons on the Central Control Section or Main Display (on the Central GUI).
The C input can be selected either from the Main Display (on the Central GUI) or from a fader user button. The latter is done by programming an instance of the "Fader User Button, Channel Functions" custom function and assigning the channel parameter to Inmix Input C.
To switch to the A, B or C inputs globally, you can program an instance of the "Central User Button, A/B/C Input switch" custom function.
Each user button switches the defined channels to All A, All B or All C. You will need at least two central user buttons to switch from All A to All B, and a third for All C. The buttons will reset any individual A/B/C selections.
The affected channels are defined in up to four ranges, making it possible to exclude channels from the global switching.