mc²36 - Monitor Audio
CRM 1 supports all possible surround formats, while CRM 2 is stereo. The connections are usually made using the local I/O so that the loudspeakers can connect to the console rear panel.
There are also two stereo headphone outputs: HP 1 and HP 2. The phones sockets can be found on the front buffer. By default, the two HP outputs follow the CRM source selectors with independent level control.
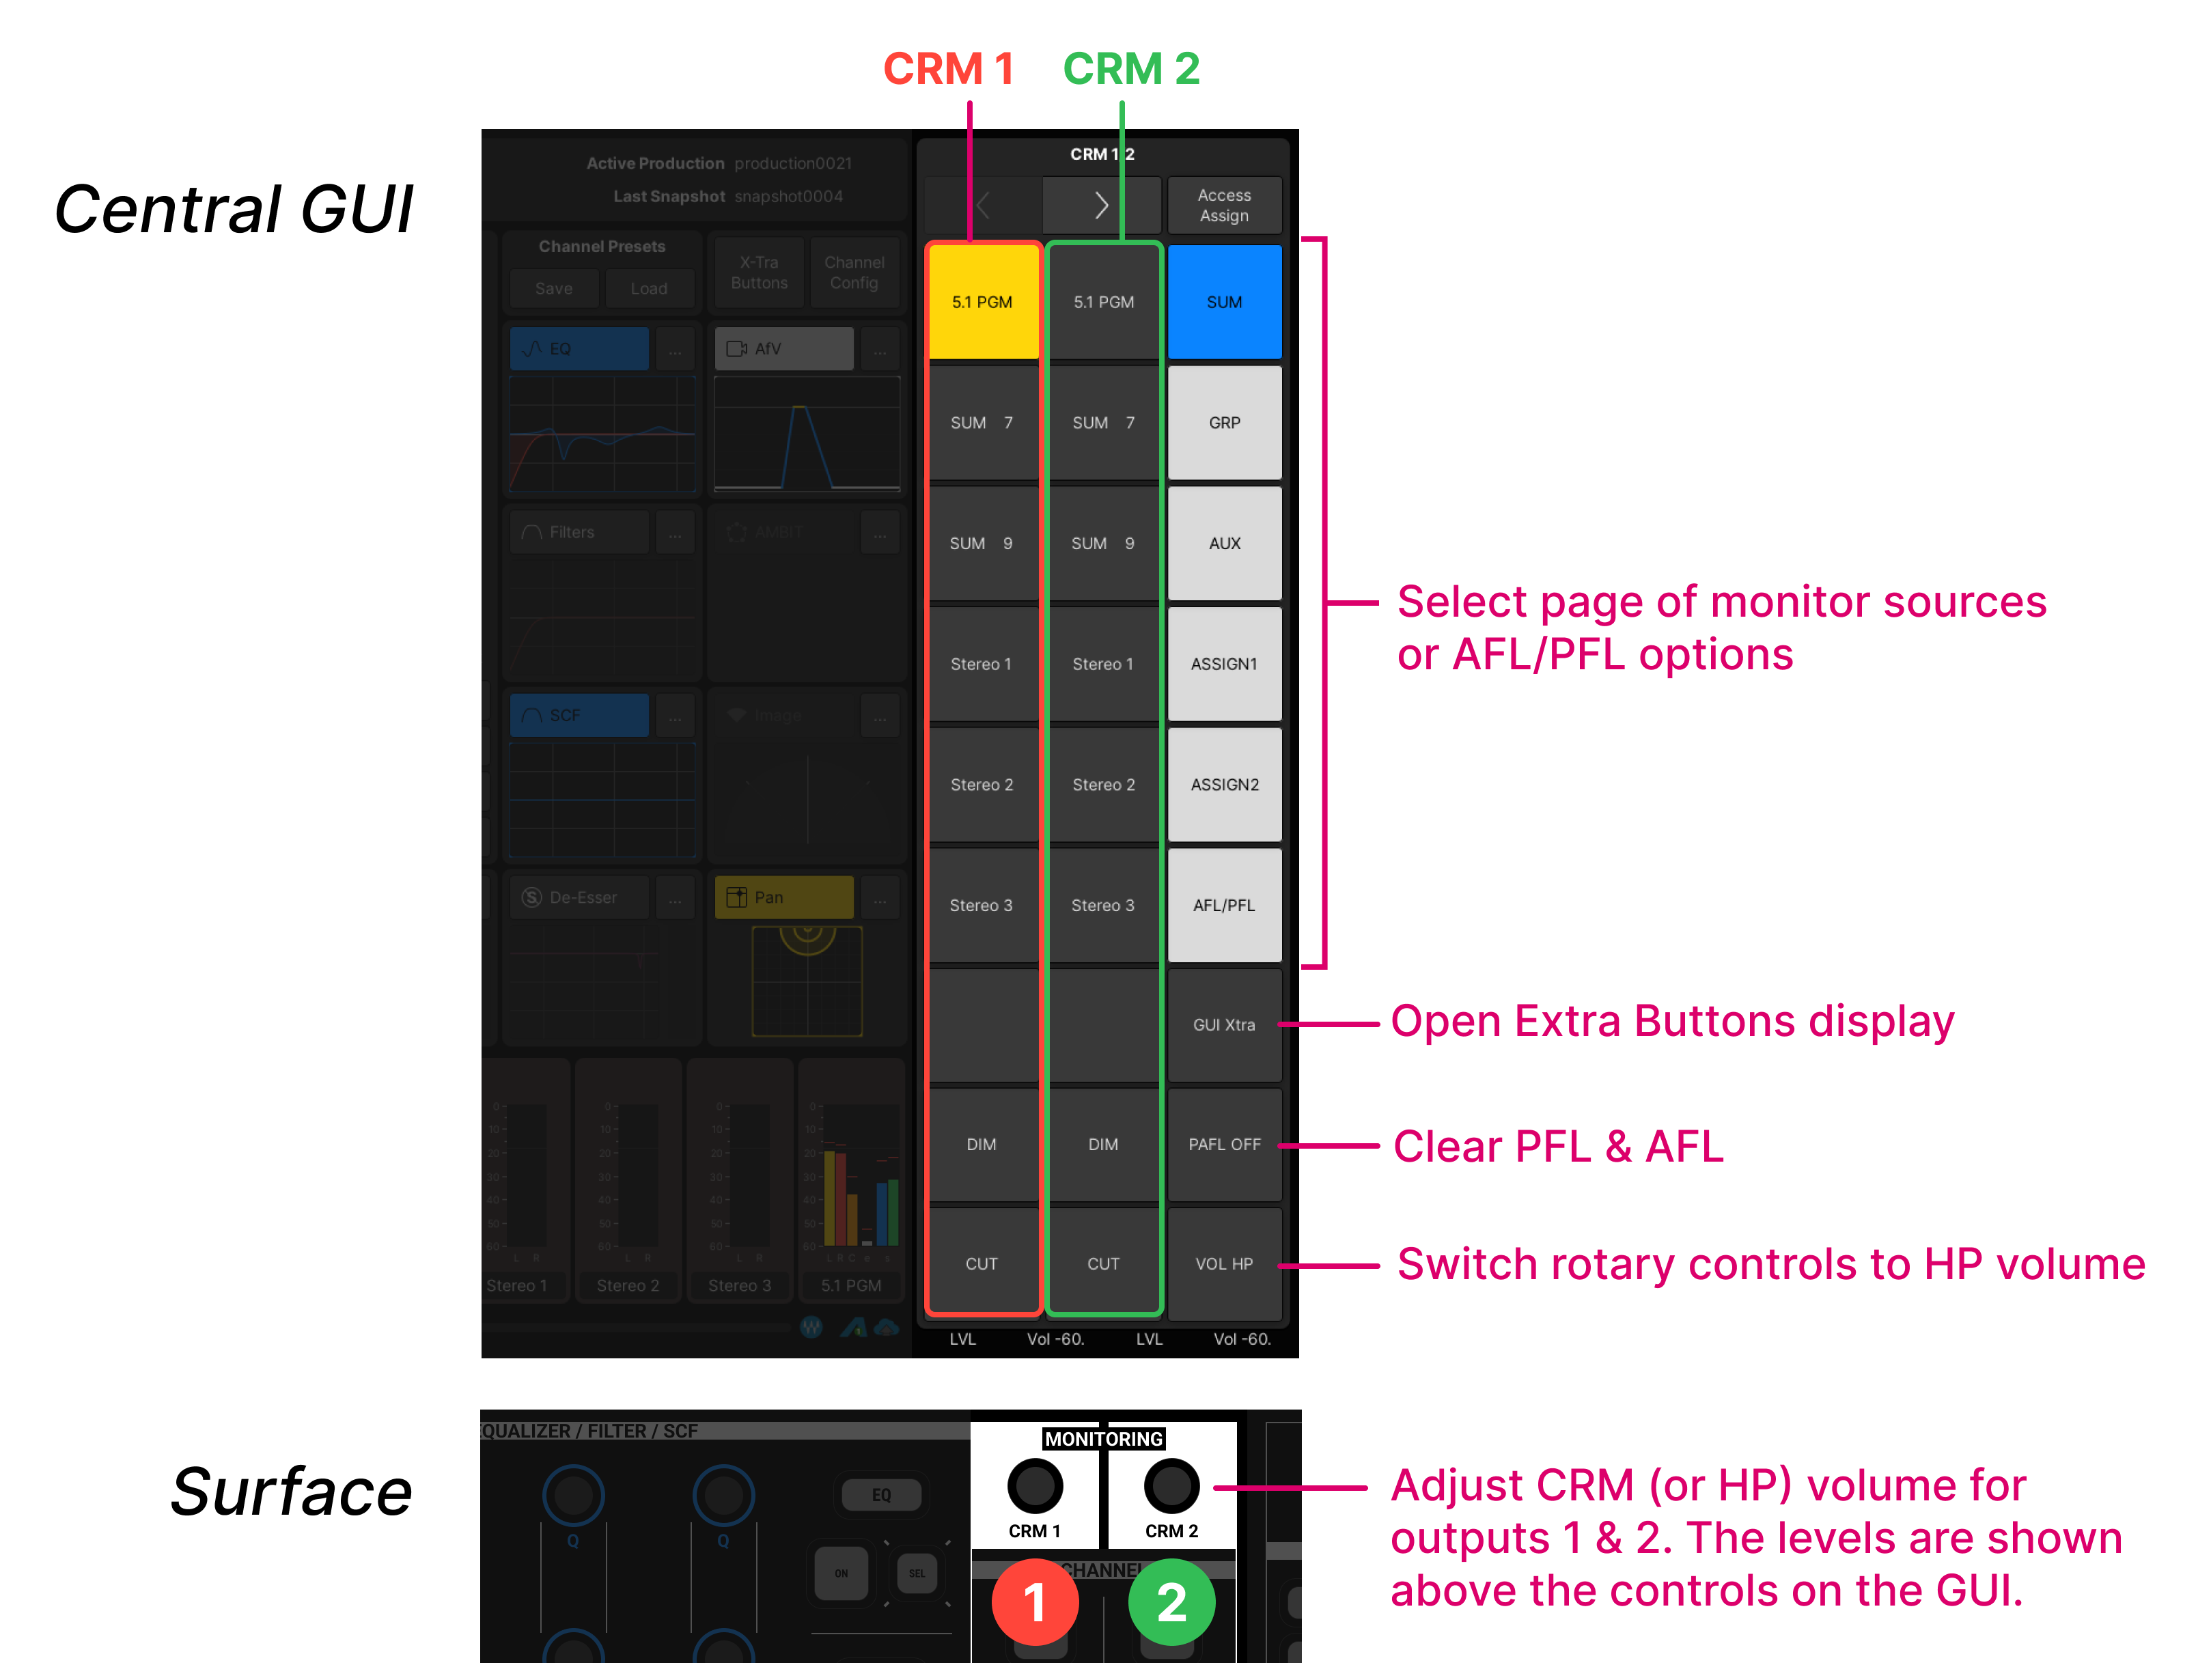
The CRM and HP levels are adjusted from the surface (using the MONITORING rotary controls below the Central GUI). All other options are adjusted from the touch-screen (using the Central GUI side panel).
The instructions below describe the default monitoring configuration. The operation may vary if the configuration is customized.

- Make sure that the Central GUI side panel is switched to monitoring mode by turning off the Access Assign button.
- Use the touch-screen arrow buttons to open the first page (CRM 1/2). There are three columns of touch-screen buttons:
- Column 1 (left) - is for CRM1
- Column 2 (middle) - is for CRM2
- Column 3 (right) is for page selection and other functions.
- To adjust the CRM 1 output:
- Select a monitor source from the left column: e.g. 5.1 PGM. You can use the right column to select a different page of sources: GRP, AUX, etc.
- Turn the CRM 1 rotary control to adjust the volume. The level is shown at the bottom of the touch-screen display (above the rotary control).
- Either press the touch-screen buttons OR press down on the rotary control to DIM, CUT or open the volume.
- The amount of dim defaults to 20dB but this can be adjusted using the Set function (described later).
- The CRM 2 output works in a similar manner.
- Select a monitor source from the middle column: e.g. Stereo 1.
- Turn the CRM 2 rotary control to adjust the volume.
- Either use the touch-screen buttons or press down on the rotary control to dim or cut the volume.
- To adjust the headphone levels, press the VOL HP touch-screen button.
- The CRM 1 and CRM 2 rotary controls now adjust the HP 1 and HP 2 levels.
- The current function and levels are always shown at the bottom of the touch-screen display: either LVL Vol -xxdB for loudspeaker control or LVL HP -xxdB for headphones.
- To adjust the A/PFL monitoring:
- Press AFL or PFL on a channel with some signal.
- Open the AFL/PFL page (in the right column).
- Use the left and middle columns to setup the monitoring. For example:
- To assign AFL to CRM 1, turn on the AFL1 option in the left column.
- To assign PFL to CRM 2, turn on the PFL1 option in the middle column.
- If a PFL is active, then the PFL CLR button lights in green. Press to clear all PFL selections.
For more information, see mc²36 - Control Room Monitoring.