mc²36 - Channel Parameters
The console provides two ways to adjust other channel parameters such as EQ gain: either locally (from the fader strip Free Controls) or centrally (from the surface or GUI).
Note that the fader strip Free Controls are available on single-fader channel bays only. On a dual-fader channel bay or main fader, the following (central) method must be used:
- Press a fader strip SEL button (to select a channel).
- Then reach out to the Central Control Section (on the surface) or Main Display (on the Central GUI).
This topic describes each method in more detail. For more information about the DSP modules and their parameters, please see mc²36 - Channel Operations.
You can use the Couple group to adjust parameters across multiple channels.
Fader Strip Free Controls
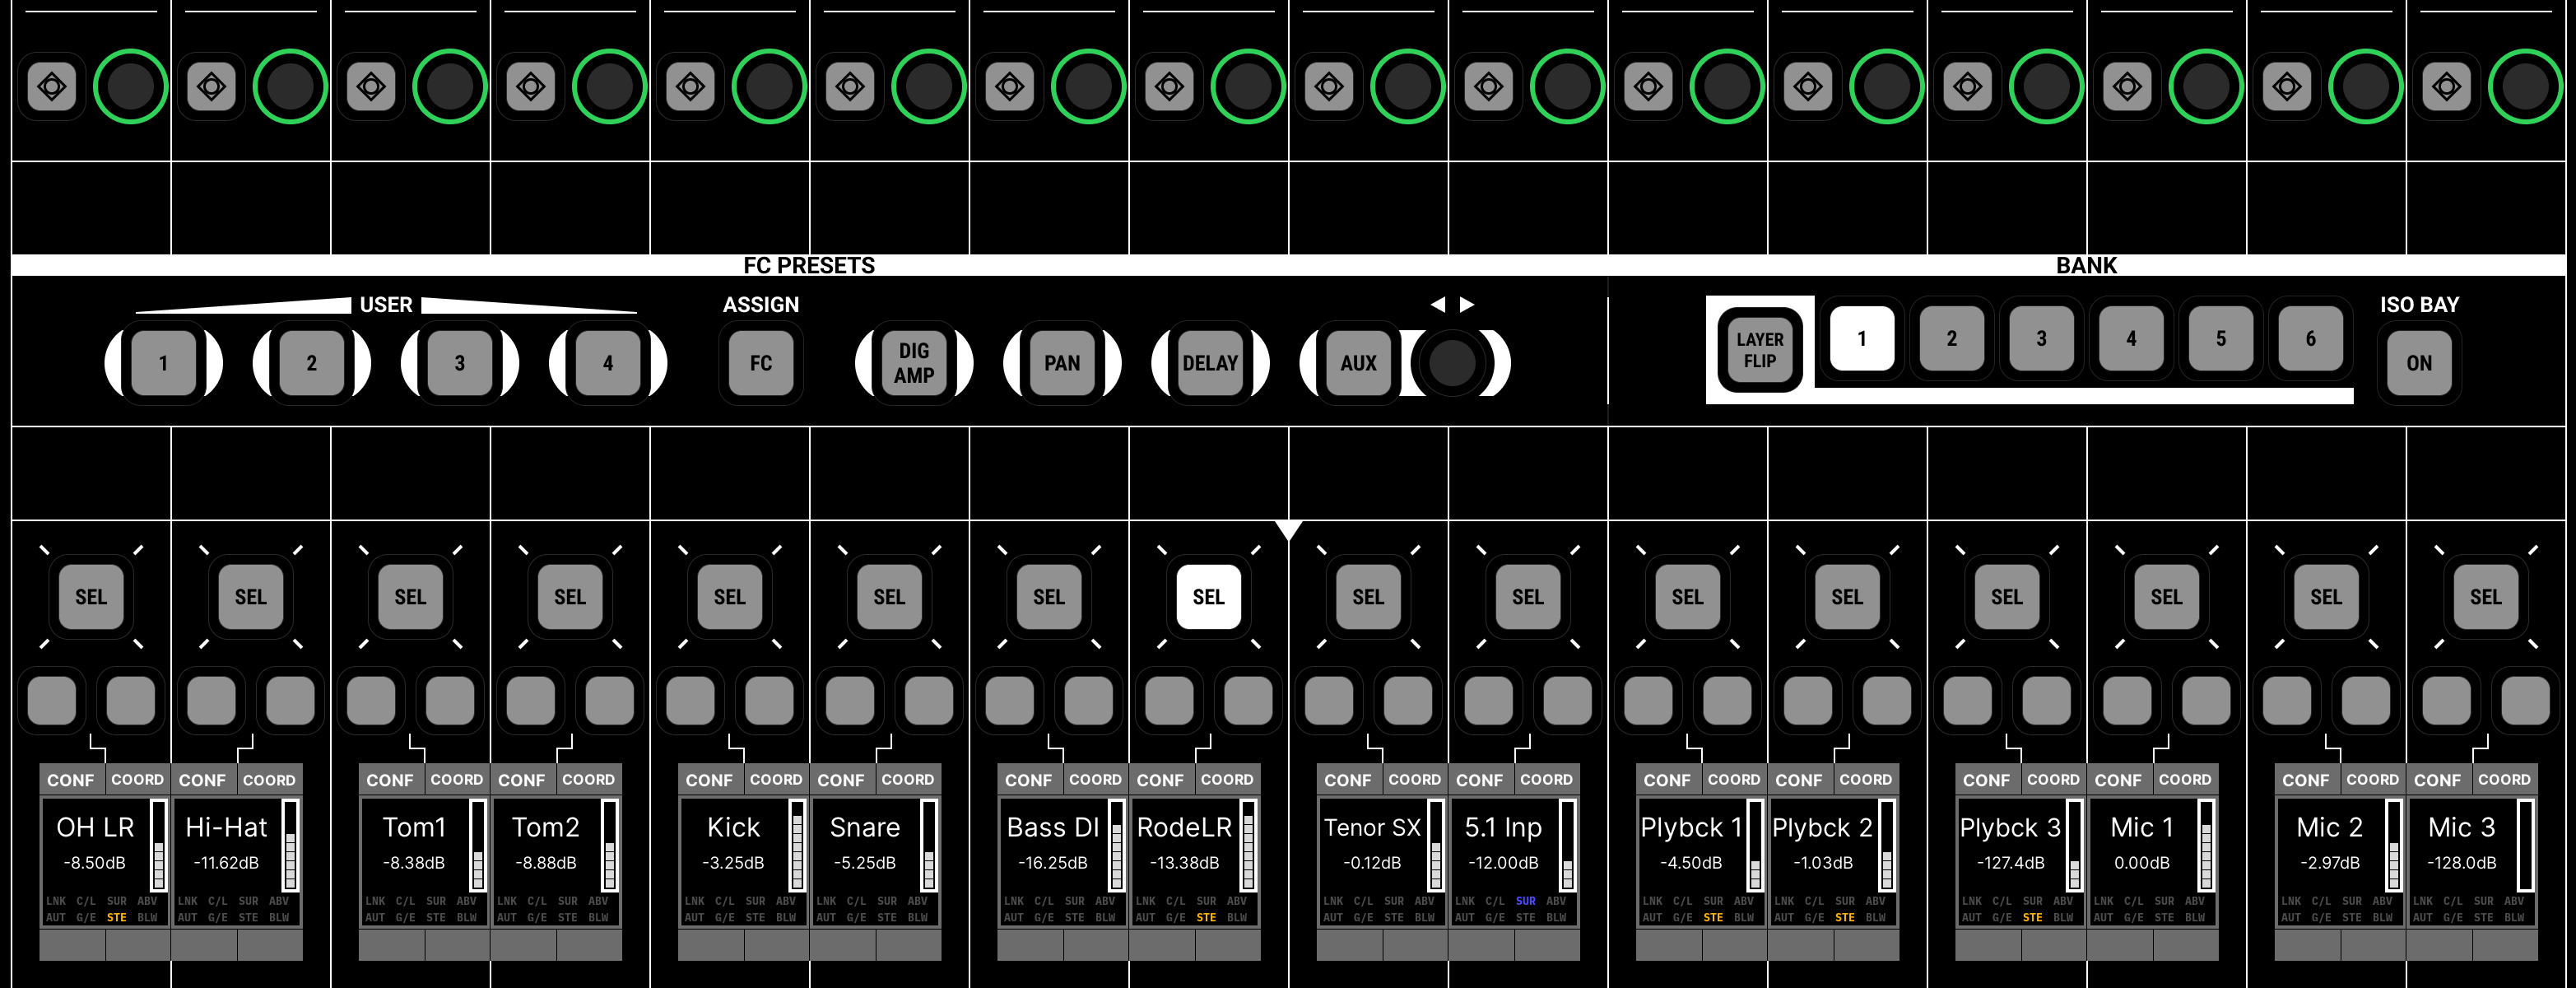
On a single-fader channel bay, every fader strip includes one assignable Free Control (FC). In the example below, the Free Controls are assigned to the same parameter on every channel: Aux 1 send level.

The controls are color-coded, making it easy to distinguish between the parameter types: EQ (blue), dynamics (magenta), aux sends (green), etc. The current function and value are shown on the Channel Display.
The default assignments can be changed using the COPY/RESET AUDIO panel (as described here). At any time, you can override the default assignments by recalling an FC PRESET. These change the function of all Free Controls within the channel bay. When you deselect the FC PRESET, the controls return to their default assignments.
Each Free Control includes a touch-sensitive rotary control and push-button. The button function depends on the assigned parameter (e.g. Aux send on/off). The rotary control operates in the same way as other rotary controls on the surface:
- Turn for fine adjustment OR push down and turn for coarse adjustment*.
- Tap down twice in quick succession to reset the parameter value.
*The fine/course tuning behaviour can be reversed, globally, using the "Console → Potentiometer → Invert Pot Fine/Course Tuning" option (in the System Settings display).
The Central Control Section

Operation
1. Check the channel in access by looking at the channel name in the title bar of the Central GUI.
The selected channel can be changed, at any time, by pressing a different fader SEL button or using the Access/Assign panel.
2. Adjust a parameter using the rotary encoders and push-buttons.
The rotary encoders use Lawo's LUX color-coding for easy identification: red for gain; yellow for balance/pan; magenta for dynamics; blue for EQ; cyan for delay; and green for aux sends.
If a parameter or module is not supported, then its controls are black (unlit). For example, there is no stereo IMAGE section for a mono channel.
3. When you touch a rotary control on the Central Control Section, a graphical overview appears on the Central GUI. This shows the DSP module that you are working on.
The timeout period, before the pop-up window closes, can be adjusted using the "GUI → Module Popup Window Timeout" option (in the System Settings display).
For a more permanent overview of the complete channel, open the Main Display.
4. All of the rotary controls support the following features:
- Turn for fine adjustment OR push down and turn for coarse adjustment*.
- Tap down twice in quick succession to reset the parameter value.
*The fine/course tuning can be reversed, globally, using the "Console → Potentiometer → Invert Pot Fine/Course Tuning" option (in the System Settings display).
Control Areas
The physical controls are divided into the following areas:
- INPUT - input gain, microphone preamplifier settings, stereo input balance/controls and tone to channel.
- DIG AMP - digital amplifier (gain); DELAY - channel delay; INSERT - insert return on/off and send level.
- DIROUT - channel direct output level and mute.
- IMAGE - width and positioning for a stereo channel.
- DYNAMICS - independent GATE, EXPANDER, COMPRESSOR and LIMITER.
- EQUALIZER - 4-band equaliser (EQ) plus 2-band filters (FILTER) and sidechain filters (SCF) for the gate or compressor.
- CHANNEL - other channel parameters including MUTE and FADER level.
- AUX SENDS - aux send levels, on/off and pickup points; AFV - Audio Follow Video parameters.
- PANNING - multi-channel panning onto the channel's mix bus outputs.
- PARAM. / FADER CTRL - the display on this panel shows the selected parameter during operations such as a copy or reset.
Note that the following modules and parameters are only available from the Central GUI's Main Display:
- De-Esser - de-essing or de-boom.
- AMBIT - upmix and spatial processing.
- 3D Pan - the 3D panning tool.
Module Selections (SEL)
There is an individual SEL button (for each module) and a SEL ALL button (at the bottom of the CHANNEL area).
During normal operation, these buttons have no function. They are used whenever you need to select a DSP module - for example, to copy or reset a parameter, link modules between channels, select modules for snapshot crossfades, etc.
The Main Display
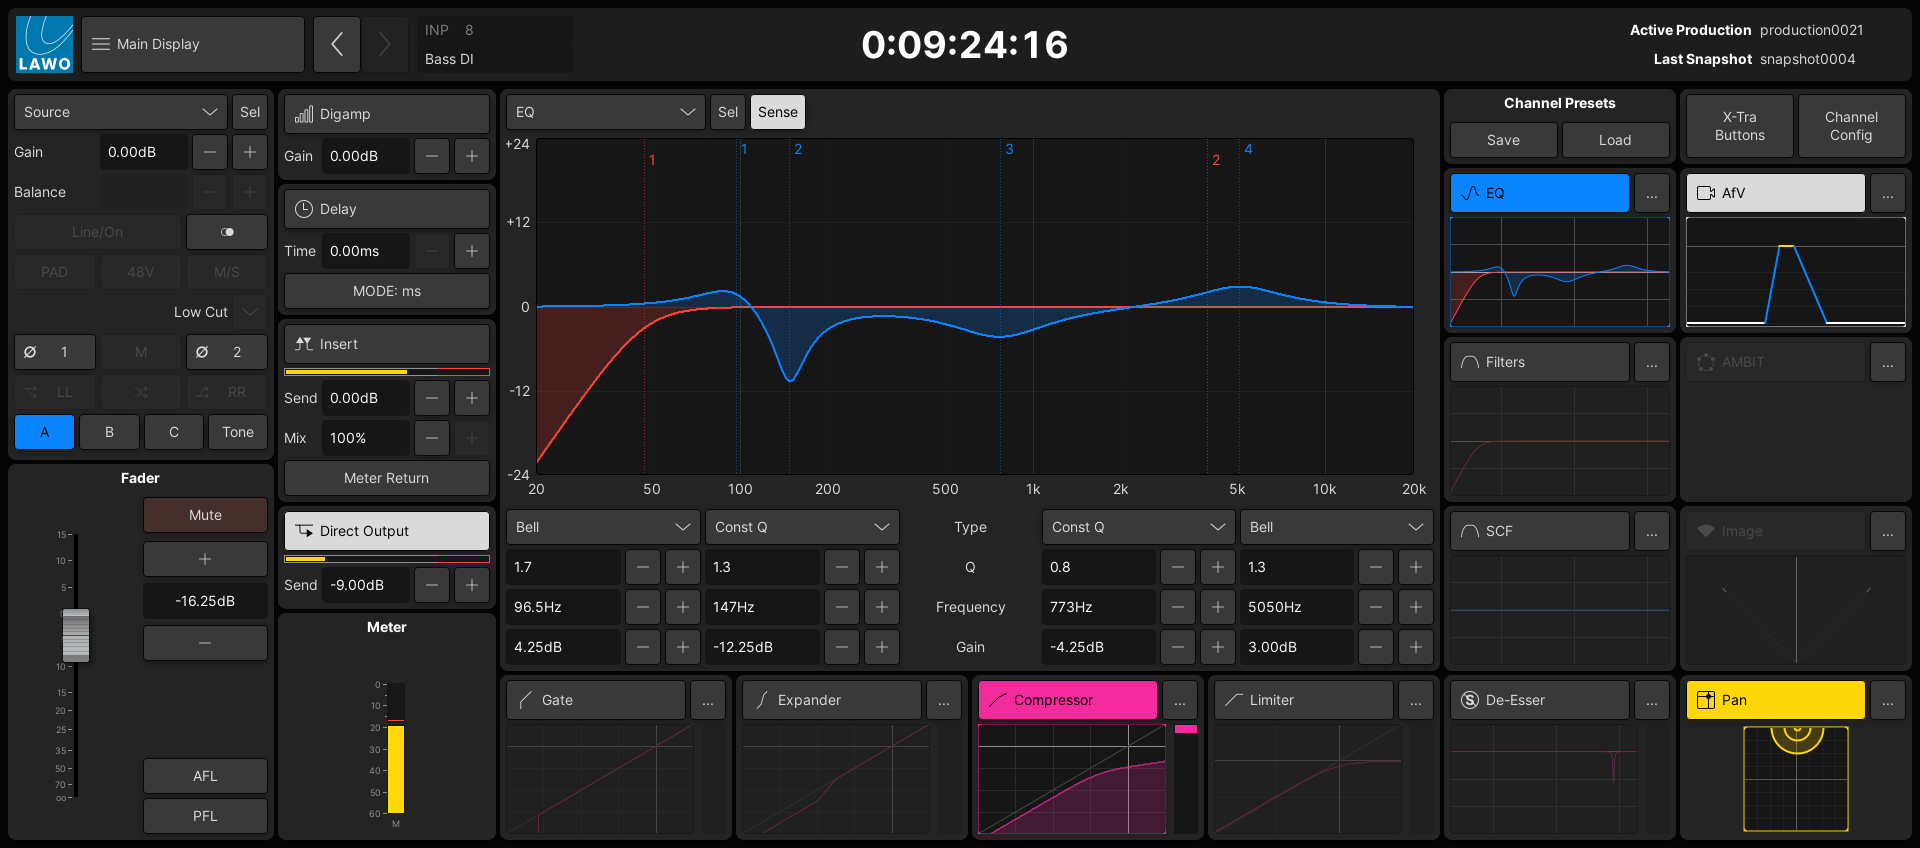
The Main Display shows all parameters for the channel in access. It provides a great overview of the selected channel and can be used to make changes using the touch-screen buttons.
The display includes the same modules as on the Central Control Section plus the following additions that are only available on-screen:
- De-Esser - de-essing or de-boom.
- AMBIT - upmix and spatial processing.
- 3D Pan (in the Panning module) - the 3D panning tool.

1. Open the Main Display on the Central GUI using one of the following methods:
- Press the CHANNEL button on the SCREEN CONTROL panel.
- Select Channel → Main Display from the GUI page menu.
- Press CTRL + 3 on the console keyboard.
2. Check the channel in access by looking at the channel name and label in the GUI headline.
The selected channel can be changed, at any time, by pressing a different fader SEL button or using the Access/Assign panel.
You can use the couple group to select a range of channels.
3. The parameter sections (Source, Fader, Digamp, etc.) are arranged around a large central display area.
For each module, there is a mini graphical display and on/off button. These are color-coded for easy identification: yellow for image/pan; magenta for dynamics; blue for EQ; etc.
If a parameter or module is not supported, then its area is black (unlit). For example, there is no stereo image section for a mono channel.
4. The large central area displays the selected module (e.g. EQ).
- It can be set to update automatically (if Sense is enabled) or always show a specific module (if Sense is disabled).
- In each case, the module is selected using the drop-down menu.
- If Sense is turned on, then the displayed module updates either when you touch a physical control on the Central Control Section or one of the module areas on the Main Display.
5. Any of the on-screen buttons can be touched. For example:
- Press AFL to monitor the channel (after-fader).
- Press Compressor to turn the compressor module on or off.
- Once a module is assigned to the central display area, there are more parameters to adjust. For example:
- Set the EQ band type using the drop-down menus.
- Press the + and - buttons to adjust the Q, Frequency and Gain values.
6. Beside each module's on/off button is the additional options menu (...).
This provides access to the Save and Load buttons (for DSP presets), and the module Sel.
- The DSP presets are described later.
- The module Sel mimics the SEL button on the Central Control Section. It can be used to copy or reset a parameter, link modules between channels, select modules for snapshot crossfades, etc.