mc²36 - Link Groups
Link groups can be used to create permanent groups where every member is a master. You can choose to link (or not link) individual parameters. For example, to link EQ across multiple channels, while keeping fader levels and other parameters independent.
Link Group Conditions
- The system supports an unlimited number of link groups.
- Any number of channels can be assigned to each link group, including channels of a different DSP type: inputs, groups, sums, etc.
- The link can apply to all channel parameters or to individual processing sections – for example, to link EQ sections but not faders.
- Every channel within a link group is a master. For example, moving any of the 8 faders within a link group adjusts the level of all 8 channels; individual offsets are retained. The master/slave behaviour varies depending on the parameter. See Master-Slave Behaviour.
- When working with Link groups, faders are always moving.
- Link group assignments are stored in snapshots and productions.
- A channel can only be assigned to a single link group. However, a channel can be assigned to both a link group and a VCA master.
- Please take care when combining VCAs with other types of group. Offset values can wrap around and result in very loud volumes when adjusting the overall master!
The channels assigned to a link group can be on any Bank or Layer. This allows you to assign one member of the link group to your working Bank/Layer, and have it control other channels on a "hidden" Bank or Layer.
Link Group Controls
The MODULE LINK button (in the centre section) is used to setup the link groups.

Both the MODULE LINK and LINK OFFSET options can be selected from the Central GUI touch-screen (using the Access/Assign 3 side panel page).

Creating a Link Group
The instructions below describe how to create a link group.
1. Select one of the channels you wish to link - either by pressing its fader SEL button or using the Access/Assign panel.
2. Select MODULE LINK (from the centre section or touch-screen).
The fader SEL buttons across the console flash, in green.
3. BEFORE selecting any faders, first select the audio module(s) you wish to link, using the SEL buttons on the Central Control Section.
You can select any audio module using the SEL buttons. You can also link bus assignments by selecting BUS on the COPY/RESET AUDIO panel. See mc²36 - Parameter Select.
4. Now press the fader SEL buttons on the channels you wish to link - the buttons stop flashing and change color from green to red.
The selected audio modules across the selected channels are now linked.
The LNK status indicator lights on the fader strips, and the name or label of the link group is shown on the Channel Display. In the example below, input channels 3 to 6 are part of link group 1.

If the link group assignments are not visible, then check that the Link option is enabled (under "Channel Display → Strip Layout") in the System Settings display. Note that this option affects only what is displayed; link groups are always available.
5. Deselect the MODULE LINK button to complete the operation.
6. Repeat the steps to create additional link groups.
To edit an existing link group:
- Select any channel within the link.
- Press MODULE LINK.
- Use the Central Control Section SEL buttons and/or fader SELs to edit the link group parameters and members.
- Deselect MODULE LINK.
To clear a link group:
- Select any channel within the link.
- Press MODULE LINK.
- Deselect all of the fader SELs within the link group.
- Deselect MODULE LINK - the LNK status indicators (on the fader strips) and LNK group labels (on the Channel Display) should be cleared/unlit.
Working with Link Groups
Any channel within a link group can be used as the master. So, when you adjust a linked parameter, it follows on all of the slaves.
Any offsets which were present when the link was created are retained. To adjust the offsets, there are two possible methods.
Adjusting Offsets (on-the-fly)
The first method can be used for any touch-sensitive control: fader or rotary encoder.
- Hold the first control so that its touch-sense is active – e.g. fader 1.
- While holding fader 1, adjust another control within the link group – e.g. fader 5.
- You are now adjusting the offset position of fader 5 relative to the rest of the link group.
Adjusting Offsets (using LINK OFFSET)
The second method is best if you need to change the offsets for lots of controls.
- Select LINK OFFSET (from the touch-screen). The button flashes to indicate that it is active.
- While LINK OFFSET is active, any link groups are temporarily suspended. This allows you to make adjustments to the individual controls.
- Once you are happy with the new values, deselect LINK OFFSET.
- The link groups now return to their normal "linked" mode of operation.
Important: Please take care of the overall gain structure, especially if you are nesting VCAs, adding a VCA master to a Link group or combining the Couple function with other types of group. Offset values can wrap around and result in large volume changes when adjusting a master, if the gain structure is not properly managed.
Link Group Options
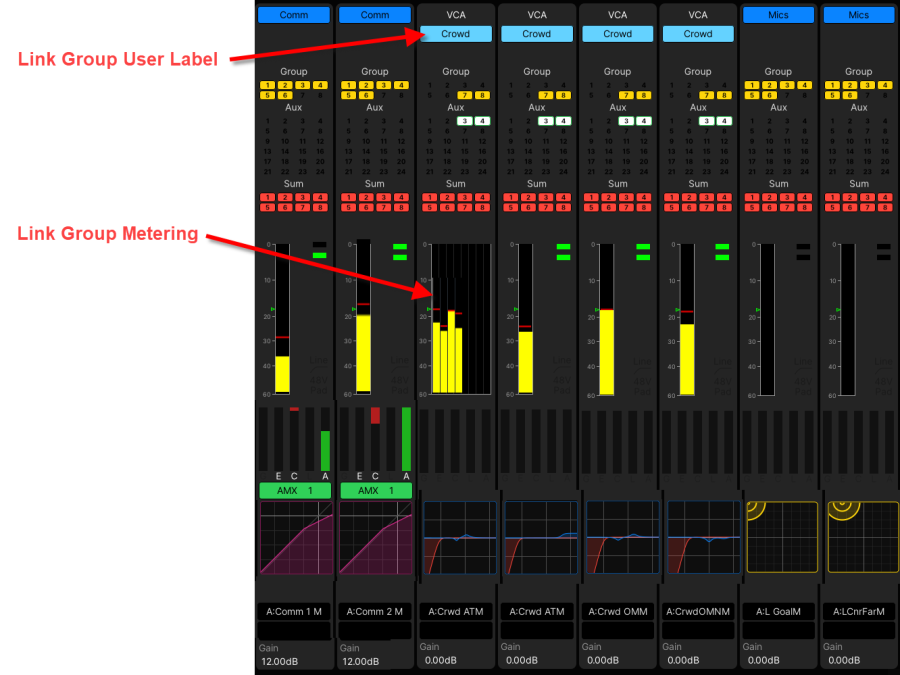
There are three additional options for link groups that are configured from the Channel Config display: a user label, color code and link group metering.

- Press the CHAN button on the SCREEN CONTROL panel.
- Select Channel → Channel Config from the GUI page menu.
- Press CTRL + 3 on the console keyboard.
2. Select one of the linked channels - either by pressing its fader SEL button or using the Access/Assign panel.
3. To edit the user label, click within the link group label field and enter the new label – e.g. Crowd.
4. To assign a background color to the link group label field, use the drop-down menu.
Note that the Link Group number is assigned automatically. Thus, the first set of linked parameters form link group 1, the second link group 2, and so on.
5. To enable multi-channel metering for the selected channel, select the Link metering option.
On this channel, the first 8 linked channels are shown in the peak meter bargraph area on the Channel Display. This allows you to assign one member of the link group to your working Bank/Layer, and move the other members to a "hidden" Bank or Layer.
