vsmStudio - Panel Editor

Introduction
The Panel Editor is the essential tool to configure the virtual panels hosted by vsmPanel, vsmWebPanel and vsmLBP Panels.
This documentation covers the configuration within vsmStudio. For more details on installing and setting up the client applications, see vsmPanel and vsmWebPanel Client (Legacy) - User Manual.
With release vsmStudio 25.2.1, we introduced the "Panel Edit Sync" feature. All panel configuration is now synced runtime across all cluster servers. This new feature also allows for parallel panel configuration from any of the vsmStudio Servers in the cluster.
Please note:
- Editing the same button from different Clients is not advised nor useful. If same button is selected on multiple clients, performed changes to button settings (e.g. layer or attachment) may not visually update automatically on the other Servers and require to re-select the button to see the respective results.
The button configuration also allows to change the displayed Bitmap, but it is also possible via the same dialogue to overwrite the default image that is tied to the attached Source or Target Signal path. Modifying the default image of a Signal Path is not part of the Panel Edit synchronization process and therefore, editing the default image of a Source/ Target via the button configuration will not be synchronized and displayed on the other Servers without push of configuration. That said, unchecking "Use Default Image" in the Edit Bitmap dialogue and then editing the image modifies the button's image only, and this action will synchronize accordingly across the cluster.
- The specific configuration of "Reference Source" and "Reference Target" buttons, although accessed via the button properties dialogue, is not included in the Panel Editing synchronization process and requires a push of configuration.
Configuration tools
Visibility layers
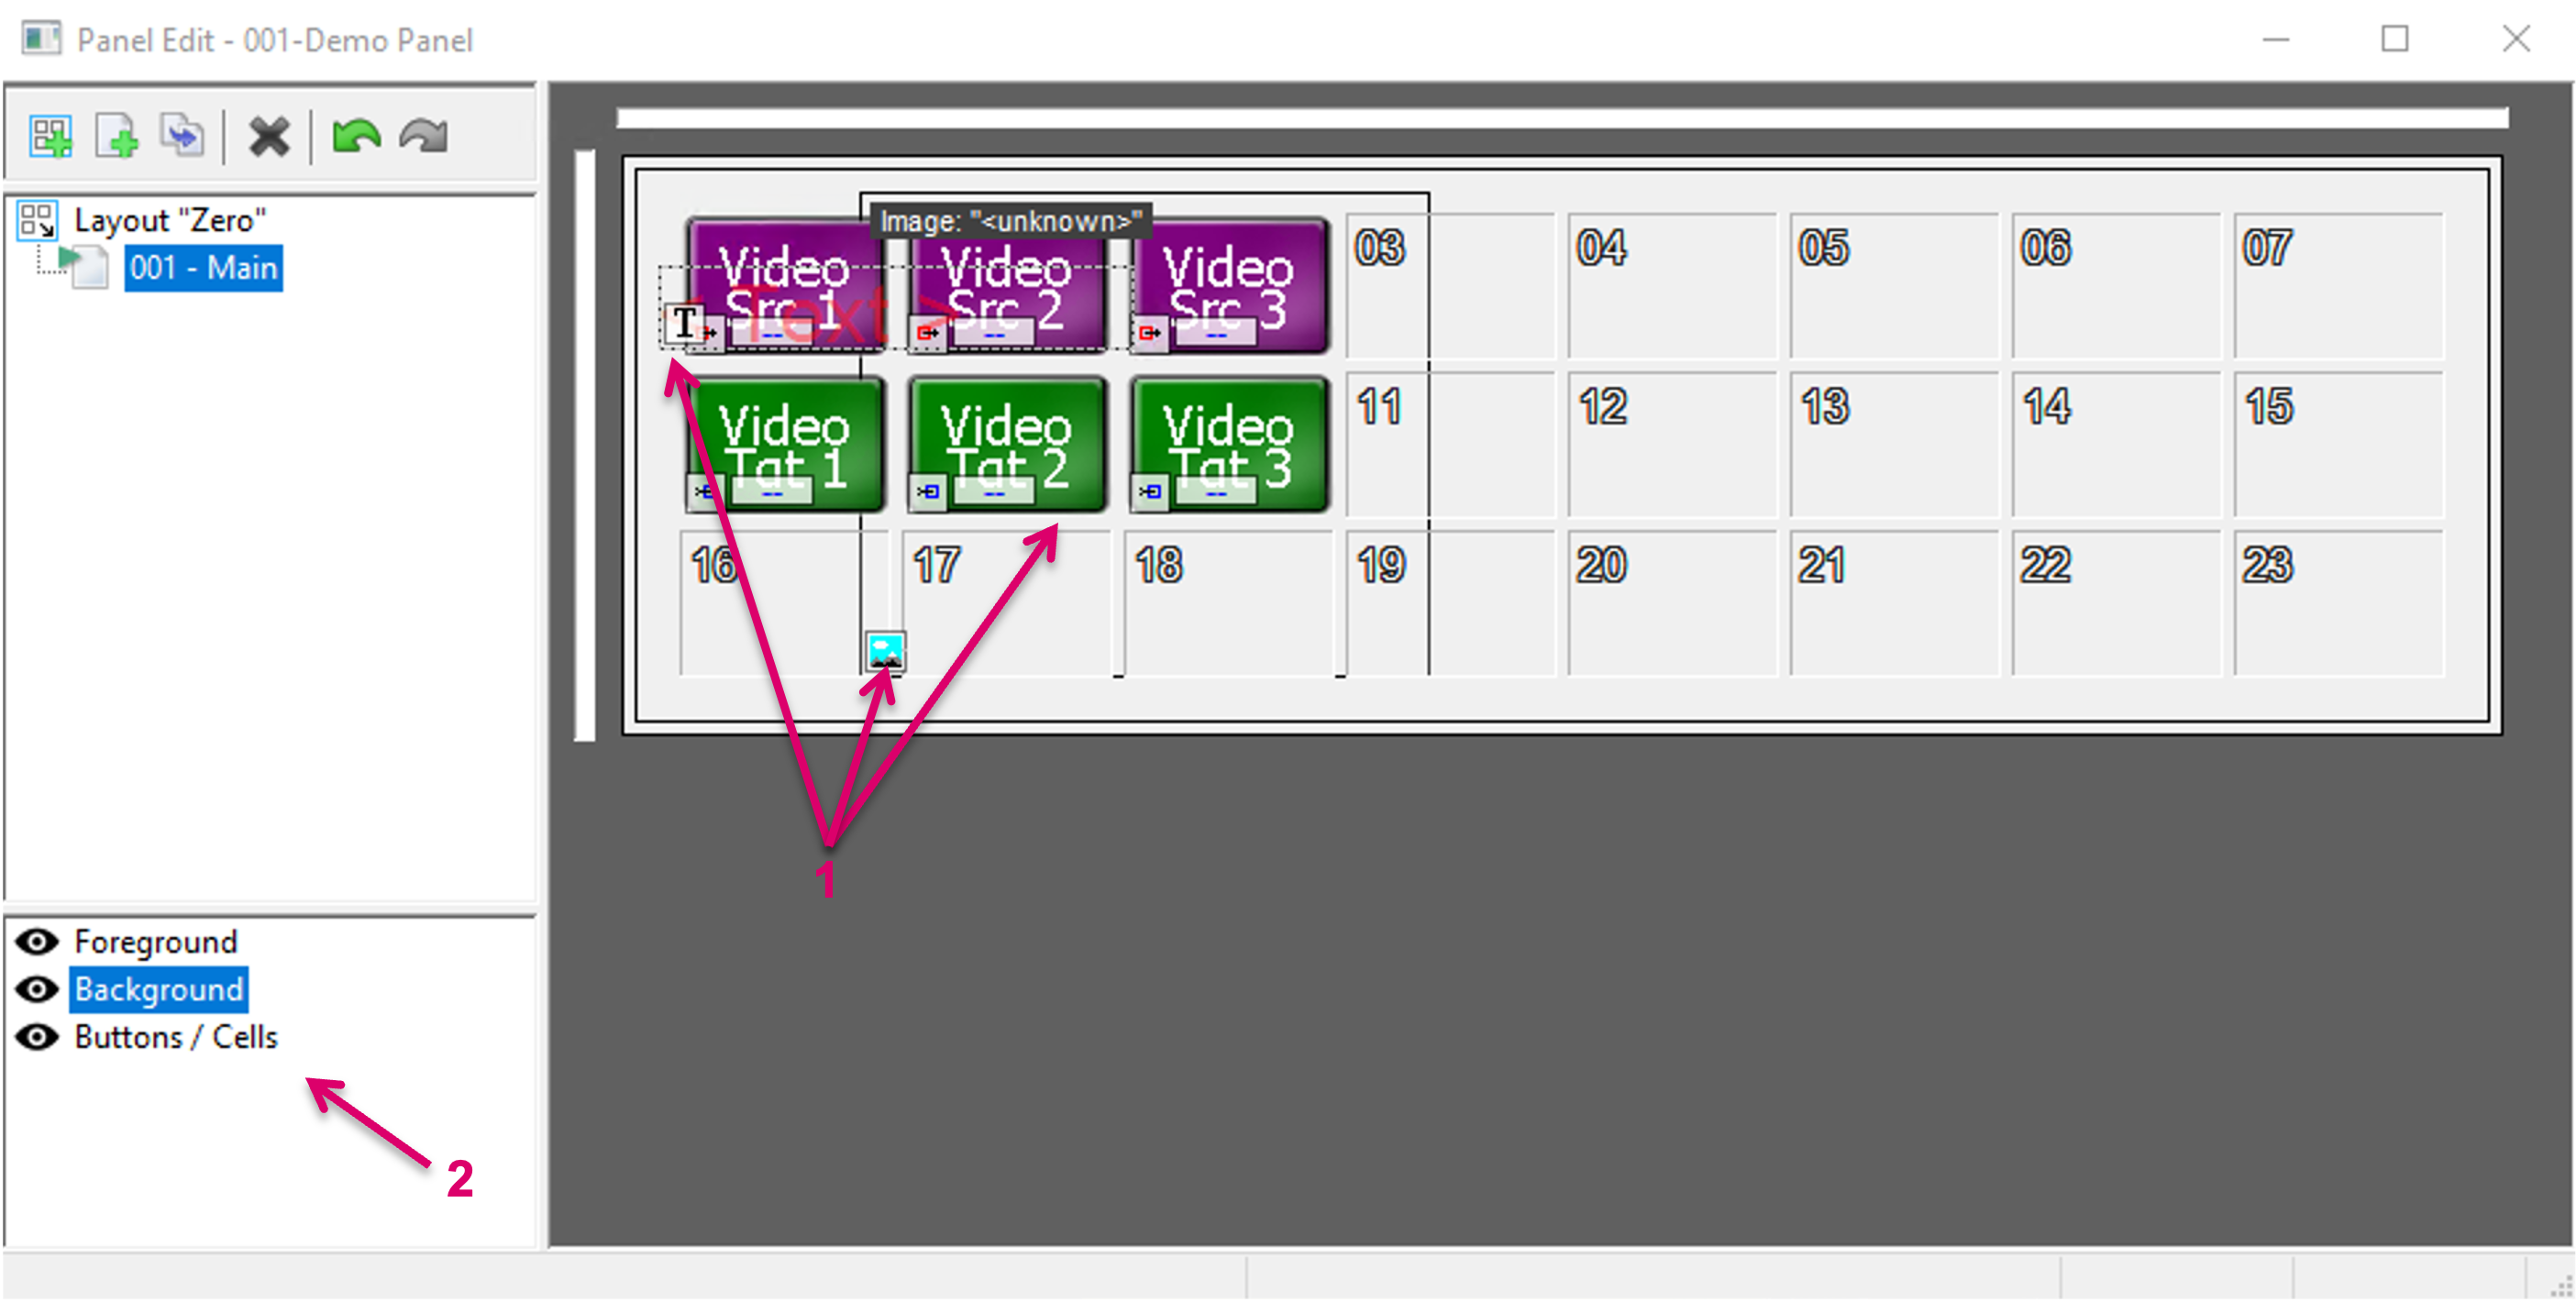
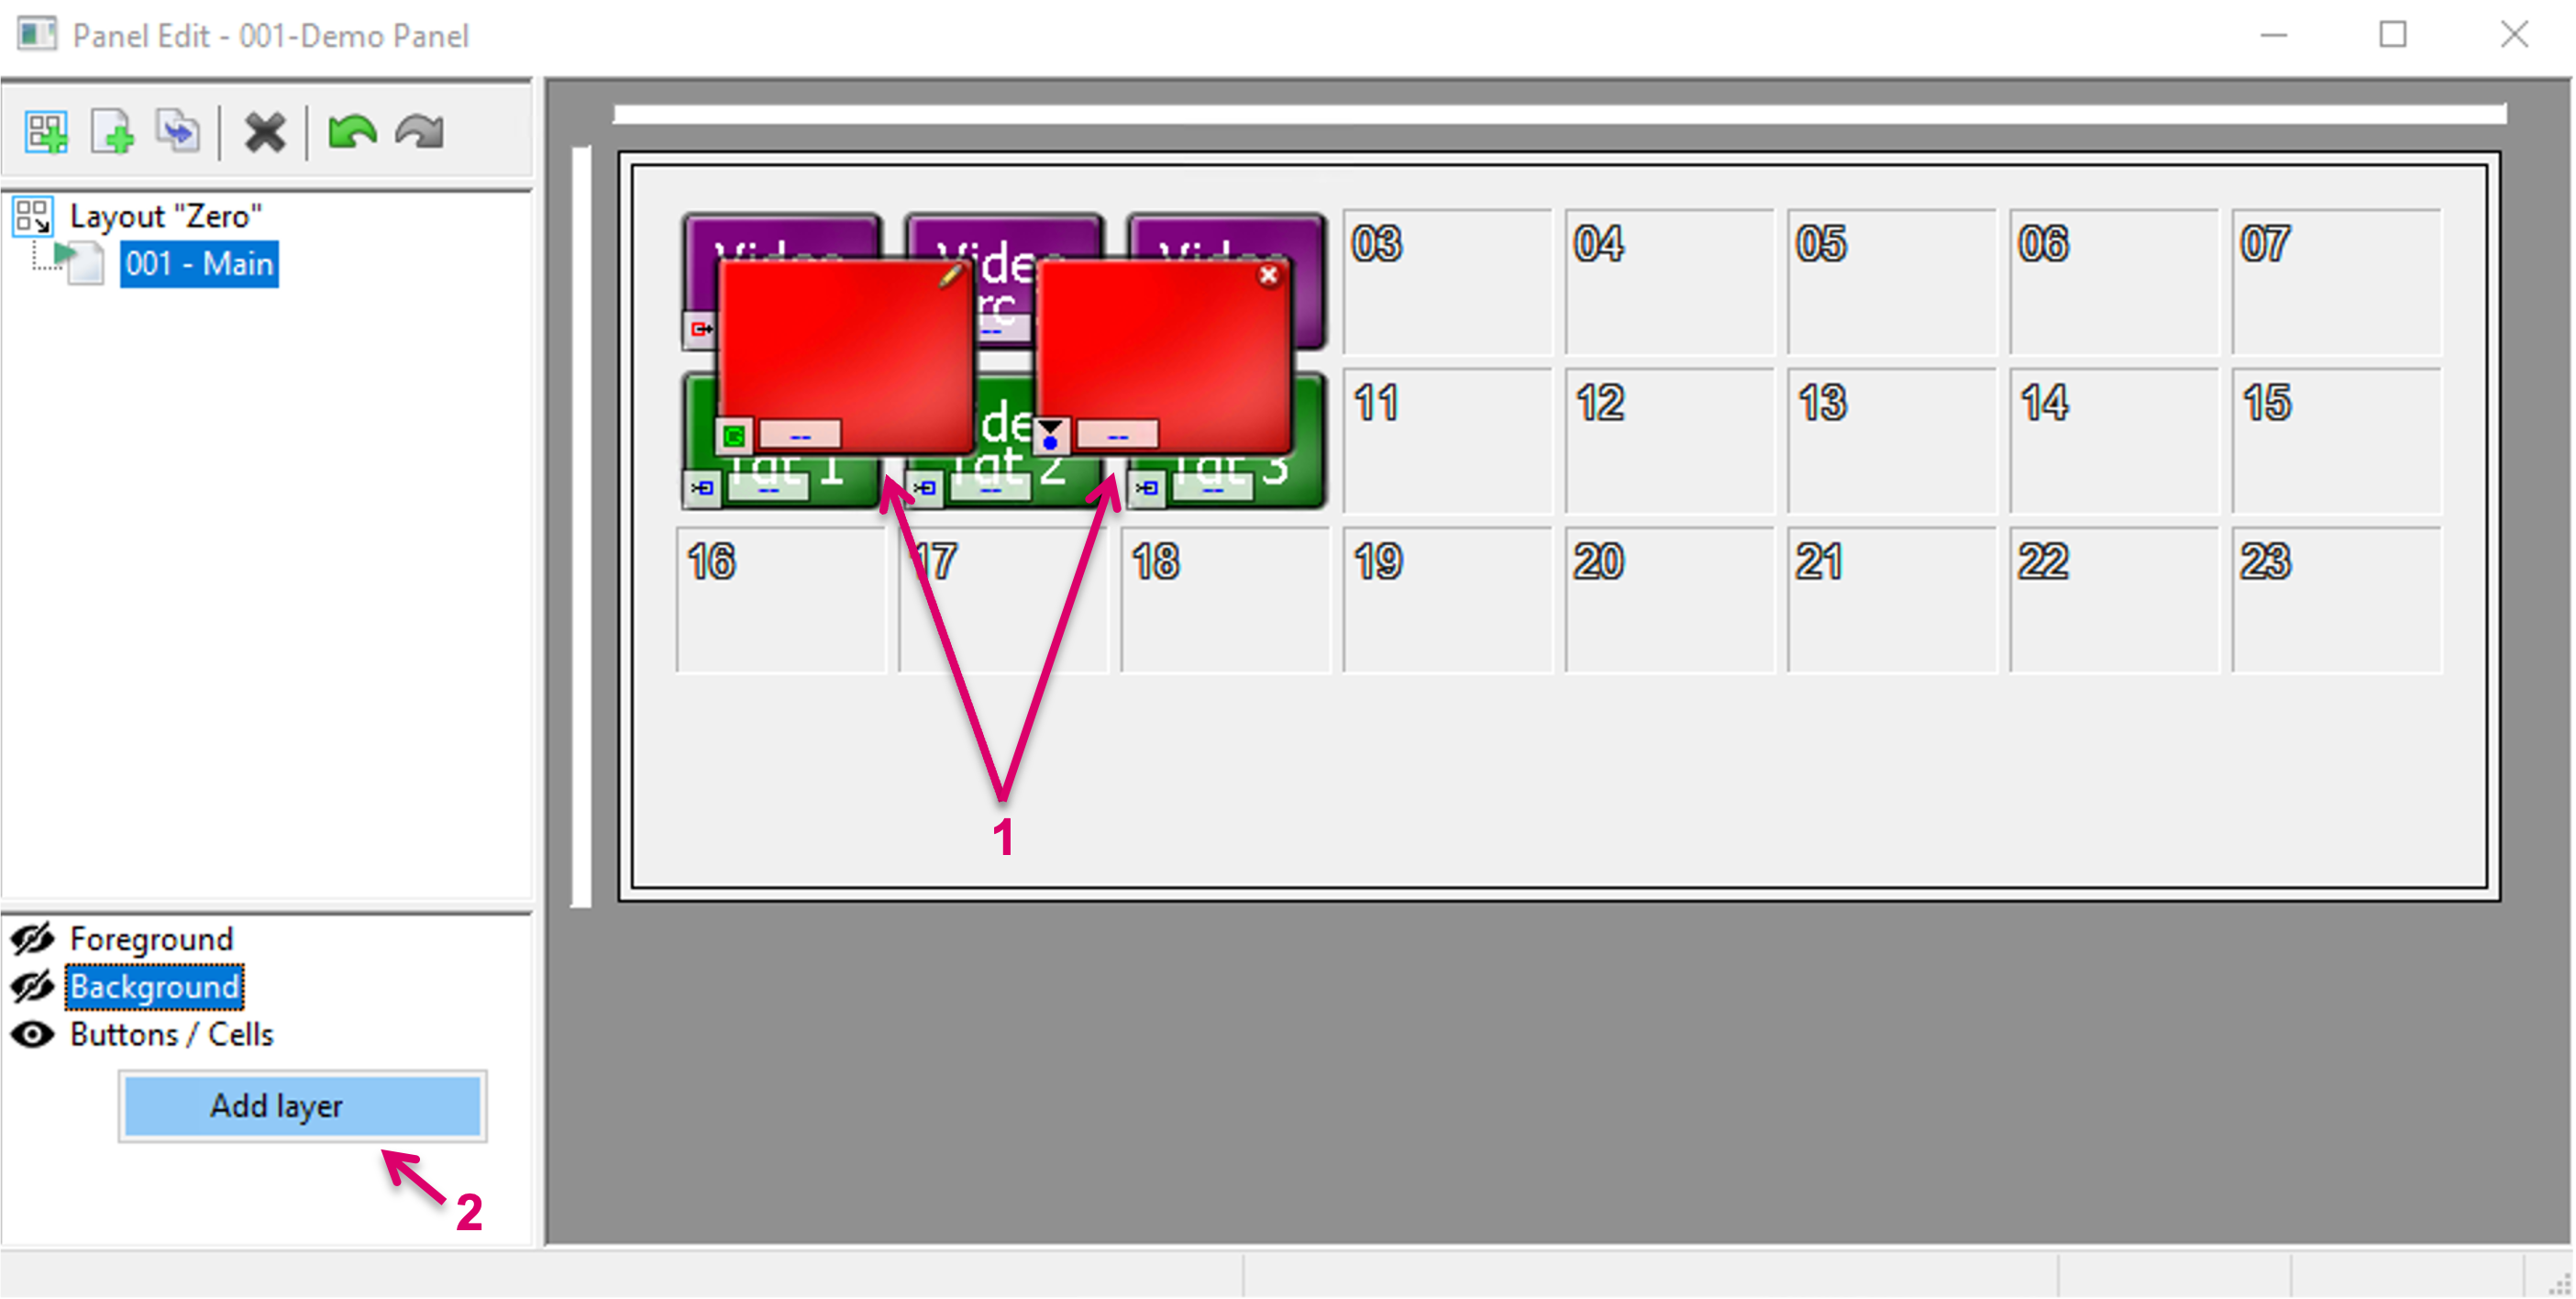
Depending on the desired panel UI design and workflow, Panel layouts can get very complex and may require to stack multiple buttons or page items on top of each other (1). Visibility layers (2) are intended to support this scenario by allowing to hide or show specific buttons and/or page items in the editing process.
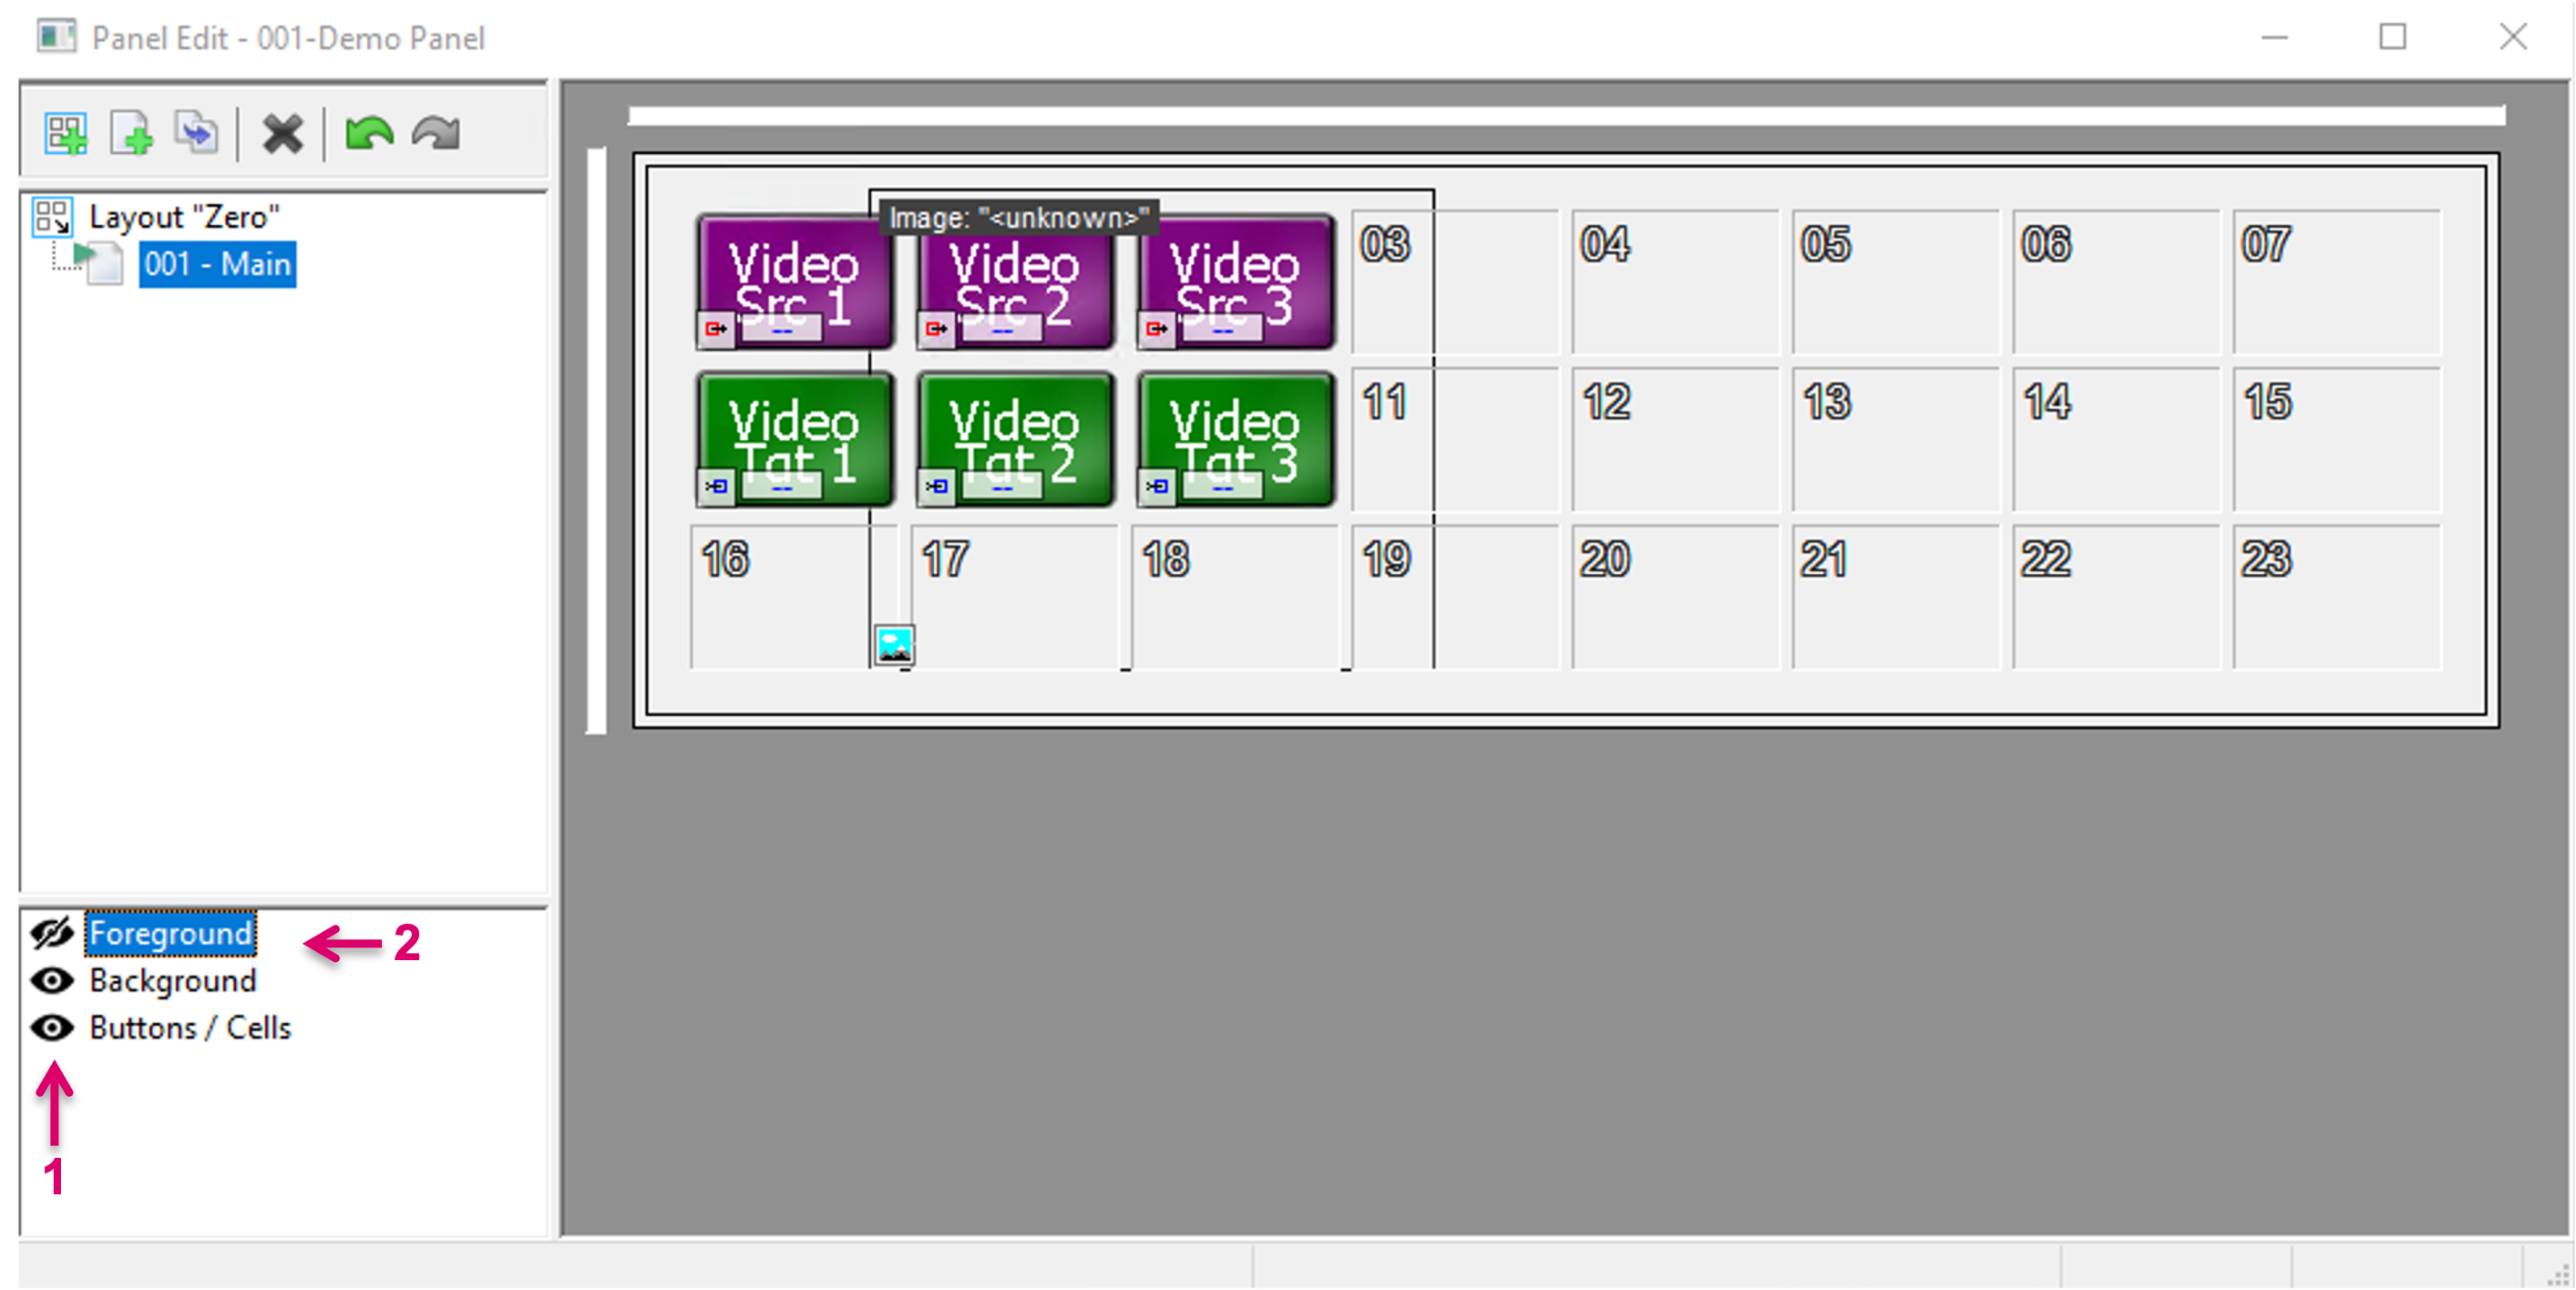
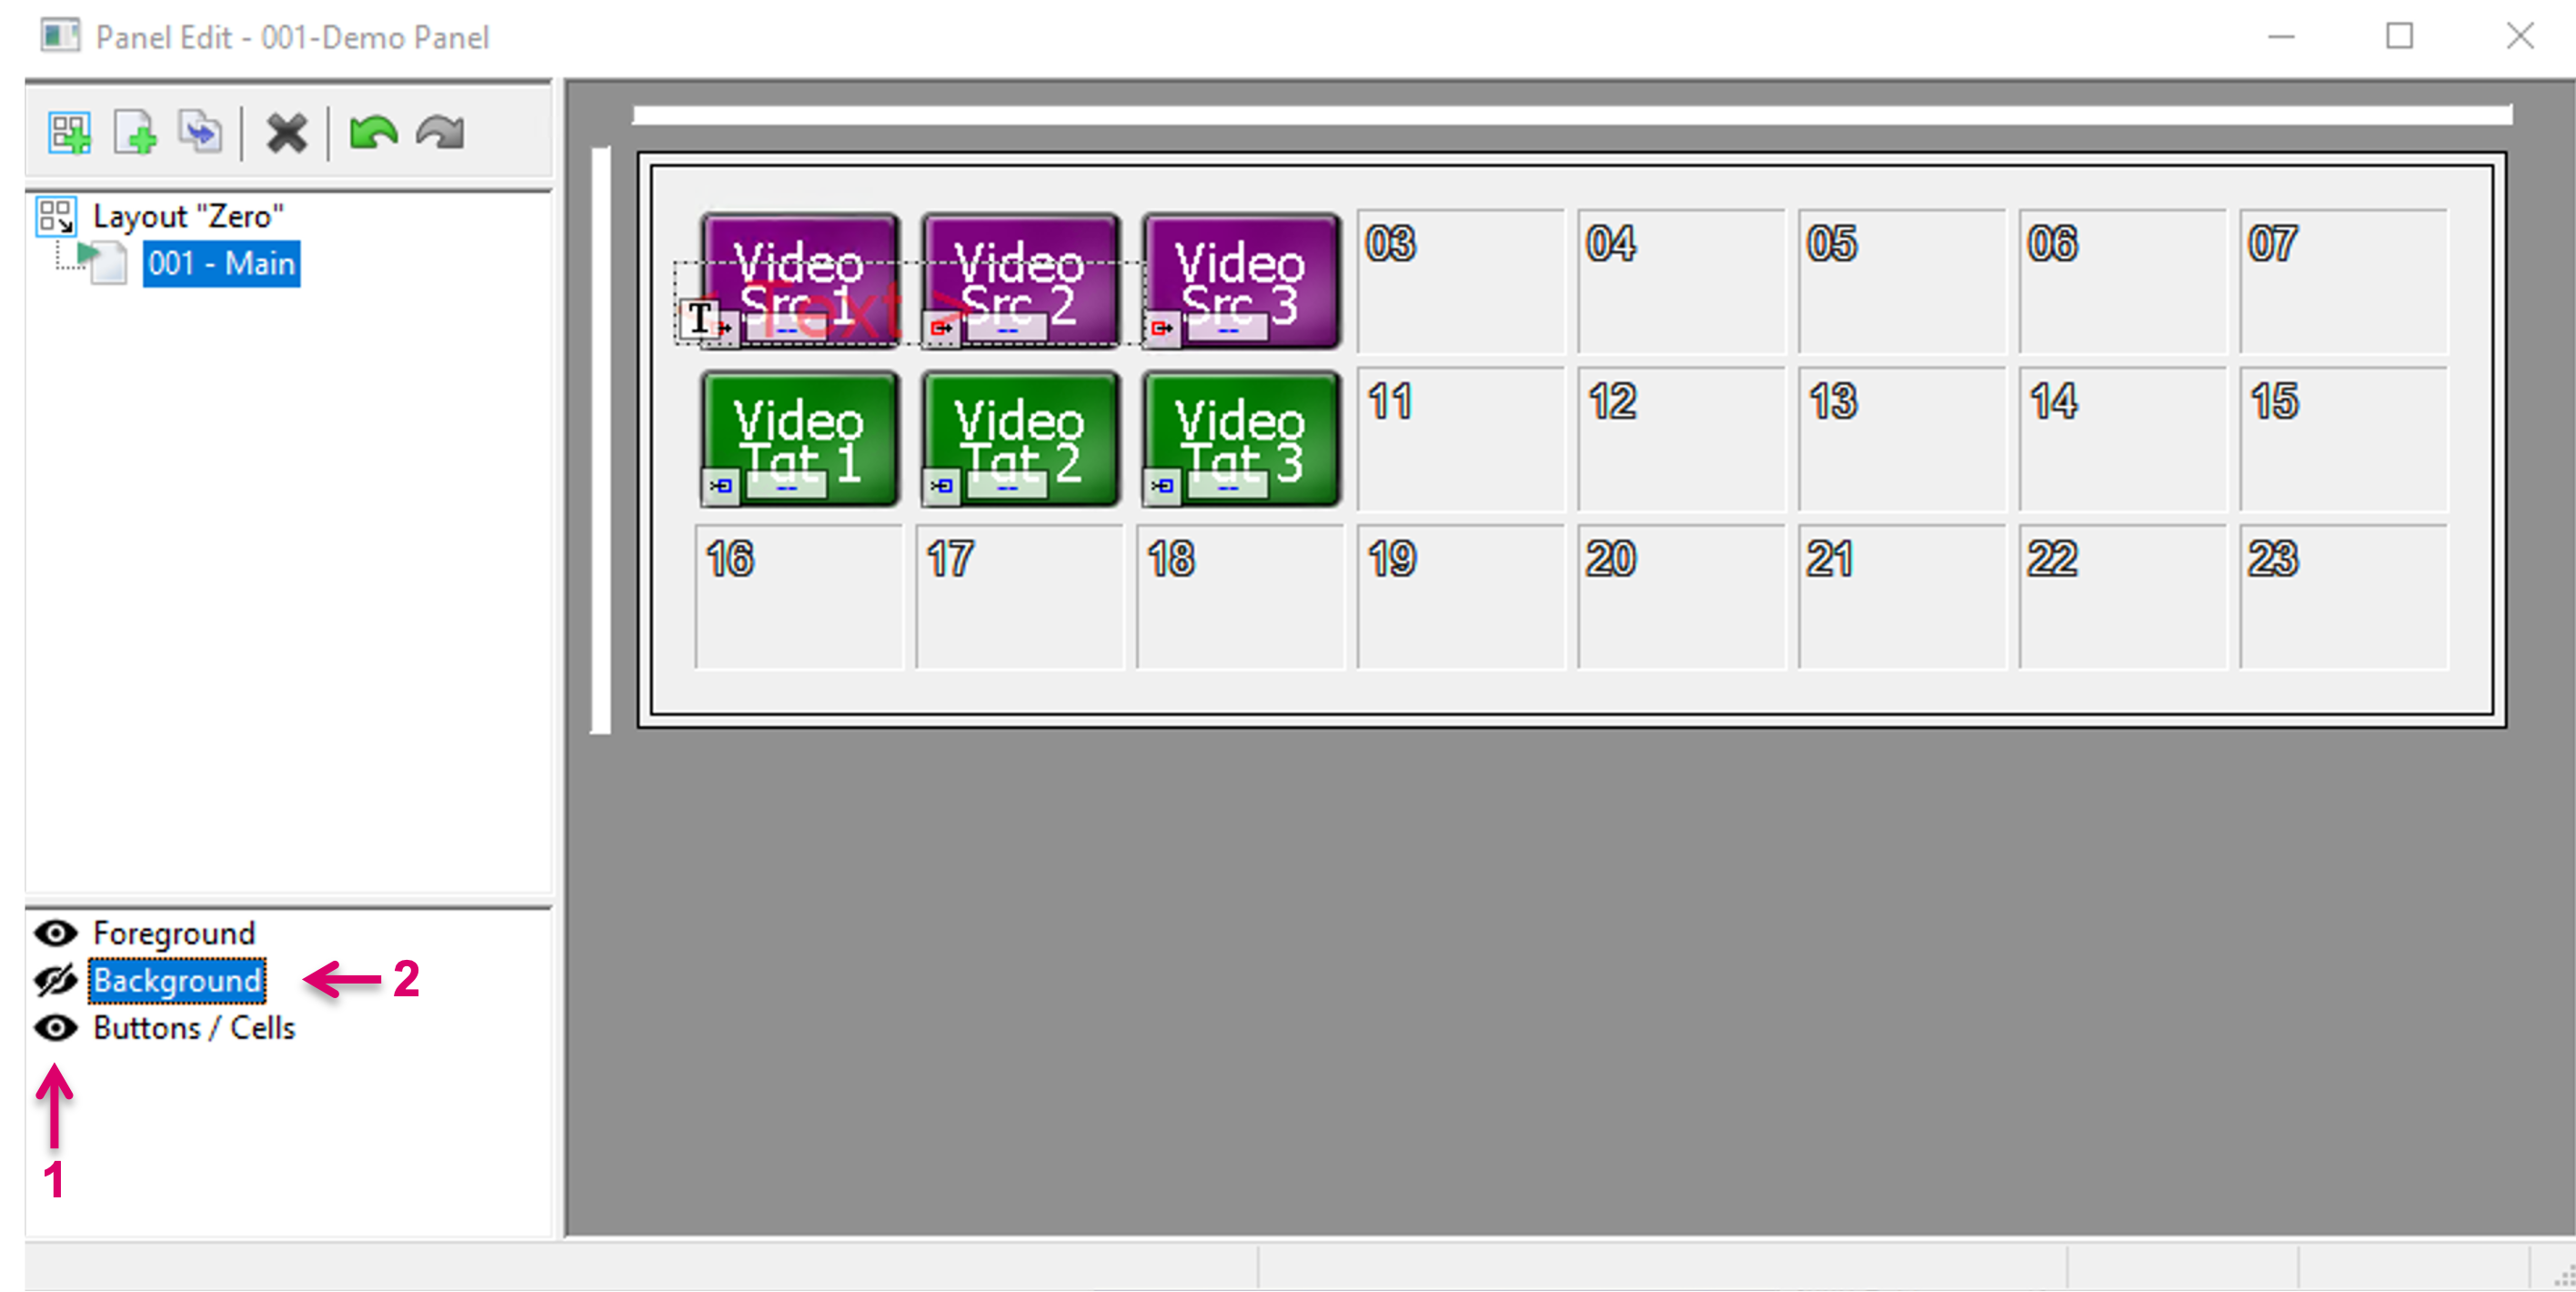
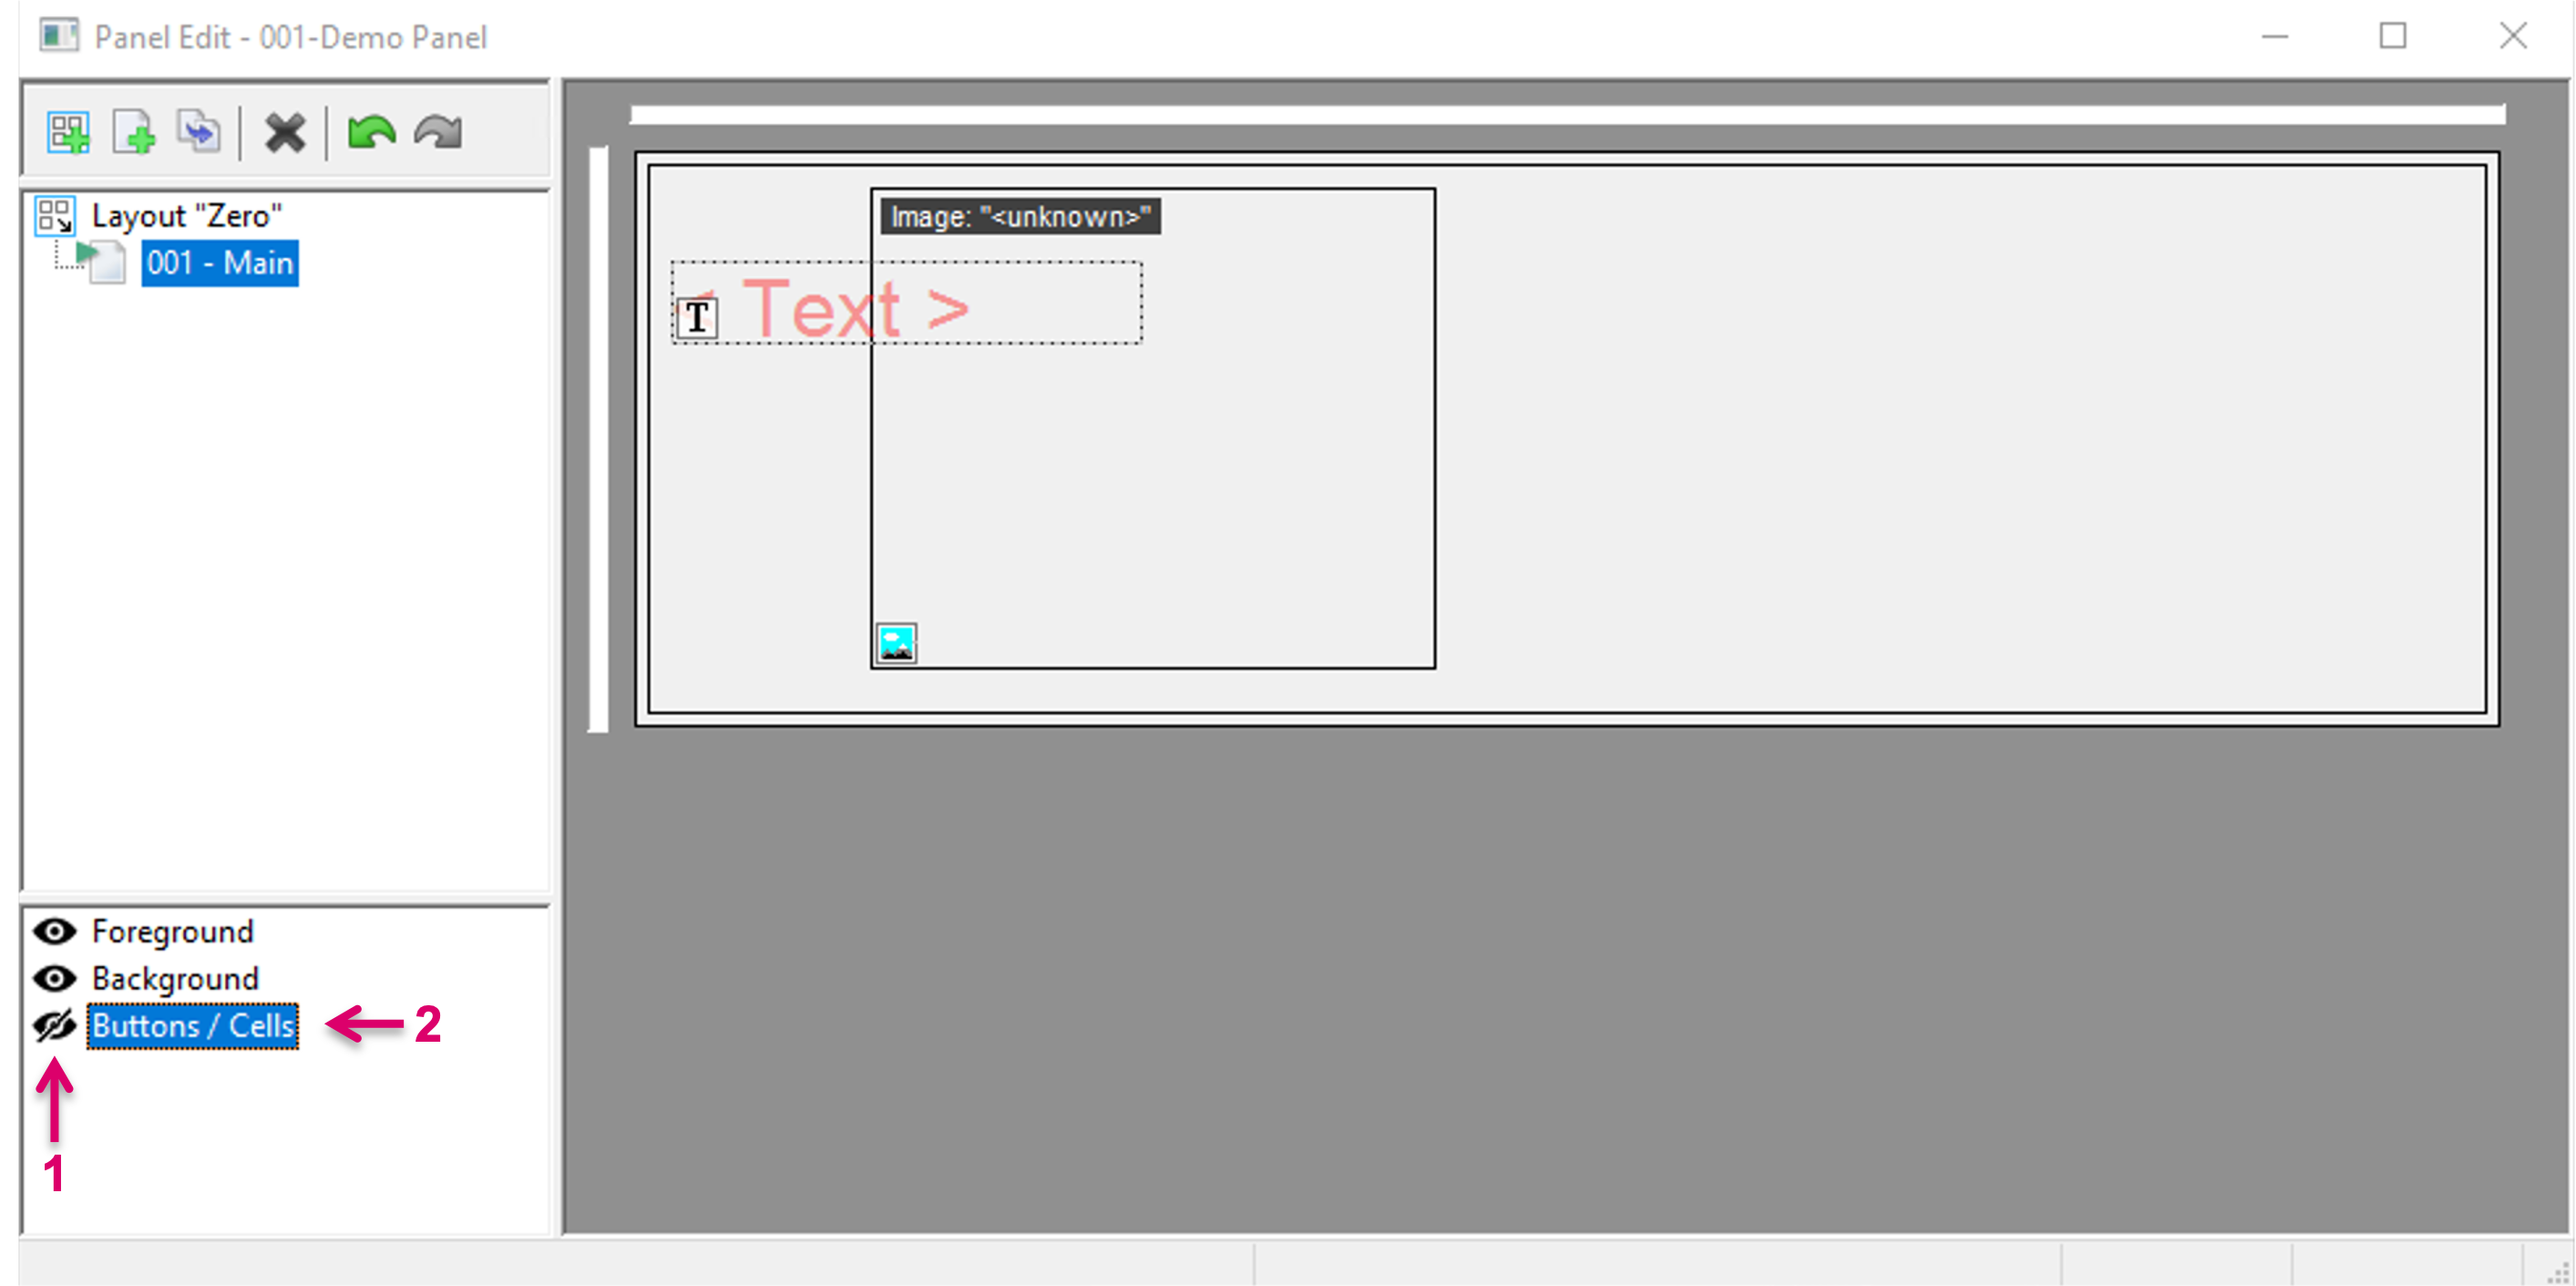
Three default layers are available from the start. By click on the little eye icon in front of each layer (1), items in Foreground (e.g., Clock, SignalList, Storage, Views or Alarms), Background (TextBox and Image) or Buttons/ Cells (2) can be hidden or shown.
 .
. 
In addition to the default layers, it is possible to create custom Layers. This may be required if buttons/ cells are stacked on top of each other (1) and therefore only specific buttons shall be temporarily hidden. To add a custom layer, just right-click into the layer section and select Add layer (2).
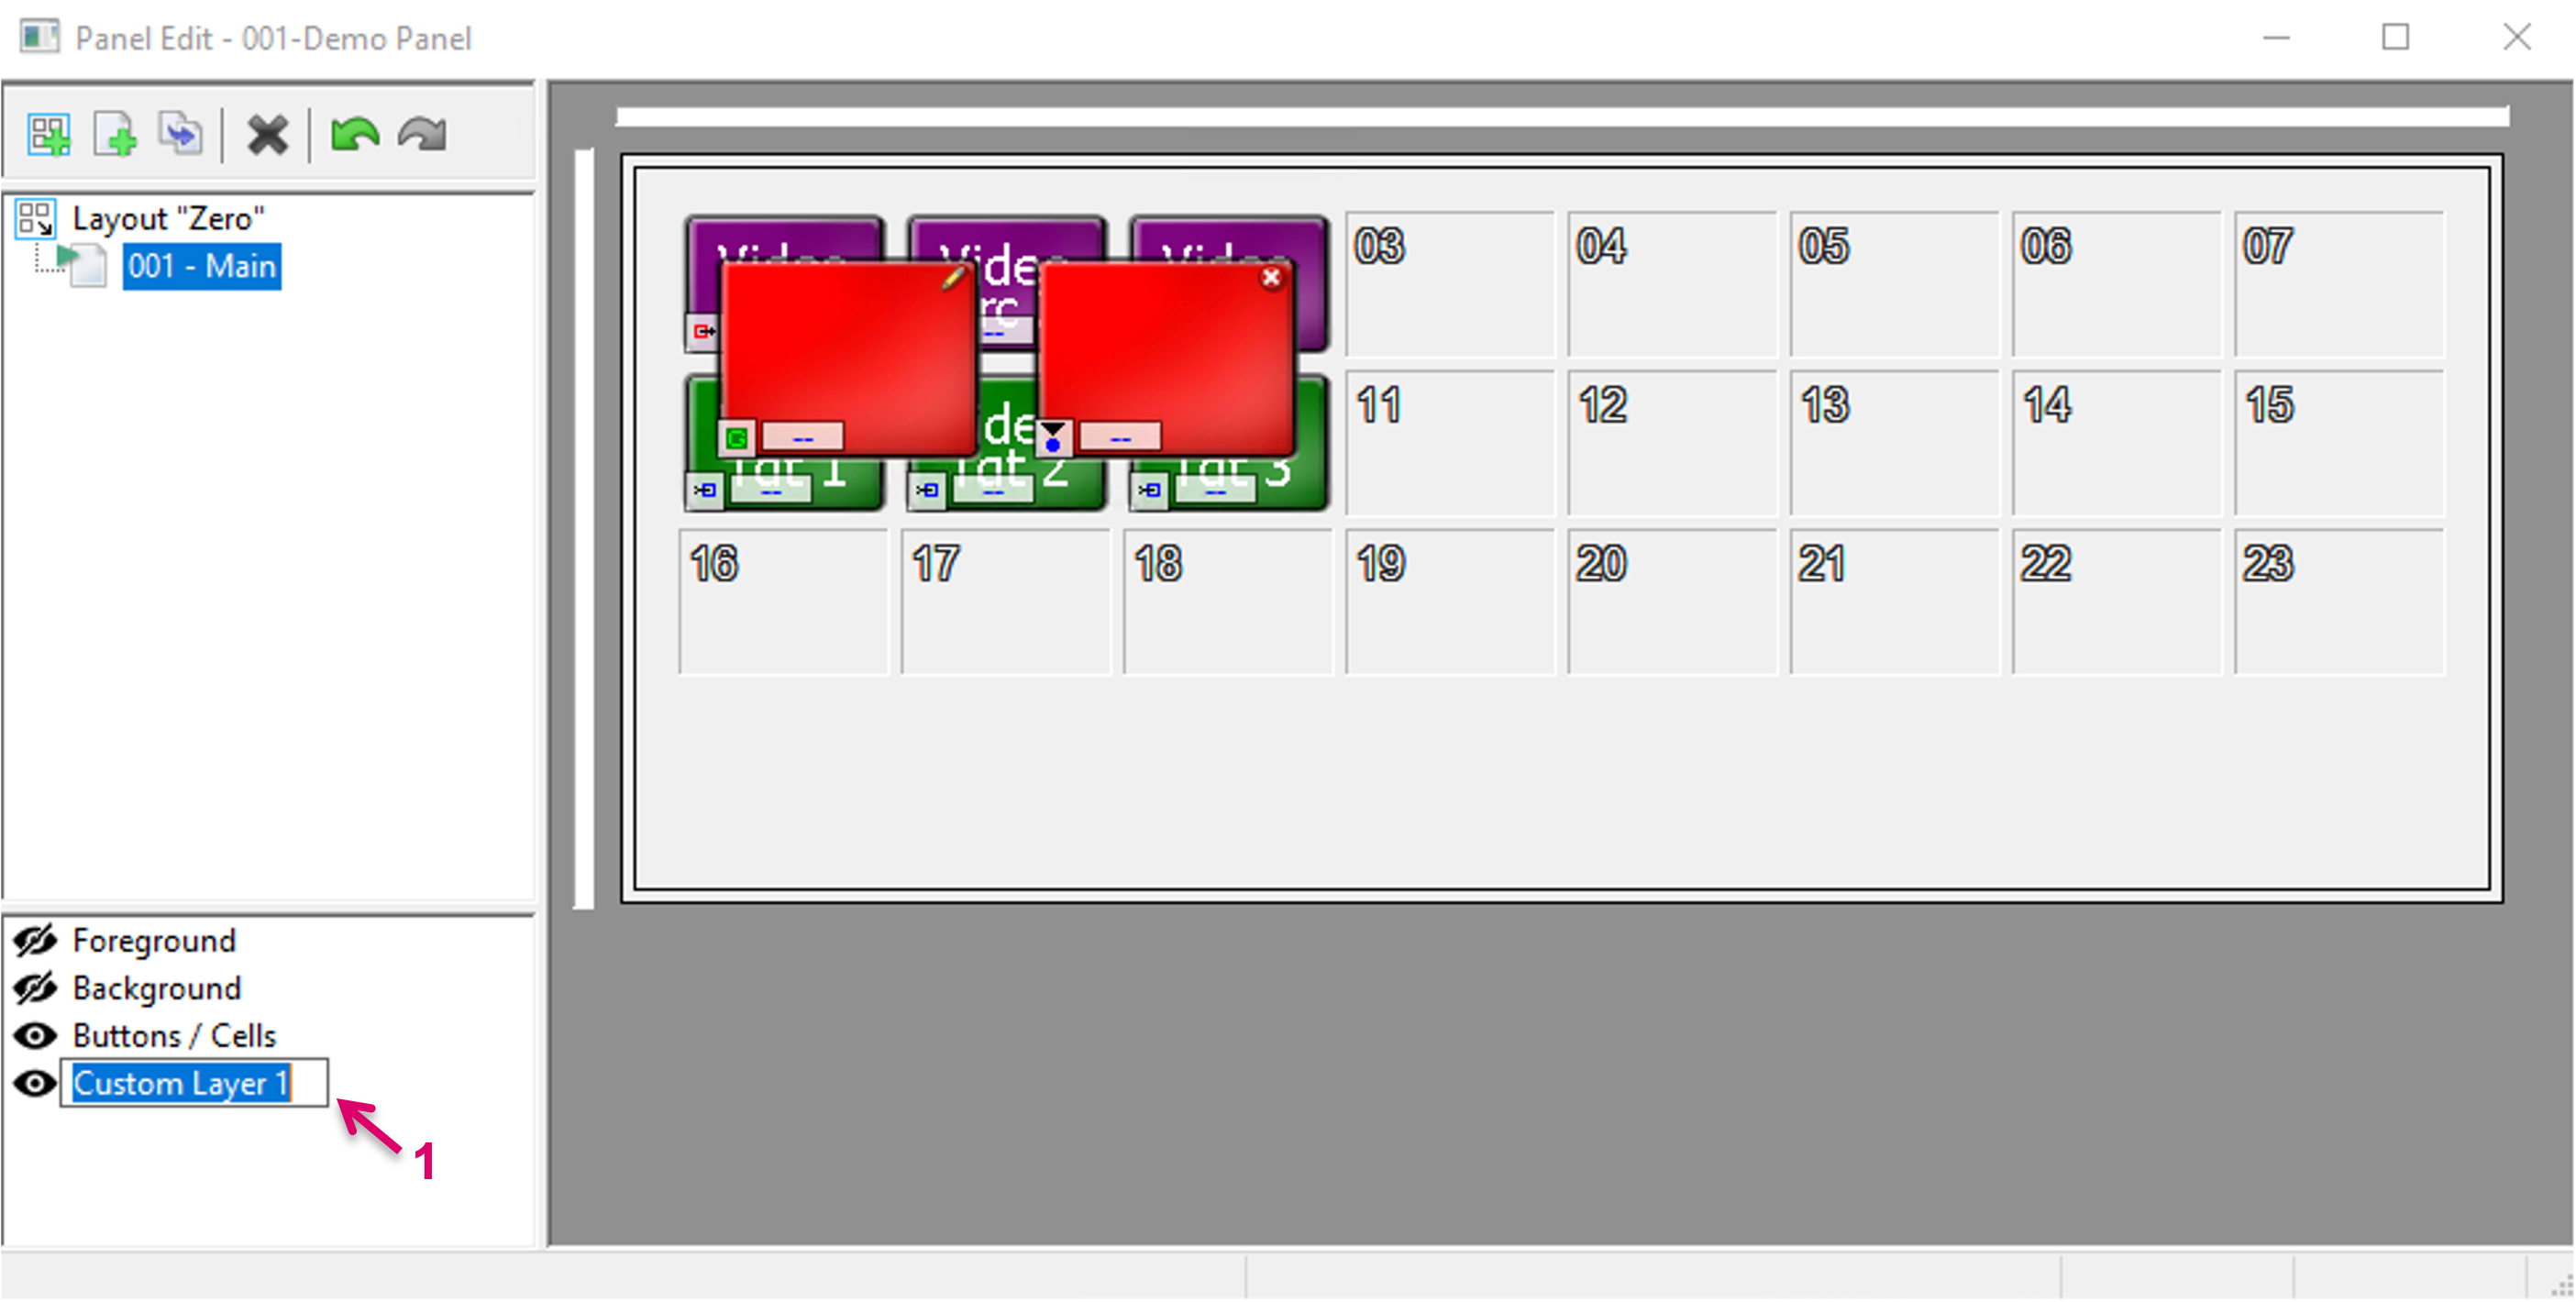
A Custom Layer is created and can be renamed. Choosing a more descriptive name might be applicable.
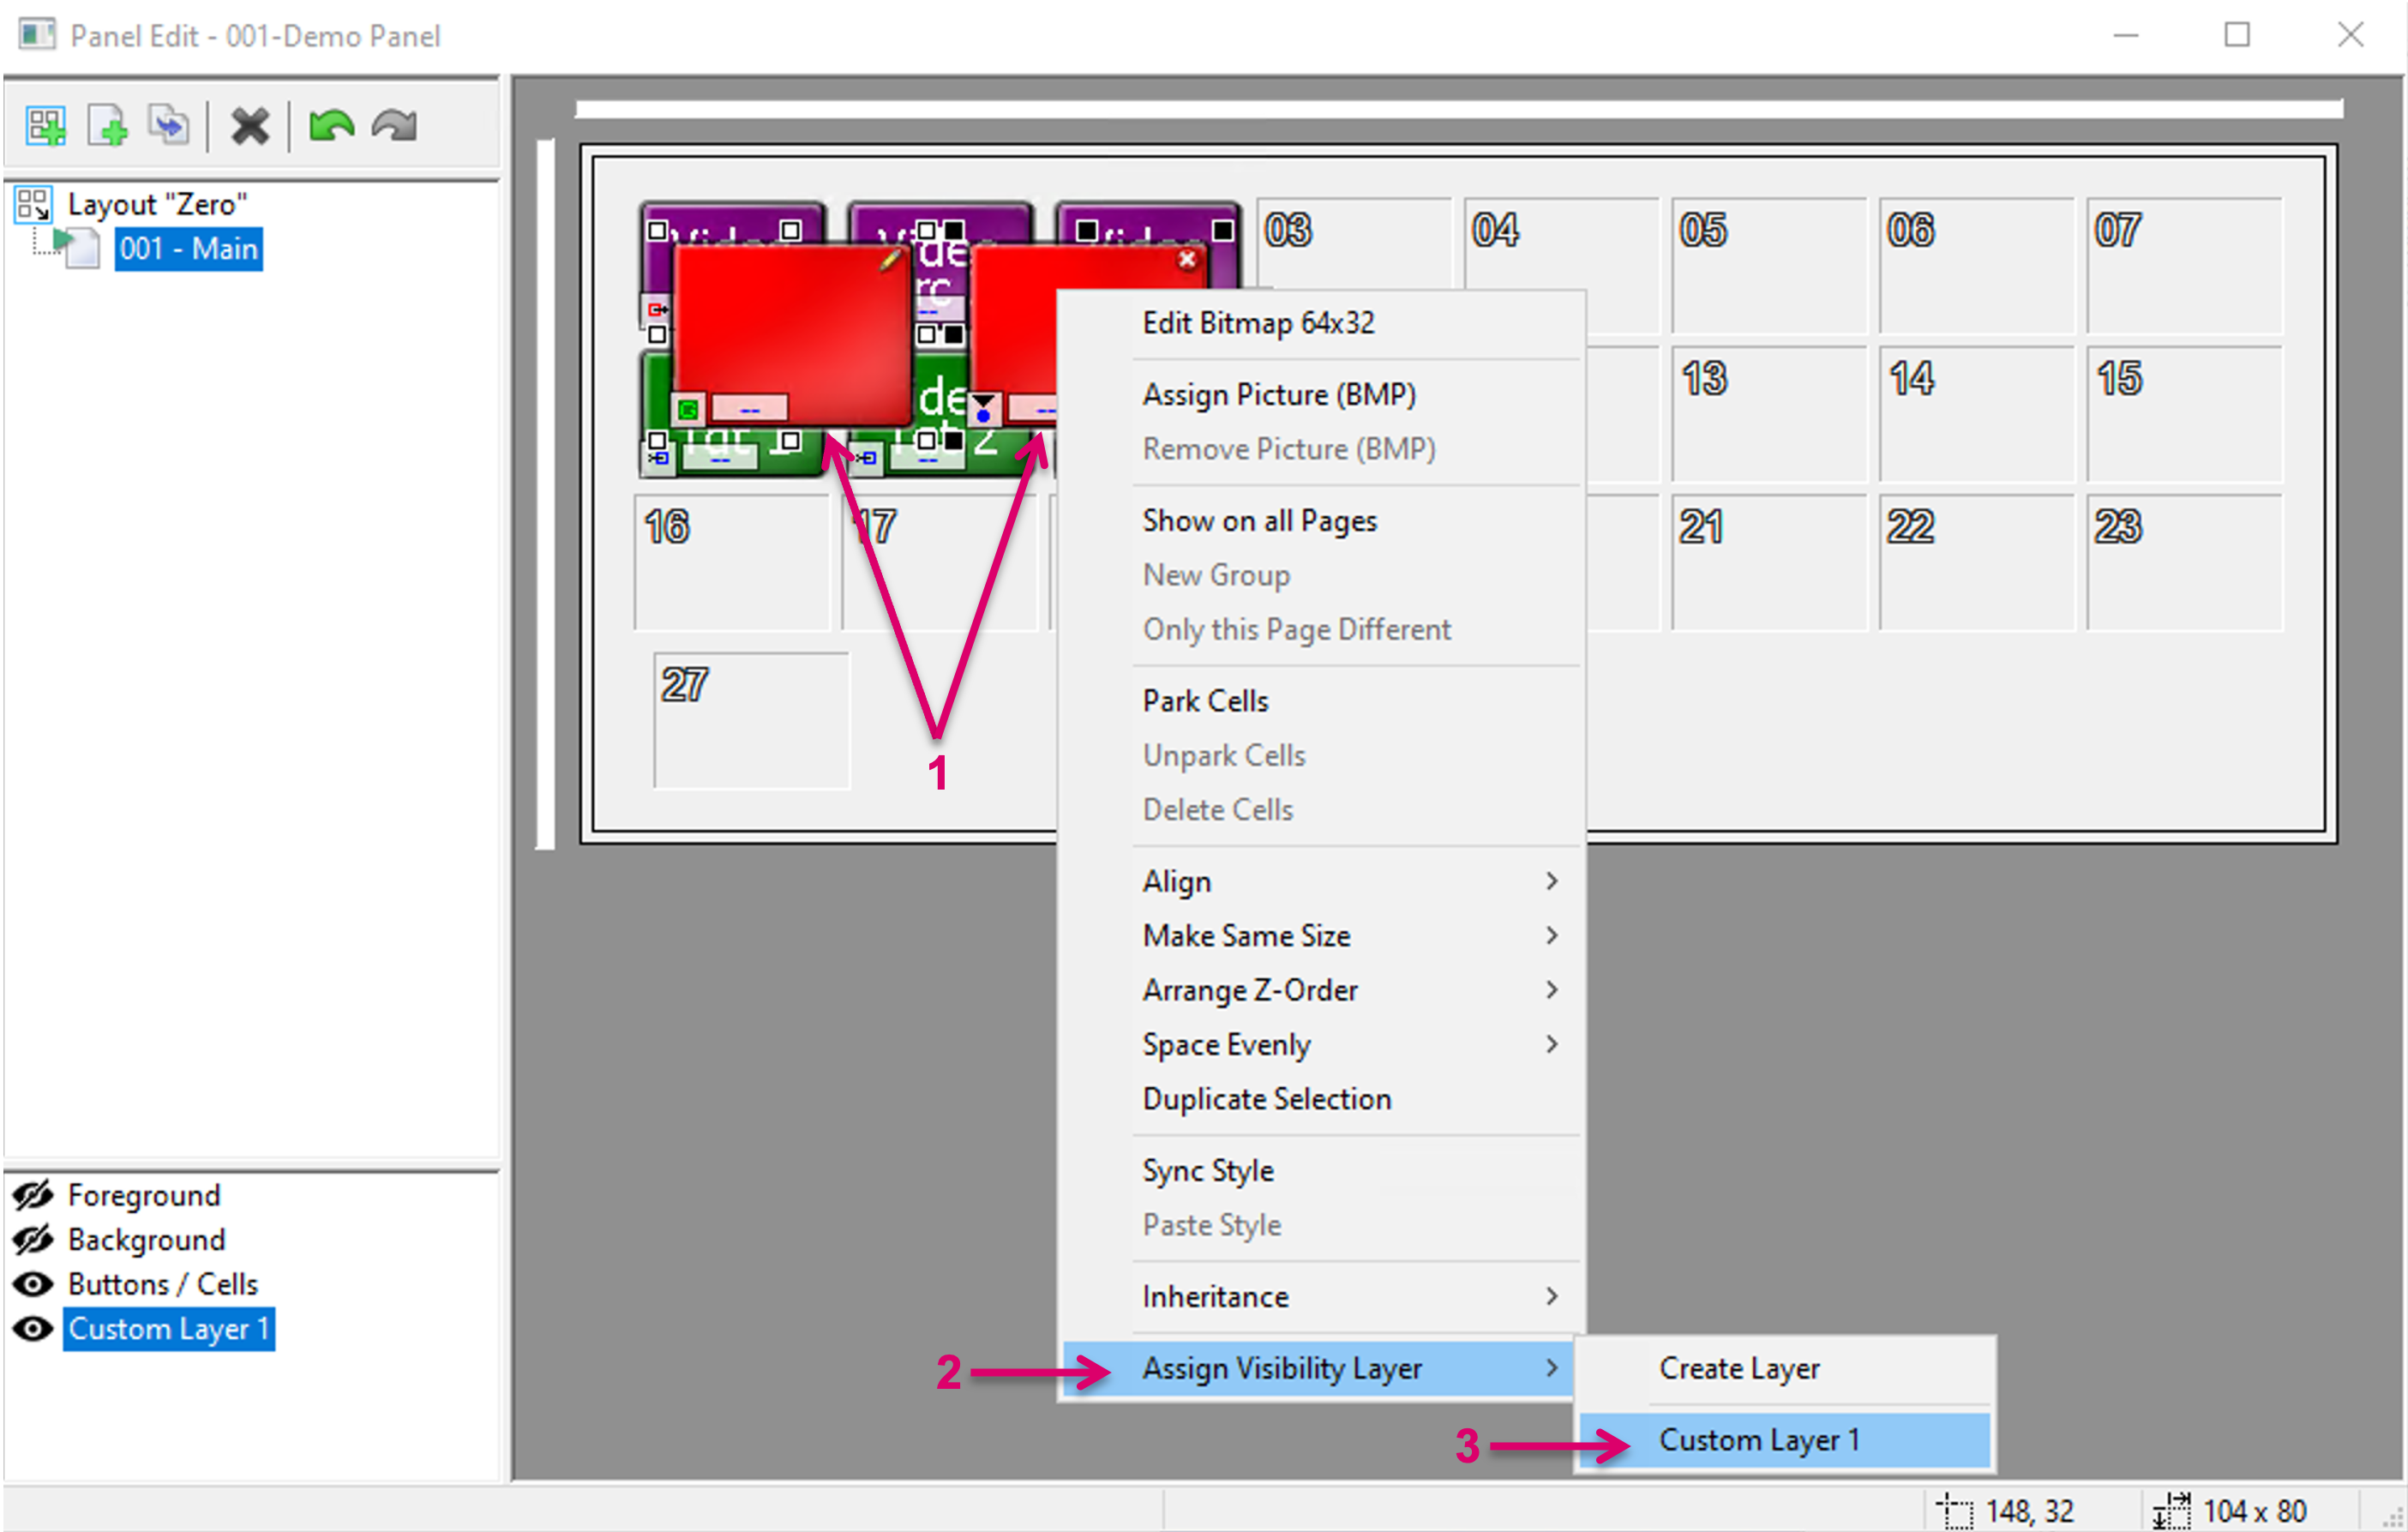
To assign an item and/ or Button/ Cell to a Custom Layer, select it (or multiple by holding shift) with right-click (1), select Assign Visibility Layer from the pop-up window (2) and select the respective Layer (3).
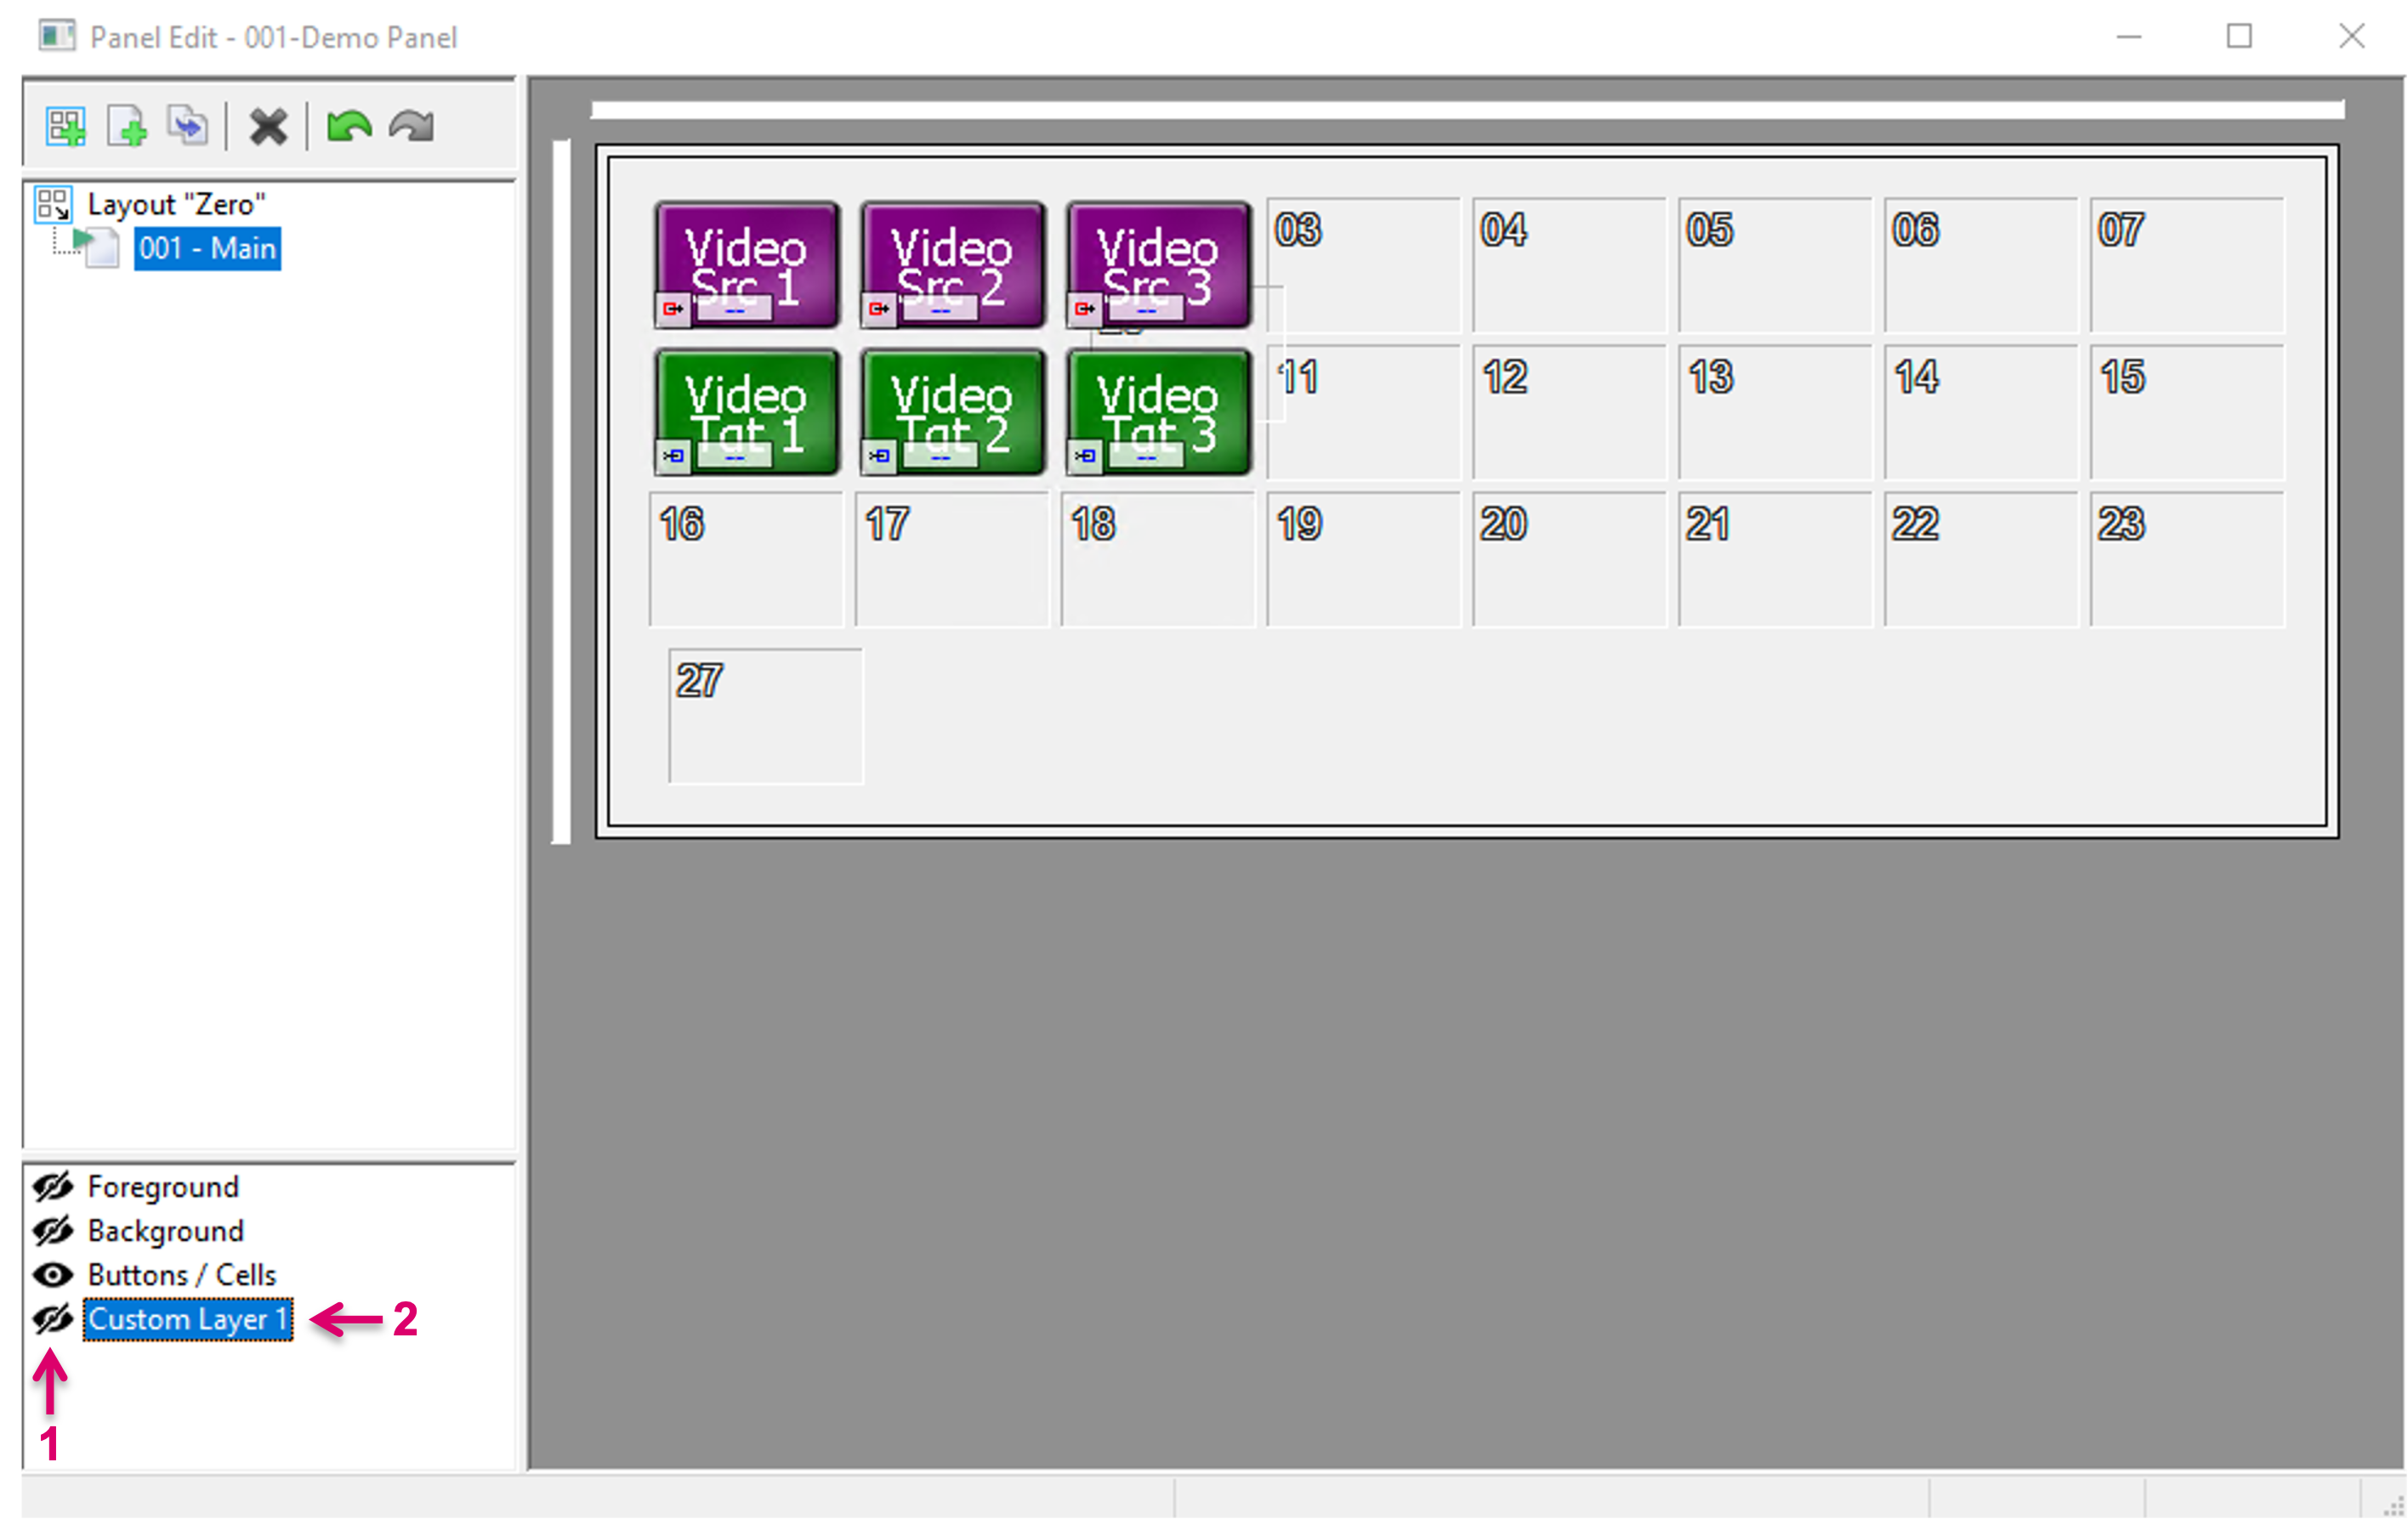
By click on the little eye icon (1) in front of the Custom Layer (2), the assigned items and/ or Buttons/ Cells can be hidden or shown.
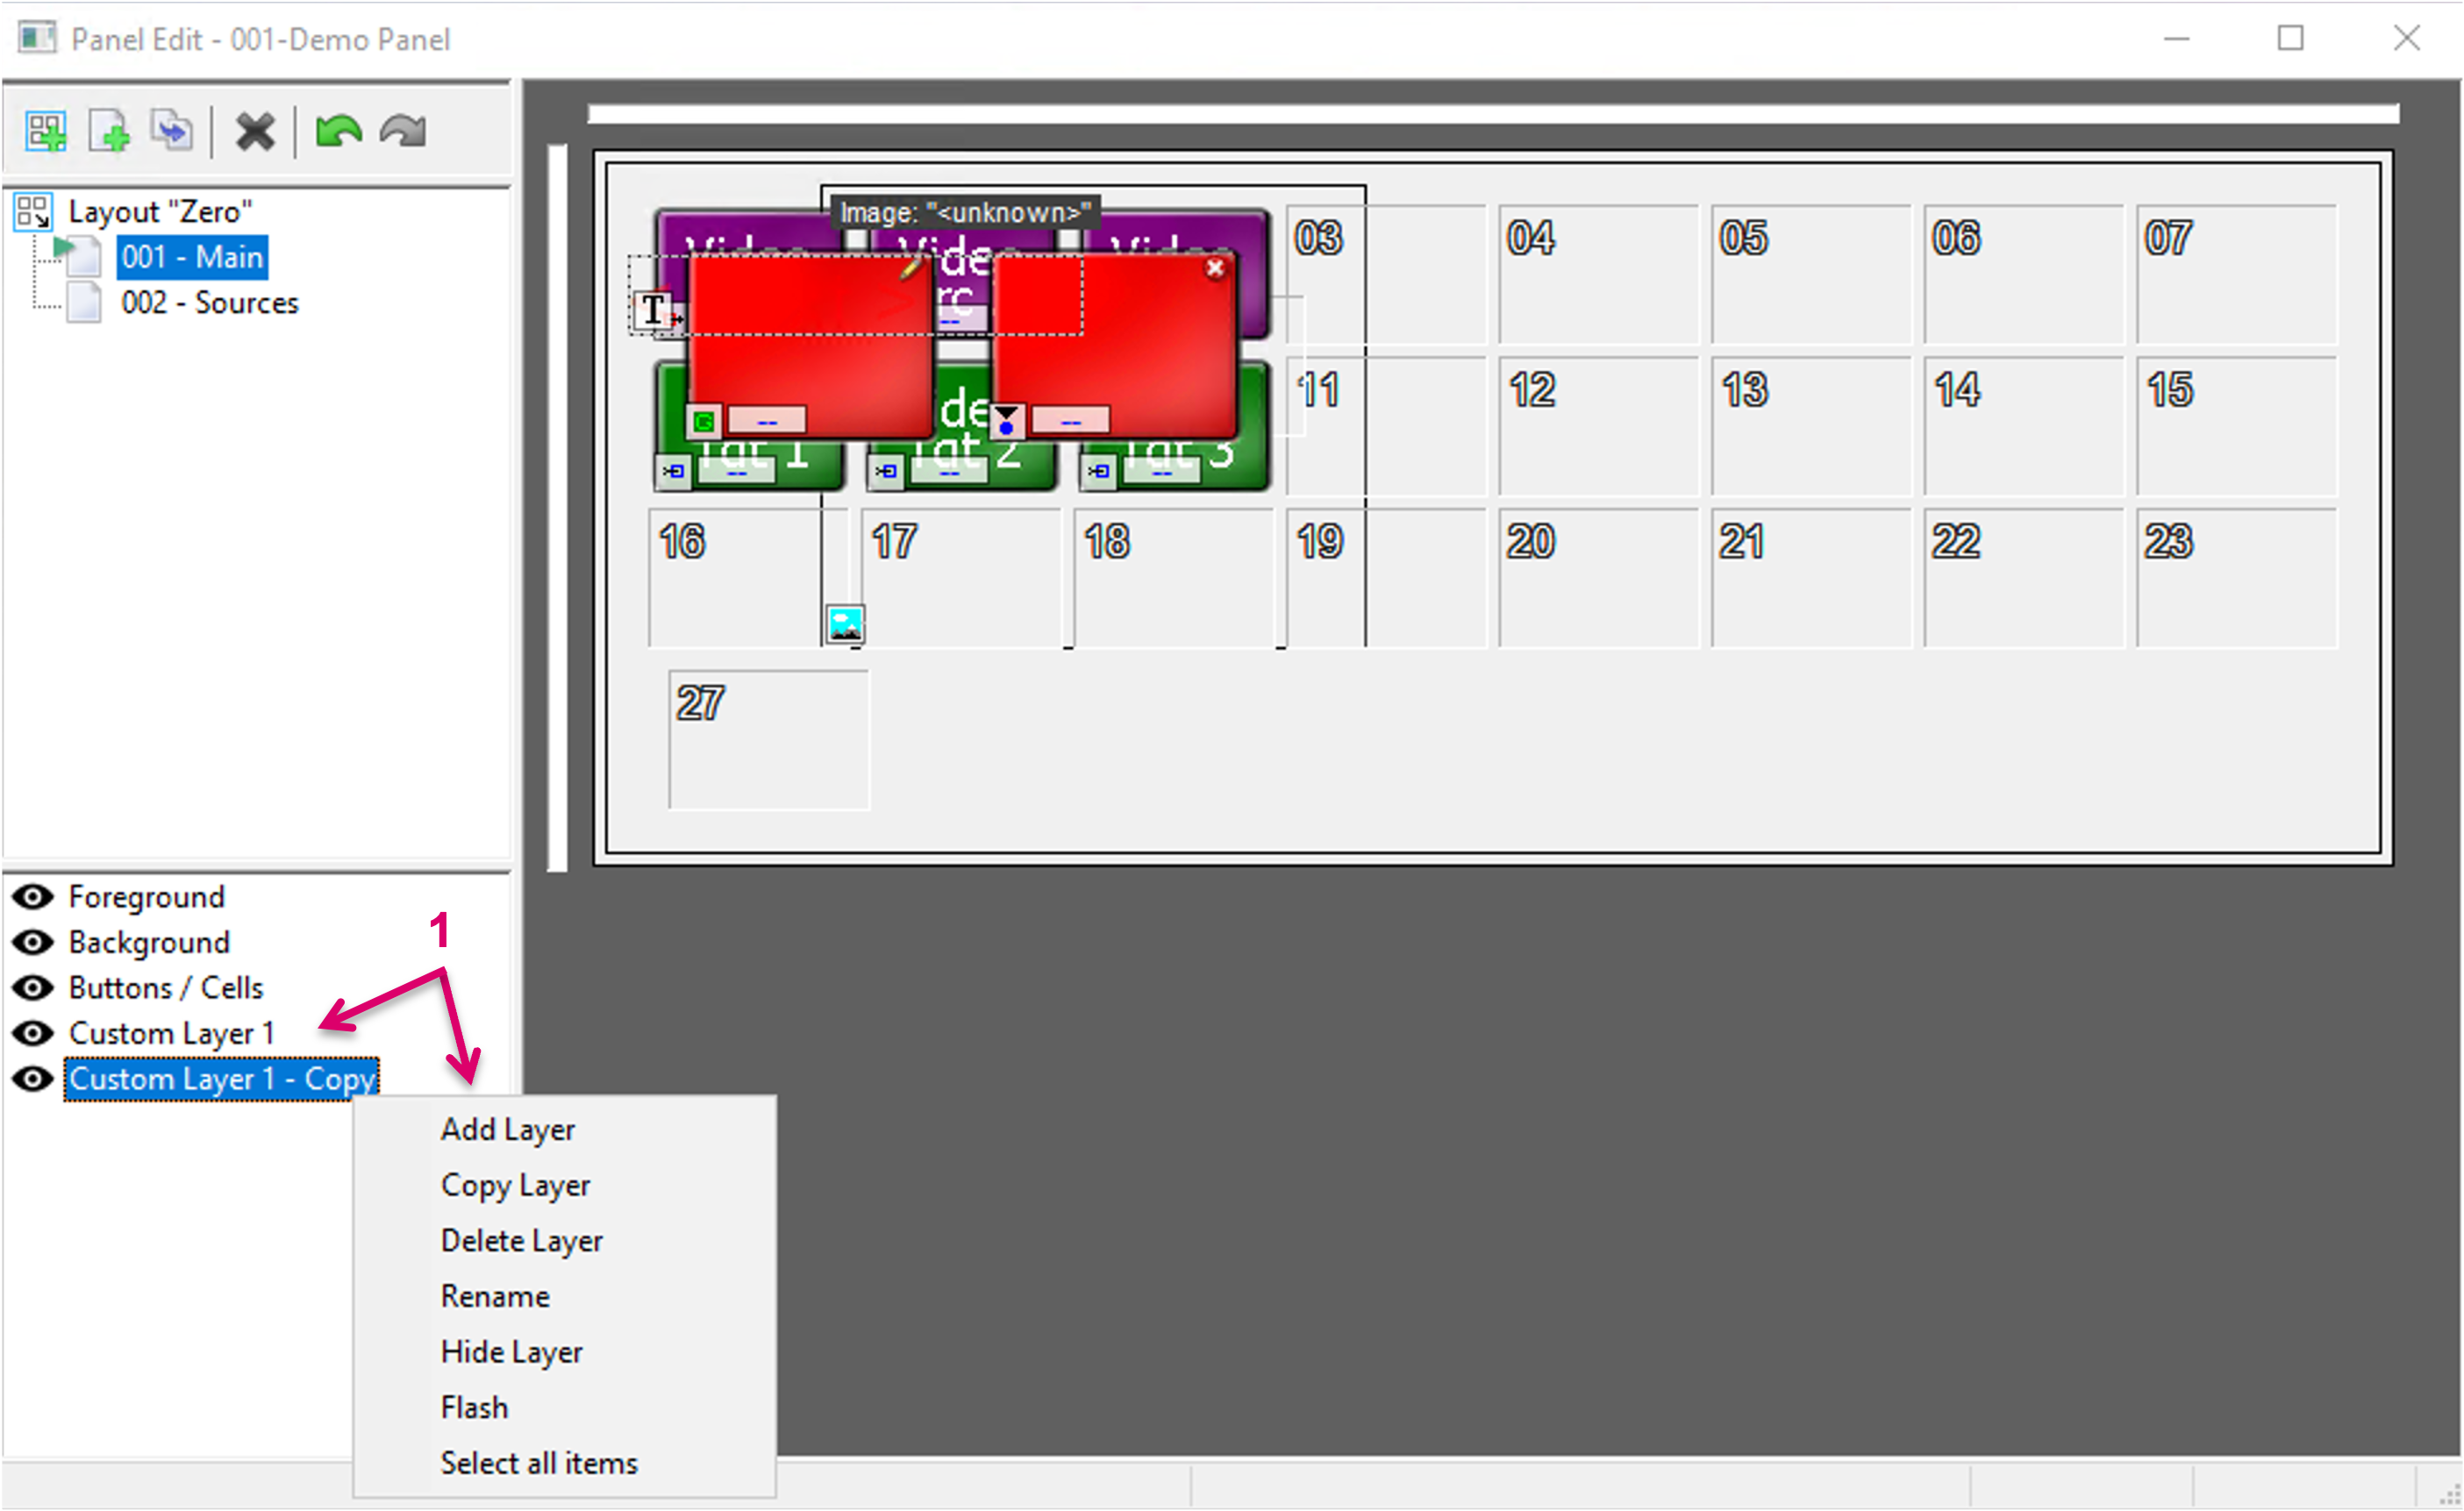
More options, like copying an already created Custom Layer or let assigned buttons and items flash to identify them are available by right click on any of the layers (1).
Undo/Redo
An Undo/Redo function is available for the panel editing process. Please note that the Undo history is flushed, when the panel editor is closed.
Keys to execute:
- Undo: Ctrl + Z
- Redo: Ctrl + Y