vsmStudio - Users

Introduction
With the launch of vsmWebPanel 1.0.0, together with vsmStudio release 26.1.1, a new User management feature was introduced. The User management allows to create different user groups and users. At time of release with focus on the support of the new vsmWebPanel, the feature allows to grant or limit panel access for different users and user groups. While the new feature is introduced to serve vsmWebPanel Clients in a standalone VSM approach, the solution is designed and prepared to also integrate with HOME and/ or Active Directory Users in the future.
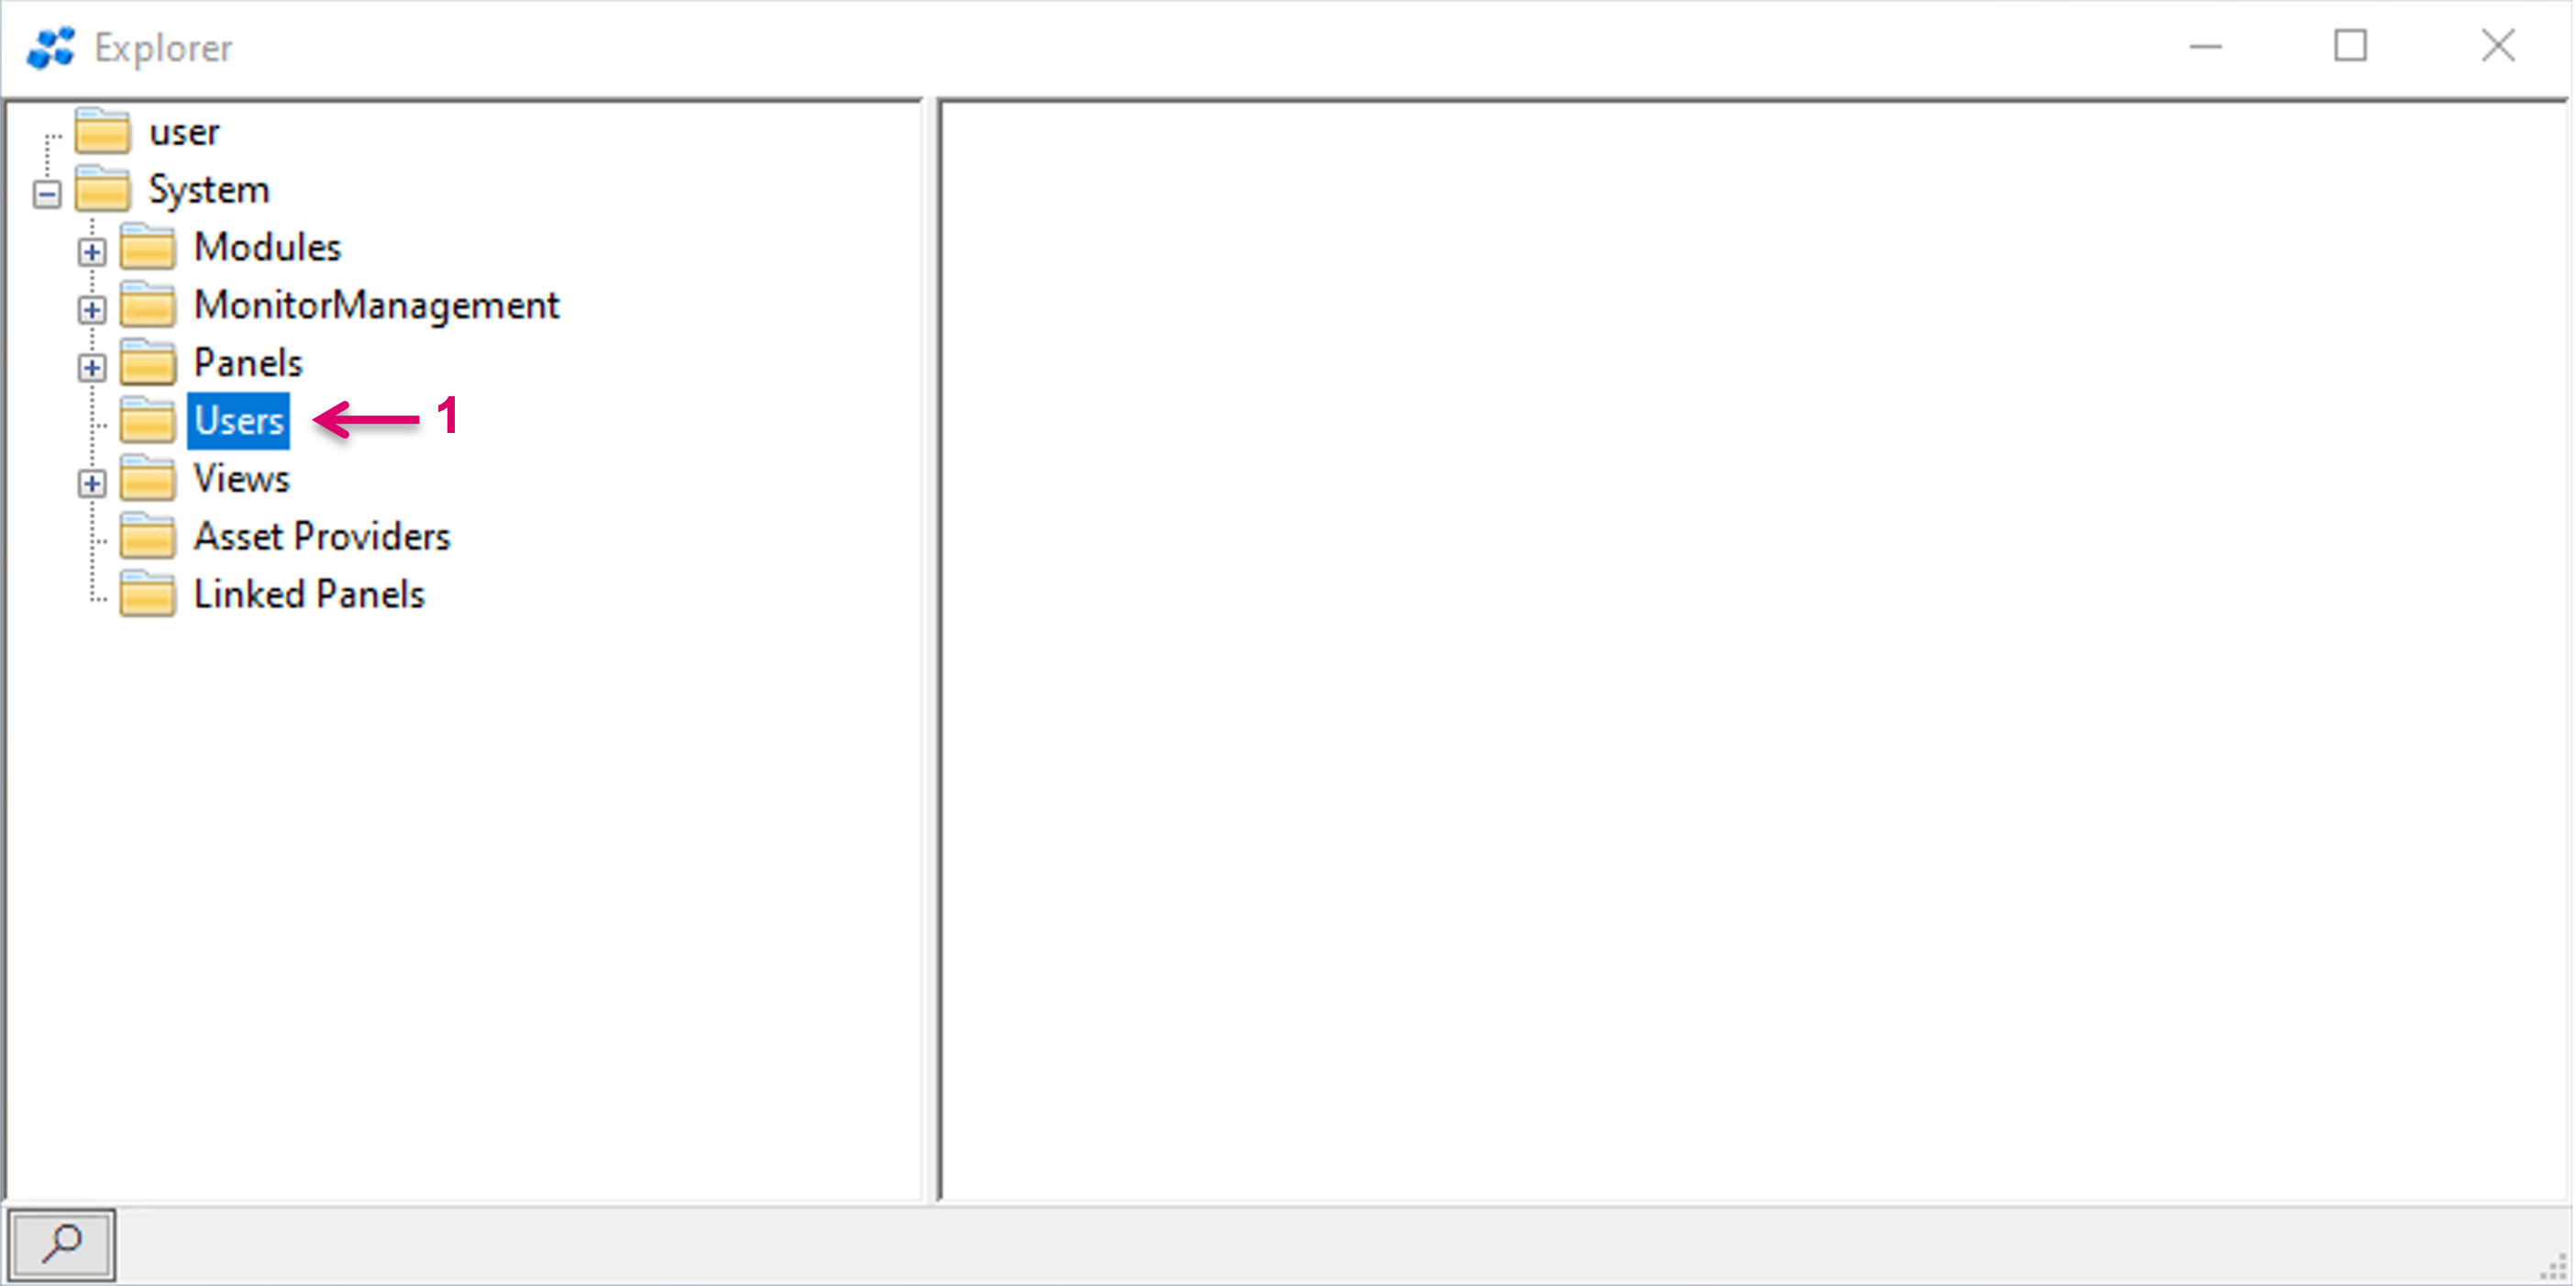
The User management is located in the Explorer Directory in vsmStudio. Navigate to the Users folder (1). In a fresh system install, no Users are listed.
Create and manage Users
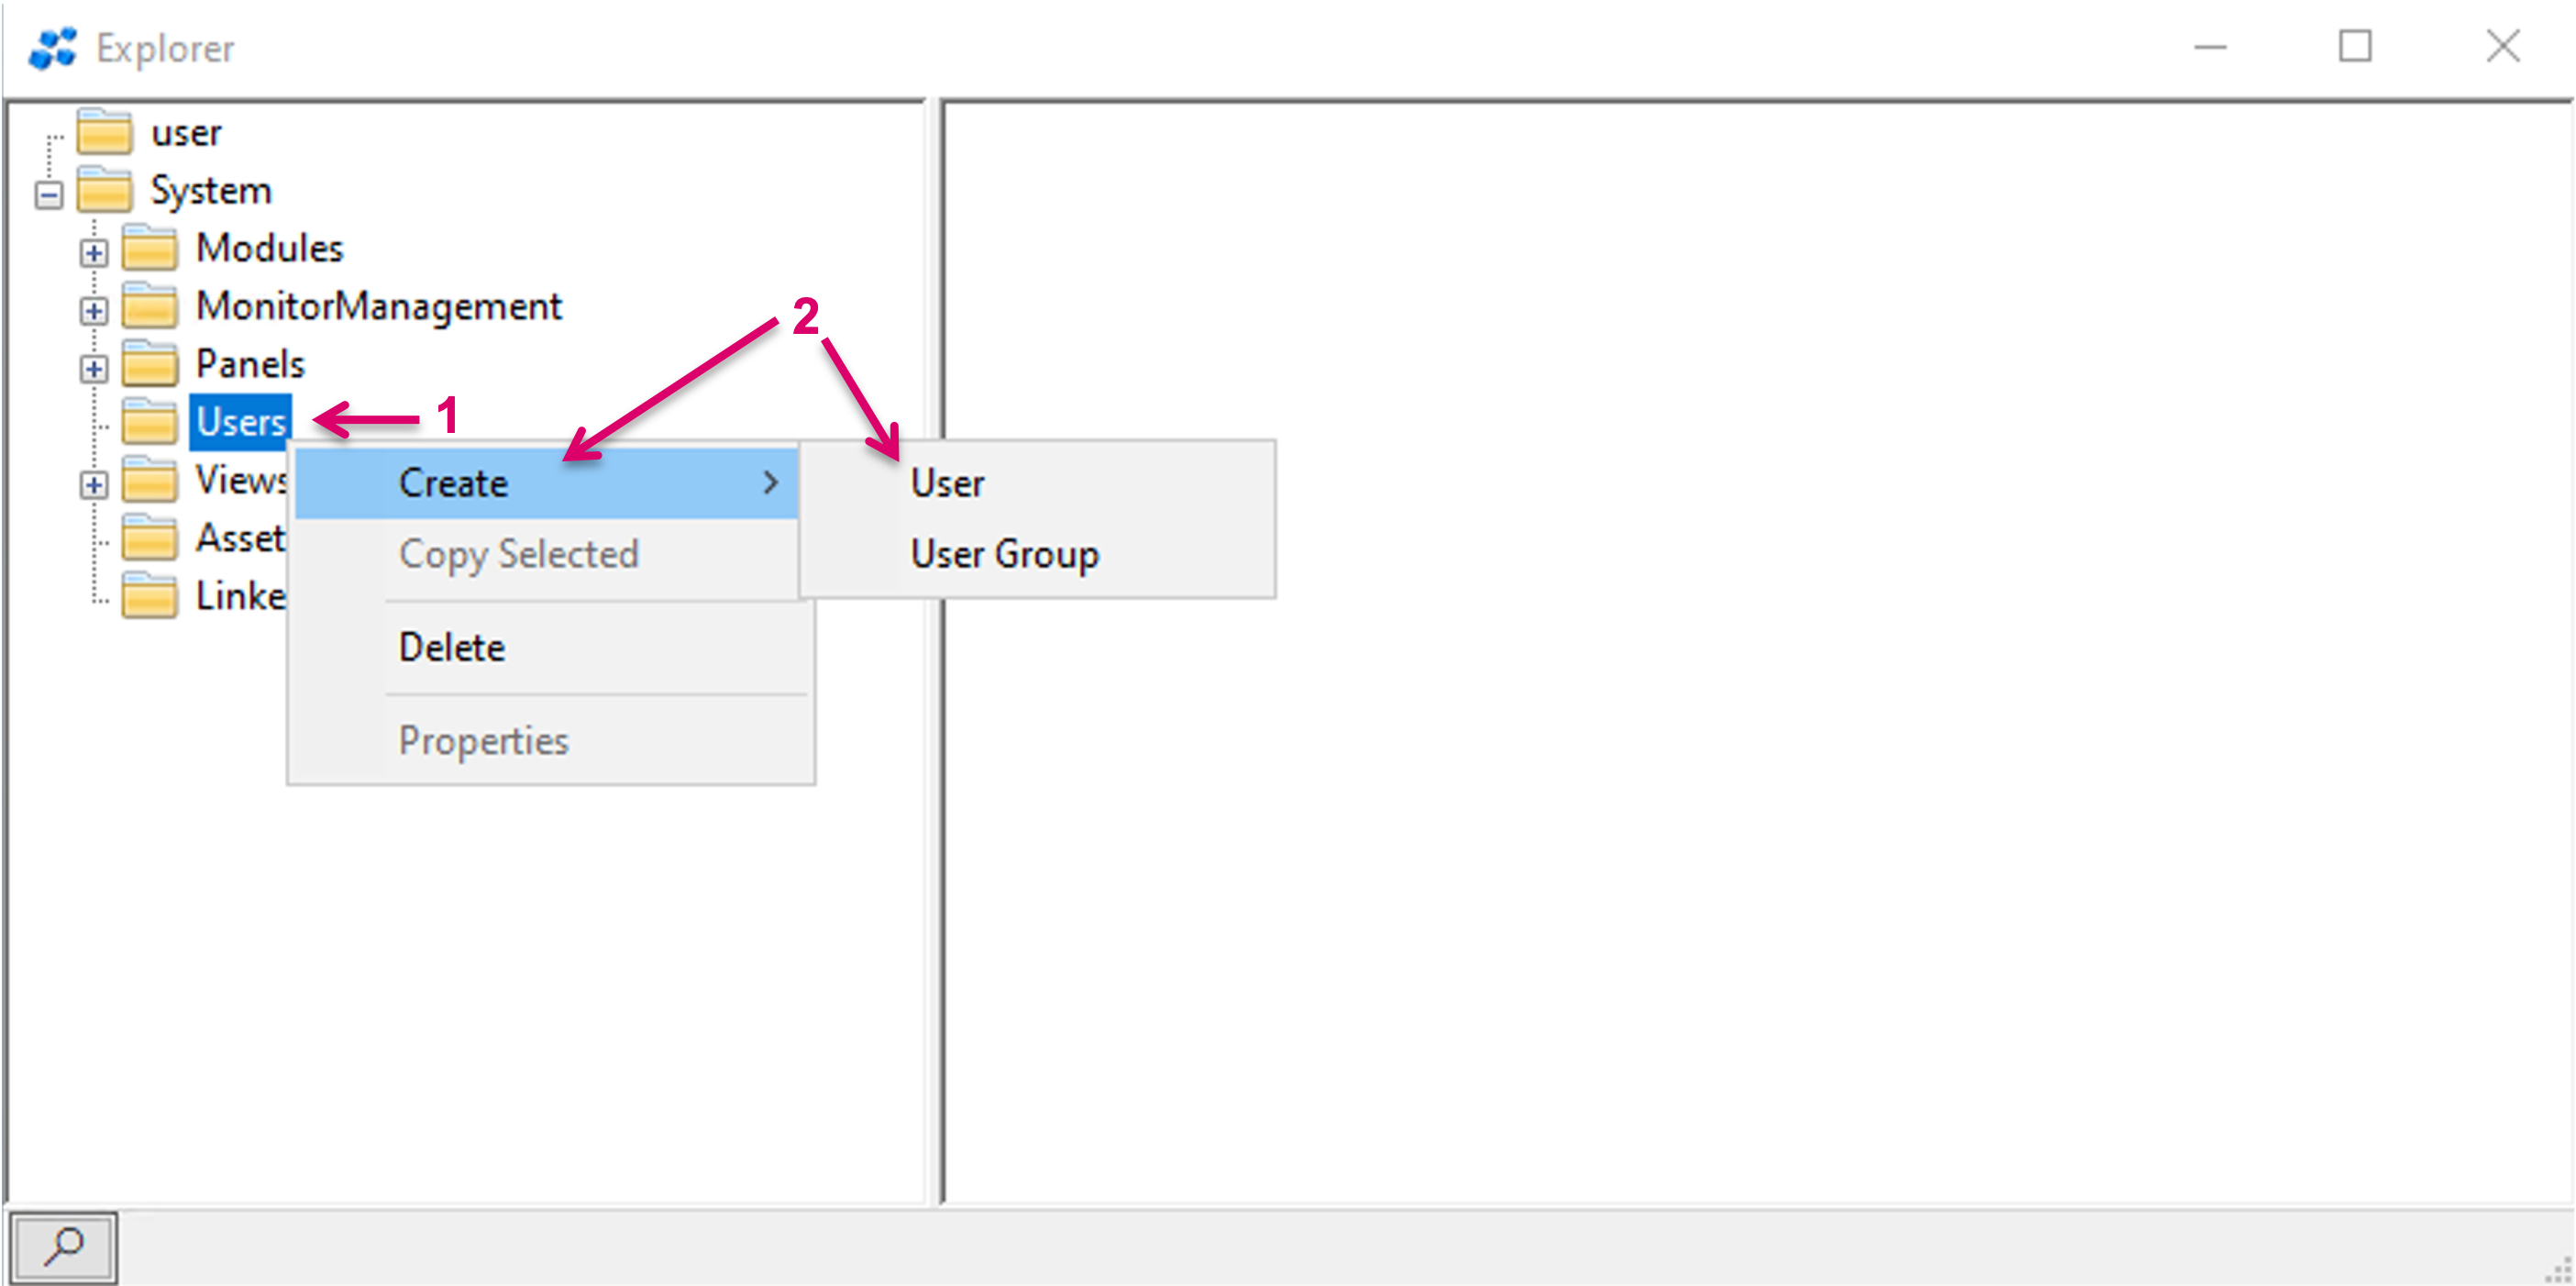
In the Explorer view, right mouse button click onto the folder "Users" (1), select Create (2) and User (3).
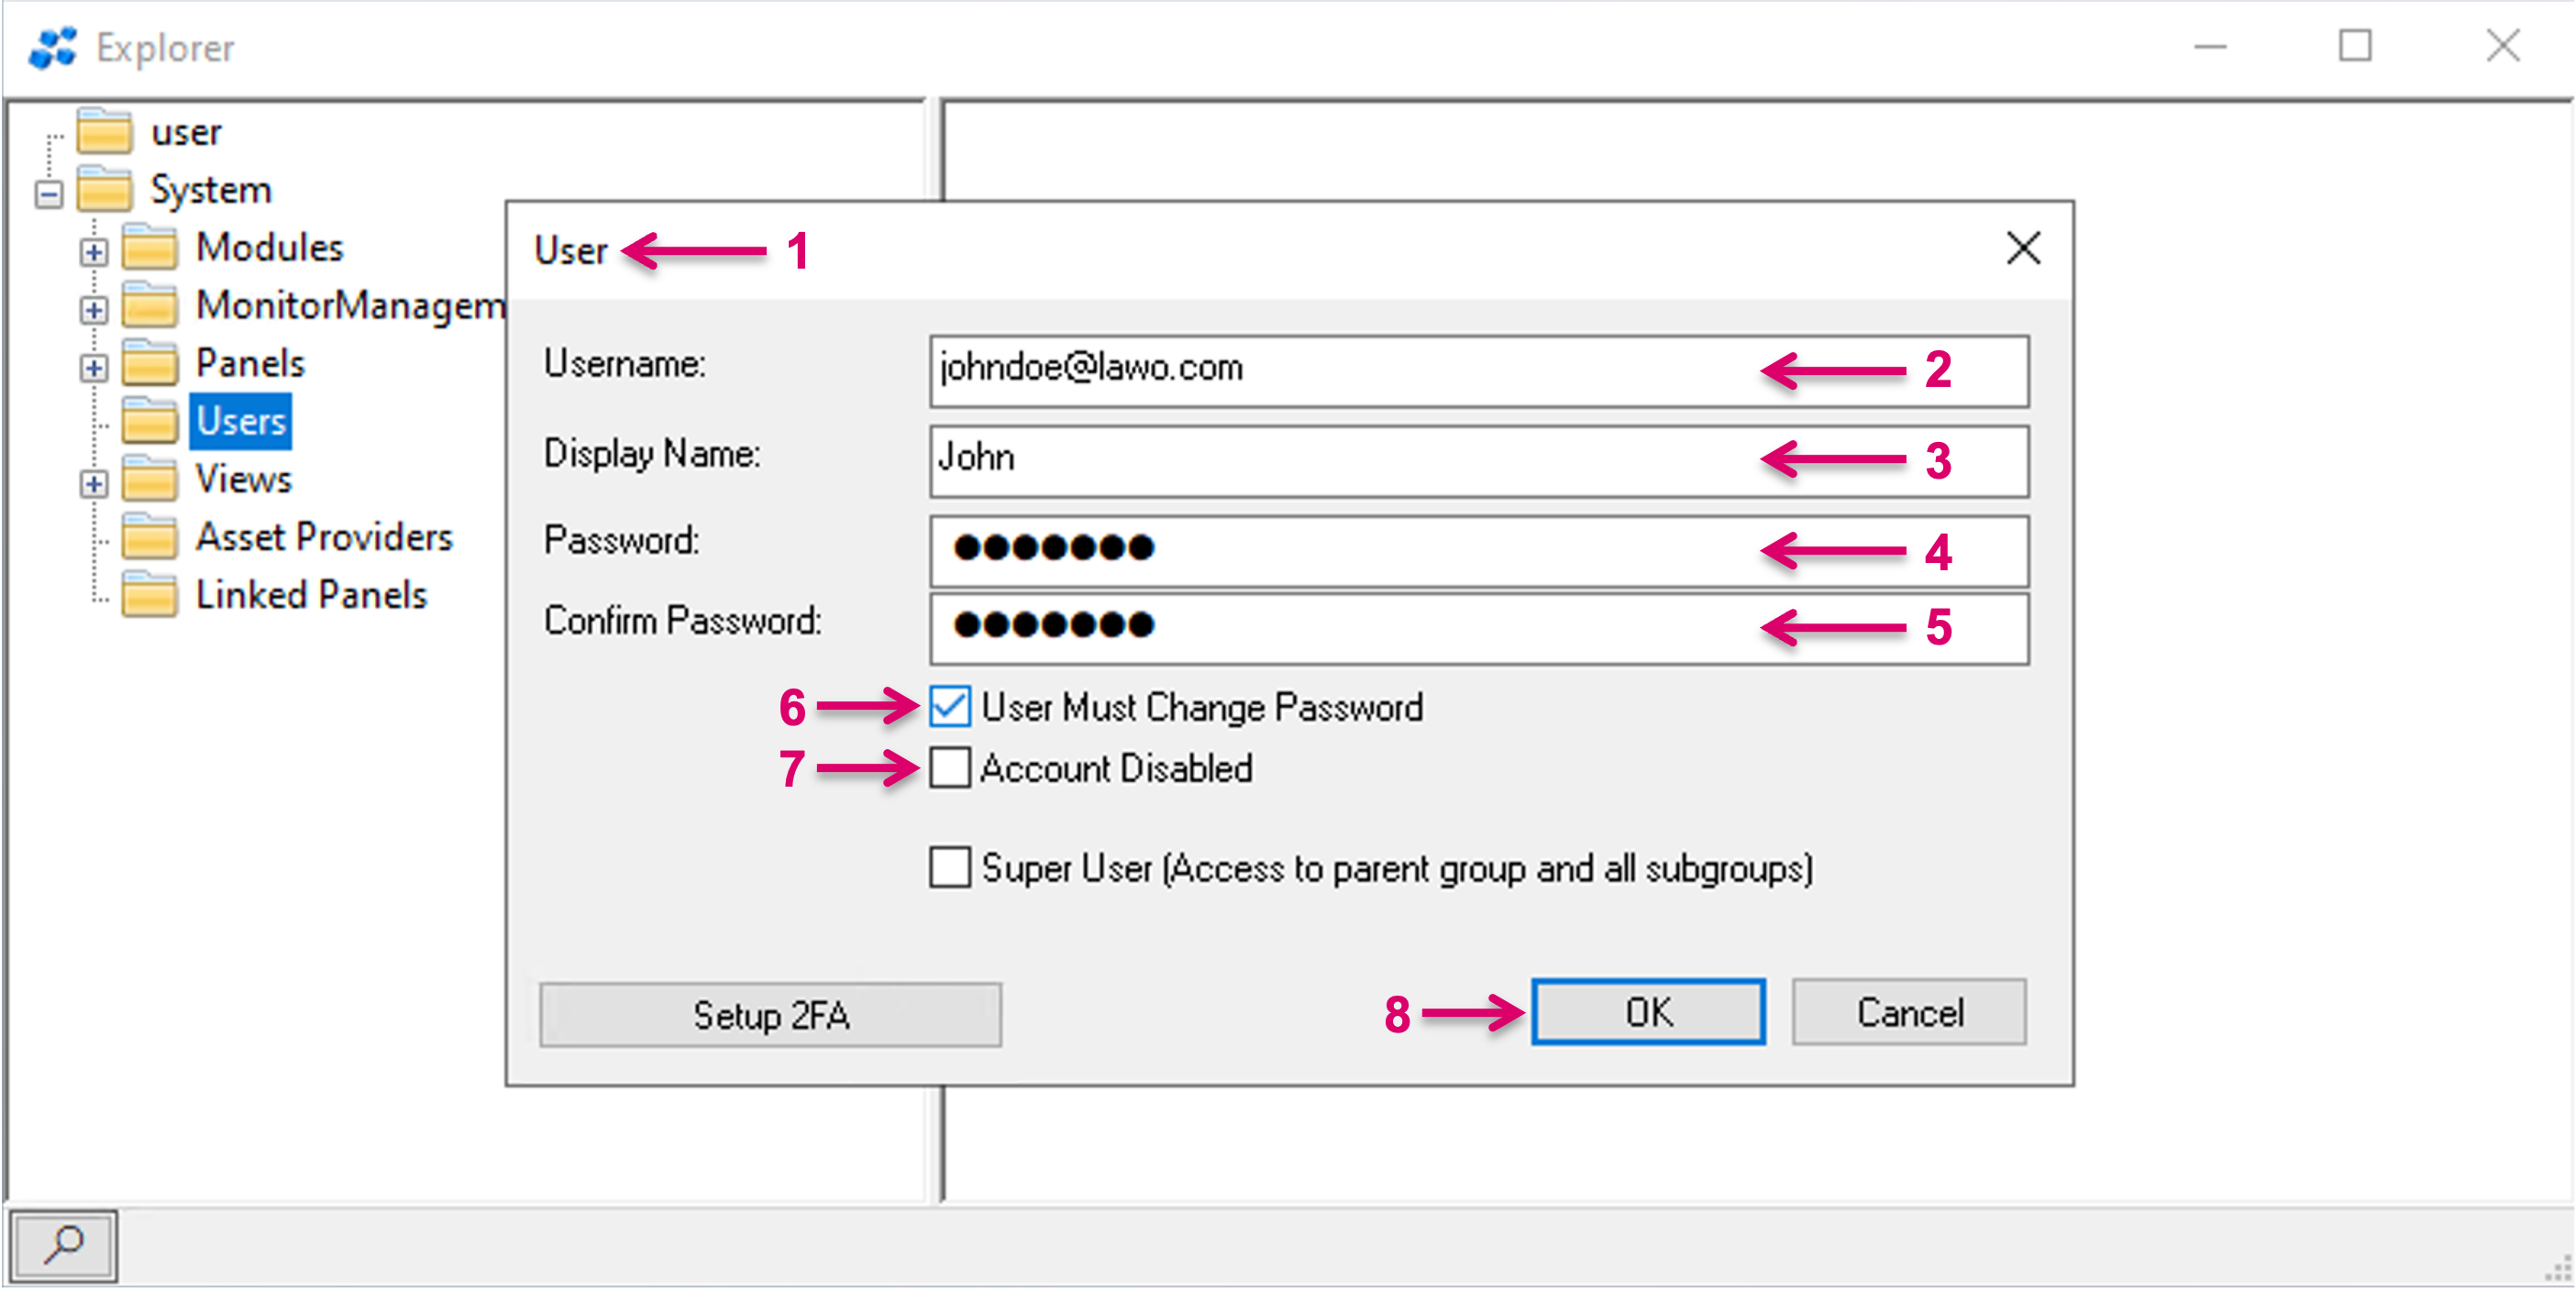
In the opening User mask (1), assign a Username (2) that will be required for the later login process. For future application you may use the User registered in Active Directory or HOME user management here. Define a Display Name (3) which is specific for the display in the vsmWebPanel UI. Set a Password of minimum 8 Characters (4) and confirm (5). If the User is supposed to change and set his own password, check the respective option (6). If this User shall not be enabled immediately, check the respective option (7). The User can be easily enabled later. Confirm the setup with OK (8).
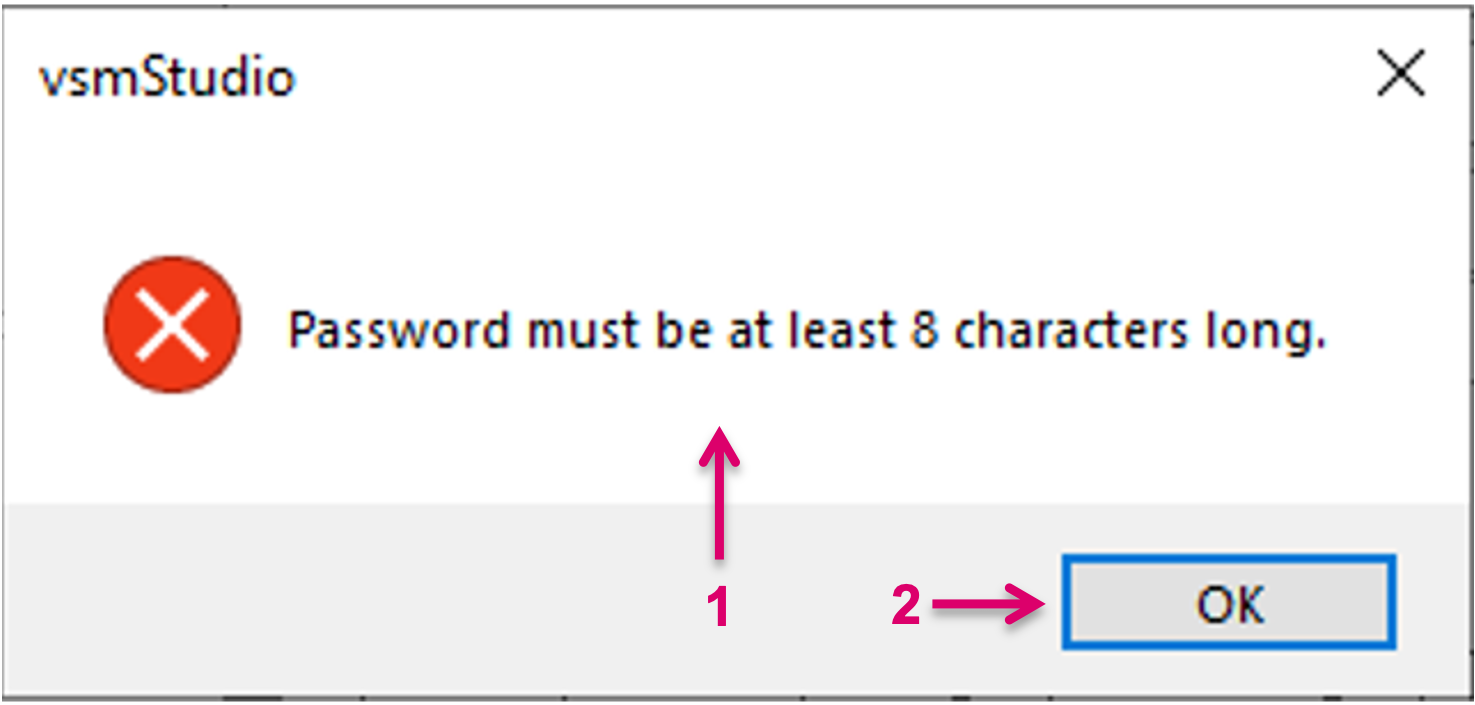
If the Password was not set according to the requirements, a pop-up window will appear (1). Confirm with OK (2) and correct the Password accordingly.
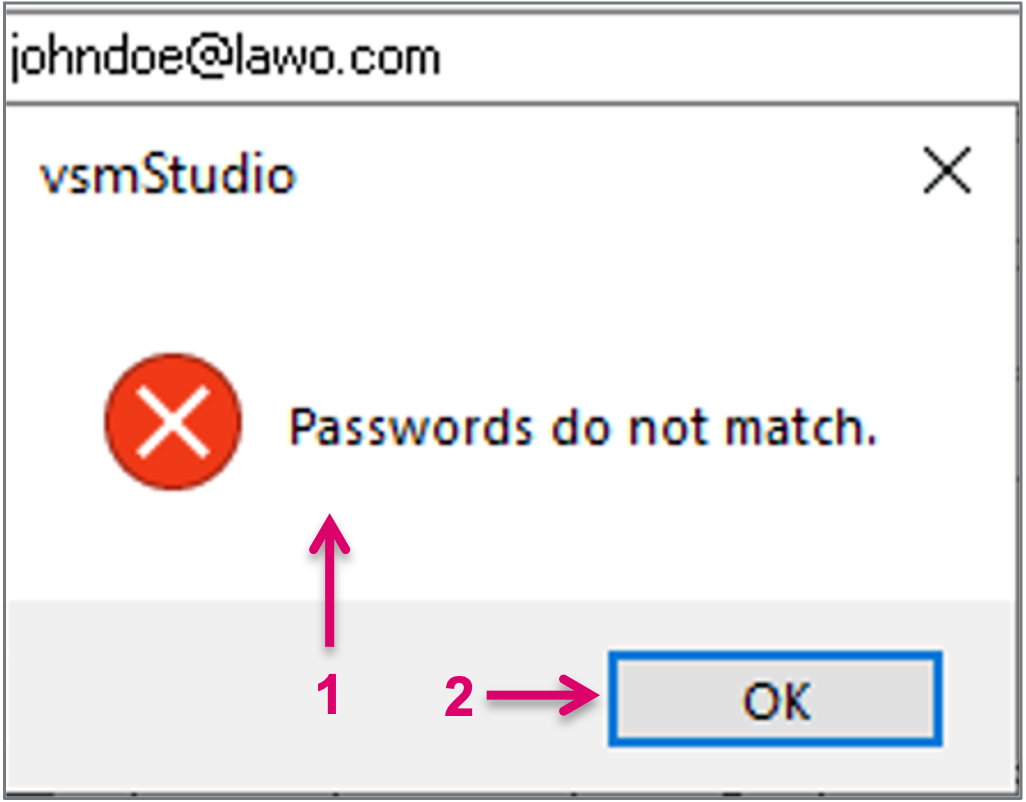
If the Password and Confirmation entry did not match, a pop-up window will appear (1). Confirm the pop-up with OK (2) and enter Password and Confirmation accordingly.
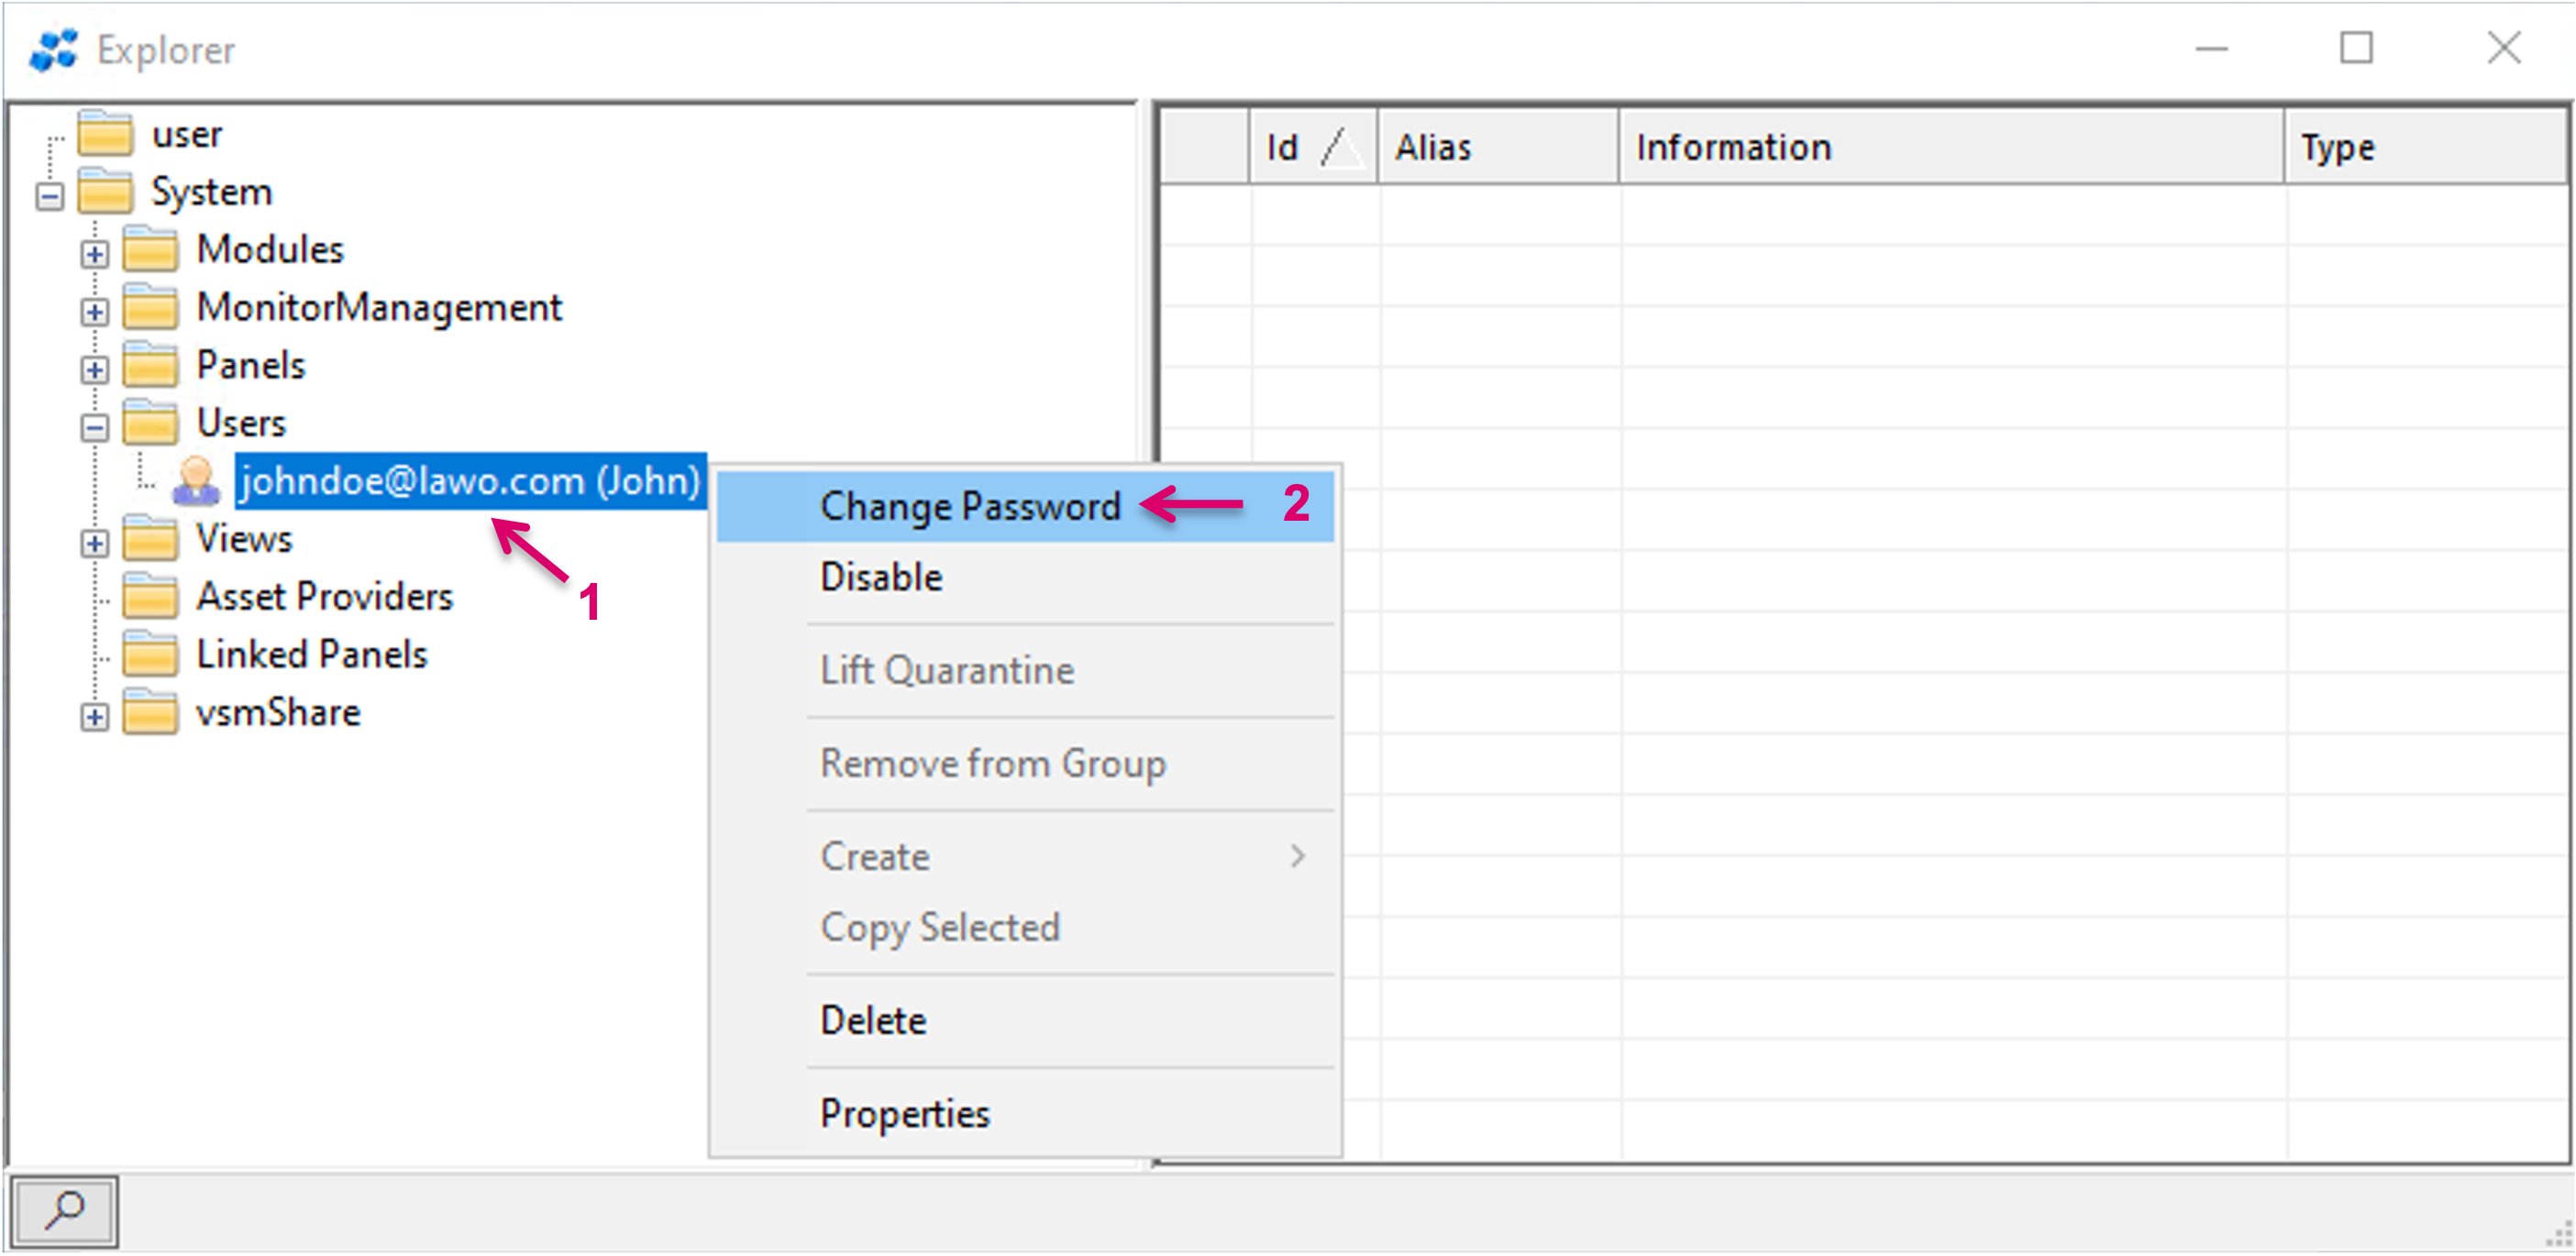
It is possible to Change the Password of existing Users, e.g. if the User forgot his password. Select the respective User (1), righ button click and select Change Password (2).
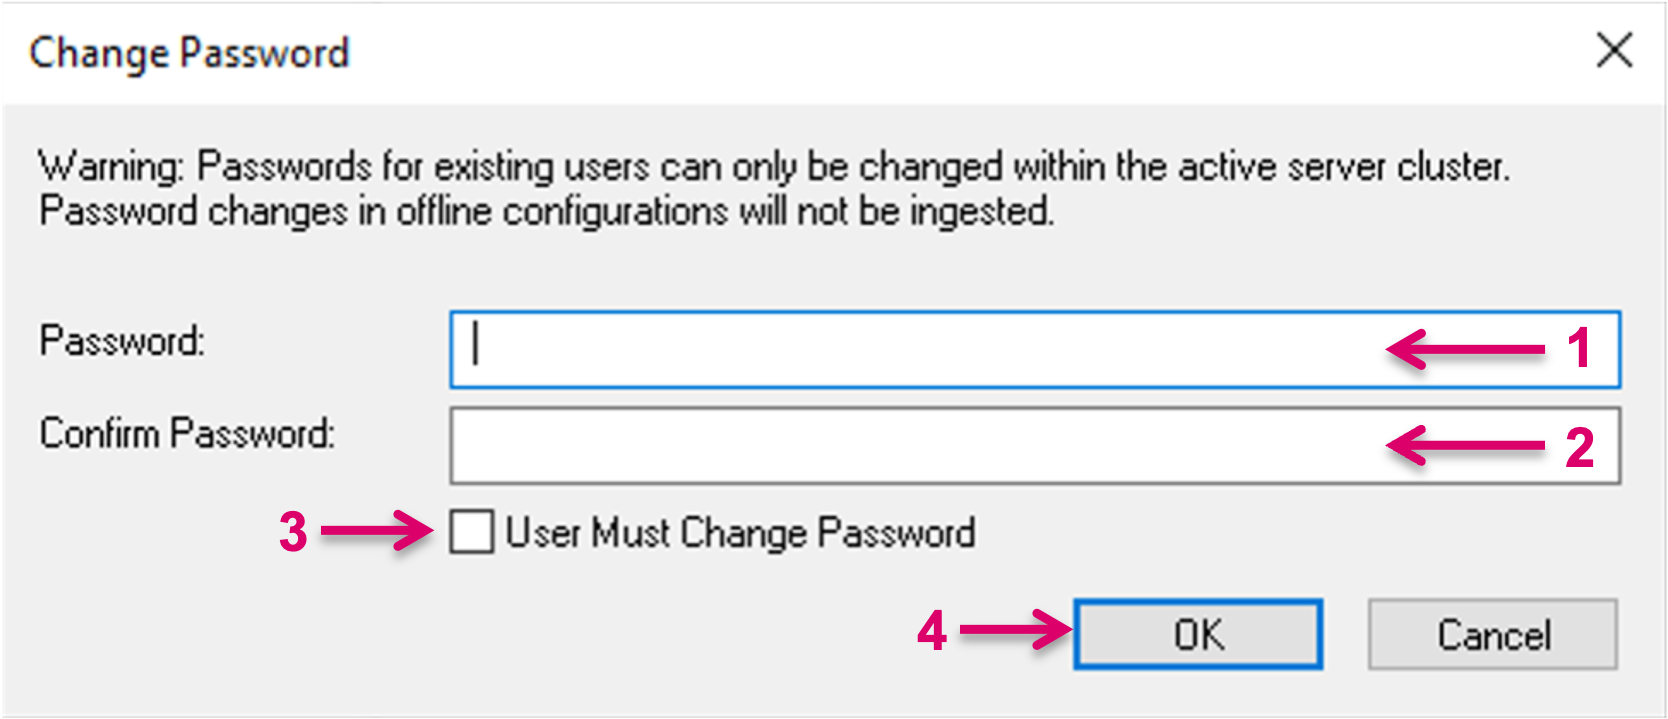
Enter the new Password (1) and Confirm (2). It may be applicable and useful to force the respective User to change his Password (3). Proceed with OK (4).
The 2FA option (1) allows a User to sign-in with a time-based one-time password instead of a static Password.

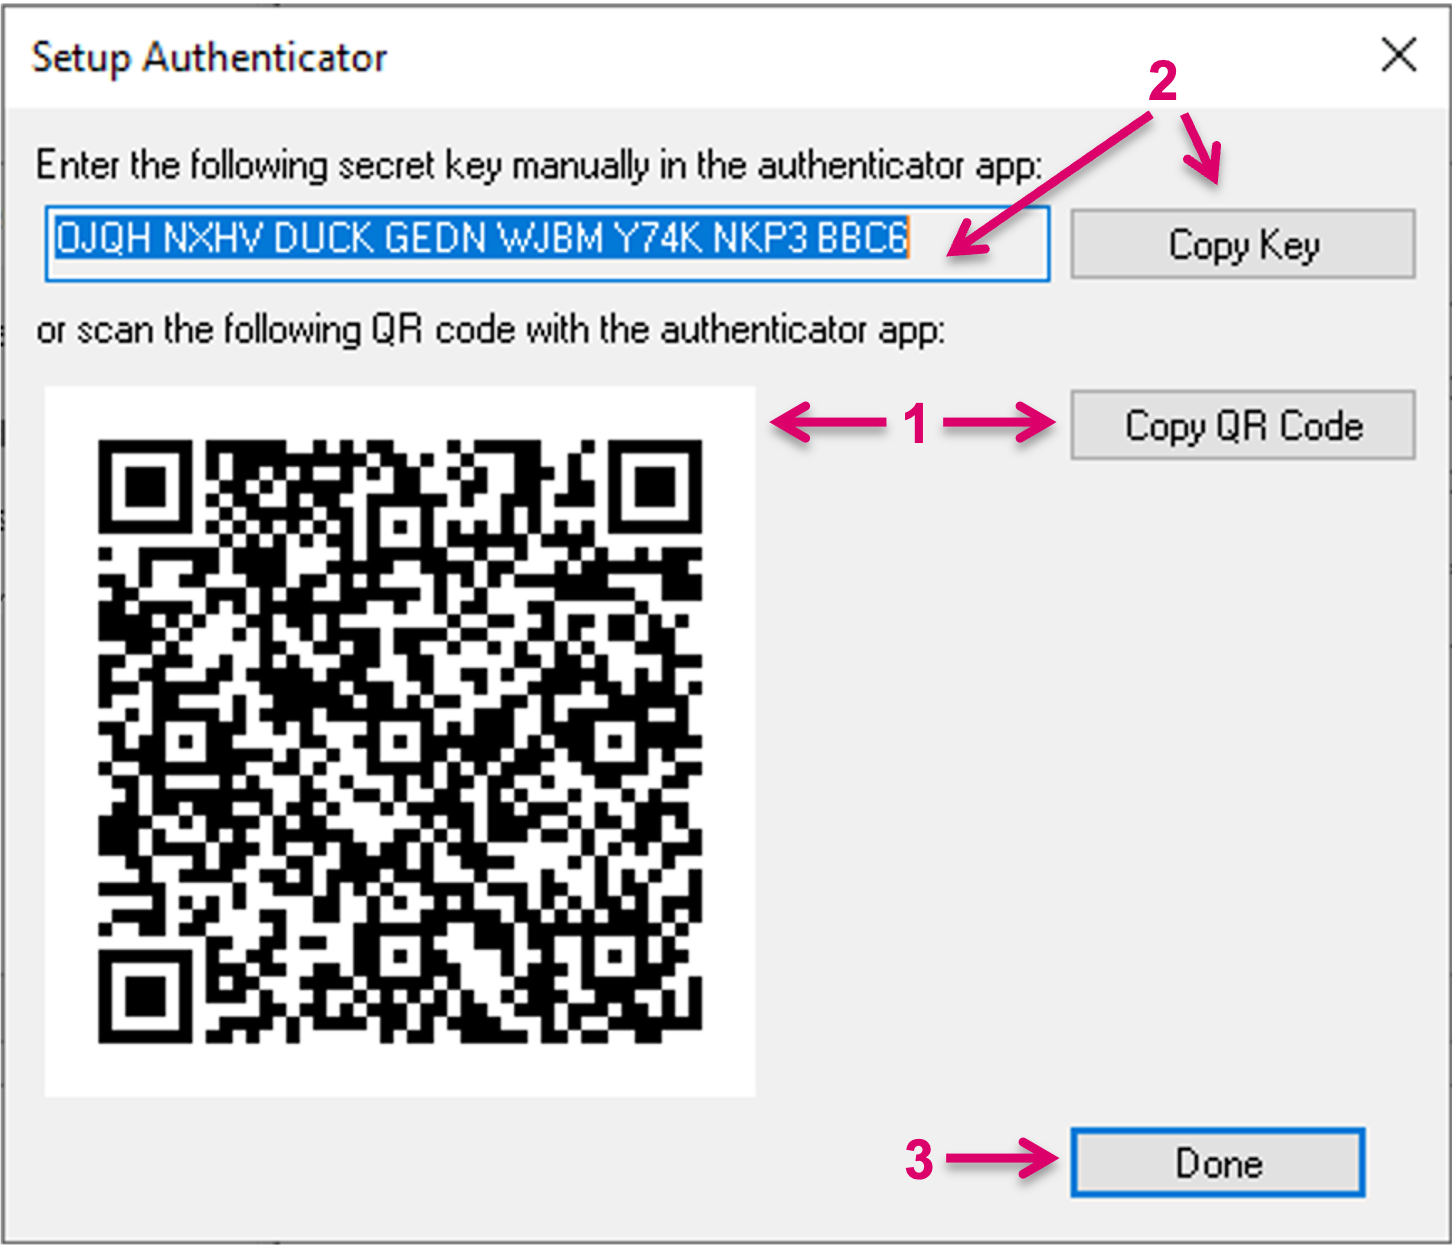
By click on the Setup 2FA the Setup Authenticator window will open. There are two ways to provide the secret key to the User who then can use the key to generate the time-based one-time password via any Authenticator App. Either via QR code (1) or via the displayed string (2). Close the window by clicking Done (3).
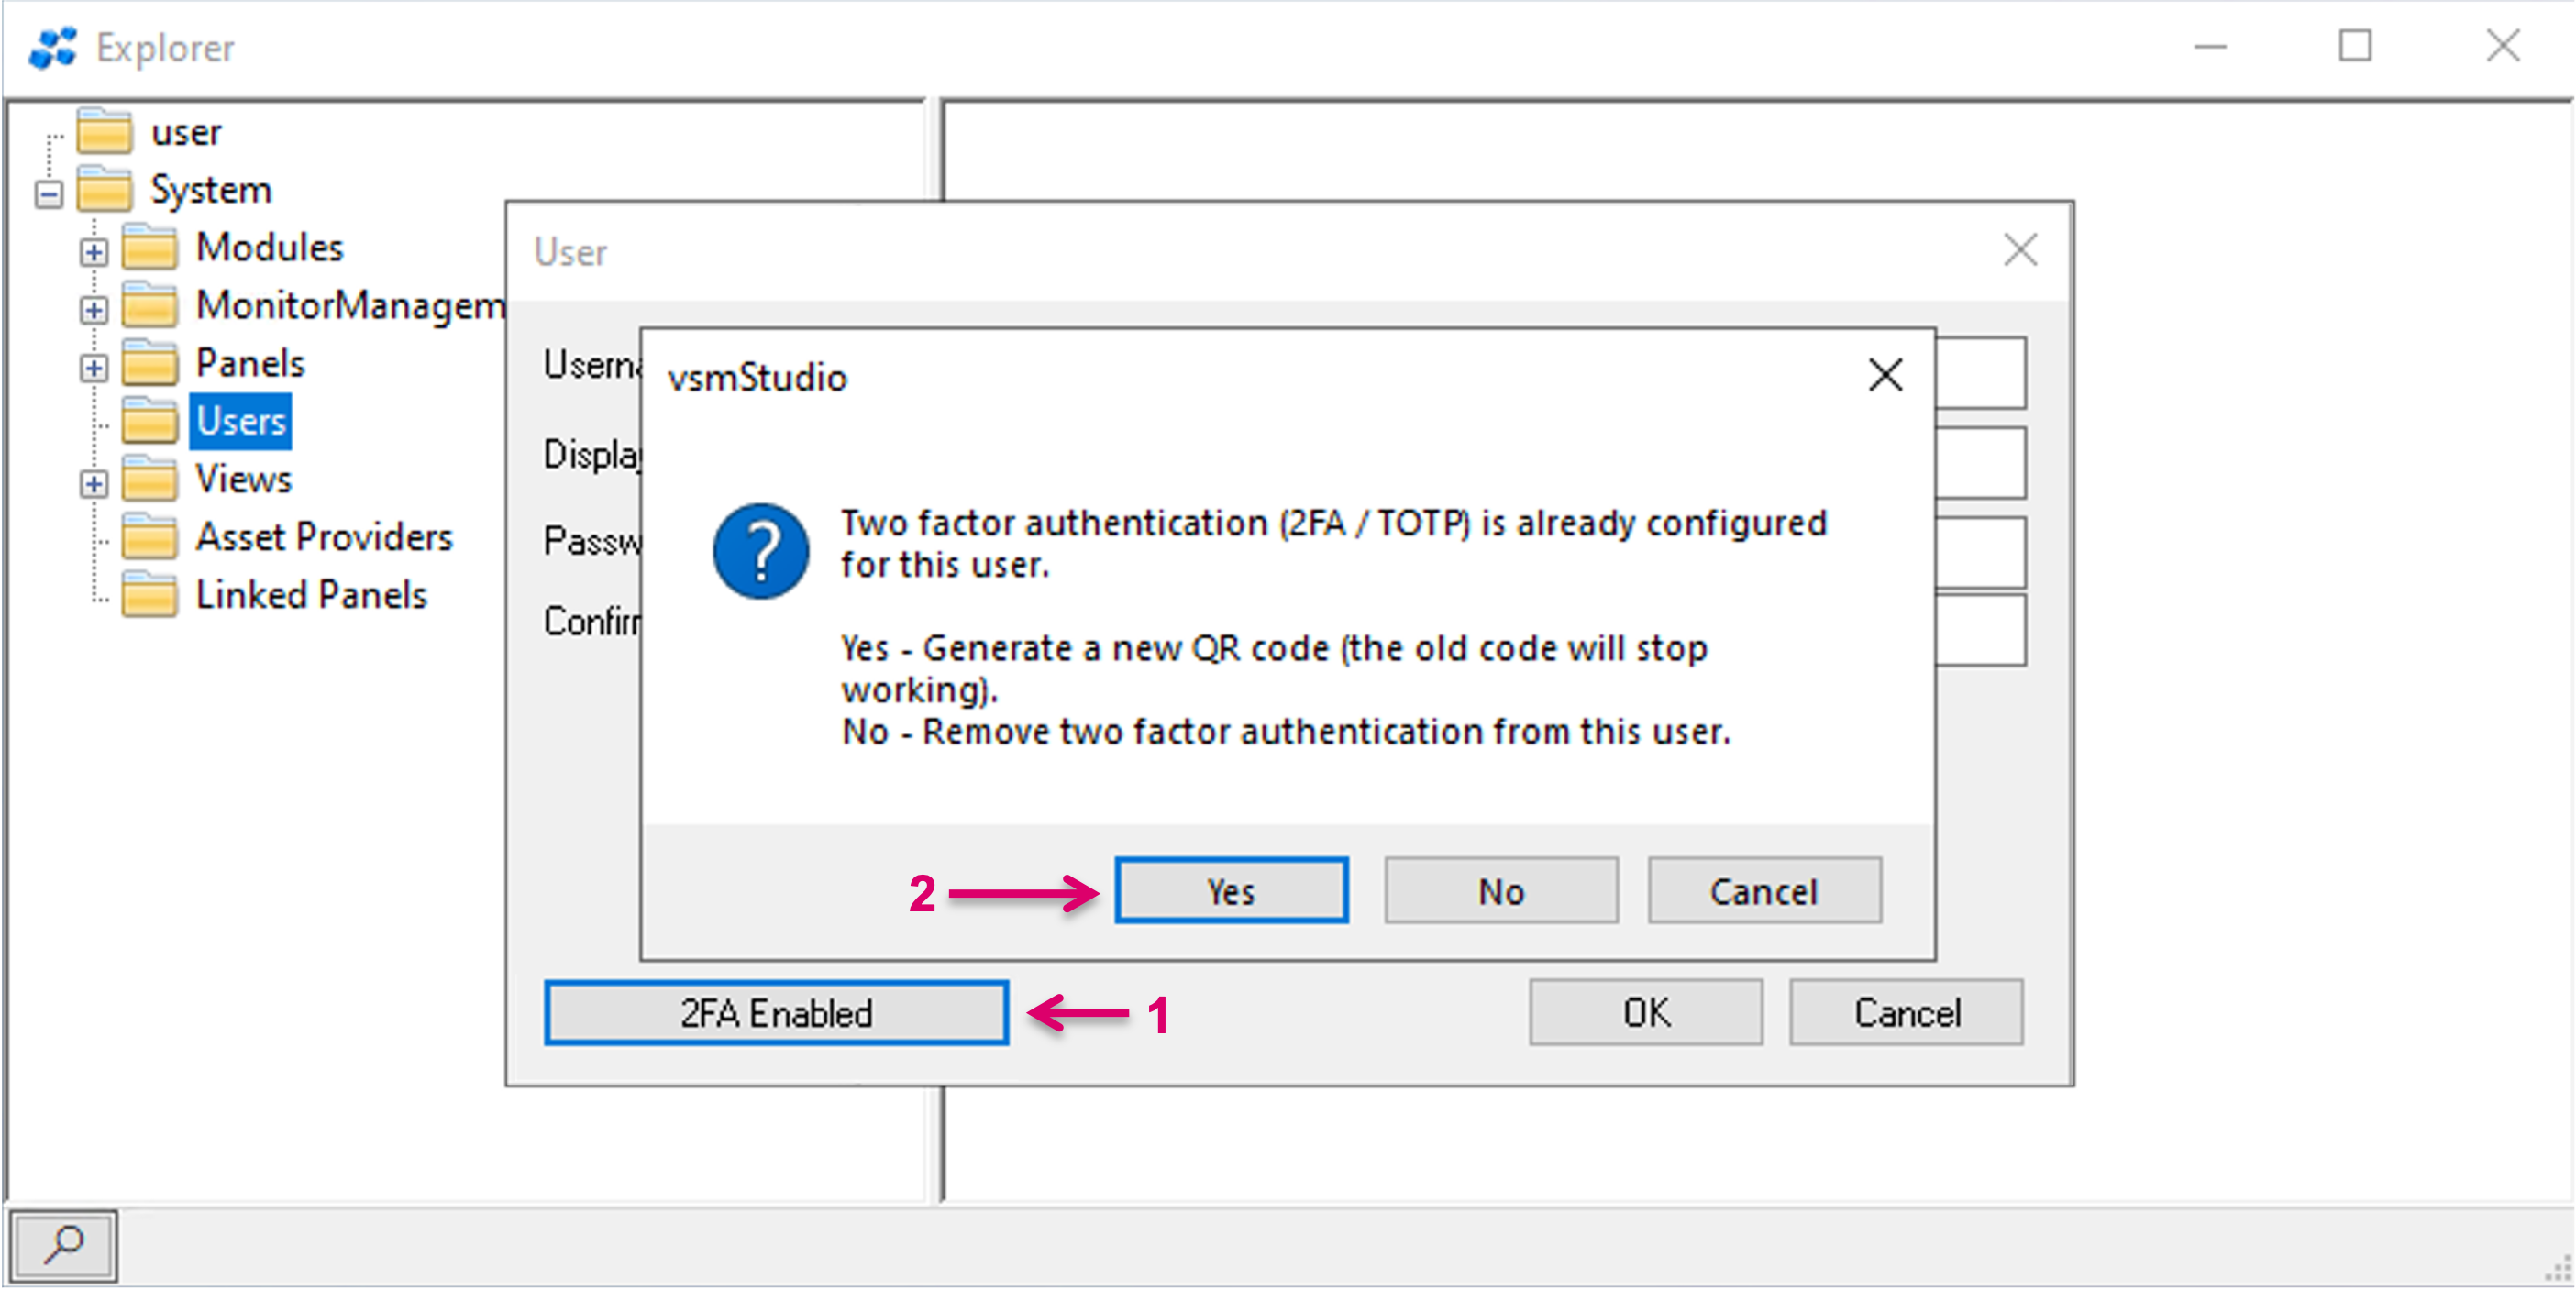
If 2FA is enabled, the button will show accordingly (1). To generate a new QR code or remove two factor authentication from this User, click the respective button and choose the respective option (2).
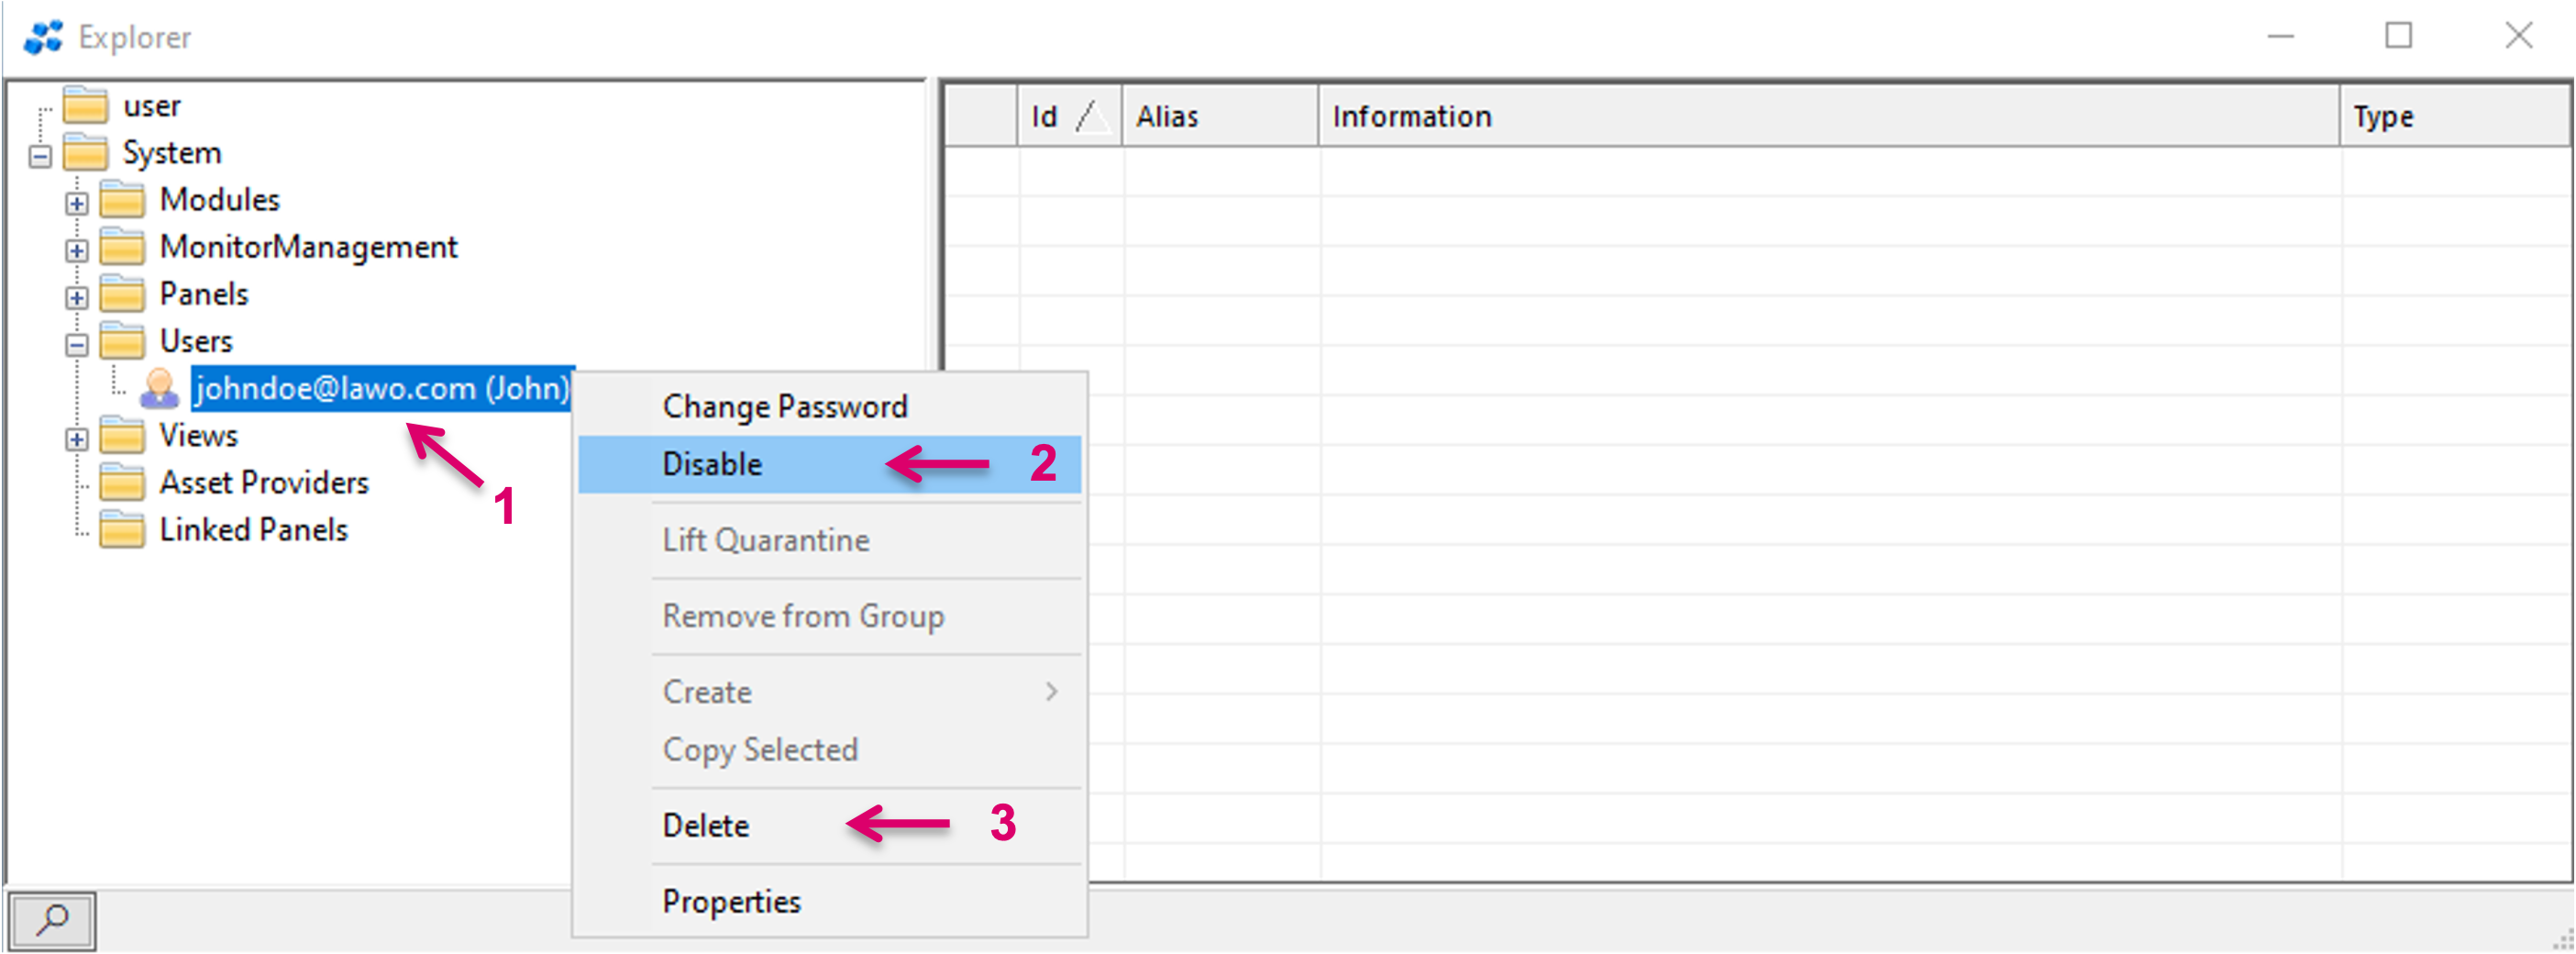
To disable a listed User, select the respective User (1) and Disable (2). To Enable a disabled User follow the same process and remove the Disable flag. Select Delete (3) to delete a User. Please note that this action cannot be undone.
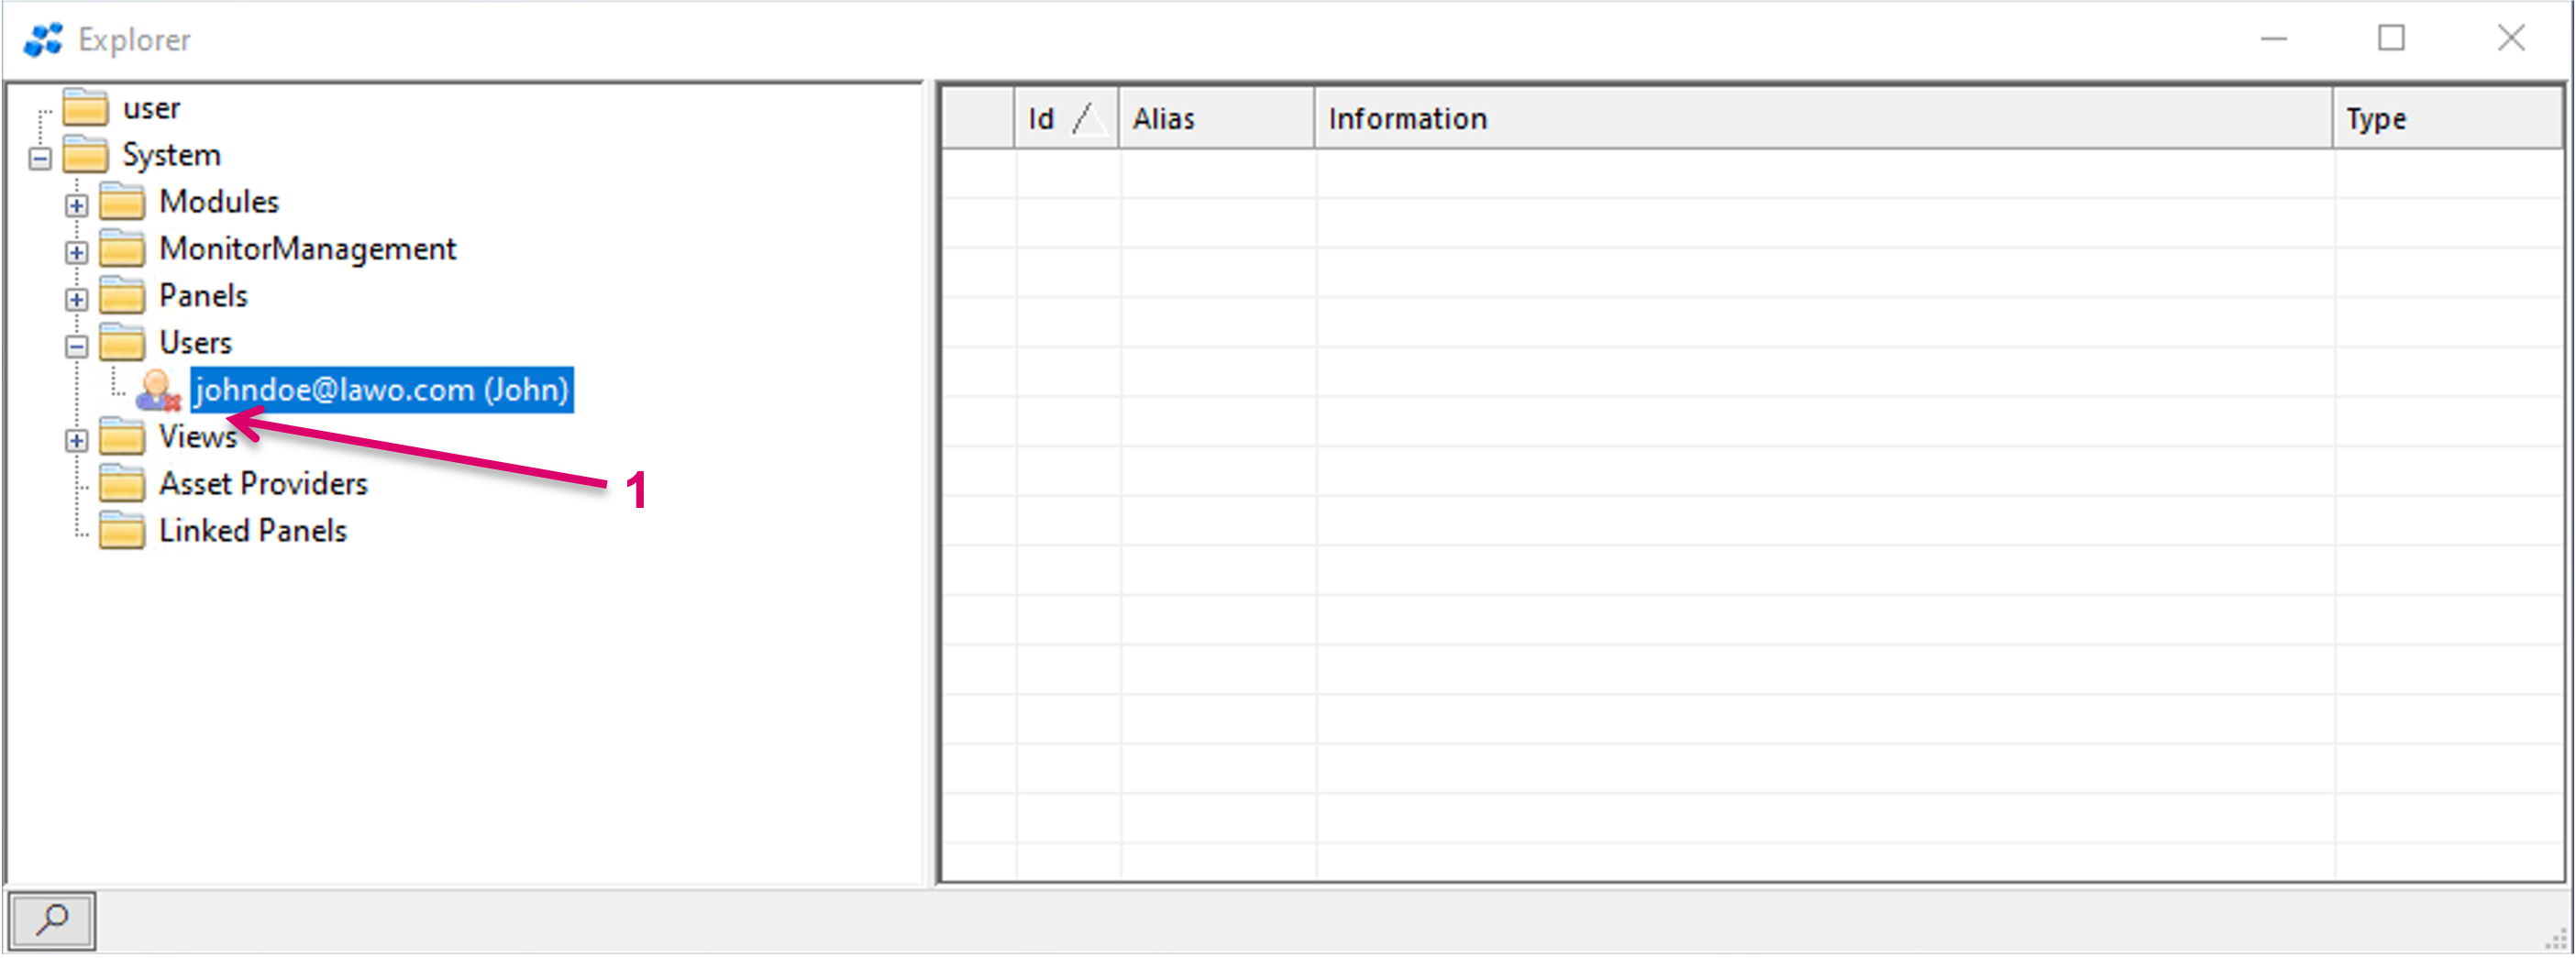
A disabled User is displayed in the list with a red x icon (1).
A User, who is currently logged in and connected to a panel, gets disabled, will immediately lose Panel access. He will remain logged in on the web browser session, unless actively signing off or refreshing the browser session. Then he won't be able to Sign in again unless this User is enabled again.
Create and manage User Groups
Users can be added to User Groups in order to share the same role assignments. like panels they can access. User Groups can in general be used to organise different User Groups in the system. It is possible to create Groups in Groups (subgroups).
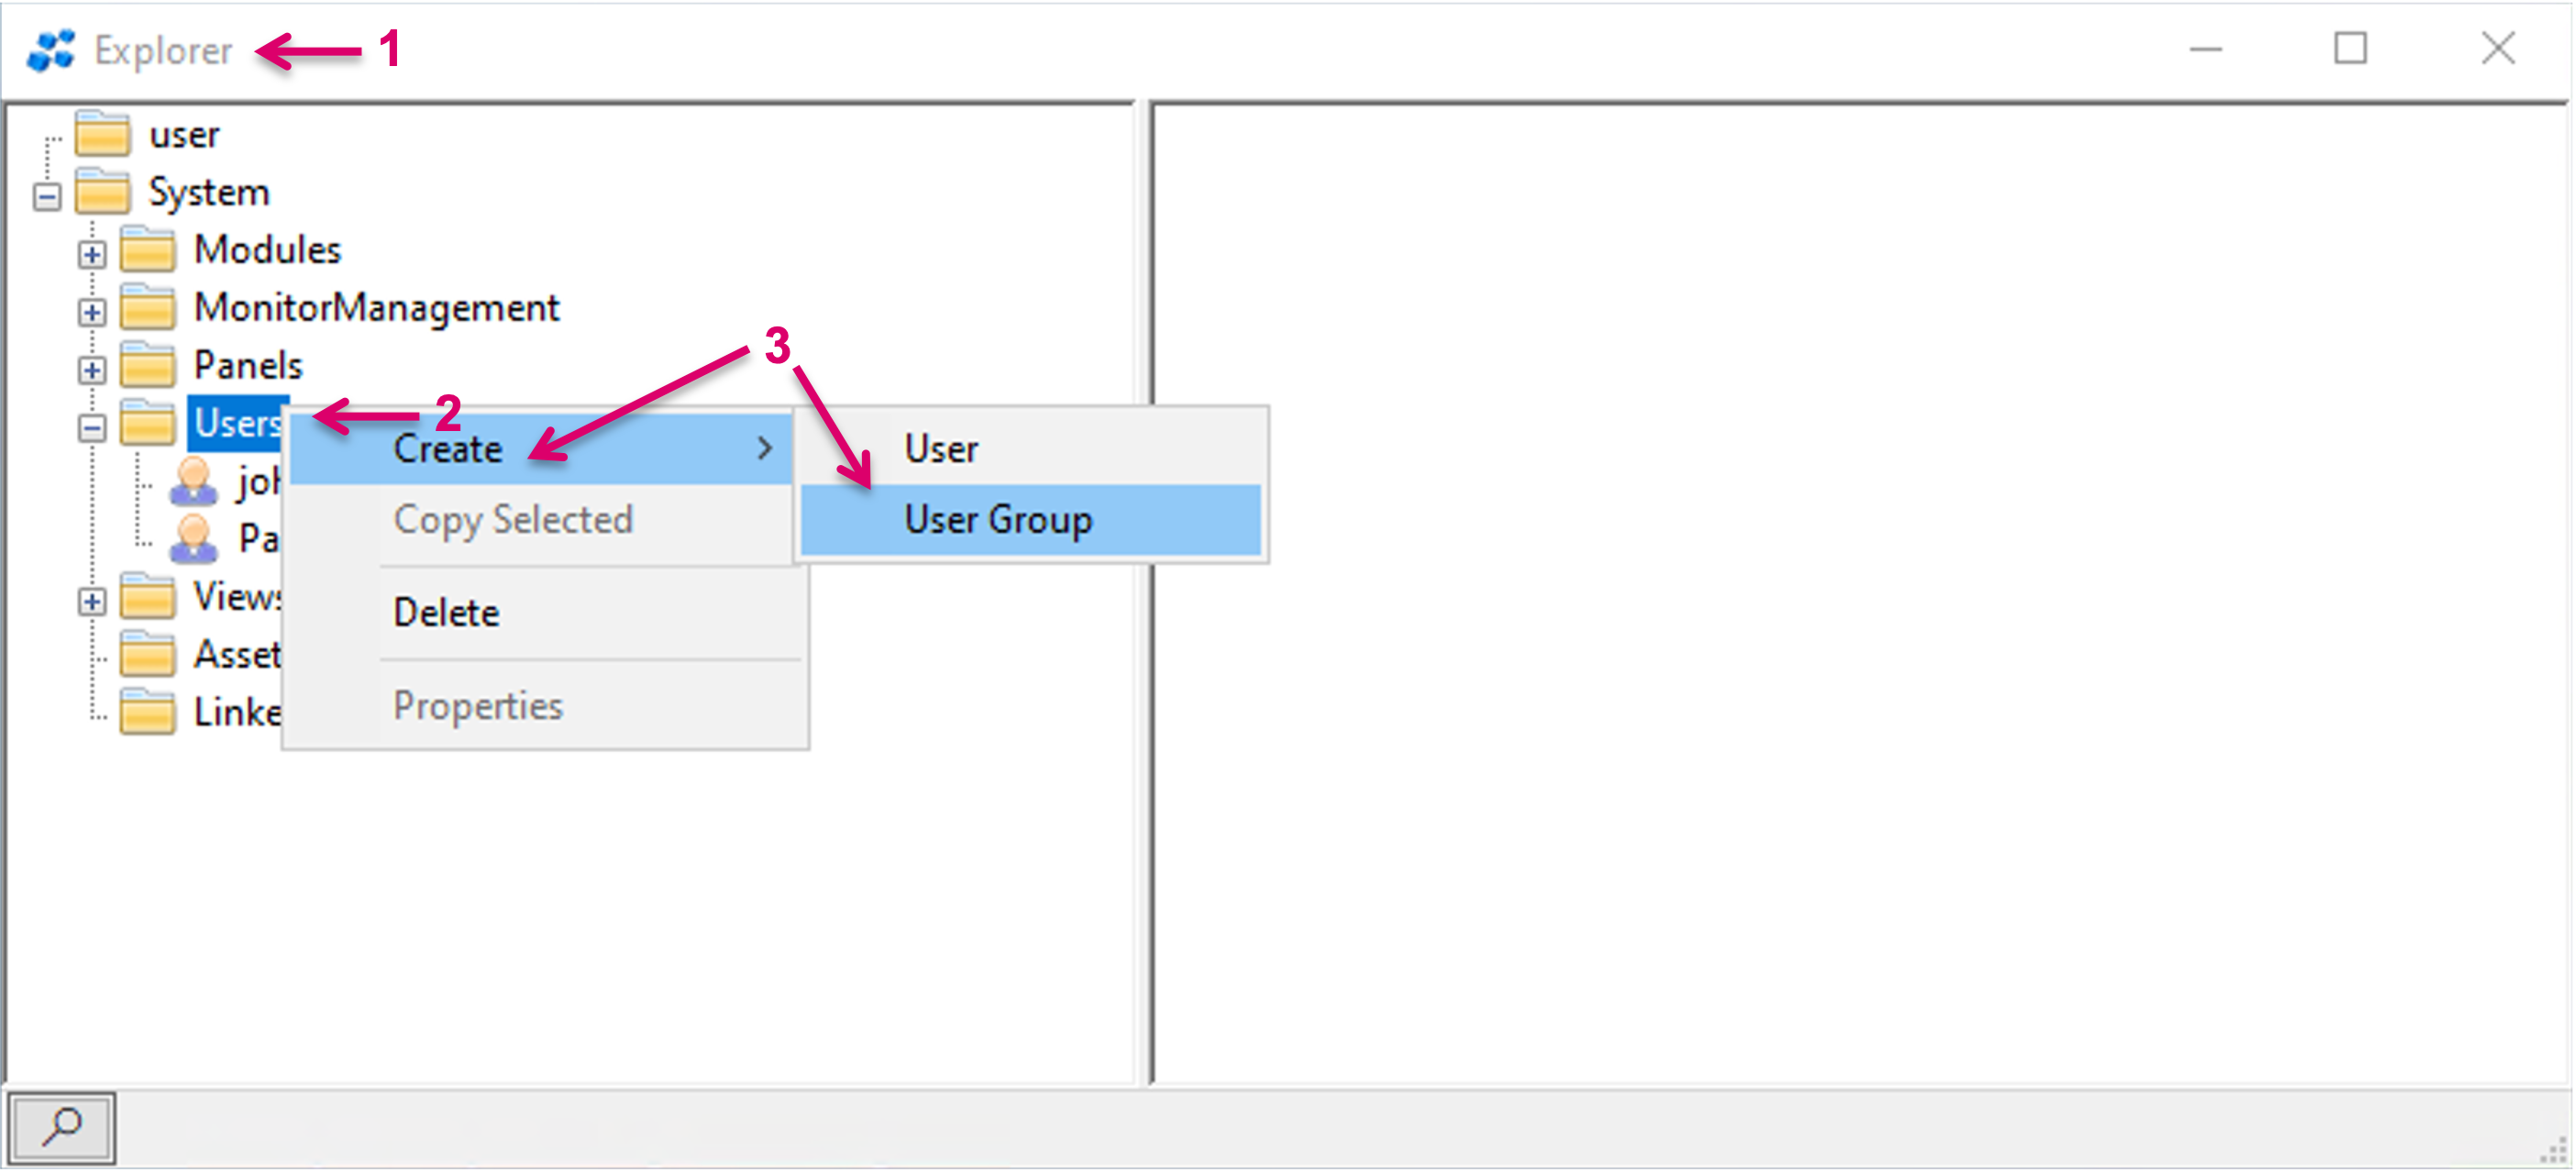
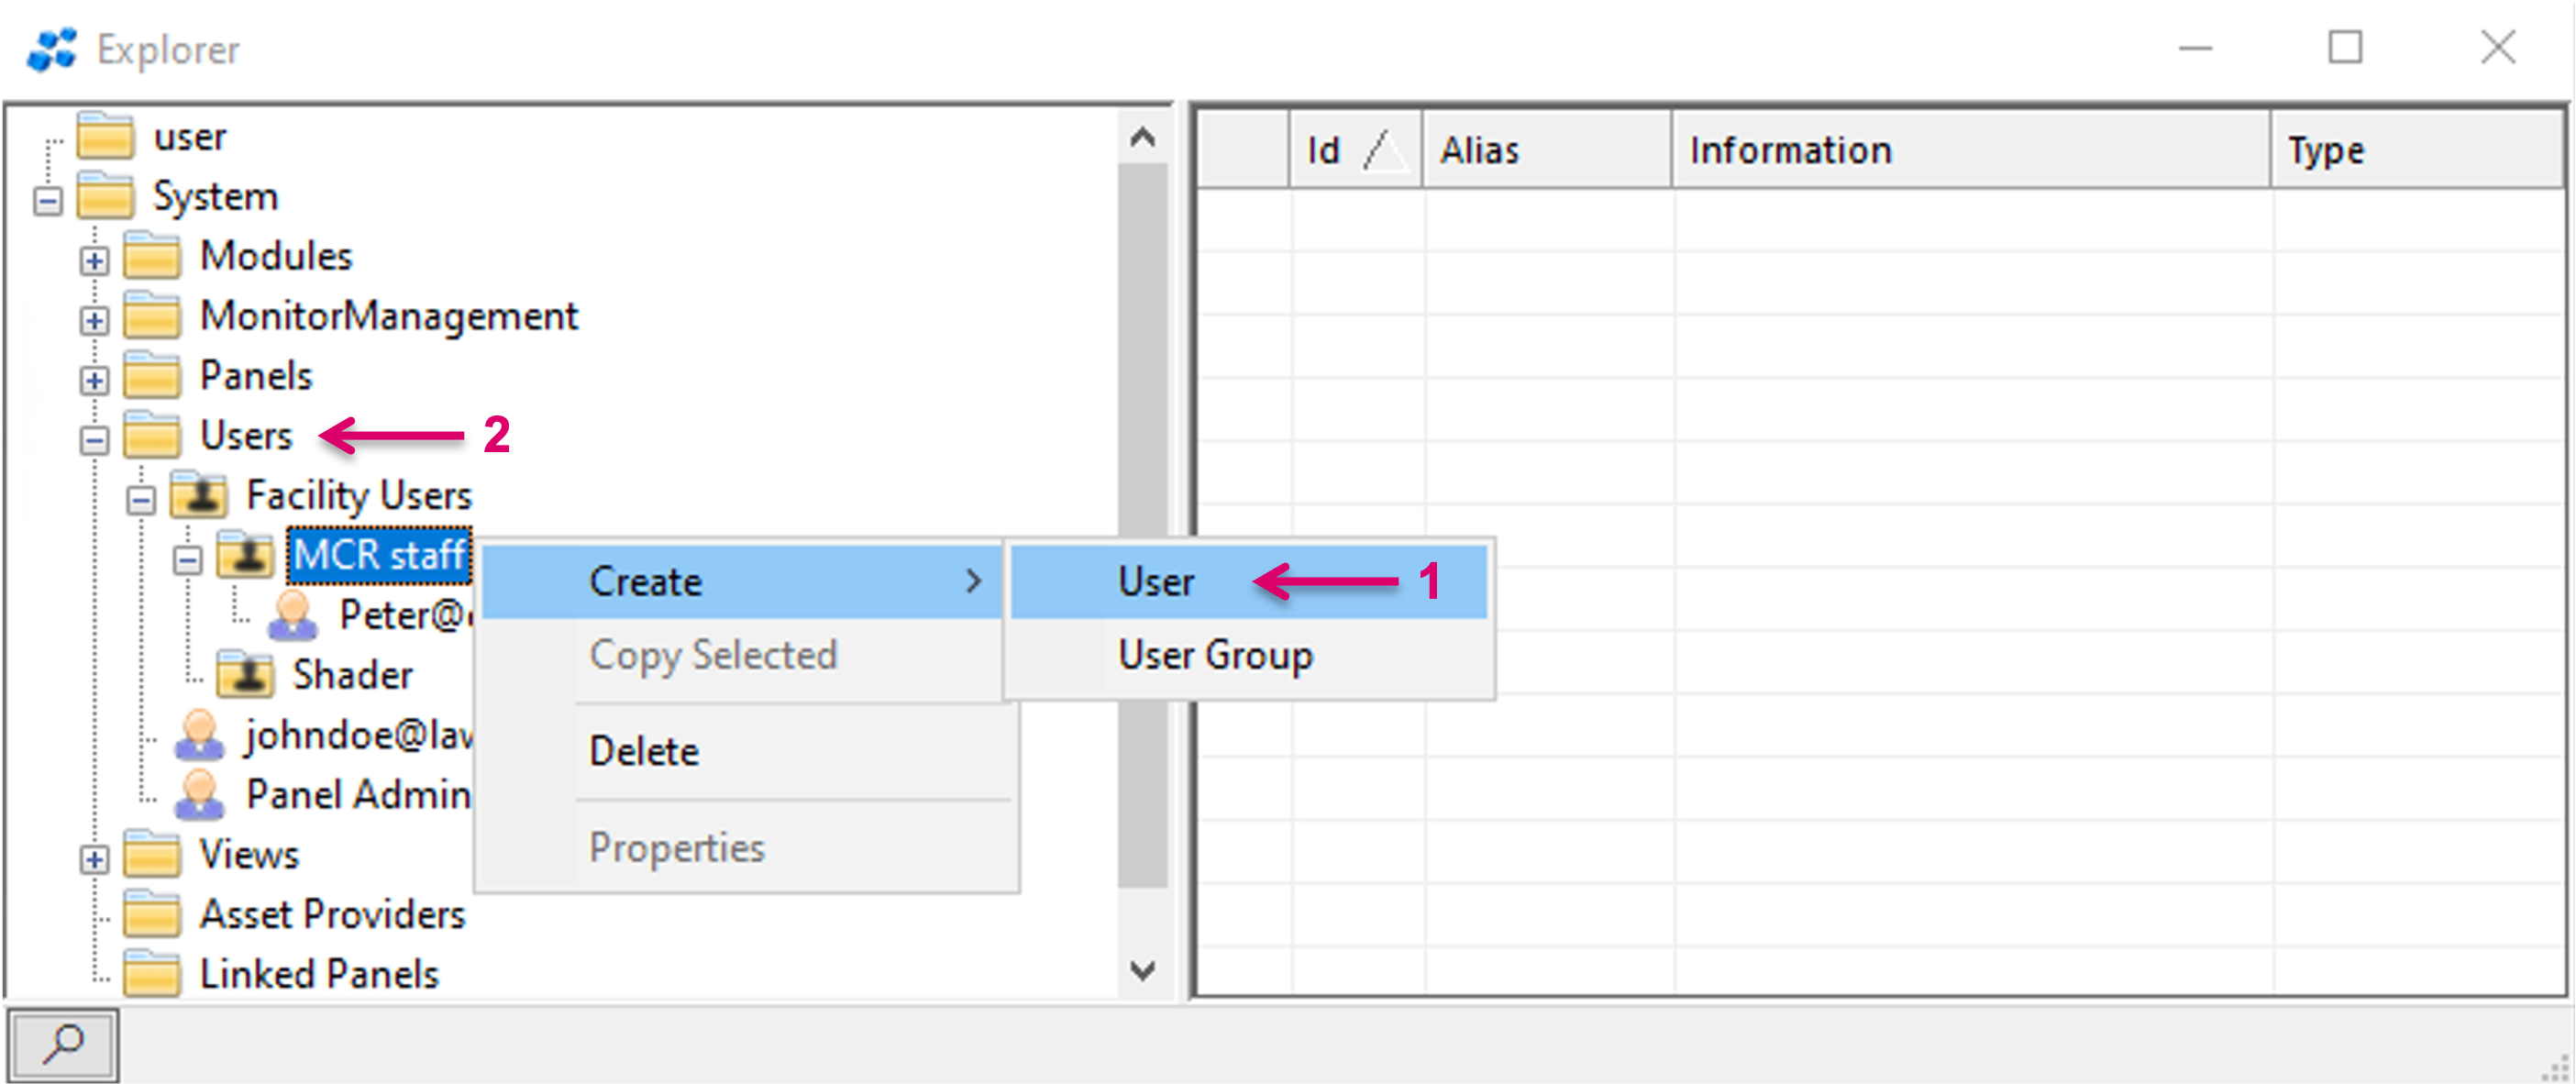
In the Explorer view (1), right mouse button click onto the folder "Users" (2), then select Create and User Group (3).
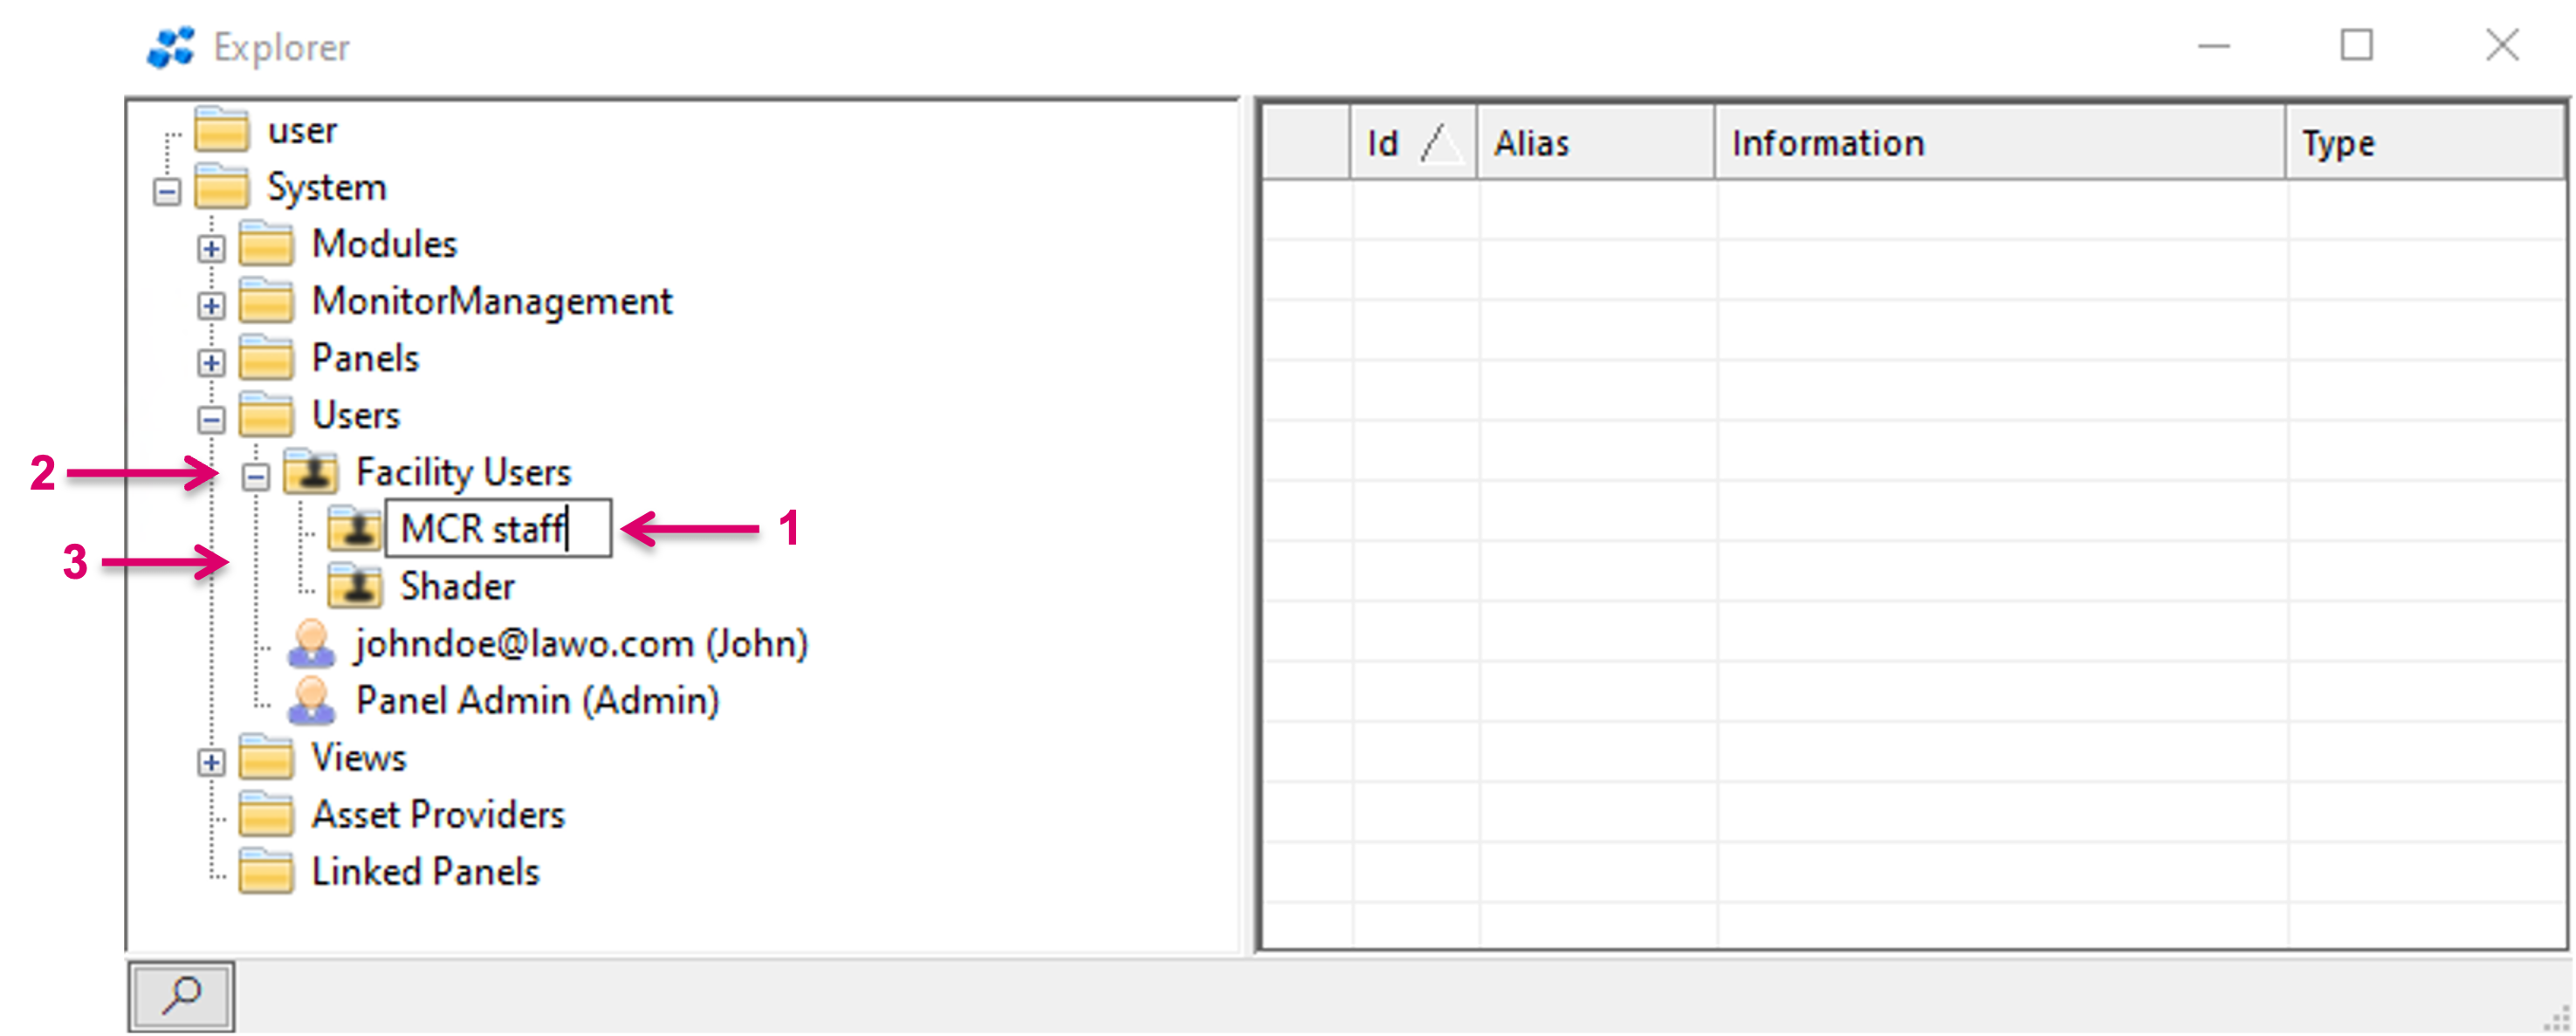
A Group entry will be created and listed immediately. Set a descriptive name (1) and confirm by pressing enter. The example shows a parent User Group (2) and two subgroups (3).
Users can be created inside (1) or outside User Groups (2). Users can be moved later while User Groups cannot be moved after creation.
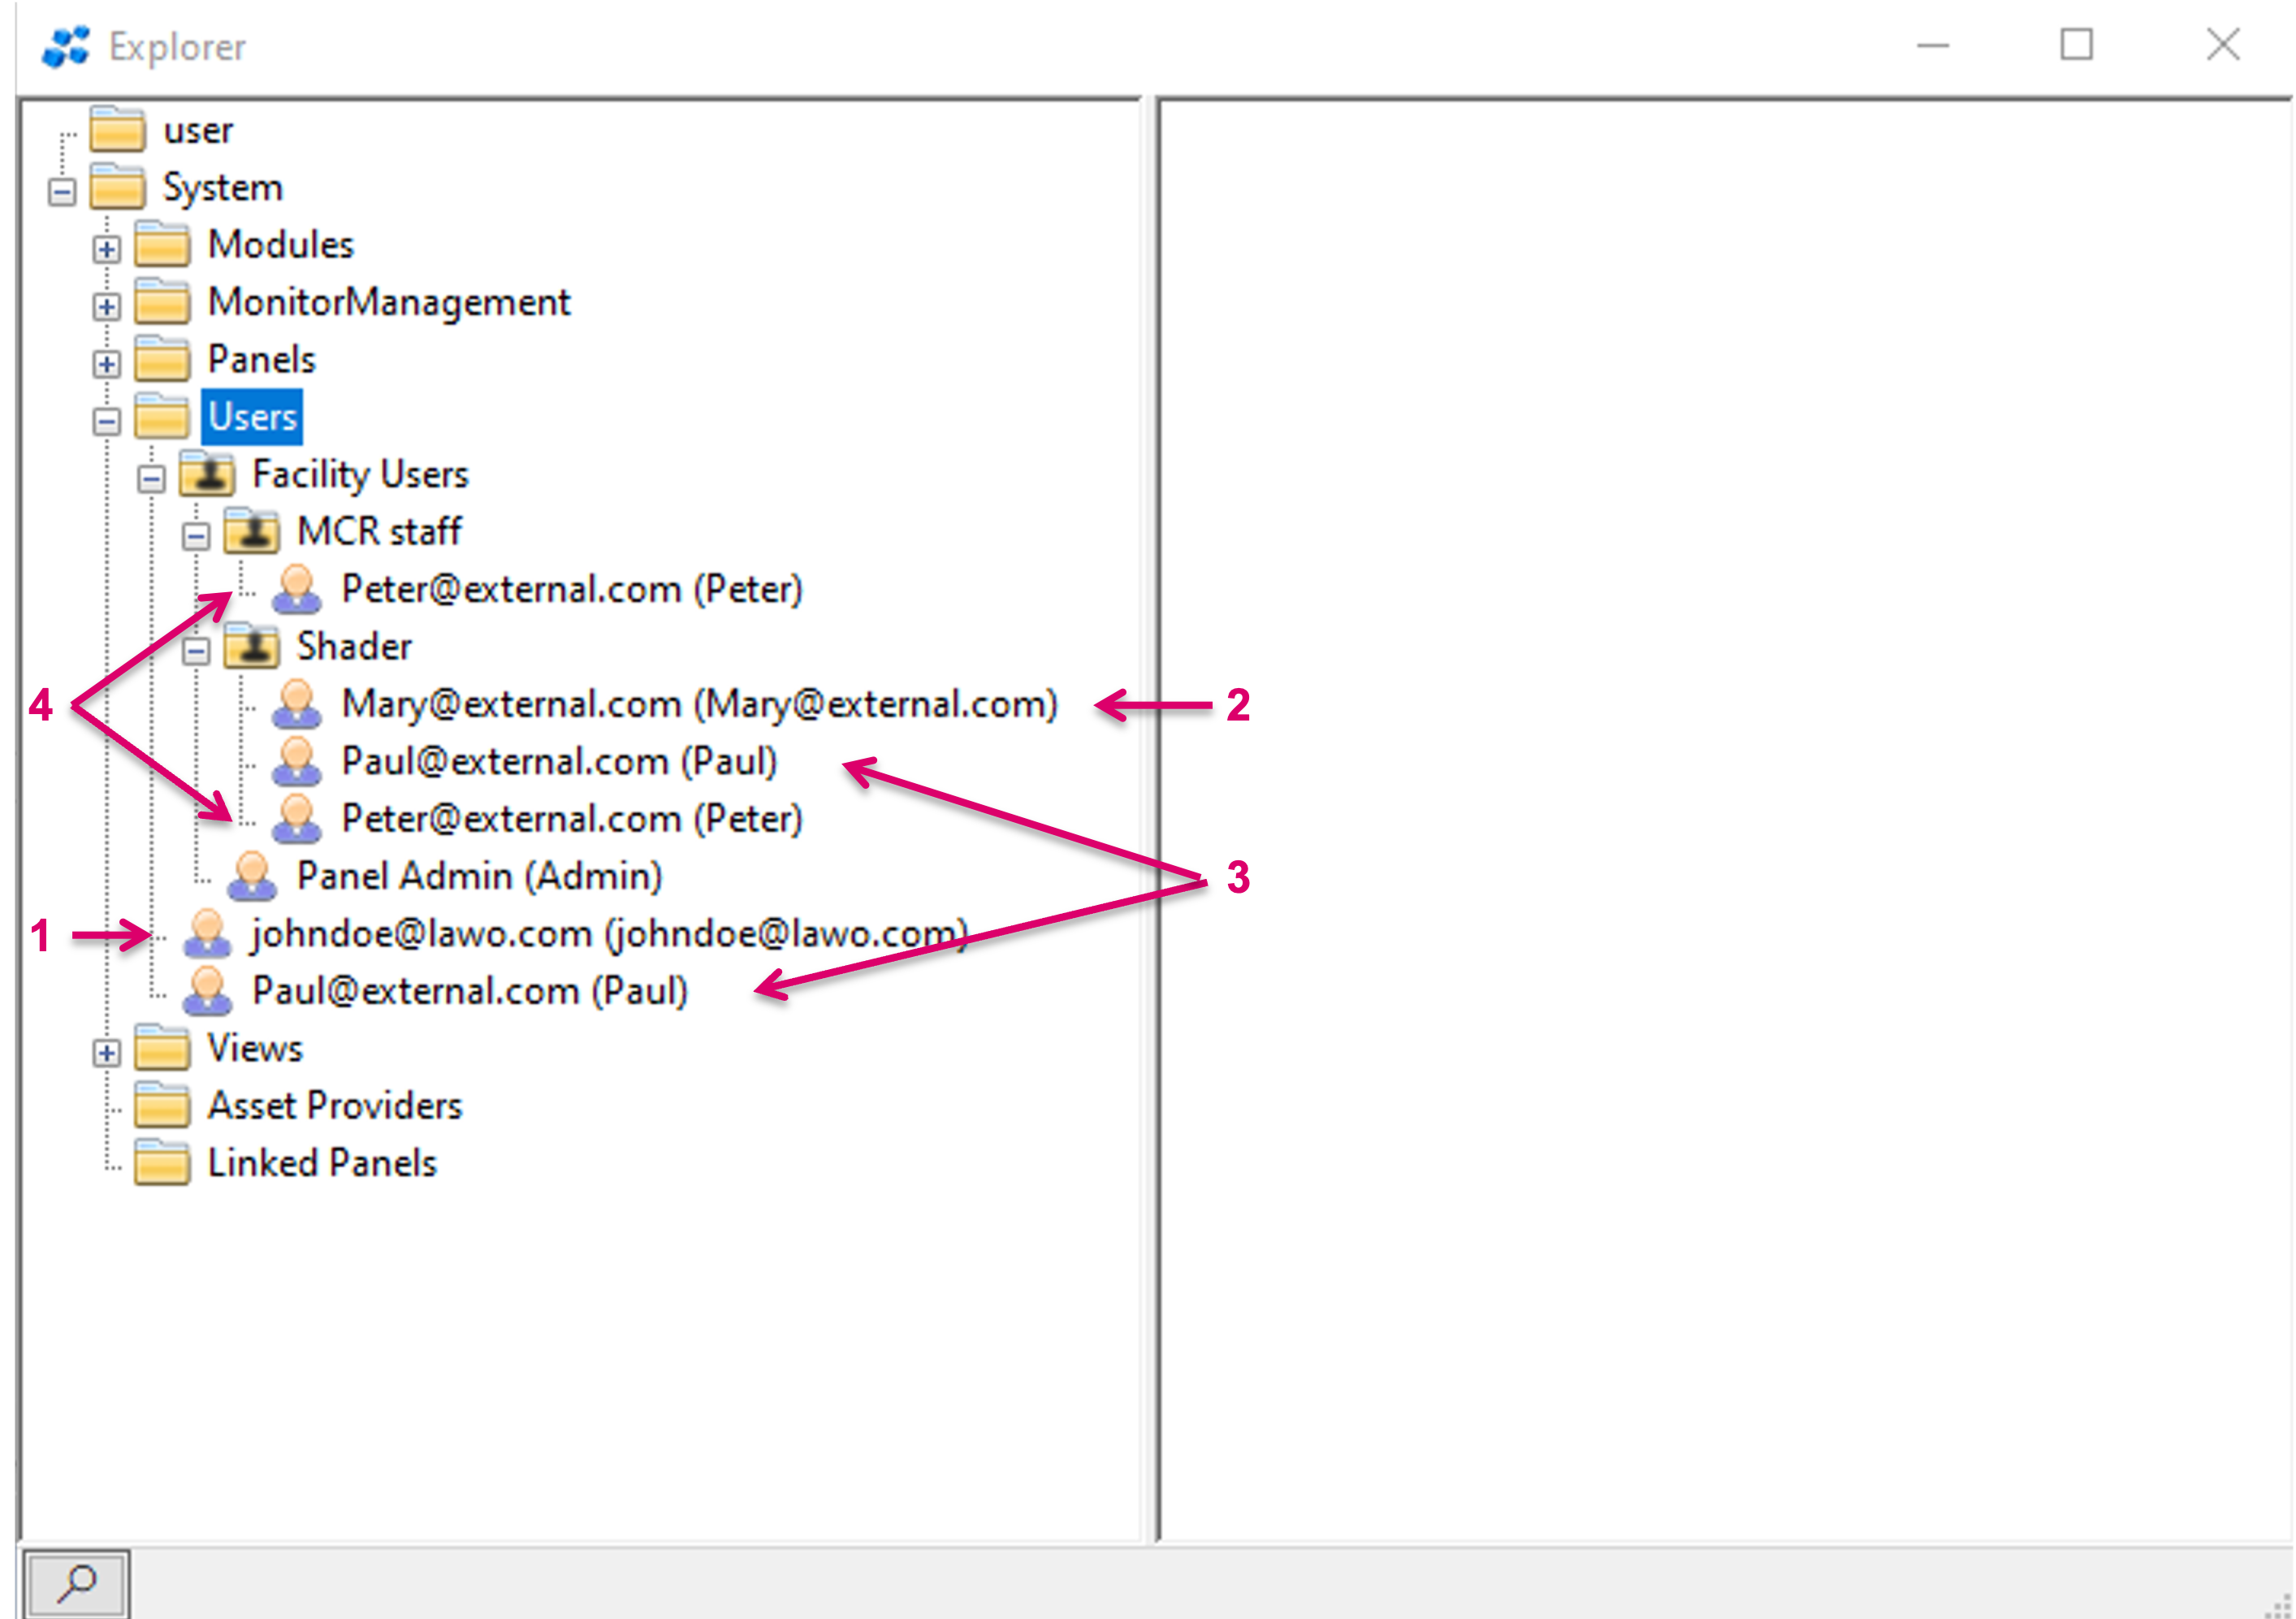
Users can be assigned in various ways. Assigned to the top Users node only (1), or to one Group only (2), or to top node and a Group (3) or multiple Group (4), etc.
Moving a User to a different position can be executed by drag and drop operation (1).

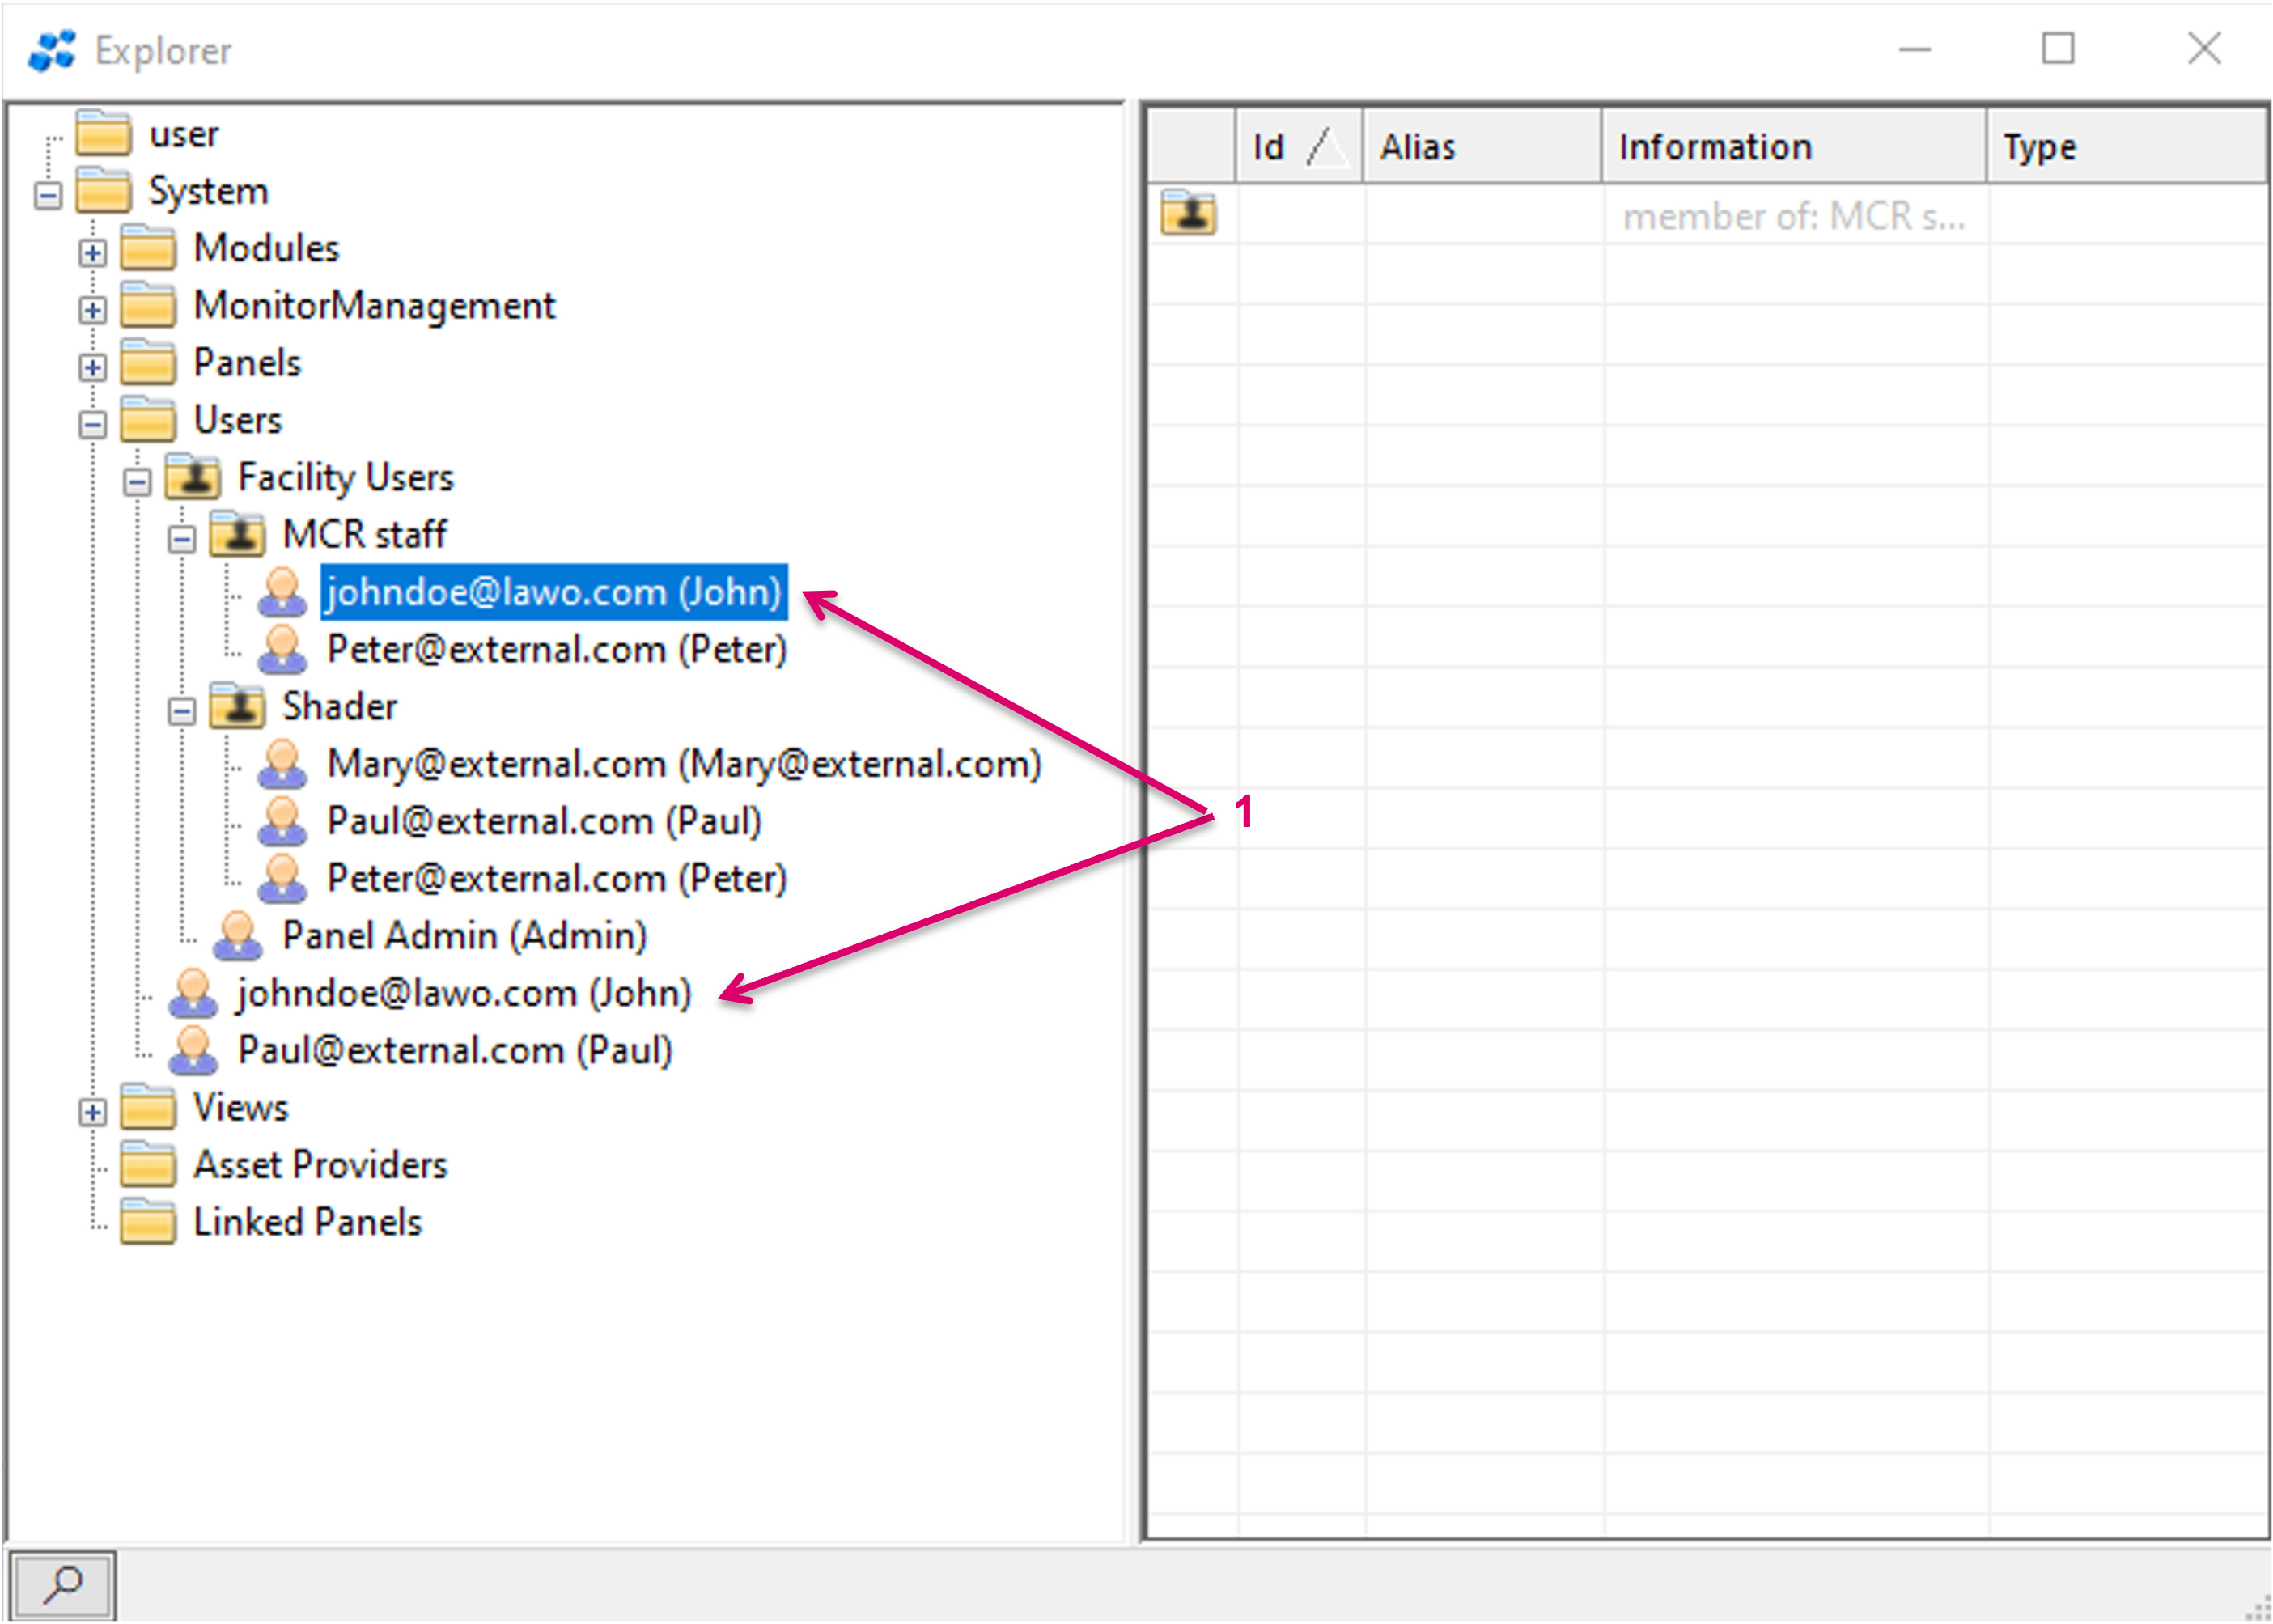
If executing a simple drag and drop operation, the User is copied to the other location and as in the example will then be assigned to both locations (1).
If holding down the Shilft key, then selecting the respective User and then dragging and dropping, the User entry will be moved to the new location and will only be assigned to the new location (1).
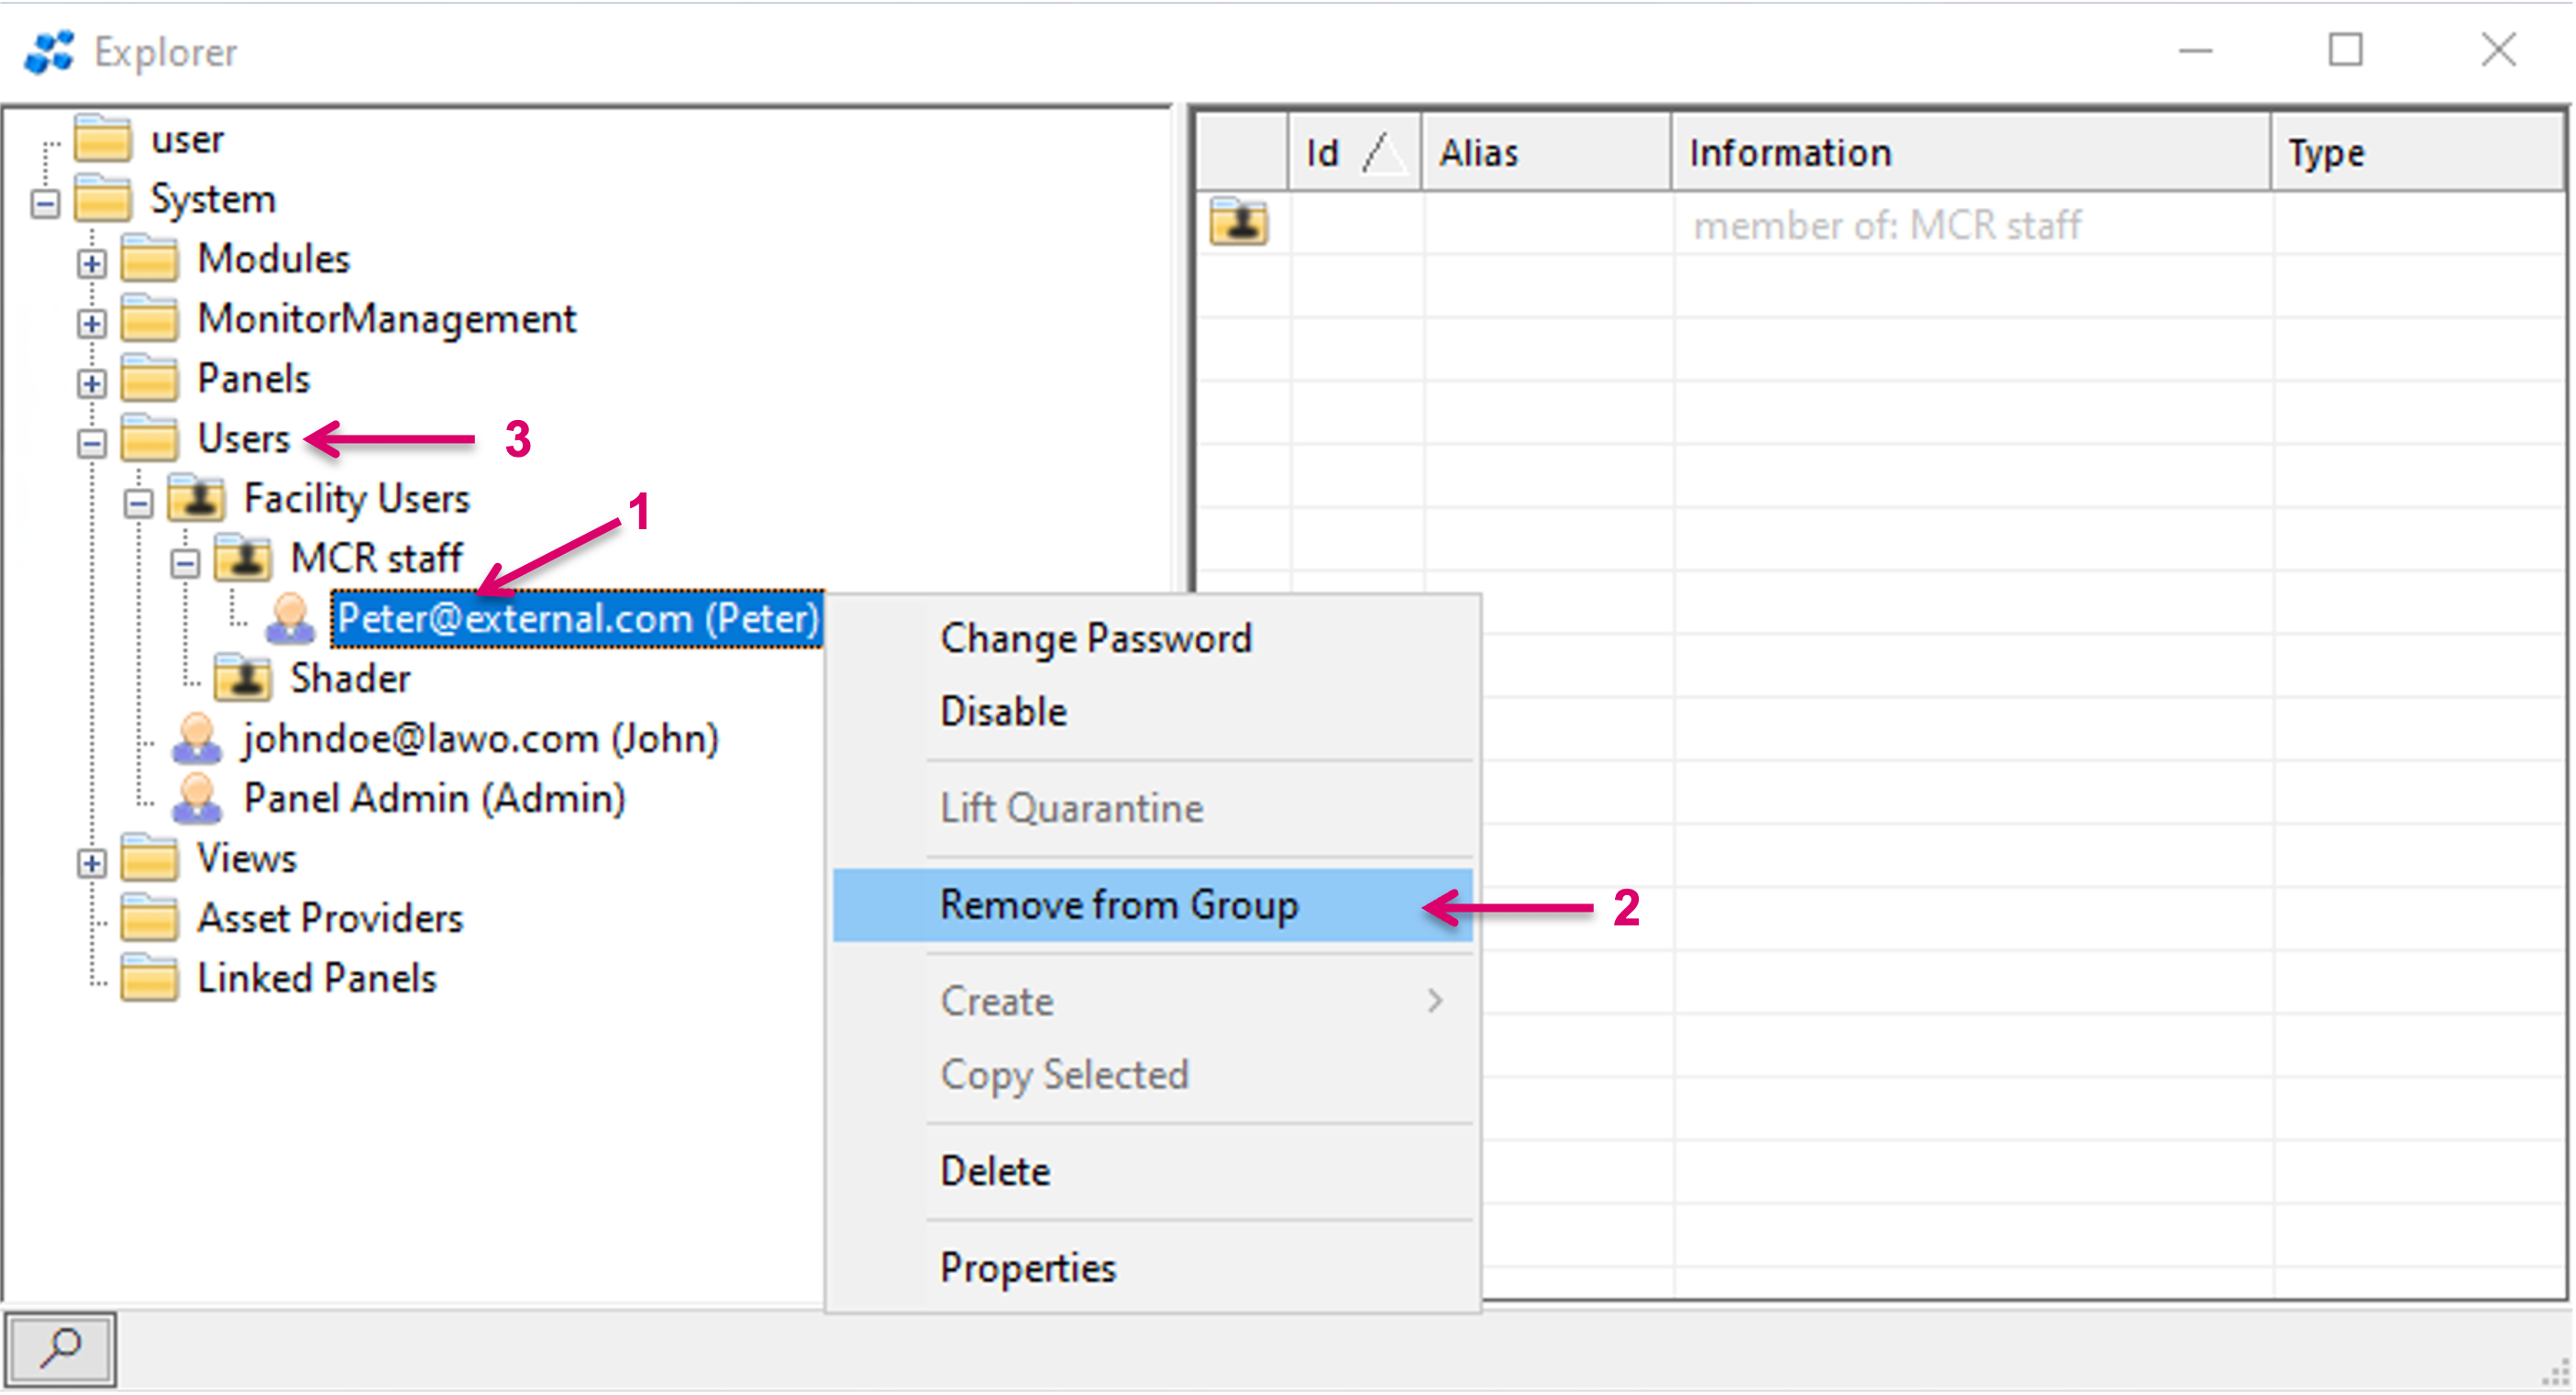
Users can be removed from a User Group by selecting the respective User (1) and selcting Remove from Group (2). The User will be moved outside of the User Group and will be listed afterwards under the top Users node (3).
Panel to User assignments
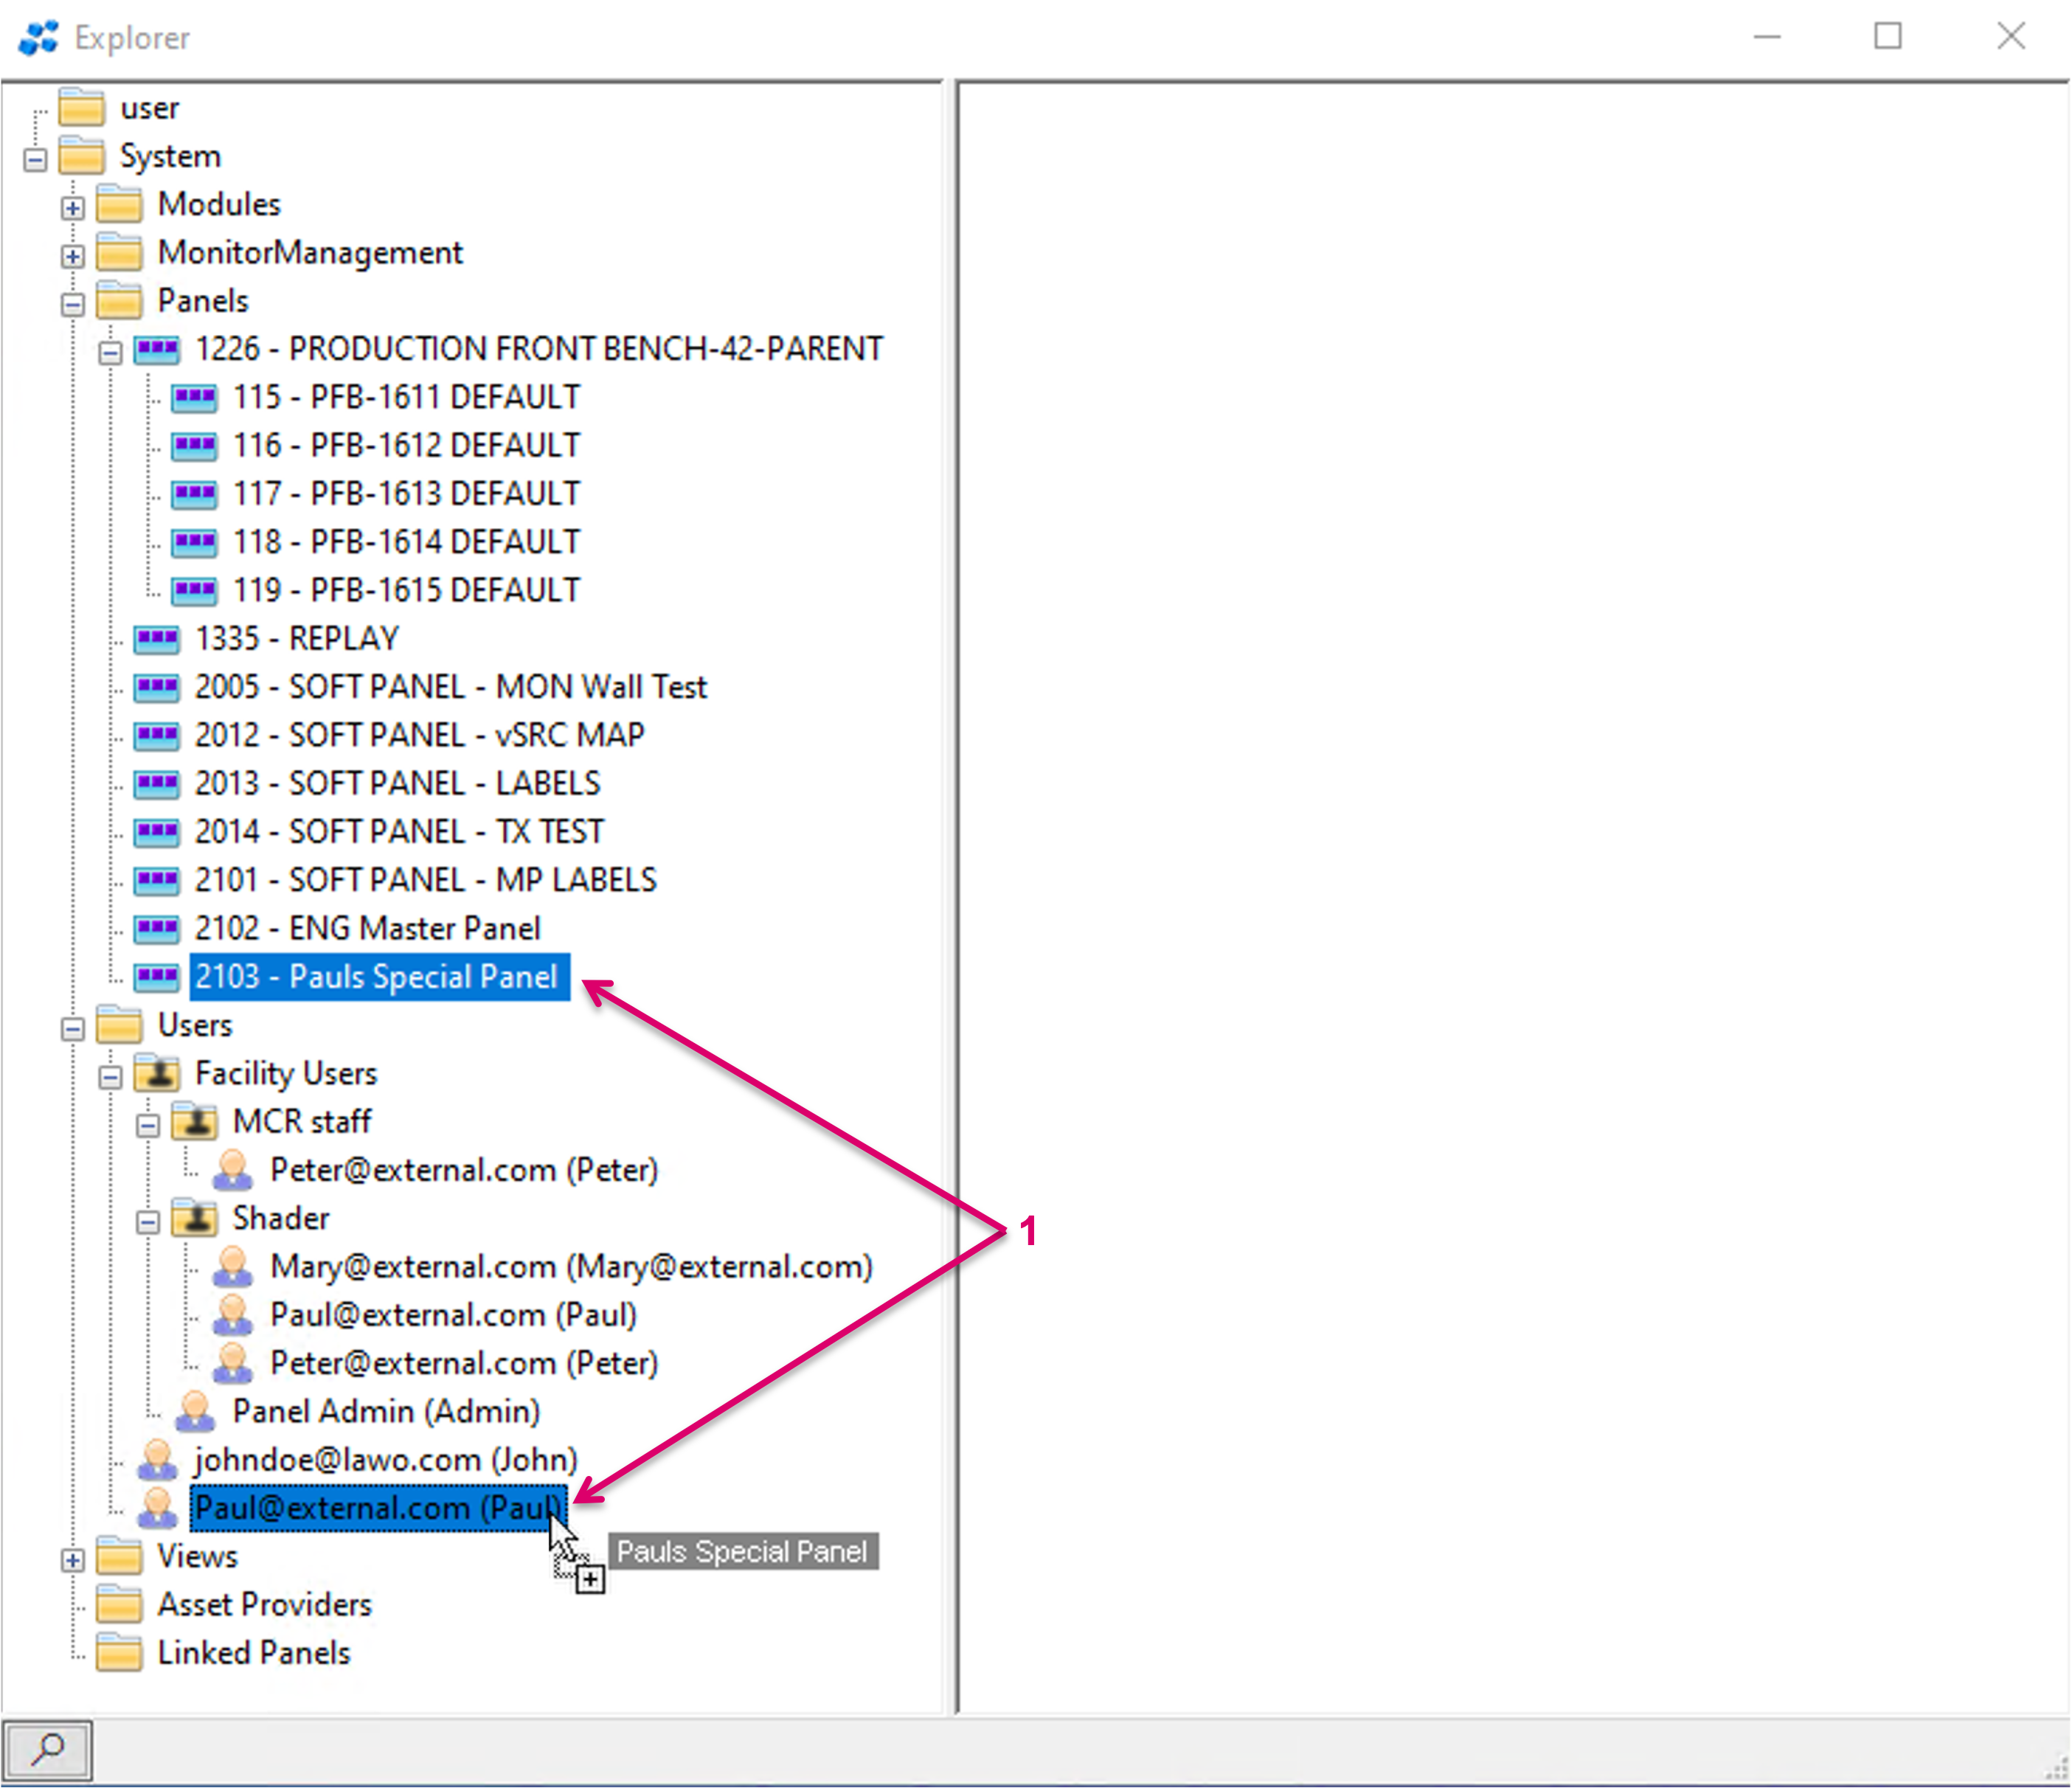
Panels can easily be assigned to Users by drag and drop (1).
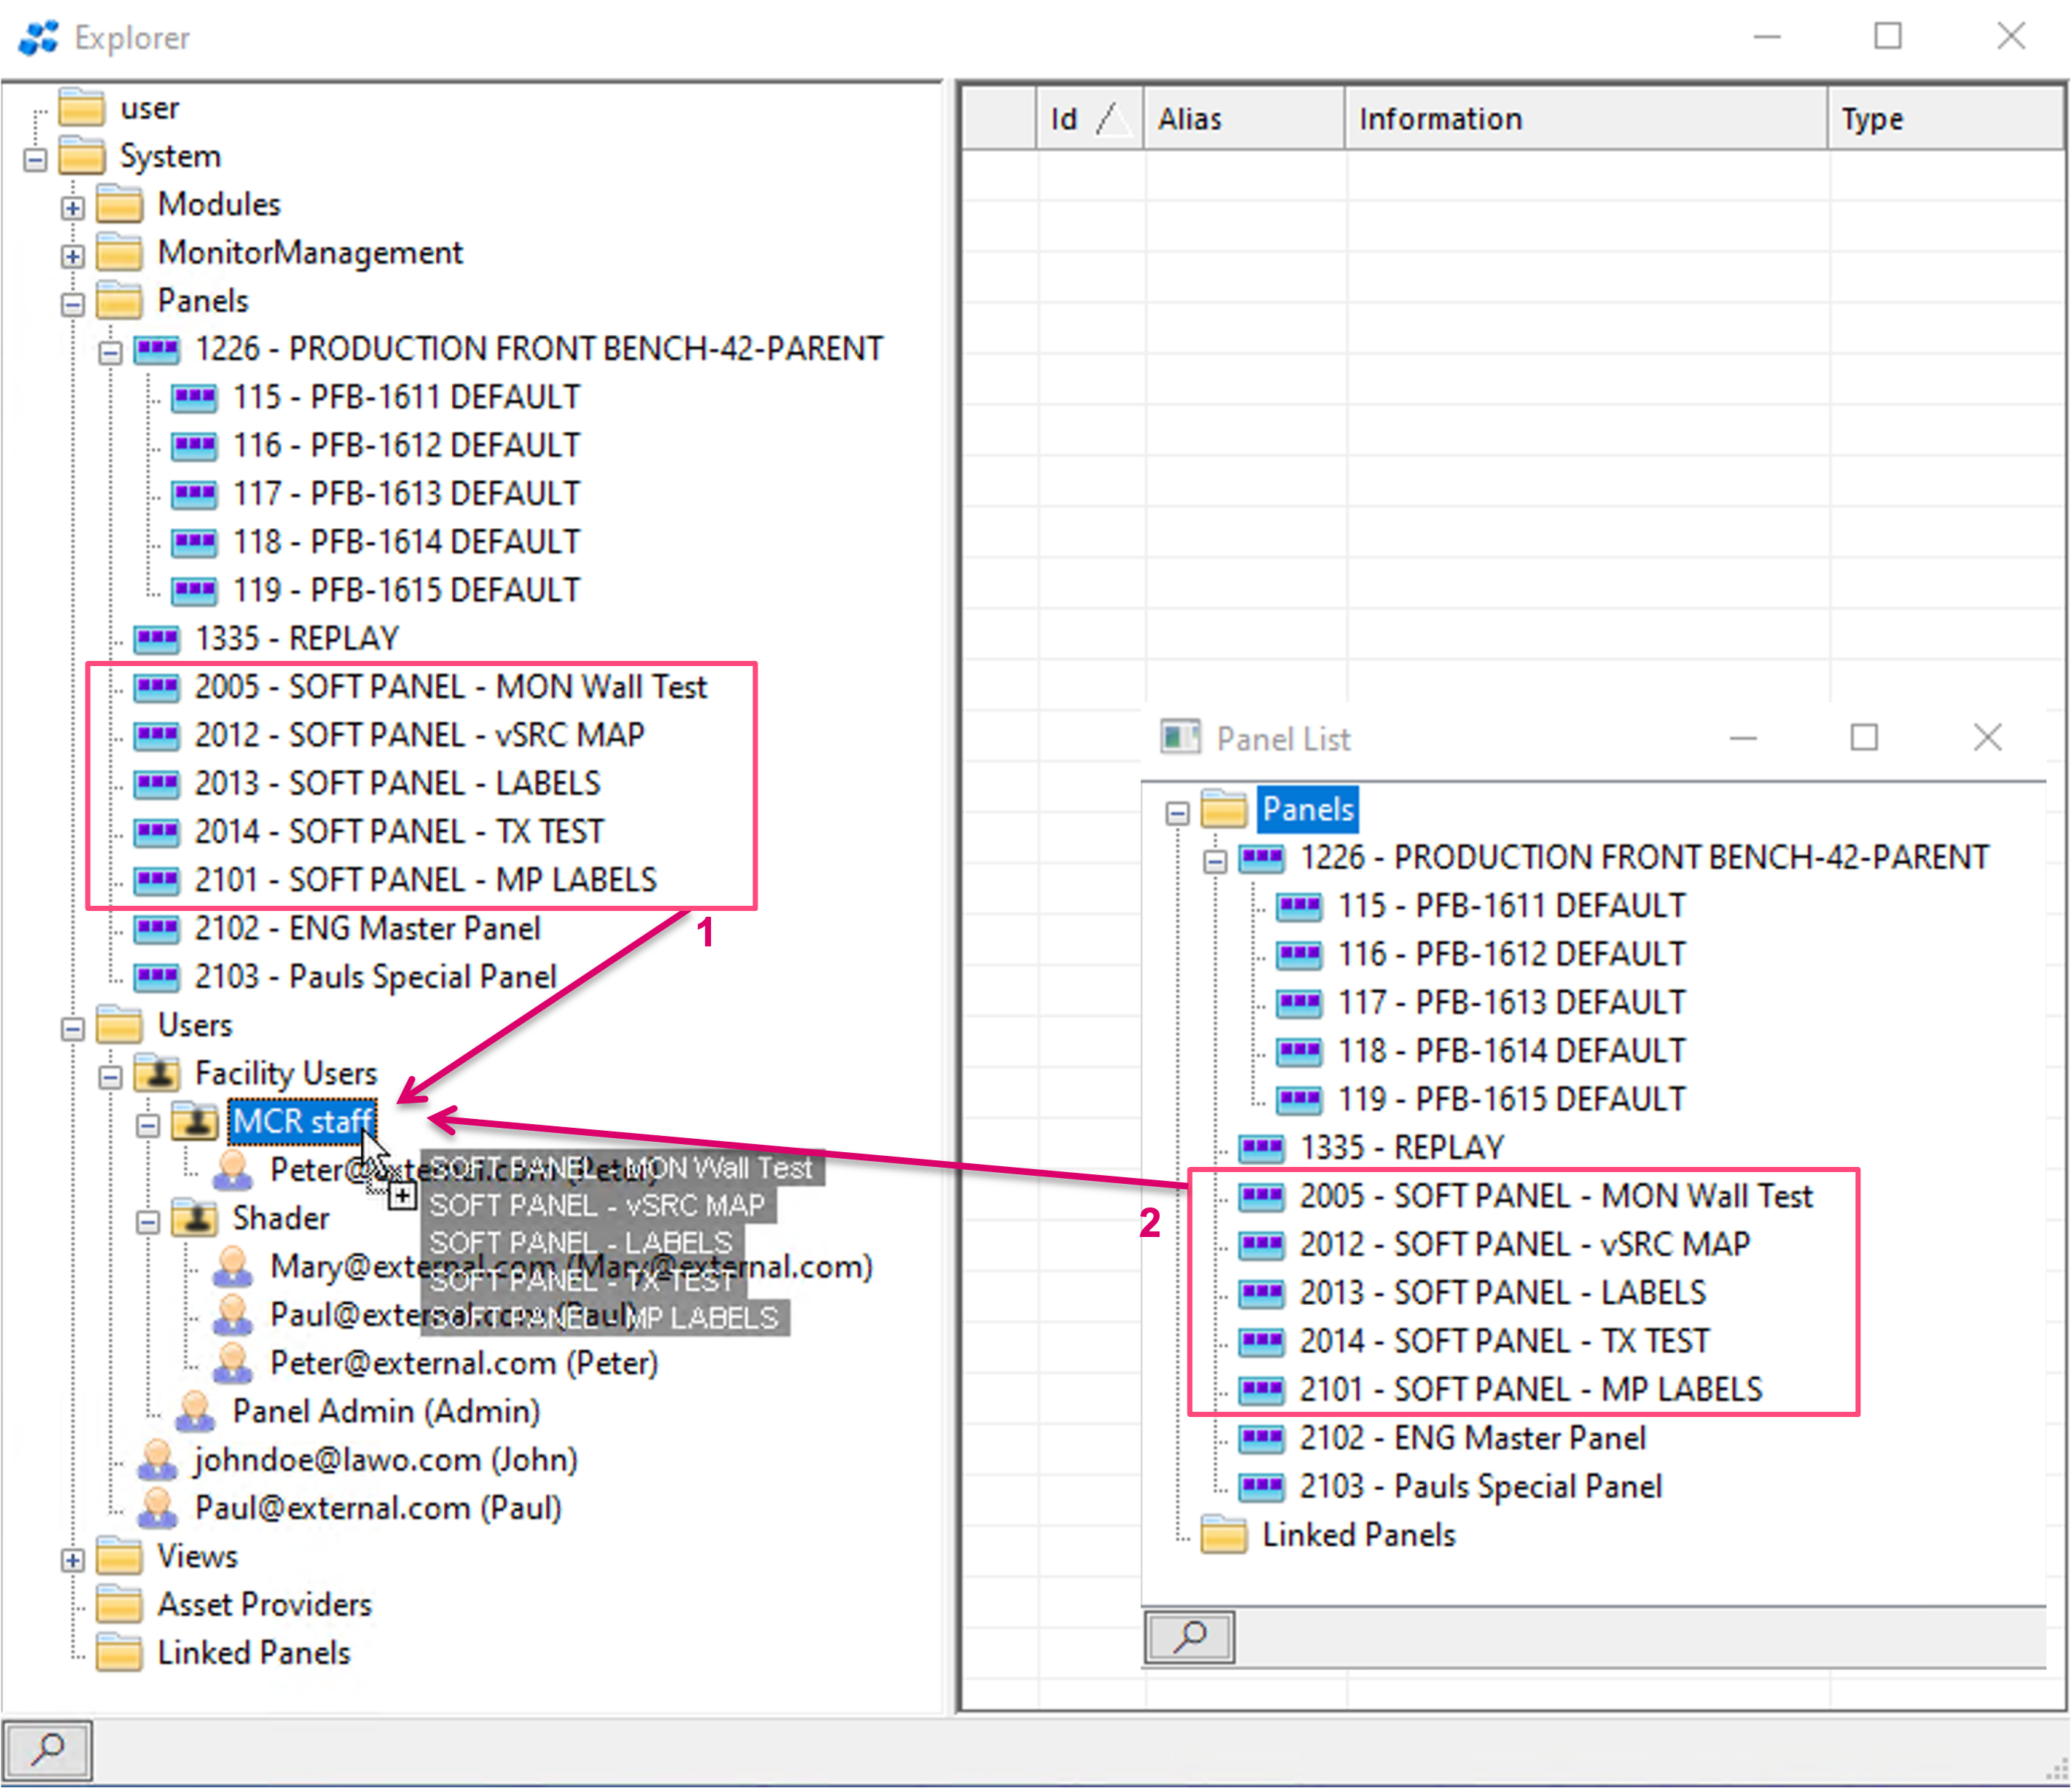
Panels can be dragged from the Panels node in the Explorer Directory (1) or the Panel List (2) and dropped to both, direct Users as well as User Groups.
Users assigned to a User Group (1) get access to all Panels assigned to the respective User Group (2).

Users (1) can be member of a User Group and get access to the assigned Panels of the Group, but at the same time have exclusive Panel assignments (2).
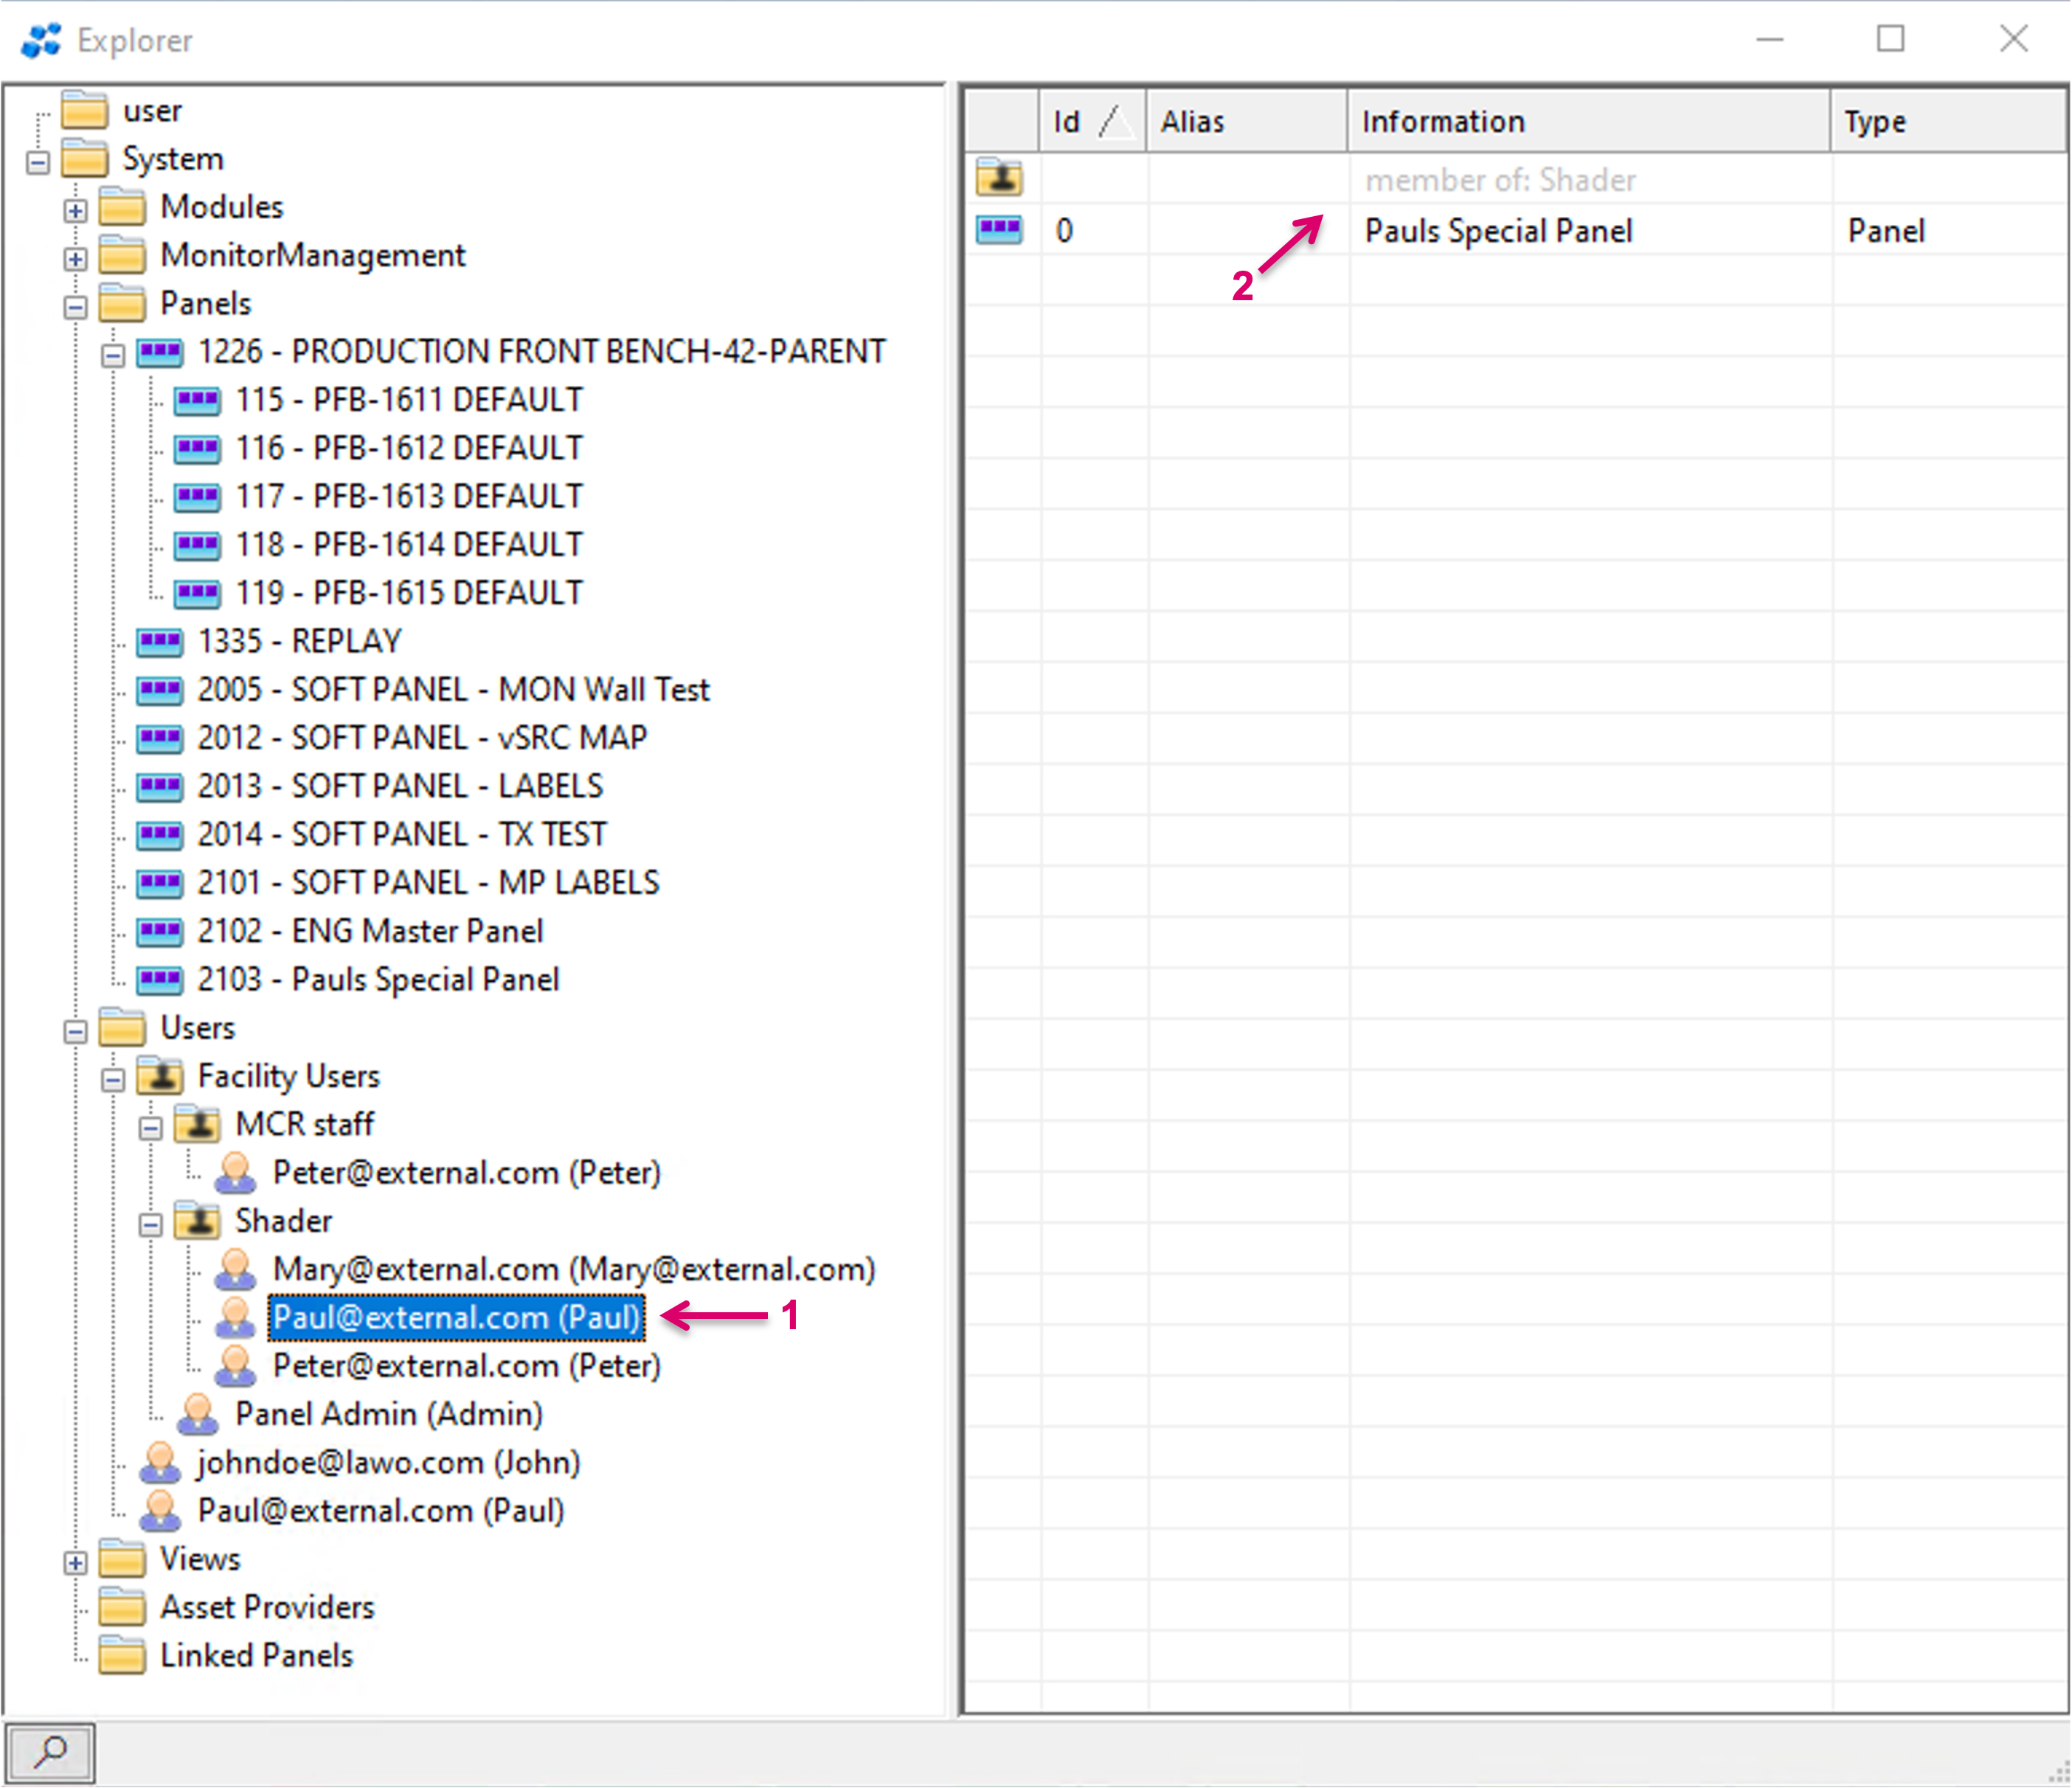
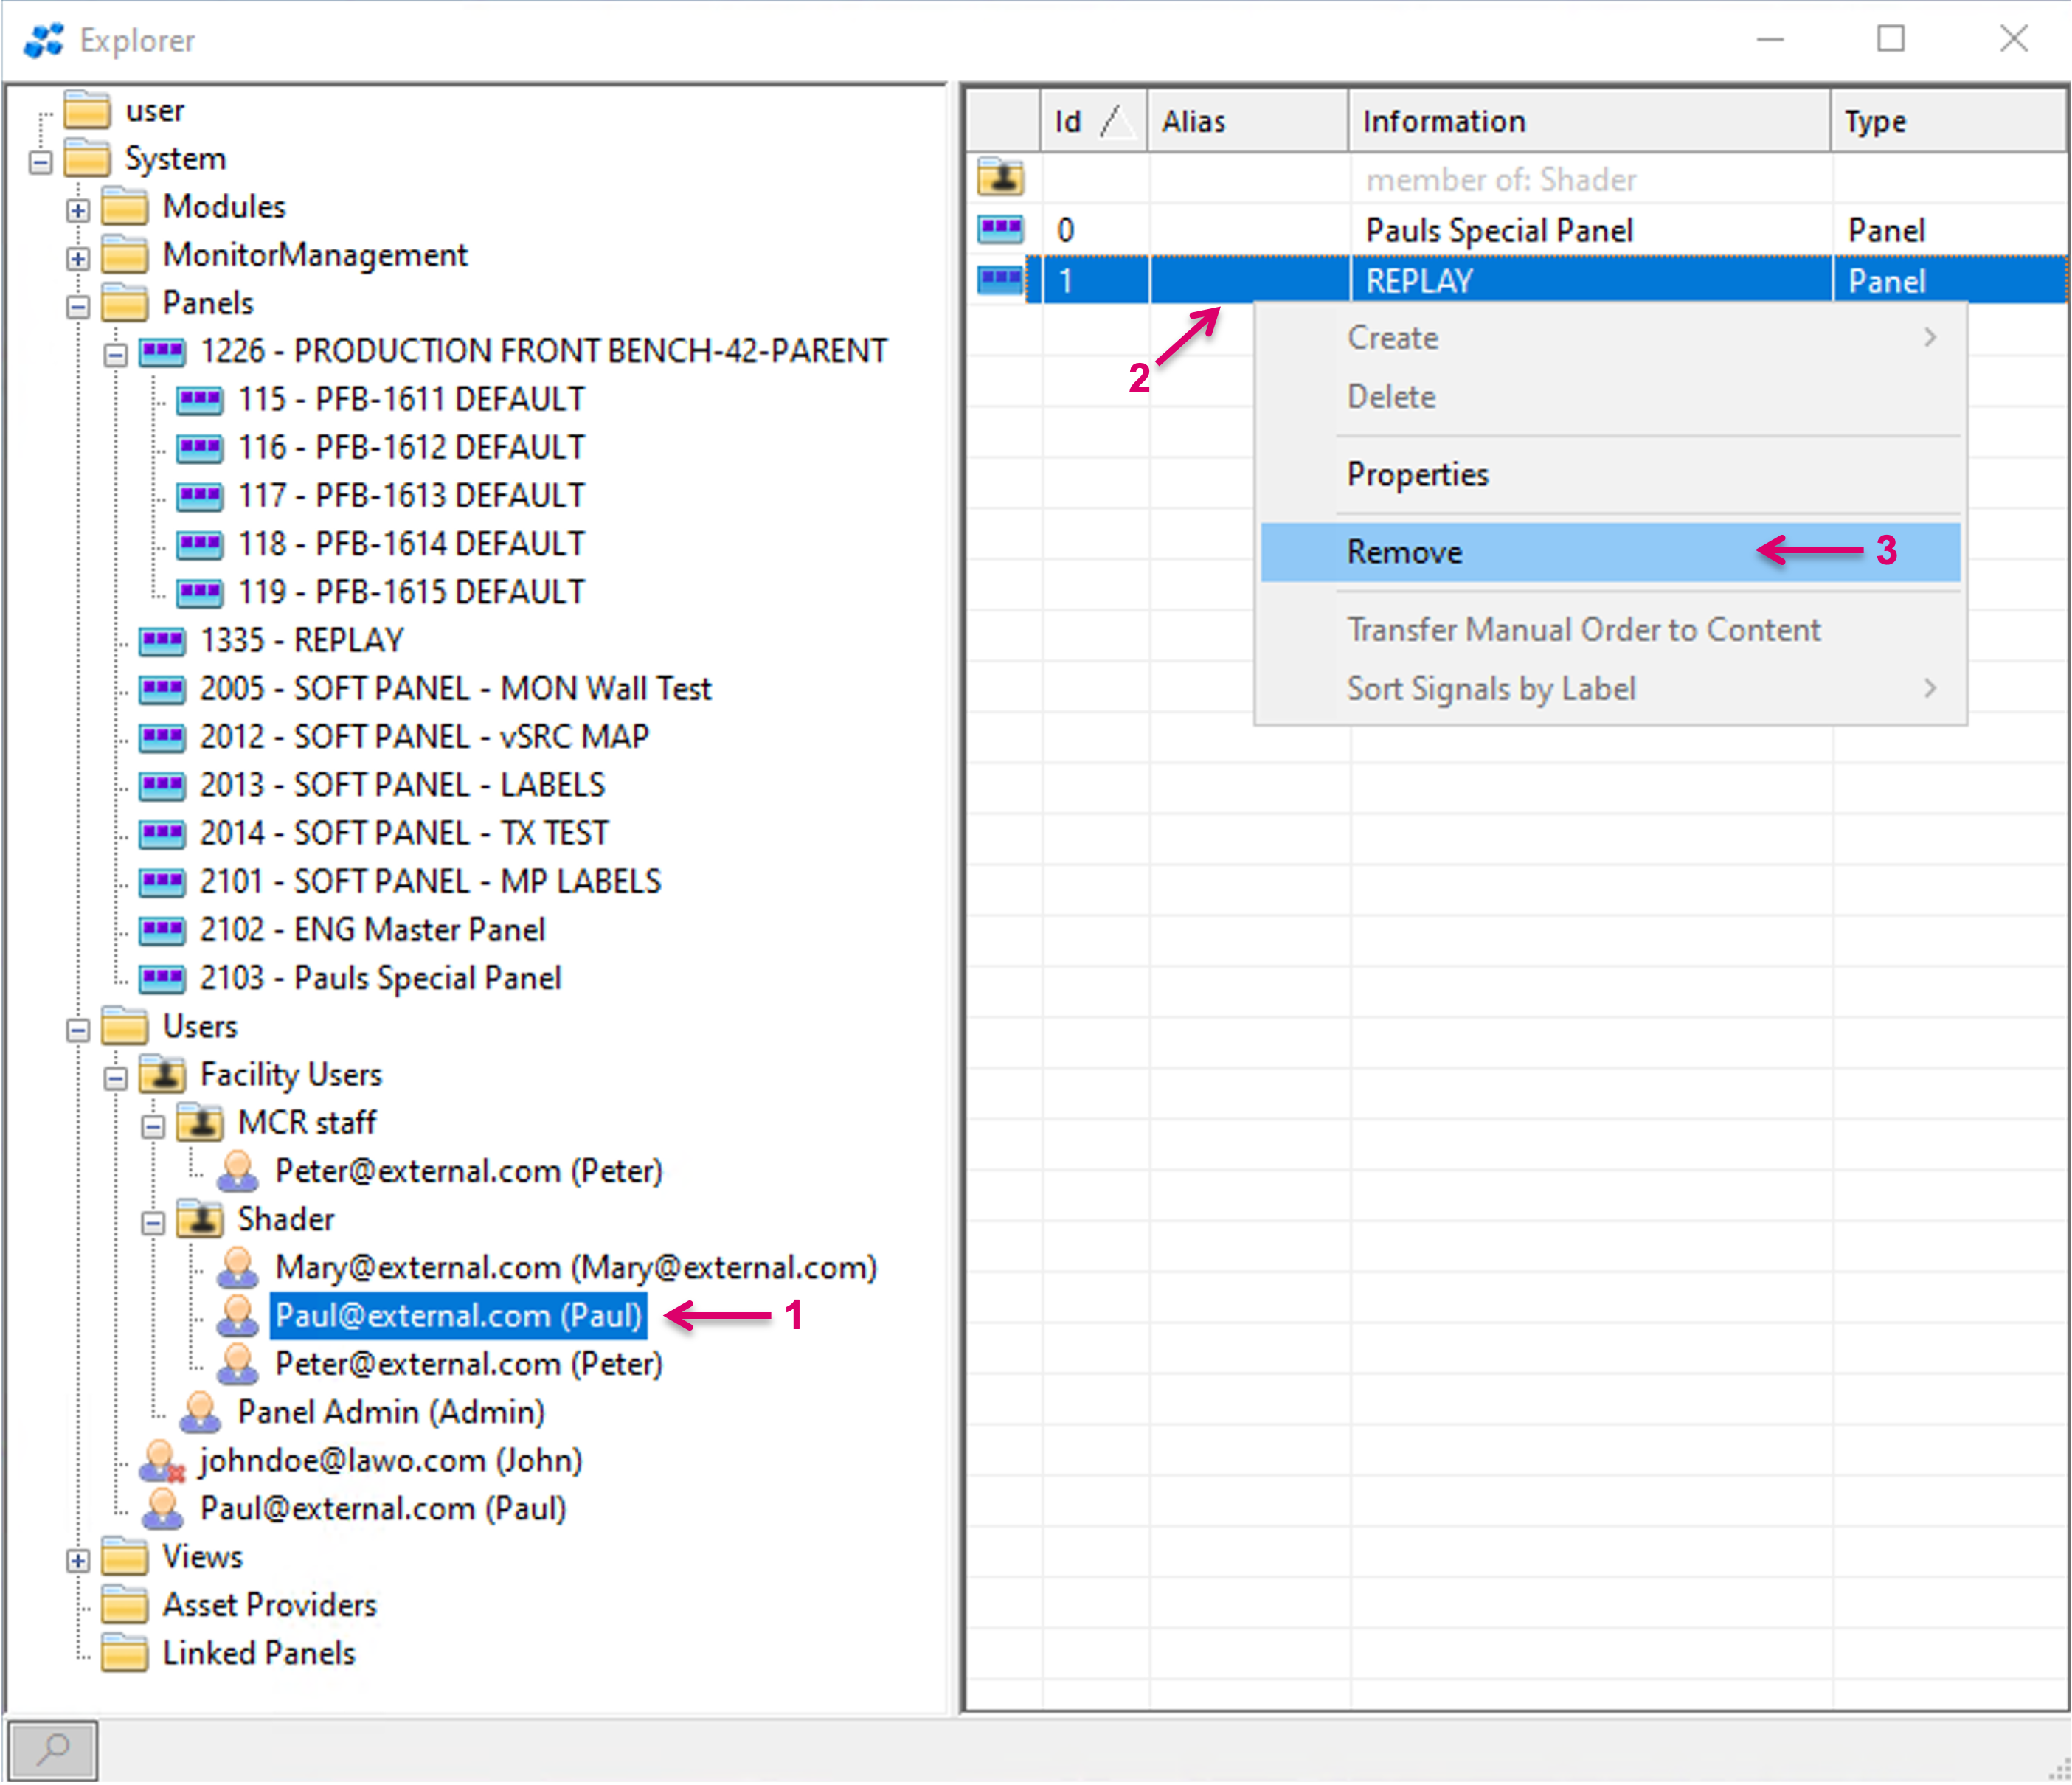
Existing Panel assignments on a User can be deleted by selecting the User (1), selecting the respective panel entry (2) and click Remove (3). Panels are just deleted out of the User assignment, not from the configuration.
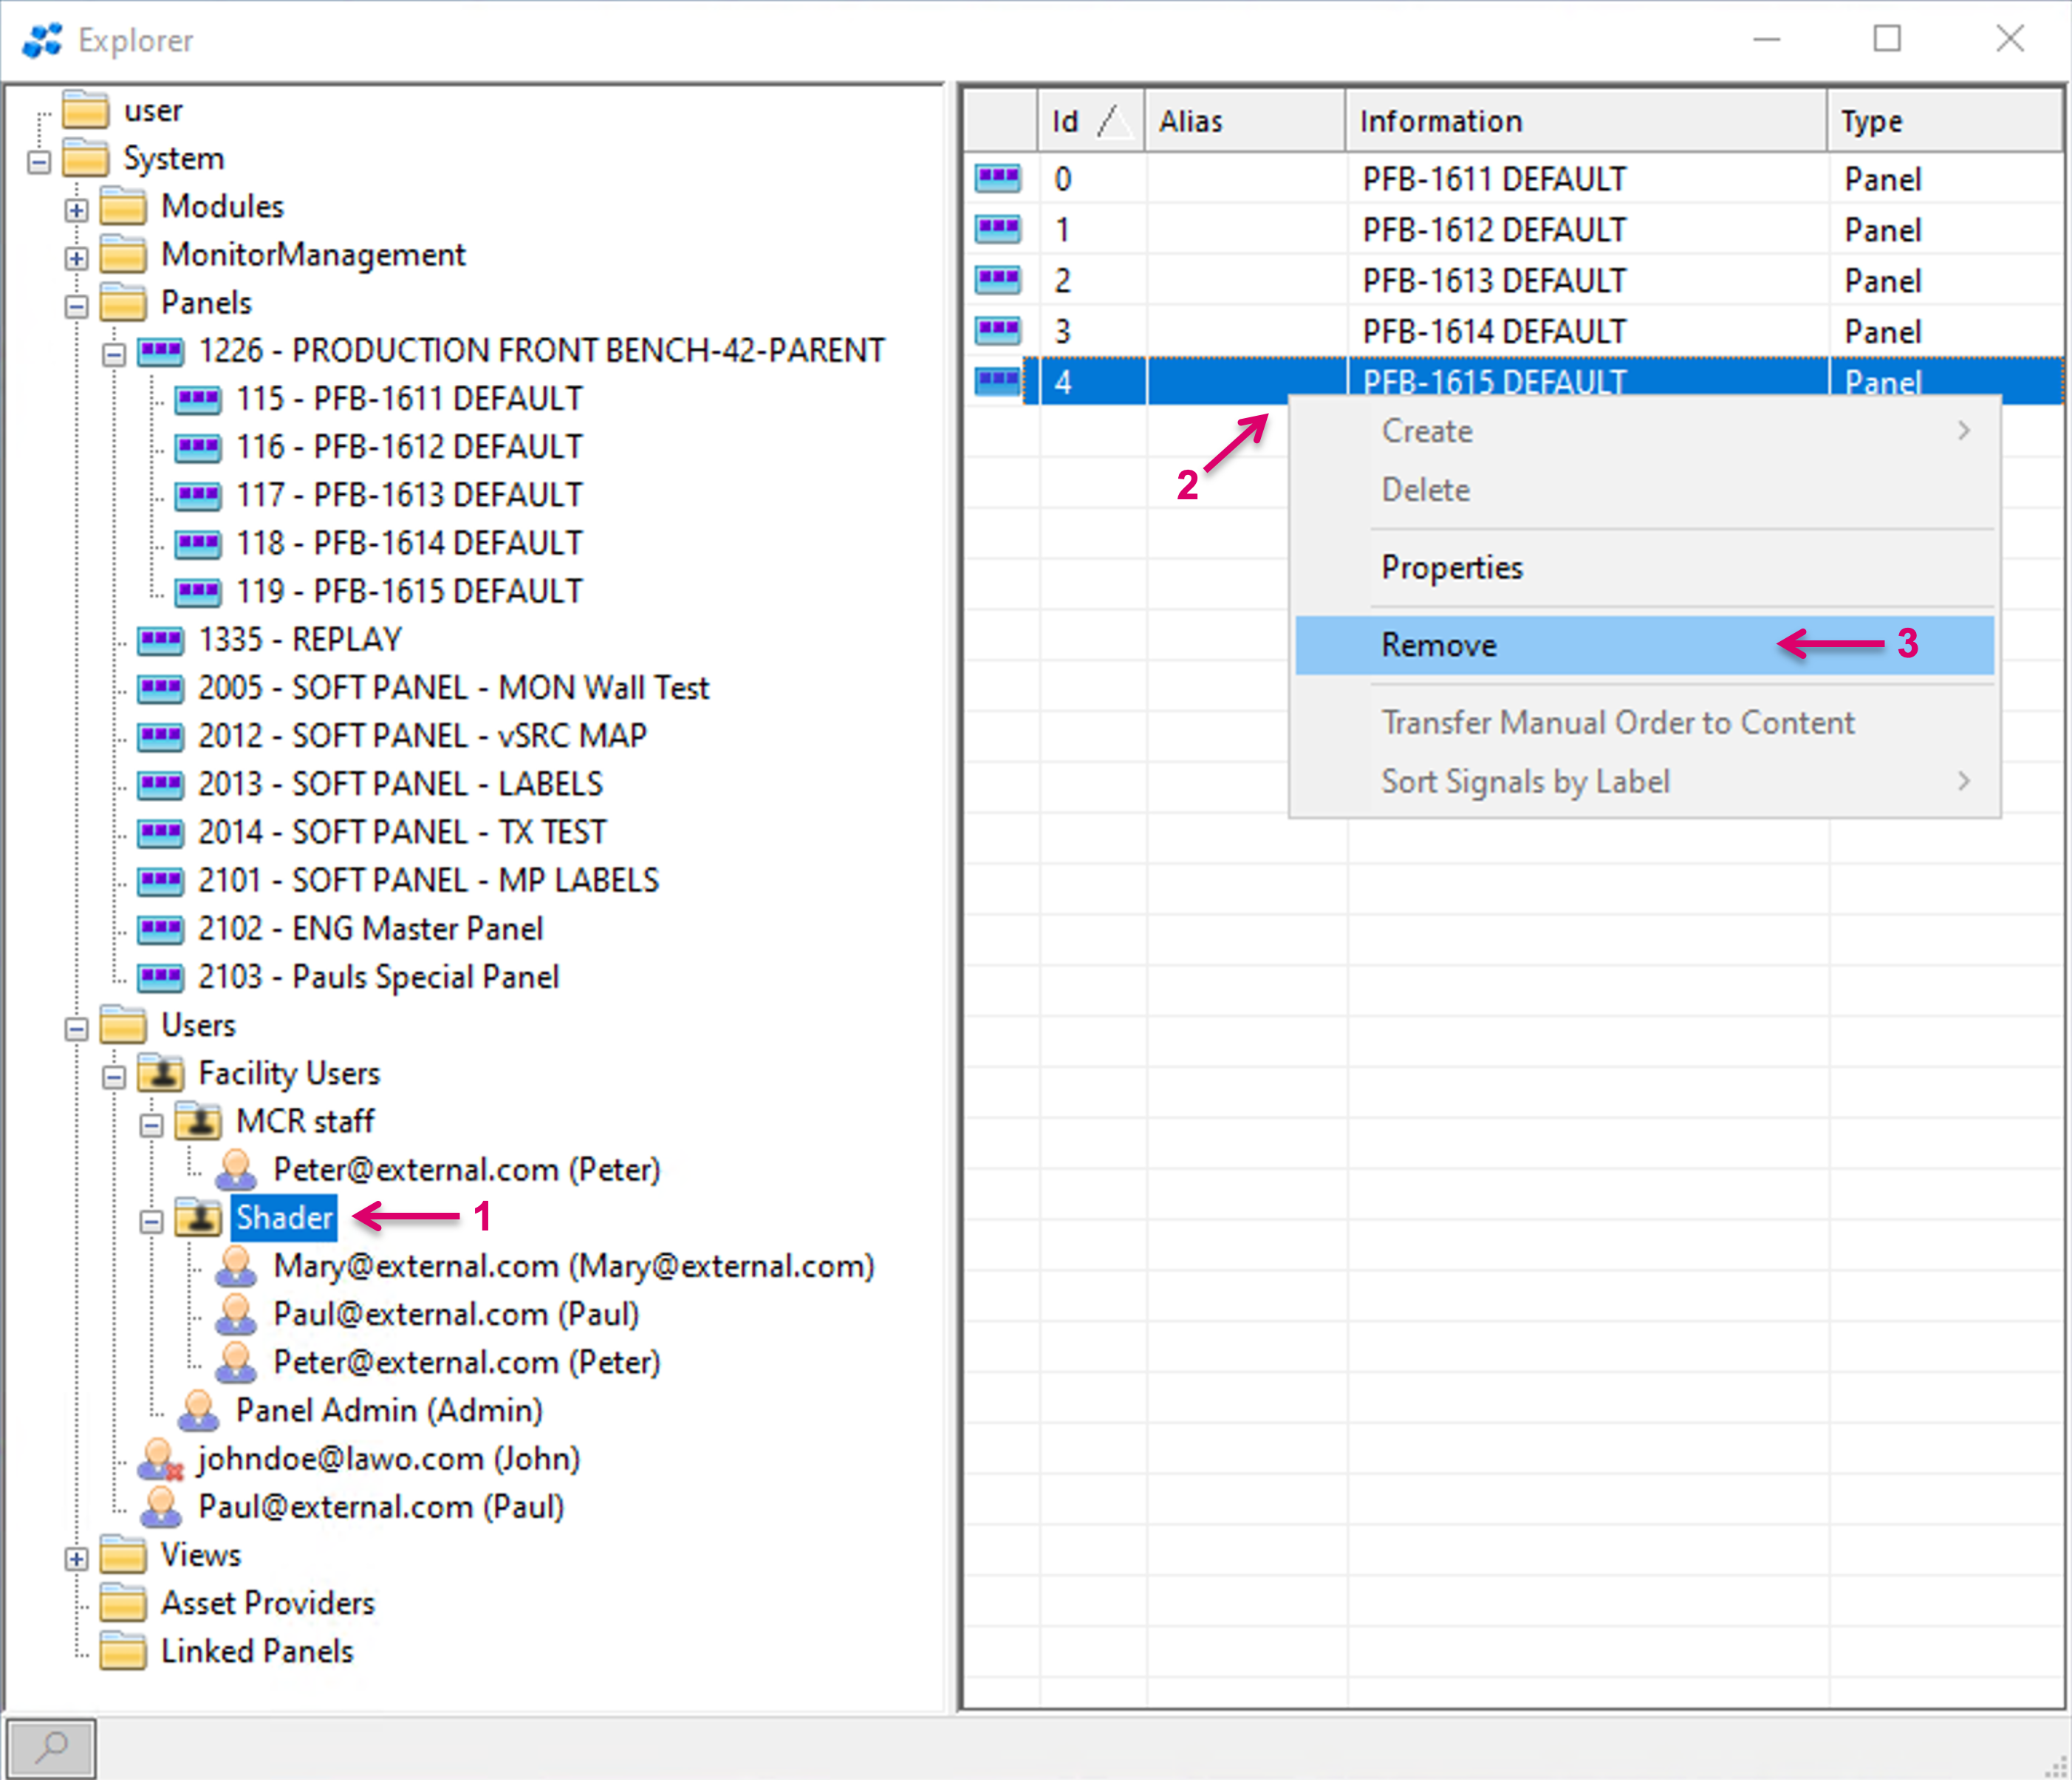
Existing Panel assignments on a User Group can be deleted by selecting the User Group (1), selecting the respective panel entry (2) and click Remove (3). Multi-selection is possible. Panels are just deleted out of the Group assignment, not from the configuration.
If multiple Panels and Groups are assigned to one User, the system will choose which of the assigned Panels will open after Sign-in. Panels assigned directly to the User node will be prioritised in the election process. For example a User assigned to multiple Panels via User Groups but with only one single Panel assigned directly, will result in always getting this directly assigned Panel opened after sign-in.
Super User
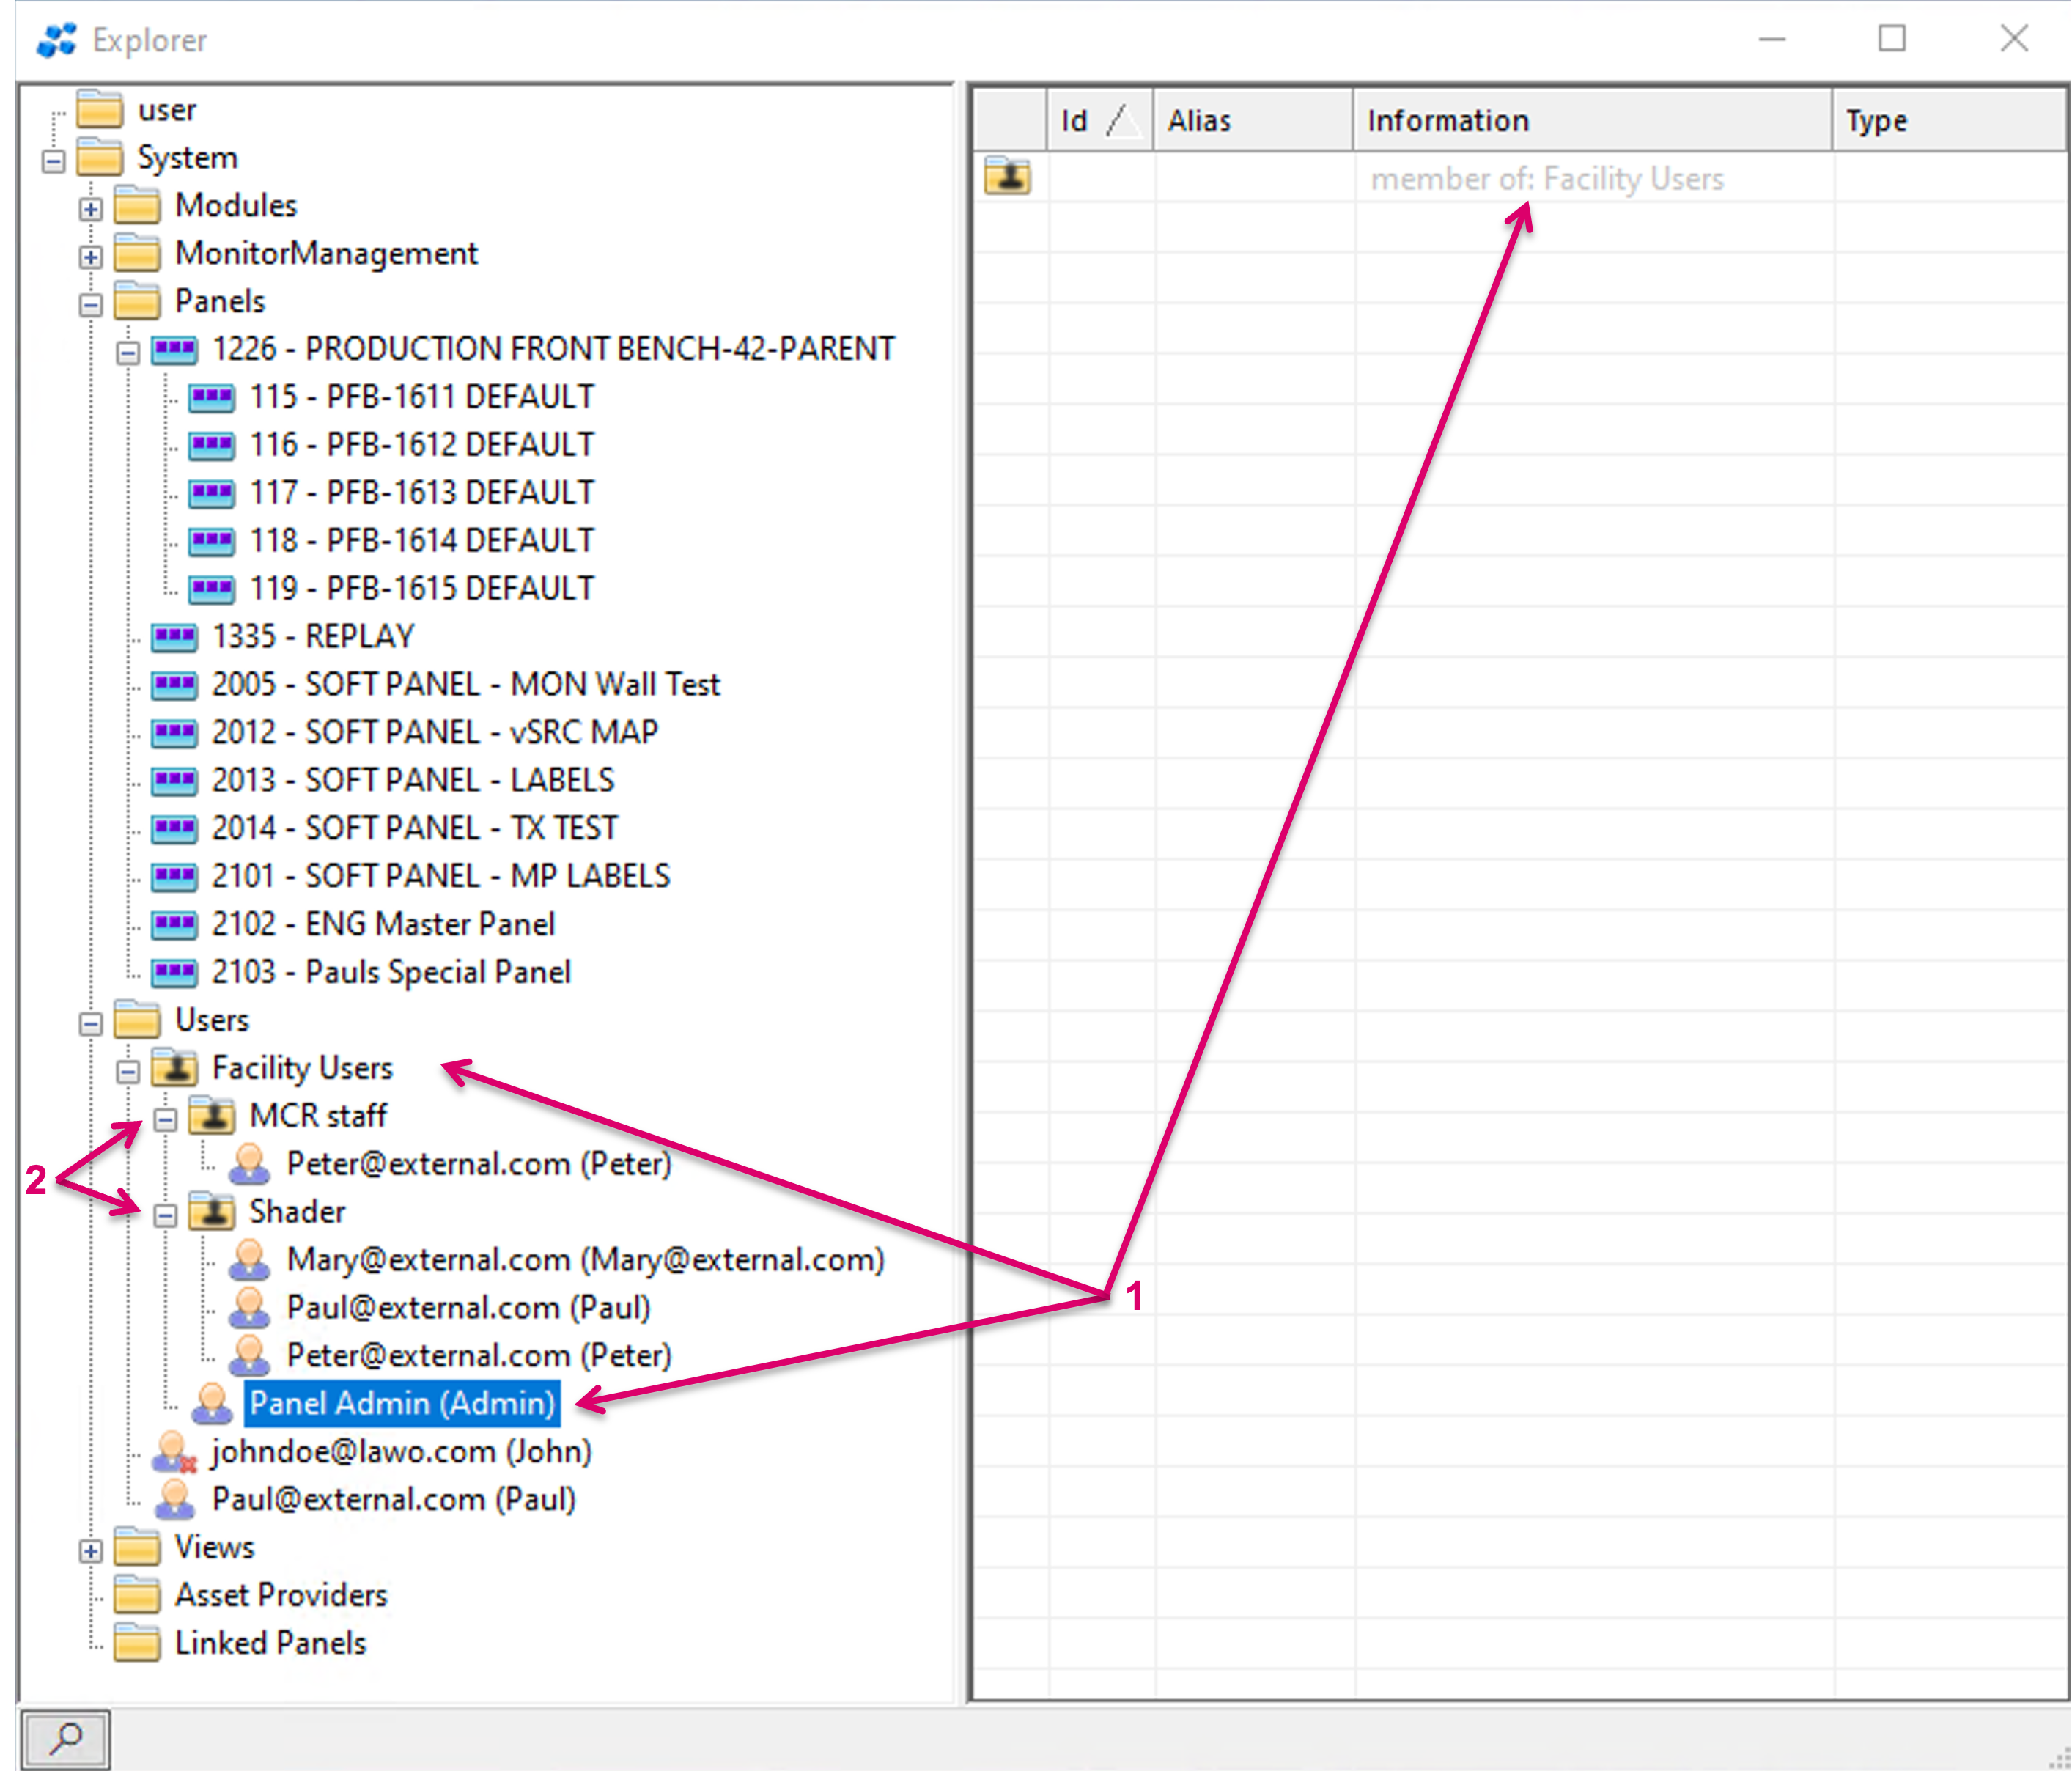
If the Super User flag is set in the User Properties (1), the respective User gets access to all resources within the parent Group folder and all sub Group folders. This setting is most likely applicable for Administrators that have the need to access Panels out of more than one Group or even require access to all panels of a facility.
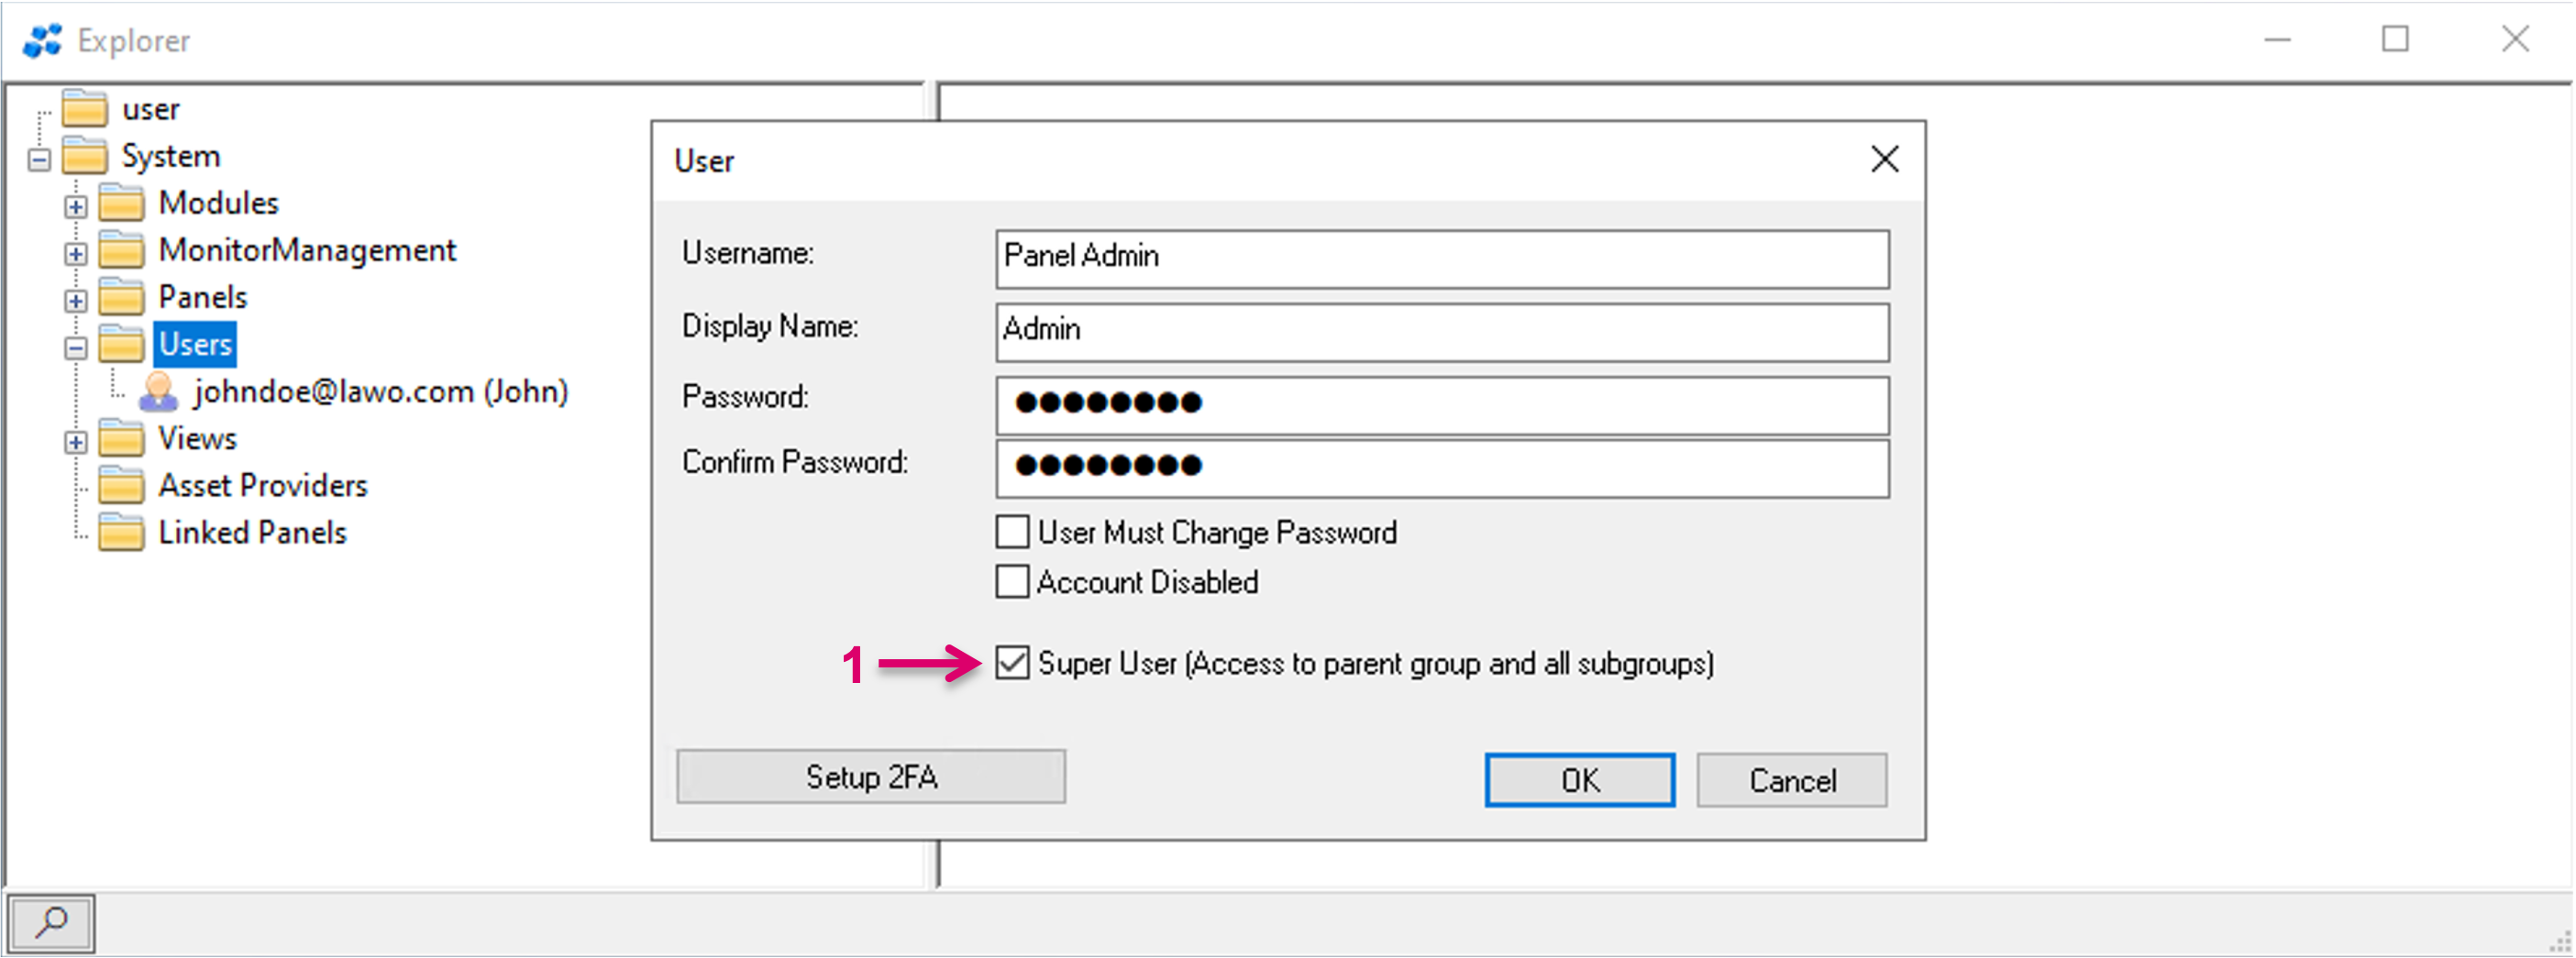
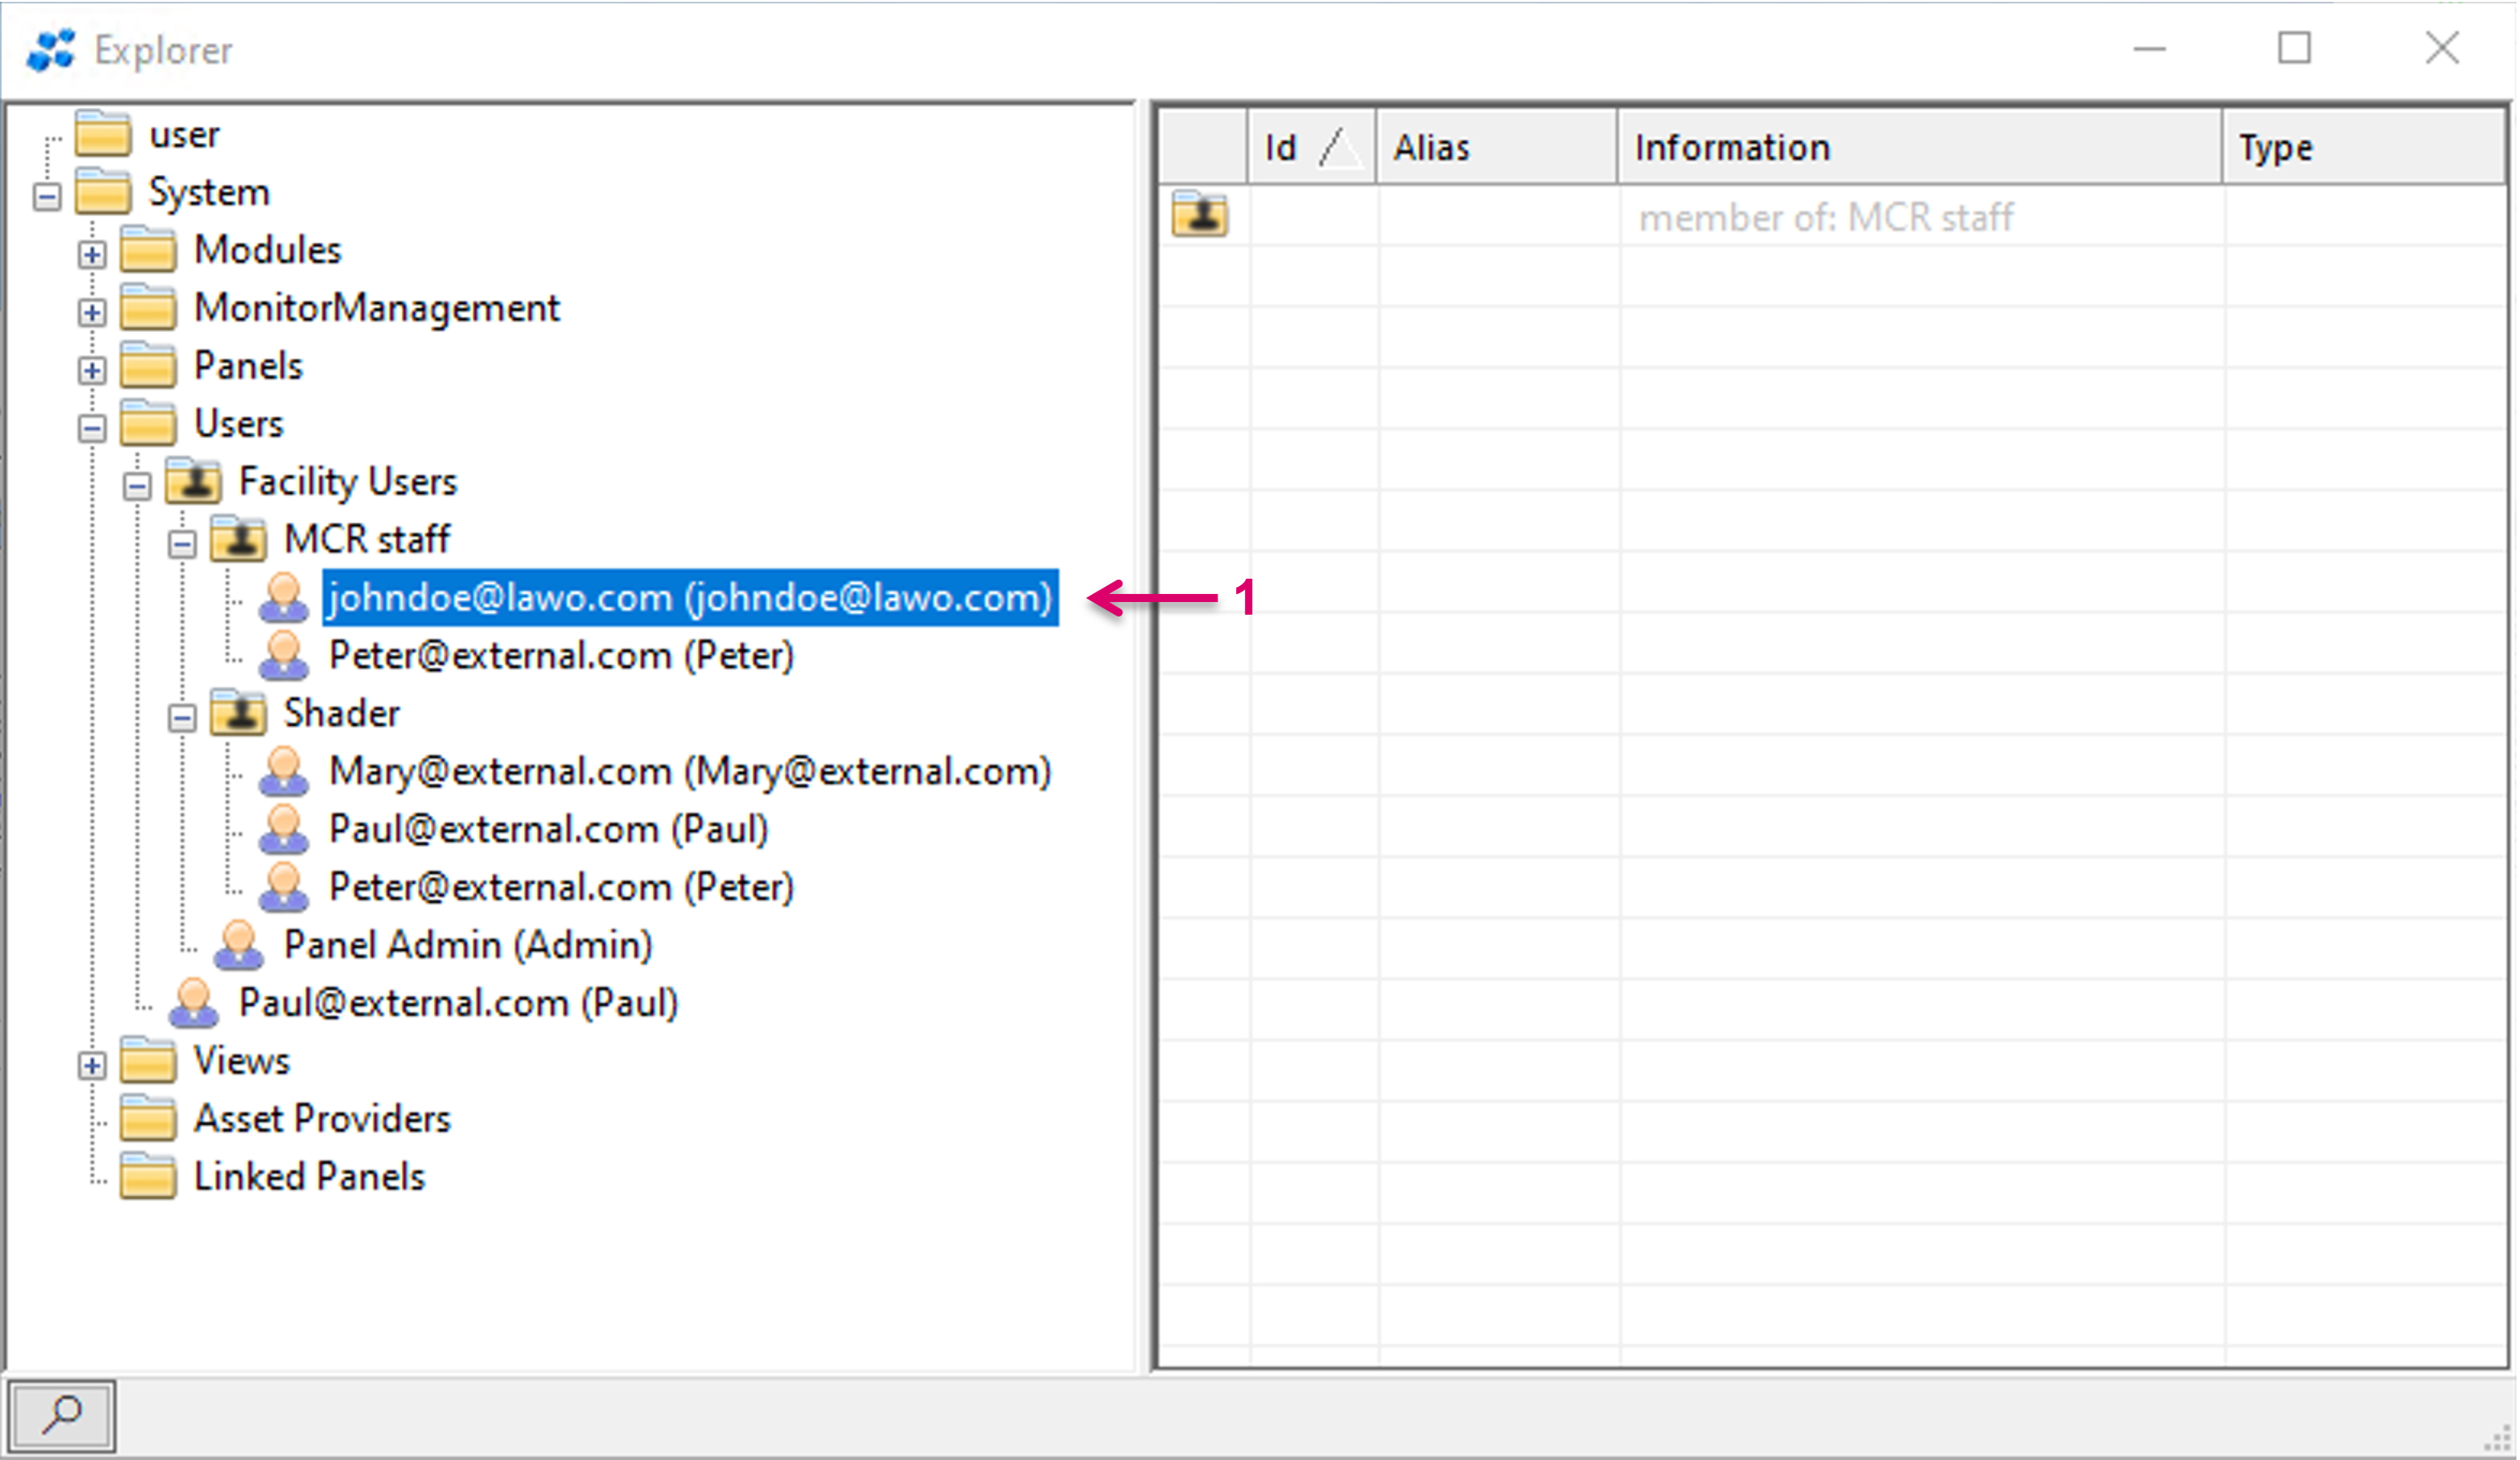
Example: If the Super User is assigned to the parent Group folder "Facility Users" (1), he can access all Panels assigned to this parent folder but also to all Panels in the sub Group folders "MCR staff" and "Shader" (2).
Offline User configuration and Quarantine status
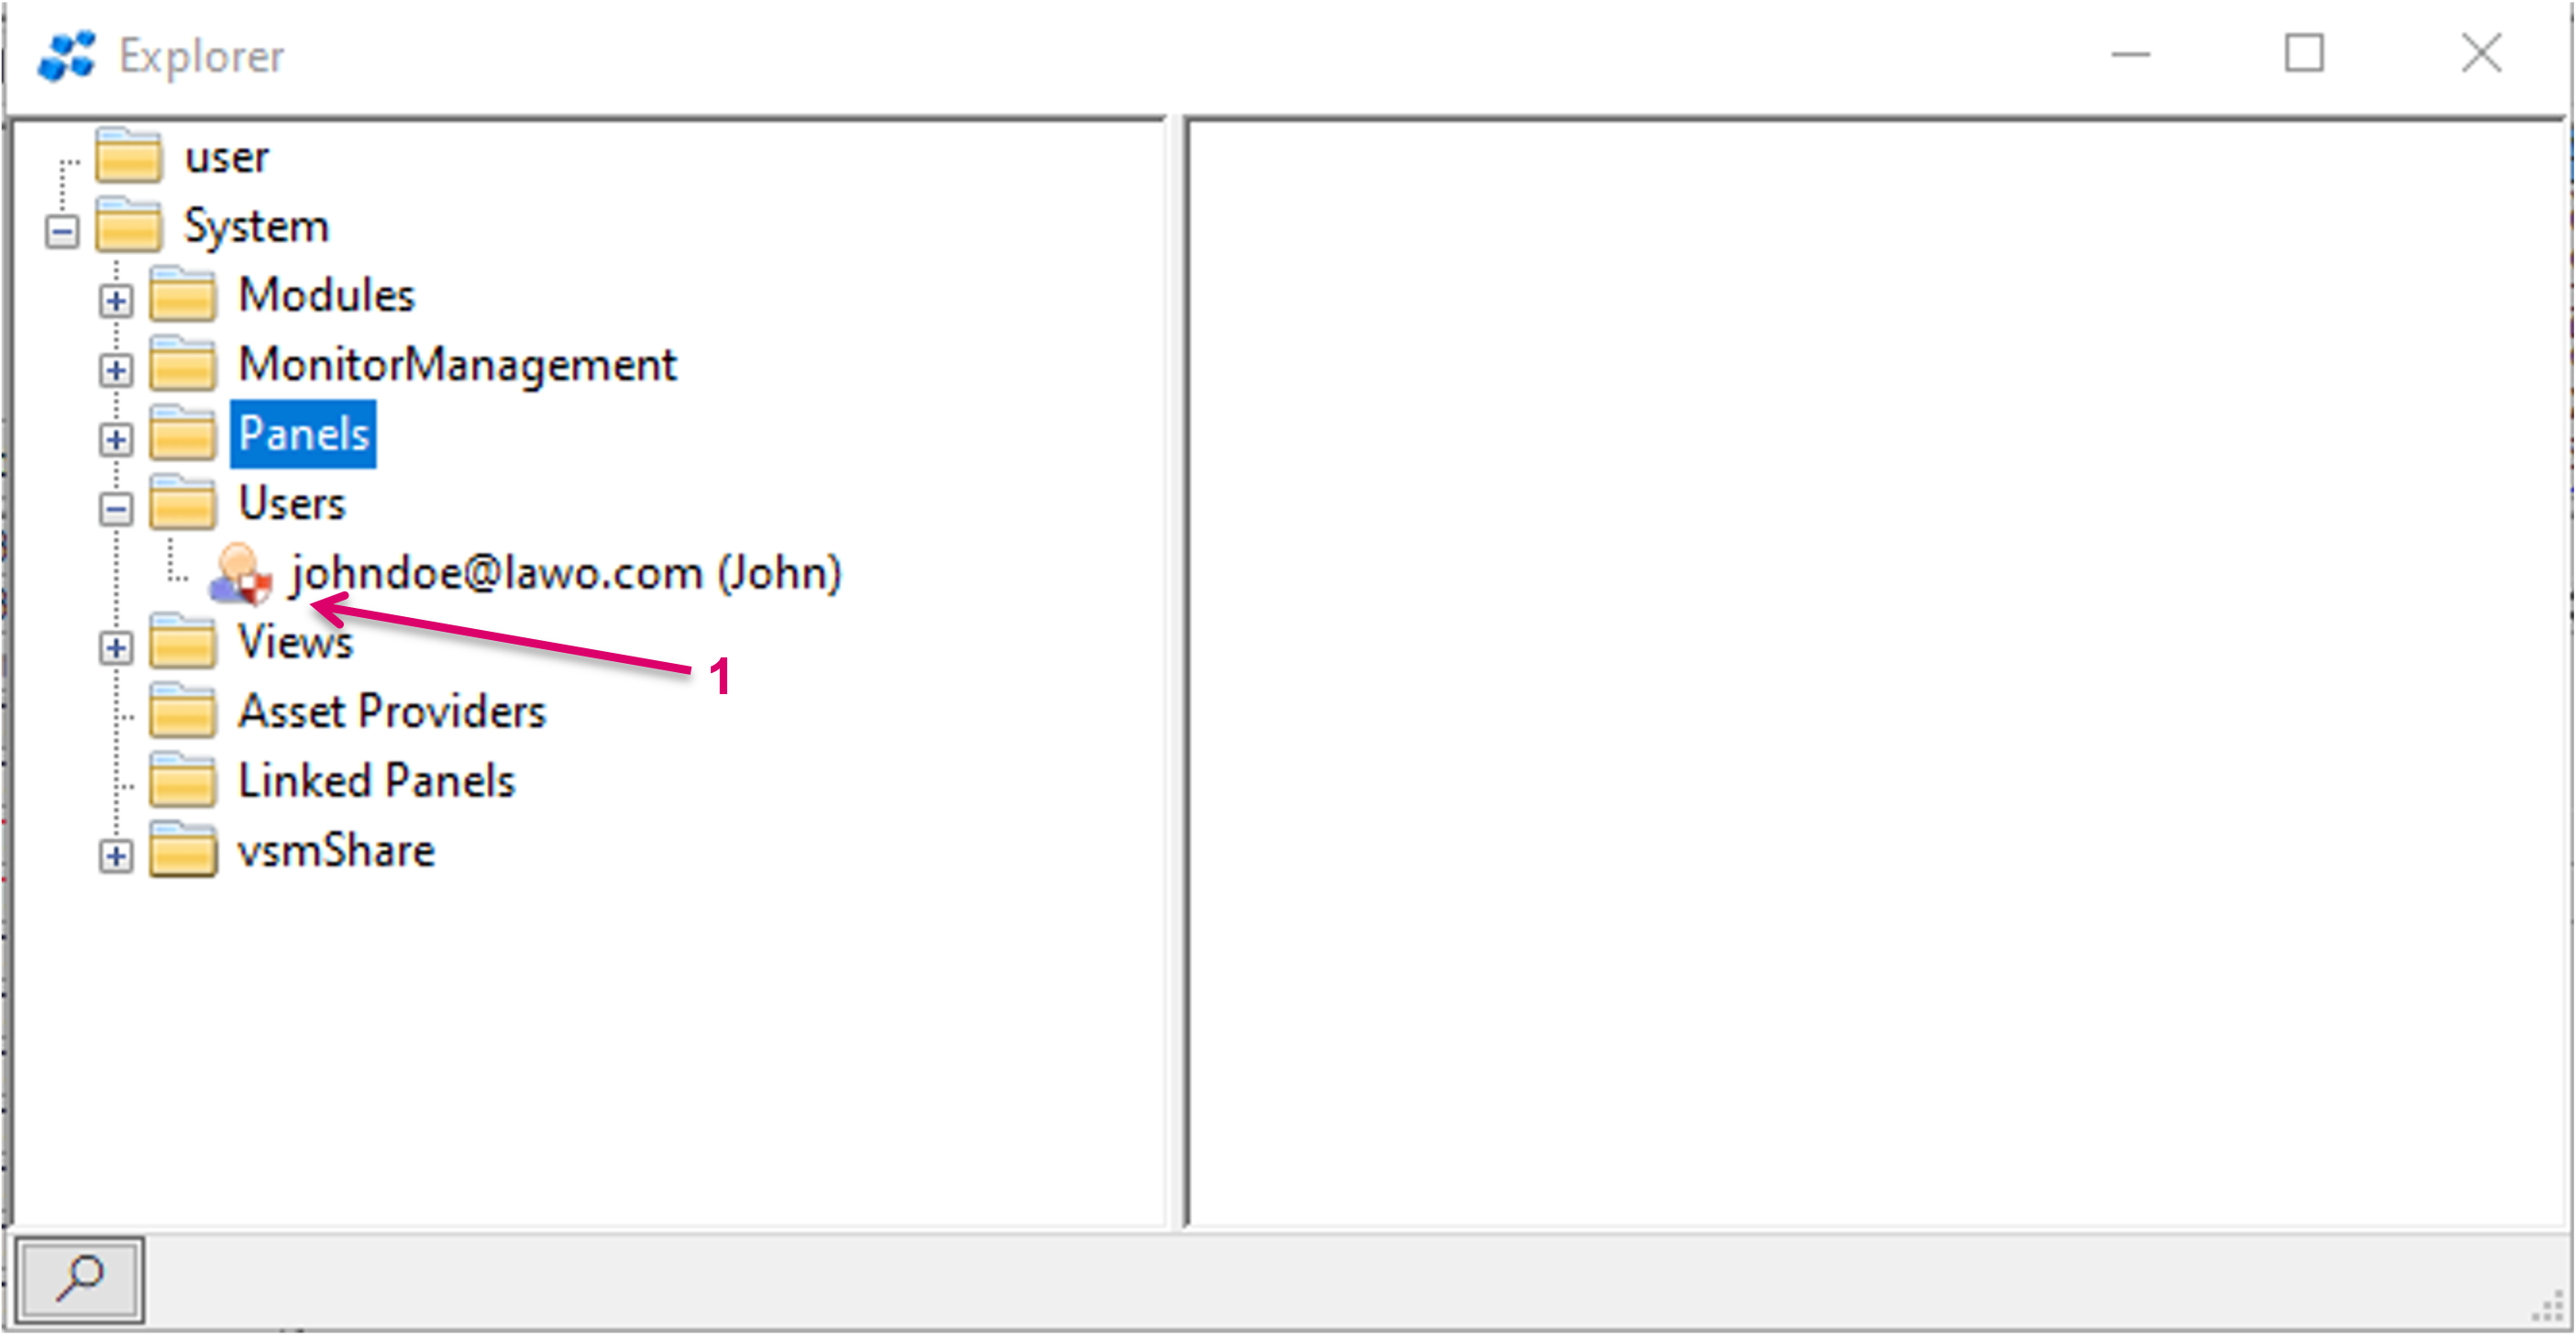
Users can be configured offline but passwords for existing users in a configuration can only be changed within the active Server cluster. Password changes in offline configurations will not be ingested. New, unknown Users that are created offline or another System, and entering a Server cluster by loading the respective configuration file, will appear in Quarantine status, indicated by a little shield icon on the User entry..
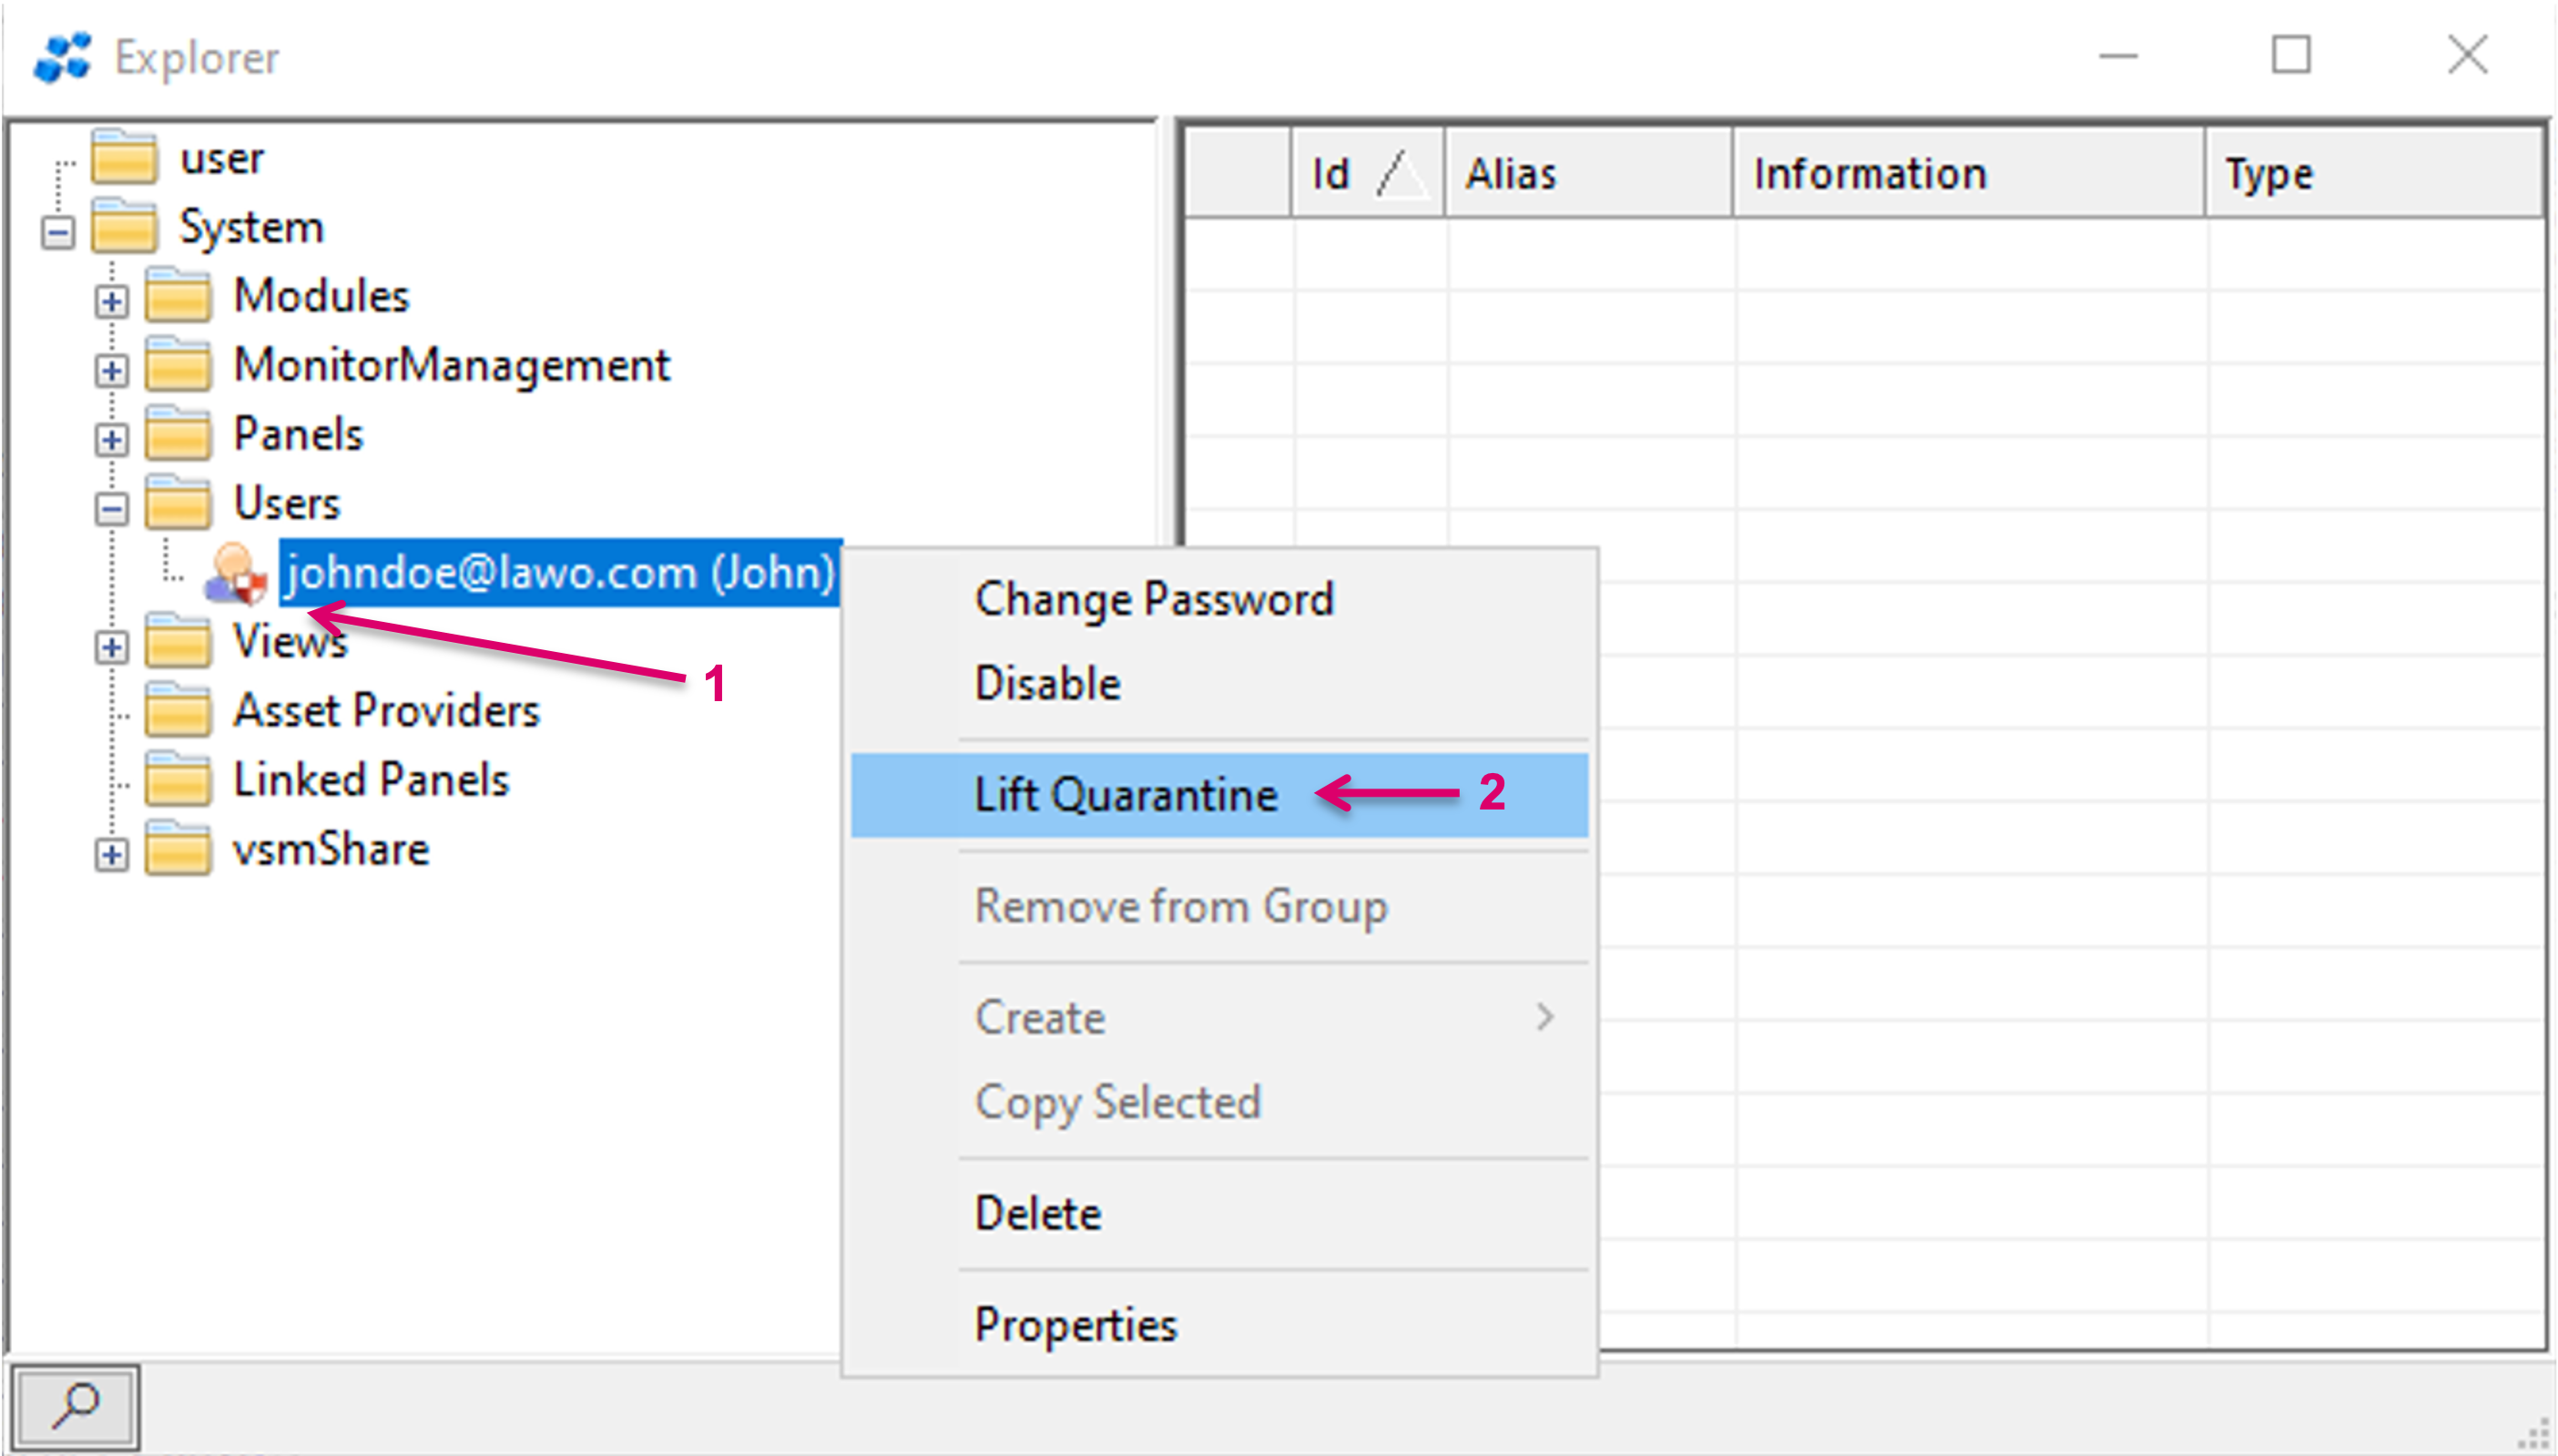
User entries in Quarantine status (1) can be released by right mouse button click and the option Lift Quarantine. This will result in the new User, and its offline configured credentials, being added to the Server Cluster database after saving the configuration.
User database
Users are saved in the Configuration.
Users are also saved in the local Server Storage and show in "Users" if:
- respective Users were created on this Server
- respective Users were part of a loaded configuration, being un-quarantined, and then Config was saved locally.
Users will not show initially if starting a New configuration. Please save the configuration and re-load after the initial settings to see and make use of available Users in the local Database.