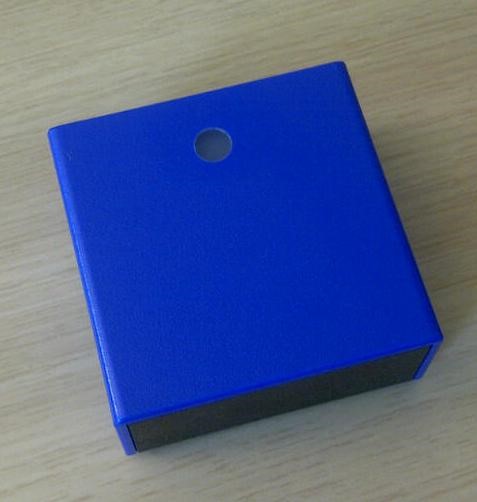
RFID Reader
DISCONTINUED PRODUCT
Specifications
| Communication port | RS422 communication to LBP panel only |
Dimension | 85mm x 85mm x 40mm (WxHxD) | |
Weight | approx. 0,4 kg | |
Power-Consumption | < 20 W | |
Working-Environment | 0°C-50°C non condensing humidity | |
| Supported Transponders | EM4200 | |
Compatibility | ISO 18000-2 | |
| Frequency | 125kHz (LF) | |
| detection radius | approx. 10cm |
2-pin low voltage PSU connector
Connector for RF-ID-Tag-Reader for 12 V DC supply, mounted on power-supply delivered with each RF-ID-Tag-Reader.
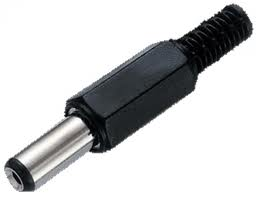

Power Supply
| Product | Description | Item Number |
|---|---|---|
| RF-ID-PSU (DC-Plug) | 12V DC power supply, DC-Plug (For use with RD-ID-Tag-Reader only) | 799-0091-000 |
(EN) Warning
Important: It is understood that only the external Power-Supply-Unit (PSU) provided by Lawo, and shipped with the specific vsm device, is used for operating the product.
To feed the device via the DC input it is mandatory to use a 12V power source that is certified as “SELV/LPS” (if certified according to 60950) or as “ES1/PS2(LPS)” (if certified according to 62368) “NEC Class 2” 12V power source. The UL mark is valid only with use of UL certified PSUs of categories QQGQ (UL 60950) or QQJQ (UL 62368). The supplied Lawo 12V PSU is compliant to these requirements.
(F) Avertissement
Important: Il est entendu que seul le bloc d'alimentation externe fourni par Lawo, et livré avec le dispositif vsm spécifique, est utilisé pour faire fonctionner le produit.
Pour alimenter l'appareil via l'entrée DC, il est obligatoire d'utiliser une source d'alimentation 12V conforme aux exigences «SELV / LPS» (si certifiée selon la norme IEC 60950) ou «ES1 / PS2 (LPS)» (si certifiée selon la norme IEC 62368) Source d'alimentation 12V “NEC Classe 2”. La marque UL est seulement valable quand l'alimentation elle-même est certifiée par UL dans les catégories QQGQ (norme UL 60950) ou QQJQ (norme UL 62368). Le bloc d’alimentation Lawo 12V fourni avec l’équipement est conforme à ces exigences.
General
In this part of the manual, you learn how to connect and configure an RFID Tag Reader to vsmStudio in order to protect or allow access to panel specific layouts.
The RFID Tag Reader is connected to a serial port of a vsmLBP hardware panel.
Please note that the serial Ports are deactivated on vsmLBP panels running as SNAP Panel (stand alone router control panel). Therefore, the RFID Tag Reader cannot be used together with SNAP panels.
To establish the connection between RFID Tag Reader and vsmLBP panel, you need to have vsmDiscover installed on your windows PC. The applicartion is part of every major VSM release, and can be downloaded from Lawo's download repository.
Content:
Preparing the Hardware Panel
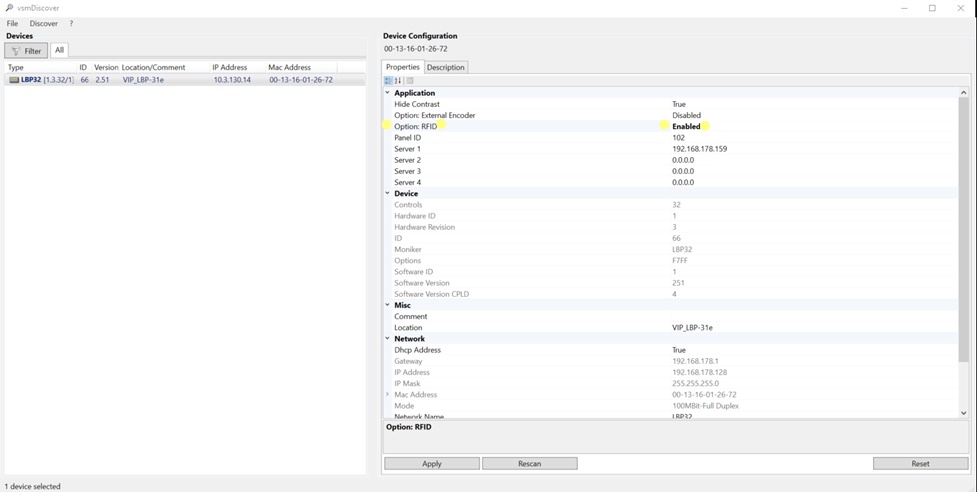
- Power up the LBP Hardware panel that you want to connect to an RFID Tag Reader and open the
vsmDiscoverapplication - Select the respecting panel in the left part of the window.
- Enable the
Option RFIDin theDevice Configuration.
Connecting the RFID Tag Reader
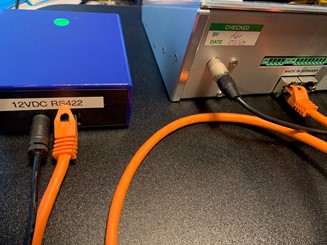
Please connect the RFID Tag Reader to the external power supply. As long no CAT cable is connected, the LED status indicator blinks red.
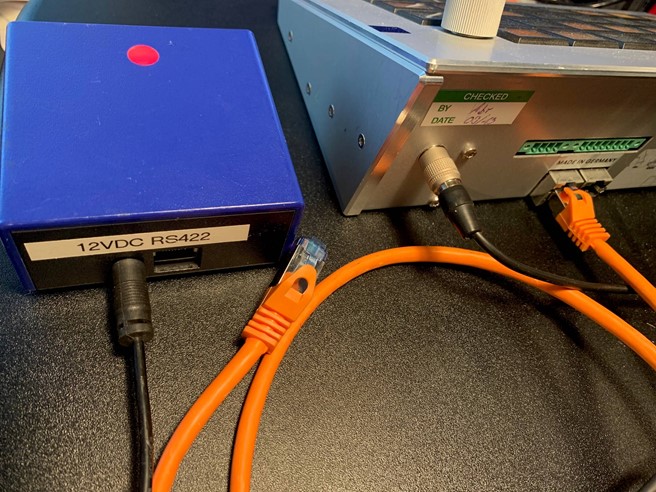
Once a CAT cable is connected between RFID Tag Reader and Panel, the LED status indicator blinks green.
Setting up the RFID Tags in vsmStudio
Open vsmStudio. Navigate to and open
Manage RFID Tags.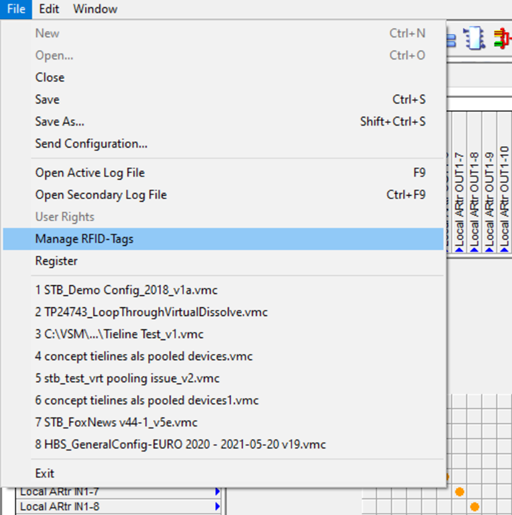
Place an RFID card or chip on top of the RFID Tag Reader ...
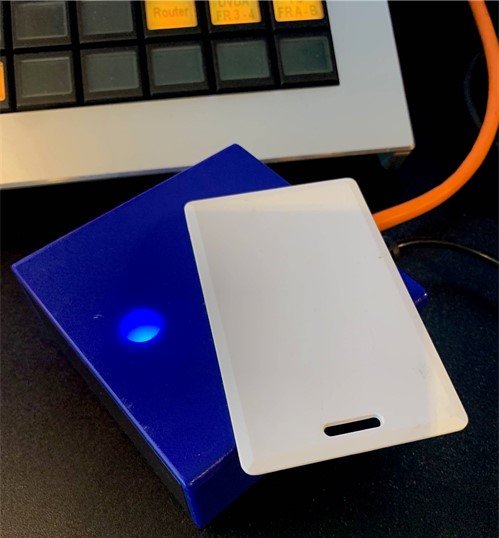
...and confirm the new hardware with “Accept New Tag”.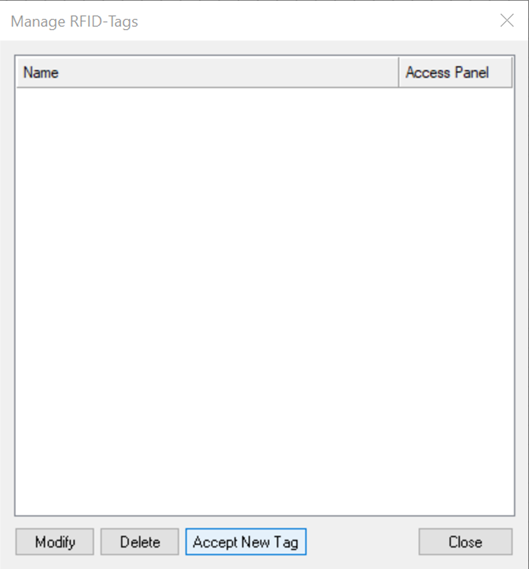
After the tag has been successfully accepted and added to the system, a window will pop up showing the hardware ID of the RFID tag. The
Namecan be changed. In this modification window it is now possible to select the operational mode.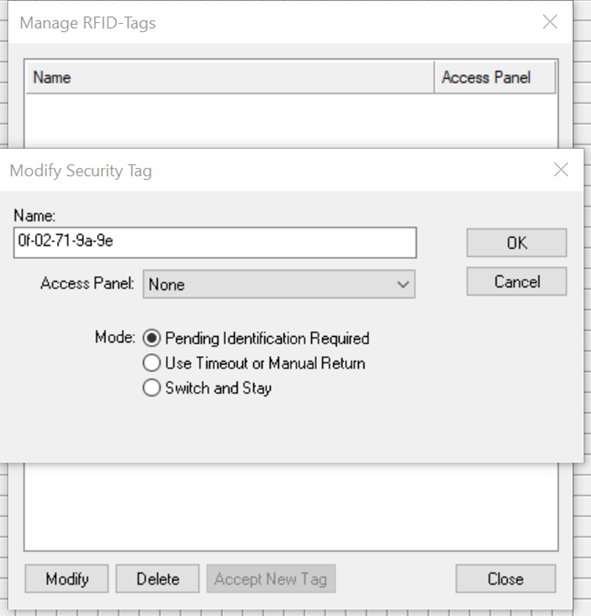
In the
Access Paneldrop down menu, you can select the panel which should be called up if the RFID tag is used together with the reader, in dependence with the selected mode. The list shows all configured panels (layout IDs) in the currently running vsmStudio configuration.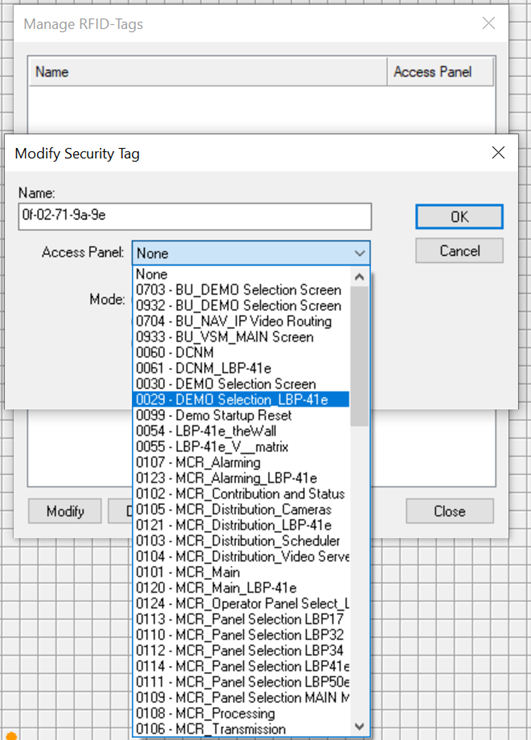
After confirming with OK, the RFID tag and reader are ready to be used.
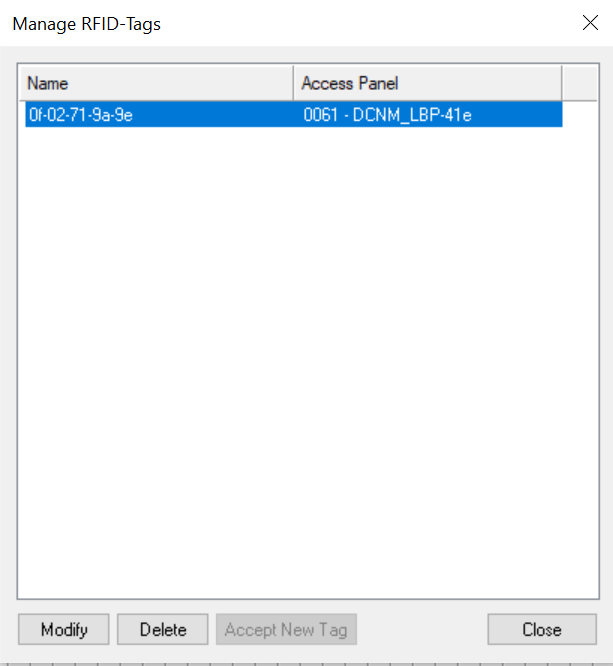
The hardware panel will show the panel (layout) that was set for this hardware as default layout.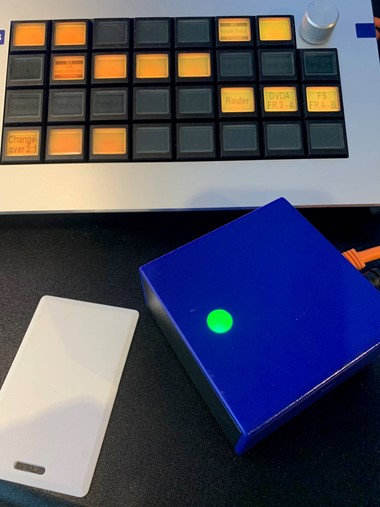
Once the RFID tag is close to the Reader, the panel will switch to the panel (layout) that was assigned to this tag.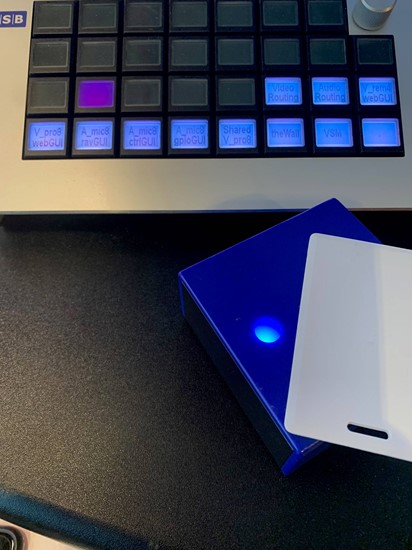
While one RFID tag can only be assigned to one panel layout, multiple tags with different panel (layout) assignments can be used on the same reader. This way, one position can show different layouts depending on the user that is present with his own specific RFID tag.
