In order to establish a connection between the Apcon Matrix and vsmStudio, two steps have to be done:
- Activate the Login for Apcon Matrix
- Enable Telnet
If these two points are not conducted correctly there will not be established a valid connection.
Settings in Apcon Browser Window
Open the web browser and type in the Apcon default IP address 192.168.0.1.

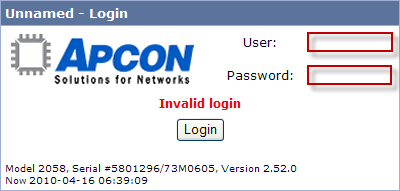
Type in User name “admin” and Password “secret” if asked.
Changing IP Address
Click on “Settings”.

Click on “LAN interface”.

Change the IP addresses to a freely chosen range.
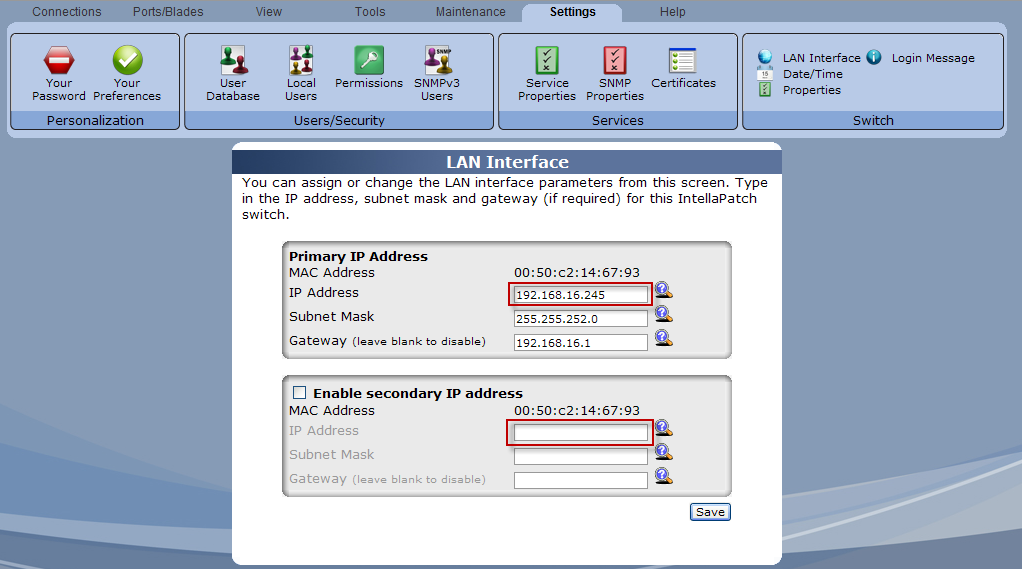
Finally click “Save” to save the changes.
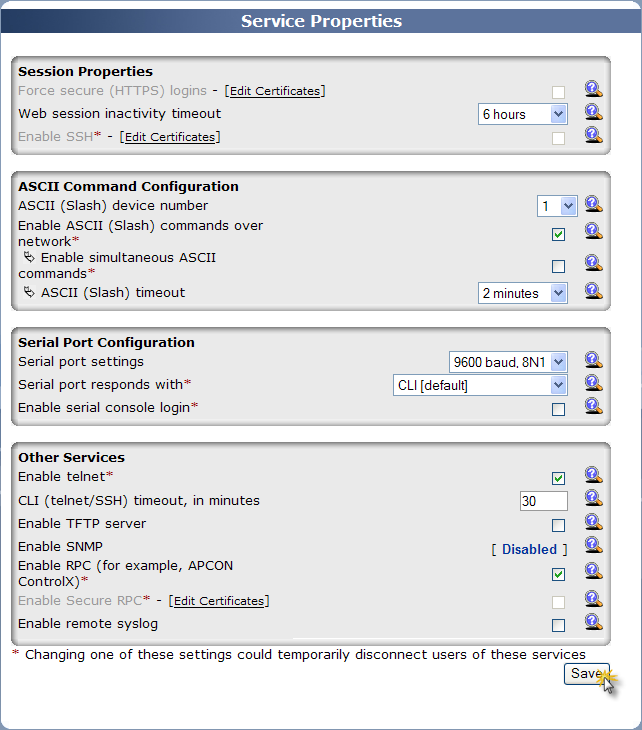
Enable Telnet Port
Click on “Service Properties“.

Set the mark behind “Enable telnet”.
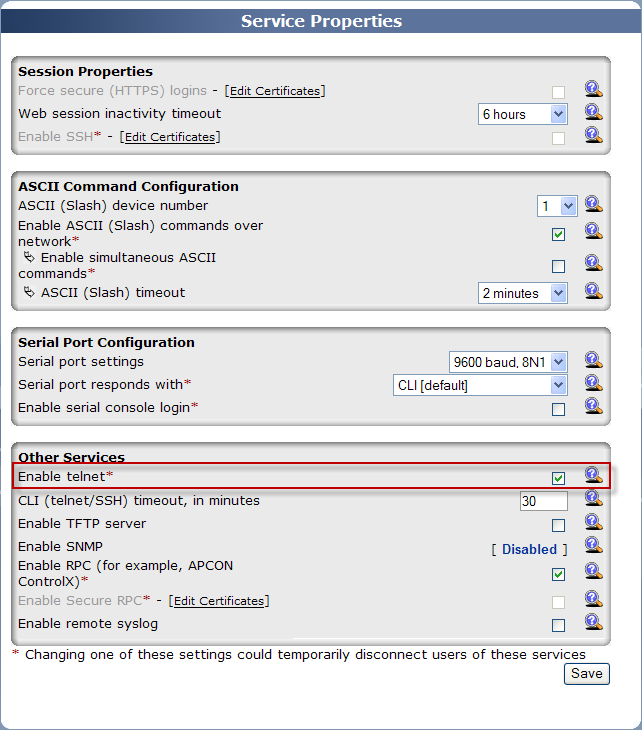
Click “Save” to finish.
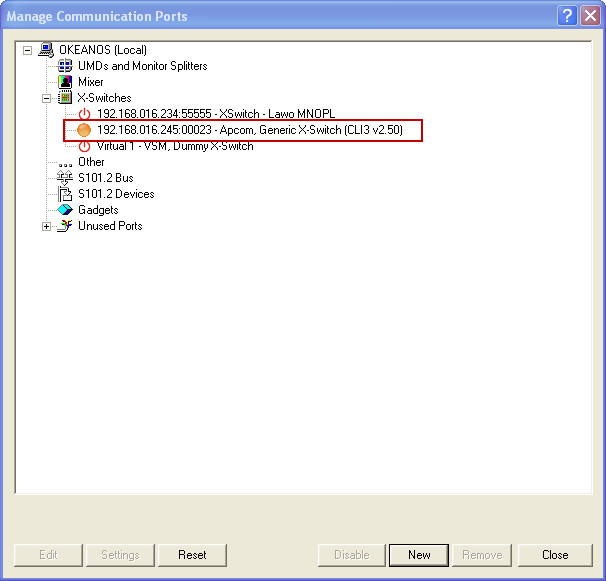
Setup Apcon Matrix in vsmStudio
Edit Communication Port in vsmStudio
Click on the “Manage Communication Ports” icon.

Select “Next” to edit a new communication port.

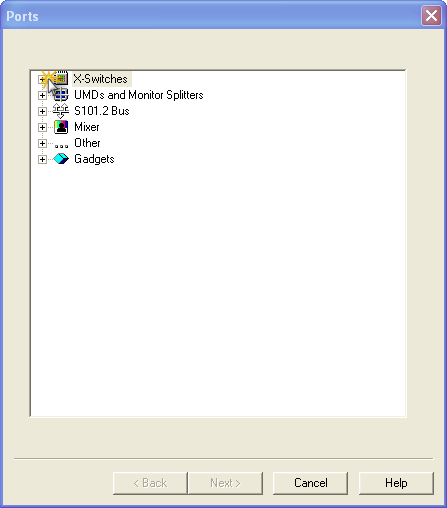
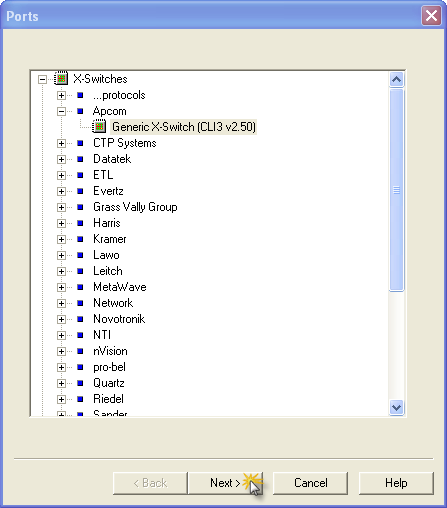
Click on the “+” in front of “X-Switches”.
Click onto the “+” in front of “Apcon”.
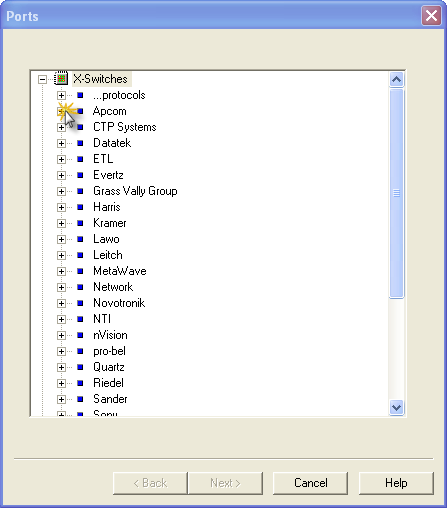
Mark the entry “Generic X-Switch (CLI3 v2.50)” and click “Next”.
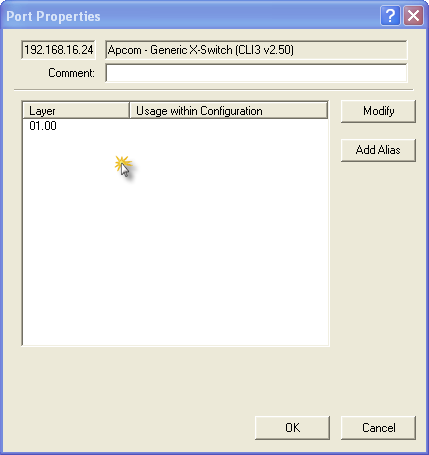
Click on “New Port”.

Type in IP address, port and a name for the connection. Then apply changes with “OK”.

1. Type in the IP address of the Apcon X-Switch.
2. Type in the Remote Port of the Apcon X-Switch (it is always 23).
3. Type in a name as Description.
Assign a layer by double-clicking into the free field.
Use the scroll down menu in order to choose the layer.
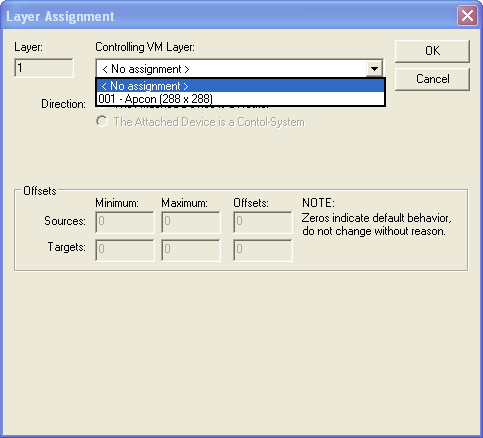
Finish editing the port by clicking “OK”.
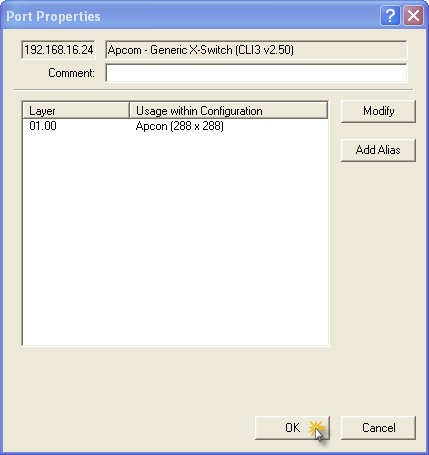
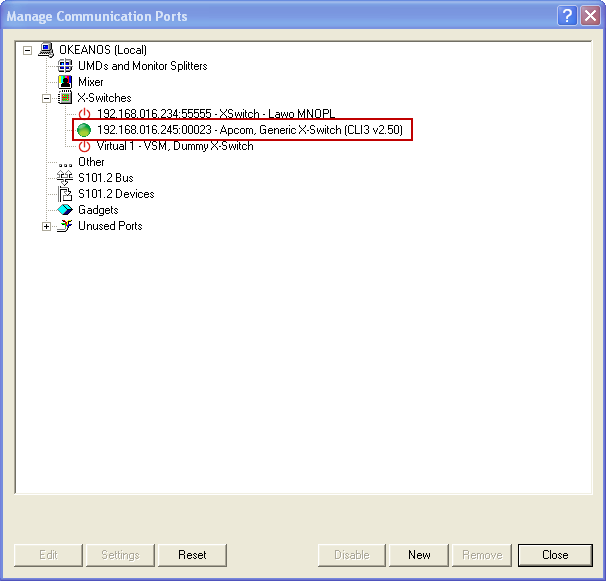
Now there is an orange dot, which toggles to a small orange and white dot.
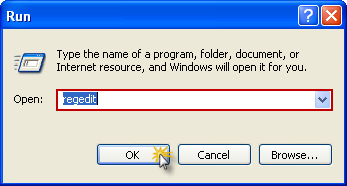
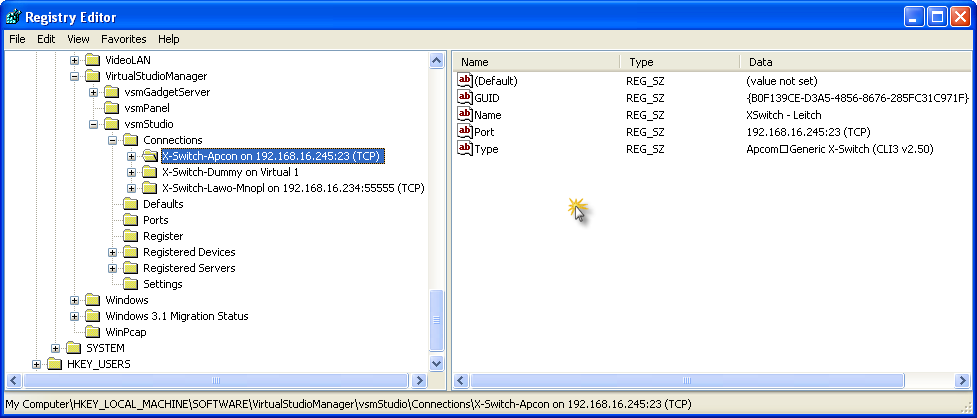
Edit Communication Port in Regedit
Go to Start > Run type in regedit and click “OK”.
Go to HKEY_LOCAL_MACHINE\SOFTWARE\VirtualStudioManager\vsmStudio\Connections. Explore the connections by clicking “+”.
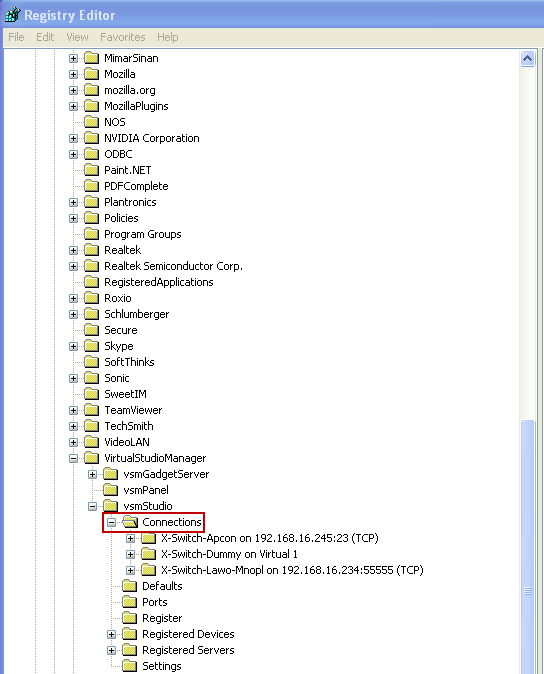
Mark the entry “X-Switch-Apcon on (IP-Address)(Port:23)”.
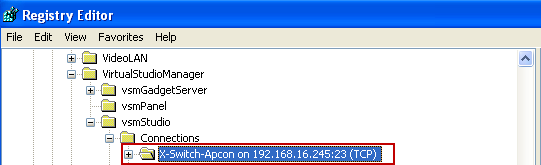
Switch to the right side of the window and right-click into the free field.
Choose “String Value” in the upcoming menu.
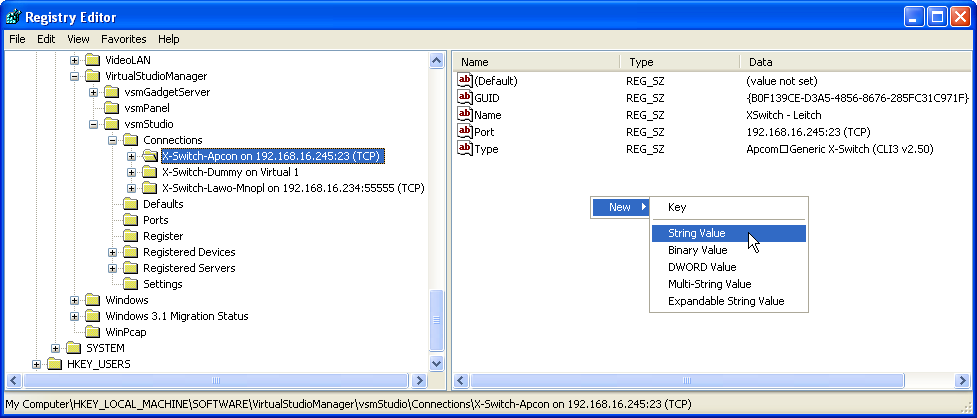
Enter “User” as name for the new “String Value”.
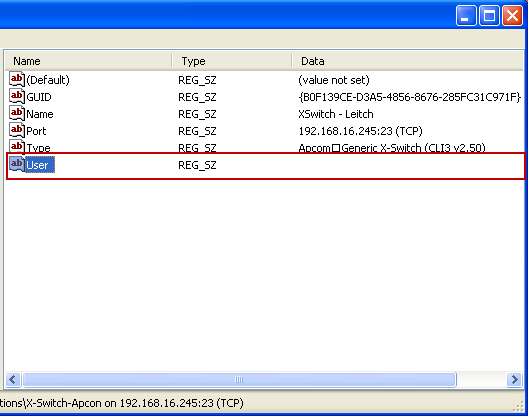
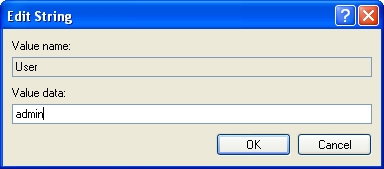
Double-click the “String Value” and enter “admin” as “Value data”. Then assign with “OK”.
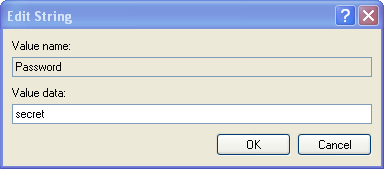
Create another “String Value” and enter “Password” as name.
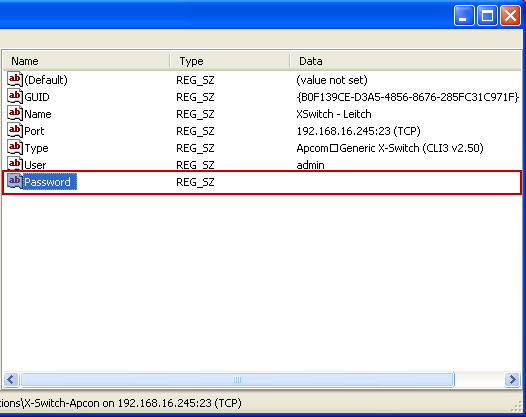
Double-click the “String Value” and enter “secret” as “Value Data”. Then assign with “OK”.
Switch back to the “Manage Communication Port” window: The connection will be displayed with a green dot in front of the IP address.