diamond - Insert Sends and Returns
The system supports up to 16 mono or stereo insert points that can be assigned to a source. They can be used to apply signal processing (using an external device) or create a separate send from the source.
Overview
To use this feature, the inserts must be defined in the configuration using the ON-AIR Designer (under "System -> Definition -> Parameter = Insert"). The configuration defines the name, format and I/O for each insert device.
Once the configuration is in place, the available inserts can be assigned to sources from the fader strip controls. The assignments are flexible as long as the following conditions are observed:
- Up to 16 external inserts can be configured, where each one can be either mono or stereo.
- A mono insert must be assigned to a mono source.
- A stereo insert can be assigned to either a mono or stereo source. If a stereo insert is assigned to a mono source, then only the left channel is used.
- If you select an insert that is used elsewhere, its connections are removed from the current source and replaced by the new assignment.
- Inserts are not supported by summing buses.
During the assignment process, the user decides where to place the insert in the channel signal flow. There are three possibilities:
- Pre EQ
- Post EQ
- Post Dynamics (or post Dynamics and Limiter if both are configured)
Once an assignment is made, the insert send is always active, while the insert return can be enabled or disabled.
The rest of this topic describes how to check and assign the insert points, and then control the insert return on/off.
Insert Assignment
The current assignments can be checked from the surface as follows.

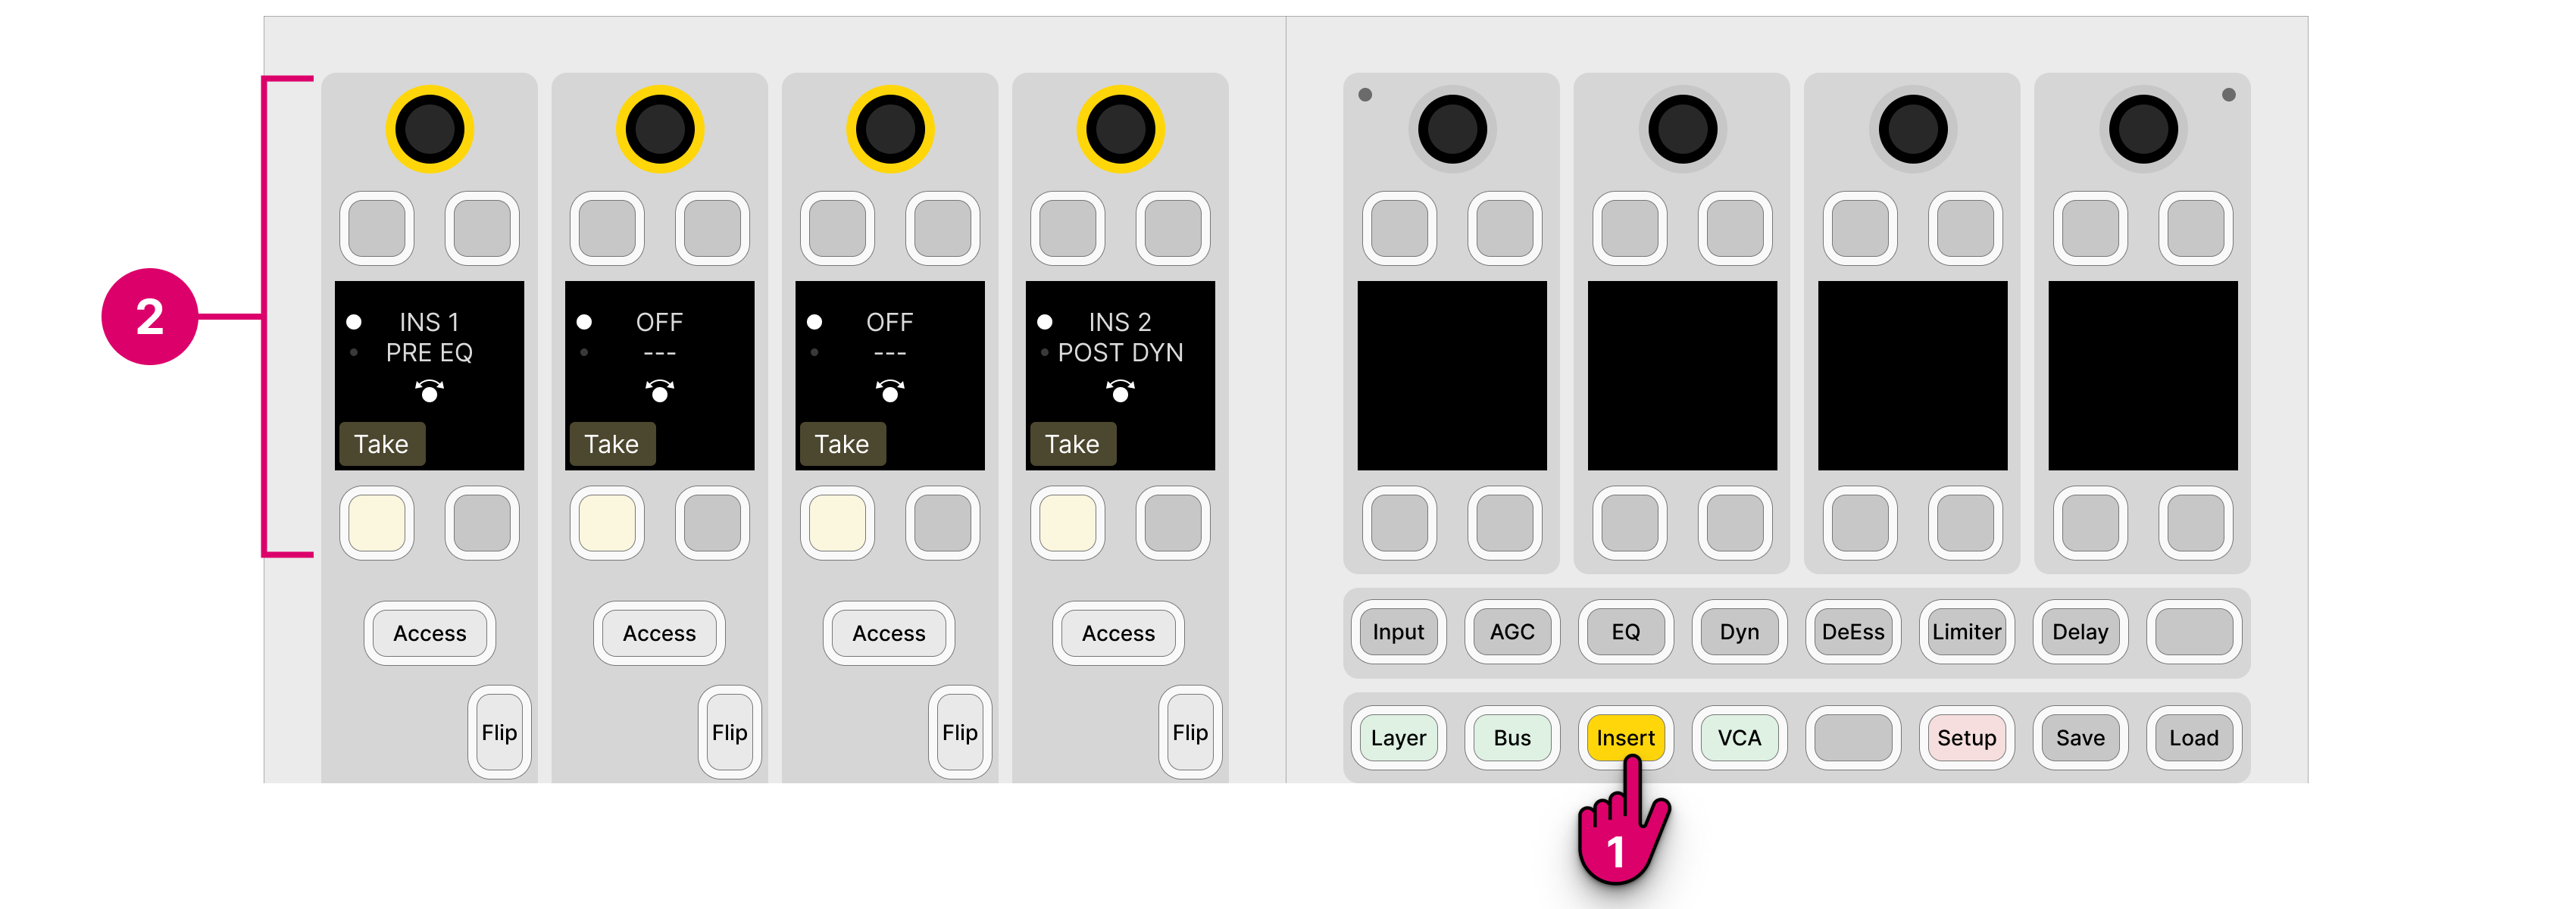
1. Press the Insert key (on the central controls module).
2. The upper controls on each fader strip switch into "insert assign" mode.
- The fader strip displays show whether a device is assigned and its position in the channel signal flow.
- In our example, the insert points are numbered but the naming depends on the configuration. If the top line shows OFF, then there is no insert assigned.
- The dots beside the insert name and position show which page is currently selected. You can press down on the rotary control to toggle between the pages.
You can assign a different device, or change the insert position, using the fader strip controls.

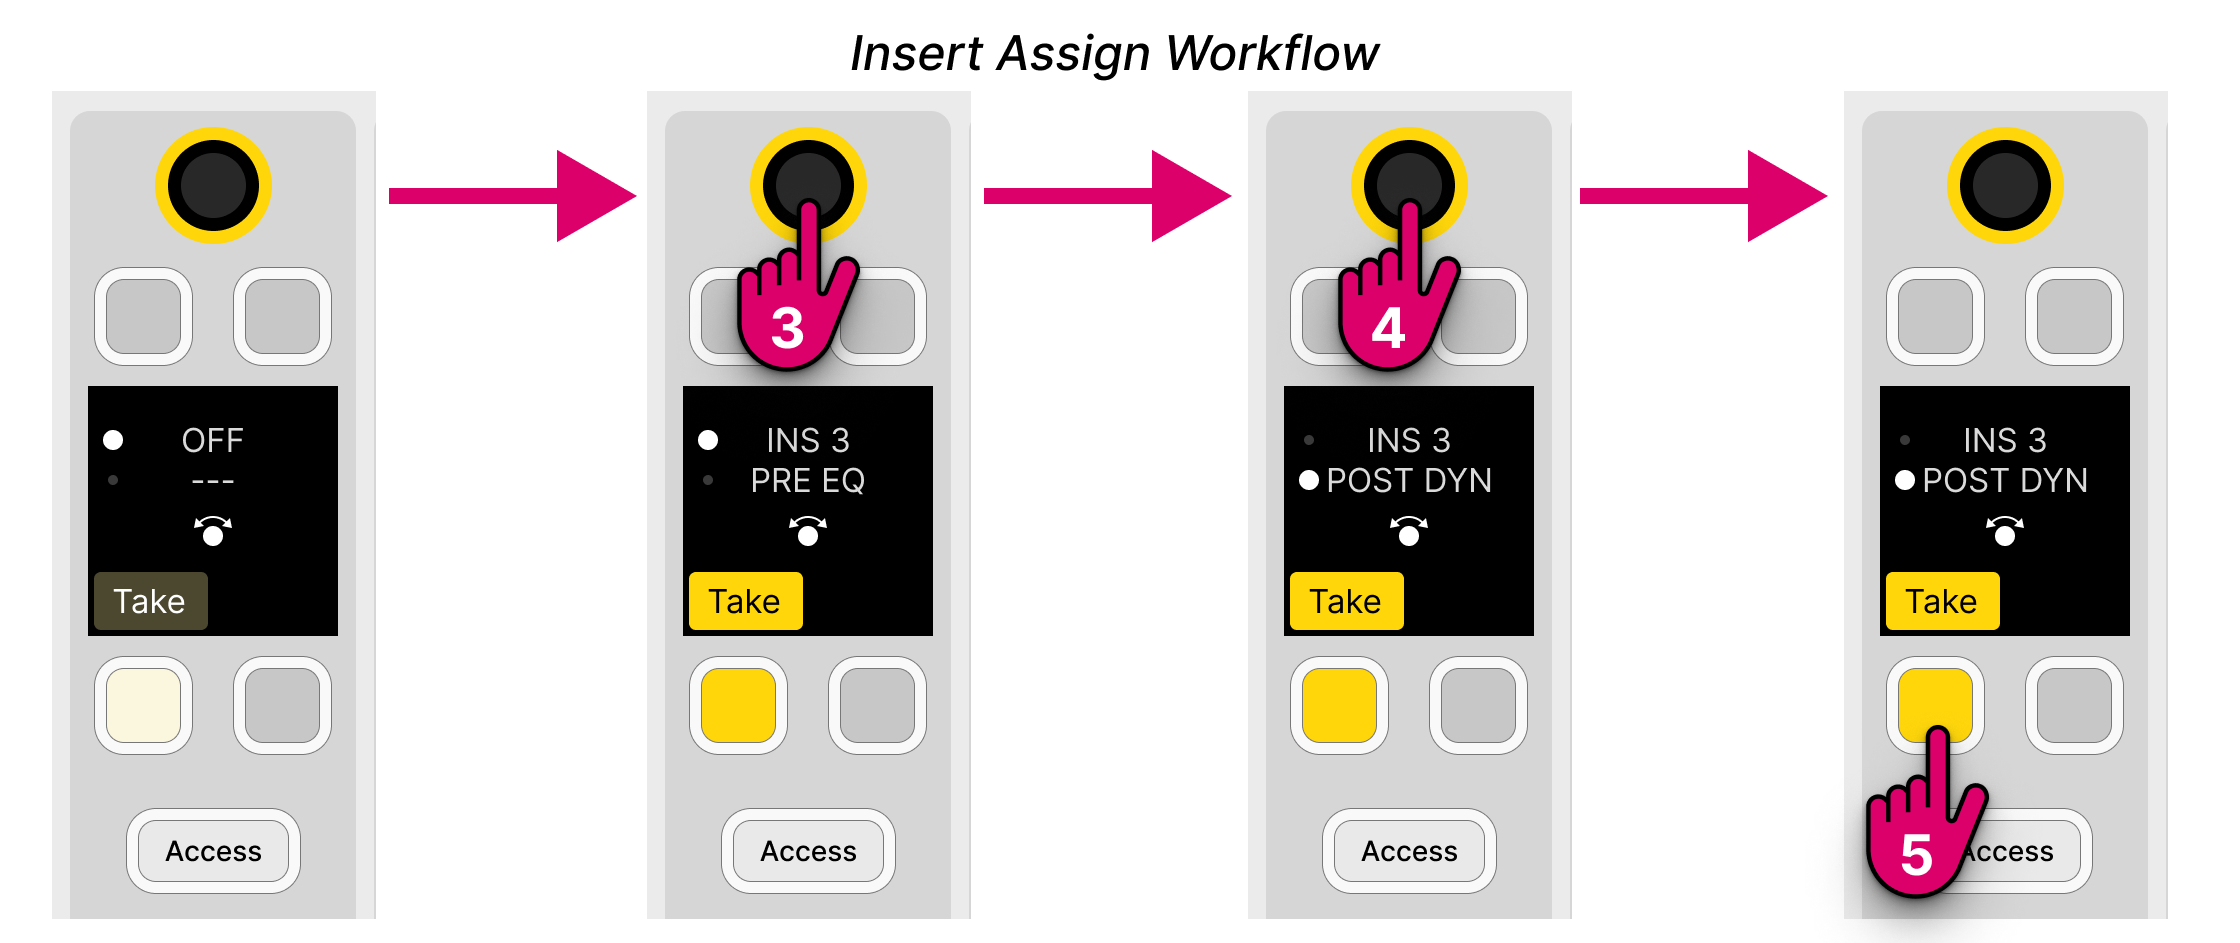
3. On the first page, turn the rotary control to scroll through the available devices, and press down to make a selection.
The Take key turns bright yellow once a different device (or position) is selected.
If you turn the rotary control and nothing happens, then there are no inserts defined in the configuration.
4. Now, turn the rotary control again to choose the signal flow position (e.g. POST DYN).
5. Once you are happy with the selections, press the Take key to confirm. (Or, press the Access key to cancel).
The insert send is always active and so, once an insert is assigned, the external device should be receiving audio (if the device is connected and signal is present).
Please note: If you select an insert that is already in use, then it will be removed from the current source and connected to the new one.
5. When you have finished editing the insert assignments, deselect Insert (on the central controls module).
The fader strip controls return to their default functions.
Insert On/Off
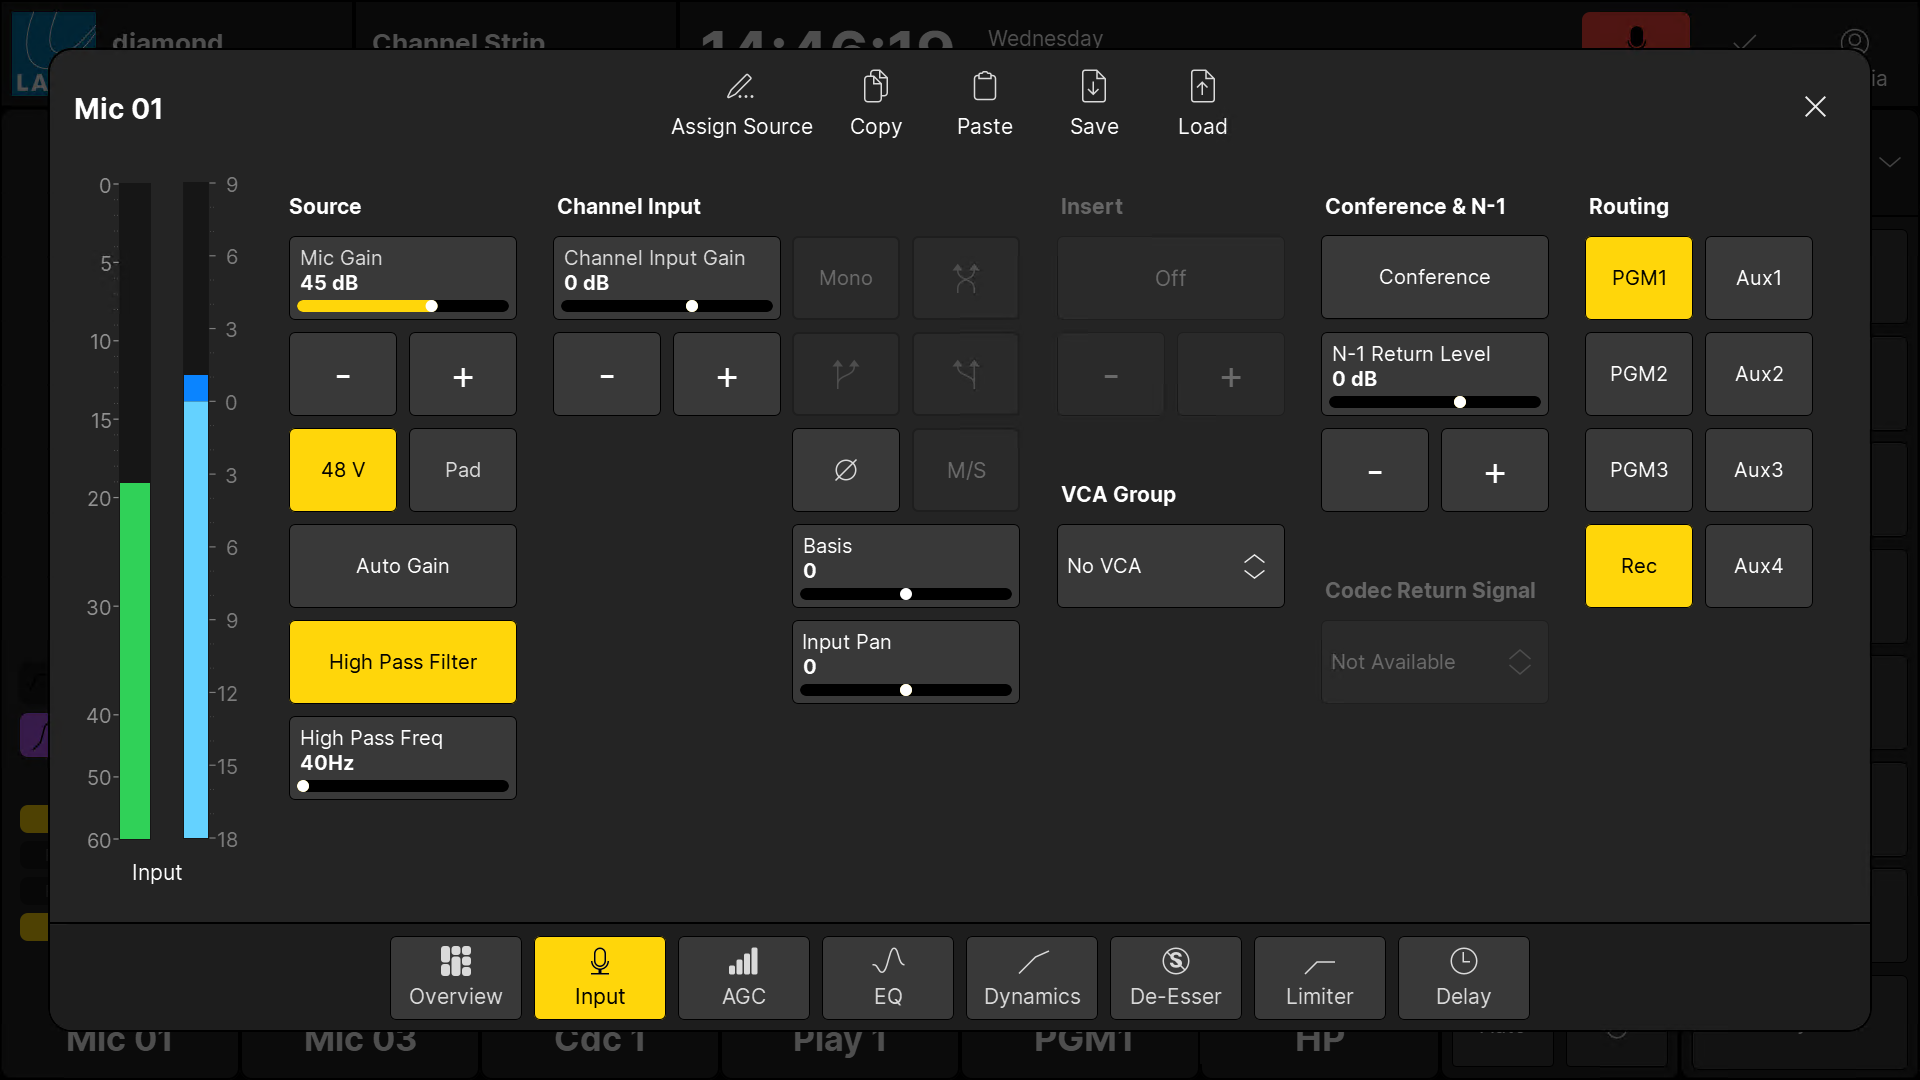
The insert return can be enabled or disabled from an MF key (on the surface) or touch-screen button (on the GUI). In the standard configuration, an 'Insert' area is prepared on the GUI as follows.
1. Open the 'Source Parameter' dialog box by pressing a fader strip Access key, and choose the Input page.

2. Touch the On/Off button under 'Insert' to switch the insert return: yellow = On; grey = Off.
3. The + and - buttons can be used to cycle through the available devices.
If there is no inserts defined in the configuration, then the 'Insert' buttons are not available (and are greyed out).