HOME Device - Network Settings
The 'Device → Network Ports' page can be used to check the status of a network port or edit its IP settings.
To open the page: click on the device label (from the main 'Devices' list) as described earlier and select the Network Ports menu tab.
Note that whether you can edit the IP settings is dependent on the type of "device". For example, if a physical device such as an A__stage is selected, then this has network ports that can be configured. However, if an app is selected, then the network ports of the app server are displayed (for information purposes) but cannot be edited. In this instance, to edit the IP settings of the app server Network Interface Cards (NICs), click on the label of the app server to open its device settings.
Overview
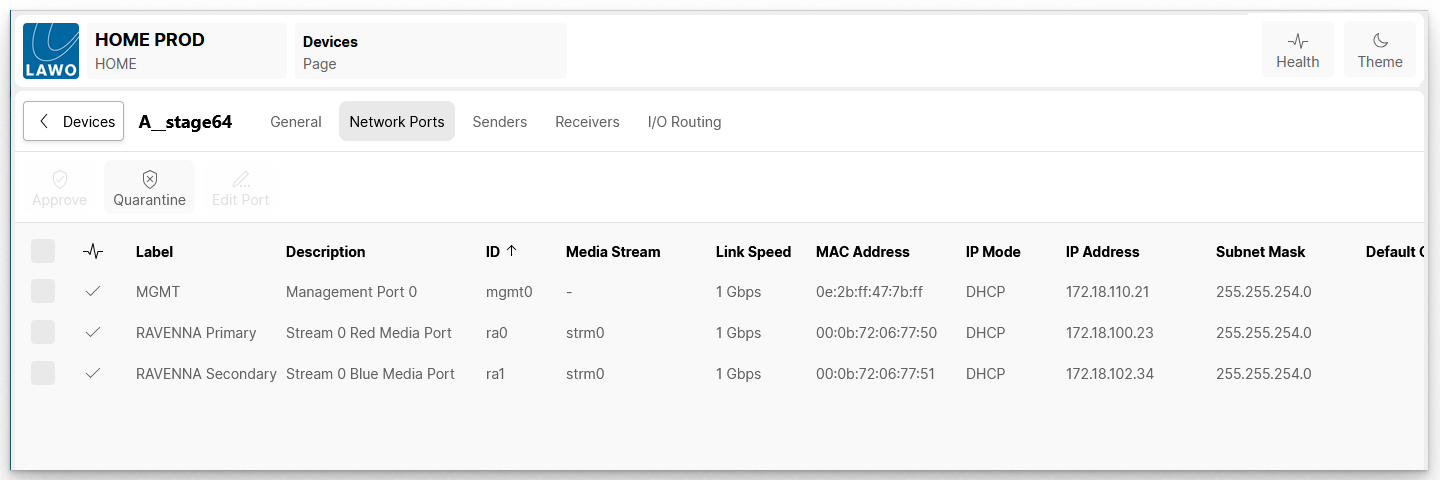
The Network Ports page lists each of the device's network ports.
Device Management
For convenience, the following functions (from the "Devices" list) are repeated at the top of the Network Ports page:
- Approve or Quarantine - click to approve or quarantine the device.
- Reboot - click to reboot the device.
- More - click for more operations.
For more information, please see HOME - Devices.
Network Port Information
The table shows information about each network port including the link state, label, description, internal ID, media stream, link speed, MAC address, IP mode, IP address and subnet. Scroll to the right to view more information such as the default gateway, name server, system name (of the network switch), etc.
Click on a column header to sort the list alphabetically. Each click toggles the sort mode between ascending (A -> Z) and descending (Z -> A). An up or down arrow appears beside the header to indicate the current sort mode.
Edit Port
To edit the IP settings of a network port, please follow the steps below.
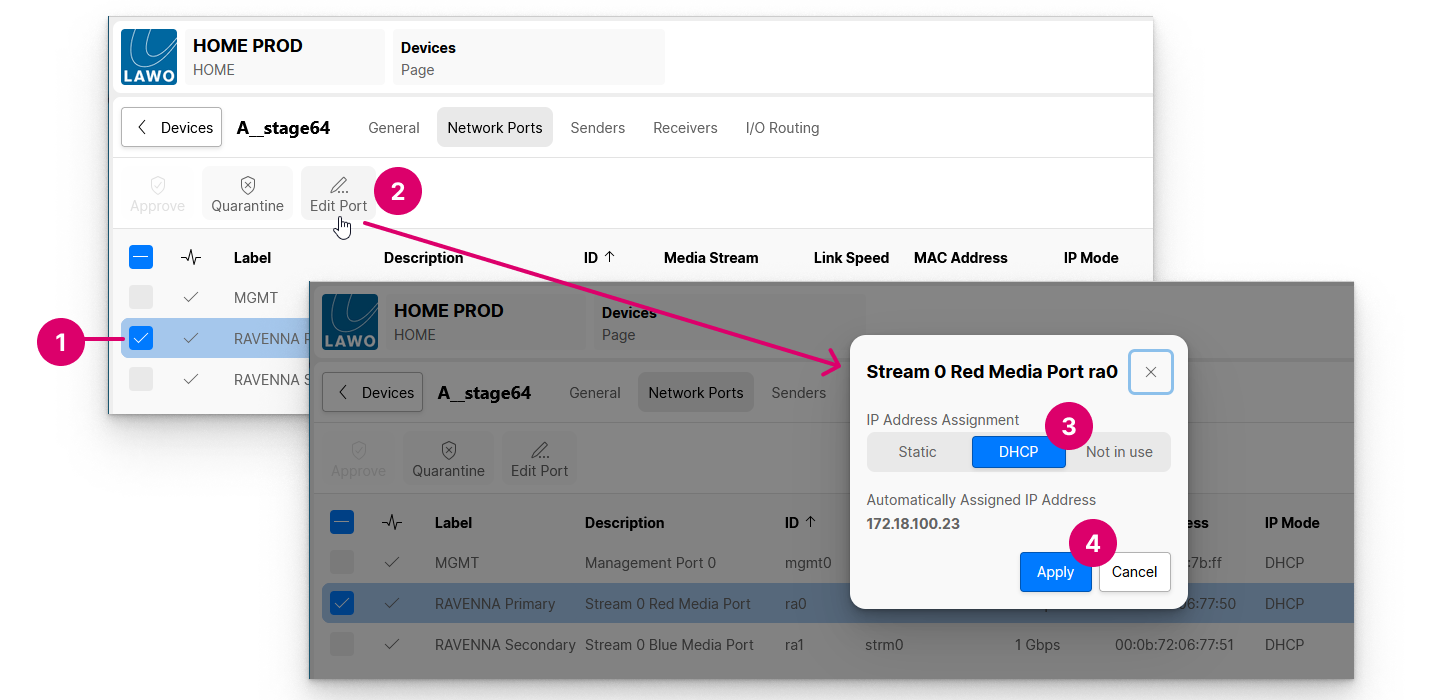
- Select the port you wish to edit (using the selection tick boxes on the left of the table).
- Click on Edit Port to open the "Edit Network Port" dialog box.
- Set the "IP Address Assignment" type. There are three possible options: Static, DHCP or Not in use.
- Static - choose this option to enter a fixed IP address and network mask manually (as described below).
- DHCP - choose this option to receive an IP address automatically from HOME's DHCP server.
- Not in use - choose this option if the port is not currently in use.
- Click on Apply to confirm and close the dialog box.
- The new settings are applied and the link state updates.
- Once applied, check the link status:
- Link up = correct operation.
- Link down = the Ethernet link is not connected or invalid.
Using a Static IP Address
If the "IP Address Assignment" is set to Static, then you can define the port's IP address (and other network settings) manually.
The IP Address must be unique and lie within the same IP address range as all other nodes you wish to connect to (i.e. the first three fields must match). The Network Mask must match the Subnet Mask of all other nodes.
If data packets are to be redirected via a network switch with Layer 3 routing capability, then enter a Gateway and up to two Name Servers. If redirection is not required, then these fields can be left blank.
Using the DHCP Server
HOME includes a DHCP server that can be used to assign IP addresses automatically. To use this method, set the "IP Address Assignment" for the network port to DHCP.