mc²96 - Configure Third-Party Device (in HOME)
This topic describes how to configure streaming for a device which is not automatically identified by HOME. This could be a third-party device or a Lawo device such as Power Core.
In our example, we are going to stream audio from a PC (running Lawo's R3LAY Virtual Sound Card).
1. Start by opening the Settings page (in HOME) and select Device Proxies.
2. Select the New button to open a pop-up where you can "add a new Device Proxy".
3. Edit the fields as follows:
- Proxy Label - enter a label (e.g. R3LAY)
- Device Type - choose the required option from the drop-down menu. For our example, choose Third Party Device. Other options include Nova73 and Power Core.
- IP Address - enter the device's MGMT/CTRL IP address. For our example (R3LAY VSC), a management IP is not required. However, this field is mandatory and so a random IP address has been entered.
- Port - enter a port number or leave the field blank to use port 0.
4. Select Add to add the device.
Third Party Device (created)
5. The new device will now appear in the "Devices" page. Select its label and then select Senders.
6. Use New Sender button to create a new sender in the usual manner.
For our application, we will create one 64-channel sender.
Note that, for a third-party device, it is the sender label that is inherited into the Signal List.display (and not the device label). So it is best to use something more descriptive in this case.
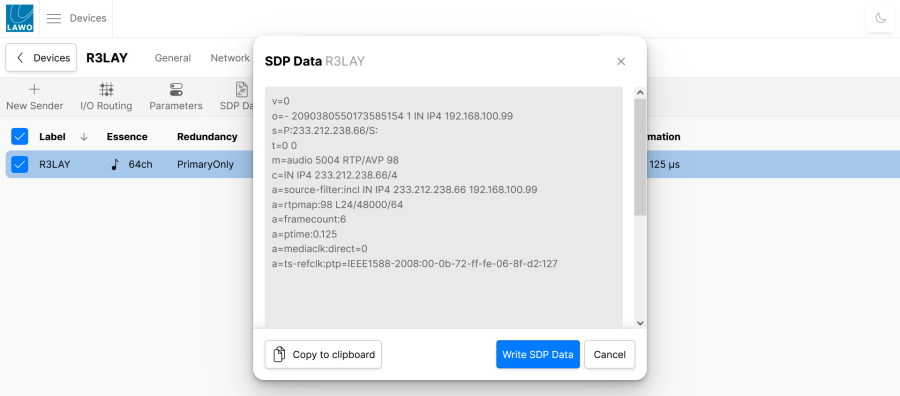
7. Once the stream is created, select it and then select SDP Data - this opens a window where you can access the SDP data for the sender.
8. For the streaming connection to work, this data must be replaced with the actual SDP from the external sender.
The easiest way to do this is by using a copy and paste.
- Copy the SDP from the sender.
- Paste the contents into the SDP Data in HOME.
SDP Data (pasted from R3LAY)
9. Select Write SDP Data to save and close the window.
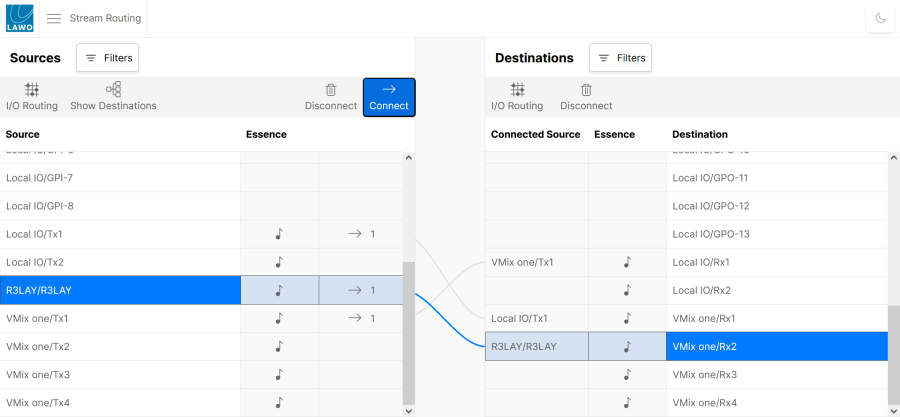
10. Now open the Stream Routing page and assign the R3LAY stream to a Virtual Mixer receiver.
Stream Routing: Third Party sender -> Virtual Mixer receiver
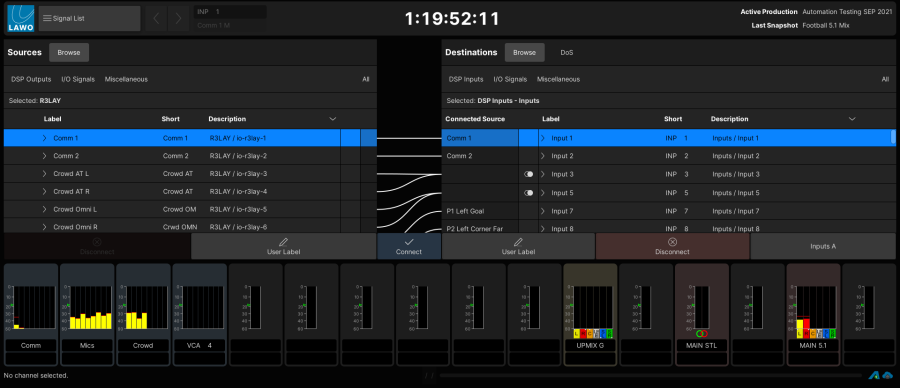
11. Now move over to the console, and open the Signal List display (on the Central GUI).
You should see the new signals in the list.
The streaming configuration is now complete and you should be able to connect signals and hear some audio!
Remember to refresh the Save State button on both the Third-Party Device and the Virtual Mixer in order to save the changes to the streaming configuration. |