mc²96 - DSP Presets
DSP presets provide a way of saving and loading settings for individual modules or for a complete channel. For example, to save your favourite Kick Drum EQ, or the complete settings for an announcer channel.
Presets are stored independently of the production, and therefore, you can load back a preset to any channel within any production. They can also be transferred to any other mc2 system.
Two different types of preset are supported:
- Module presets – for individual processing modules: Image, EQ, Filters, Sidechain Filters, Gate, Expander, Compressor, Limiter, AFV settings, Panning and AMBIT. (Note that module presets cannot be stored for the input mixer, digamp, delay, insert, direct out or fader level. AMBIT presets can only be saved and loaded to/from surround VCAs.)
- Channel presets – for the complete channel. This includes all the processing modules listed above plus the input mixer, digamp, delay, insert, direct out and fader level. The only settings NOT stored by a channel preset are bus routing assignments.
In both cases, the operation is similar.
1. Select the channel you wish to work on by placing it in access - e.g. press its fader SEL button.
2. Open the Main Display on the Central GUI.
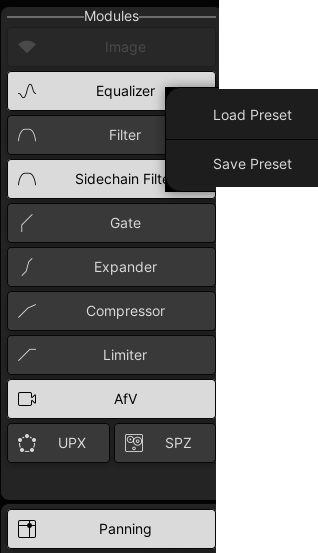
3. Right-click on one of the module on/off buttons on the right of the display.
For example, to save or load an EQ preset, right-click on Equalizer.
Main Display (EQ Preset Load/Save for INP 1)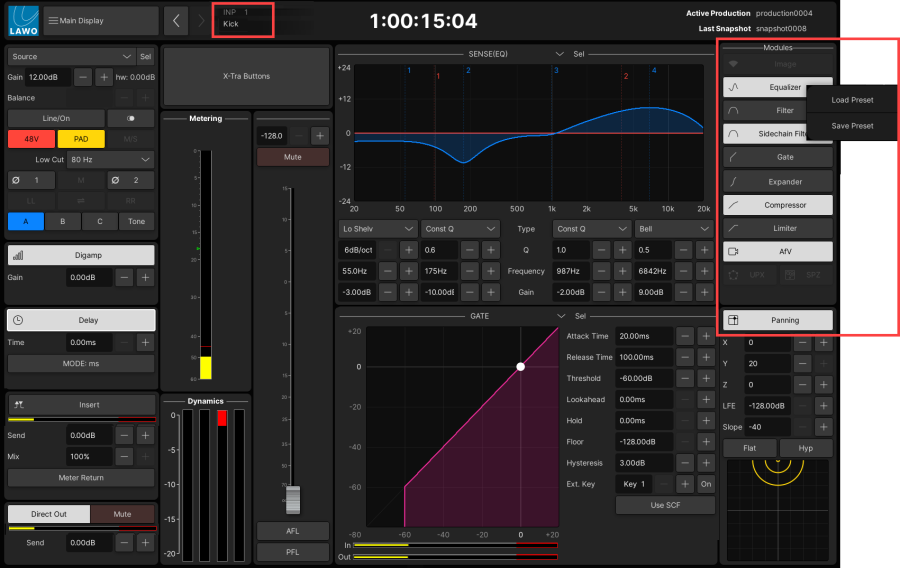
Organizing Presets in Folders
Before you save lots of presets into the root directory, it is a good idea to create some folders. This will help with the organization and stop the list of presets growing too quickly!
- To create a new folder:
1. Open the 'Load Preset' window by right-clicking on any audio module and selecting Load Preset.
2. Right-click anywhere inside the window and select Create folder: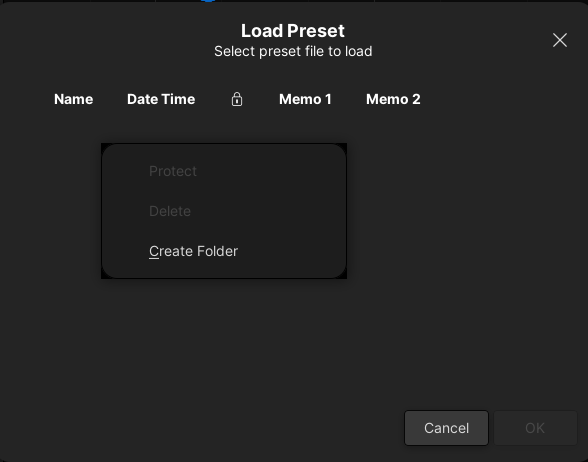
A folder is created with a default name (e.g. folder0000).
3. To rename the folder, click on its name field - click once to select all text or double-click to insert a cursor: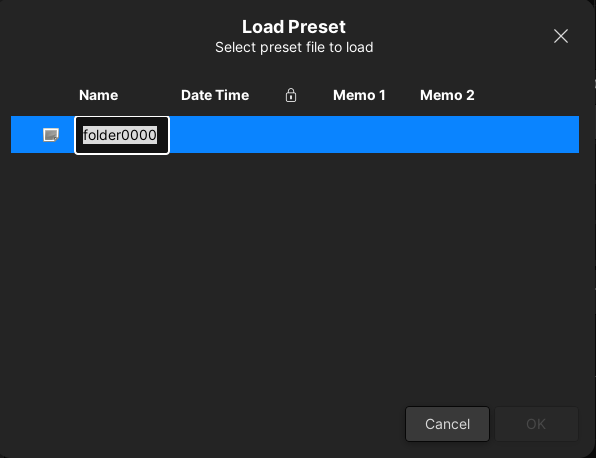
4. Type in the new name and press ENTER to confirm. Or, to exit without making a change, press ESC.
5. Select Cancel to exit the 'Load Preset' window.
When you next save or load a preset, you will see the new folder name.
Note that while you can protect individual presets, you cannot protect folders - the right-click Protect option is "greyed out".
You can use the File display (on the console) or File Transfer display (on mxGUI) to move presets between folders. |
Saving a Module Preset
1. Select the channel you wish to save from - either by pressing its fader SEL button or using the Access/Assign panel.
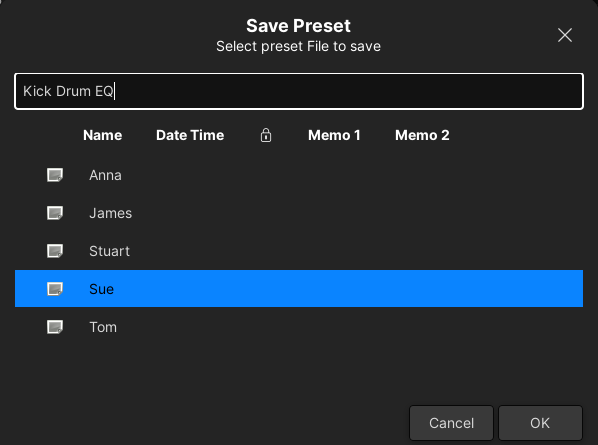
2. Right-click on the module you wish to save (e.g. Equalizer) and select Save Preset - the 'Save Preset' window appears:
|
|
3. Create or select a folder (recommended).
4. Type in a filename (e.g. Kick Drum EQ) and select OK.
The EQ module settings are saved as a preset into the selected folder, and the 'Save Preset' window closes.
Preset names within each folder must be unique. If you enter an identical name to an existing preset, then the existing preset will be overwritten. |
5. Repeat these steps to save settings for other modules by right-clicking on the appropriate module on/off button.
You can save presets for Image, EQ, Filters, Sidechain Filters, Gate, Expander, Compressor, Limiter, AFV settings and Panning modules, but NOT for the input mixer, digamp, delay, insert, direct out or fader level.
To save an AMBIT module preset, you must have the surround VCA channel in access.
Presets are stored as different file types to help distinguish EQ presets (.peq) from Compressor presets (.pco) and so on. |
Saving a Channel Preset
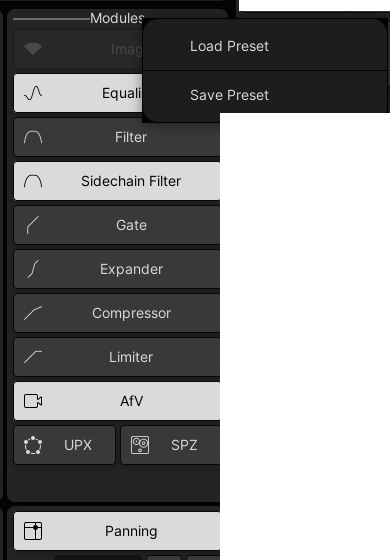
1. To save a preset for the complete channel, right-click on the word Modules and select Save Preset:
|
|
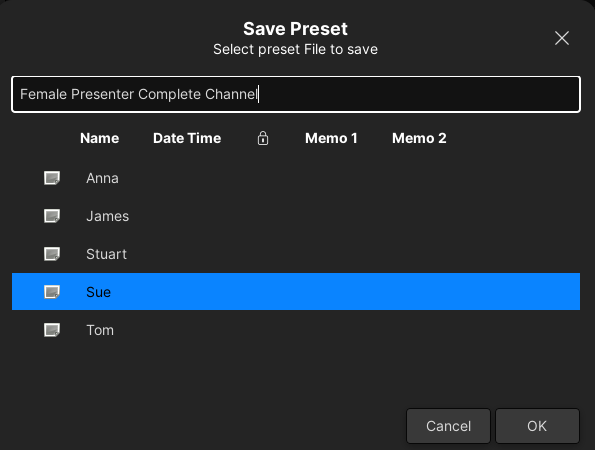
2. Create or select a folder (recommended).
3. Type in a filename (e.g. Female Presenter Complete Channel) and select OK.
The complete channel settings are saved as a channel preset into the selected folder, and the 'Save Preset' window closes.
Preset names within each folder must be unique. If you enter an identical name to an existing channel preset, then the existing preset is overwritten. |
A channel preset stores all processing modules including the input mixer, digamp, delay, insert, direct out or fader level. The only channel settings not stored by a channel preset are bus assignments.
Channel presets have a .pch suffix to identify their file type. |
Loading a Preset
Presets can be loaded to any channel within any production. | |
|
|
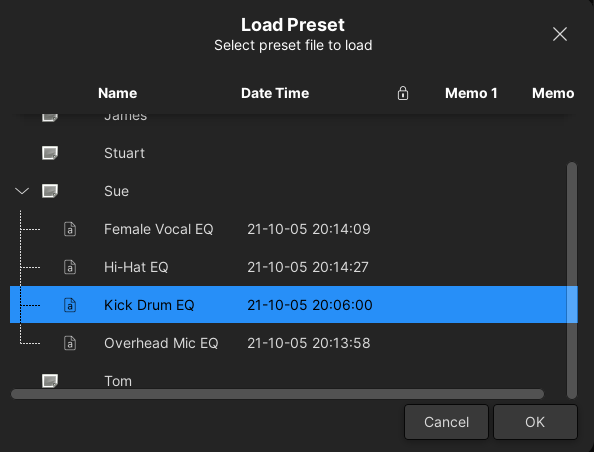
3. Click on the arrows to open up a folder (if you using folders).
Note that you will only see presets applicable to the selected module - in our example, EQ presets. This avoids you accidentally loading say a compressor preset to an EQ module!
4. Select a preset and OK.
The preset is loaded to the EQ module, resetting all parameters including the status of the module on/off button, and the 'Load Preset' window closes.|
Renaming, Protecting & Deleting Presets
Presets can be renamed, protected or deleted from the 'Load Preset' window.
1. To rename a preset, click on the name field - click once to select all text or double-click to insert a cursor.
Type in the new name and press ENTER to confirm. Or, to exit without making a change, press ESC.
2. To protect or delete a preset, right-click and select the correct option.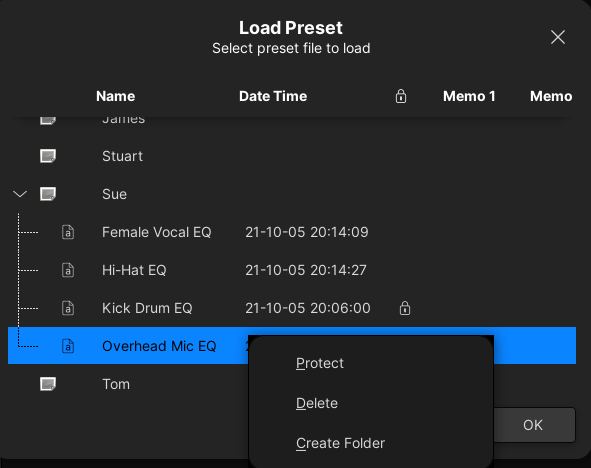
When a preset is protected, a padlock icon appears beside its name.
Note that if you choose Delete, there is no level of confirmation, so please take care when using Delete.
3. When you have completed all operations, select Cancel to exit the 'Load Preset' window.
Importing and Exporting Presets
Individual presets and folders can be imported and exported to a USB interface, mxGUI computer or network drive. This allows you to archive or transfer presets between systems. See File Import/Export for details.
